ATOM Display Lite
SKU:K115-B
Description
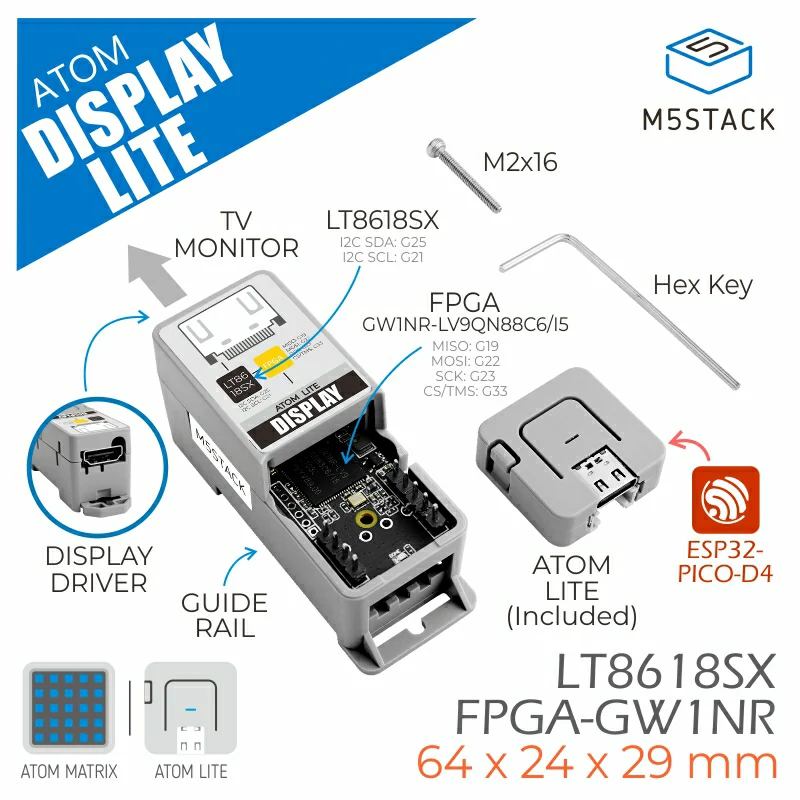
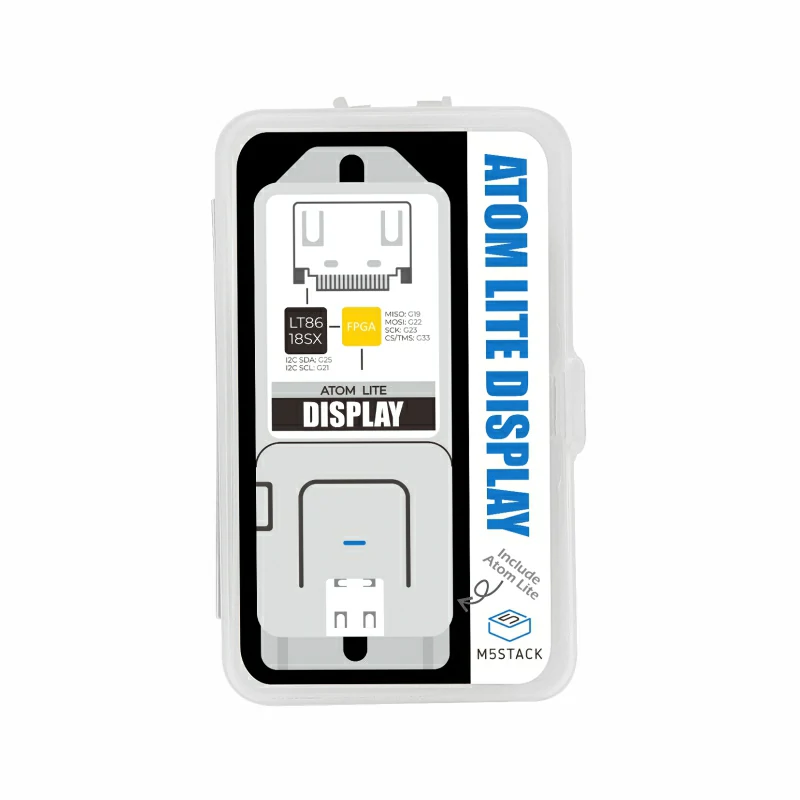
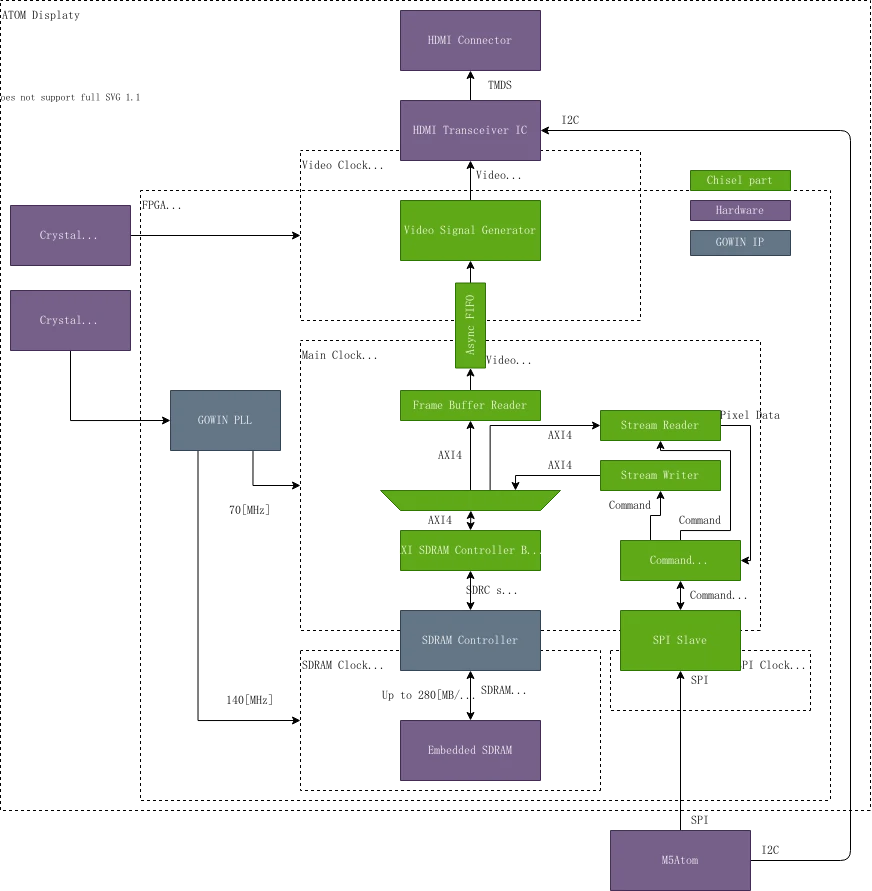
ATOM Display Lite is an all-in-one display driver kit. Use FPGA to simulate traditional SPI TFT-LCD Data output. This kit supports images at a maximum resolution of 1280 x 720 pixels (720P). Built-in LT8618SX RGB to HDMI chip supports wide range HDMI signal output. Integrate 2.4G Wi-Fi, with 4M Flash + 520KB SRAM. So small yet powerful, which can replace the traditional display driving solution.
Note: ATOM Display Lite needs to be paired with monitors with adaptive resolution scaling function.
Comparison
| Products |
MCU |
Flash |
RAM |
IO PINS |
| ATOM Display Lite |
ATOM Lite (ESP32-PICO-D4) |
4MB |
520KB SRAM |
G22,G19,G23,G33,G26,G32,G25,G21 |
| ATOM Display PSRAM |
ATOM PSRAM (ESP32-PICO-V3-02) |
8MB |
520KB SRAM + 2MB PSRAM |
G22,G19,G5,G33,G26,G32,G25,G21 |
Product Features
- All codes of FPGA and driver library are open-source
- Use FPGA (Gowin GW1NR-9C) to simulate traditional SPI TFT-LCD Data output
- Built-in LT8618SX RGB to HDMI chip (supports 24bit color depth)
- SPI interface (FPGA) + I2C interface (LT8618SX)
- Maximum 720P (1280x720) image output
- Multiple output modes, optimized frame rate up to 12 ~ 16FPS
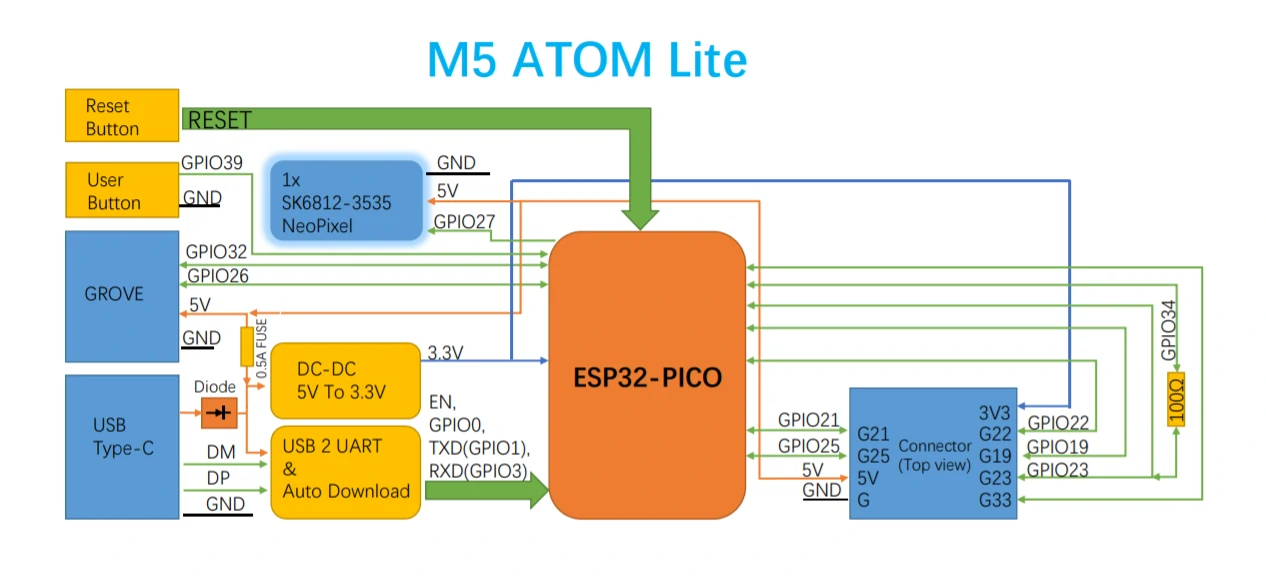
- Built-in ATOM Lite main controller (ESP32-PICO-D4, 4MB Flash + 520KB SRAM)
- Programmable RGB LED x1, reset button x1, button x1, Grove expansion port x1
- Development platform: Arduino (UIFlow support coming soon)
Includes
- 1x ATOM Lite
- 1x ATOM Display
Application
- Display input signal source
- HD Data Board
Specifications
| Specification |
Parameters |
| ESP32-PICO-D4 |
240MHz dual core, 600 DMIPS, 520KB SRAM, Wi-Fi |
| FPGA |
Gowin GW1NR-9C |
| LT8618SX |
RGB to HDMI chip, support 24bit color depth |
| Max. image output |
720P(1280x720) |
| Output frame rate |
1280x720 60Hz |
| Net weight |
21g |
| Gross weight |
34g |
| Product Dimensions |
64 * 24 * 29mm |
| Packaging size |
76 * 46 * 29mm |
Pin Mapping
| ATOM |
G39 |
G27 |
| BUTTON |
SIGNAL |
/ |
| RGB LED |
/ |
SK_DIN |
| ATOM |
G25 |
G21 |
5V |
GND |
| LT8618SX |
LT_CSDA |
LT_CSCL |
VIN |
GND |
Schematics
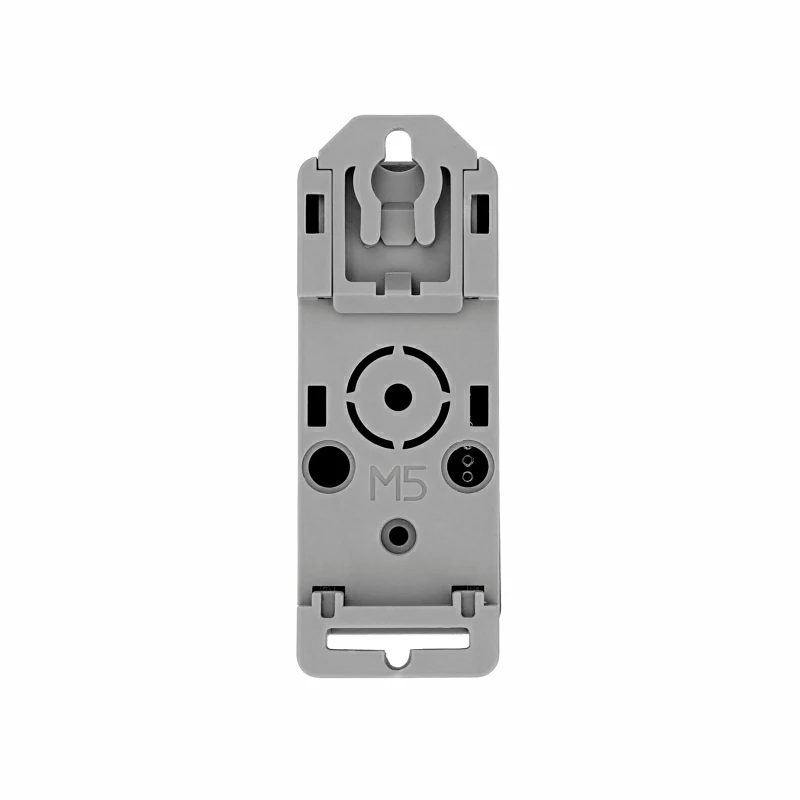
Structure
Example
Arduino
Click here to see the M5Atom & Arduino tutorial
Before using the examples in the M5GFX library, you need to change the header file to match the device you are currently using. Introduce #include <M5AtomDisplay.h> and create the example M5AtomDisplay display; as shown in the example below;`
#include <Arduino.h>
#include <vector>

#include <M5AtomDisplay.h>
M5AtomDisplay display;

void setup(void)
{
  display.begin();
}

void loop(void)
{
  display.fillScreen(RED);
  delay(1000);
  display.fillScreen(GREEN);
  delay(1000);
  display.fillScreen(BLUE);
  delay(1000);
}