


ODrive
描述
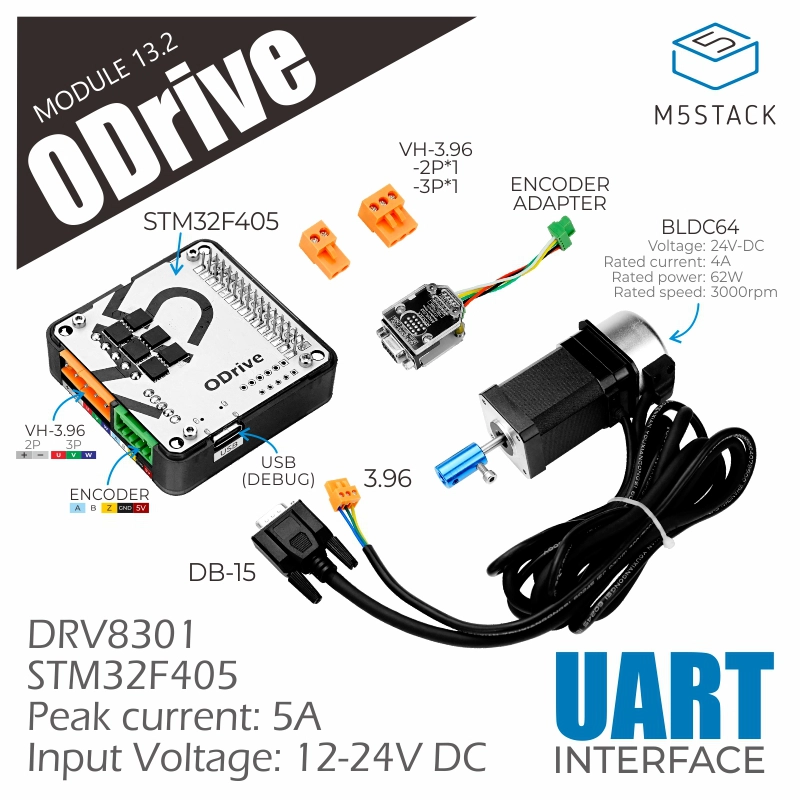
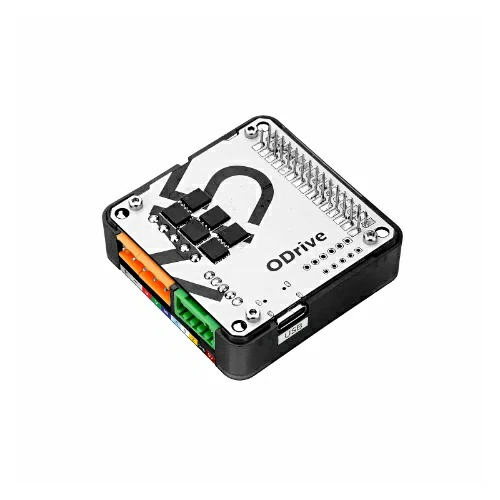
ODrive 是M5Stack推出的一款高性能伺服电机驱动模块,基于开源运动控制方案ODrive制作。支持控制单个三相伺服电机,峰值驱动电流可达5A。具备高转速电机控制能力的同时提供编码器信号接口,能够实现高精度运动控制定位。模块使用UART通信接口,兼容ODrive官方配置工具与协议(通过上位机工具还可配置不同的电机运动模式使电机工作更加的顺畅稳定)。
- 工作方式: 通过PC上位机配置电机参数,通过UART发送指令控制电机位移。
产品特性
- 单个三相伺服电机驱动
- 峰值驱动电流5A
- 12-24V DC电源输入接口(要求适配器输出电流可达5A)
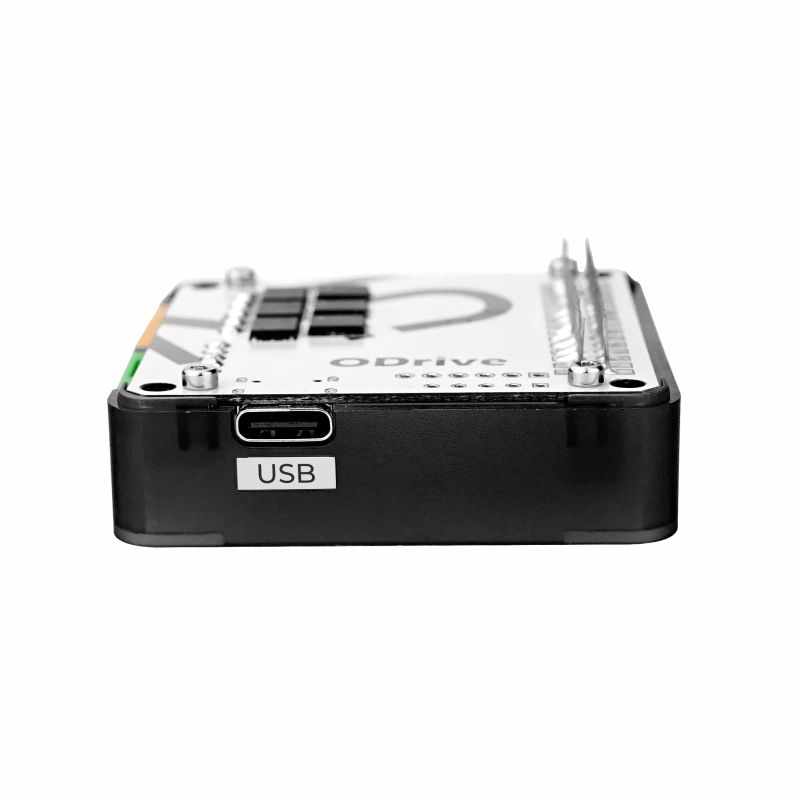
- 通信接口:UART
- 单通道伺服电机驱动/带编码器接口
包含
单模块版本
- 1x ODrive Module
- 1x 3.96-3P端子
- 1x 3.96-2P端子
- 1x 2.54-5P端子
配套电机版本
- 1x ODrive Module
- 1x 3.96-3P端子
- 1x 3.96-2P端子
- 1x 2.54-5P端子
- 1x 伺服电机(详细参数见下方规格表)
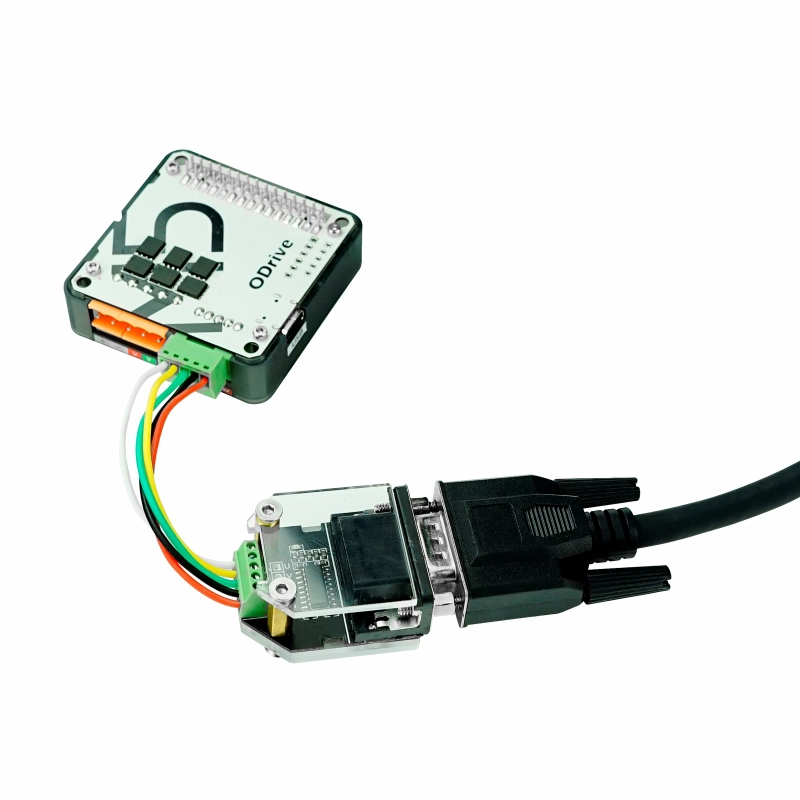
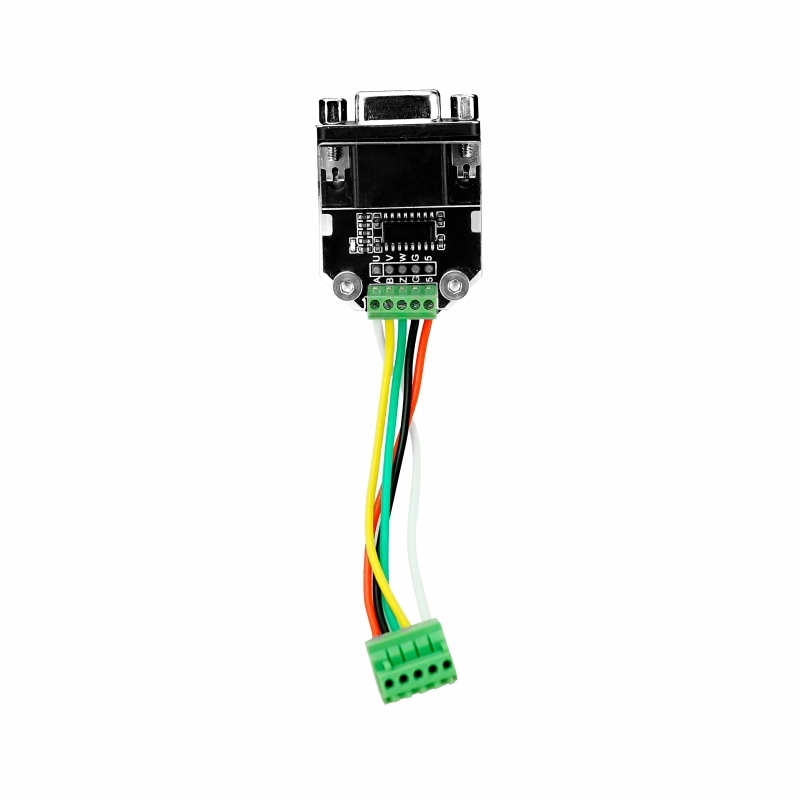
- 1x 编码器转接板
应用
- 高精度运动控制
- 伺服电机驱动
规格参数
| 规格 | 参数 |
|---|---|
| 选配的伺服电机规格 | 相数:3, 电压: 24V-DC, 额定电流: 4A, 额定功率: 62W, 额定转速:3000rpm |
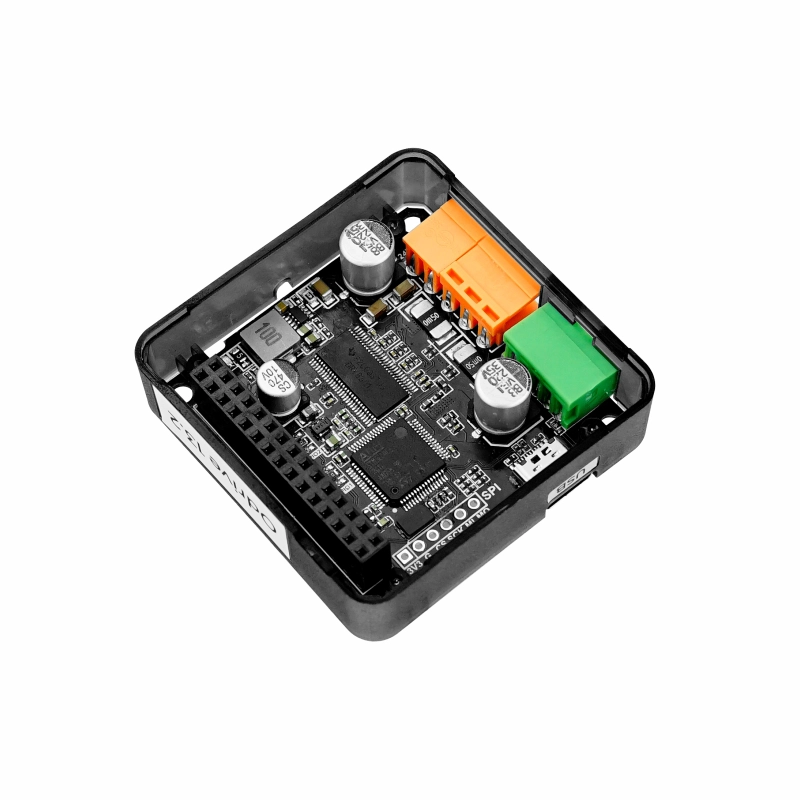
| 电机驱动芯片 | DRV8301 |
| 最大驱动电流 | 5A |
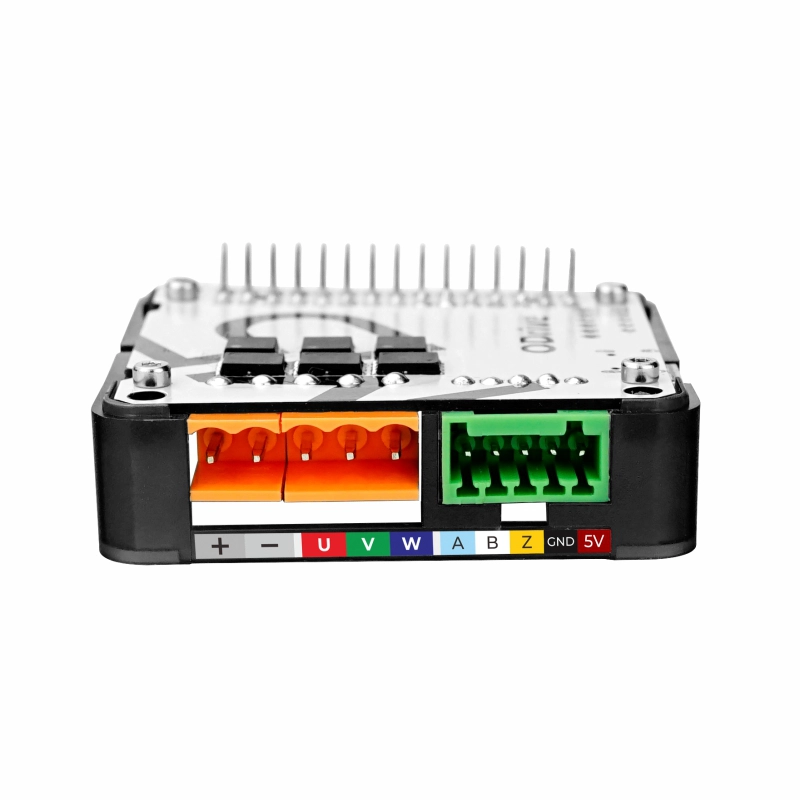
| 接口类型 | 3.96-2P(电源), 3.96-3P(电机), 2.54-5P(编码器) |
| 输入电源 | 12-24V DC |
| 净重 | 22.5g |
| 毛重 | 42.3g |
| 产品尺寸 | 54.2*54.2*13.2mm |
| 包装尺寸 | 95*65*25mm |

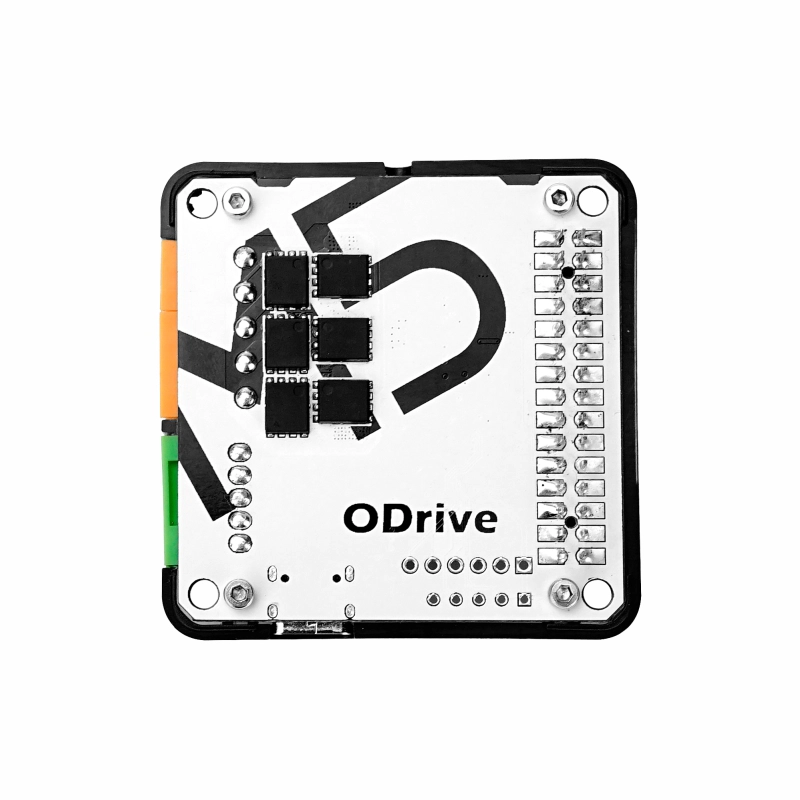
管脚映射
| M5Core1 | GPIO13 | GPIO5 | 5V | GND |
|---|---|---|---|---|
| ODrive | RX | TX | 5V | GND |
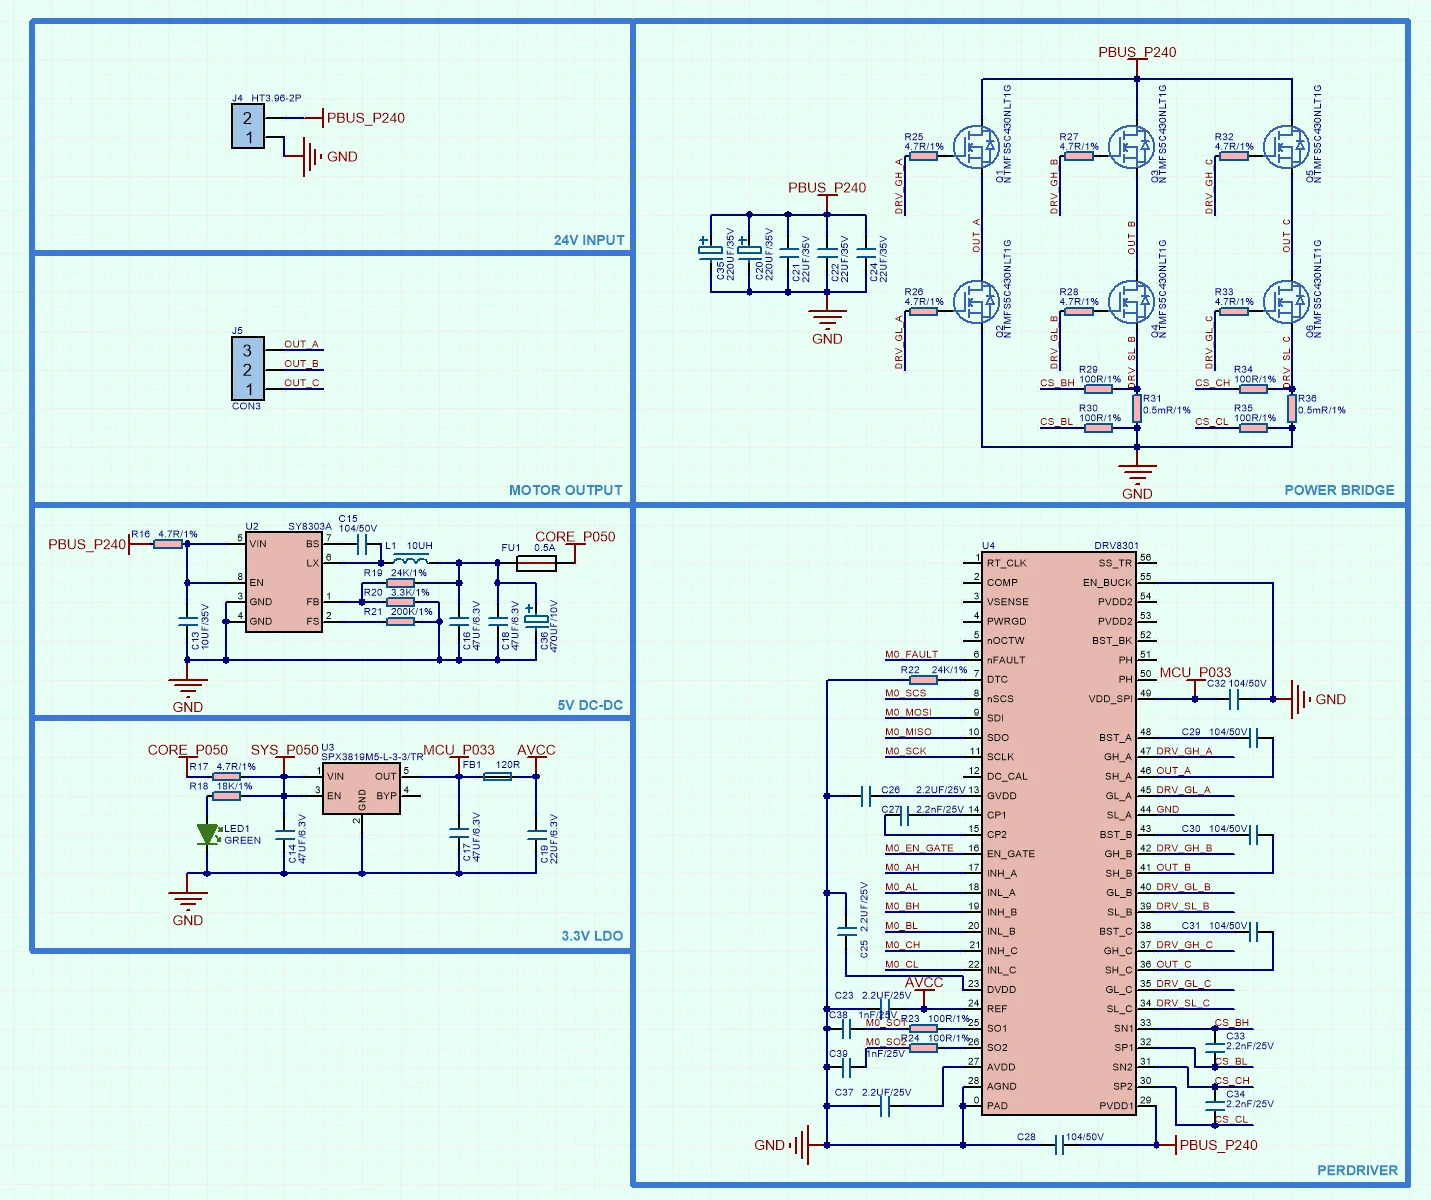
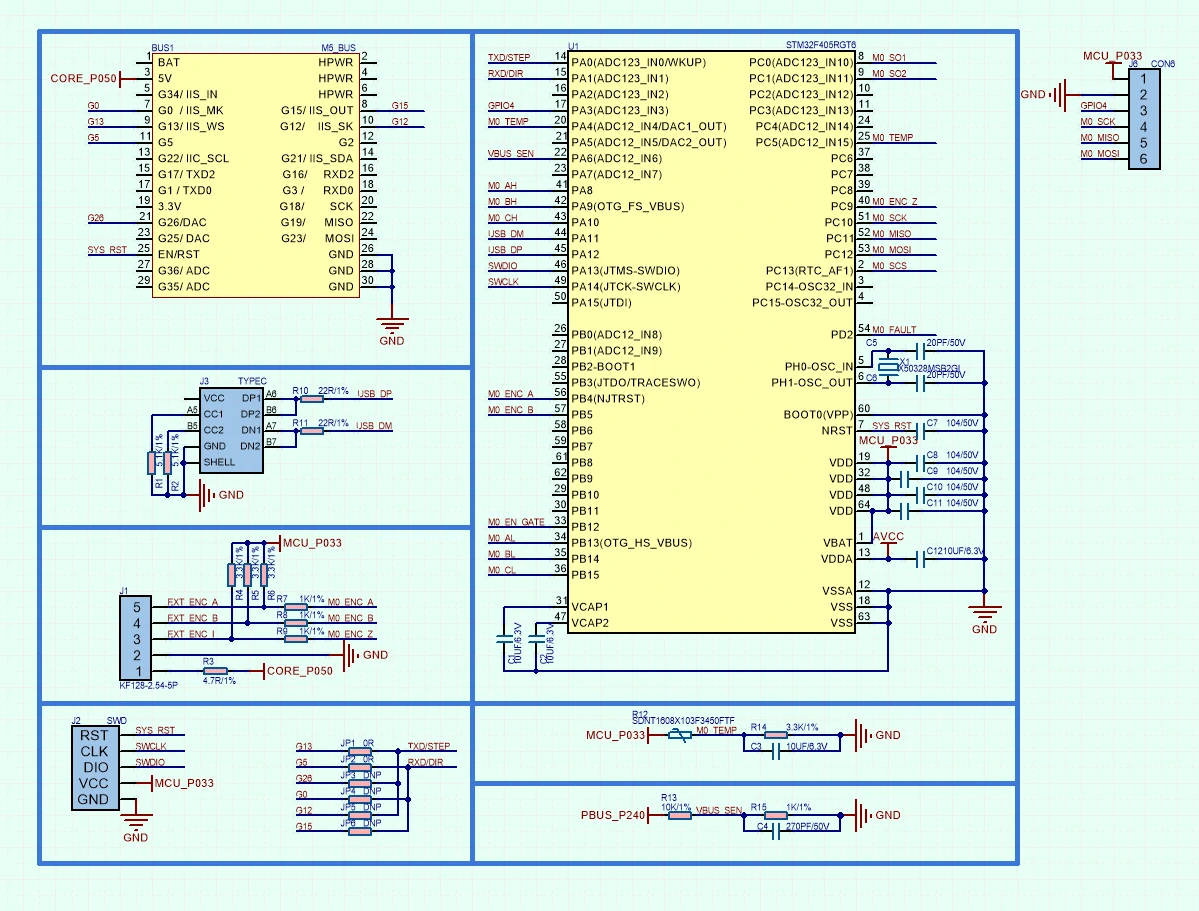
原理图
相关链接
案例程序
说明:该案例使用ODrive模块控制伺服电机高速精准转动,按下按键C进行校准(期间请勿触碰电机转轴),长按及短按按键A控制电机转动。 注意:该案例中的电机参数配置仅适用于与M5 Odrive套件配套的电机型号,当驱动其他类型电机时,请自行根据使用的电机,进行参数配置。
相关视频
Arduino-API
//Create an instance, specify the serial port used
ODrive odrive(Serial1);

// Commands
void setPosition(float position);
void setPosition(float position, float velocity_feedforward);
void setPosition(float position, float velocity_feedforward, float current_feedforward);
void setVelocity(float velocity);
void setVelocity(float velocity, float current_feedforward);
void setCurrent(float current);
void setGain(float pos, float vel, float vel_integrator);
void setControlMode(int32_t mode);
void setControlInputPos(float pos);
void trapezoidalMove(float position);
// Getters
float getVelocity();
float getVbusVoltage();
int32_t getEncoderShadowCount();
float getEncoderPosEstimate();
float getMotorTemp();
float getPhaseCurrent();
float getBusCurrent();
bool checkError(int32_t* axis=NULL, int32_t* motor_thermistor=NULL, int32_t* encoder=NULL, int32_t* controller=NULL);
// General params

// State helper
bool runState(int32_t requested_state, uint32_t timeout);

// device will reboot
void eraseConfig();
void reboot();
void saveConfig();
void setDefaultConfig();

float readFloat();
int32_t readInt();
void writeToDeive(const char* data);
void writeConfig(const char* config, float_t value);
void writeConfig(const char* config, int32_t value);
int32_t readConfigInt(const char*config);
float readConfigFloat(const char*config);
ODriveTool
odrivetool是 ODrive配套的配置和调试软件,通过它配置电机参数。该教程将演示在Linux平台下odrivetool的安装与基本使用。
- 使用下方命令,进行odrivetool v0.5.1 的安装,环境要求:
python3。
pip3 install odrive==0.5.1.post0
- 将
~/.local/bin添加到系统环境变量中, 执行下方命令, 并插入export PATH=$PATH:~/.local/bin至文本末尾。
vim ~/.bashrc
- 命令行执行
odrivetool运行工具。并将ODrive模块连接至电脑等待odrivetool识别。成功连接后输入odrv0.vbus_voltage测试获取驱动板电源电压。
$odrivertool

ODrive control utility v0.5.1.post0
Website: https://odriverobotics.com/
Docs: https://docs.odriverobotics.com/
Forums: https://discourse.odriverobotics.com/
Discord: https://discord.gg/k3ZZ3mS
Github: https://github.com/madcowswe/ODrive/

Please connect your ODrive.
You can also type help() or quit().

Connected to ODrive 306A396A3235 as odrv0

In [1]: odrv0.vbus_voltage
- 常用配置命令。
//配置电机电流限制
odrv0.axis0.motor.config.current_lim [A].

//配置电机转速限制值
odrv0.axis0.controller.config.vel_limit

//配置功率耗散电阻的电阻值
odrv0.config.brake_resistance

//保存配置
odrv0.save_configuration()
更多详情内容, 请点击此处查看Odrive官方文档