ESP-IDF Quick Start
Devices & Examples
Core2
CoreS3
Dial
Tab5
Unit PoE-P4
Zigbee
Core2 ESP-IDF BSP Usage Tutorial
This tutorial will introduce how to integrate the Core2 Board Support Package (BSP) in the ESP-IDF development environment, allowing for quick initialization and management of onboard peripheral drivers to improve development efficiency.
1. Preparation
- Environment setup: This tutorial is based on building the ESP-IDF development environment on the Ubuntu operating system. For setup on other platforms, please refer to ESP-IDF - ESP32 Getting Started Guide.
ESP-IDF Version
This tutorial recommends using ESP-IDF version
v5.4.1- Use the git version control tool to clone the esp-idf project, switch to the specified branch, and run scripts to install the related toolchain.
Note
The
. in the . ./export.sh command must be followed by a space before the script; this command is equivalent to source ./export.shgit clone -b v5.4.1 --recursive https://github.com/espressif/esp-idf.git
cd esp-idf
./install.sh
. ./export.sh- The
idf.pycommands used in the following tutorial all depend on ESP-IDF. Before running the commands, you need to invoke. ./export.shin the project directory to activate the relevant environment variables. For more details, please refer to ESP-IDF - ESP32 Getting Started Guide.
2. Project Creation
- Open a terminal and navigate to your working directory. Create a project folder named
core2_projects. After changing into this folder, invokeexport.shfrom the esp-idf project to activate the environment variables. The following commands assume that thecore2_projectsfolder andesp-idfare in the same directory; adjust paths as needed. Execute theidf.py create-projectcommand below to create a blank project template, with the example project namedmy_project.
mkdir core2_projects
cd core2_projects
. ../esp-idf/export.sh
idf.py create-project my_project- Change into the project directory, and use the Espressif Component Registry tool to add the M5Stack Core2 BSP.
cd my_project
idf.py add-dependency "espressif/m5stack_core_2^2.0.0"- Set the target chip platform:
idf.py set-target esp323. Example Program
- Open the entry file of the blank template and copy the following example program content into it.
vim main/my_project.ccpp
1 2 3 4 5 6 7 8 9 10 11 12 13 14 15 16 17 18 19 20 21 22 23 24 25 26
#include "freertos/FreeRTOS.h"
#include "freertos/task.h"
#include "esp_log.h"
#include "lv_demos.h"
#include "bsp/esp-bsp.h"
static char *TAG = "app_main";
#define LOG_MEM_INFO (0)
void app_main(void) {
/* Initialize display and LVGL */
bsp_display_start();
/* Set display brightness to 100% */
bsp_display_backlight_on();
ESP_LOGI(TAG, "Display LVGL demo");
bsp_display_lock(0);
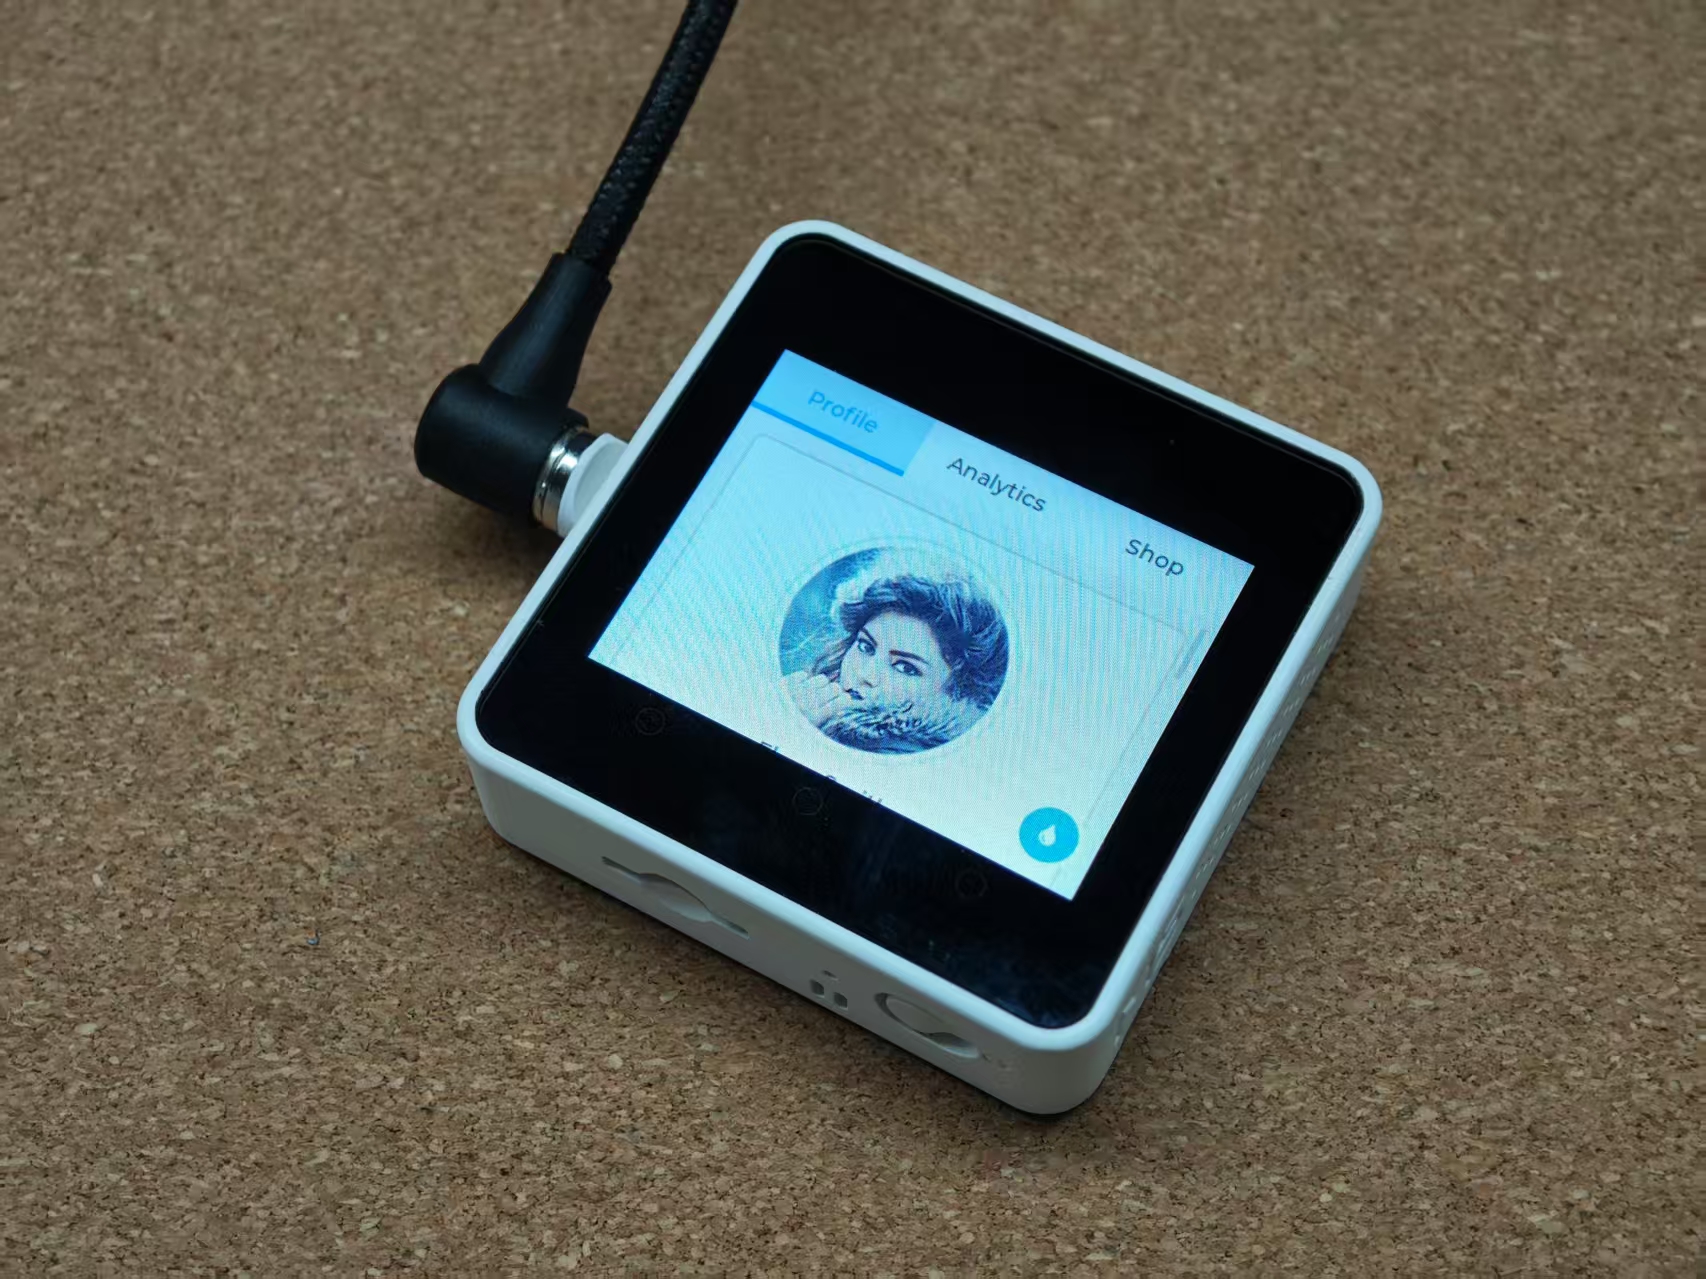
lv_demo_widgets(); /* A widgets example */
// lv_demo_music(); /* A modern, smartphone-like music player demo. */
// lv_demo_stress(); /* A stress test for LVGL. */
// lv_demo_benchmark(); /* A demo to measure the performance of LVGL or
// to compare different settings. */
bsp_display_unlock();
}- This example program demonstrates how to drive the display to show LVGL component demos. You can switch between different demos by uncommenting the corresponding lines to compile different display examples. Before using a particular demo component, run
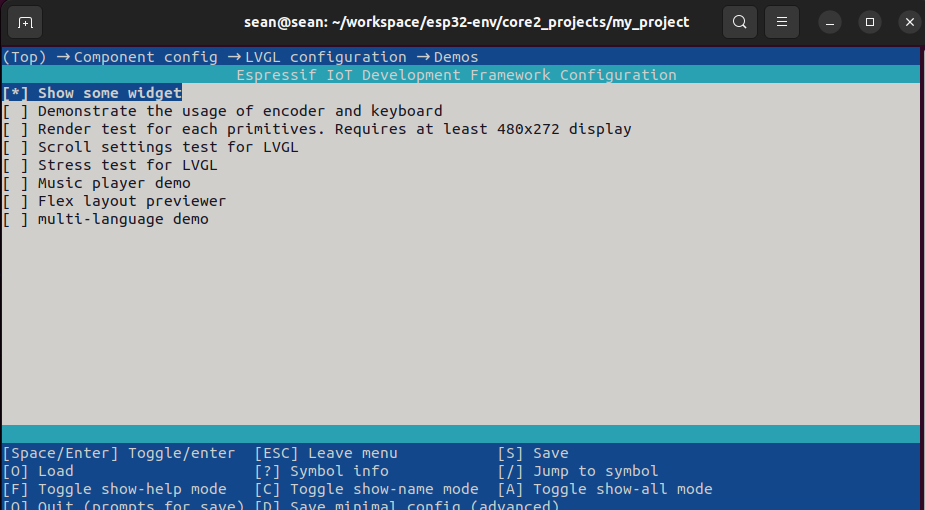
idf.py menuconfig, navigate toComponent config->LVGL Configuration->Demos, and enable the corresponding LVGL demo.
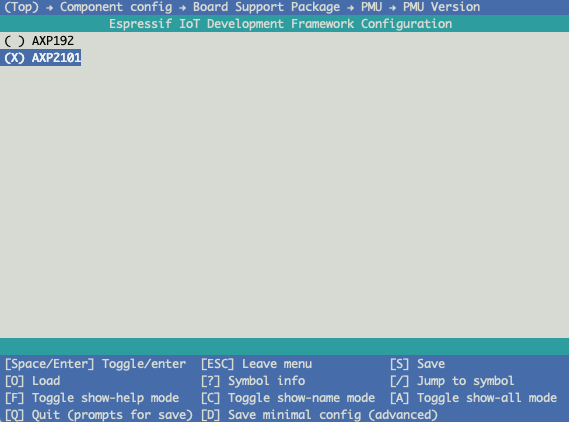
- If you are using Core2 v1.1, set
Component config→Board Support Package→PMU→PMU Versionto AXP2101; if you are using Core2, set it to AXP192.
4. Program Compilation and Flashing
- Execute the following command to compile and flash the program.
idf.py flash