


ESP-IDF 上手教程
Zigbee
ESP Zigbee NCP
本教程将介绍如何使用 Unit Gateway H2 搭配 CoreS3 主控运行 ESP Zigbee Host/NCP 案例程序。ESP Zigbee NCP (Network Co-Processor) 是一种网络协处理器模式,它将 Zigbee 协议栈运行在一个独立的处理器上,通过串口与主处理器通信。这种架构可以让主处理器专注于应用层逻辑,而将 Zigbee 网络相关的处理交给协处理器处理。参考下方教程为 Unit Gateway H2 烧录 ESP Zigbee NCP 固件,为 CoreS3 烧录 ESP Zigbee Host 固件,实现创建 Coordinator 节点。
1. 准备工作
- 1. 环境配置: 参考ESP-IDF - ESP32S3上手教程完成基本编译环境。
ESP-IDF 版本
该案例编译推荐使用 ESP-IDF 版本
v5.3.1git clone -b v5.3.1 --recursive https://github.com/espressif/esp-idf.git
cd esp-idf
./install.sh
. ./export.sh- 2. 使用 Git 指令
clone recursive递归克隆 ESP-Zigbee-SDK 仓库
git clone --recursive https://github.com/espressif/esp-zigbee-sdk.git
cd esp-zigbee-sdk- 3. 使用到的硬件产品:


- 4. 后续教程使用到的 idf.py 指令均依赖 ESP-IDF, 运行指令前需要执行 ESP-IDF 中
. ./export.sh用于激活相关的环境变量。详细说明请参考ESP-IDF - ESP32S3上手教程。
2. 编译 NCP 固件
- 1. 参考下方指令进入对应的 NCP 固件目录,设置编译 target 为
esp32h2。
cd examples/esp_zigbee_ncp
idf.py set-target esp32h2
idf.py menuconfig- 2. 使用
idf.py menuconfig进入配置页面。在 menuconfig 中配置设备的引脚信息:Component config->Zigbee Network Co-processor
- Component config → Zigbee Network Co-processor
- UART RX Pin: 23
- UART TX Pin: 24
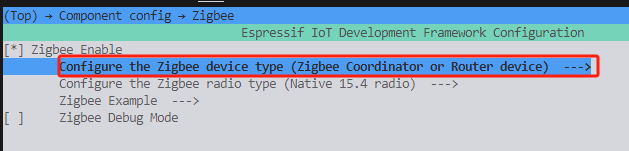
- Component config → ESP Zigbee → Configure the Zigbee device type
- Zigbee Coordinator or Router device # or Zigbee End Device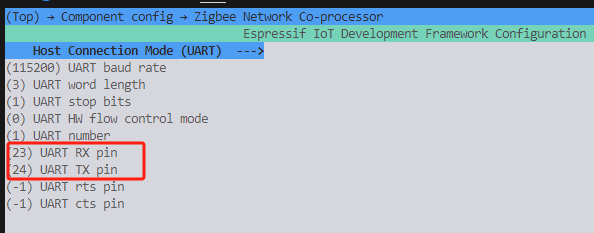
- 3. 完成配置后,执行以下指令进行 NCP 固件编译。
idf.py build- 4. 打开 Unit Gateway H2 外壳,按住设备 boot 按键,然后连接 USB 供电使其进入下载模式。并执行以下指令进行烧录。 注:固件烧录前,建议使用命令
idf.py erase_flash进行擦除。

idf.py erase_flash
idf.py flash3. 编译 HOST 固件
- 1. 参考下方指令进入对应的 HOST 固件目录,设置编译 target 为
esp32s3。
cd examples/esp_zigbee_host
idf.py set-target esp32s3 # 使用 CoreS3
idf.py menuconfig- 2. 使用
idf.py menuconfig进入配置页面。在 menuconfig 中配置设备的引脚信息:Component config->Zigbee NCP Host
- Component config → Zigbee NCP Host
  - UART RX Pin: 18
  - UART TX Pin: 17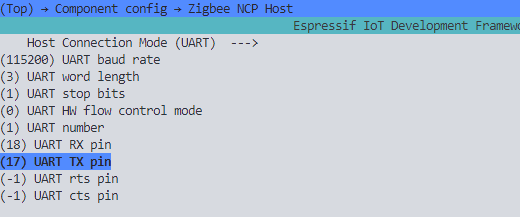
添加以下函数与头文件,并添加到 app_main 中开头进行调用初始化,打开 CoreS3 的 Grove 供电输出能力。
#include "driver/i2c.h"

void fix_aw9523_p0_pull_up(void)
{
    /* AW9523 P0 is in push-pull mode */
    const i2c_config_t i2c_conf = {
        .mode = I2C_MODE_MASTER,
        .sda_io_num = GPIO_NUM_12,
        .sda_pullup_en = GPIO_PULLUP_DISABLE,
        .scl_io_num = GPIO_NUM_11,
        .scl_pullup_en = GPIO_PULLUP_DISABLE,
        .master.clk_speed = 400000
    };
    i2c_param_config(I2C_NUM_1, &i2c_conf);
    i2c_driver_install(I2C_NUM_1, i2c_conf.mode, 0, 0, 0);

    uint8_t data[2];
    data[0] = 0x11;
    data[1] = 0x10;
    i2c_master_write_to_device(I2C_NUM_1, 0x58, data, sizeof(data), 1000 / portTICK_PERIOD_MS);
    i2c_driver_delete(I2C_NUM_1);
}idf.py build
idf.py flash4. 开始运行
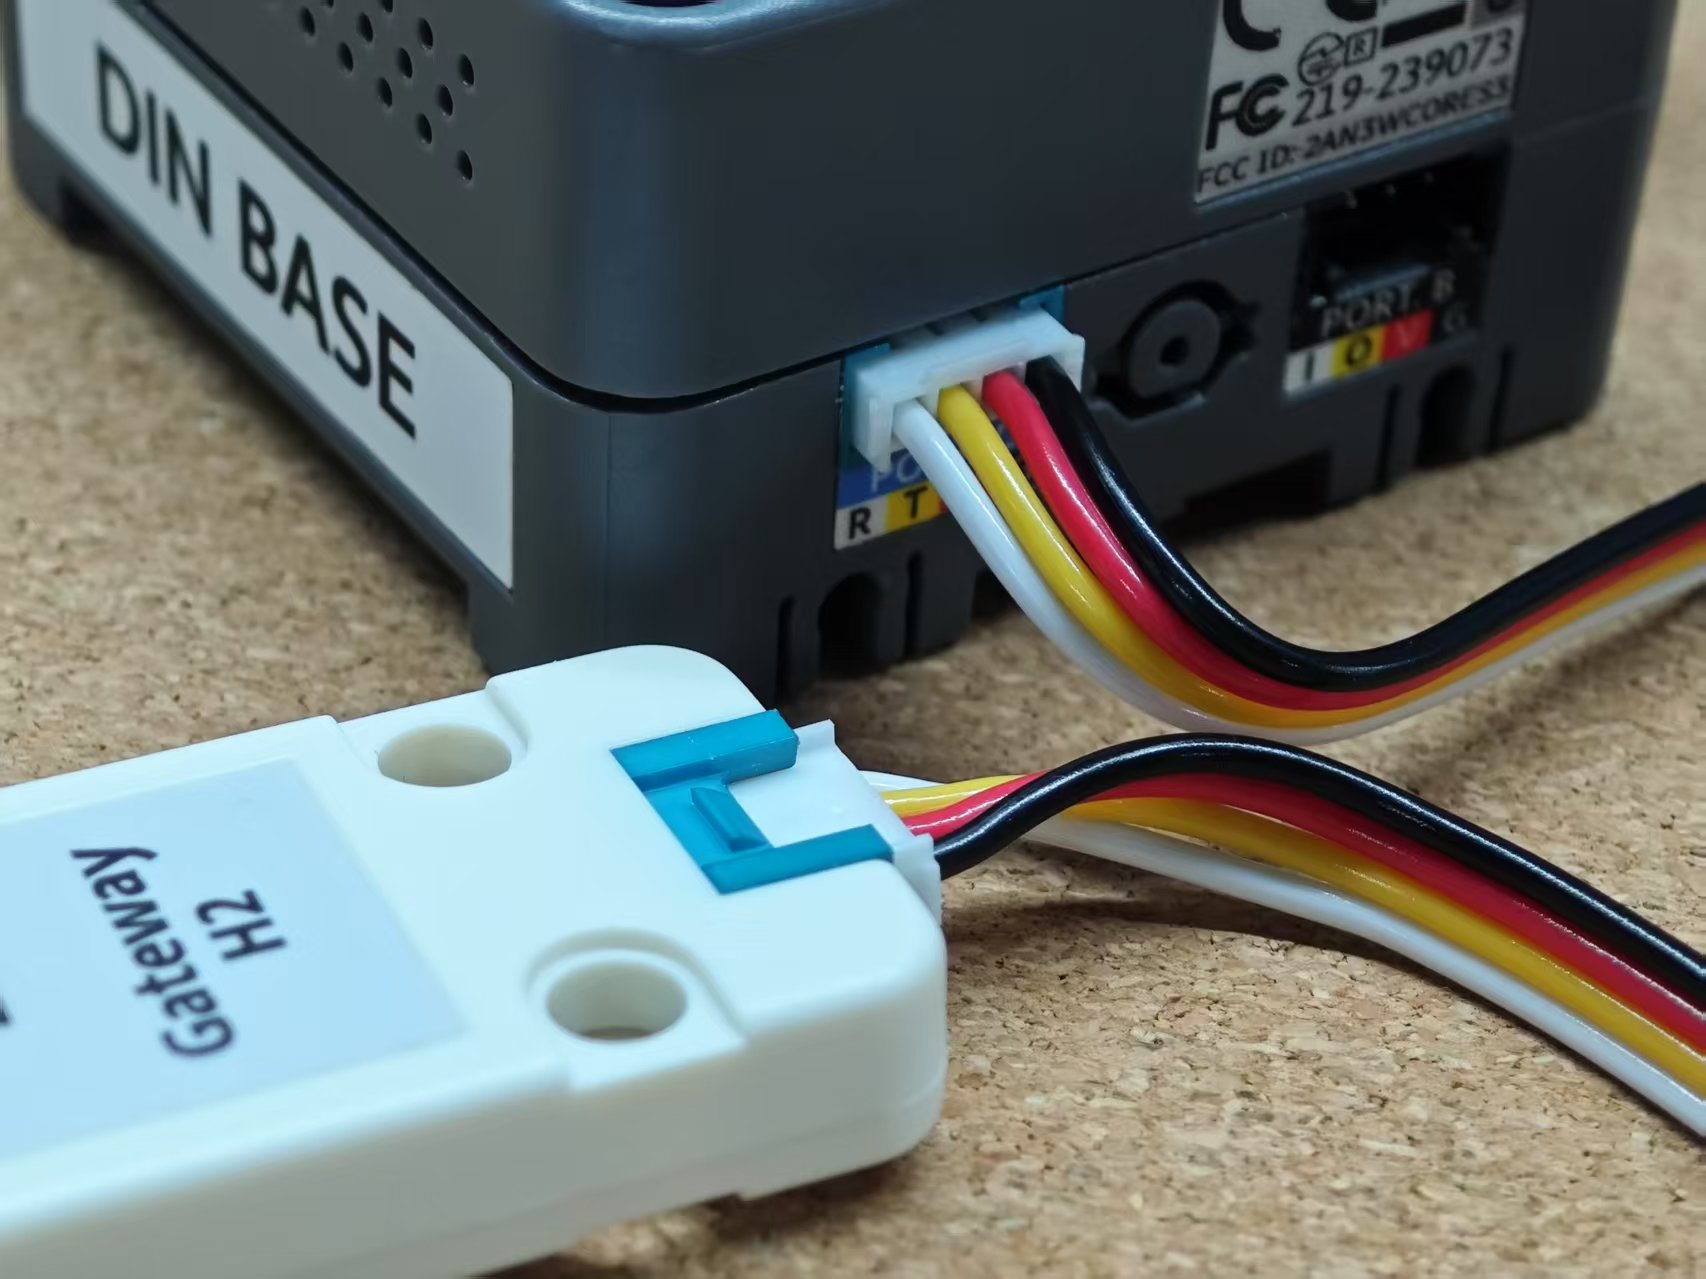
- 将 CoreS3 与 Unit Gateway H2 连接。
- 将 CoreS3 连接至电脑
- 通过
idf.py monitor或其他的串口调试工具在 115200bps 配置下查看运行日志。
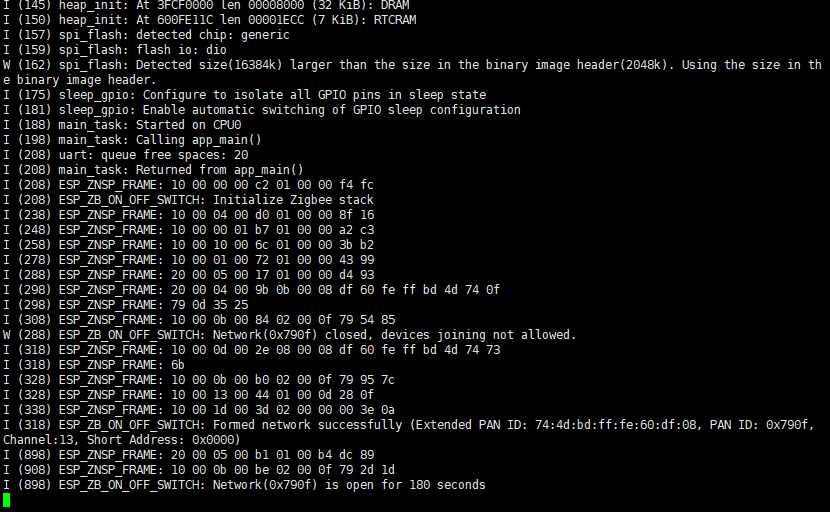
正常运行日志内容:
- NCP 端显示 Zigbee 协议栈初始化成功
- Host 端显示与 NCP 连接成功
- Zigbee 网络创建成功(Coordinator 模式)