ESP-IDF Quick Start
Devices & Examples
Core2
CoreS3
Dial
Tab5
Unit PoE-P4
Zigbee
CoreS3 ESP-IDF BSP Usage Tutorial
This tutorial introduces how to integrate the CoreS3 Board Support Package (BSP) into the ESP-IDF development environment for rapid initialization and management of onboard peripheral drivers, improving development efficiency.
1. Preparation
- Environment Setup: This tutorial is based on Ubuntu OS for building the ESP-IDF development environment. For other platforms, please refer to ESP-IDF – ESP32‑S3 Get Started Tutorial.
ESP-IDF Version
This tutorial recommends using ESP-IDF version
v5.4.1- Use Git version control to clone the esp-idf project, switch to the specified branch, and run the script to install the related toolchain.
Note
There is a space between the
"." and ./export.sh in the . ./export.sh command, which is equivalent to source ./export.shgit clone -b v5.4.1 --recursive https://github.com/espressif/esp-idf.git
cd esp-idf
./install.sh
. ./export.sh- All subsequent
idf.pycommands depend on ESP‑IDF. Before running them, call. ./export.shunder your project directory to activate the necessary environment variables. For details, refer to ESP-IDF – ESP32‑S3 Get Started Tutorial.
2. Project Creation
- Open a terminal and go to your working directory. Create a project folder named
cores3_projects. After entering that folder, callexport.shfrom the esp-idf directory to activate the environment variables. The commands below assume thatcores3_projectsandesp-idfare at the same directory level; adjust paths if needed. Execute the followingidf.py create-projectcommand to create a blank project template namedmy_project.
mkdir cores3_projects
cd cores3_projects
. ../esp-idf/export.sh
idf.py create-project my_project- Enter the project directory and add the M5Stack CoreS3 BSP using the Espressif Component Registry tool:
cd my_project
idf.py add-dependency "espressif/m5stack_core_s3^3.0.0"- Set the target chip platform:
idf.py set-target esp32s3- Due to API compatibility, before compiling, enter the configuration menu
Component config→Audio Codec Device Configurationand disable the backward-compatibleI2C Driveroption:
idf.py menuconfig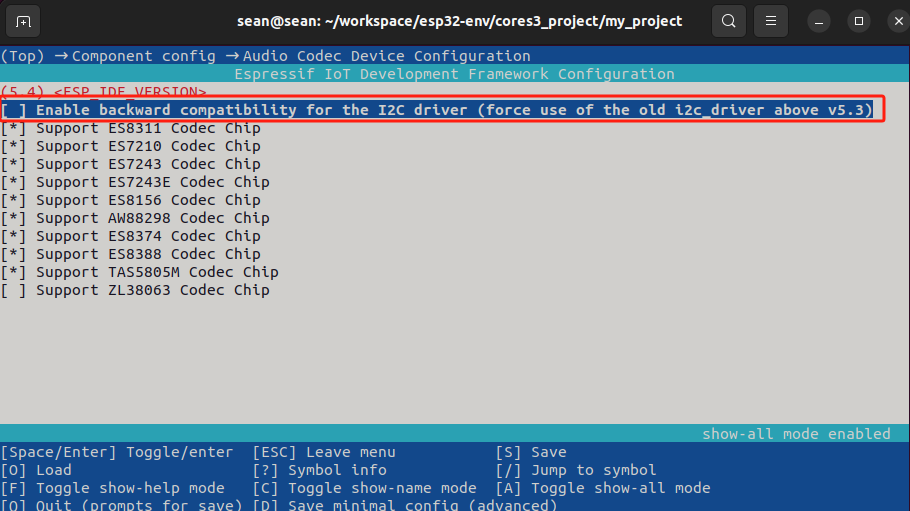
3. Example Program
- Open the entry file of the blank template and replace its contents with the following example:
vim main/my_project.c cpp
1 2 3 4 5 6 7 8 9 10 11 12 13 14 15 16 17 18 19 20 21 22 23 24 25 26
#include "freertos/FreeRTOS.h"
#include "freertos/task.h"
#include "esp_log.h"
#include "lv_demos.h"
#include "bsp/esp-bsp.h"
static char *TAG = "app_main";
#define LOG_MEM_INFO (0)
void app_main(void) {
/* Initialize display and LVGL */
bsp_display_start();
/* Set display brightness to 100% */
bsp_display_backlight_on();
ESP_LOGI(TAG, "Display LVGL demo");
bsp_display_lock(0);
lv_demo_widgets(); /* A widgets example */
// lv_demo_music(); /* A modern, smartphone-like music player demo. */
// lv_demo_stress(); /* A stress test for LVGL. */
// lv_demo_benchmark(); /* A demo to measure the performance of LVGL or
// to compare different settings. */
bsp_display_unlock();
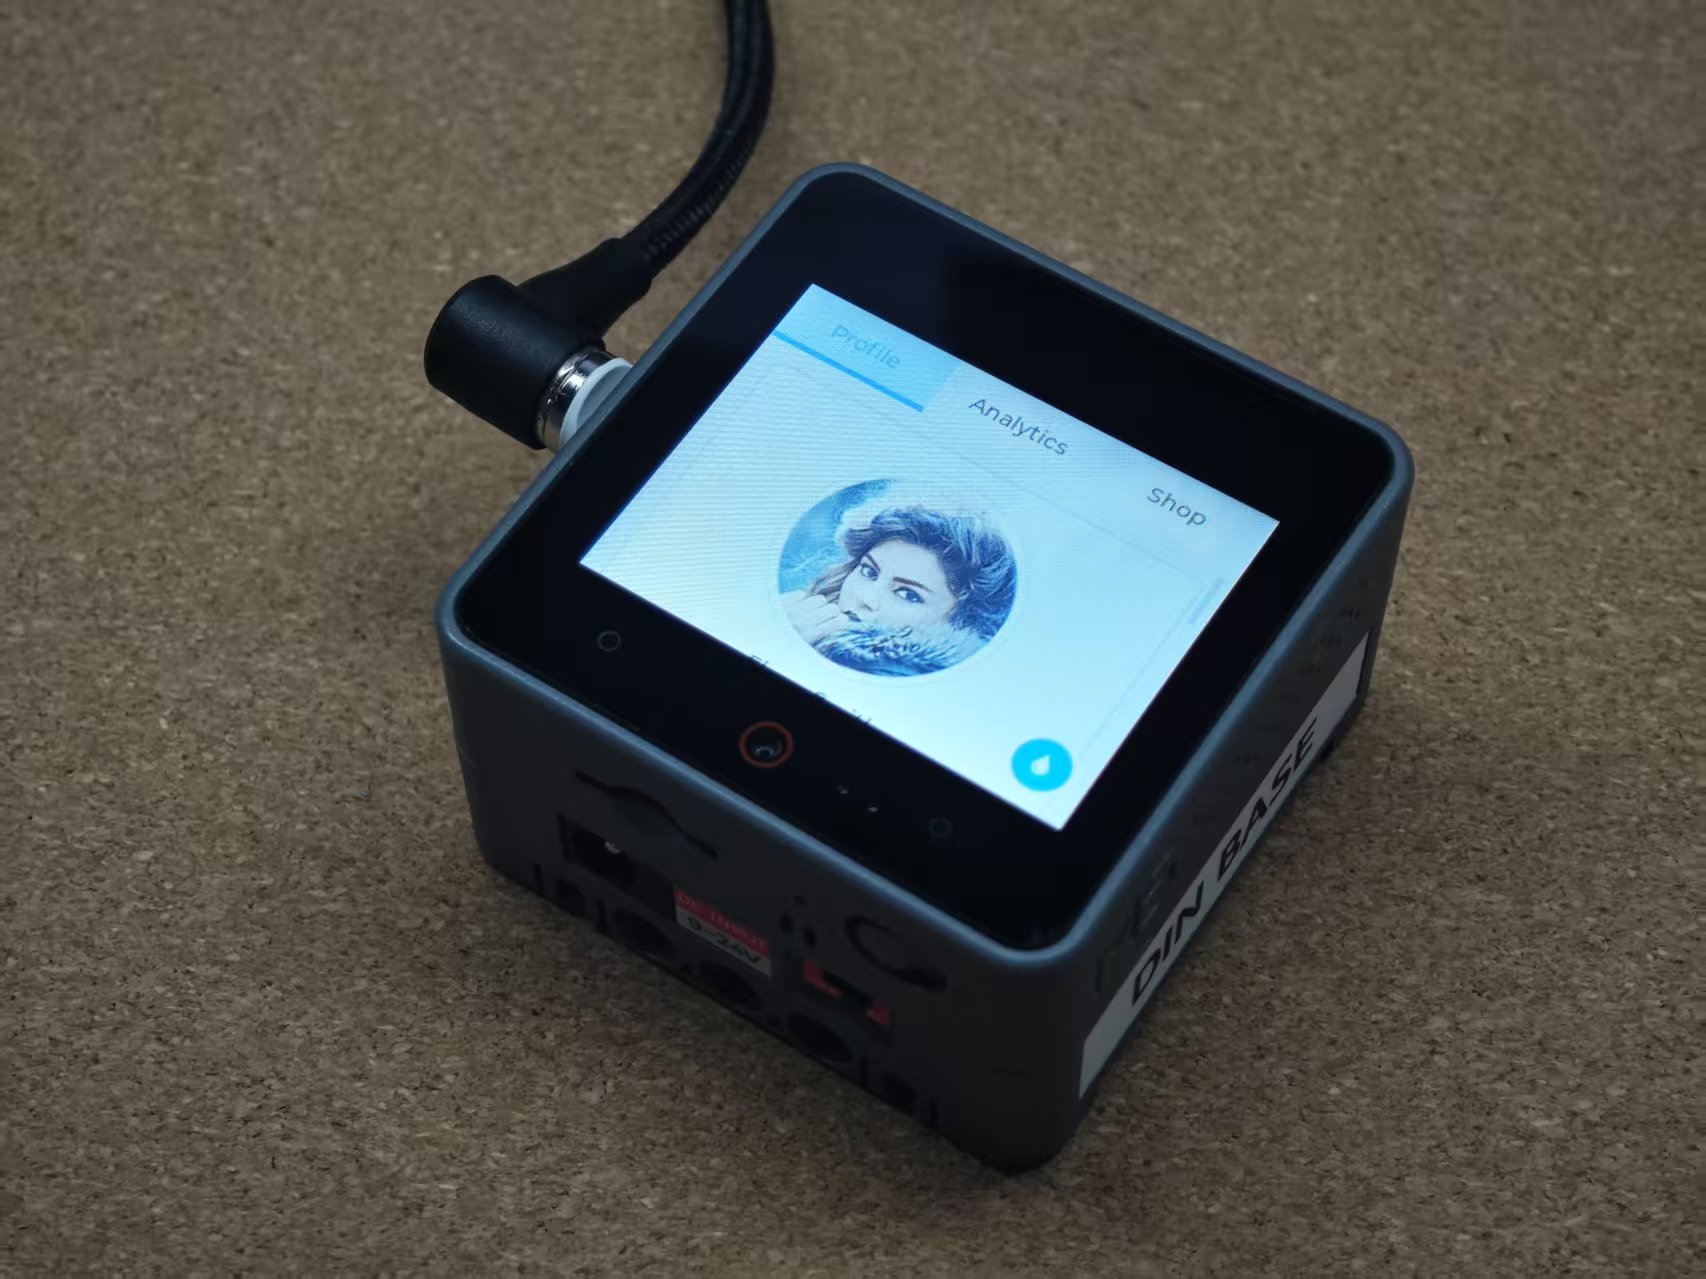
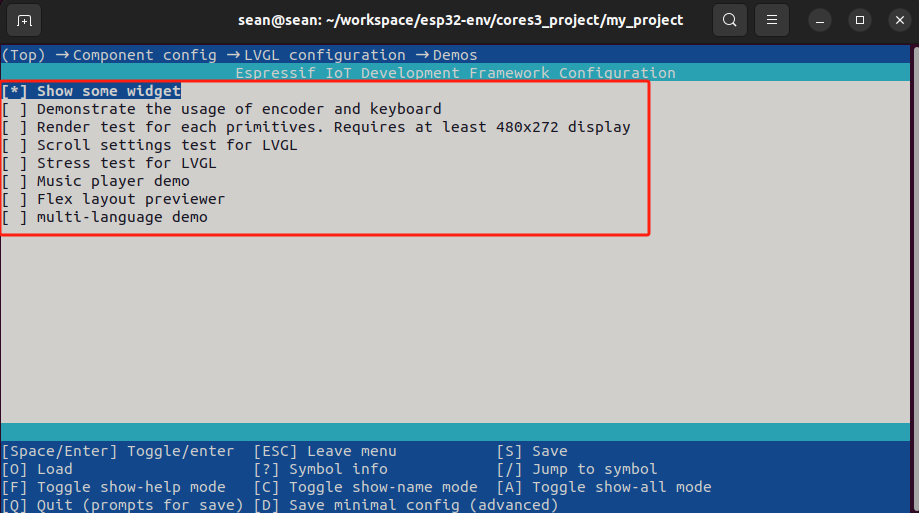
}- This example shows how to drive the display and run an LVGL demo. You can uncomment other demos to build different examples. Before using a demo, enter
Component config→LVGL Configuration→Demosinidf.py menuconfigand enable the desired LVGL demo.
4. Build & Flash
- Long‑press the device’s reset button (about 2 seconds) until the internal green LED lights up, then release to enter download mode, waiting for flashing.
.gif)
- Run the following command to build and flash the program:
idf.py flash