


RS485
<img src="
https://static-cdn.m5stack.com/resource/docs/static/assets/img/product_pics/unit/unit_rs485_01.webp"
width="20%" height="20%"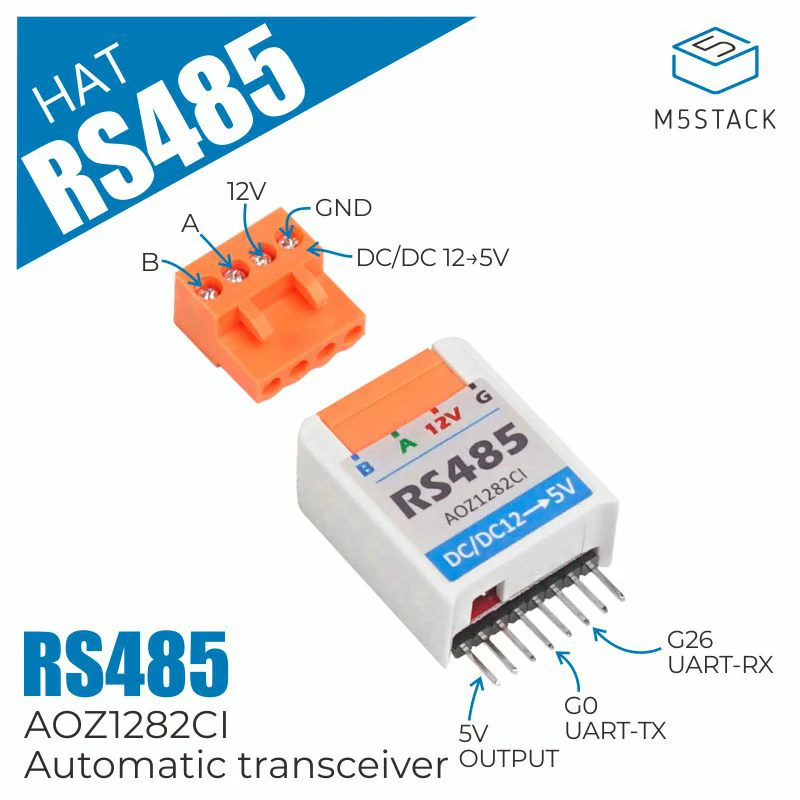
RS485使用介绍
RS485是一种长距离数据传输标准,其基本使用方法与串口的用法相同,即定义RX与TX端口,通信波特率及数据位,进行通信。通常情况下配置为(9600,Serial_8N1,RX_PIN,TX_PIN),9600波特率,8个数据位,无奇偶校验位,1个停止位
RS485使用Arduino示例
- 在程序初始化时定义串口2,通常情况下M5Stack的串口为16(RX_PIN)和17(TX_PIN),M5StickC的串口为33(RX_PIN)和32(TX_PIN),HAT串口为26(RX_PIN)和0(TX_PIN),
Serial2.begin(115200, SERIAL_8N1, RX_PIN, TX_PIN);
- 发送数据可以使用Serial2.print(“x”)或者Serial.write("x"),关于两者的区别请参照Arduino中Serial的使用
Serial2.print("97");或者Serial2.write("97");
- 读取数据可以使用Serial2.read()从缓冲区中读出
if(Serial2.available()){ char c = Serial2.read(); }
*以下基本代码仅供参考
#include <M5Stack.h>

#define RX_PIN 16
#define TX_PIN 17

void setup() {
  M5.begin();
  Serial2.begin(9600, SERIAL_8N1, RX_PIN, TX_PIN);  //串口2初始化
}


void loop() {
    if(M5.BtnA.wasPressed()){                    //如果按键A被按下
        Serial2.print("hello,from RS485\r\n");  //通过串口2发送数据
    }
    if(Serial2.available()){                   //如果串口有数据读取并打印
        char c = Serial2.read();
        Serial.print(c);
   }
   M5.update();                               //按键状态刷新
}
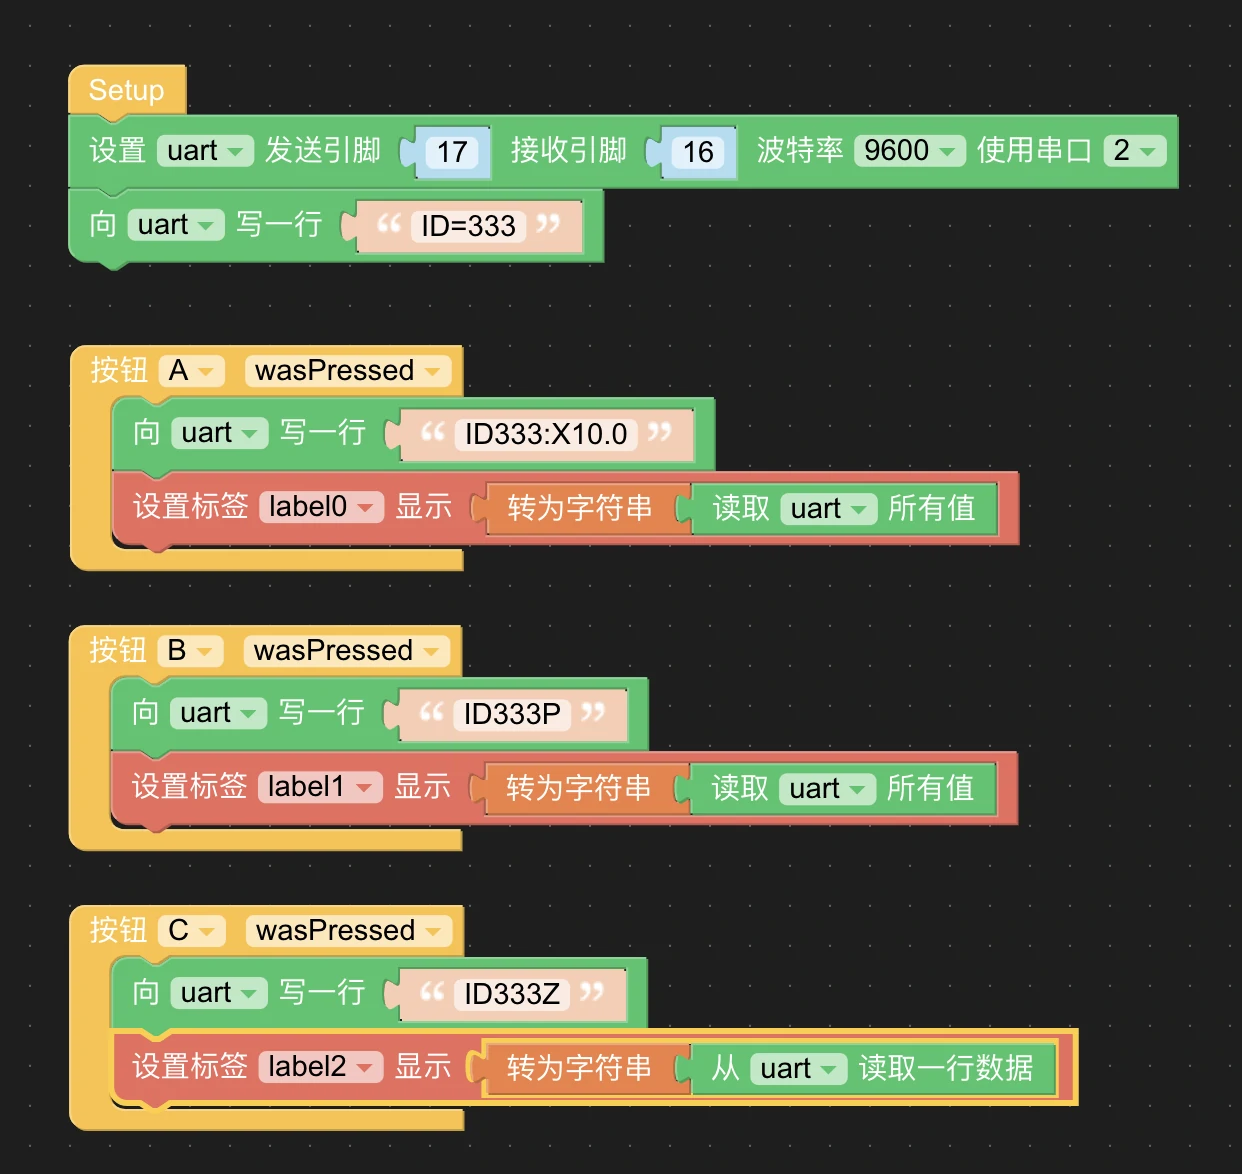
UIFlow使用RS485示例
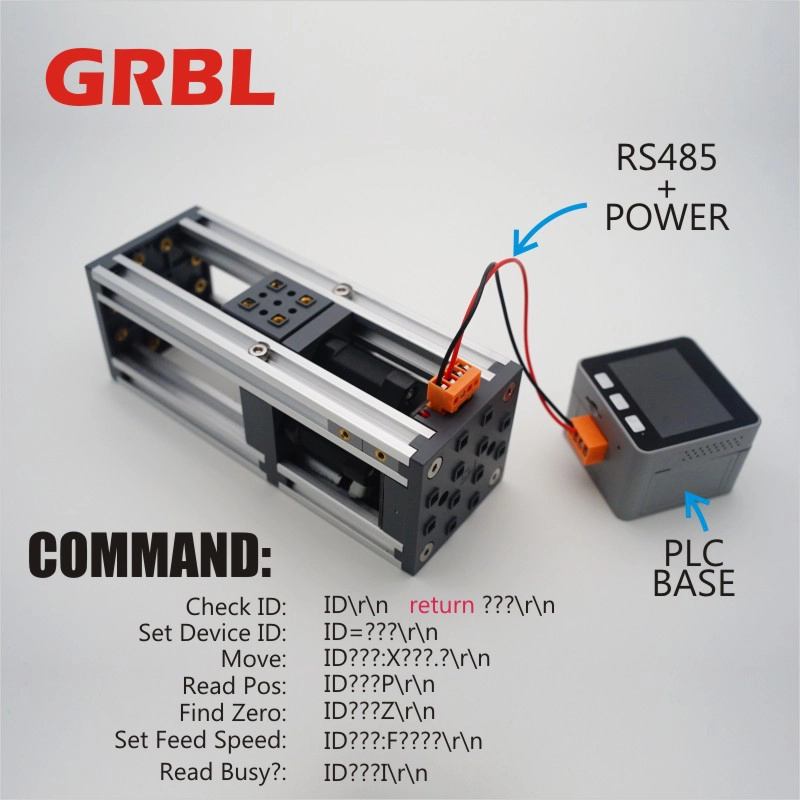
PUSH6060例程
具体细节参考RS485示例,以下为示范代码
#include <M5Stack.h>
#define RX_PIN      16
#define TX_PIN      17

#define X_LOCAL 40
#define Y_LOCAL 40

#define X_OFF 160
#define Y_OFF 30

int distance = 0;    //步进电机移动步进值

void header(const char *string, uint16_t color){     //标题
    M5.Lcd.fillScreen(color);
    M5.Lcd.setTextSize(1);
    M5.Lcd.setTextColor(TFT_MAGENTA, TFT_BLUE);
    M5.Lcd.fillRect(0, 0, 320, 30, TFT_BLUE);
    M5.Lcd.setTextDatum(TC_DATUM);
    M5.Lcd.drawString(string, 160, 3, 4);
}

void setup() {
    M5.begin();
    M5.Power.begin();

    header("PUSH 6060", TFT_BLACK);
    M5.Lcd.setTextFont(2);
    M5.Lcd.setTextColor(TFT_WHITE, TFT_BLACK);
    Serial2.begin(9600, SERIAL_8N1, RX_PIN, TX_PIN);  //配置串口2
    delay(500);
    Serial2.print("ID=123\r\n");                     //串口2输出ID=123\r\n,配置6060电机ID为123
}


void loop() {
    if(M5.BtnA.wasPressed()){                      //按键A按下发送ID\r\n,查看6060电机ID
      Serial2.print("ID\r\n");
    }
    if(M5.BtnB.wasPressed()){                      //按键B按下发送ID123:X%d\r\n控制移动绝对行程,其中%d为变量distance
      if(distance < 50){
         distance +=10;
         Serial2.printf("ID123:X%d\r\n",distance);
      }
    }
    if(M5.BtnC.wasPressed()){                      //按键C按下发送ID123Z\r\n,电机回原点
      Serial2.print("ID123Z\r\n");
    }
    if(Serial2.available()){                       //串口2接收6060返回的消息并打印
      char c = Serial2.read();
      Serial.print(c);
    }
    M5.update();
}