
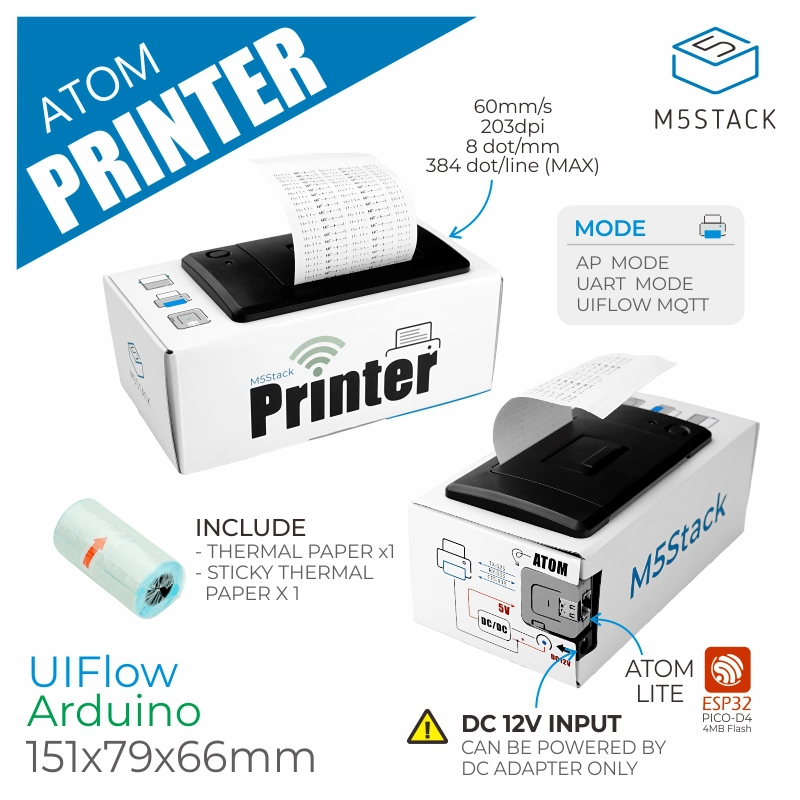
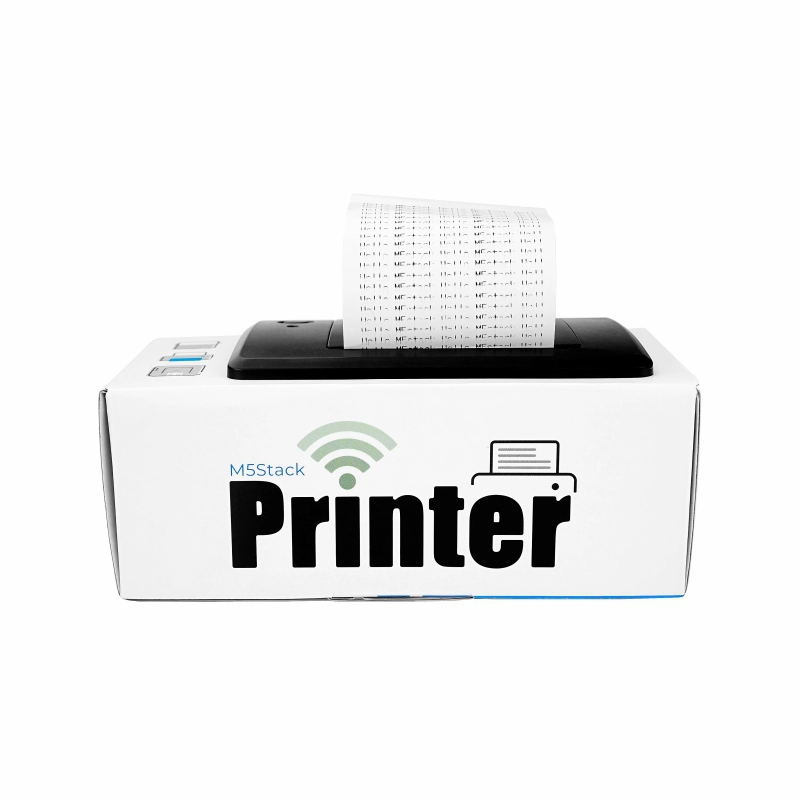
Atom Printer
SKU:K118
Description
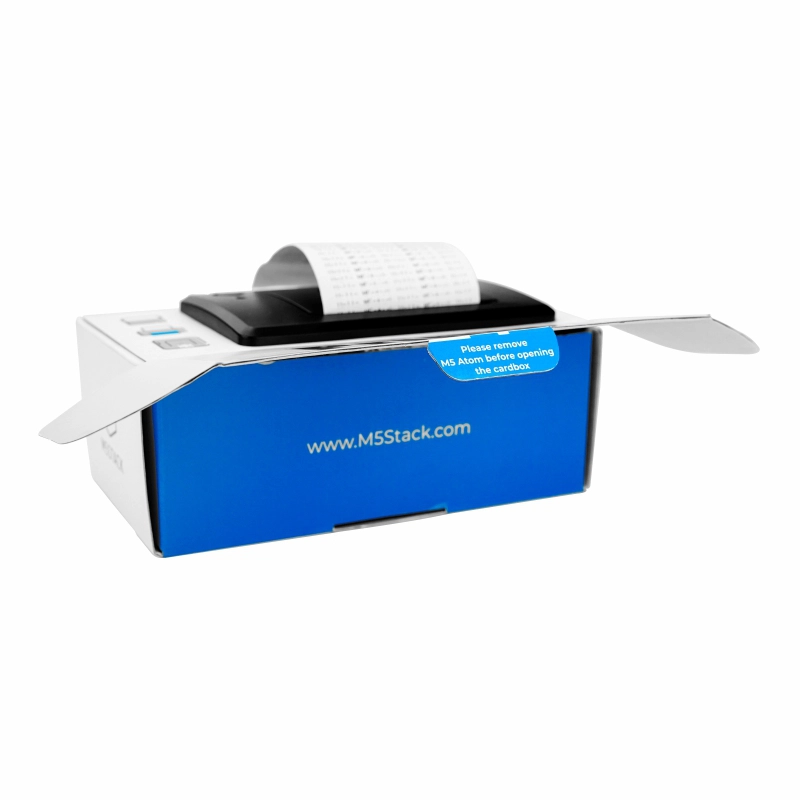
Atom Printer is a DIY thermal printer kit, featuring the Atom-Lite IoT core controller paired with a 58mm thermal printer. It supports printing characters, graphics, barcodes, 1D codes, QR codes, and more. The body is covered with a full cardboard shell, giving it a distinctive maker style. The built-in firmware supports two modes: AP connection printing and MQTT message push printing. Based on the ATOM IoT control core, you can further develop more cool printing applications.
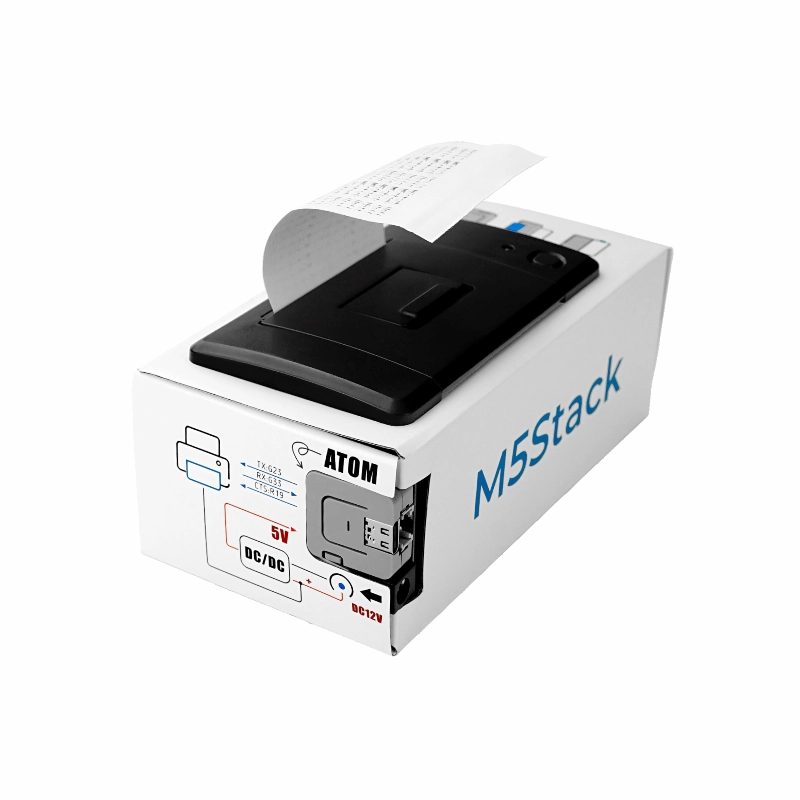
Note: This kit does not come with a power adapter. Users need to prepare their own
DC 12V (5.5mm specification) power adapter. For optimal print quality, the adapter should have a power supply capacity of 2.5A or higher, as the power supply capability will directly affect the print display quality.Tutorial
This tutorial will introduce you to the Atom Printer device tutorial & quick start
Features
- Atom-Lite: ESP32-PICO-D4 4MB Flash IoT controller
- Geek-style cardboard shell
- Supports printing characters, graphics, barcodes, QR codes
- Communication interface: UART
- Fast printing speed, high resolution
- Usage methods:
- AP hotspot connection, web control printing
- MQTT content push printing (Topic is the device's Mac address)
- Serial command control (UART 9600bps 8N1)
- Development platforms: UiFlow, Arduino
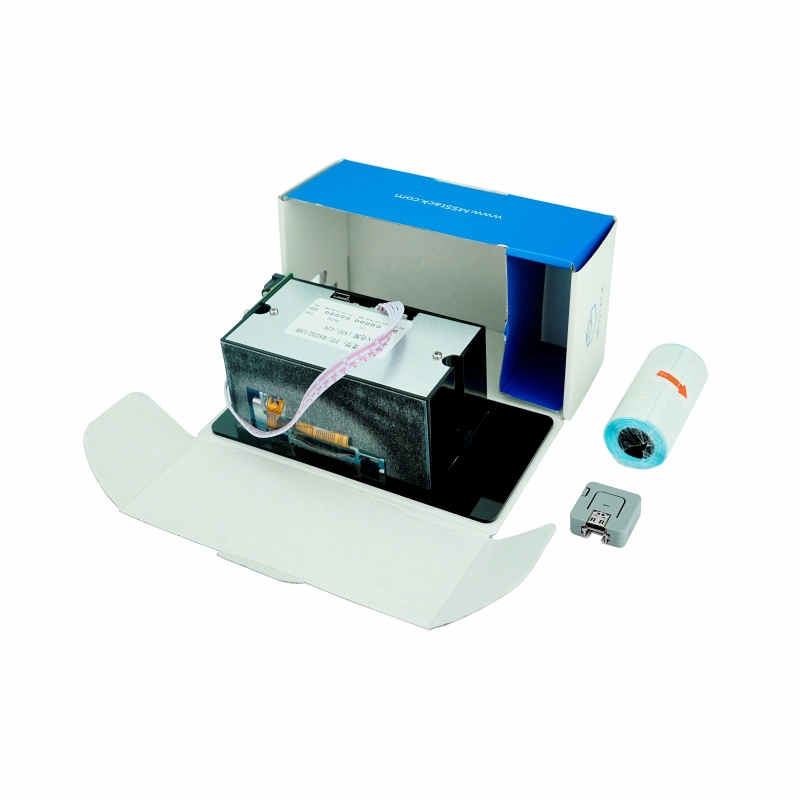
Includes
- 1 x Atom Printer
- 1 x Thermal paper roll
- 1 x Sticker thermal paper roll
Applications
- Various receipt printing scenarios
Specifications
| Specification | Parameter |
|---|---|
| Printing method | Thermal printing |
| Supported text and graphics | Text, graphics, characters, barcodes (Codebar, code93, code39, code128, ENA13, ITF25, UPC-A, UPC-E), QR codes |
| Power supply voltage | DC 12V |
| Operating current | 2.5A |
| Printing color | Black and white |
| Printing speed/resolution | 60mm/s 203dpi 8 dots/mm, up to 384 dots per line |
| Printing width | 58mm |
| Lifespan | 50km printing distance |
| Paper cutting method | Manual tear-off |
| Thermal paper roll specs | 58mm±0.05mm (width) 0.05 ~ 0.1mm (thickness), maximum diameter ≤40mm |
| Printing speed | 60mm/s |
| Communication interface | USB/RS232/TTL (ATOM defaults to TTL interface UART 9600bps 8N1) |
| Product Size | 151 x 79 x 66mm |
| Product weight | 285g |
| Package Size | 158 x 82 x 70mm |
| Gross weight | 321g |
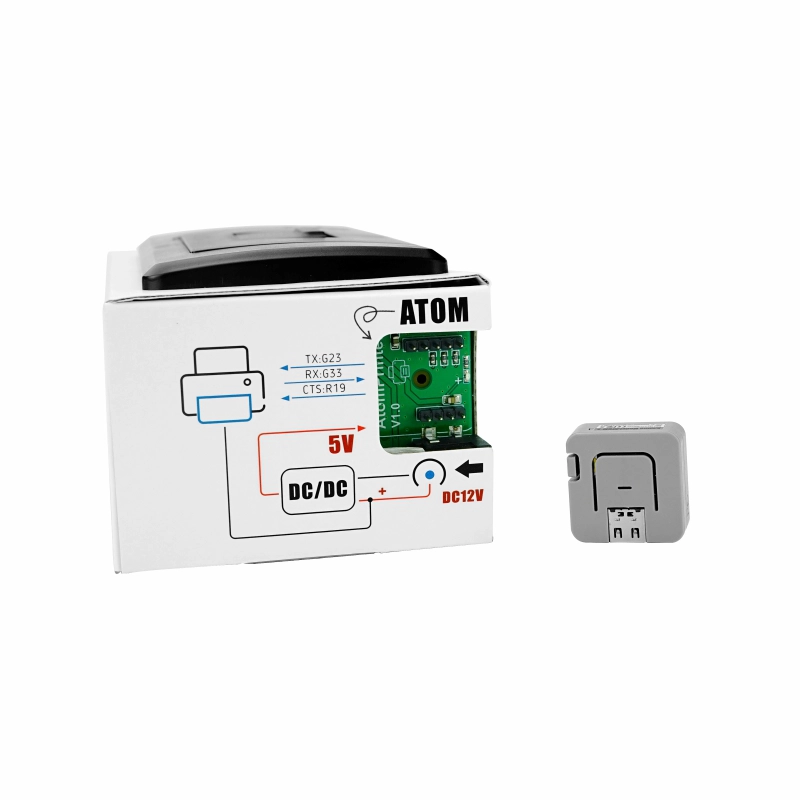
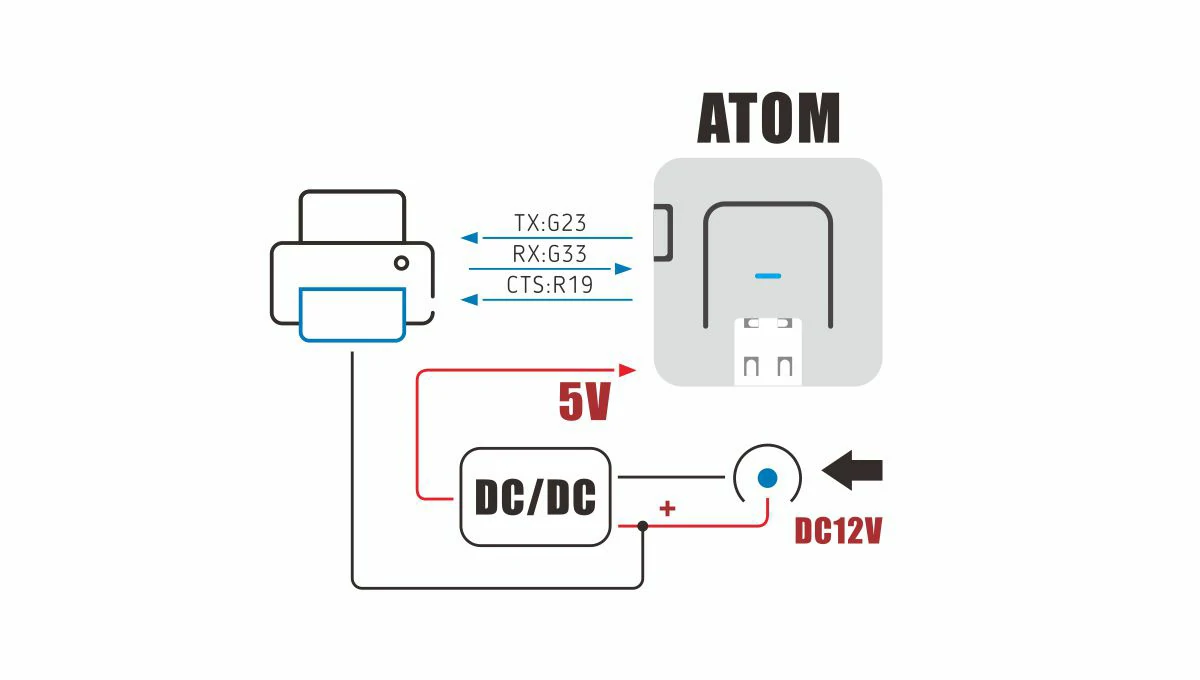
PinMap
- Atom PRINTER
| Atom | G23 | G33 | G19 |
|---|---|---|---|
| Atom PRINTER | TX | RX | CTS |
Softwares
Arduino
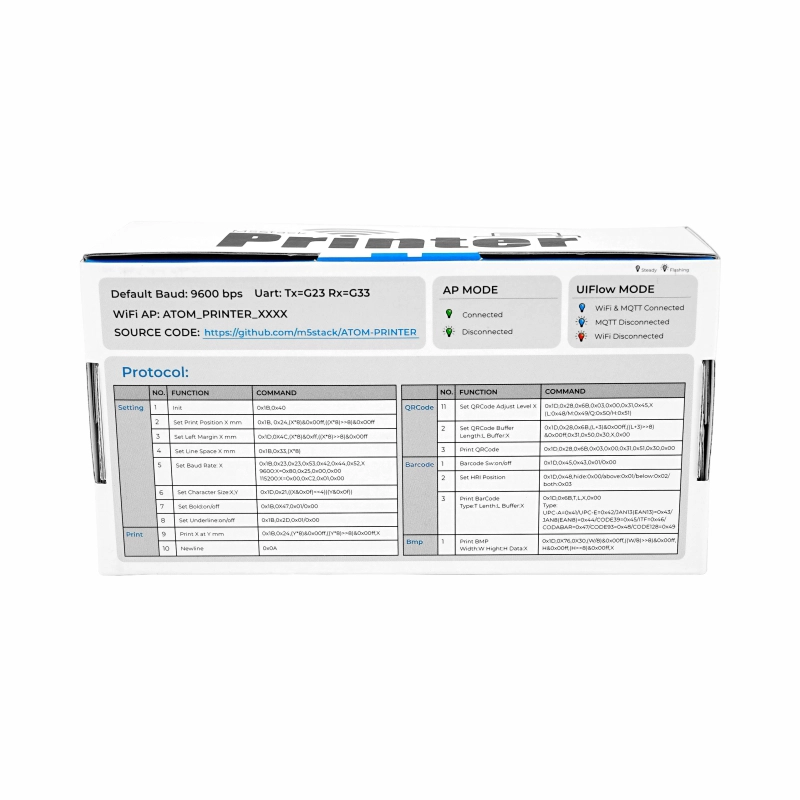
Protocol
Setting
| NO | Function | command |
|---|---|---|
| 1 | Init | 0x1B,0x40 |
| 2 | Set Print Position X mm | 0x1B,0x24,(X * 8)&0x00ff,((X * 8)>>8)&0x00ff |
| 3 | Set Left Margin X mm | 0x1D,0X4C,(X * 8)&0xff,((X * 8)>>8)&0x00ff |
| 4 | Set Line Space X mm | 0x1B,0x33,(X *8) |
| 5 | Set Baud Rate: X | 0x1B,0x23,0x23,0x53,0x42,0x44,0x52,X (9600:X=0x80,0x25,0x00,0x00) (115200:X=0x00,0xC2,0x01,0x00) |
| 6 | Set Character Size:X,Y | 0x1D,0x21,((X&0x0f)<<4) (Y&0x0f) |
| 7 | Set Bold:on/off | 0x1B,0X47,0x01/0x00 |
| 8 | Set Underline:on/off | 0x1B,0x2D,0x01/0x00 |
| NO | Function | Command |
|---|---|---|
| 1 | Print X at Y mm | 0x1B,0x24,(Y * 8)&0x00ff,((Y * 8)>>8)&0x00ff,X |
| 2 | Set Print Position X mm | 0x1D,0x28,0x6B,0x03,0x00,0x31,0x45,X (L:0x48/M:0x49/Q:0x50/H:0x51) |
QRCode
| NO | Function | Command |
|---|---|---|
| 1 | Set QRCode Adjust Level X | 0x1D,0x28,0x6B,0x03,0x00,0x31,0x45,X (L:0x48/M:0x49/Q:0x50/H:0x51) |
| 2 | Set QRCode Buffer Length:L Buffer:X | 0x1D,0x28,0x6B,(L+3)&0x00ff,((L+3)>>8)&0x00ff,0x31,0x50,0x30,X,0x00 |
| 3 | Print QRCode | 0x1D,0x28,0x6B,0x03,0x00,0x31,0x51,0x30,0x00 |
BarCode
| NO | Function | Command |
|---|---|---|
| 1 | Barcode Sw:on/off | 0x1D,0x45,0x43,0x01/0x00 |
| 2 | Set HRI Position | 0x1D,0x48,hide:0x00/above:0x01/below:0x02/both:0x03 |
| 3 | Print BarCode Type:T Lenth:L Buffer:X | 0x1D,0x6B,T,L,X,0x00 Type: UPC-A=0x41/UPC-E=0x42/JAN13(EAN13)=0x43/JAN8(EAN8)=0x44/CODE39=0x45/ITF=0x46/CODABAR=0x47/CODE93=0x48/CODE128=0x49 |
Bmp
| NO | Function | Command |
|---|---|---|
| 1 | Print BMP Width:W Hight:H Data:X | 0x1D,0X76,0X30,(W/8)&0x00ff,((W/8)>>8)&0x00ff,H&0x00ff,(H>>8)&0x00ff,X |
EasyLoader
| Easyloader | Download Link | Notes |
|---|---|---|
| Atom Printer Test Easyloader | download | / |
Video
Page Tools