

Product Guide
Linux PC
CardputerZero
AI Accelerator Card
LLM-8850 Card
Large Language Models
AI & Agent
Real-Time AI Voice Assistant
XiaoZhi Voice Assistant
AtomS3R-M12 Volcengine Kit
Offline Voice Recognition
Industrial Control
IoT Measuring Instruments
Air Quality
PowerHub
Module13.2 PPS
VAMeter
T-Lite
Input & Output Devices
Ethernet Camera
PoECAM
Wi-Fi Camera
Unit CamS3/-5MP
AI Camera
LoRa & LoRaWAN
Motor Control
Restore Factory Firmware
DIP Switch Usage Guide
Atom Printer Guide
This tutorial demonstrates how to flash firmware for the Atom Printer and perform web printing and MQTT remote printing operations.
1. Preparations
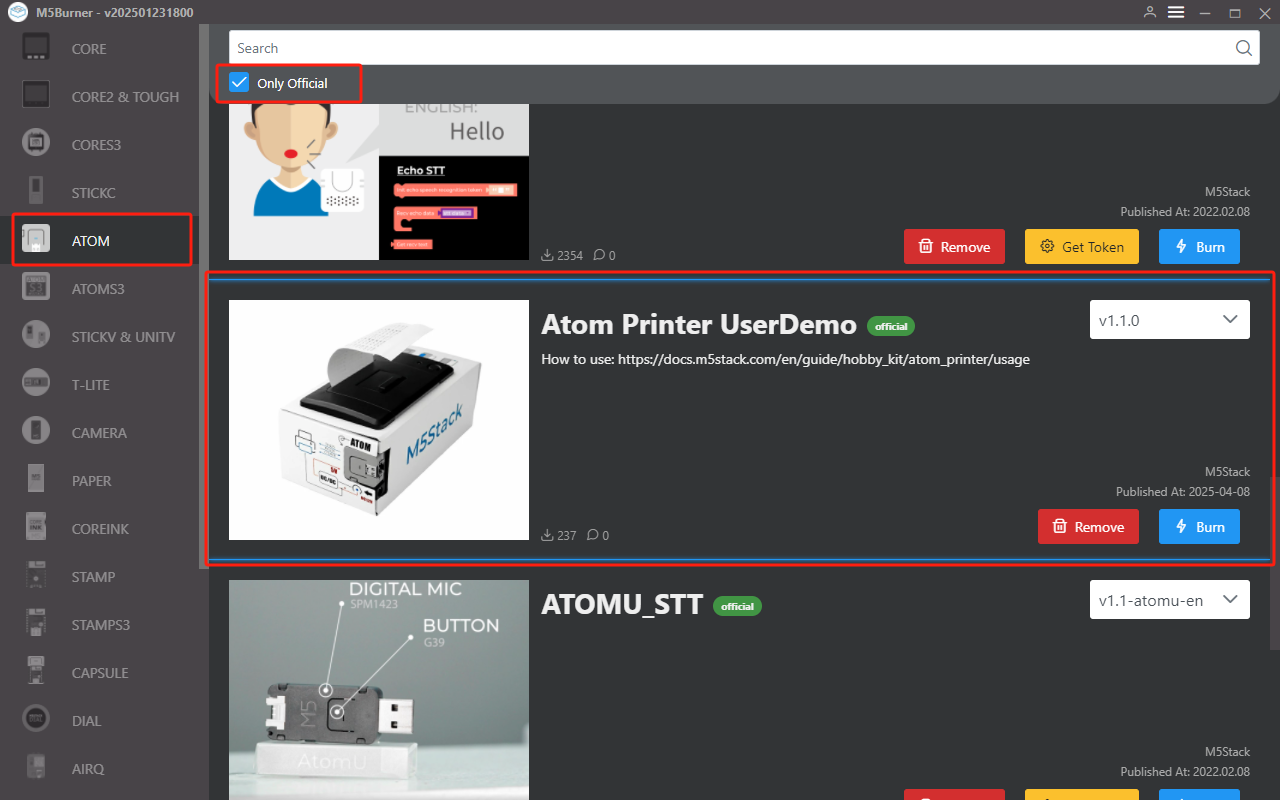
- Refer to the M5Burner tutorial to download the flashing tool, and download the corresponding firmware as shown in the image below.
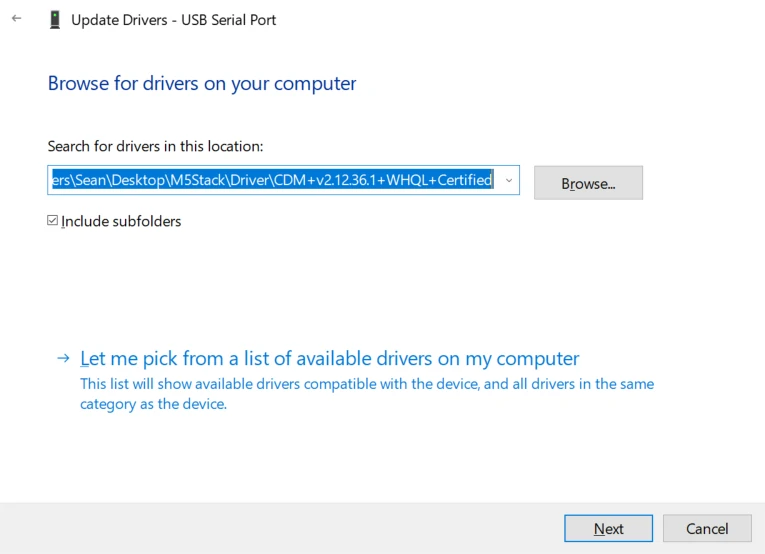
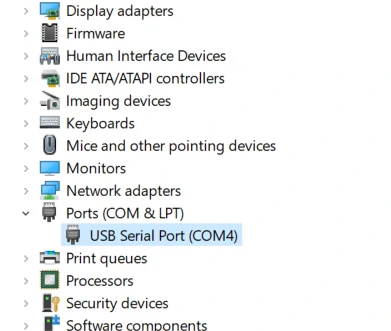
2. USB Driver Installation
M5Stack or USB Serial. Windows recommends installing the driver file directly through Device Manager (custom update), as the executable installation method may not work properly). Click here to download the FTDI driver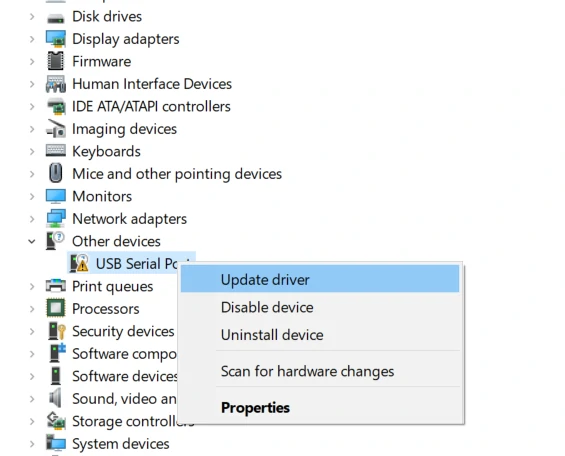
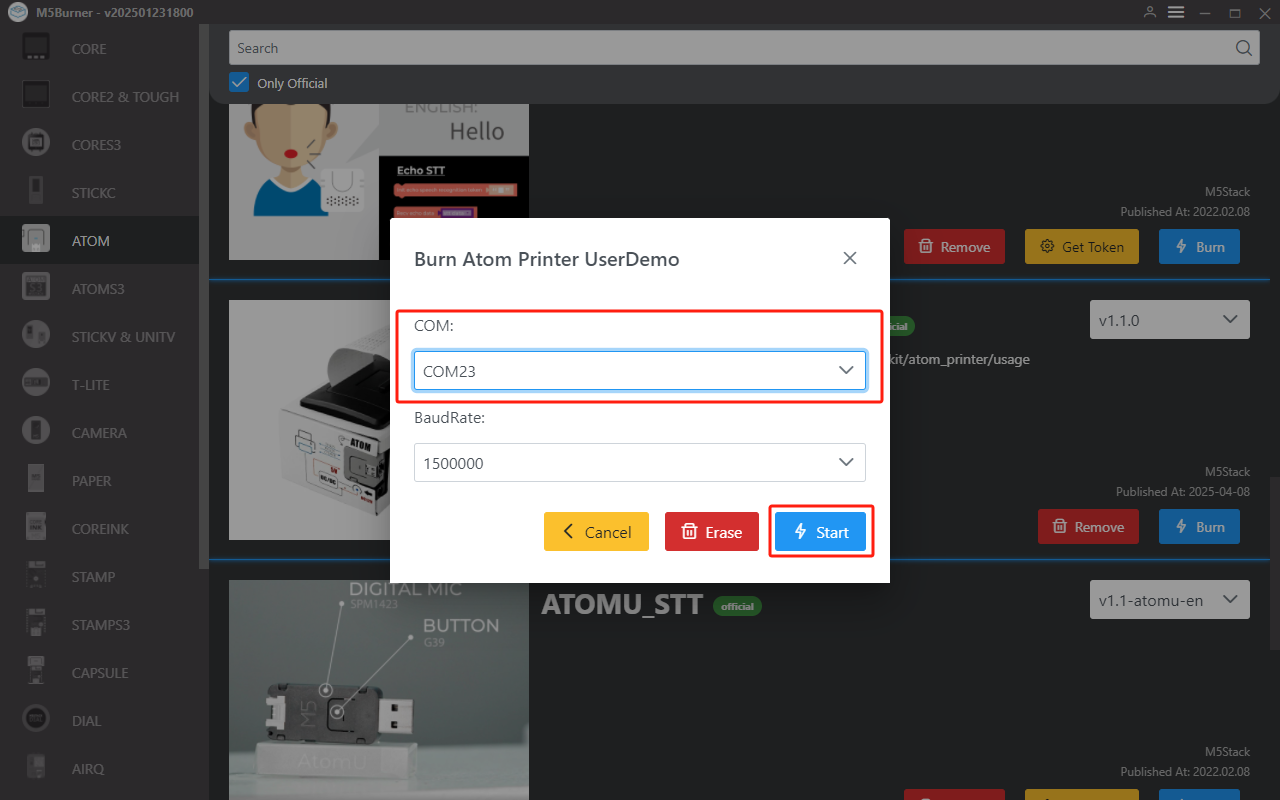
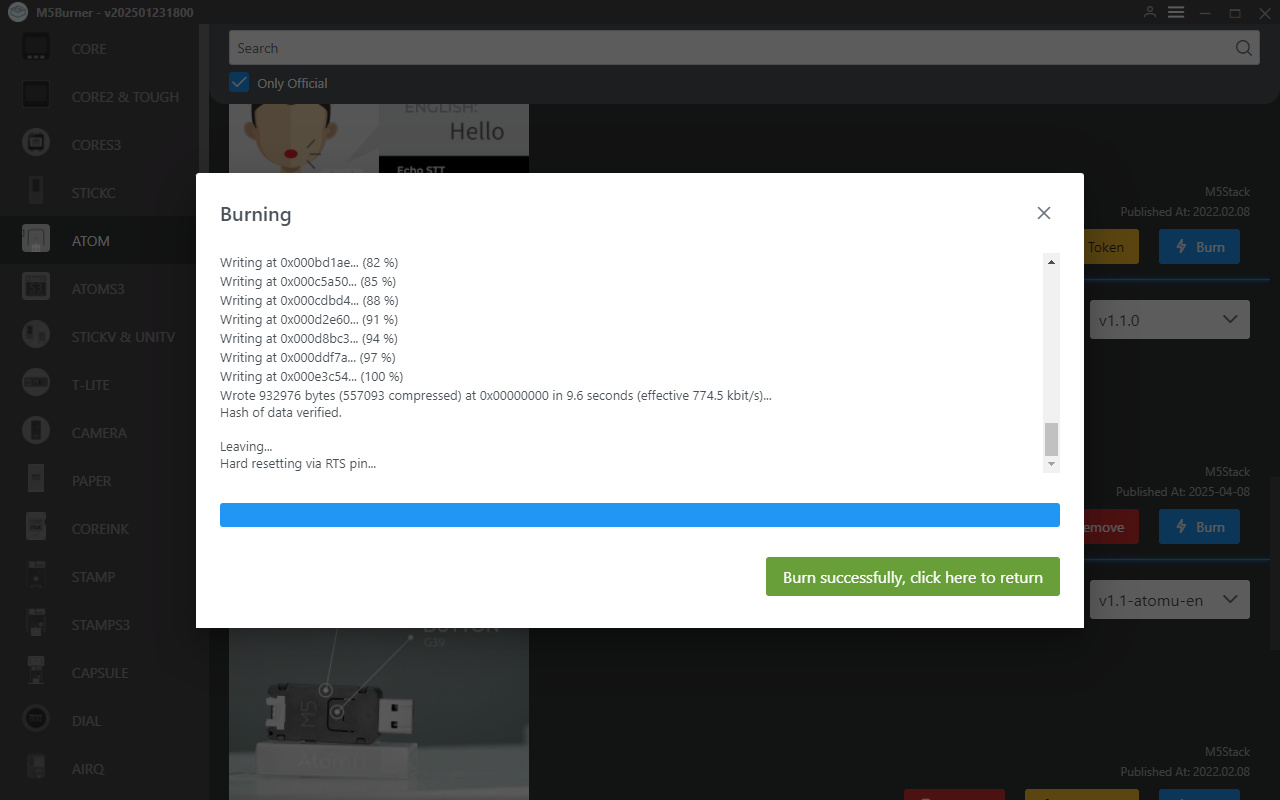
System Preferences > Security & Privacy > General > Allow apps downloaded from > App Store and identified developers is selected.3. Firmware Flashing
Connect the device to your computer via USB, click the Burn button, and select the corresponding port for flashing.
4. How to use?
AP Printing
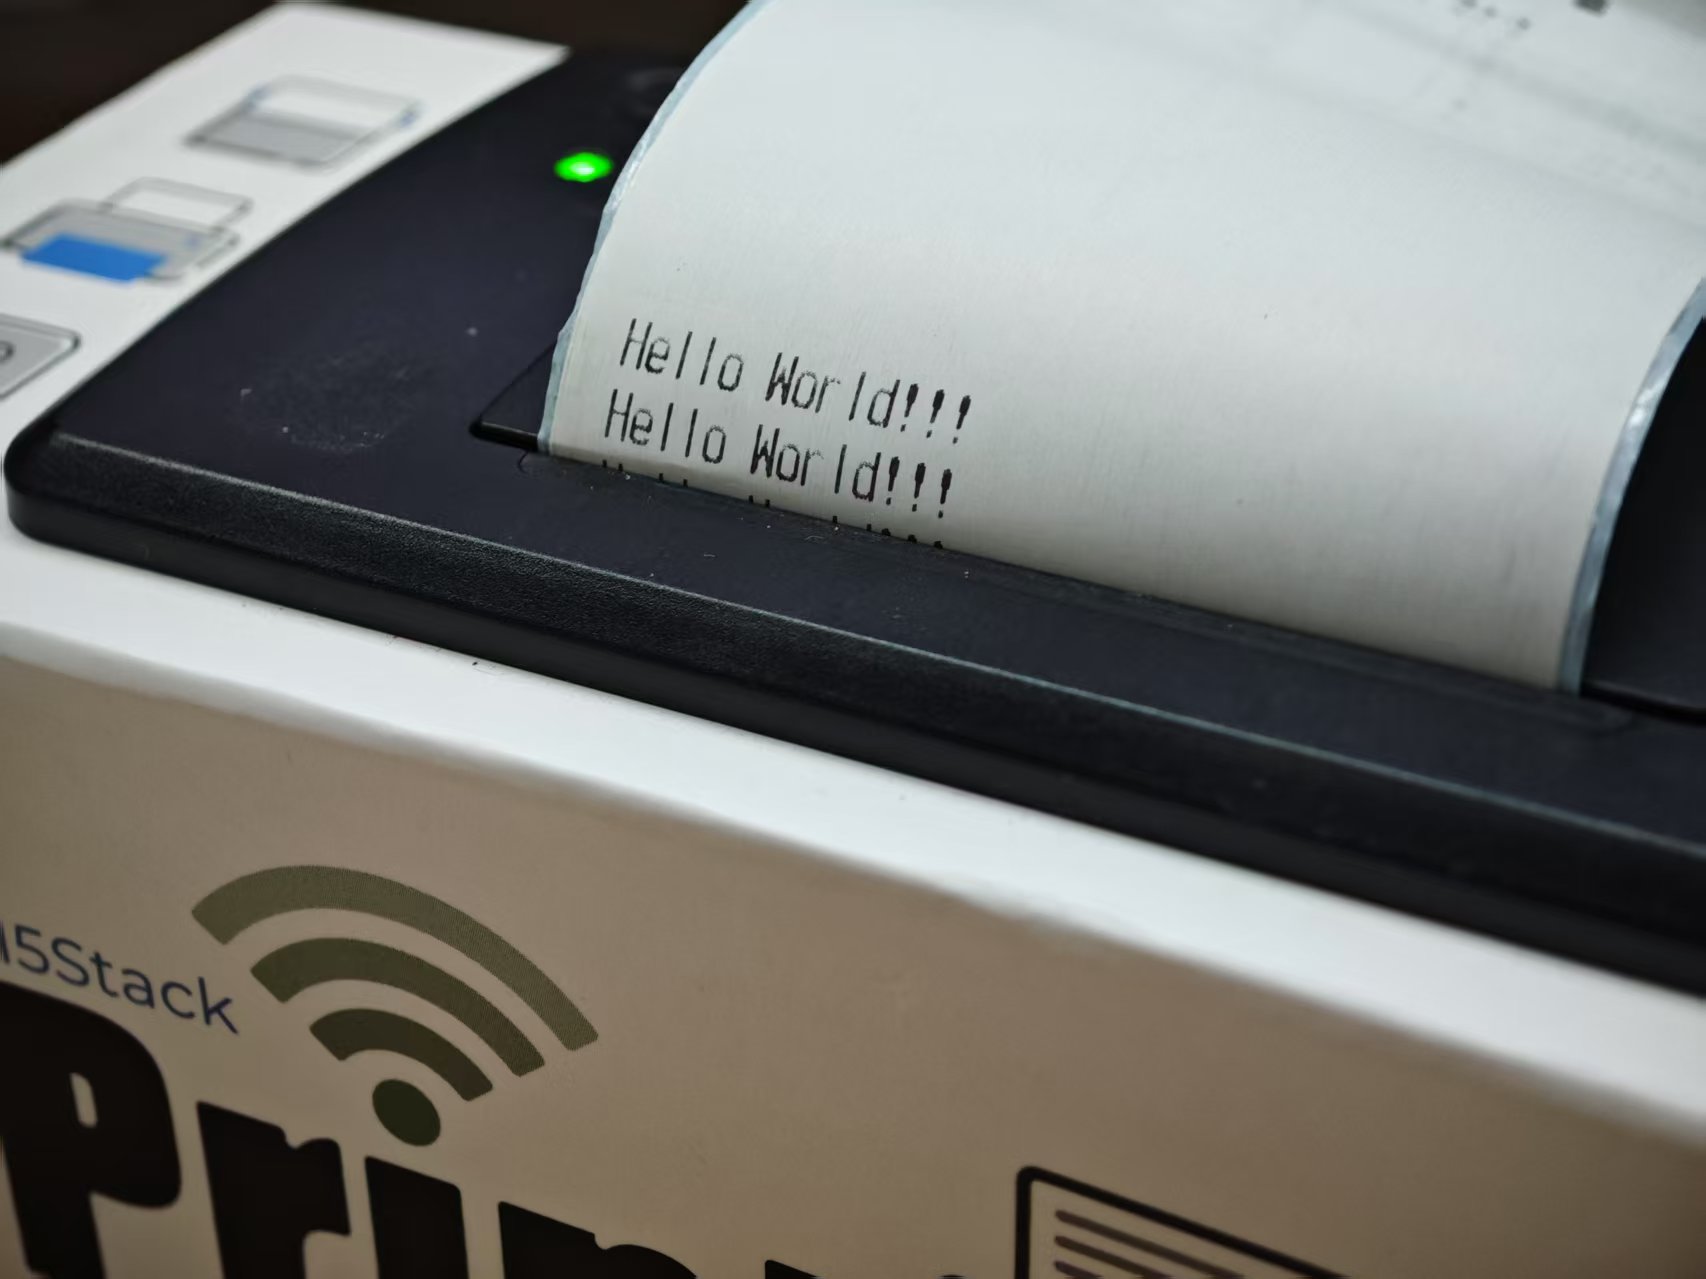
After booting, the device will default to enabling an AP hotspot (ATOM_PRINTER-xxxx). Connect your phone to the AP hotspot and use a browser (Chrome recommended) to access 192.168.4.1 to navigate to the printing page (connecting to the AP usually redirects to this page by default). The page offers multiple printing options: text, QR code, and barcode. Enter characters in the corresponding input field and click the Print button to print.
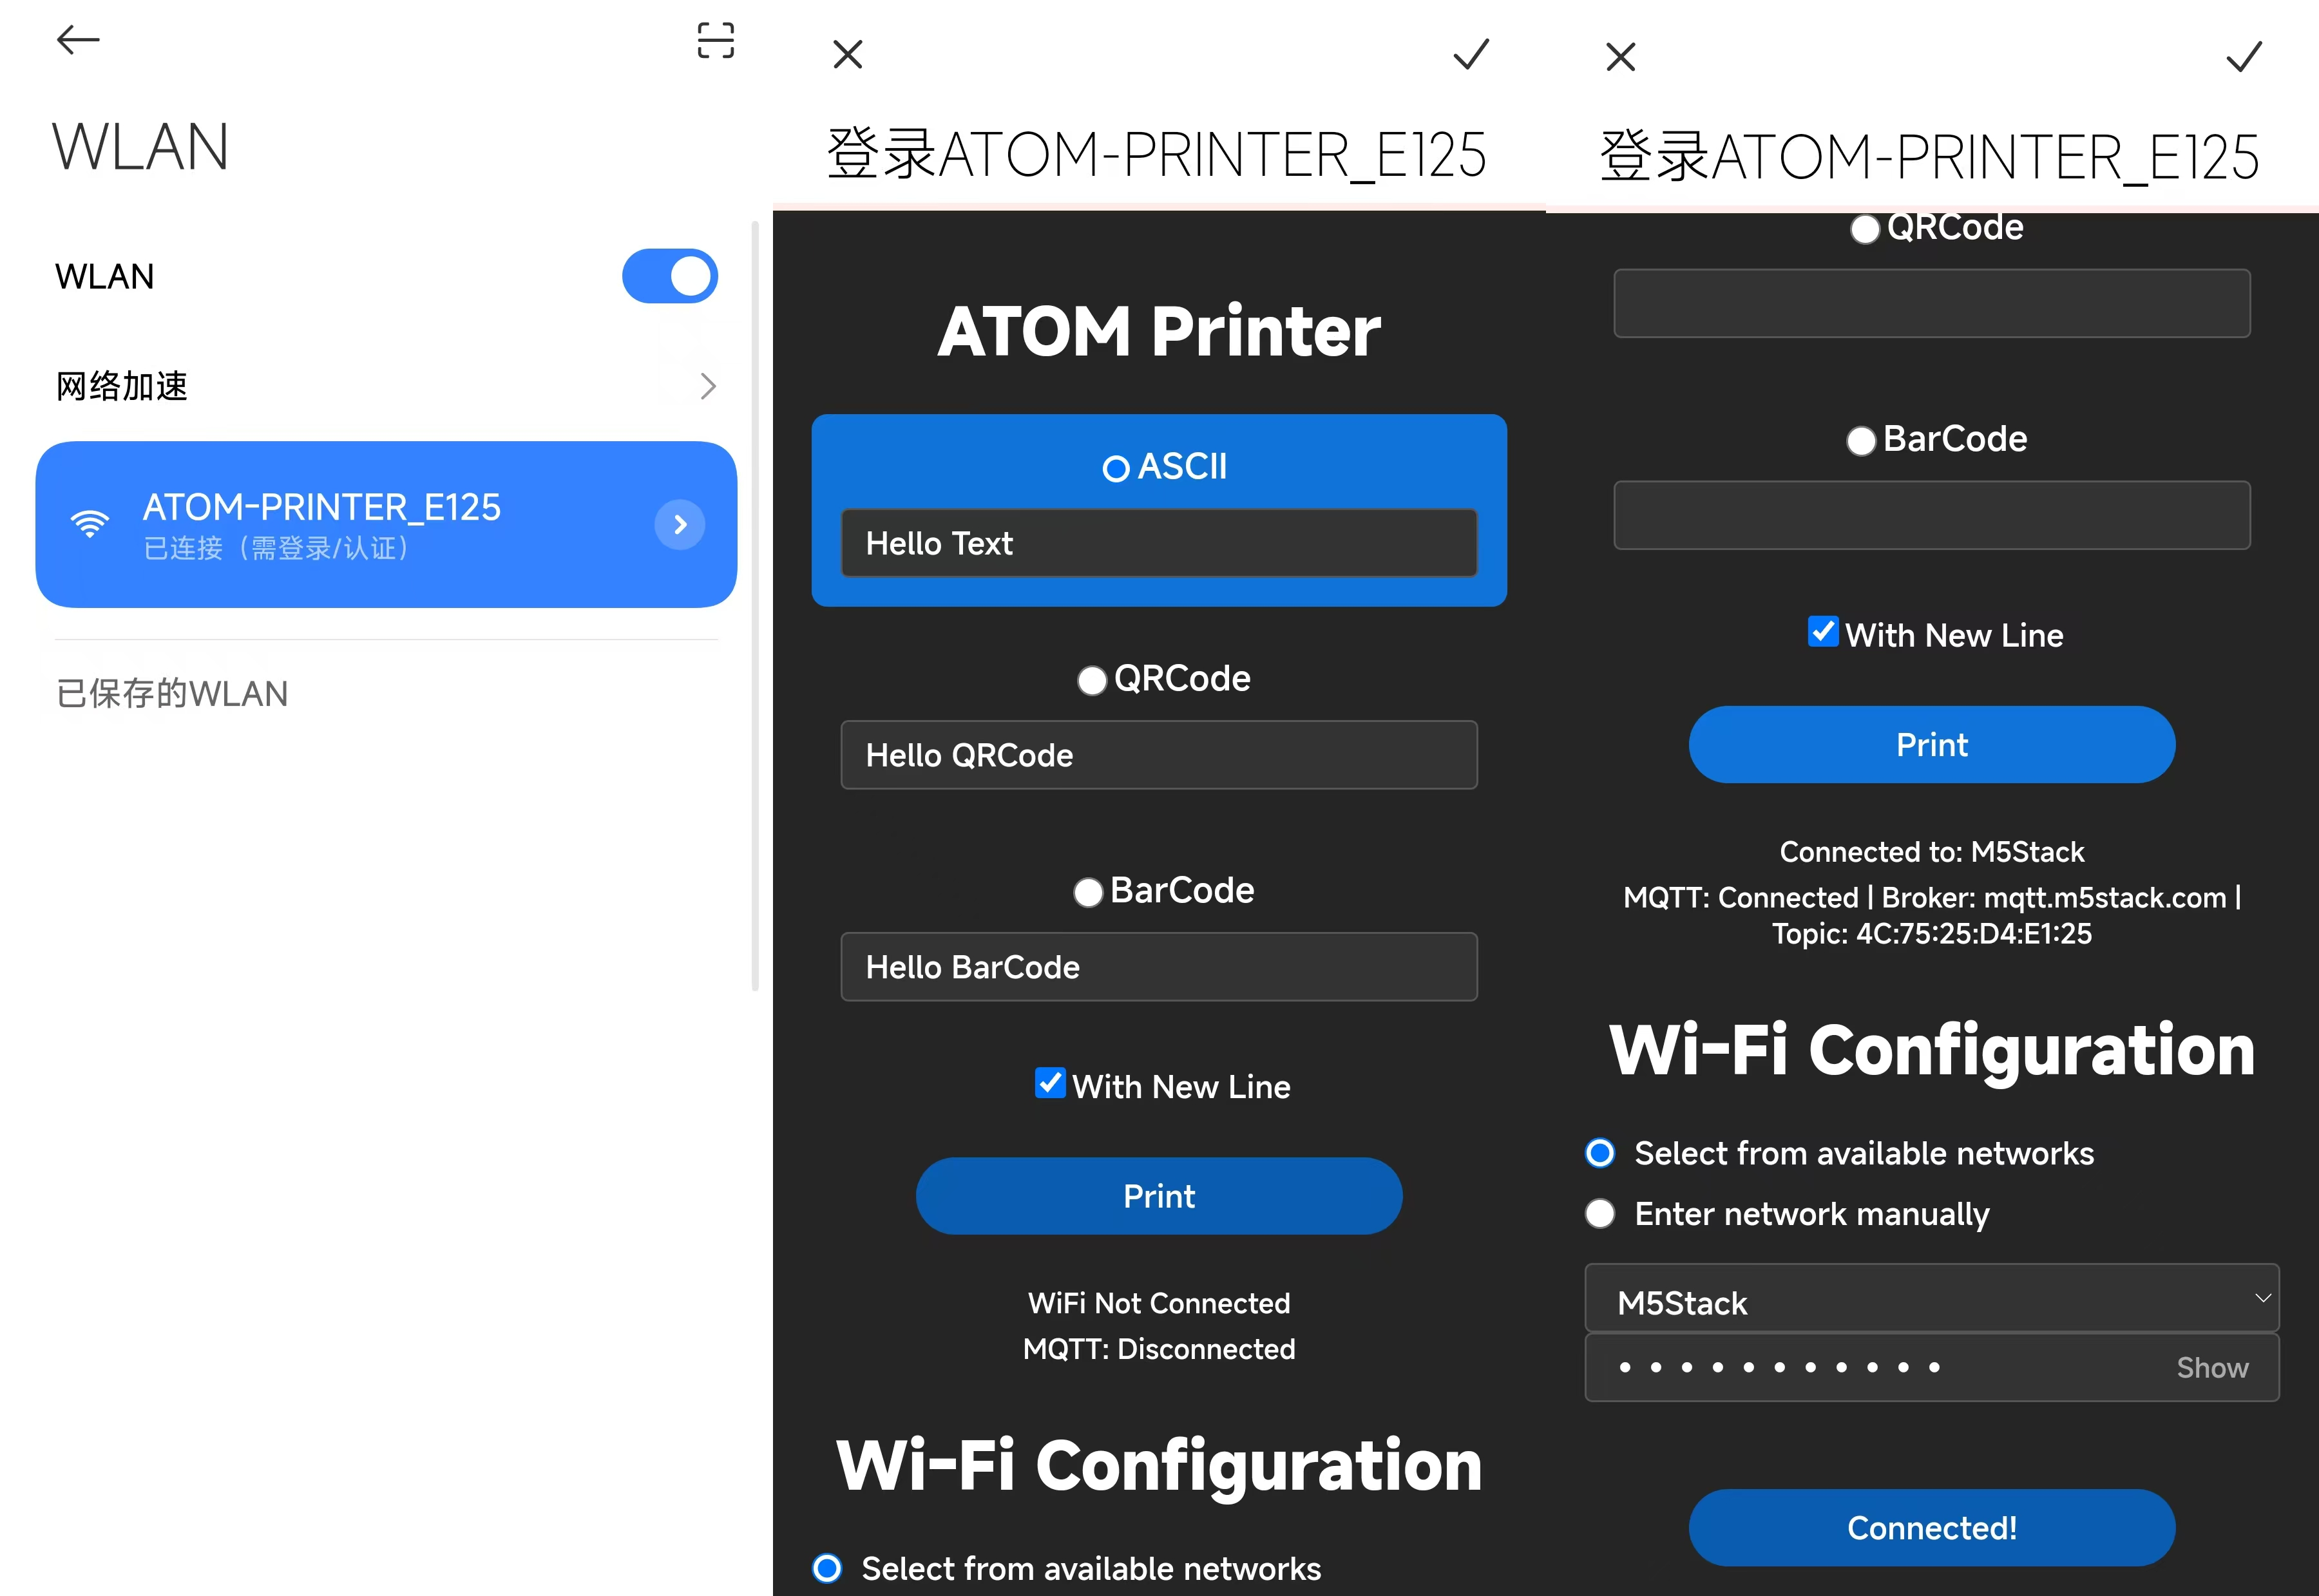
MQTT Remote Printing
The bottom of the AP printing page provides Wi-Fi configuration options. By configuring Wi-Fi, the device will automatically connect to the M5Stack MQTT server (Server: mqtt.m5stack.com, Port: 1883). Once connected, the device uses its MAC address as the subscription topic, enabling remote printing control via other MQTT clients.
- Example: Use the MQTT debugging tool for remote printing control.
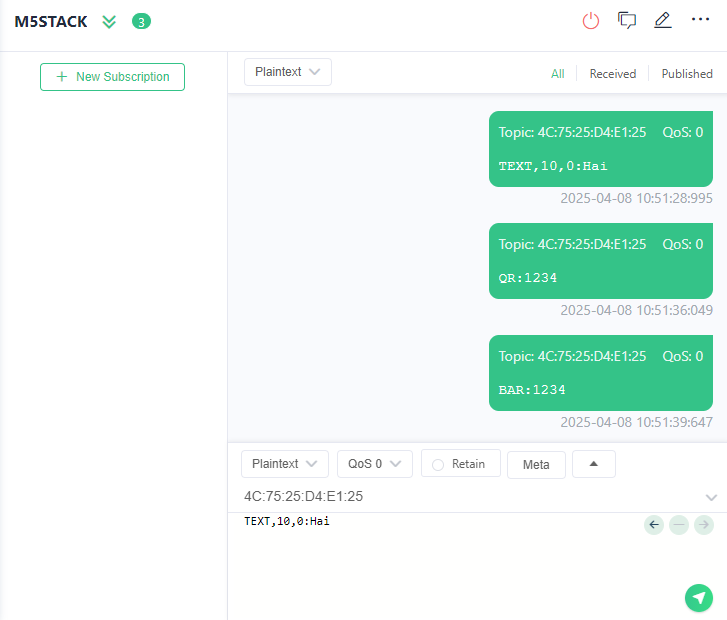
- Text printing command:
TEXT,10,0:Hai - QR code printing command:
QR:1234 - Barcode printing command:
BAR:1234 5. Notes
Status LED Indicators
- Green blinking: Initialization complete
- Green solid: Wi-Fi connected
- Blue solid: MQTT connected
- Blue blinking: MQTT disconnected
Button Operations
- Long-press the middle button on the Atom to restart and clear Wi-Fi information.