

M5Scale DIY Kit
SKU:K029
Description
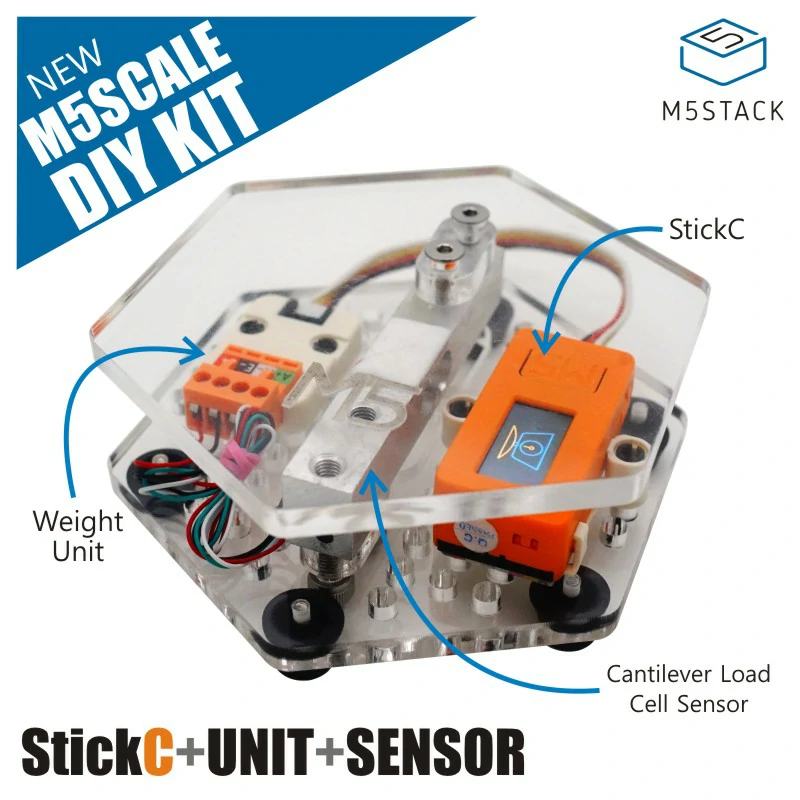
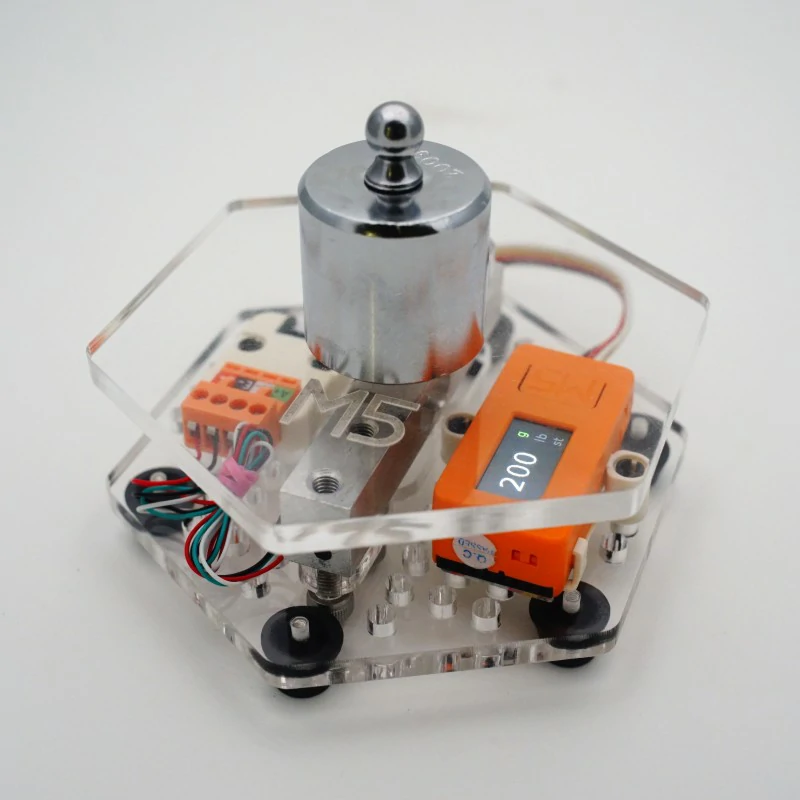
M5Scale DIY Kit is an electronic scale DIY kit that uses the M5StickC as the control core, paired with the Weight Unit and a load cell to form the core functional circuit. The overall structure is made of acrylic material. The internal load cell detects the bending caused by the weight of an object on the scale and converts it into a voltage signal, which is then input to the Weight sensor. Finally, the data is captured and read by the M5StickC. The kit includes some small components for assembly, and the LEGO-compatible holes on the panel allow for additional DIY designs. The StickC, serving as the control core, supports multiple development platforms and integrates modules such as WIFI, making it easy to redesign the product's functionality.
Features
- DIY electronic scale
- M5StickC + Weight Unit
- Measurement range: 10KG (default code)
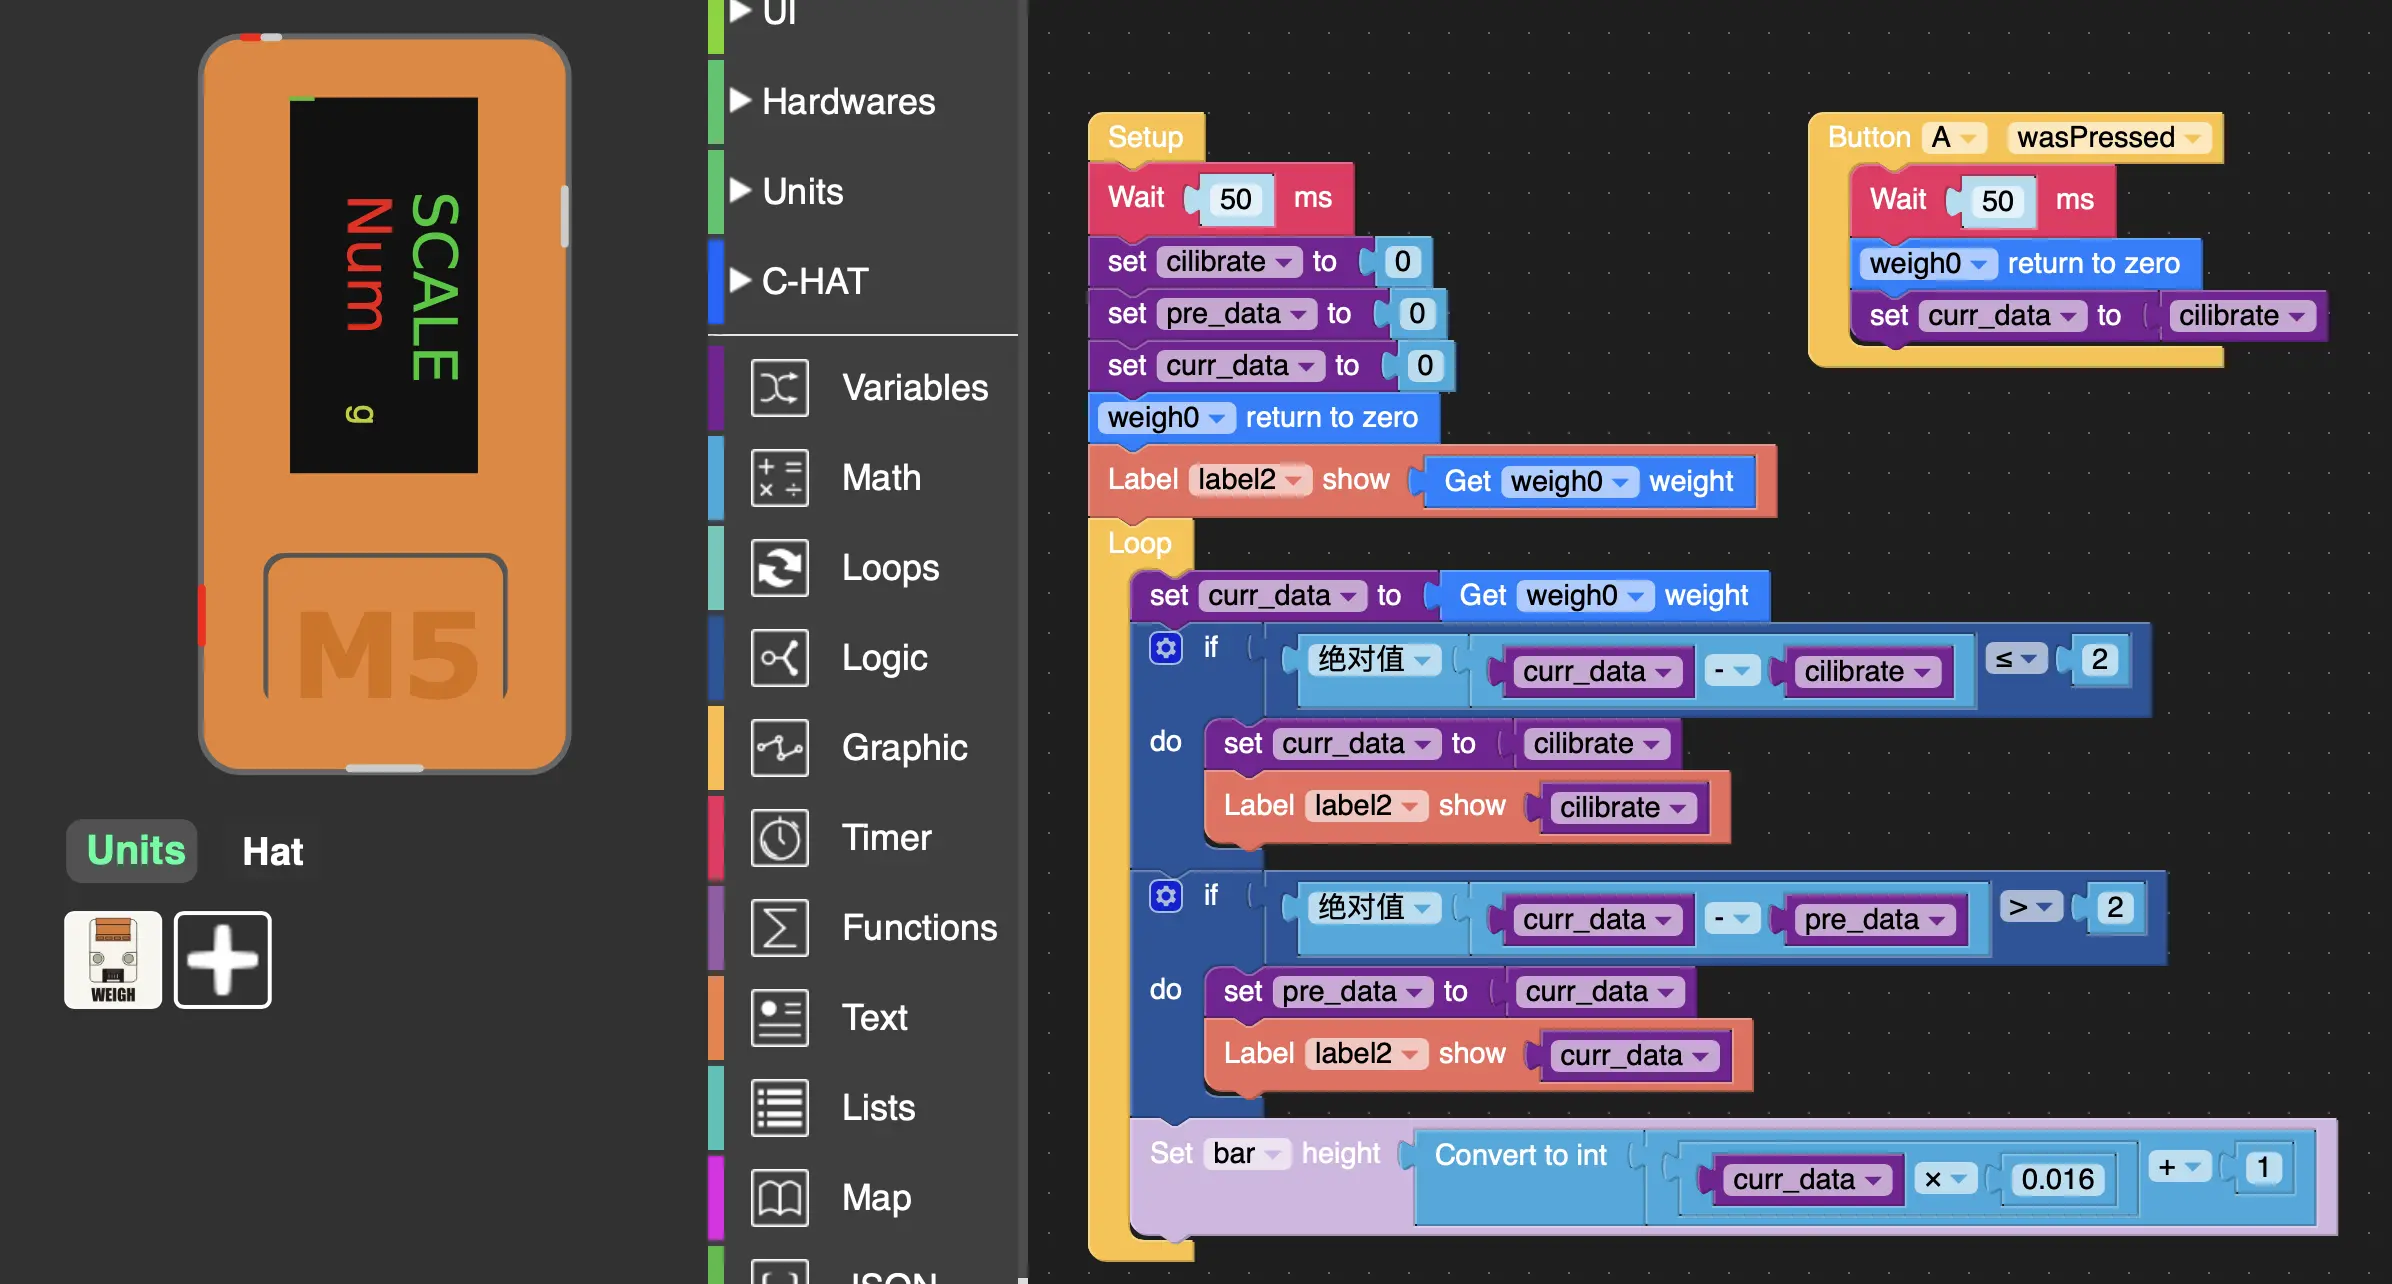
- Open-source code
- LEGO-compatible
- Acrylic structure
- Load cell technical parameters:
- Range: 20kg
- Output sensitivity: 1.0±0.1mV/V
- Wiring: Power (red), Signal+ (white), Signal- (green), Ground (black)
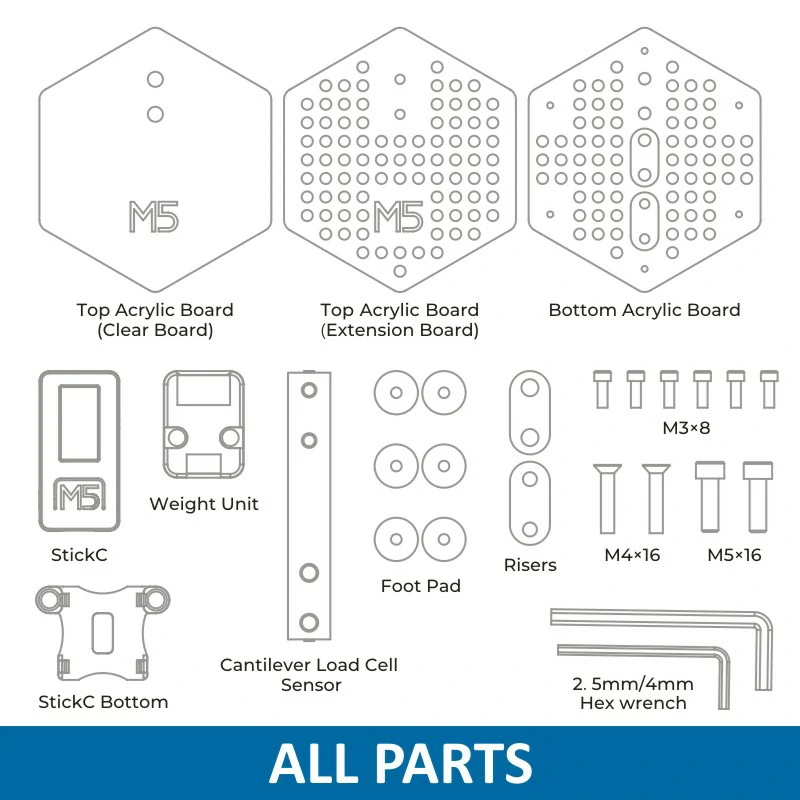
Includes
- 1 x M5Scale DIY Kit
- 1 x Installation manual
Applications
- High-precision electronic scale
- Small-range weighing machine
Specifications
| Specification | Parameter |
|---|---|
| Net weight | 260.0g |
| Gross weight | 285.0g |
| Product size | 100 x 100 x 43mm |
| Package size | 220 x 140 x 45mm |
Softwares
Arduino
UiFlow1
Easyloader
| Easyloader | Download Link | Notes |
|---|---|---|
| M5Scale DIY Kit Test Easyloader | download | / |