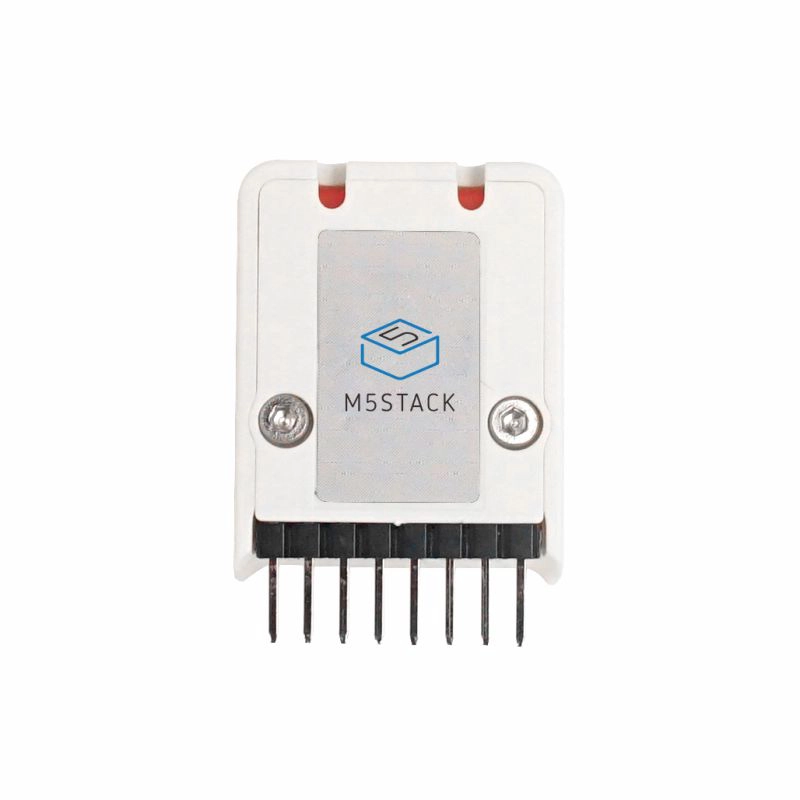
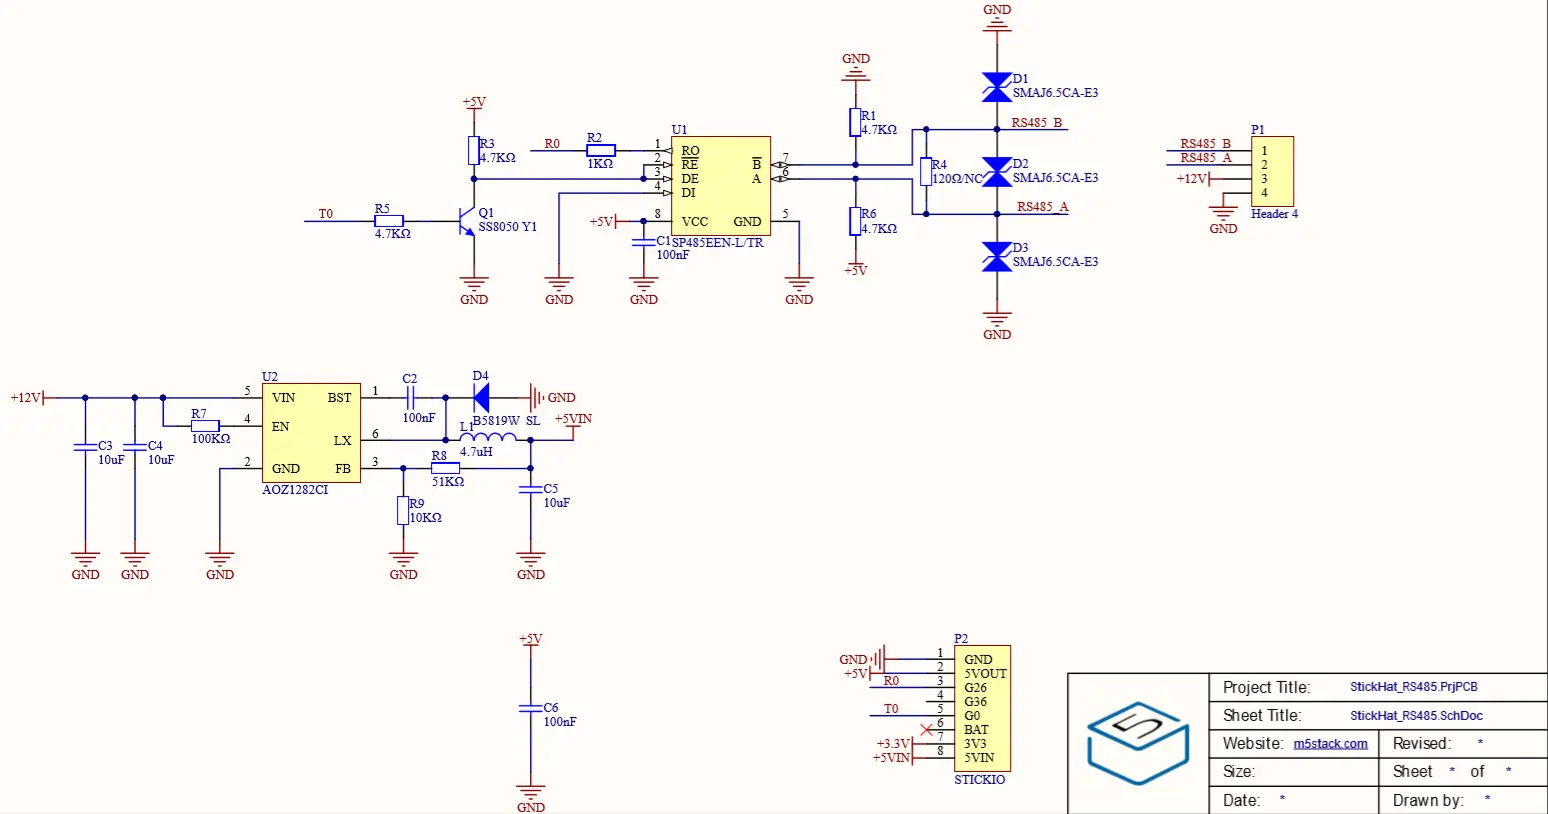
RS485 HAT

SKU:U067

Description

RS485-HAT is a TTL to RS485 converter for M5StickC. Among M5stack products we have 5 items that include TTL to RS485, they are RS485 unit, RS485 HAT, PLC, LAN, BASE26 they have different input voltage, vary from 5V - 12V.

In this RS485-HAT, it consists of a 485 automatic transceiver circuit and a DC-DC buck circuit which can drop an input 12V to 5V.

RS485 is a standard defining the electrical characteristics of drivers and receivers for use in serial communications systems, widely used in the industrial field. multi point systems are supported.

It is used to convert the TTL standard to the RS485 standard. If the outside serial device is RS485 standard, you can attach this hat on top of stickc, therefore, to implement the communication with RS485 device by TTL protocol.

Product Features

  • Built-in SP485EEN
  • The built-in automatic transceiver circuit
  • Built-in DC-DC buck circuit
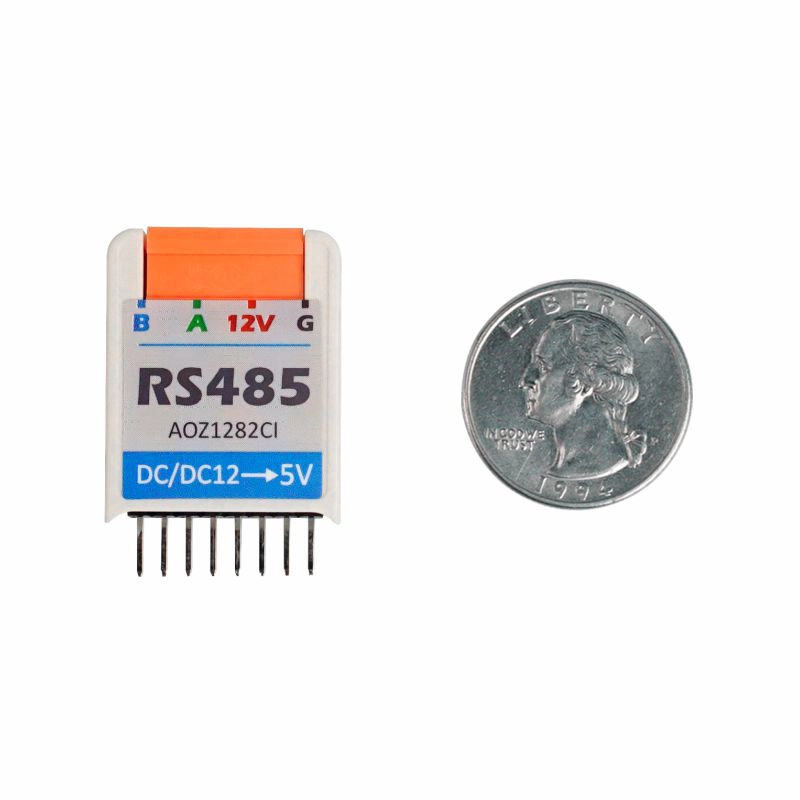
  • AOZ1282CI
  • input DC 12 V
  • BandRate up to 115200
  • Program Platform: Arduino, UIFlow(Blockly, Python)

Include

  • 1x RS485 HAT
  • 1x 4 Pin 3.96 Pitch Terminal

Applications

  • RS485 multi point systems
  • Serial communication in industrial field.

Specification

Resources Parameter
Net weight 7g
Gross weight 17g
Product Size 35*24*8mm
Package Size 40*42*30mm

EasyLoader

download EasyLoader

1.EasyLoader is a simple and fast program burner. Every product page in EasyLoader provides a product-related case program. It can be burned to the master through simple steps, and a series of function verification can be performed.

  1. After downloading the software, double-click to run the application, connect the M5 device to the computer through the data cable, select the port parameters, click "Burn" to start burning. (For M5StickC burning, please Set the baud rate to 750000 or 115200)

Pin Map

M5StickC GPIO0 GPIO26 5V GND
HAT ADC TX RX 5V GND

Schematic

Learn

This uses the stepper driven 6060 push and rs485. The movement is based on the tilt of the M5stick which is measured with the built-in IMU.

Example

Example

Arduino