

ESP-IDF Quick Start
Devices & Examples
Core2
CoreS3
Dial
Tab5
Unit PoE-P4
Zigbee
ESP Zigbee NCP
このチュートリアルでは、Module Gateway H2 と CoreS3 コントローラを組み合わせて ESP Zigbee Host/NCP サンプルプログラムを実行する方法を紹介します。ESP Zigbee NCP (Network Co-Processor) は、別個のプロセッサ上で Zigbee プロトコルスタックを実行し、シリアルポートを介してメインプロセッサと通信するネットワーク・コプロセッサーモードです。このアーキテクチャにより、メインプロセッサはアプリケーション層のロジックに専念でき、Zigbee ネットワーク関連の処理はコプロセッサに委ねることができます。以下のチュートリアルを参照して、Module Gateway H2 に ESP Zigbee NCP ファームウェアを、CoreS3 に ESP Zigbee Host ファームウェアをフラッシュし、Coordinator ノードを作成します。
1. 準備作業
- 1.環境設定: ESP-IDF - ESP32S3 入門チュートリアル を参照して、基本的なコンパイル環境を整えてください。
ESP-IDF
このサンプルのコンパイルには ESP‑IDF バージョン
v5.3.1 の使用を推奨します。git clone -b v5.3.1 --recursive https://github.com/espressif/esp-idf.git
cd esp-idf
./install.sh
. ./export.sh- 2.Git コマンド
clone --recursiveを使用して、ESP-Zigbee-SDK リポジトリを再帰的にクローンします
git clone --recursive https://github.com/espressif/esp-zigbee-sdk.git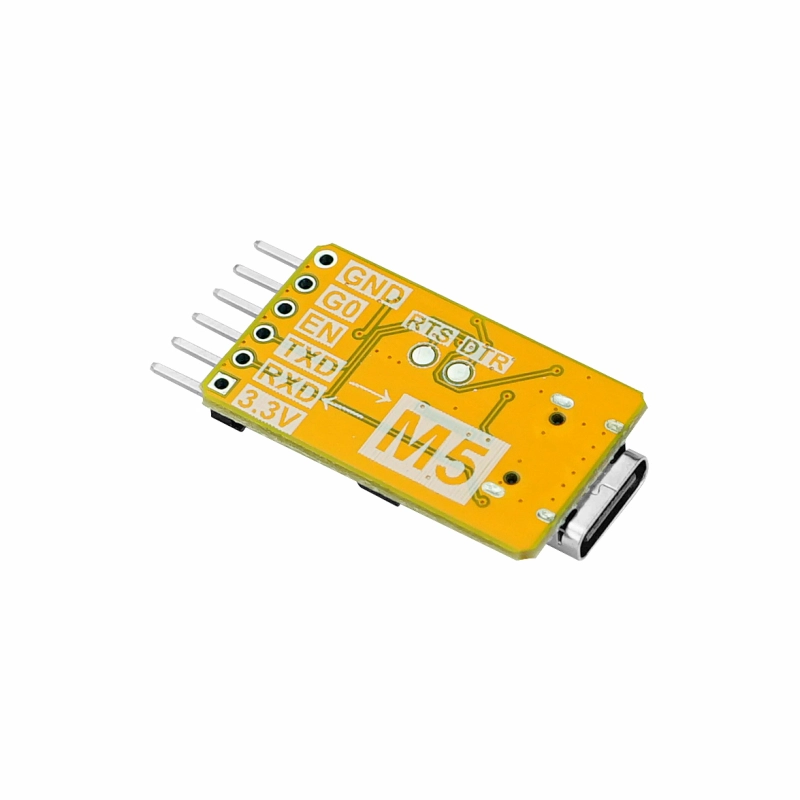
cd esp-zigbee-sdk- 3.使用するハードウェア製品:


- 4. 後続のチュートリアルで使用する
idf.pyコマンドは ESP‑IDF に依存します。コマンドを実行する前に、ESP‑IDF 内で. ./export.shを実行して関連の環境変数を有効にしてください。詳細については ESP-IDF - ESP32S3 入門チュートリアル をご参照ください。
2. NCP ファームウェアのコンパイル
- 1. 以下のコマンドを参照して、対応する NCP ファームウェアのディレクトリに移動し、ビルドターゲットを
esp32h2に設定してください。
cd examples/esp_zigbee_ncp
idf.py set-target esp32h2
idf.py menuconfig- 2.
idf.py menuconfigを使用して設定画面に入り、menuconfig 内でデバイスのピン設定を以下の項目で設定します:Component config→Zigbee Network Co-processor
- Component config → Zigbee Network Co-processor
- UART RX Pin: 23
- UART TX Pin: 24
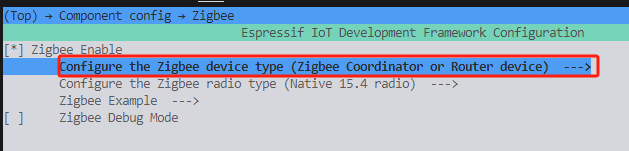
- Component config → ESP Zigbee → Configure the Zigbee device type
- Zigbee Coordinator or Router device # or Zigbee End Device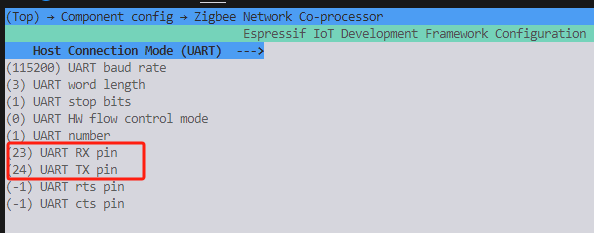
- 3. 以下のコマンドを実行して、NCP ファームウェアをビルド、フラッシュ領域を消去、そしてフラッシュします:
idf.py build
idf.py erase_flash
idf.py flash # 実際のポートに応じて修正してください3. HOST ファームウェアのコンパイル
- 1. 以下のコマンドを参照して、対応する HOST ファームウェアのディレクトリに移動し、ビルドターゲットを
esp32s3に設定してください。
cd examples/esp_zigbee_host
idf.py set-target esp32s3 # CoreS3 用
idf.py menuconfig- 2.
idf.py menuconfigを使用して設定画面に入り、menuconfig 内でデバイスのピン設定を以下の項目で設定します:Component config→Zigbee NCP Host
- Component config → Zigbee NCP Host
  - UART RX Pin: 10
  - UART TX Pin: 17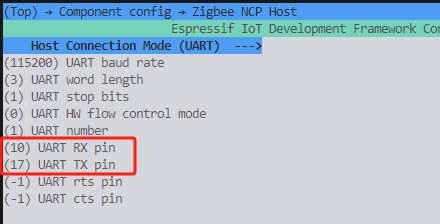
- 3. 以下のコマンドを実行して、HOST ファームウェアをビルドおよびフラッシュします:
idf.py build
idf.py flash4. 実行開始
- CoreS3 と Module Gateway H2 を接続します。
- CoreS3 をコンピューターに接続します。
idf.py monitorまたはその他のシリアルデバッグツールを使用して、115200bps の設定で実行ログを確認してください。
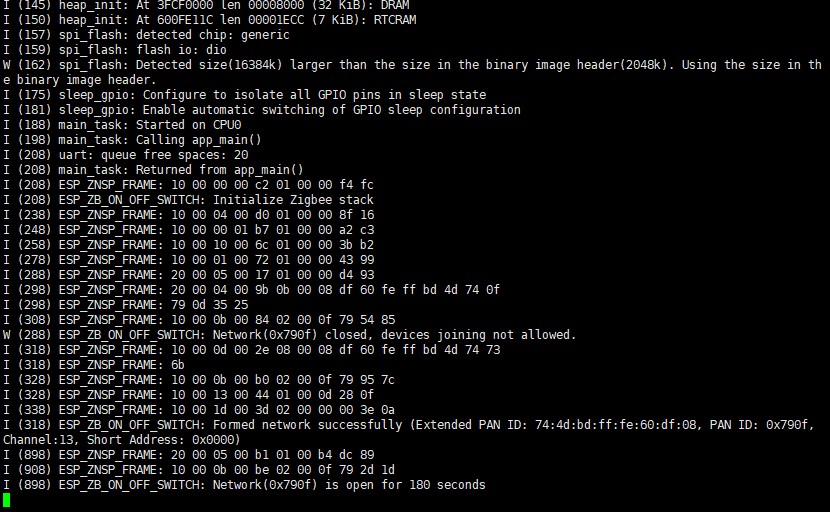
正常な実行ログの内容:
- NCP 側では Zigbee プロトコルスタックの初期化が成功したことが表示されます。
- Host 側では NCP との接続が成功したことが表示されます。
- Zigbee ネットワークの作成に成功(Coordinator モード)。
Page Tools