

Product Guides
AI & Voice
AI Voice Assistants
Volcengine
Offline Speech Recognition
Unit ASR
Module ASR
Audio & Voice Input
Voice Pyramid
Cameras & Vision
Camera Features
M5Camera
PoECAM
Unit CamS3 / CamS3-5MP
Connectivity & IoT
Industrial Control & Measurement
Air Quality
PowerHub
StamPLC
VAMeter
T-Lite
Module13.2 PPS
Unit RollerCAN
Display & Interaction
Paper
PaperColor
StopWatch
Tab5 Keyboard
Chain DualKey
Robotics & Maker Projects
Atom Printer
Bala
Bala2
BalaC Plus
Faces Kit Gameboy
RoverC & JoyC
StampFly & Atom Joystick
Firmware & Device Maintenance
Firmware Upgrade
Hardware Configuration
Design & Selection References
StampFly & Atom Joystick Firmware Flashing and Usage Guide
StampFly & Atom Joystick is an open-source quadcopter kit from M5Stack. This tutorial mainly uses StampFly together with Atom Joystick as an example to demonstrate how to flash the firmware, pair the devices, and perform basic flight operations. Atom Joystick v1.1 also applies (its controller is AtomS3R).
1. Flashing Tools
Please click the appropriate button below to download the M5Burner firmware flashing tool for your operating system. Extract and open the application.
| Software Version | Download Link |
|---|---|
| M5Burner_Windows | Download |
| M5Burner_MacOS | Download |
| M5Burner_Linux | Download |
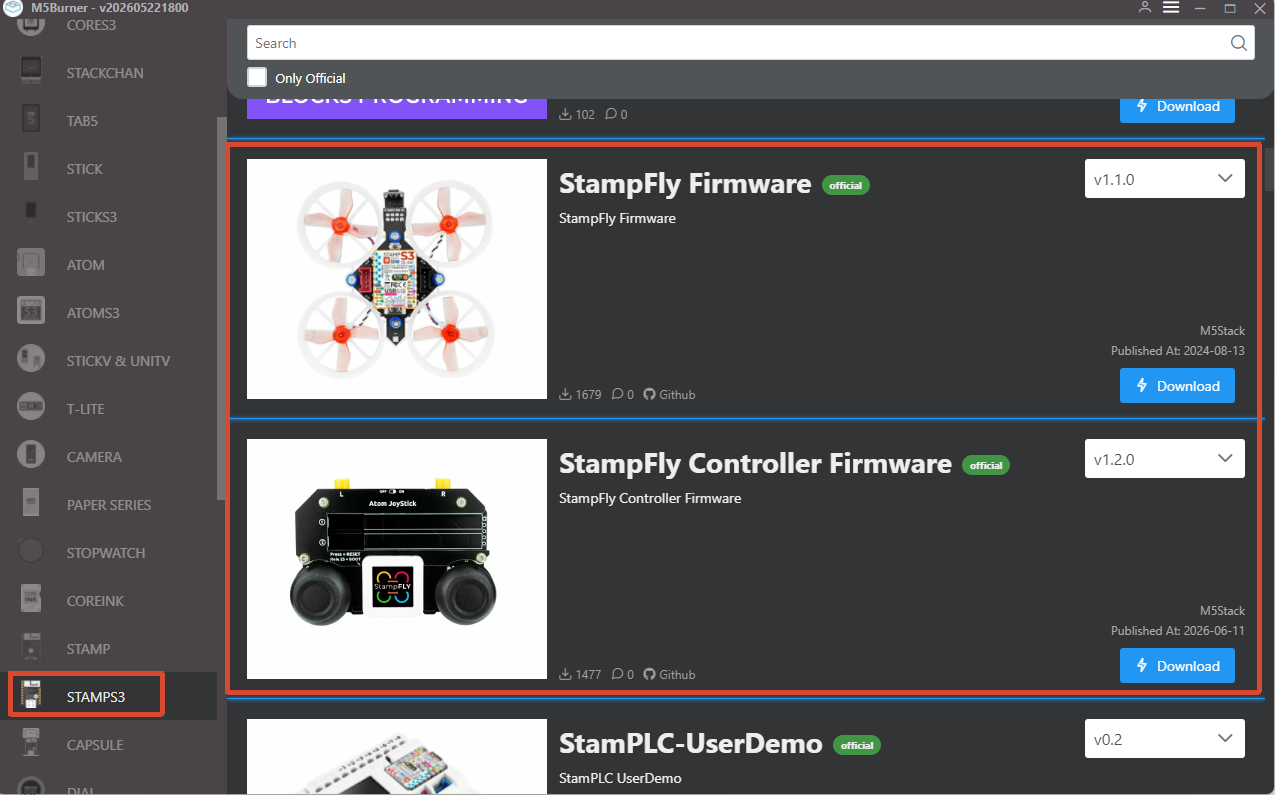
Double-click to open the Burner flashing tool, select the device type STAMPS3 from the left menu, and download the StampFly Firmware and StampFly Controller Firmware. The StampFly Controller Firmware applies to both Atom Joystick and Atom Joystick v1.1; StampFly Controller Firmware v1.2.0 and later versions support flashing on Atom Joystick v1.1 devices.
2. Firmware Flashing
Flashing StampFly Firmware
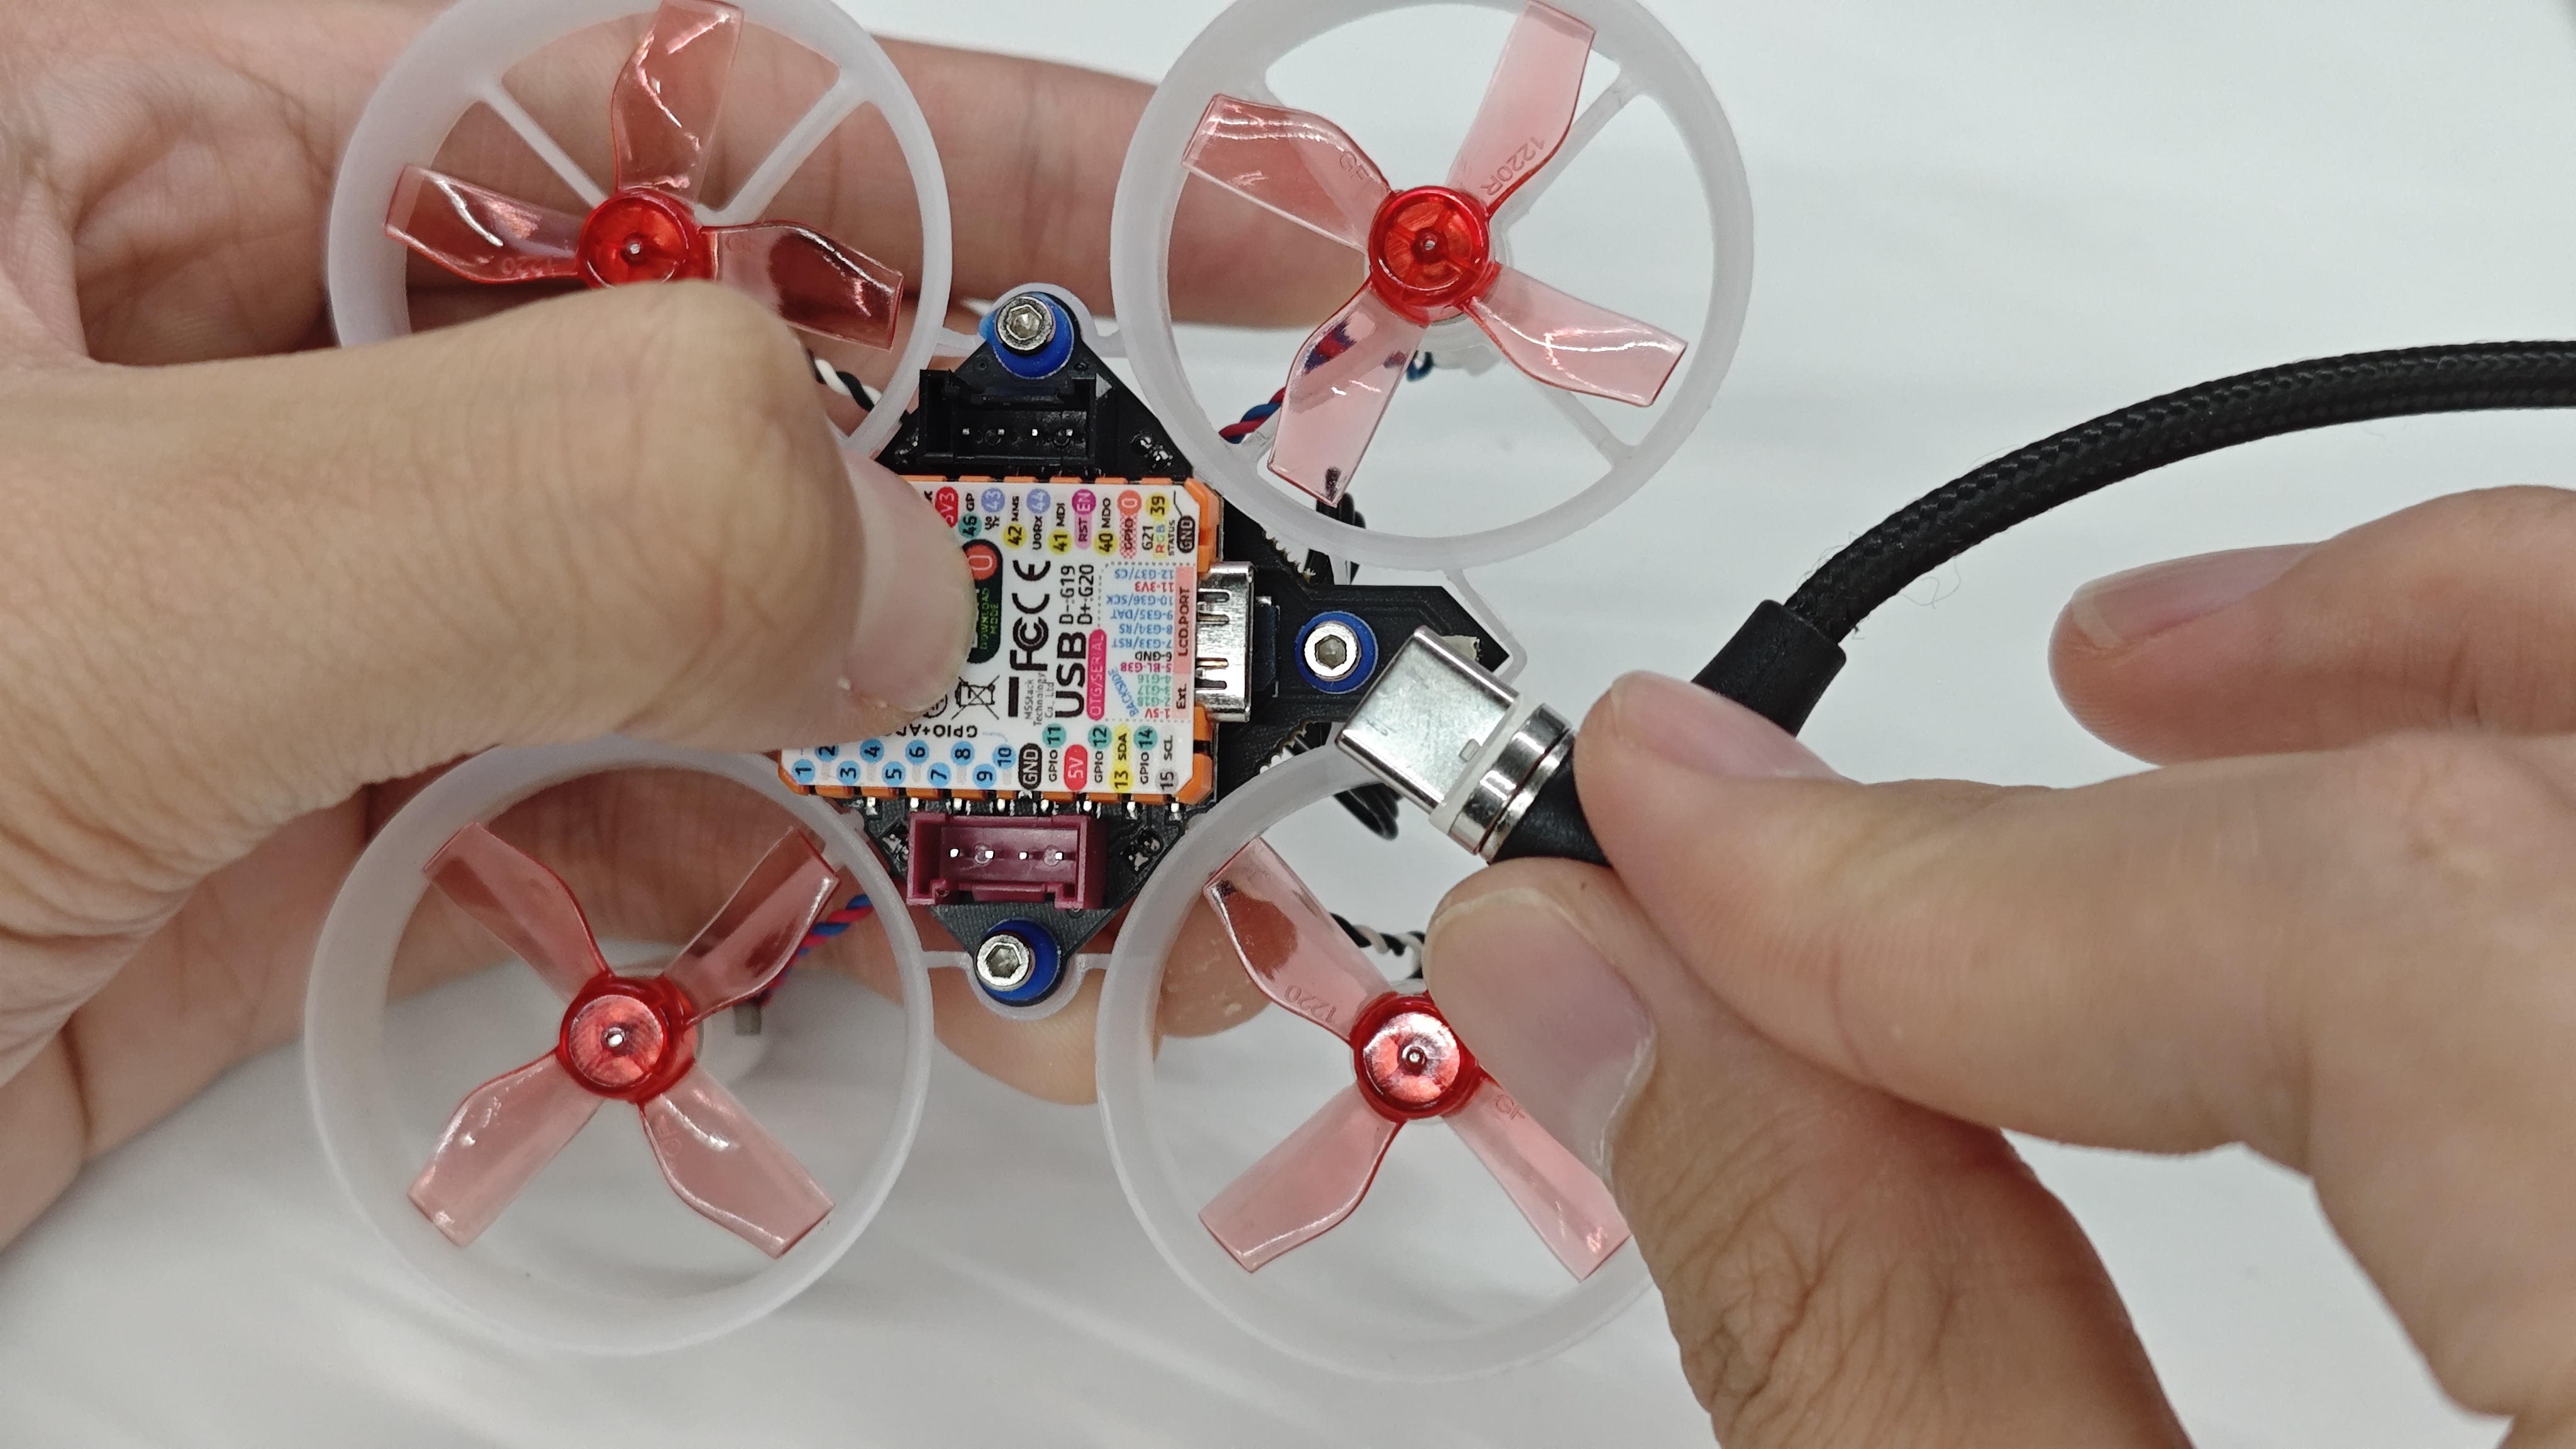
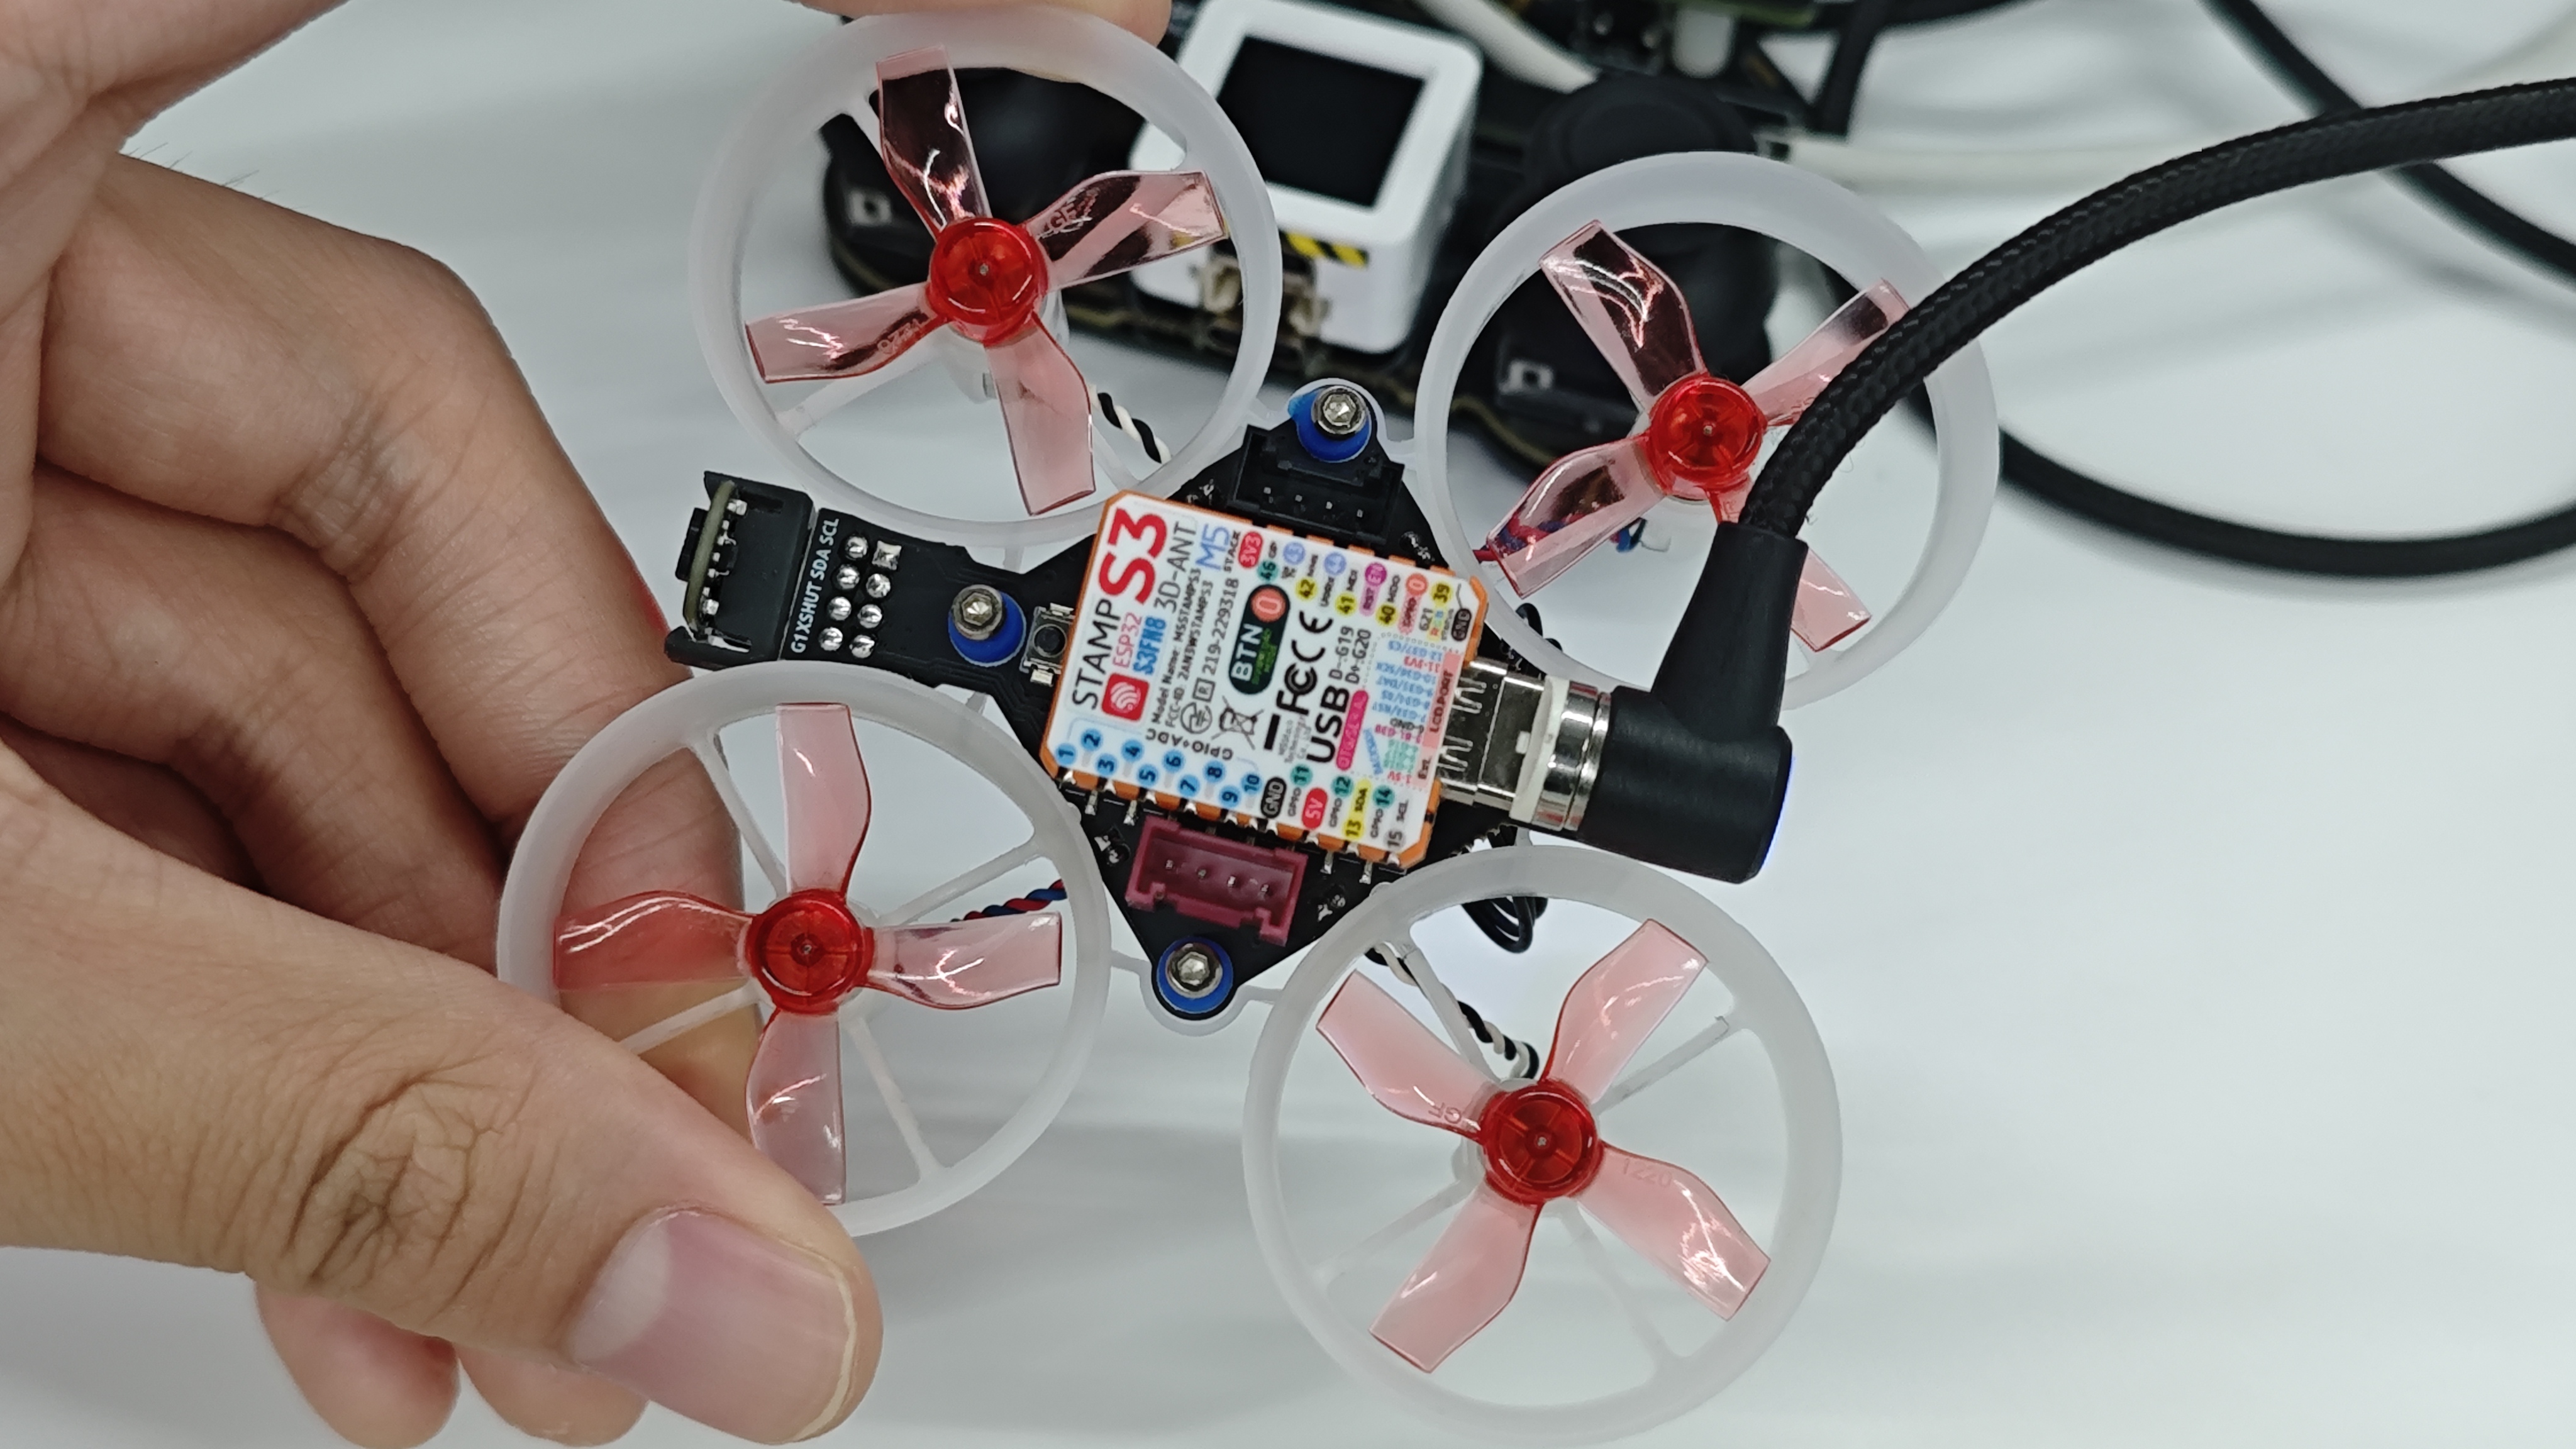
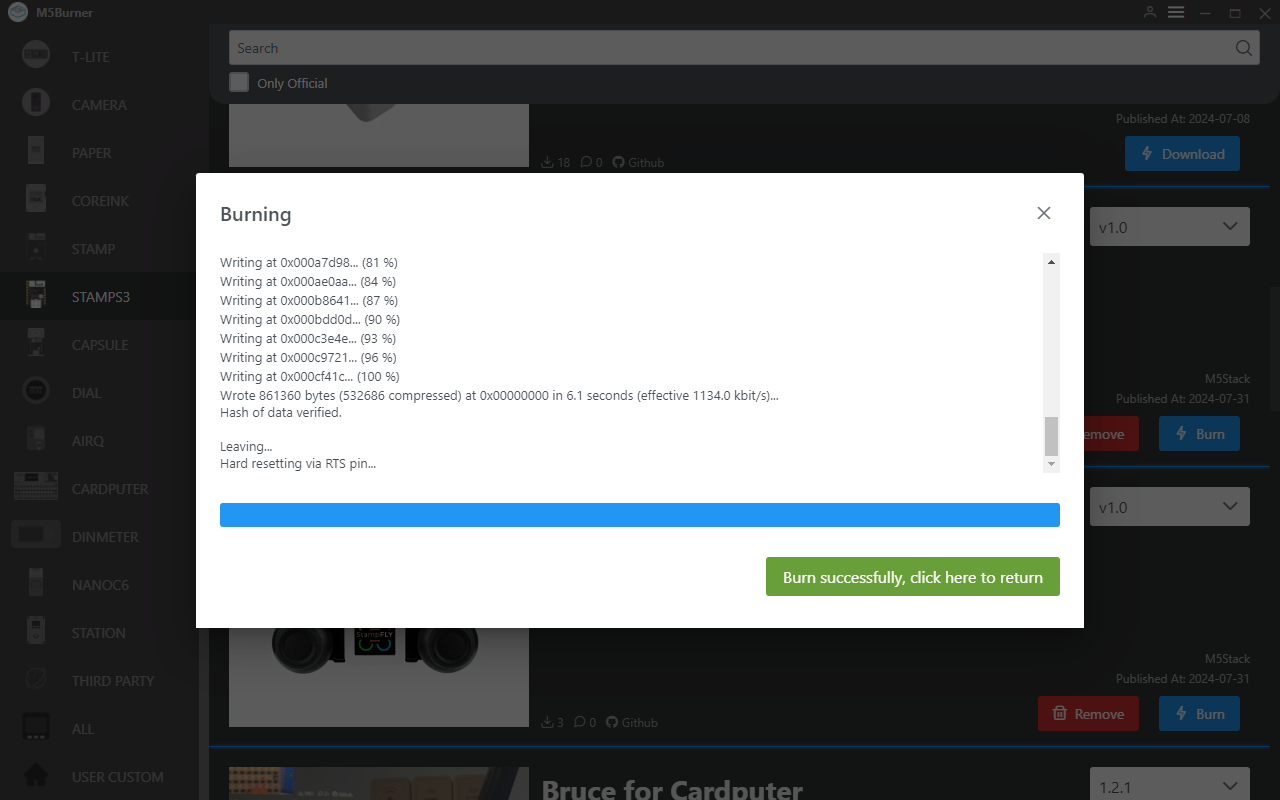
While the device is powered off, press and hold the center button of the StampS3, then connect the USB cable to enter download mode. The device port will be successfully recognized.
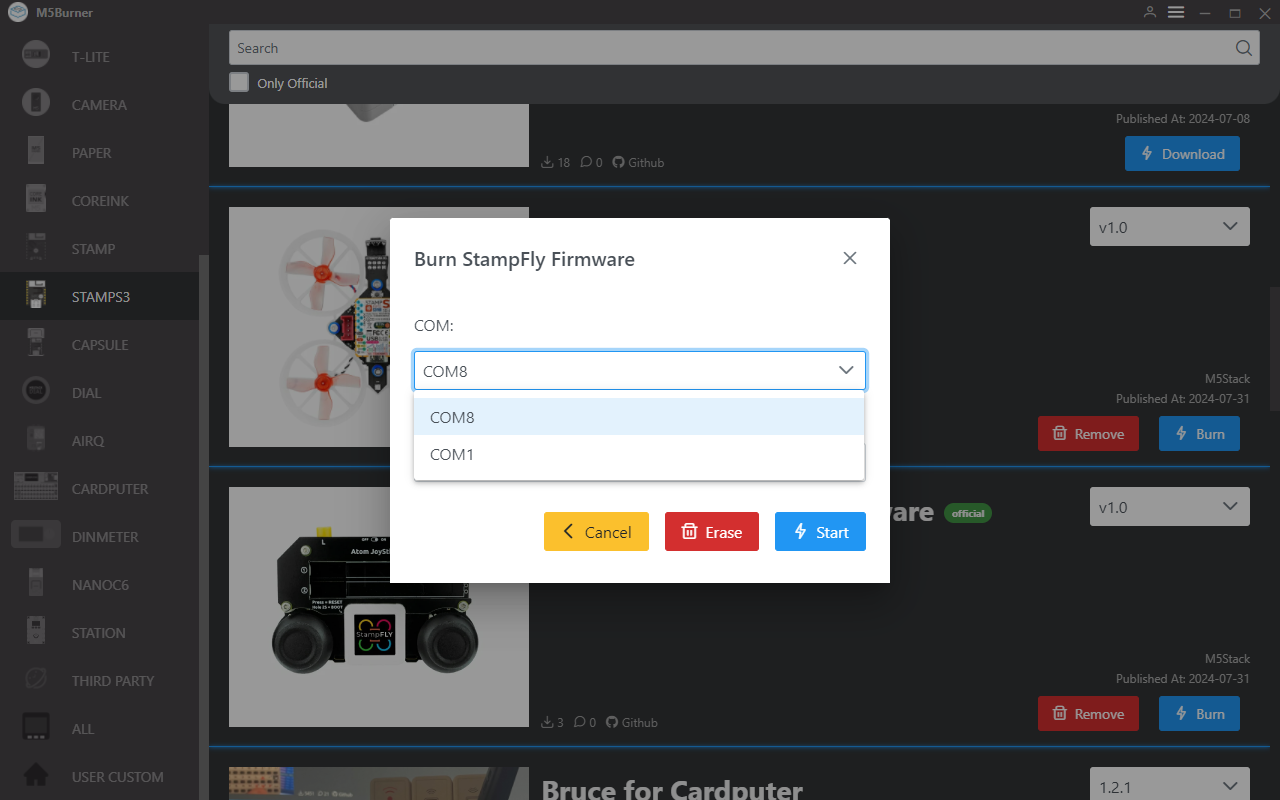
Click Burn, select the appropriate port, and start flashing.

Flashing Atom Joystick Firmware
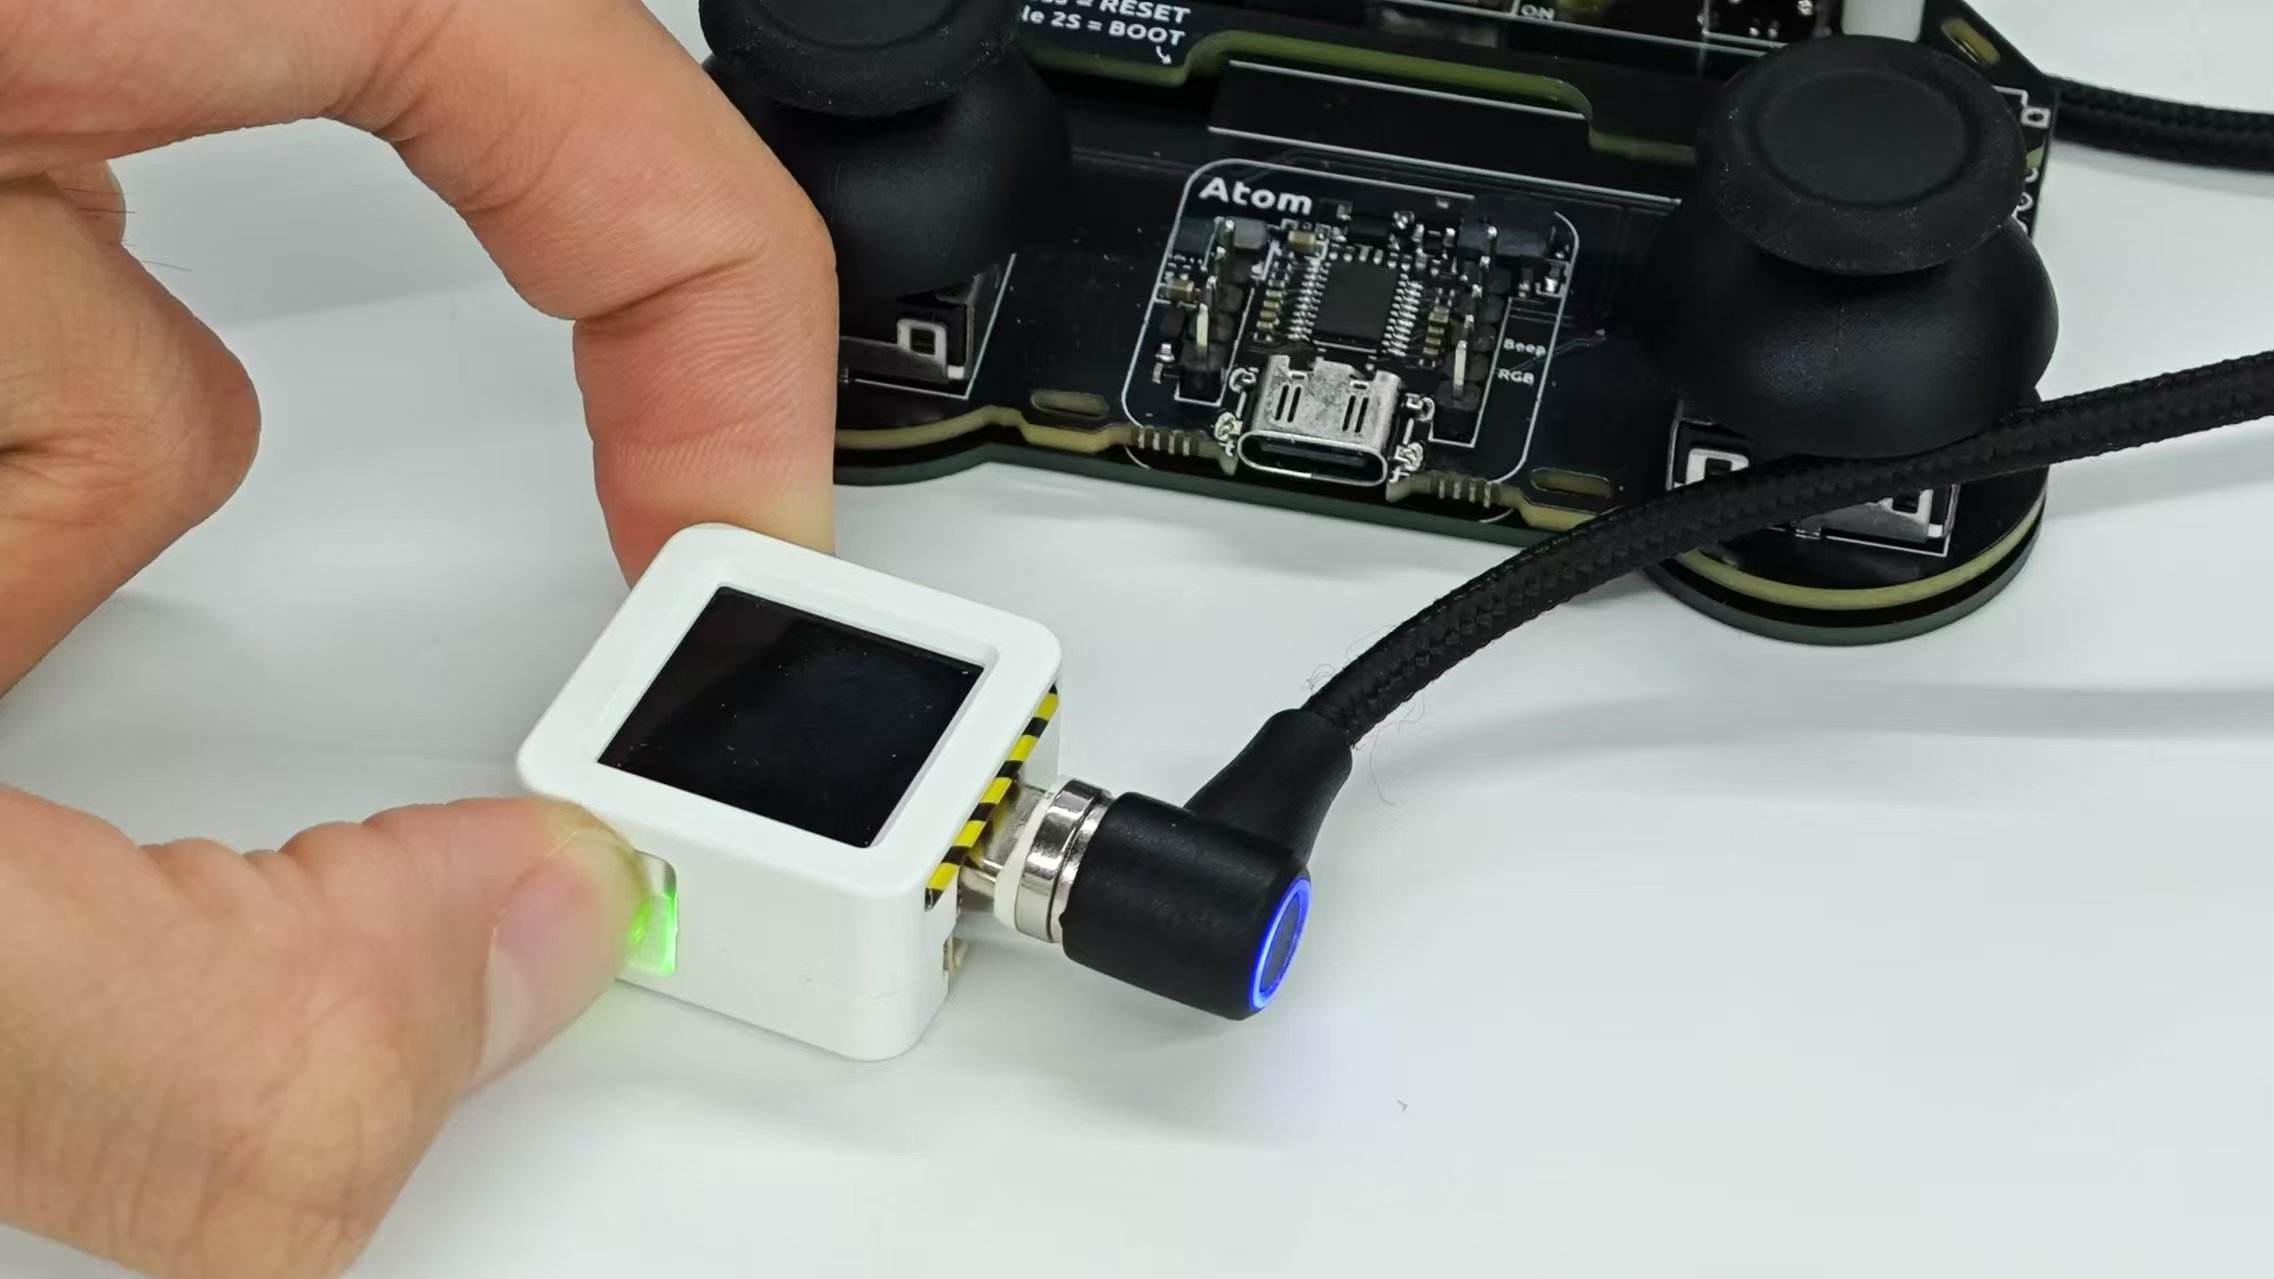
Atom Joystick uses the AtomS3 as its controller, and Atom Joystick v1.1 uses the AtomS3R as its controller. The steps to enter download mode are the same for both: connect the USB cable, then press and hold the reset button on the side of the device until the green light turns on, and then release the button. The green light turns off after the button is released, indicating that the device has entered download mode, and the device port will be successfully recognized. Follow the same steps as the StampFly firmware flashing process to flash the StampFly Controller Firmware.
3. Device Pairing
4. Operating Instructions
Device Pairing
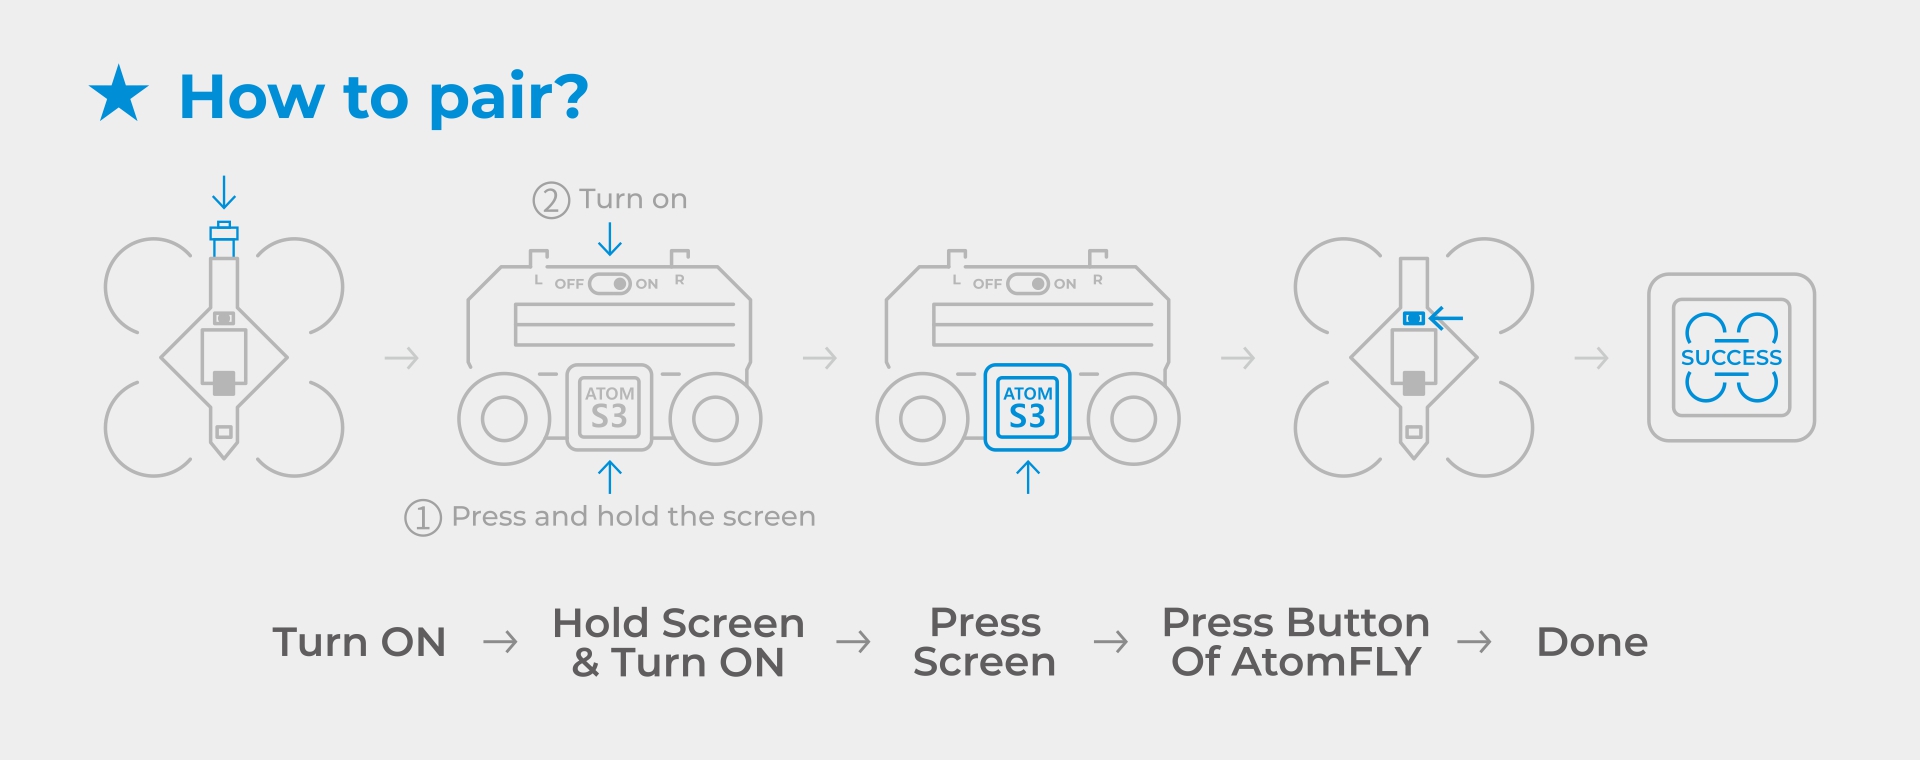
- 1.Press and hold the center button on the AtomS3 / AtomS3R to power on, then follow the screen prompts to enter pairing mode by pressing the button again.
- 2.Press the reset button on the StampFly to send the pairing signal.
- 3.Wait for pairing to complete.
Takeoff and Landing
- 1.Press the center button on the AtomS3 / AtomS3R to control takeoff or landing.
Function Modes
The button layout and operation of Atom Joystick and Atom Joystick v1.1 are the same, as follows:
Left Front Button on Atom Joystick (Control Mode Switch)
Stabilize Mode: Provides stable control, suitable for regular flight and cruising.Sport Mode: Offers maximum control freedom, allowing for complex maneuvers but requiring high operational skill.
Right Front Button on Atom Joystick (Altitude Mode Switch)
Auto Altitude: Maintains a stable altitude at the set level; pushing the left joystick up or down will change the set altitude.Manual Altitude: Full throttle control of altitude, requiring higher operational skill.
Center Button on Right Joystick (Aerial Flip Action)
5. Status Light Indicators
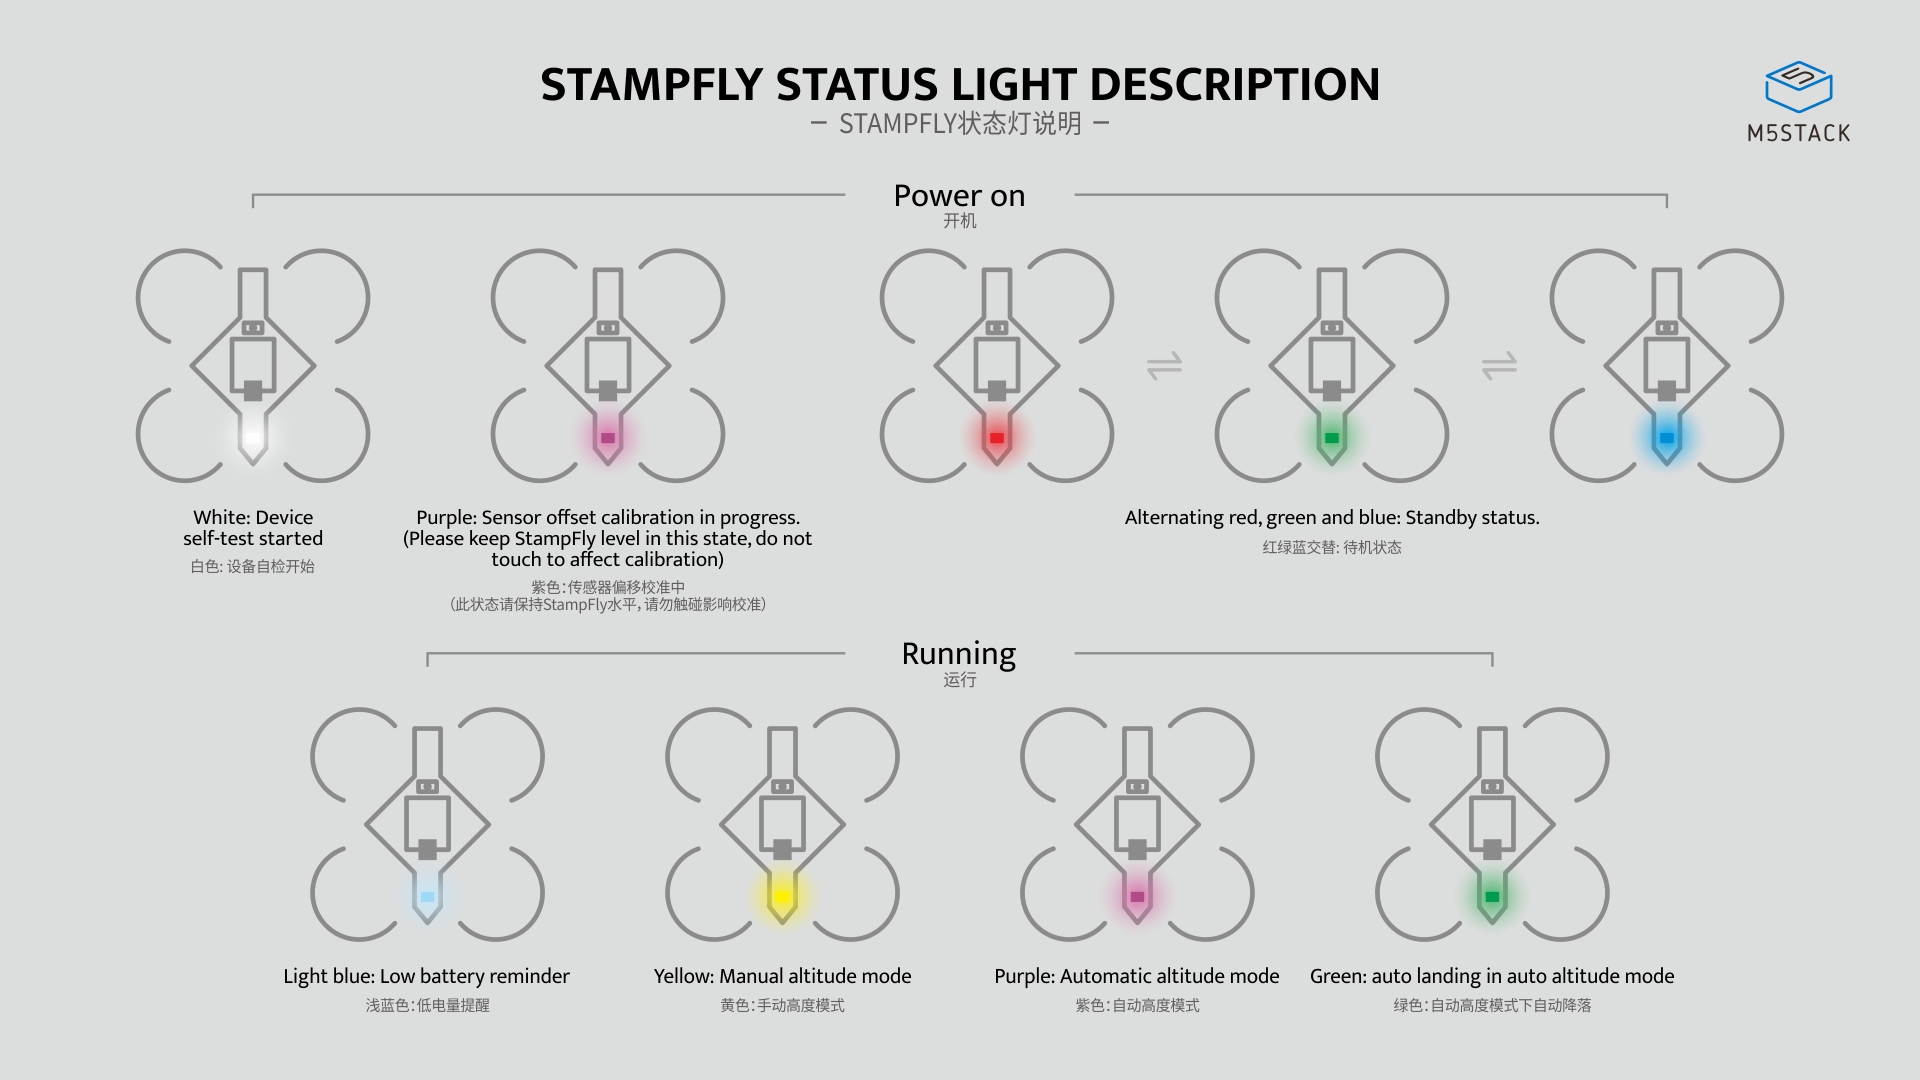
- Power On
- White: Device self-check initiated.
- Purple: Sensor offset calibration in progress (Keep the StampFly level and avoid touching to prevent calibration interference).
- Red, green, and blue alternating: Standby mode (ready for takeoff).
- Operation
- Light blue: Low battery warning.
- Yellow: Manual altitude mode.
- Purple: Auto altitude mode.
- Green: Auto descent in auto altitude mode.