

M5Stack
What is M5Stack?
Internal Firmware Upgrade Guide
Overview
Some M5Stack products contain a dedicated coprocessor, such as an STM32. When new features or bug fixes become available, the coprocessor's internal firmware can be updated over I2C.
The upgrade requires a controller that acts as the HOST. The HOST firmware includes the internal firmware image for the target device. When you initiate an upgrade from the web page served by the HOST, the HOST transfers the firmware image to the target device over I2C and writes it to the device. The complete workflow is shown below:
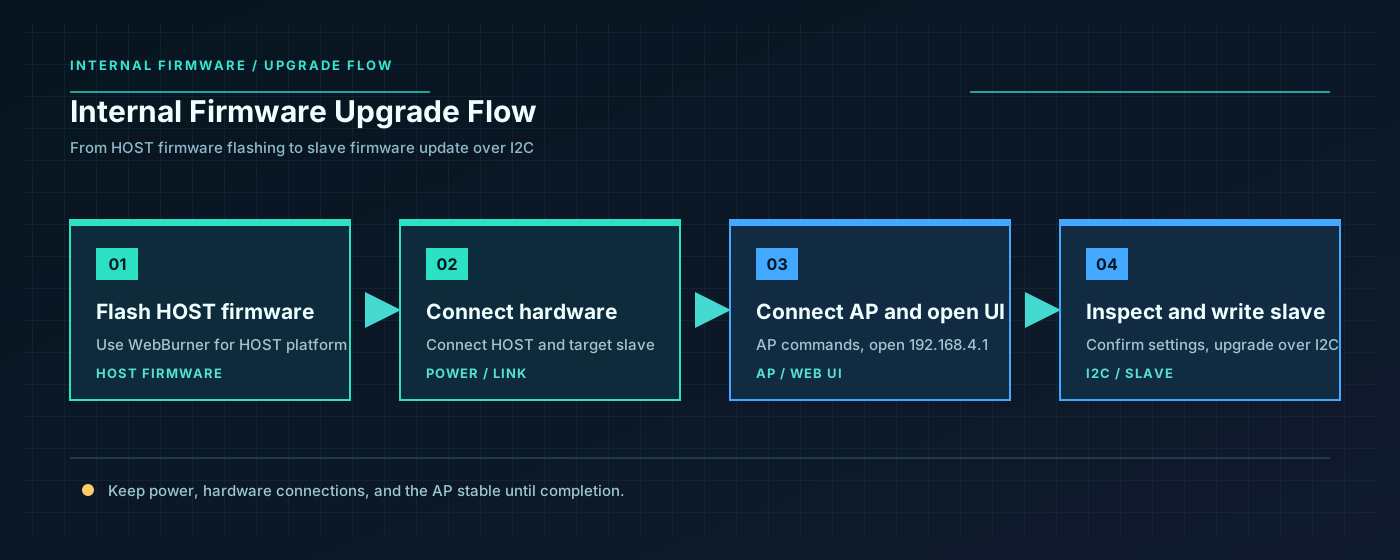
- Flash the appropriate HOST firmware for your product model and HOST platform.
- Connect the HOST to the target device according to the product instructions, then power on the devices.
- Wait for the HOST to start its access point (AP), then connect your phone or computer to it.
- Open
192.168.4.1in a browser to access the local upgrade page. - Verify the HOST and communication settings on the page, detect the target device, and write the internal firmware.
The HOST model, communication pins, AP name, and upgrade page may vary by product. Refer to the relevant product page and the settings shown on the upgrade page. This guide uses Faces Gamepad3 to illustrate the interface, and all screenshots are from that product. Other products that support this feature follow the same workflow.
Procedure
1. Flash the HOST Firmware
Select the HOST firmware link that matches your product model and HOST chip type from the product page or the table below. This opens the M5Burner Web firmware flashing page. Follow the on-screen instructions to flash the firmware.
| SKU | Product | ESP32 HOST | ESP32-S3 HOST |
|---|---|---|---|
| A004-V3 | Faces Gamepad3 | WebBurner ↗ | WebBurner ↗ |
| U188 / U182 | Unit RollerCAN / Unit Roller485 | WebBurner ↗ | WebBurner ↗ |
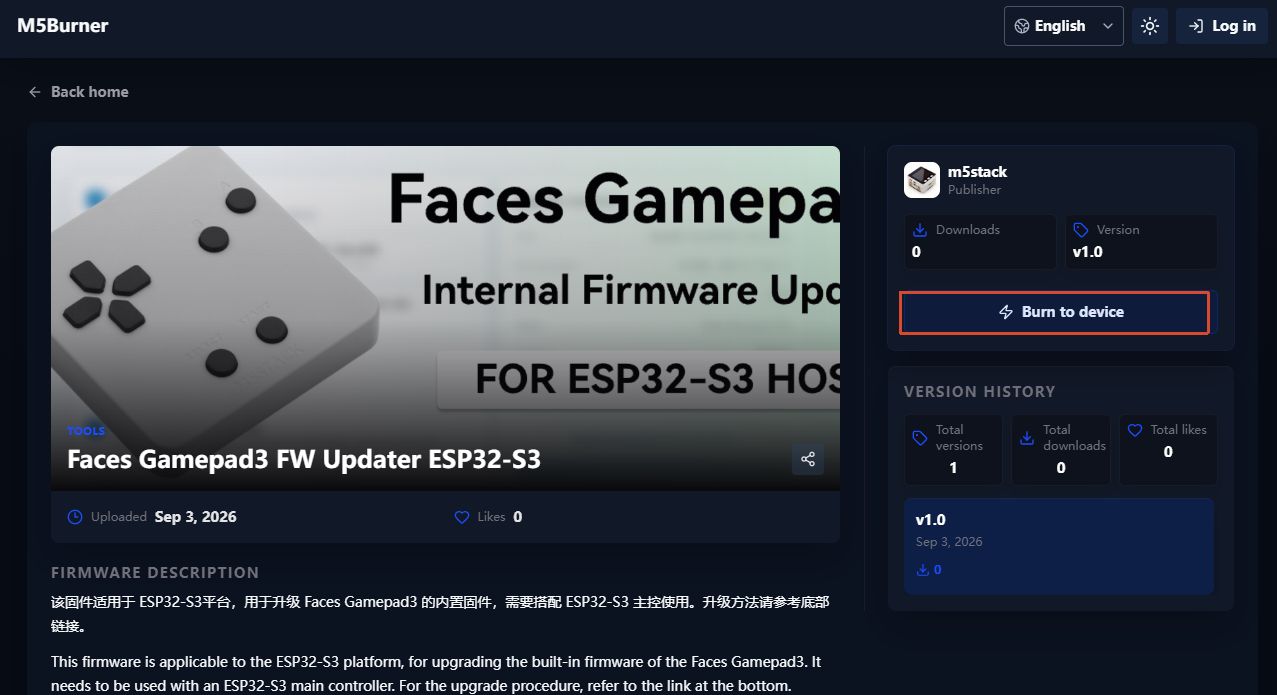
2. Connect and Power On the Hardware
After flashing the HOST firmware, connect the HOST to the target device according to the product instructions and provide a stable power supply to the devices.
Once it starts, the HOST enters AP (Access Point) mode. The AP only allows your phone or computer to access the HOST's web page and send commands; it does not carry the firmware image. Connect your phone or computer to the HOST's AP. Use the AP name specified in the product instructions or displayed by the device.
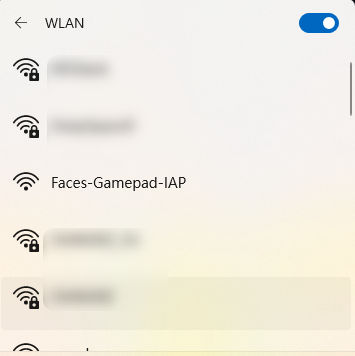
3. Connect to the AP and Open the Control Page
With your phone or computer connected to the HOST's AP, open http://192.168.4.1 in a browser to access the internal firmware upgrade control page.
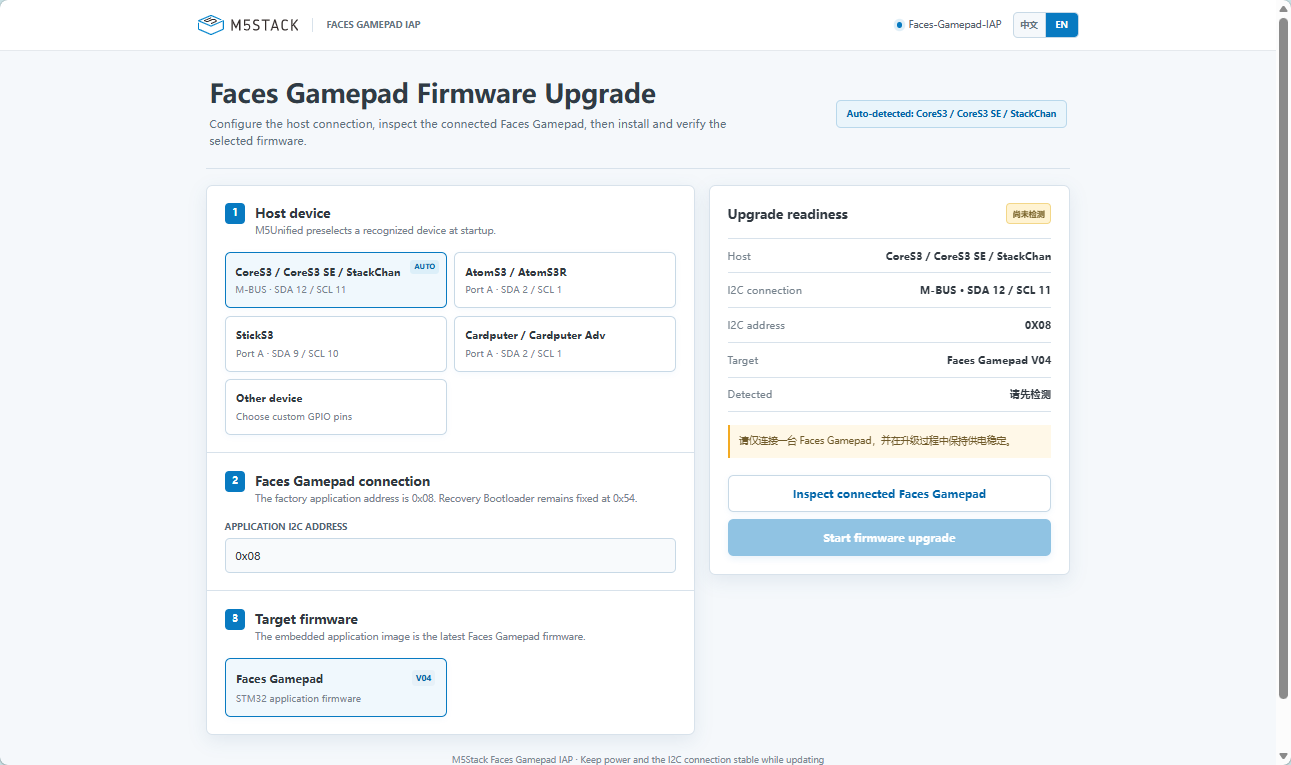
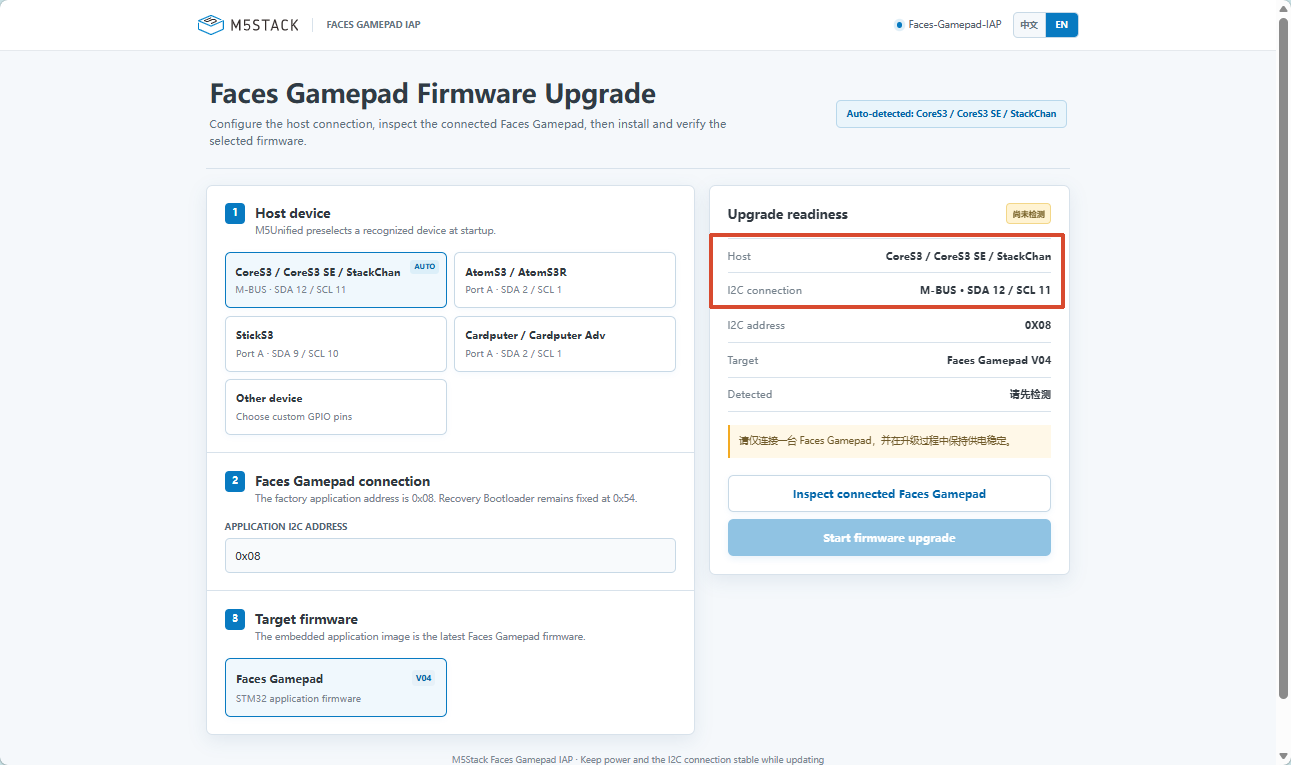
4. Verify the HOST and Communication Settings
On the upgrade page, check that the automatically detected HOST model, communication interface, and SDA/SCL pins are correct. If any settings are incorrect, adjust them manually to match your hardware connections. If your HOST is not listed, select Other device and follow the on-screen instructions to configure the communication pins.
5. Check the Device Connection
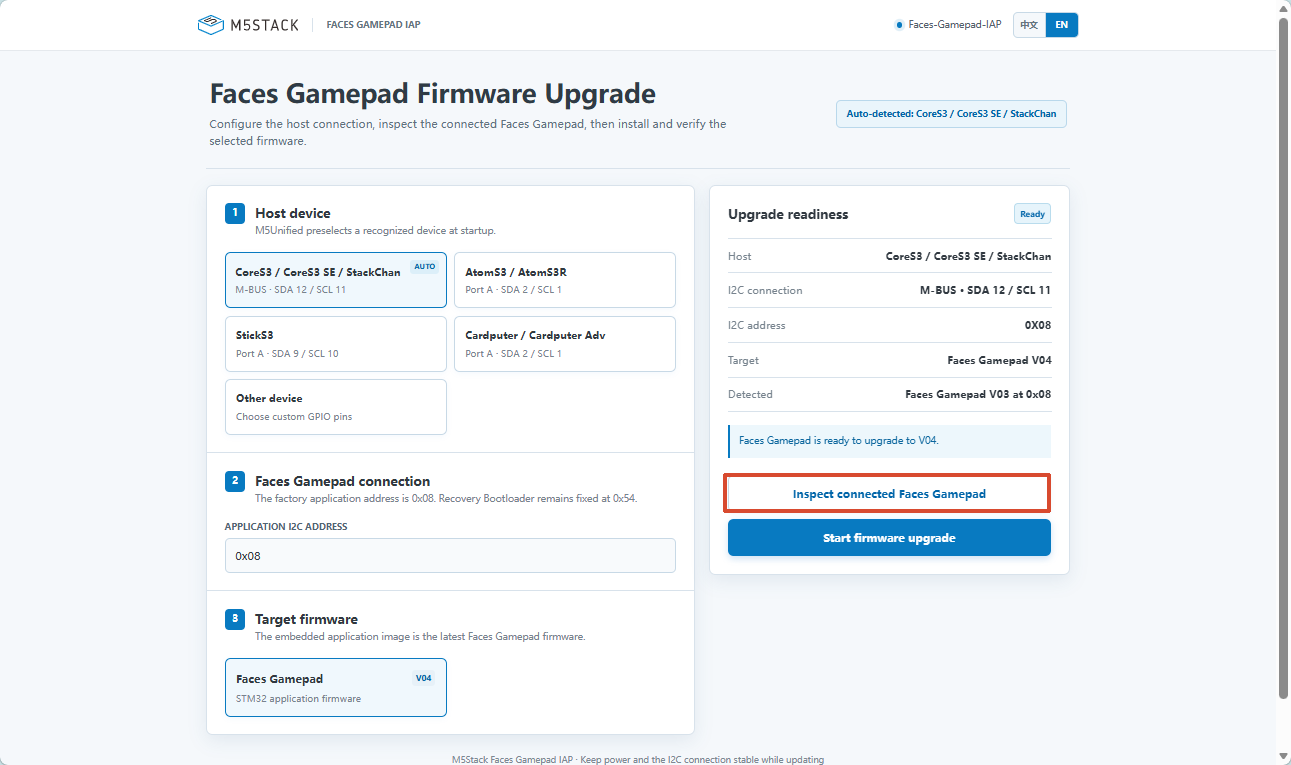
Click the device detection button on the page to check I2C communication between the HOST and the target device.
6. Start the Upgrade
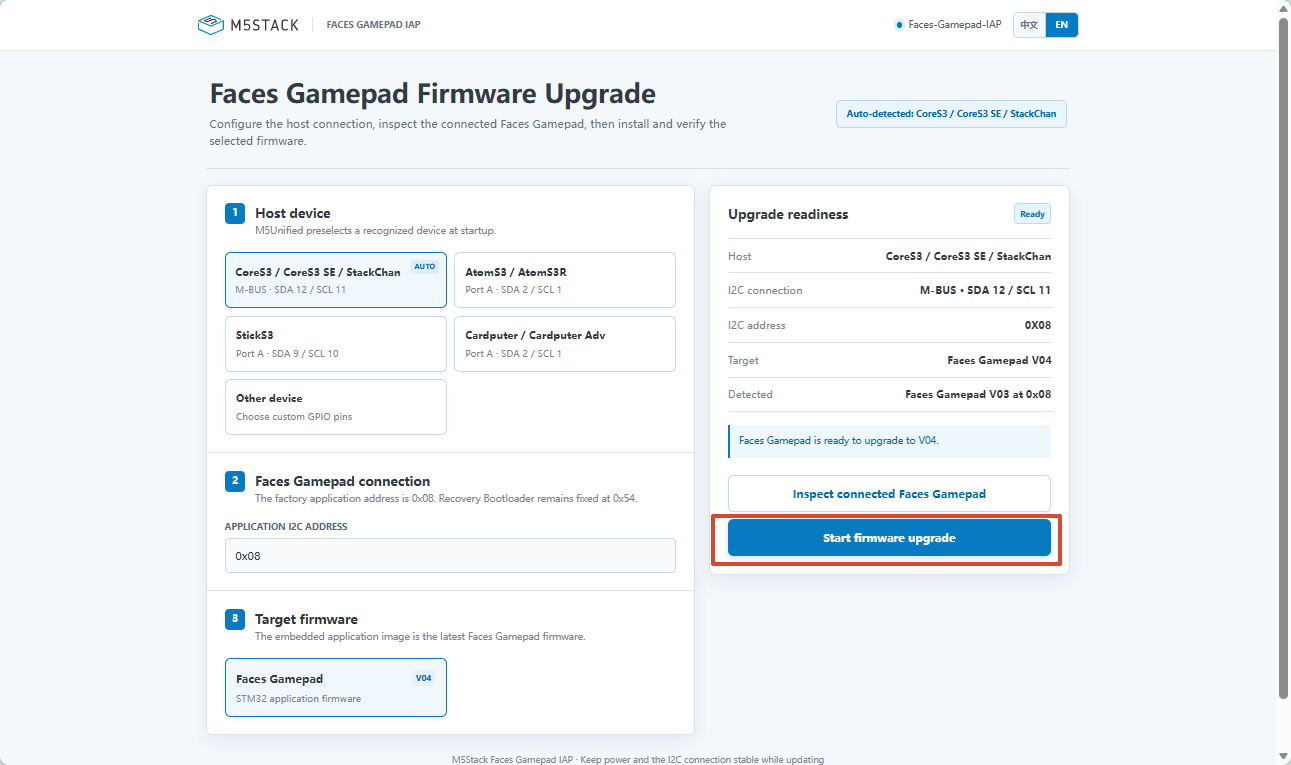
Once the device is detected successfully, click Start firmware upgrade to open the upgrade confirmation page.
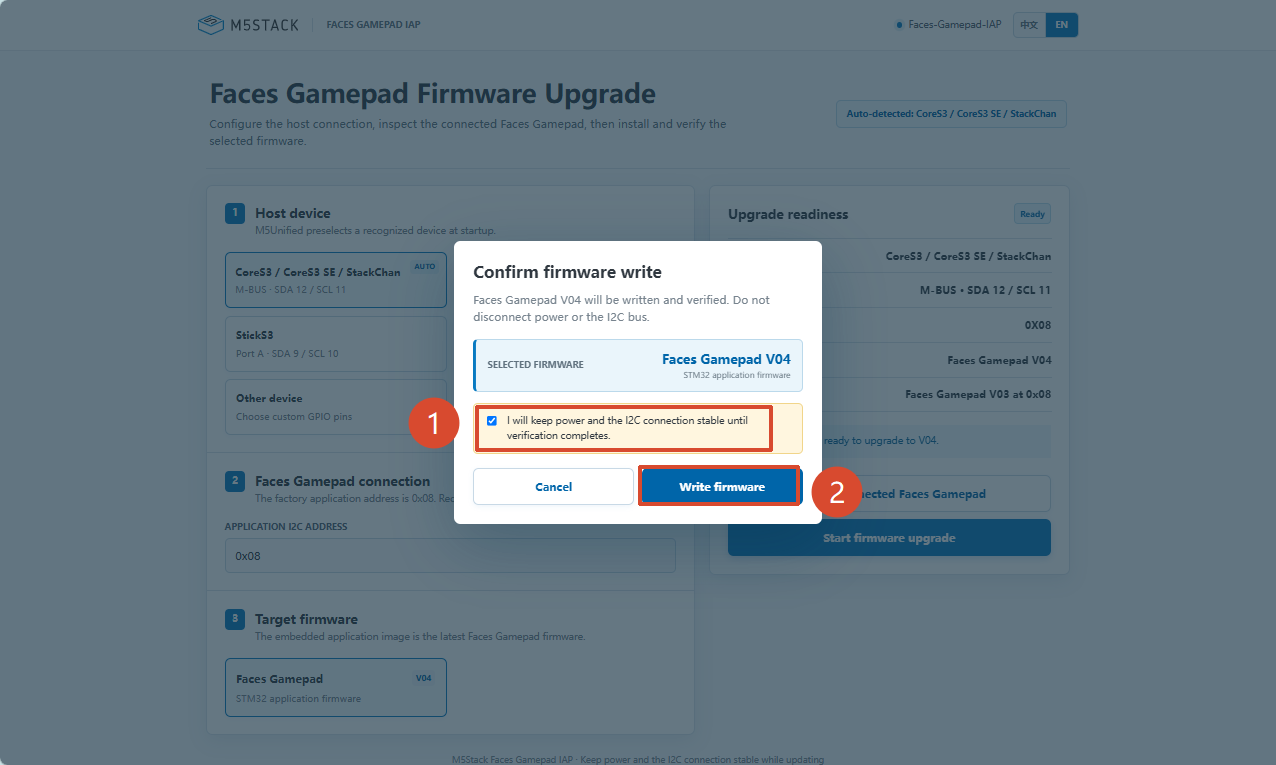
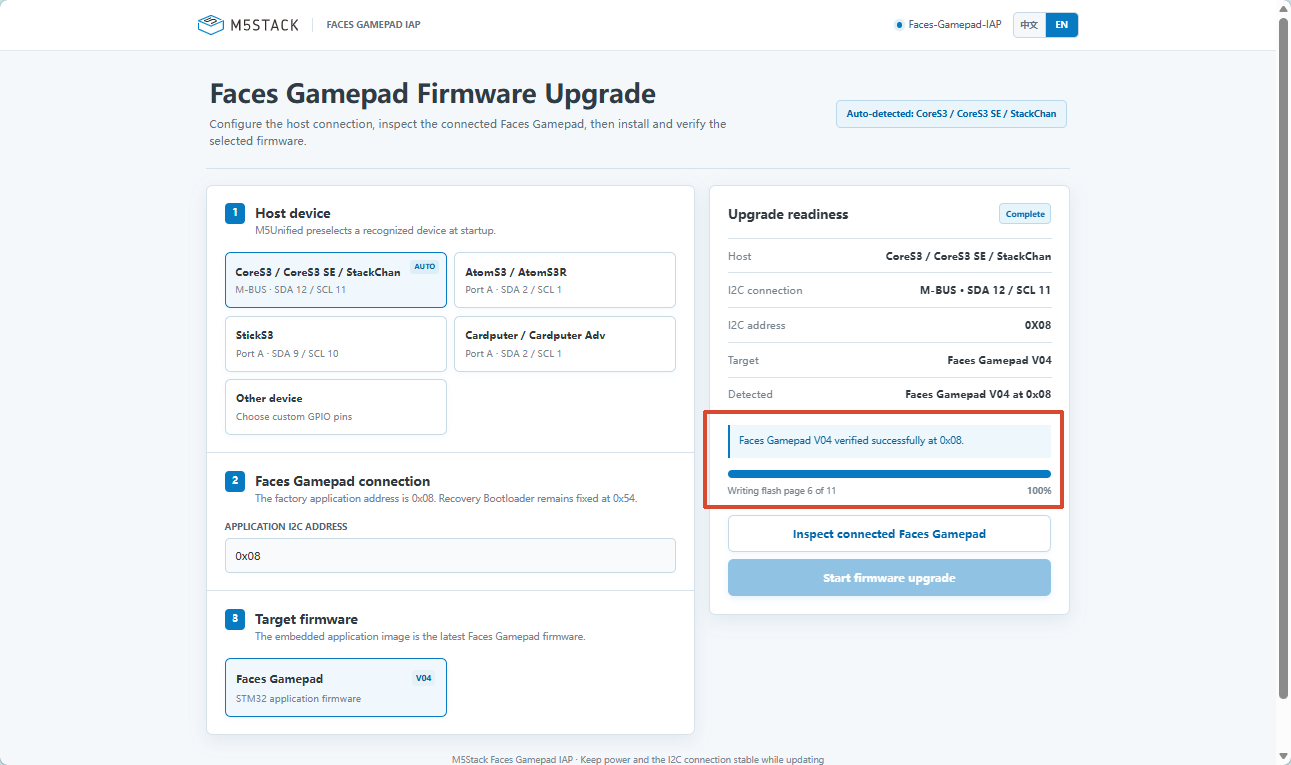
In the confirmation dialog, make sure the power supply and connections are stable, select Ensure stable power and connection, then click Write firmware. Upon receiving the command from the web page, the HOST writes the internal firmware image bundled in its firmware to the target device over I2C.
Wait for the page to report that the upgrade is complete and version verification has passed. Do not power off or disconnect the devices until the page explicitly confirms both.
FAQ
Power Loss or Connection Interruption During an Upgrade
- Reconnect the devices, power them on, and wait for the HOST to finish starting up.
- Connect to the HOST's AP in your phone's or computer's Wi-Fi settings.
- Open
http://192.168.4.1. - Run device detection again.
- If the page indicates recovery mode or Bootloader, confirm and restart the upgrade.
Recovery repeats the entire upgrade from the beginning. You do not need to manually select where to resume.
The Device's AP Is Not Found
- Make sure the HOST and target device are correctly connected, powered on, and have finished starting up.
- Reset the HOST and wait for it to restart.
- Make sure your phone or computer has not automatically switched back to another Wi-Fi network.
The Web Page Does Not Open
- Make sure your phone or computer is connected to the HOST's AP.
- Enter
http://192.168.4.1manually in the browser. - Disconnect the VPN to prevent it from switching automatically when the cellular network connection changes.
The Target Device Is Not Detected
- Make sure the target device is powered on.
- Check that you are using the correct interface and that the connector is oriented correctly.
- Verify that you are using the communication interface and SDA/SCL pins required by the product. Core/Core2 must use M5-Bus.
- Make sure only one target device is connected.
- Unplug and reconnect the cable, then run device detection again.
The Upgrade Fails
- Maintain a stable power supply to both the HOST and the target device.
- Check the cable and connectors for poor contact.
- Power cycle the devices, run device detection again, and repeat the full upgrade.
- If the device enters recovery mode, follow the steps under "Power Loss or Connection Interruption During an Upgrade".