Home Assistant
Home Assistant OS
Kit
Sensor
Switch/Relay
AtomS3R-M12 Home Assistant Integration
Introduction
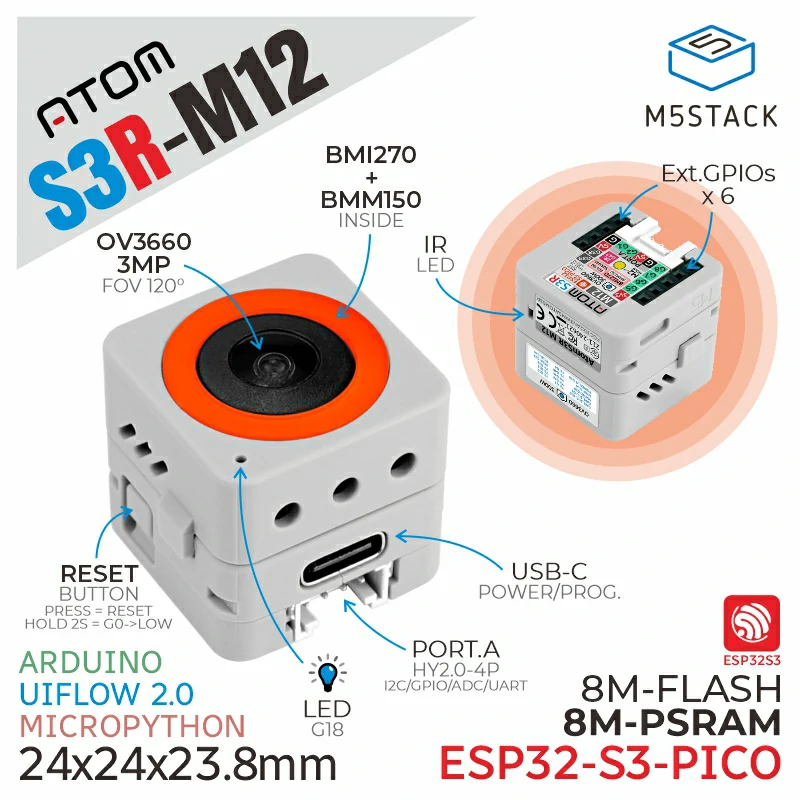
AtomS3R-M12 is a compact IoT programmable controller (24×24×22.1mm) with an M12 3MP OV3660 wide-angle camera. Powered by ESP32-S3-PICO-1-N8R8 (Wi-Fi, 8MB Flash + 8MB PSRAM), it features a 5V→3.3V power circuit, BMM150 geomagnetic and BMI270 six-axis sensors, UVC driver-free USB camera, infrared control, enhanced 3D antenna for stable connectivity, USB-C for power/firmware, a HY2.0-4P expansion port, and six GPIO/power pins for easy expansion—ideal for IoT monitoring and educational development.
See the latest configuration examples on ESPHome
Preparation
- Home Assistant host
- Install and enable ESPHome Builder in Home Assistant
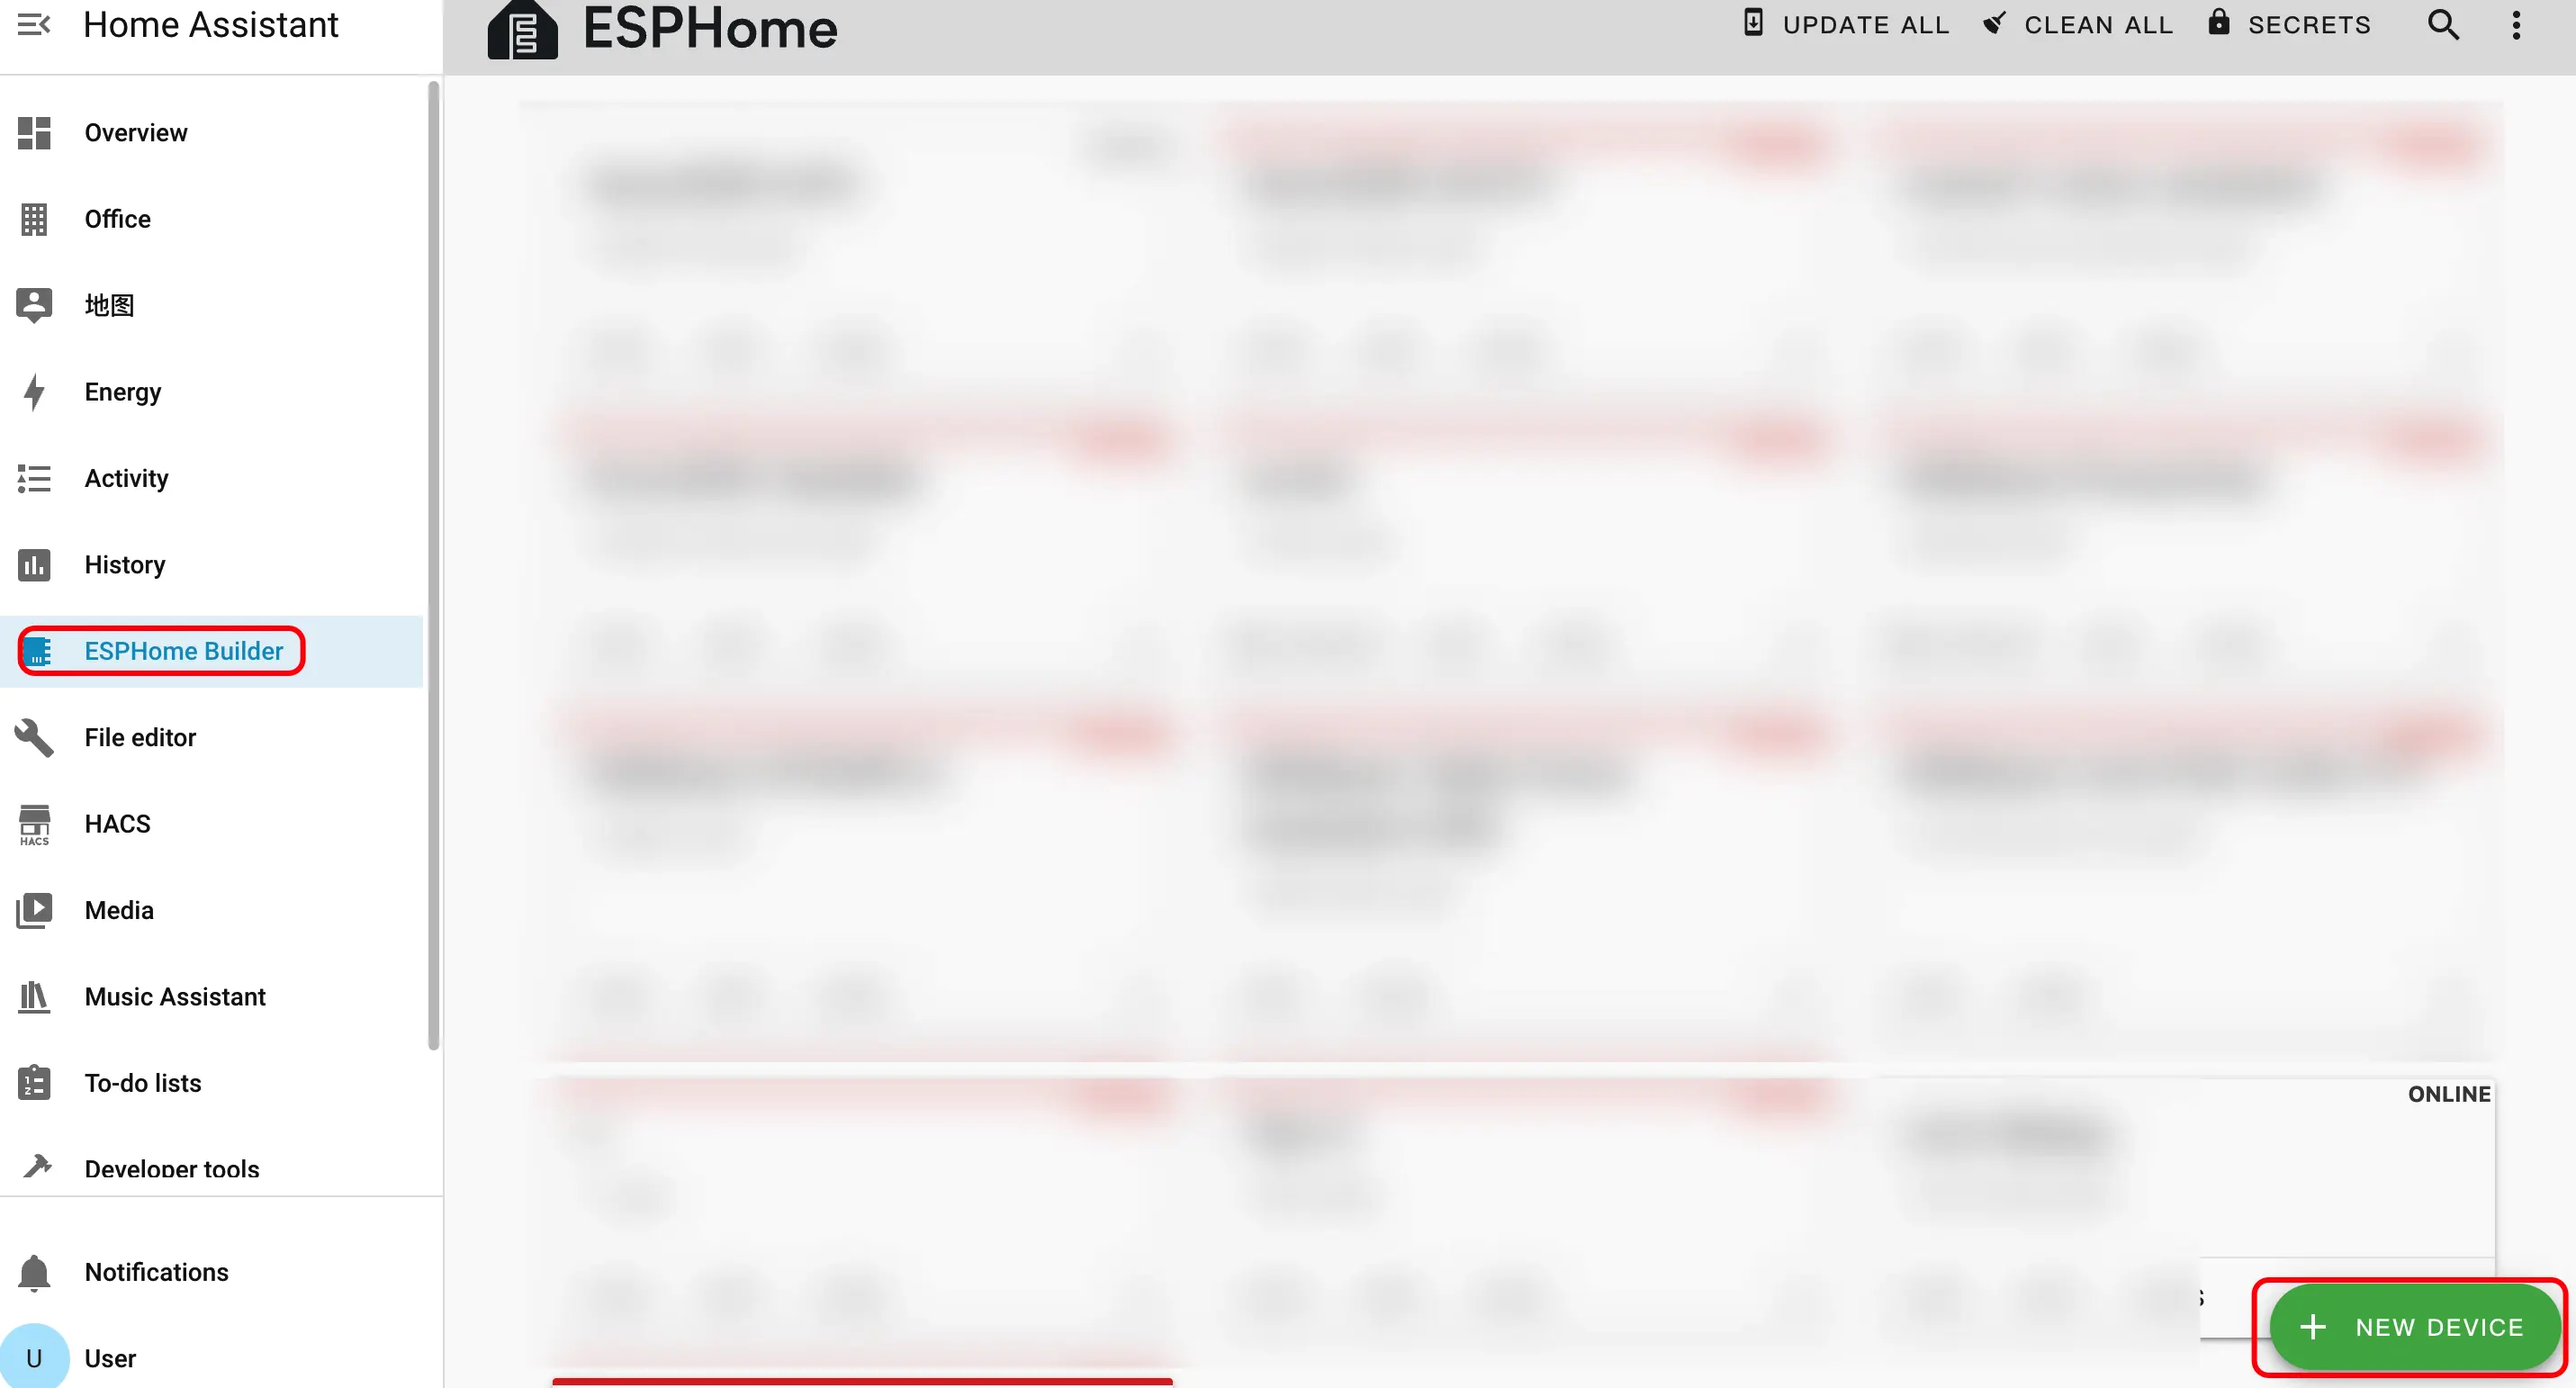
Step 1. Create New Device
- Click the green button in the lower right corner to create a device.
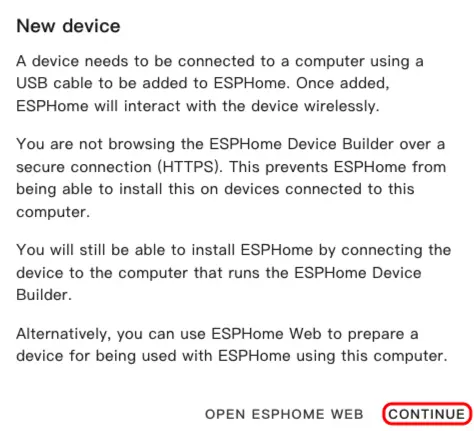
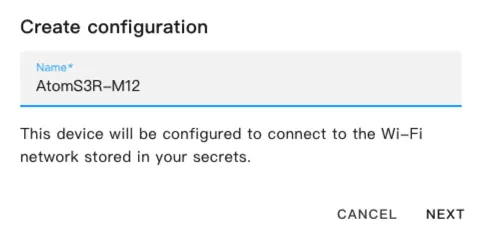
Step 2. Create Device Name
- Click
CONTINUE.
- Click
New Device Setup.

- Enter the name of the device and Click
NEXT.
Step 3. Choose Device Type
- Click
ESP32-S3.
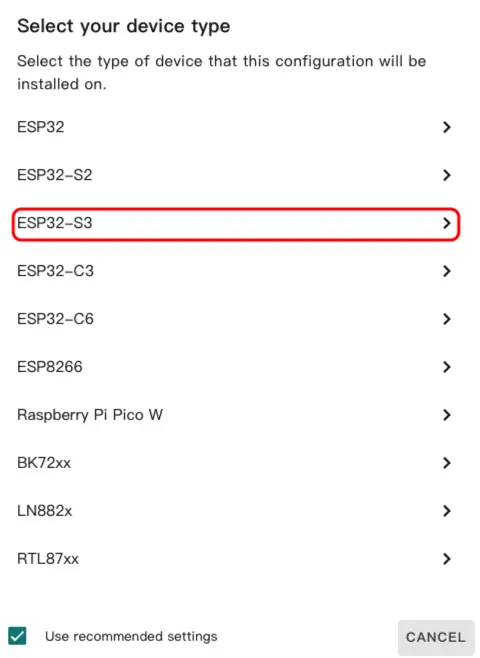
- Click
SKIP.
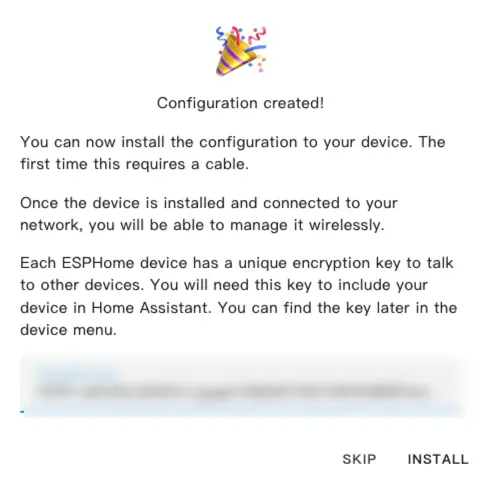
Step 4. Start Edit YAML File
- Click
EDIT. We can customize device functionality through YAML files.

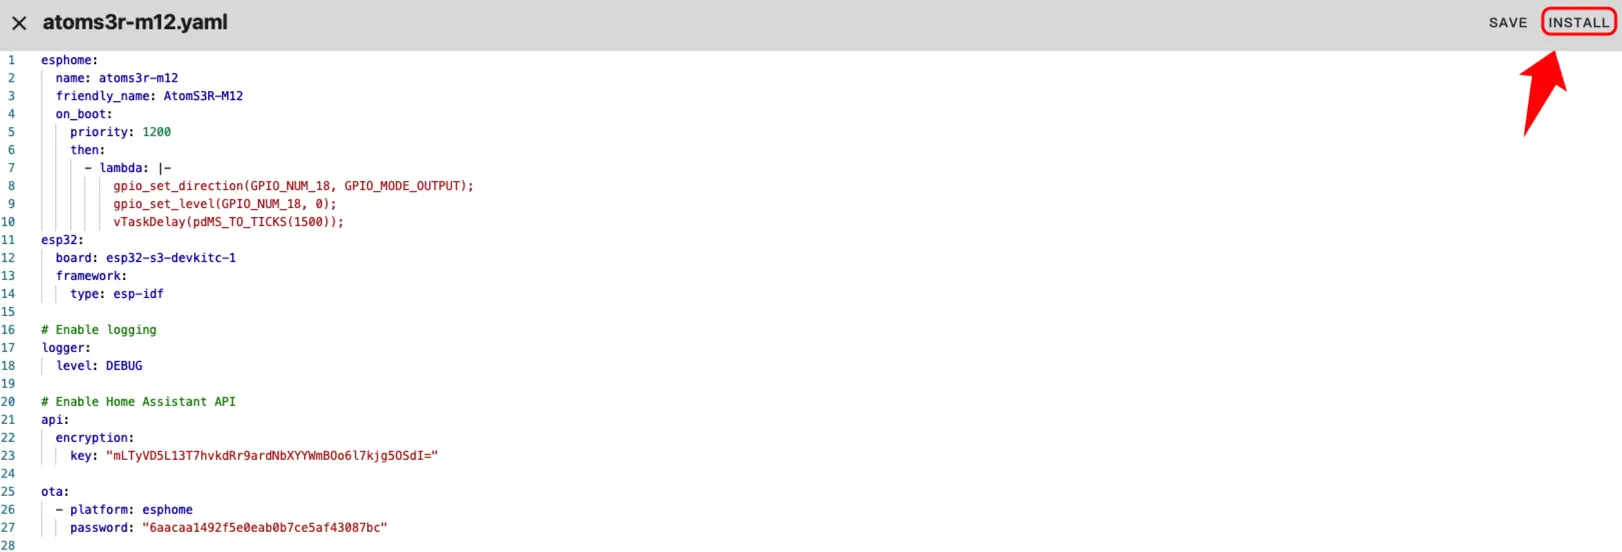
Device Setup
The following is the core part of the code. Relevant references and explanations are provided below.
Basic Info and Boot Actions
- Add the on_boot component
esphome:
  name: atoms3r-m12
  friendly_name: AtomS3R-M12
  on_boot:
    priority: 800
    then:
      - lambda: |-
          gpio_set_direction(GPIO_NUM_18, GPIO_MODE_OUTPUT);
          gpio_set_level(GPIO_NUM_18, 0);
vTaskDelay(pdMS_TO_TICKS(1500)); PSRAM Configuration
- Add the PSRAM component
psram:
  mode: octal
speed: 80MHz External Components
- Add the External Components components
external_components:
  - source: github://DennisGaida/m5stack-atoms3r-components/components@main
components: [bmi270_bmm150]I2C Bus Configuration
Add the I2C components
i2c: - id: BMI270_150 sda: GPIO45 scl: GPIO0 - id: camera_i2c sda: GPIO12 scl: GPIO9 frequency: 100kHz timeout: 10msSensor Configuration
Add the Sensor components
sensor:
  - platform: bmi270_bmm150
    i2c_id: BMI270_150
    address: 0x68
    update_interval: 3s
    acceleration_x:
      name: "BMI270 Accel X"
    acceleration_y:
      name: "BMI270 Accel Y"
    acceleration_z:
      name: "BMI270 Accel Z"
    gyroscope_x:
      name: "BMI270 Gyro X"
    gyroscope_y:
      name: "BMI270 Gyro Y"
    gyroscope_z:
      name: "BMI270 Gyro Z"
    temperature:
name: "BMI270 Temperature" Camera Configuration
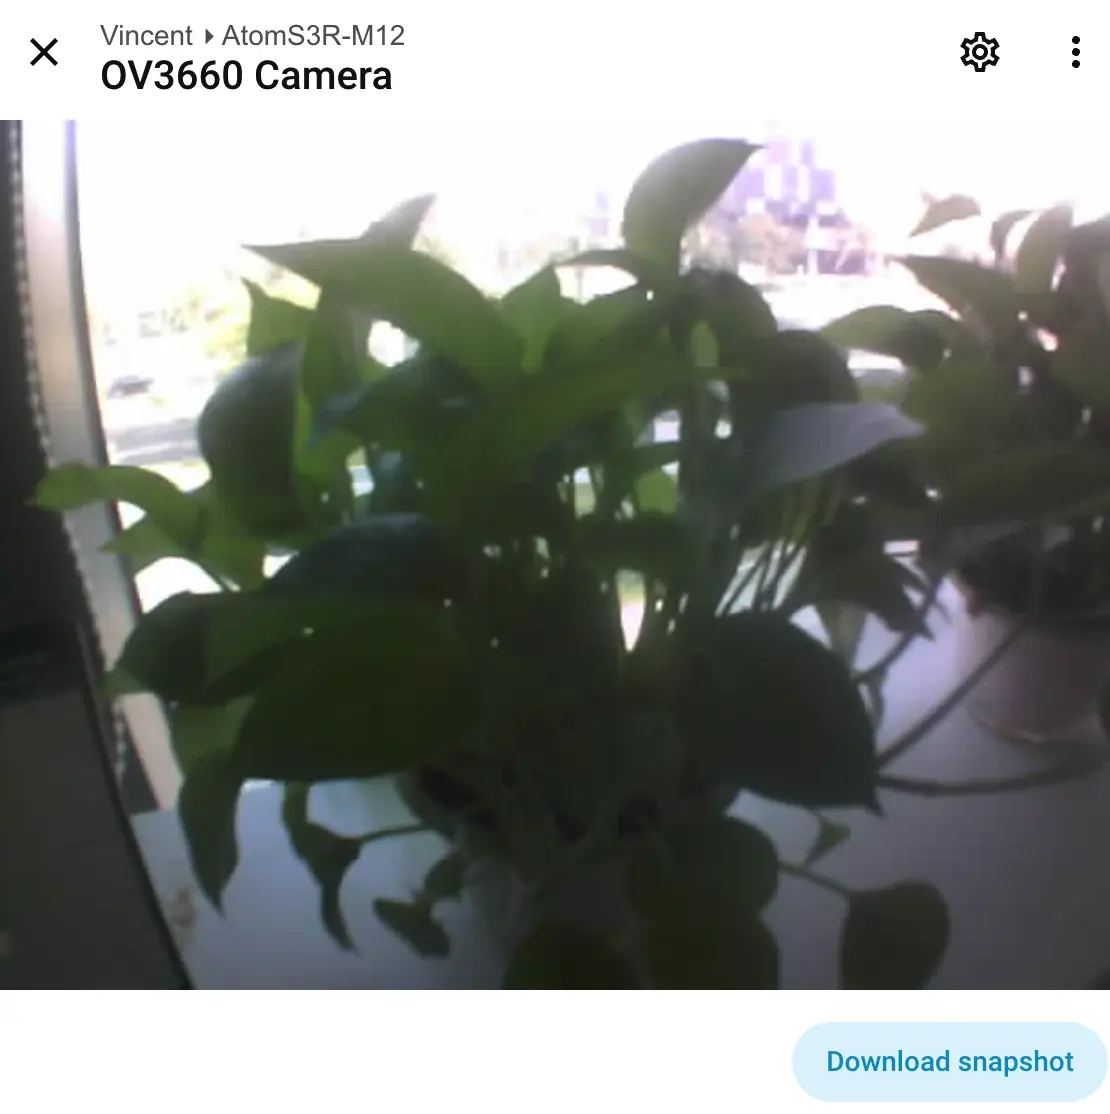
- Add the ESP32 Camera components
esp32_camera:
  name: "OV3660 Camera"
  external_clock:
    pin: GPIO21
    frequency: 20MHz
  i2c_id: camera_i2c
  data_pins: [GPIO3, GPIO42, GPIO46, GPIO48, GPIO4, GPIO17, GPIO11, GPIO13]
  vsync_pin: GPIO10
  href_pin: GPIO14
  pixel_clock_pin: GPIO40
  resolution: 640X480
jpeg_quality: 10Firmware Build
- Click
INSTALLagain to flash and wait for it to complete.
- After making changes, click
SAVEandINSTALLin the top-right corner, then chooseManual Downloadin the popup.
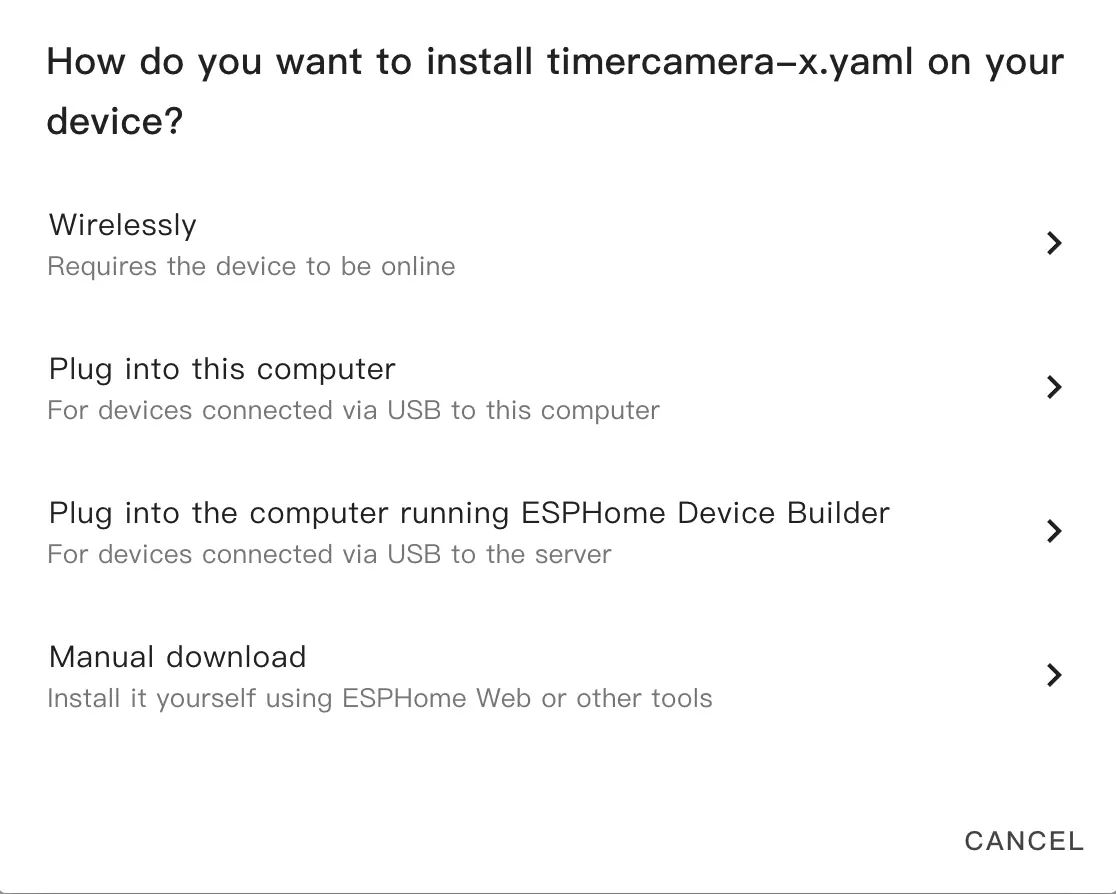
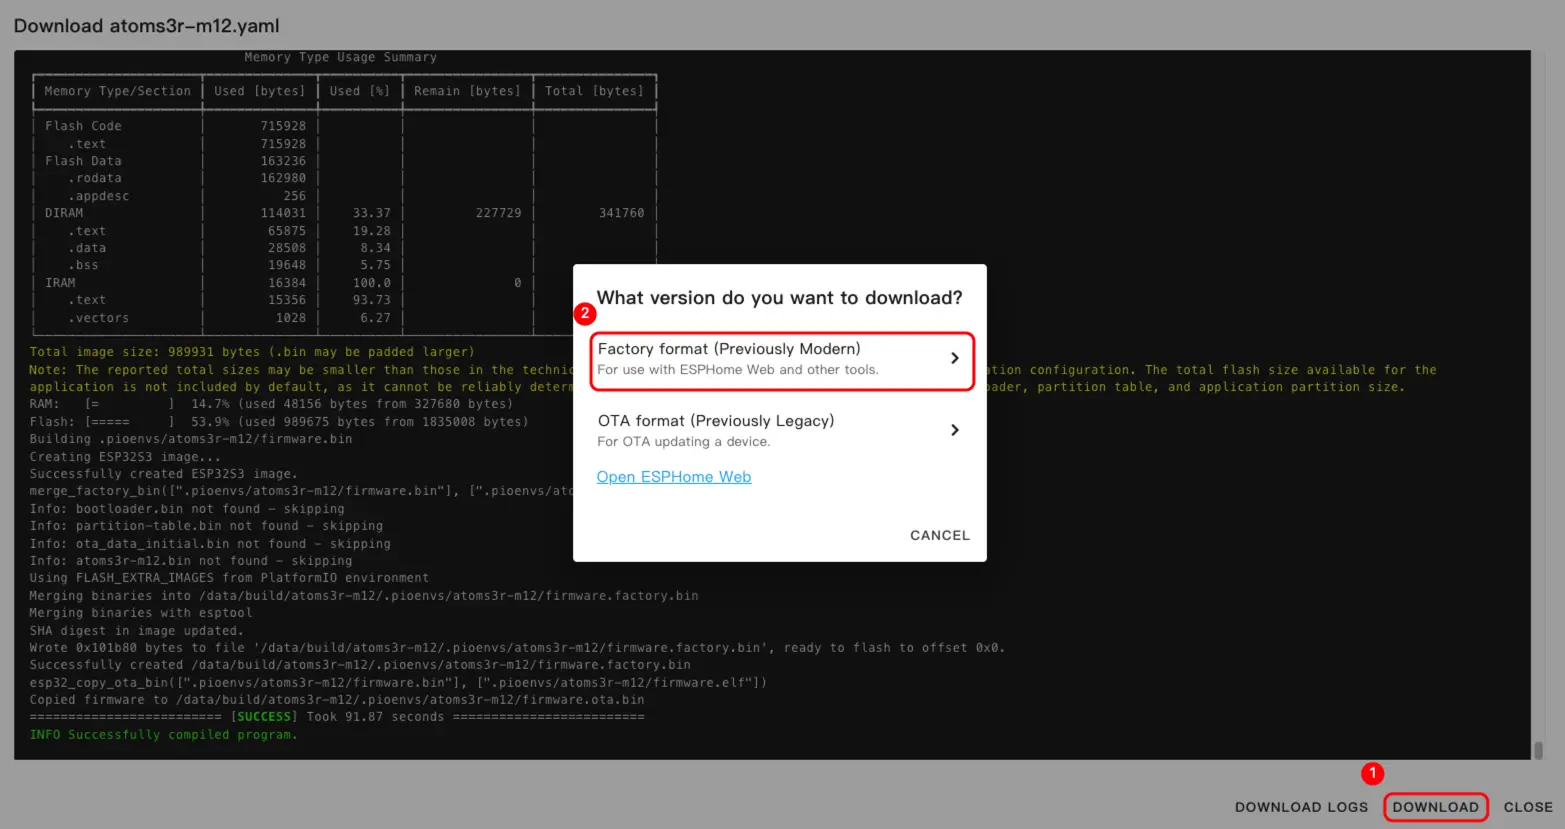
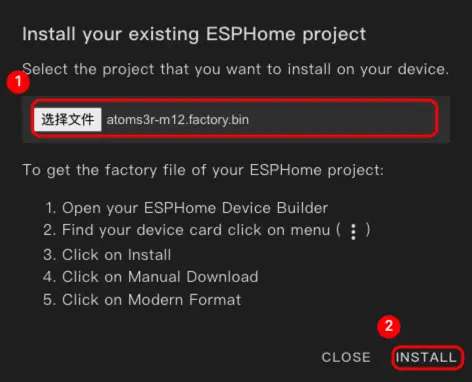
- After the firmware compilation is complete, click Download and select
Factory format(Previously Modern)
Firmware Upload
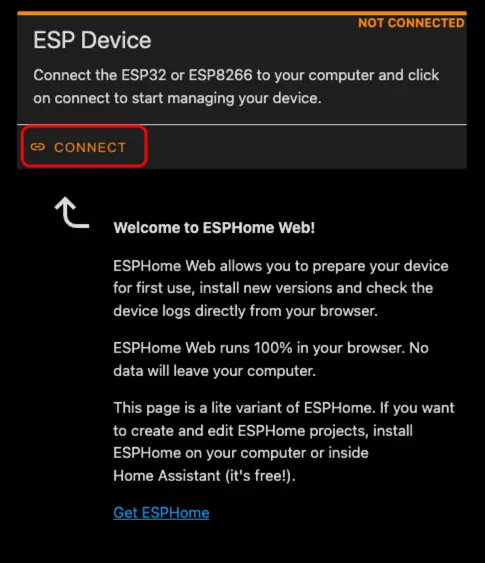
- Connect the device to your host via a USB Type‑C cable. Open ESPHome Web and click
CONNECTto connect to the device.
- Locate the corresponding serial port number
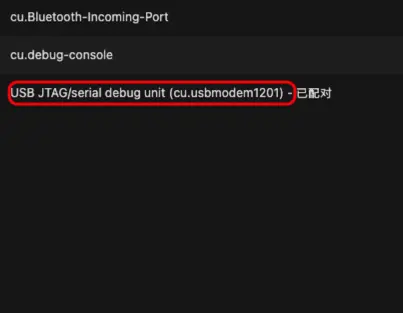
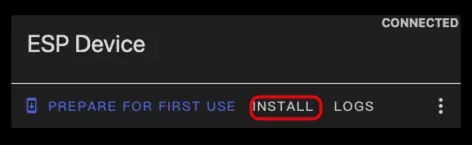
- Click
INSTALL
- Select the previously compiled firmware to upload.
Home Assistant Integration
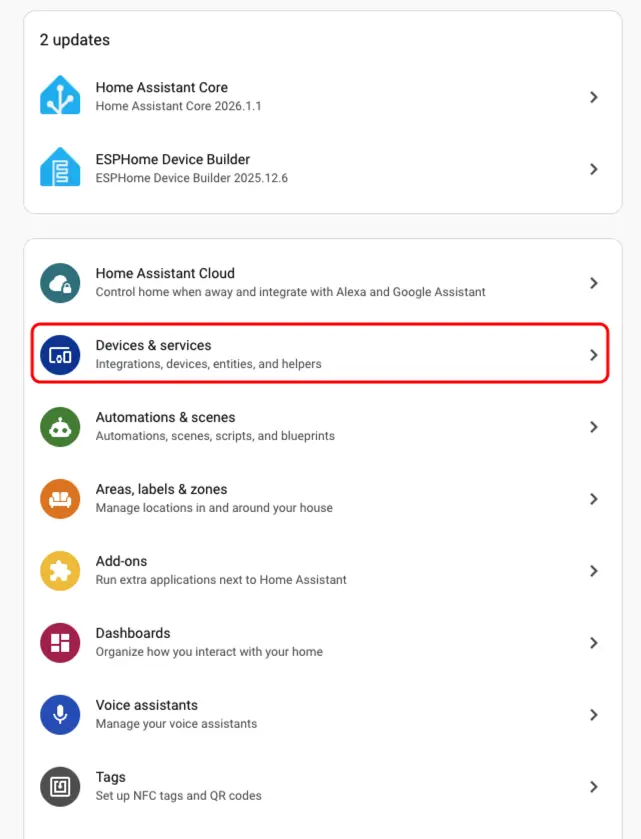
- Click
Settings->Device & servicesto check the device.
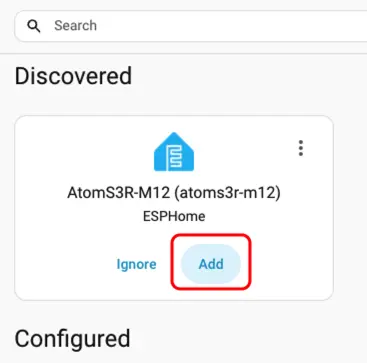
- We can find the corresponding device in the
Discoversection.
- After adding the device, the data will be displayed correctly.
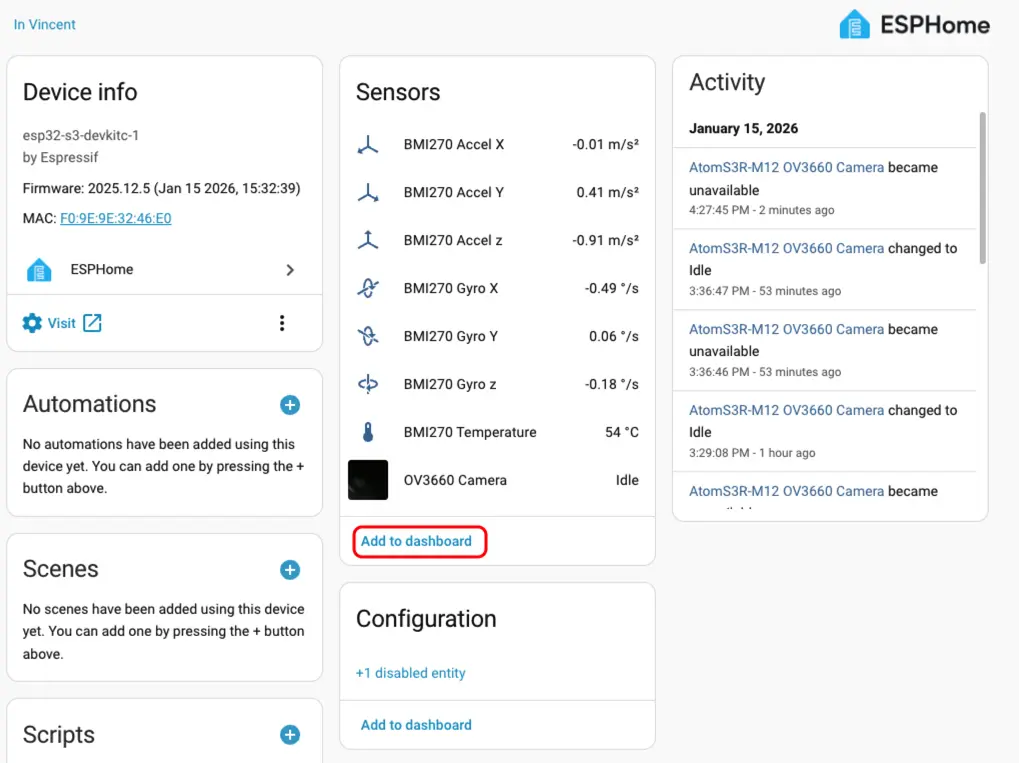
- Finally, we add these entities to the Dashboard, and the following shows their display results.