

Home Assistant
Media Player
Expansion
Sensor
CoreS3 HA Voice Assistant
This chapter describes how to configure CoreS3 as a Home Assistant voice assistant.
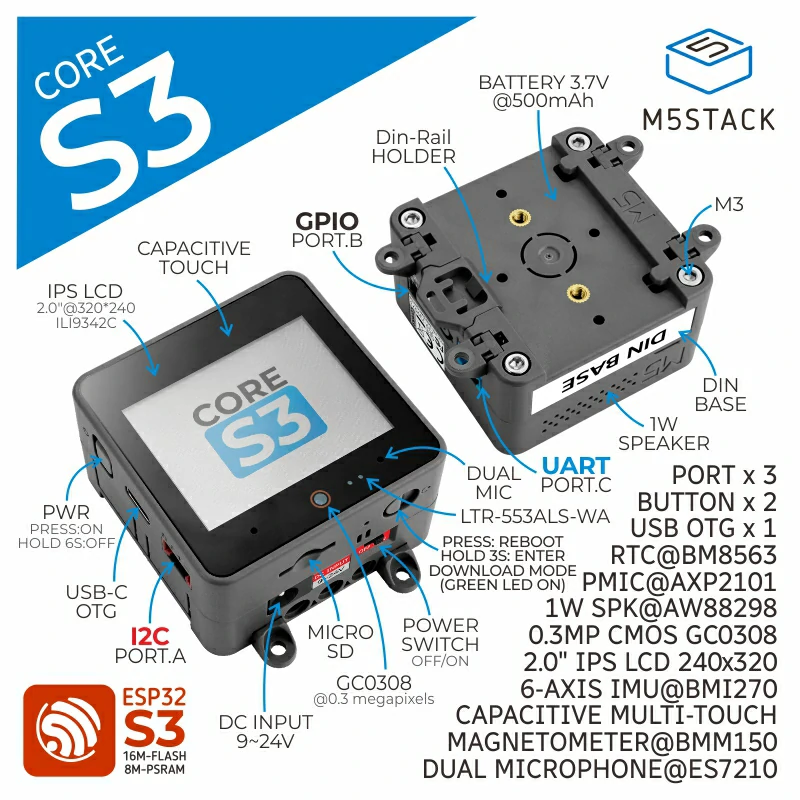
1. Preparation
Environment Setup
- Refer to the official Home Assistant documentation to install Home Assistant.
- Refer to the official ESPHome documentation to install the ESPHome Device Builder add-on. (Note: This tutorial is based on
ESPHome 2025.1.2. If compilation errors occur, switch to this version for verification.) - Install and configure the voice recognition add-ons:
Hardware Products

2. Online Flashing
Click the Online Flashing button below and follow the prompts to flash the firmware and configure Wi-Fi, allowing you to quickly connect CoreS3 to Home Assistant.
For detailed flashing and configuration instructions, refer to Online ESPHome Firmware Flashing and Configuration.
After using online flashing, you do not need to perform the "Firmware Compilation & Flashing" steps. Proceed directly to 4. Getting Started.
3. Firmware Compilation & Flashing
This section explains how to recompile the project from the yaml configuration file for secondary development, feature modifications, or new functionality.
Compilation Time
Compiling firmware through HA is resource-intensive. The first compilation may take a long time to download resources, depending on the device running the HA service and network quality.
Create Device
- Open the ESPHome plug-in page and click
NEW DEVICEin the lower right corner to create a new device.
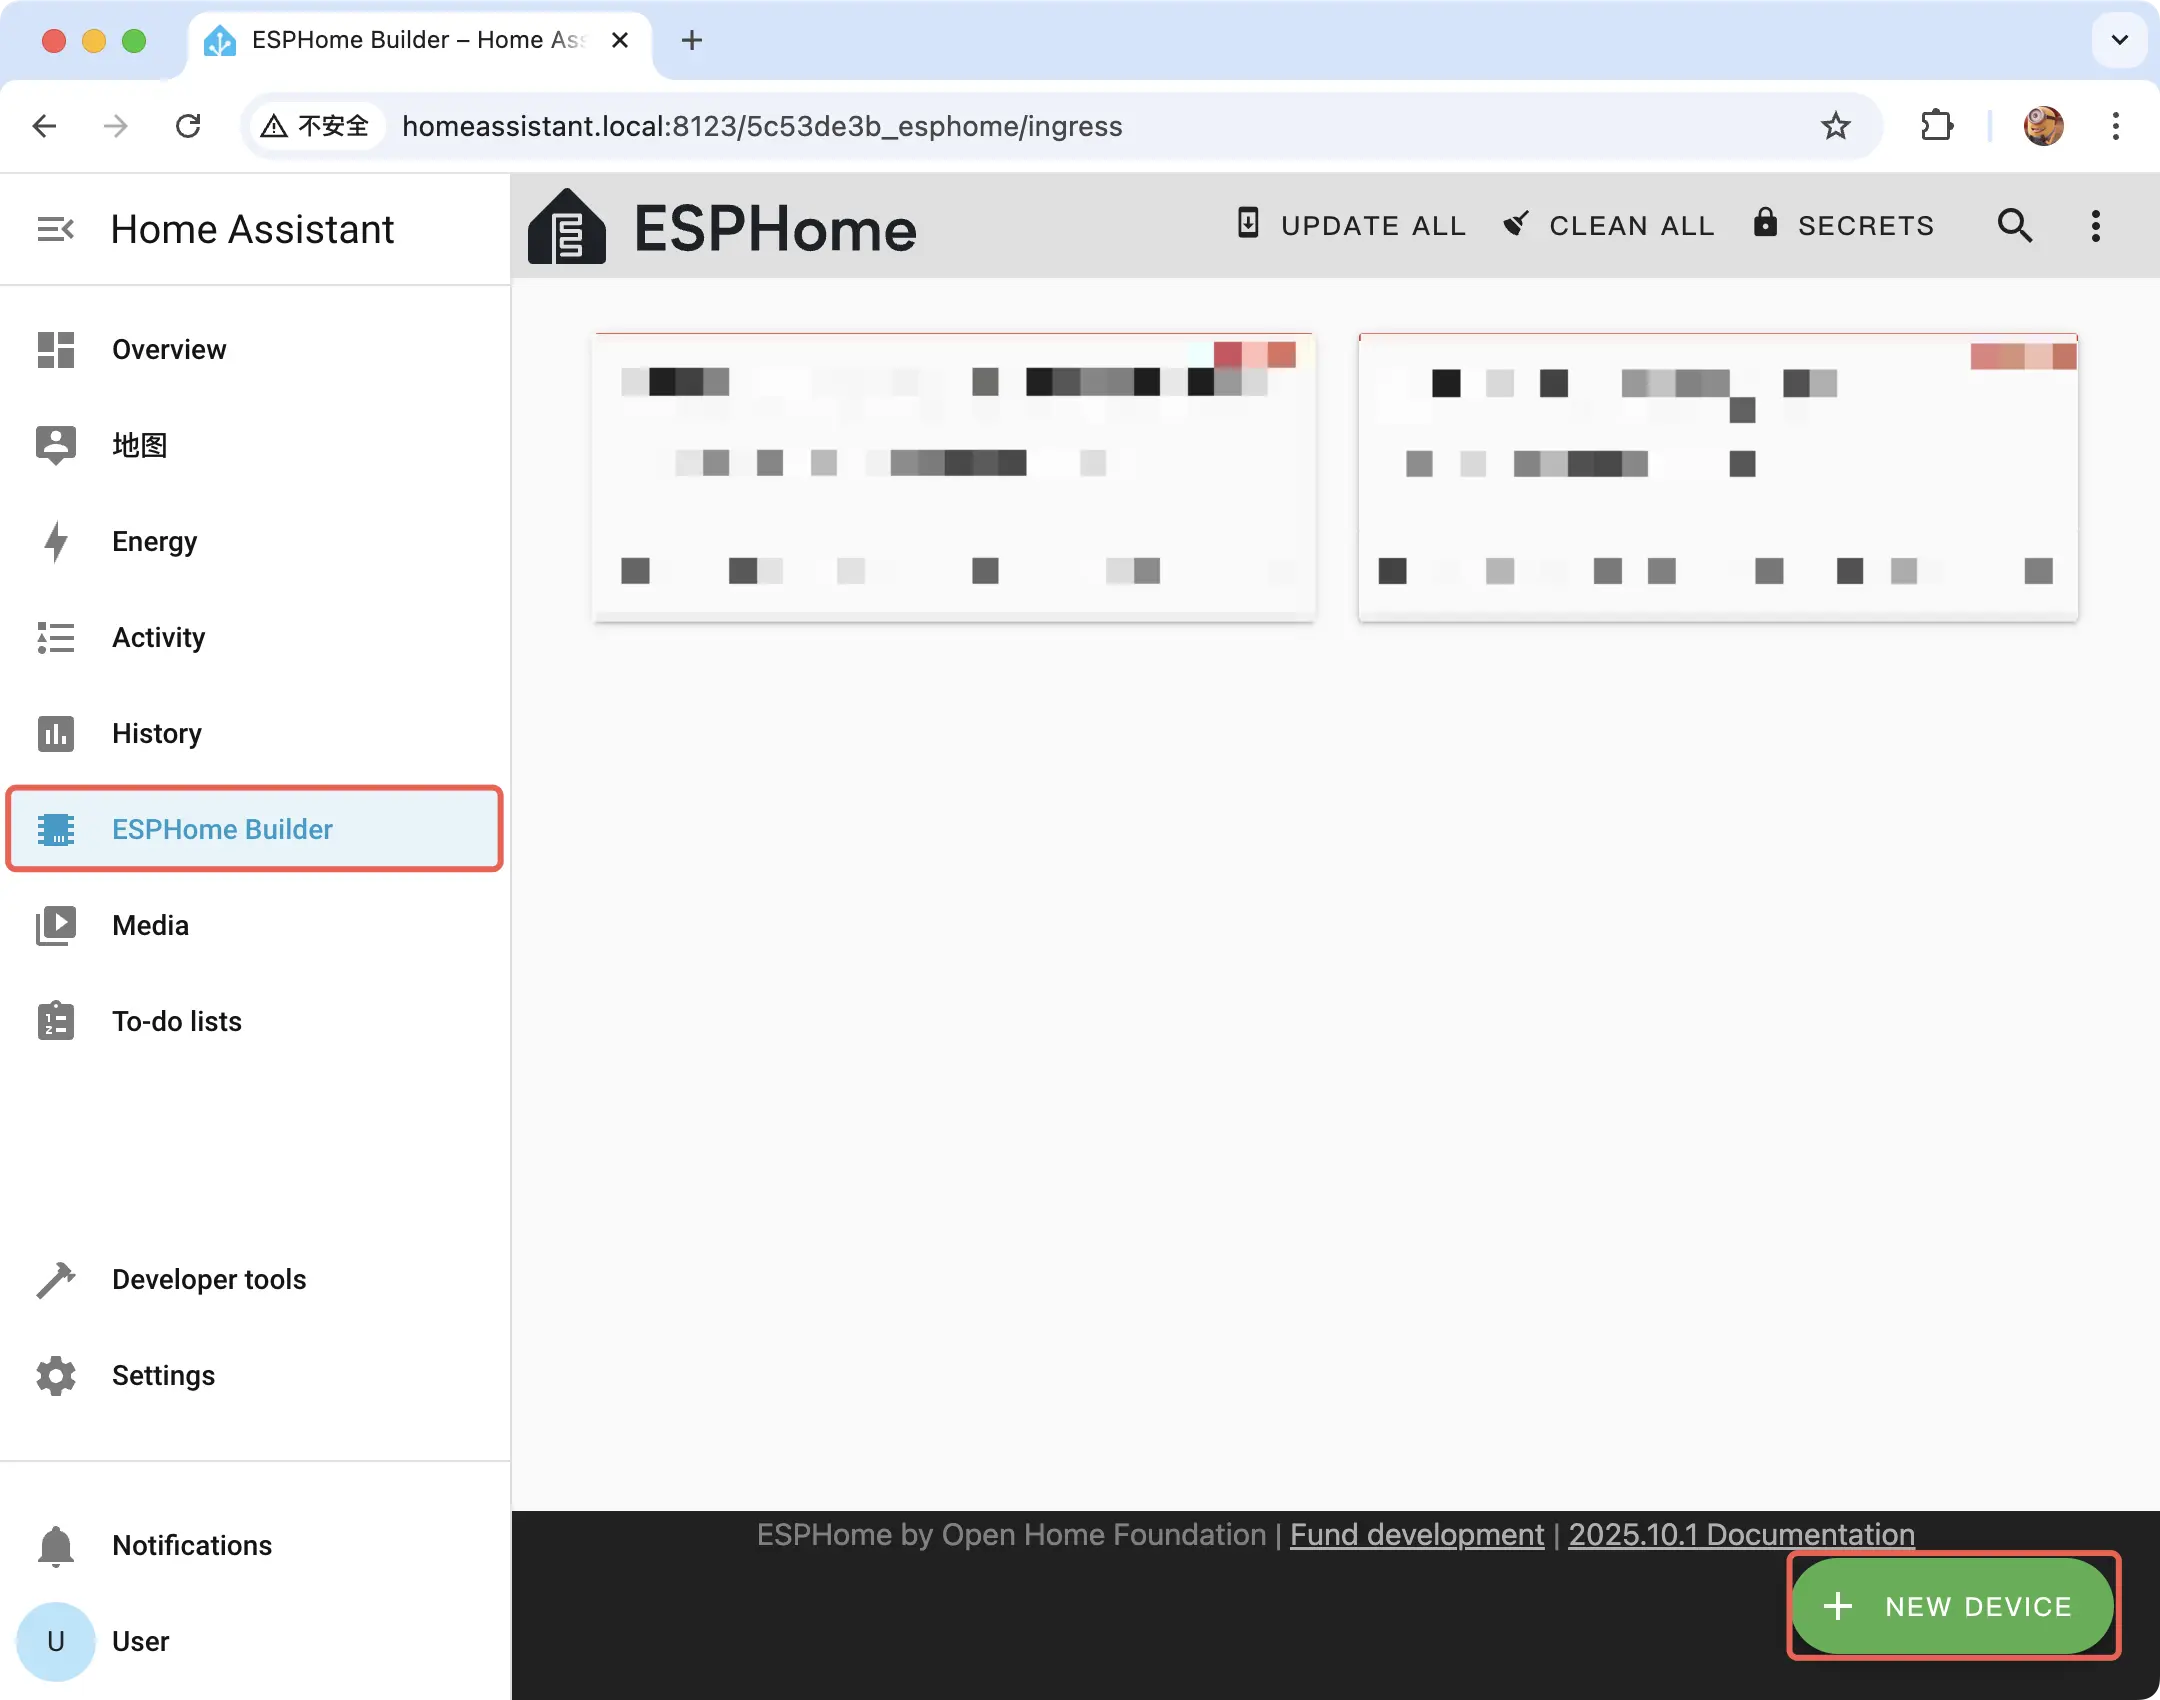
- Click
CONTINUEin the pop-up window.
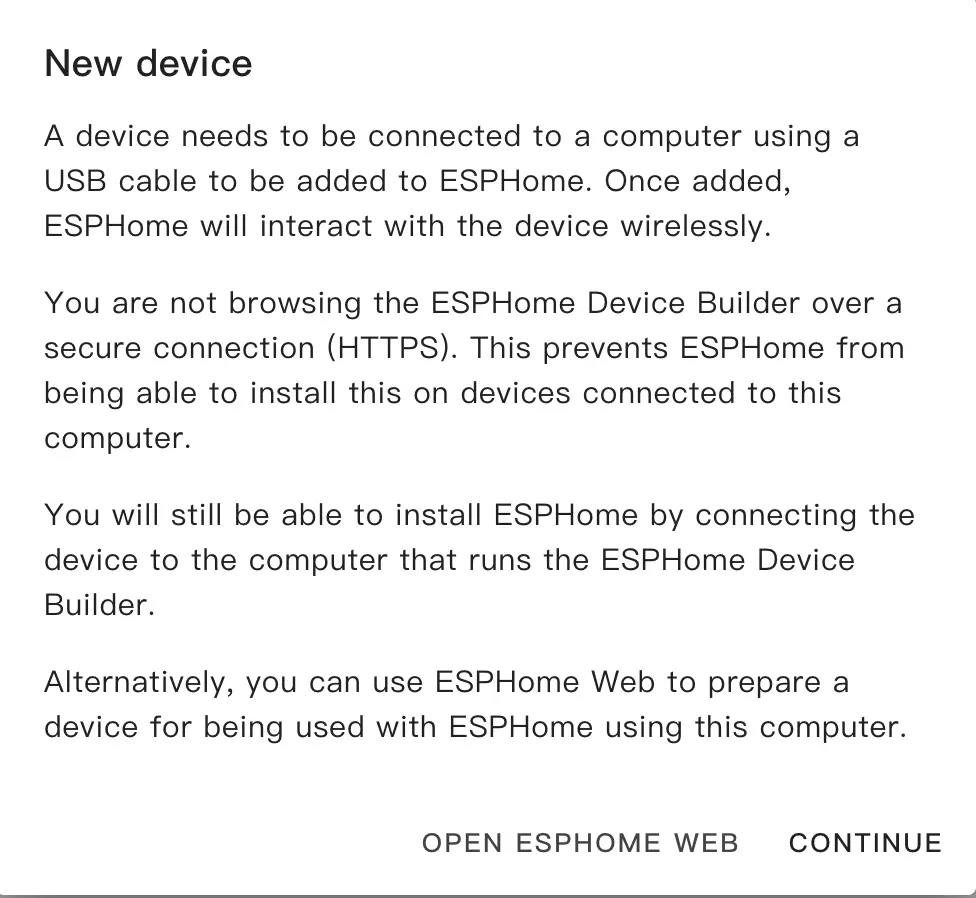
- Select
New Device Setupto create a new configuration file.
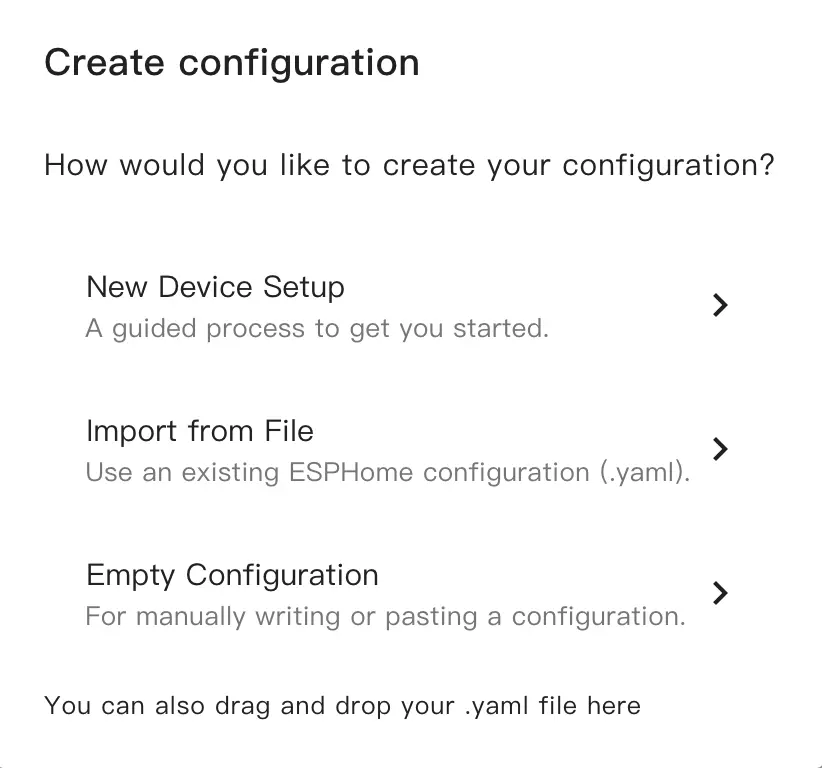
- Fill in the configuration file name.
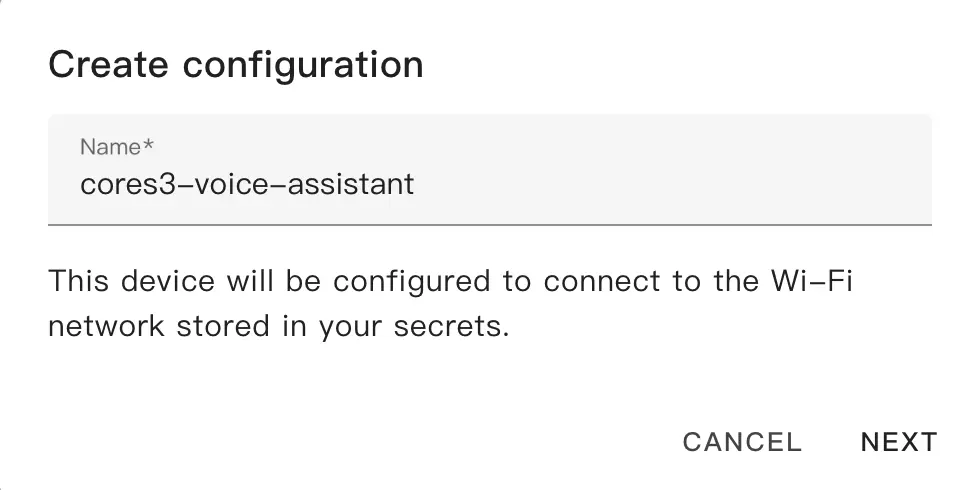
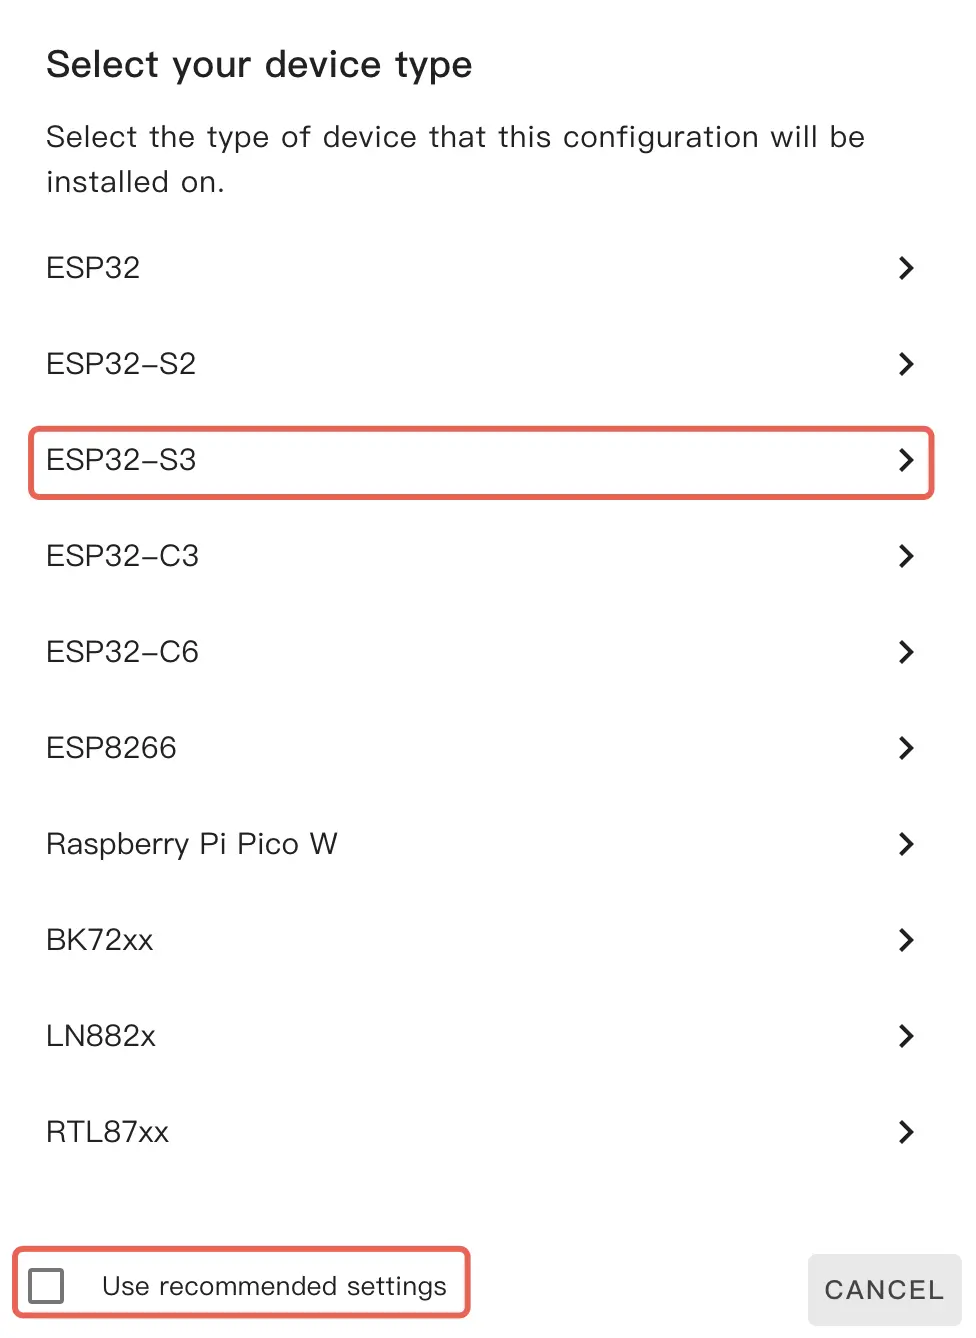
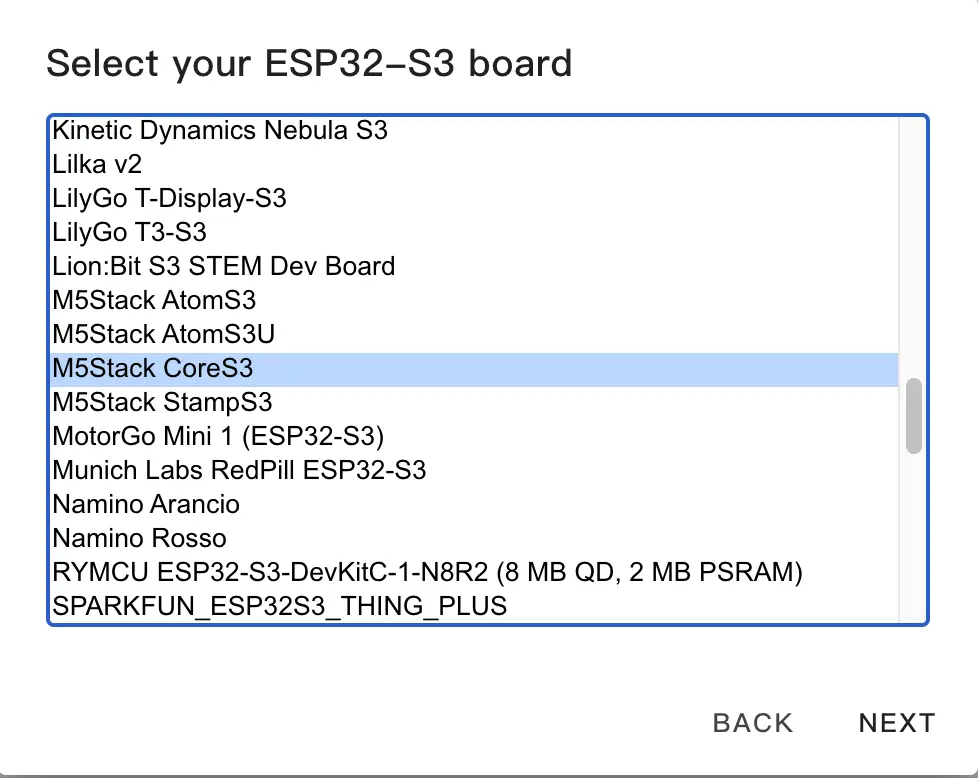
- Select the device type. First, uncheck
Use recommended settings, then clickESP32-S3and selectM5Stack CoreS3.
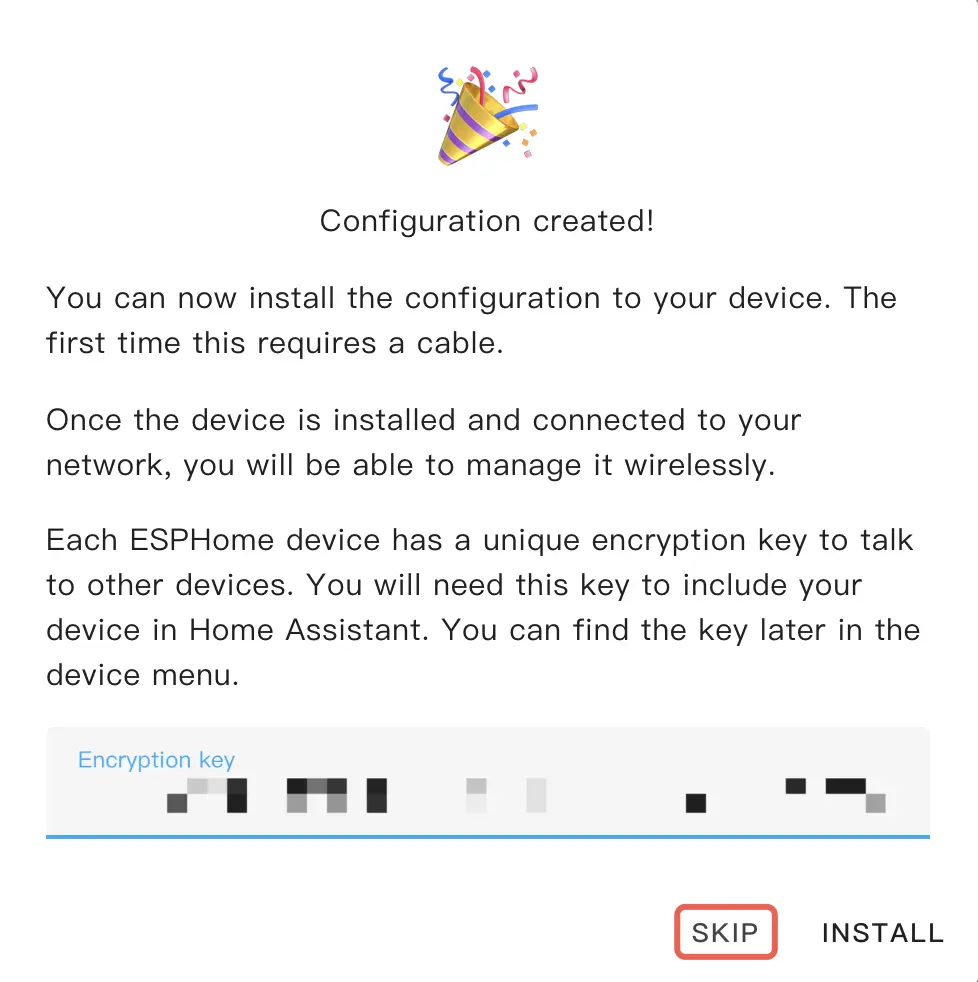
- Copy the Home Assistant API Encryption Key for backup and click
Skip.
Modify Configuration
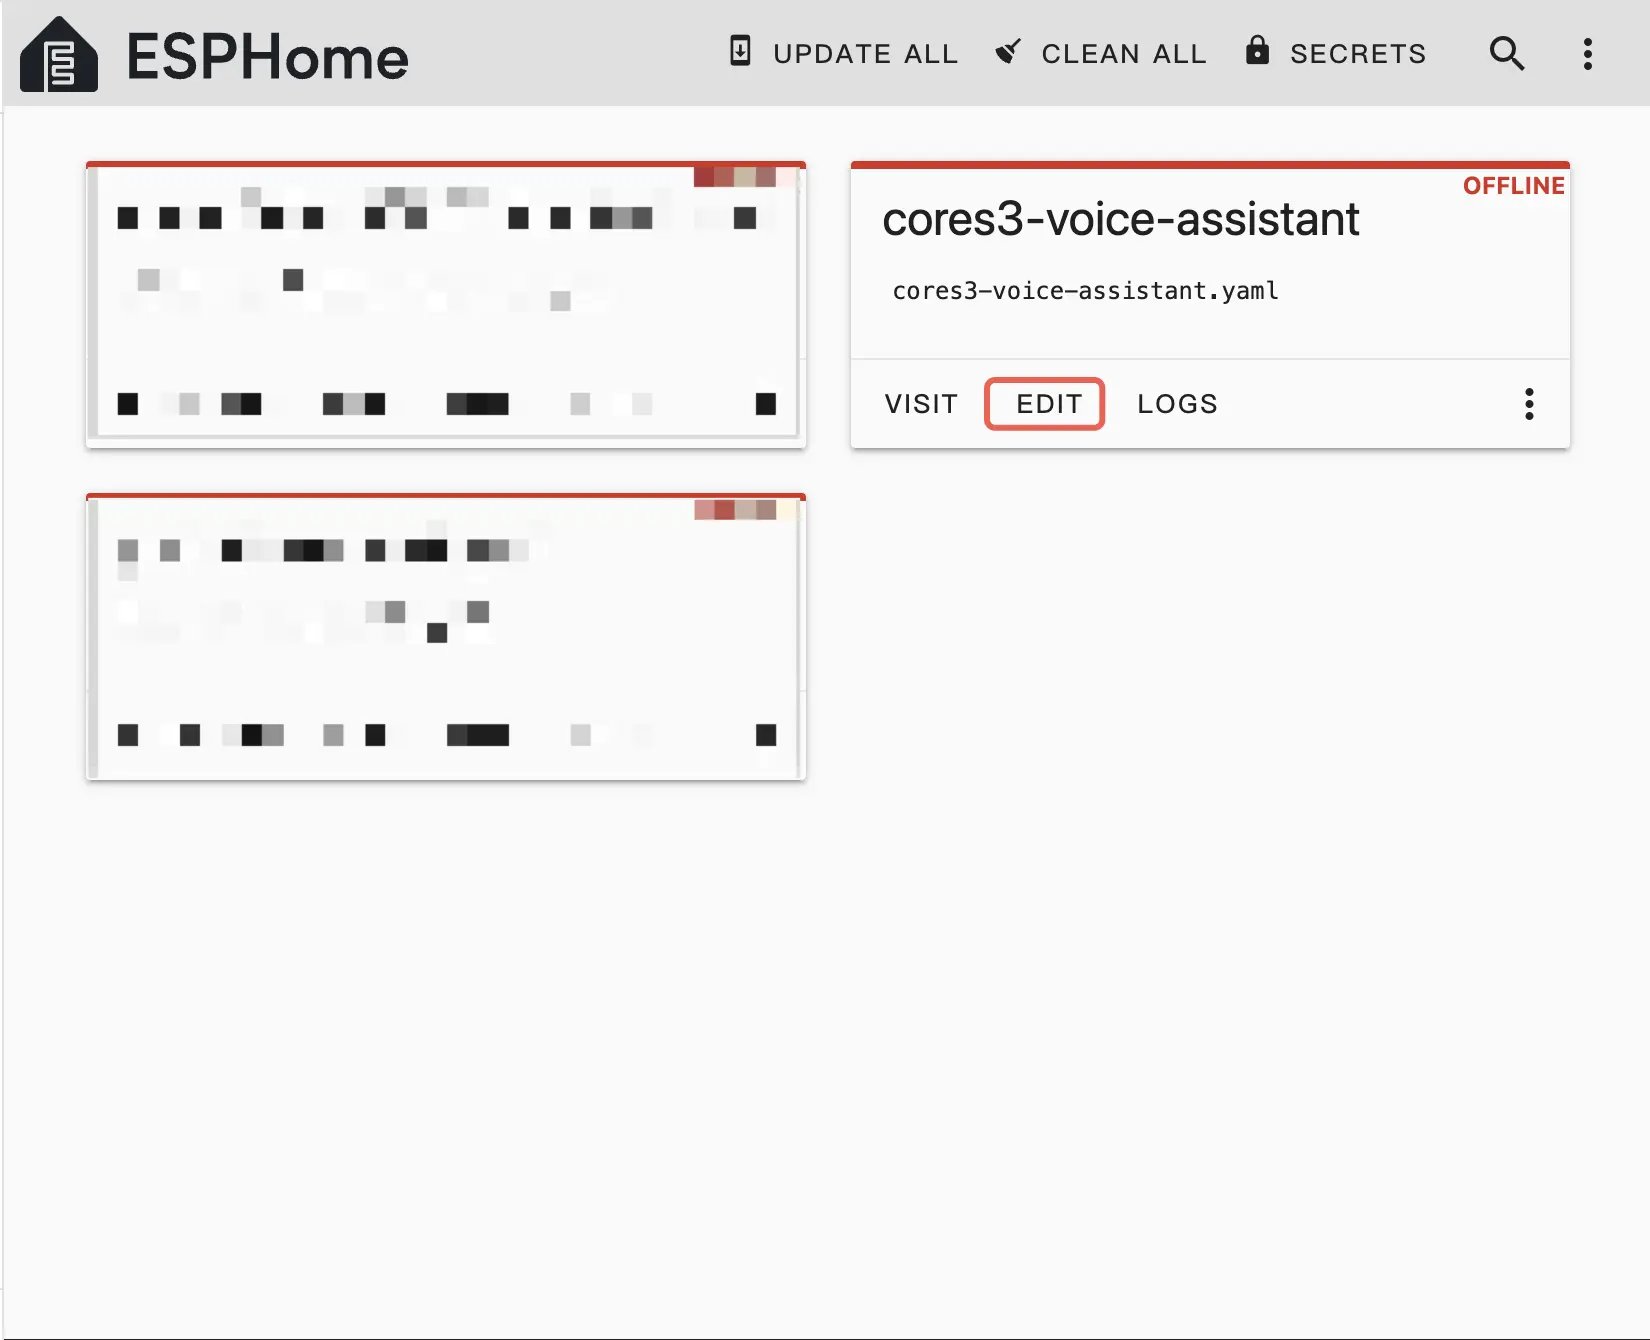
- Click
EDITat the bottom left of the device to modify the Wi-Fi connection configuration. (The Wi-Fi configuration defaults to the Wi-Fi configuration of the current HA server, and also supports direct modification to plain text: ssid: "xxxx").
- Add the resource package configuration link below to add voice assistant functional components to the device.
packages:
  remote_package_files:
    url: https://github.com/m5stack/esphome-yaml
    files: [common/cores3-satellite-base.yaml]
    ref: main
    refresh: 0s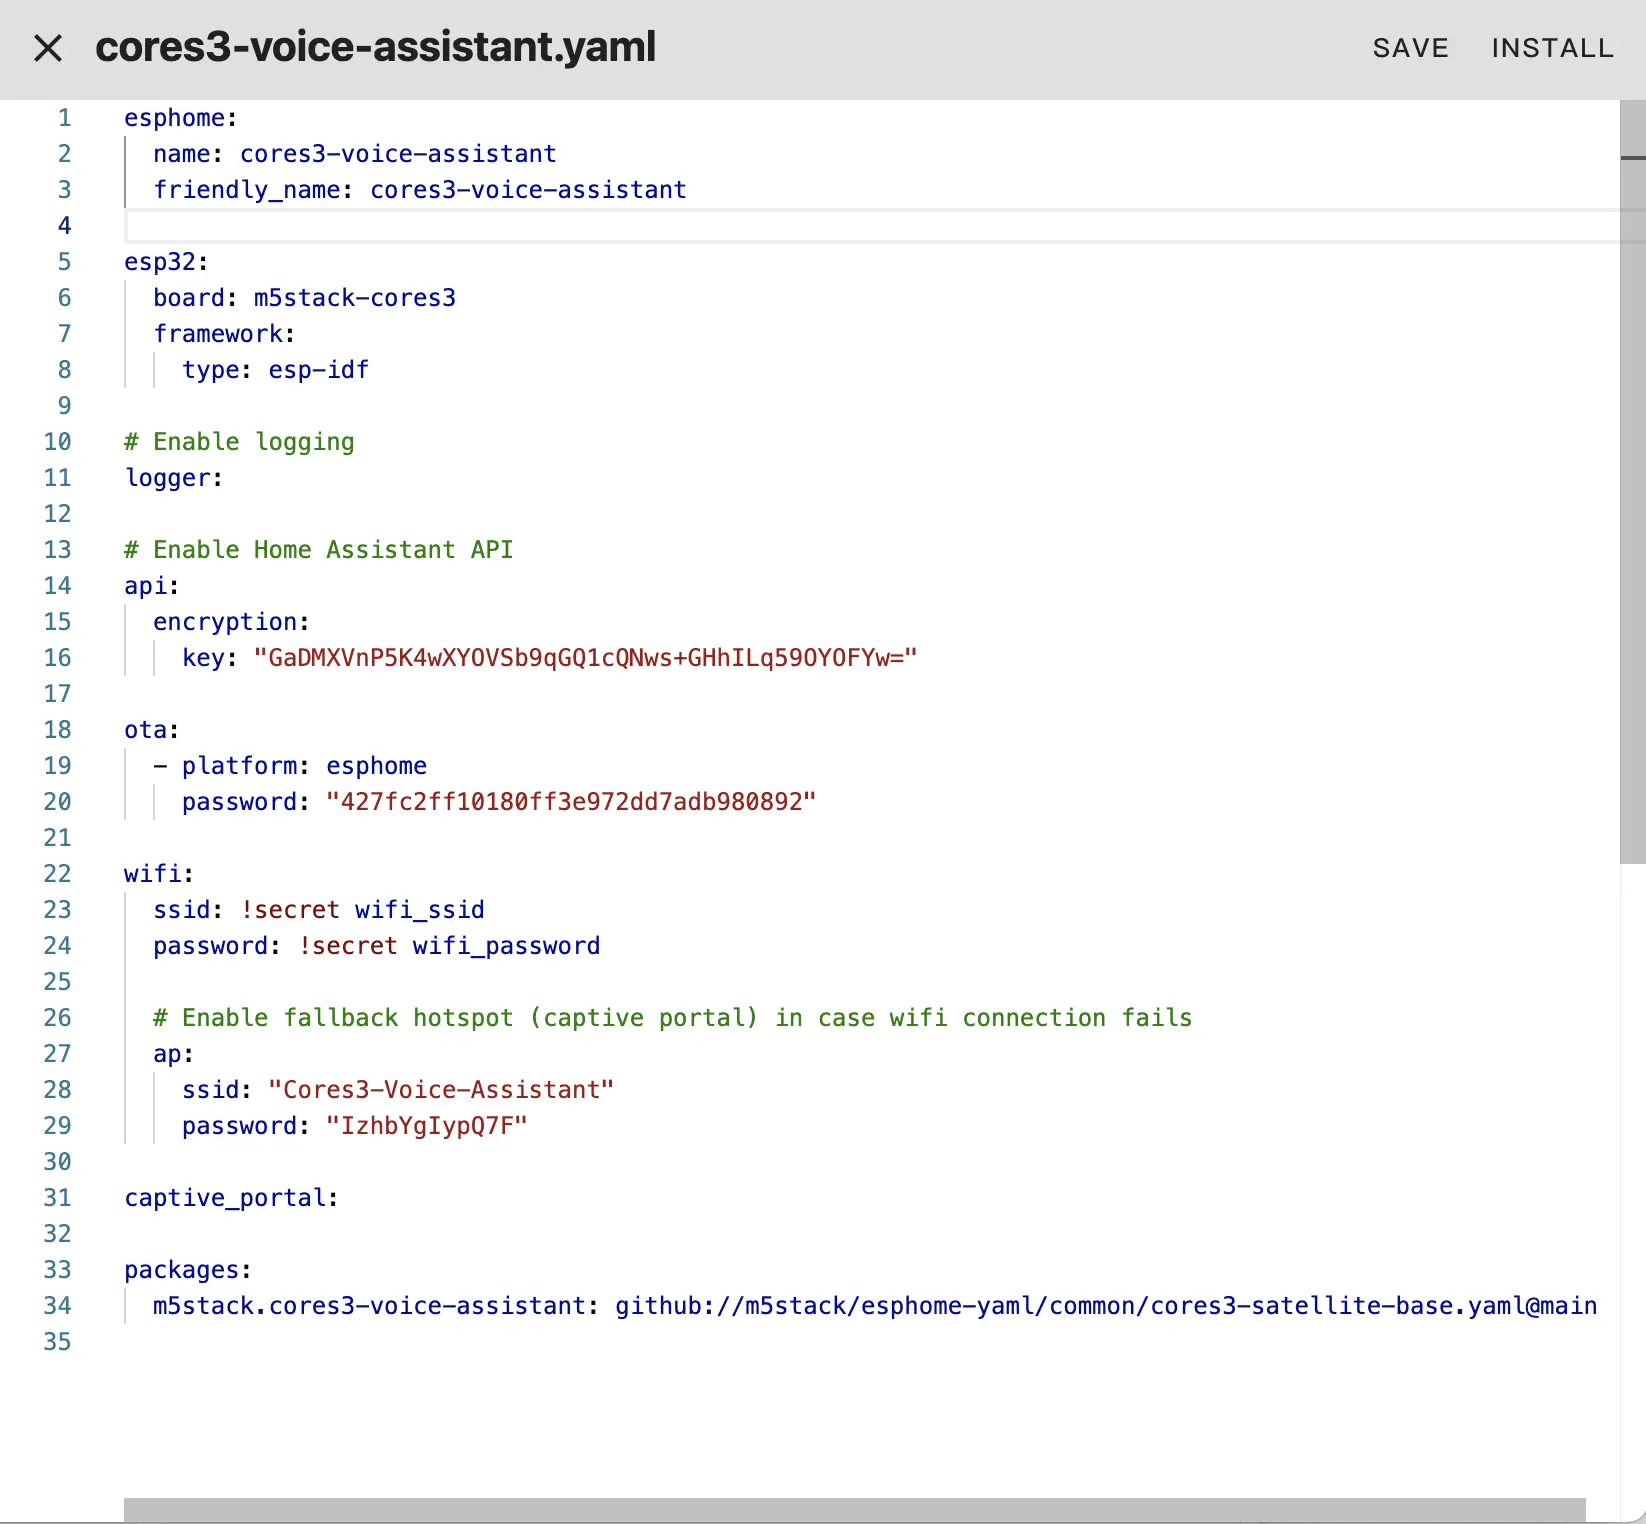
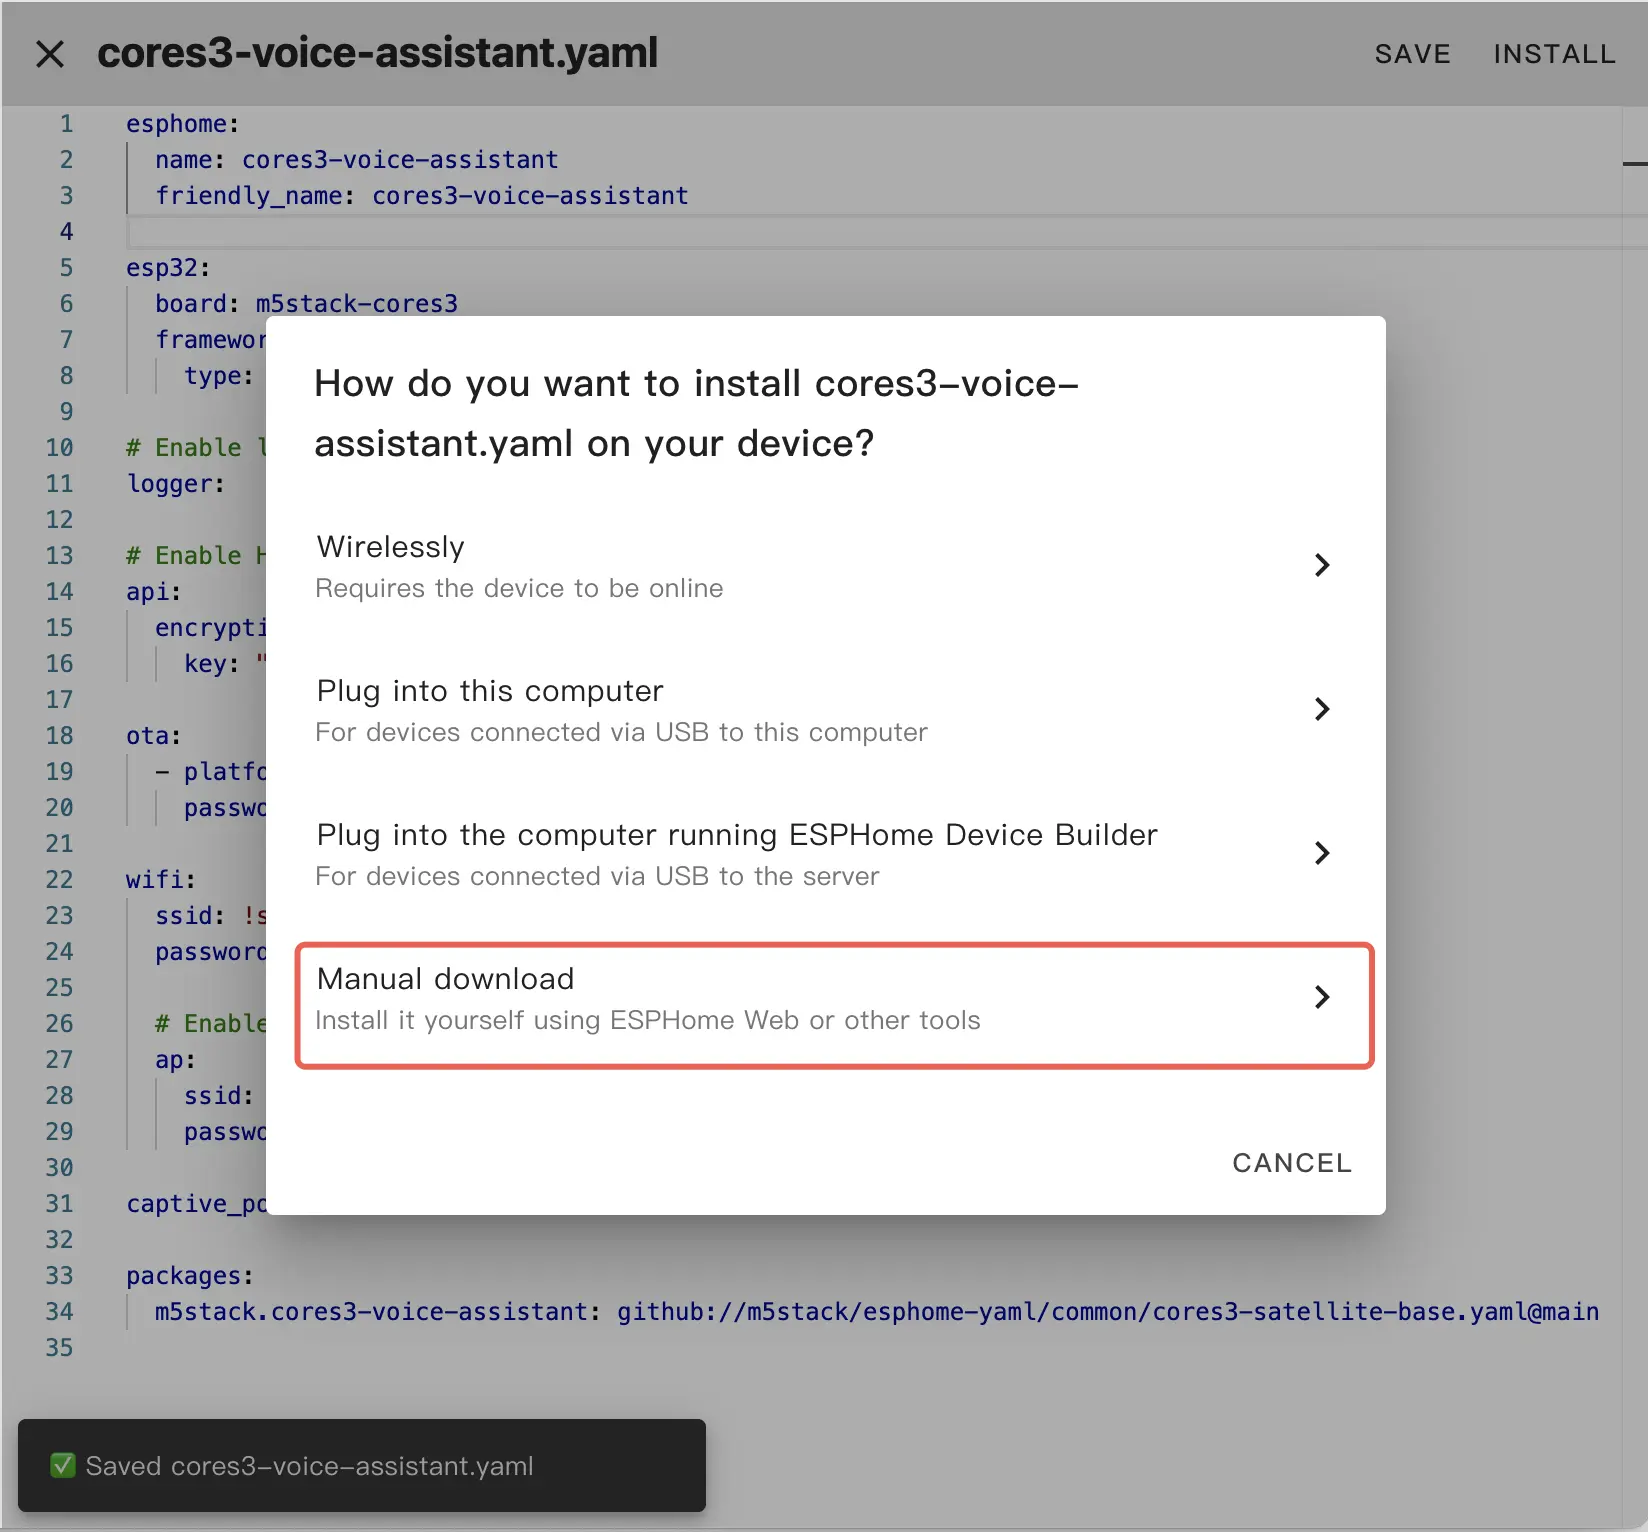
- Then click
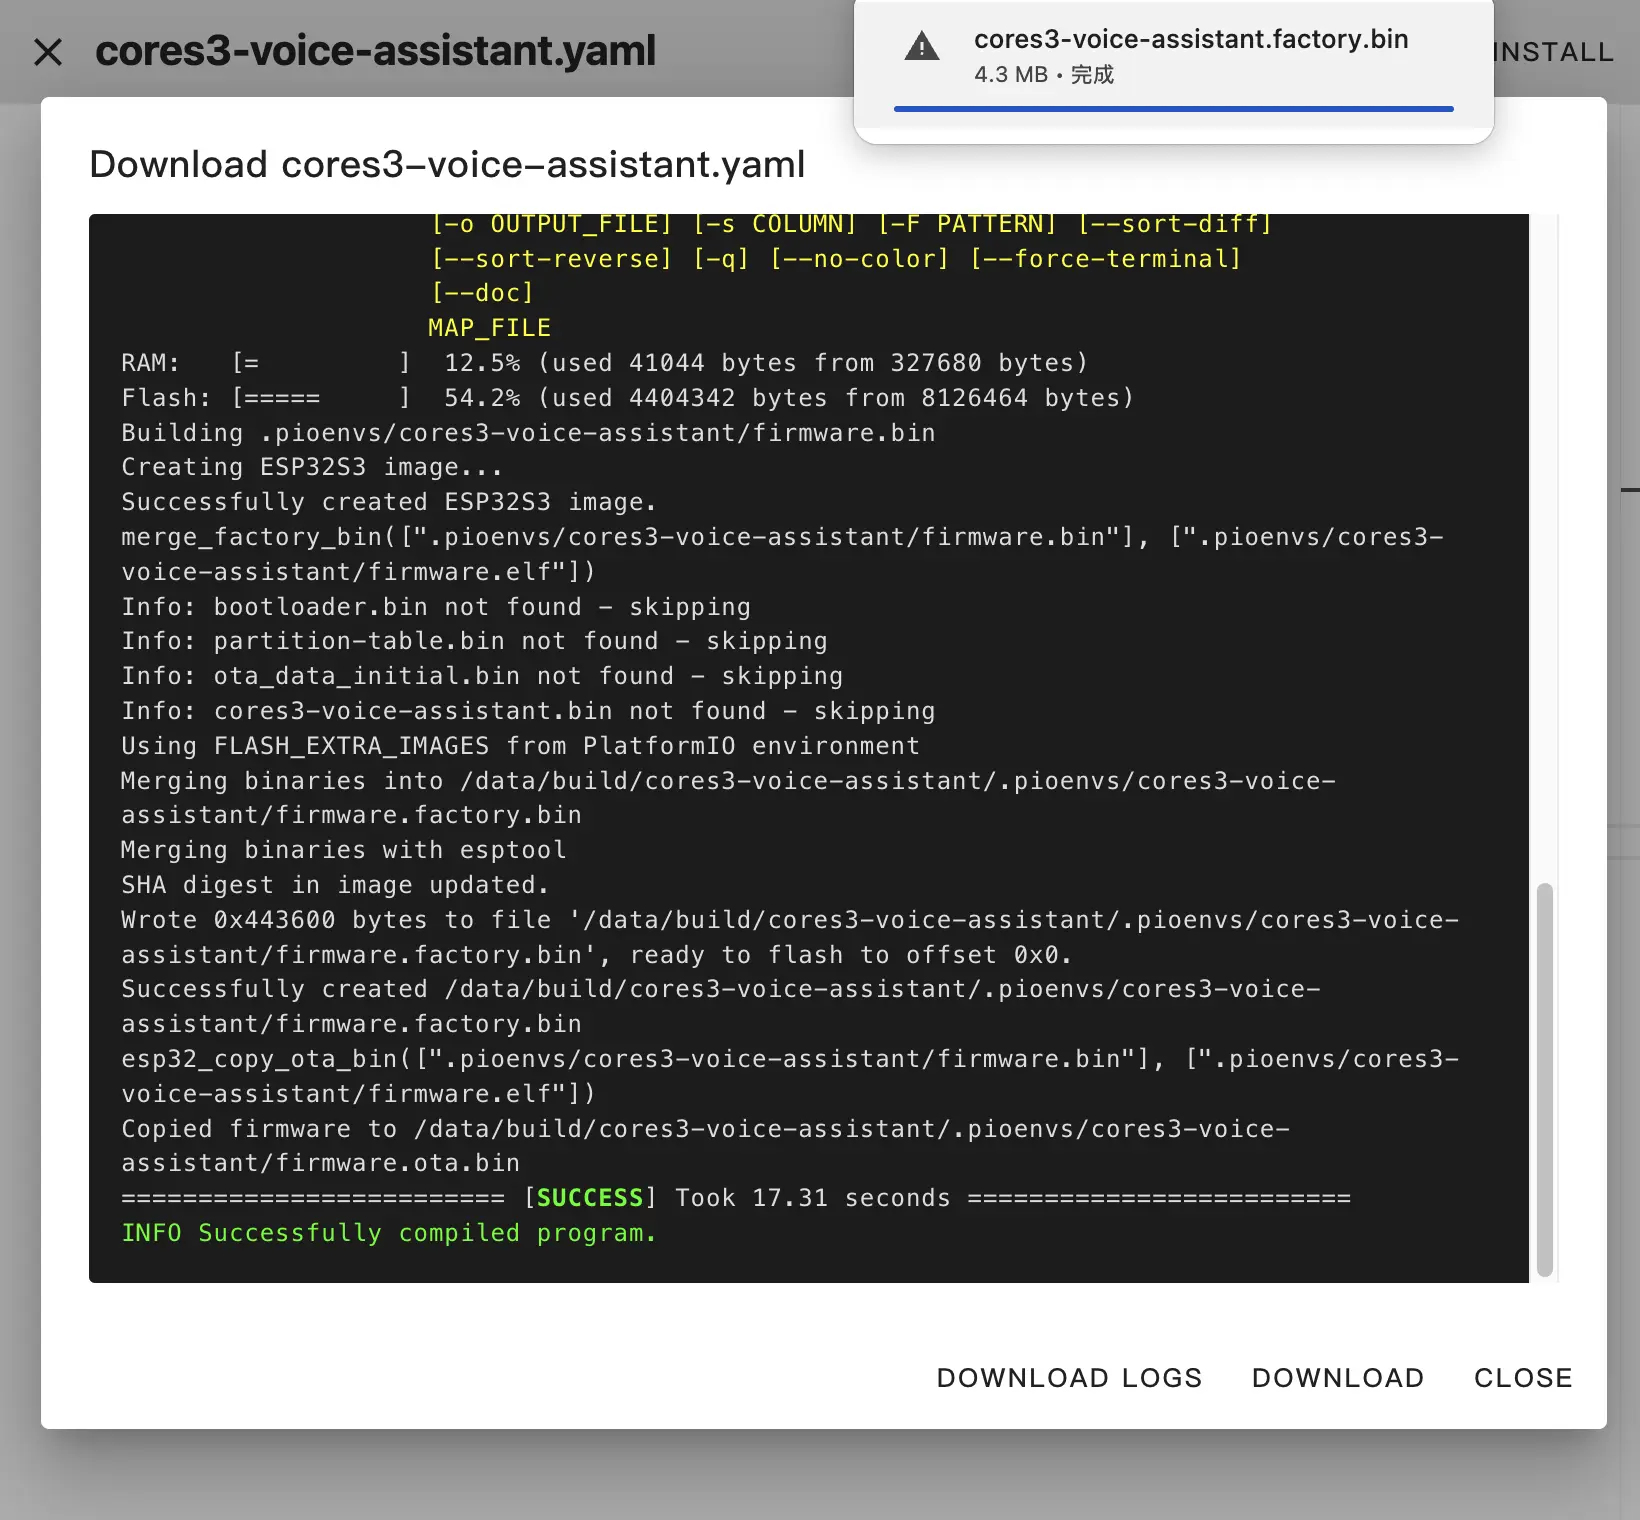
SAVEandINSTALLin the upper right corner. In the pop-up installation method, selectManual download.
Flash Firmware
- After the firmware compilation is completed, click the
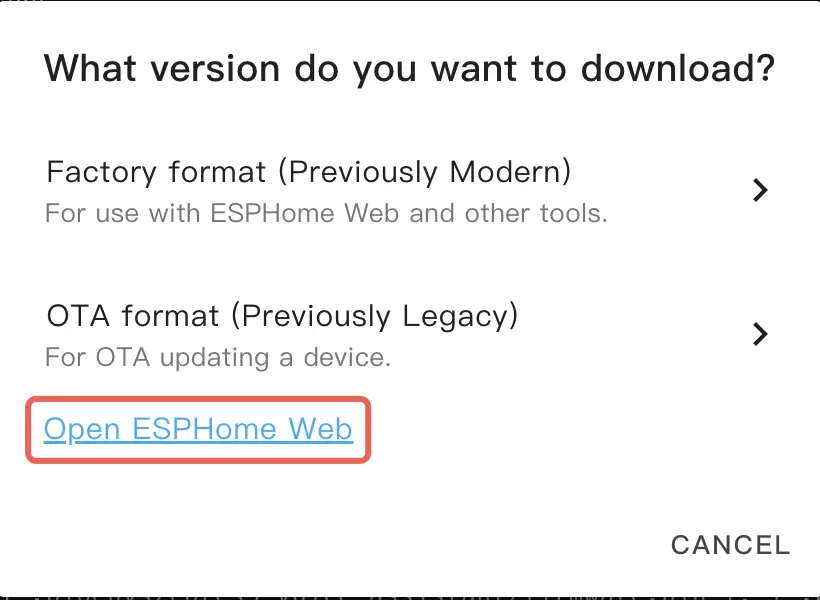
Downloadbutton and select theModern Formatfirmware to download to your local machine.
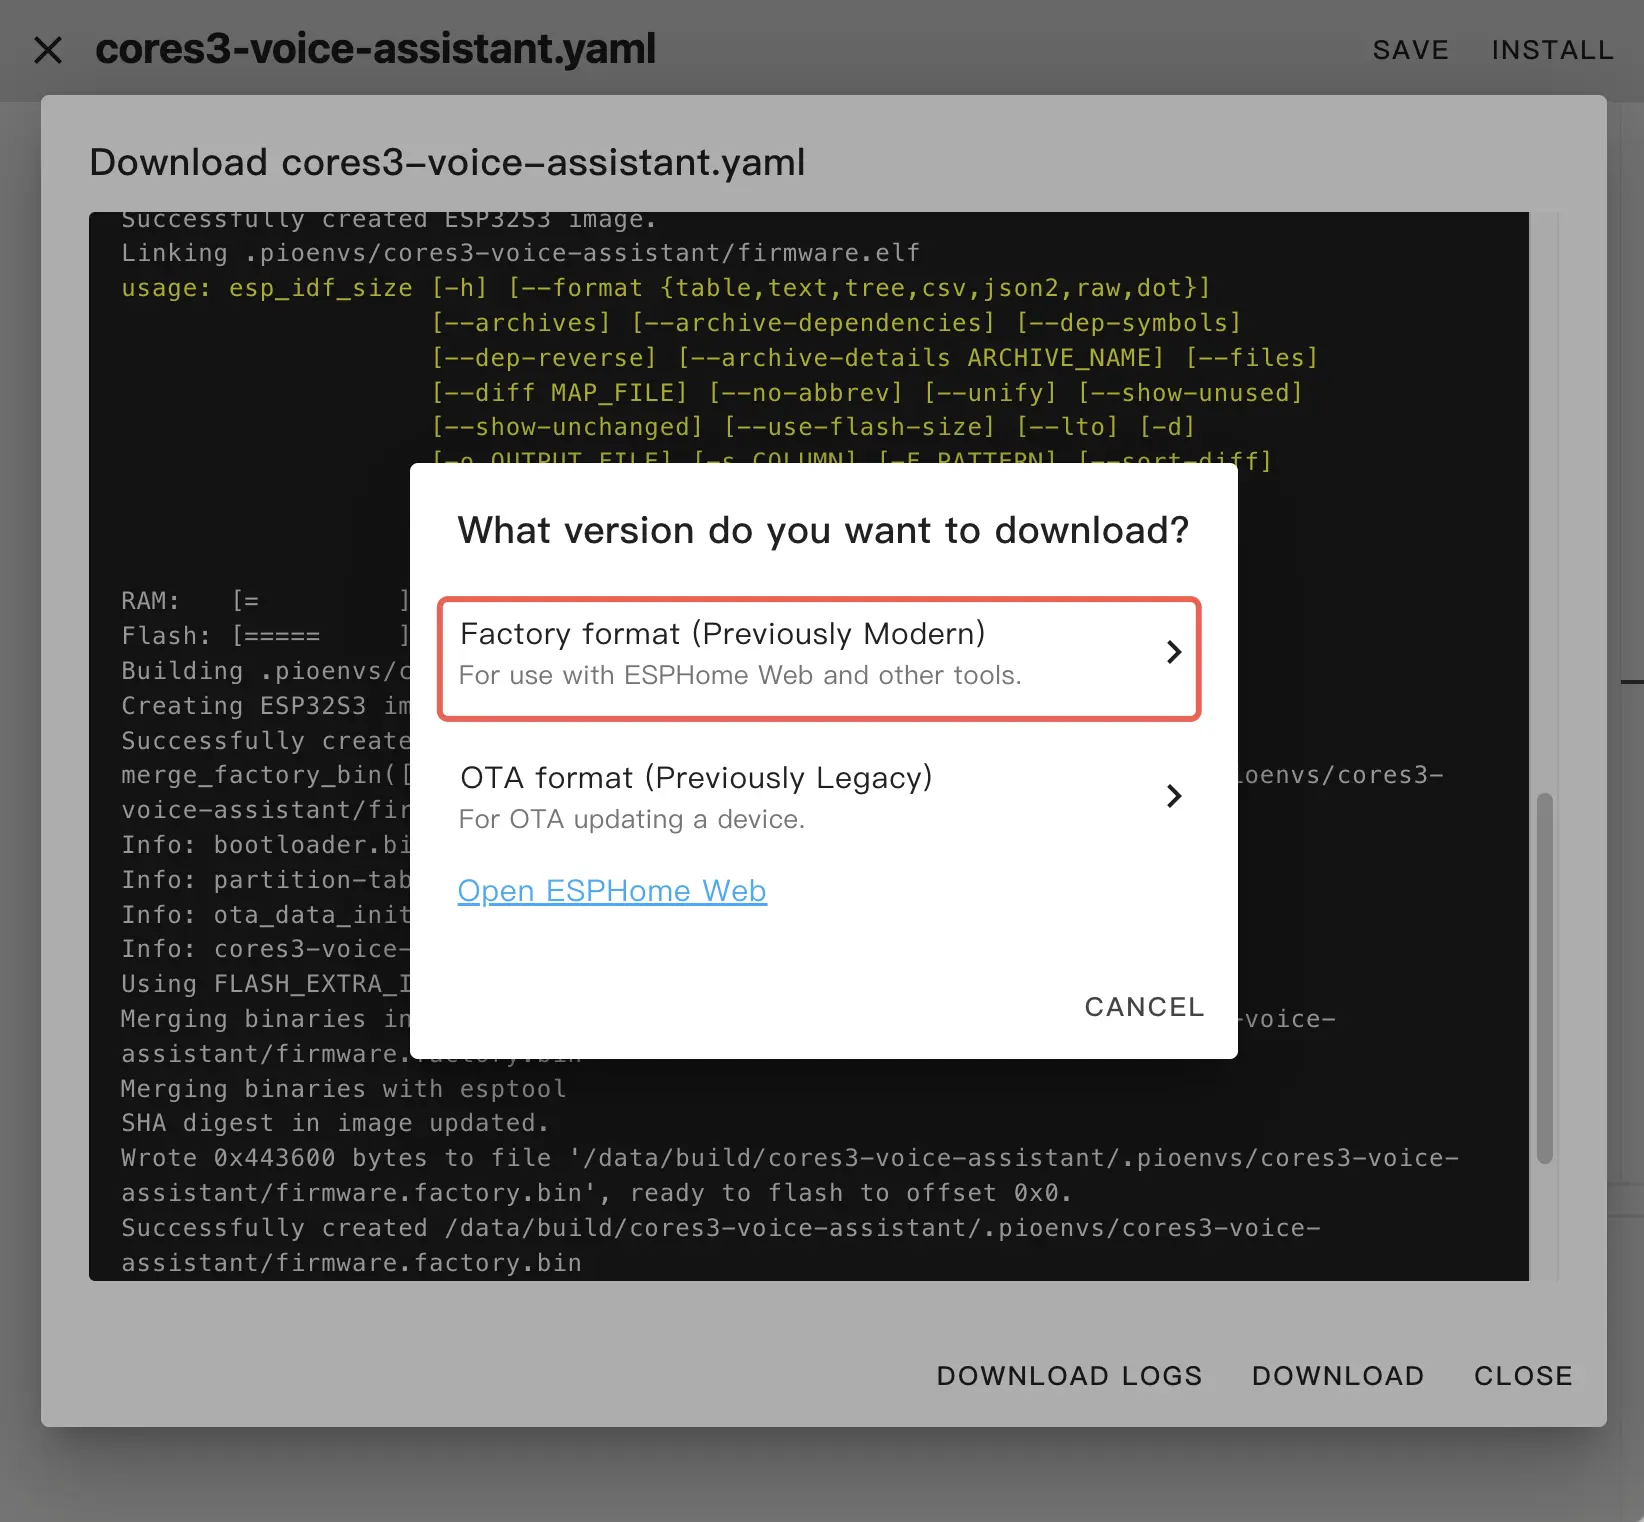
- Click
Open ESPHome Webto use the web burning tool for burning, or use other tools such as esptool for burning. The starting address for firmware burning is 0x00.
- Connect the CoreS3 device to the computer via a USB-C cable. Long press the reset button until the green light comes on and release it to enter download mode.
.gif)
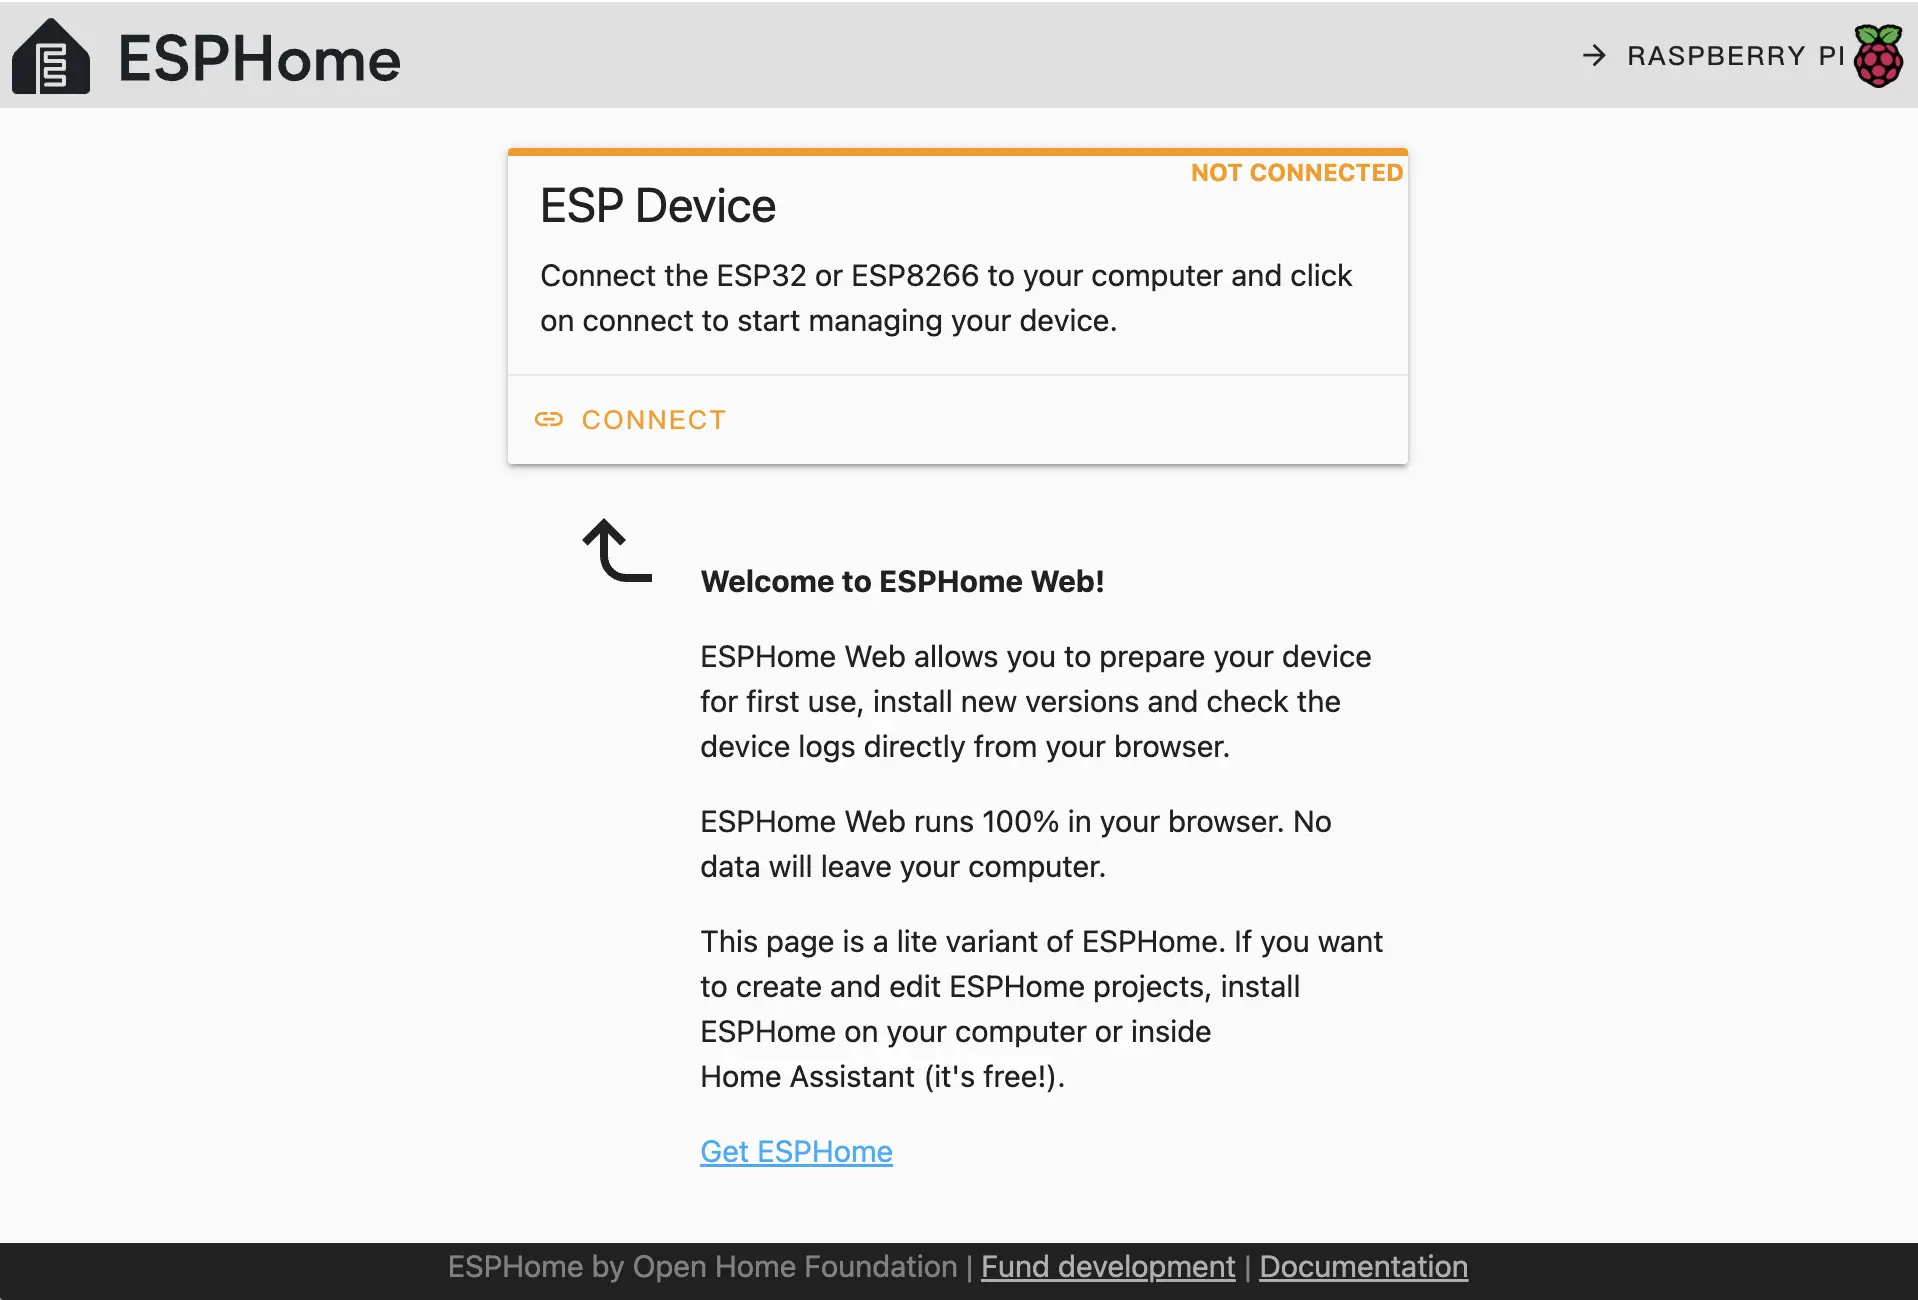
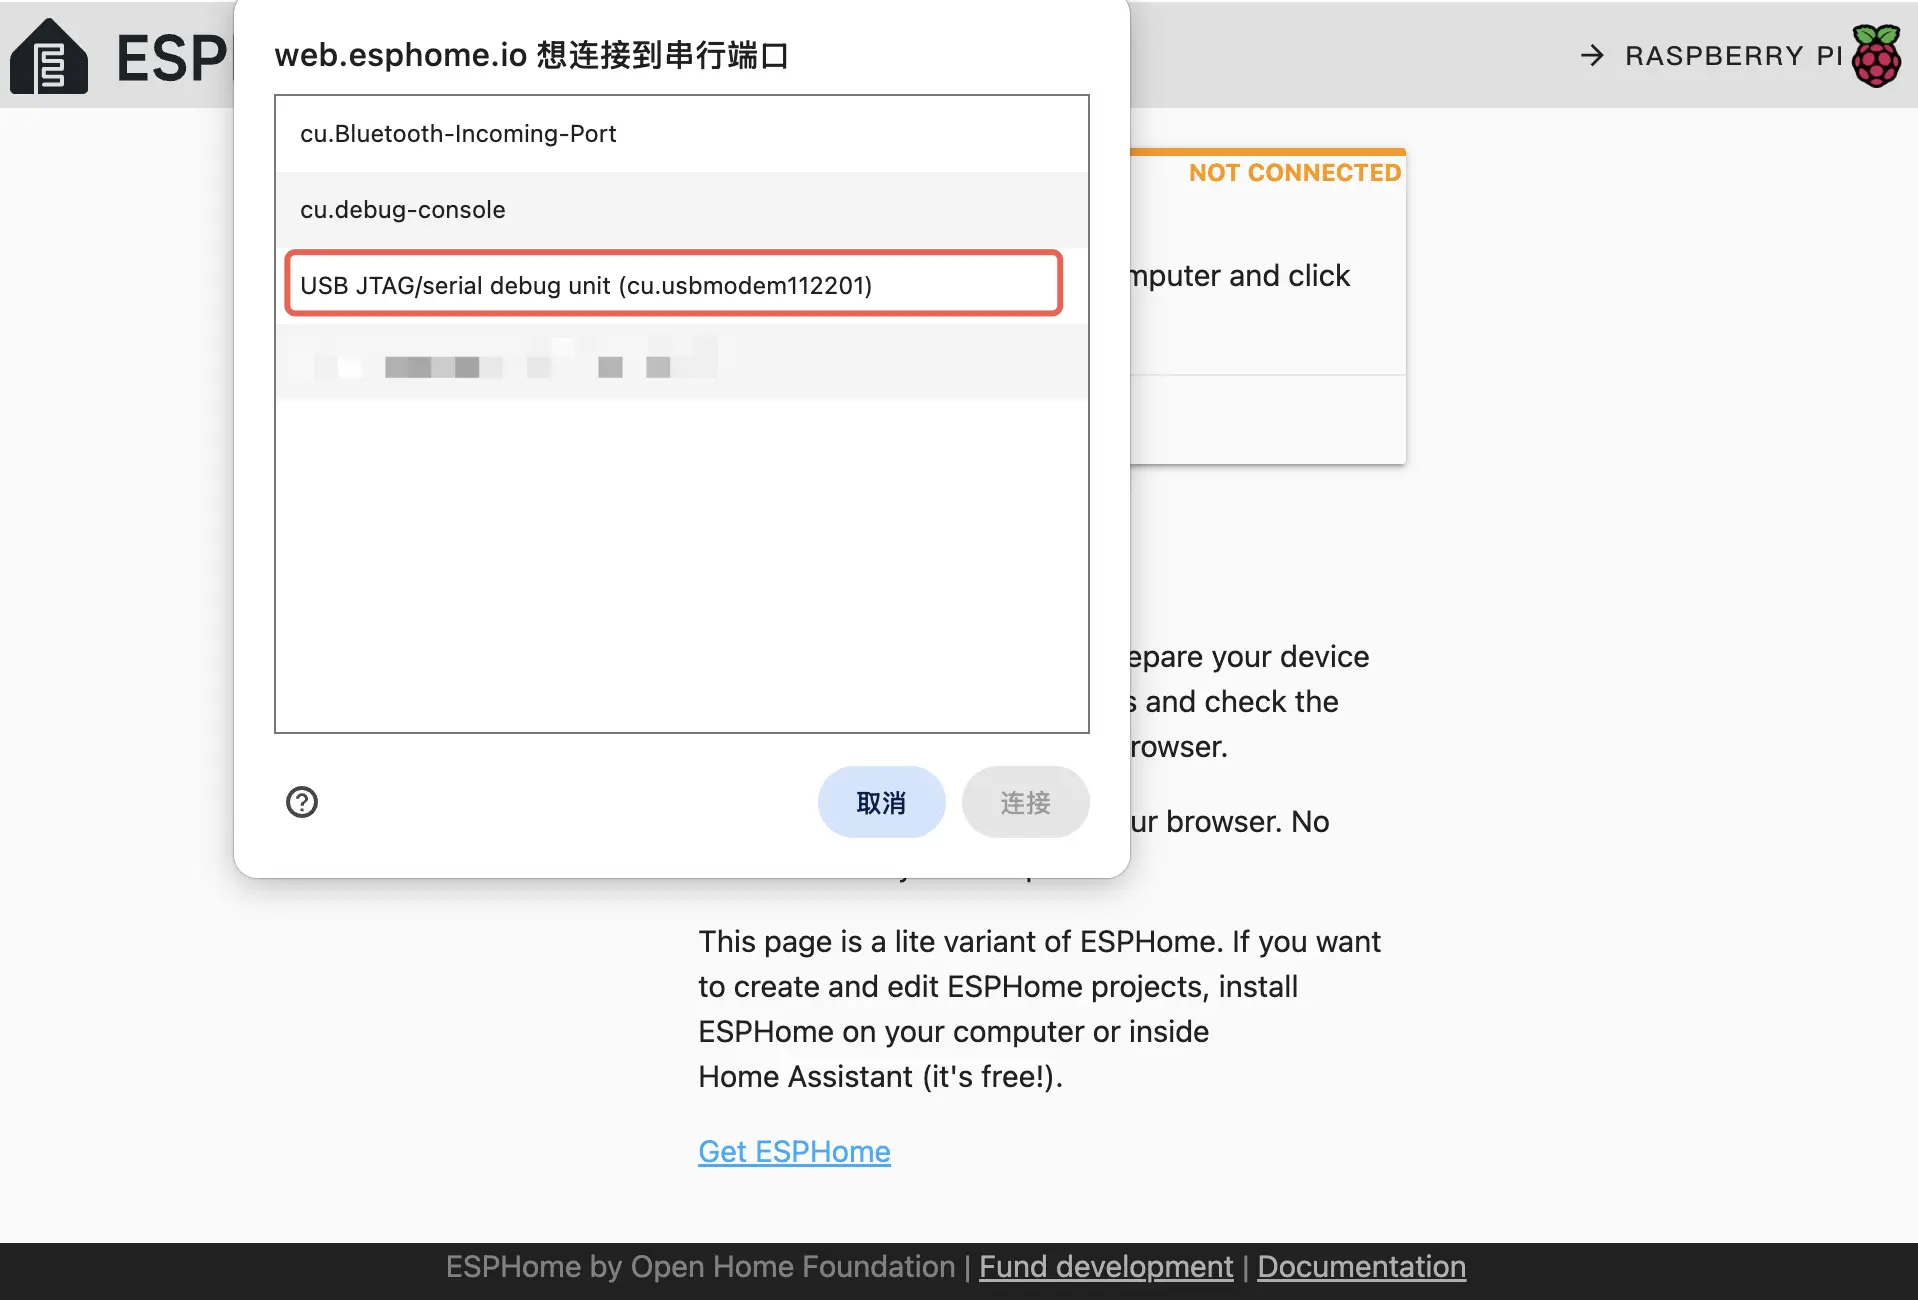
- Click Connect in Open ESPHome Web to connect the device and select the corresponding device port.
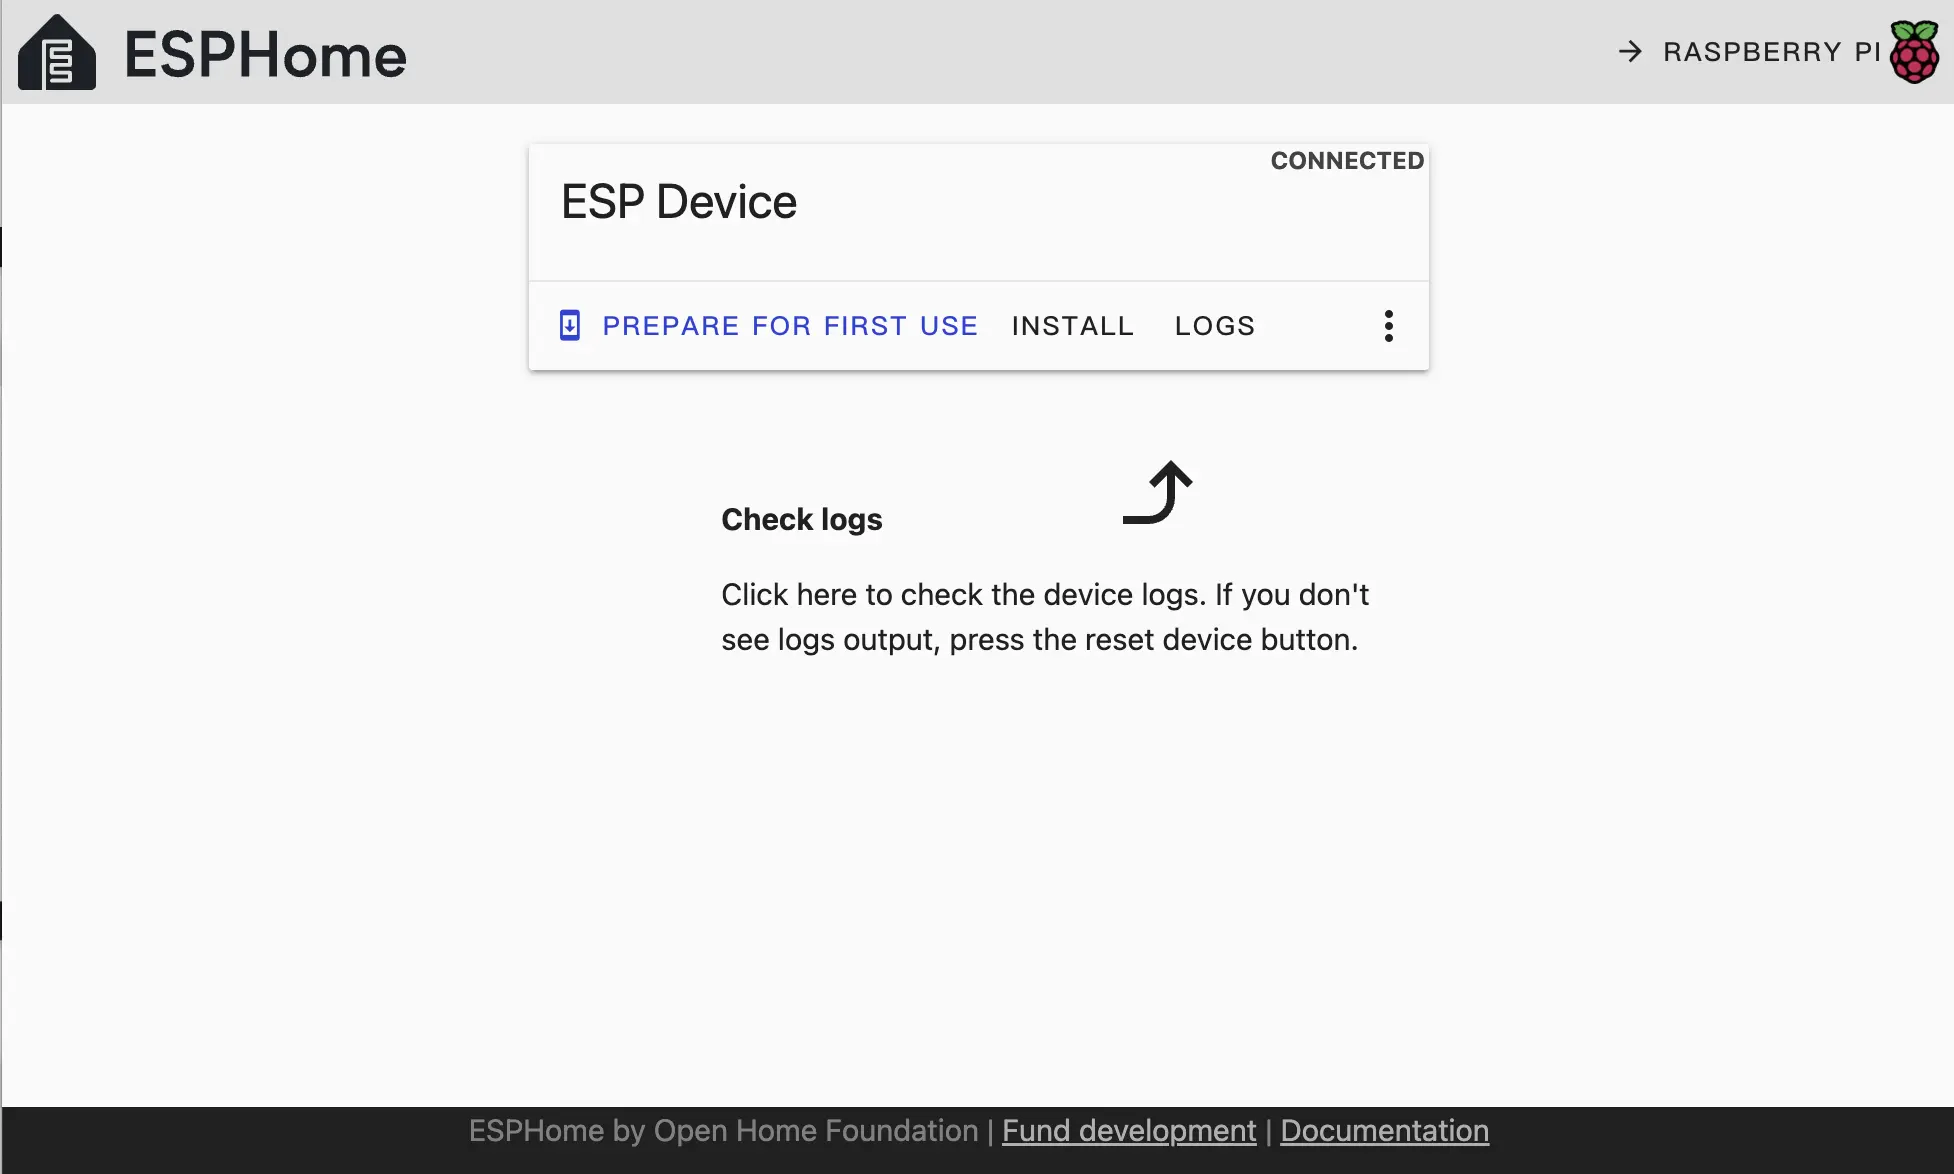
- Click
INSTALLand select the*.binfile compiled in the previous steps.
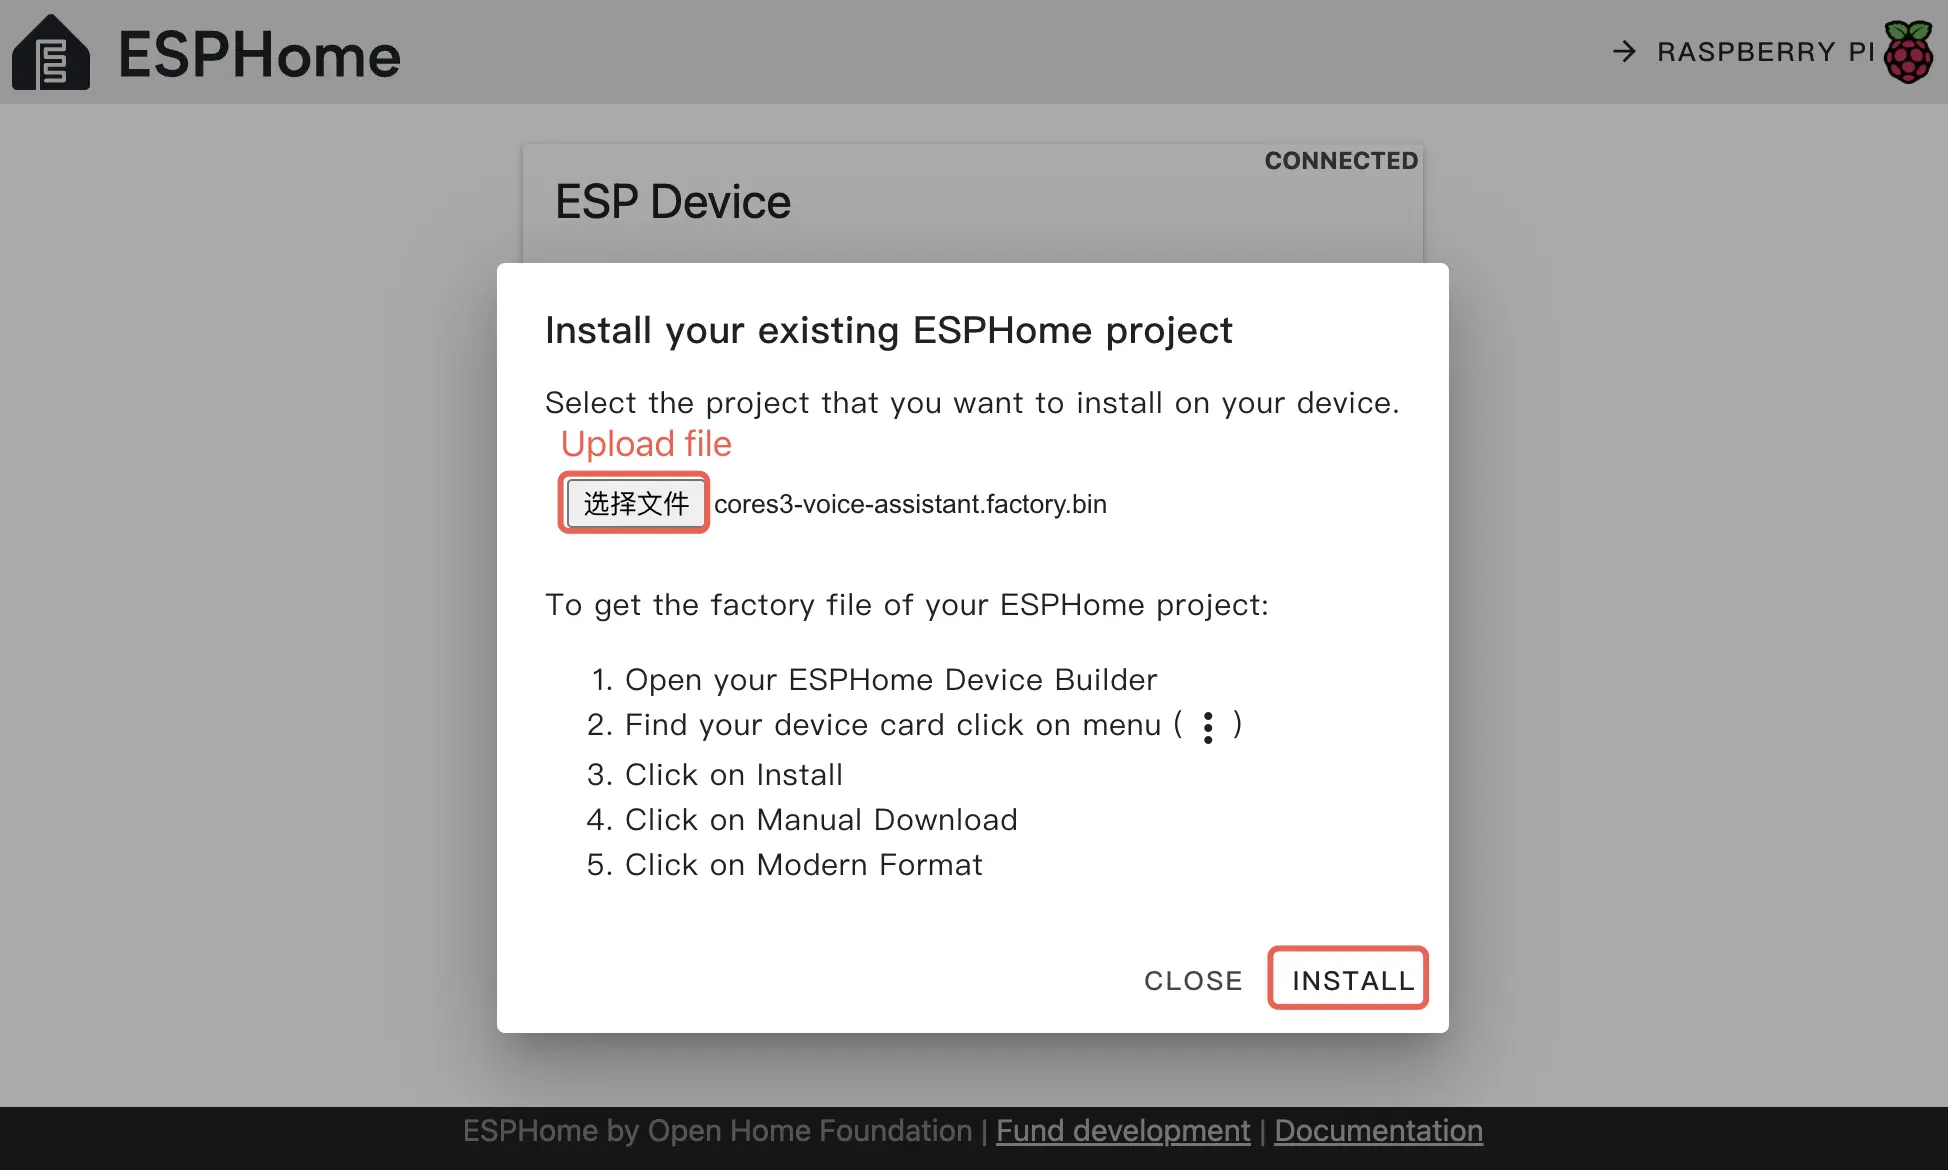
- Click the
INSTALLbutton again to burn.
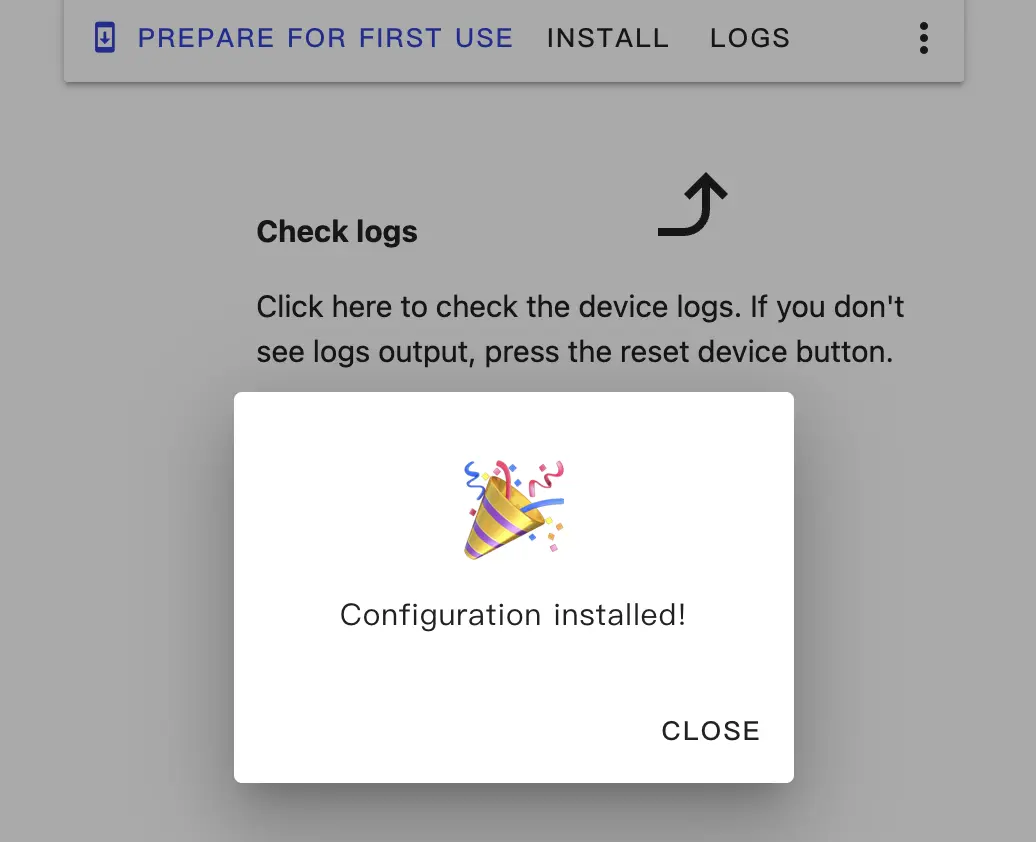
- Wait for the burning to complete.
4. Getting Started
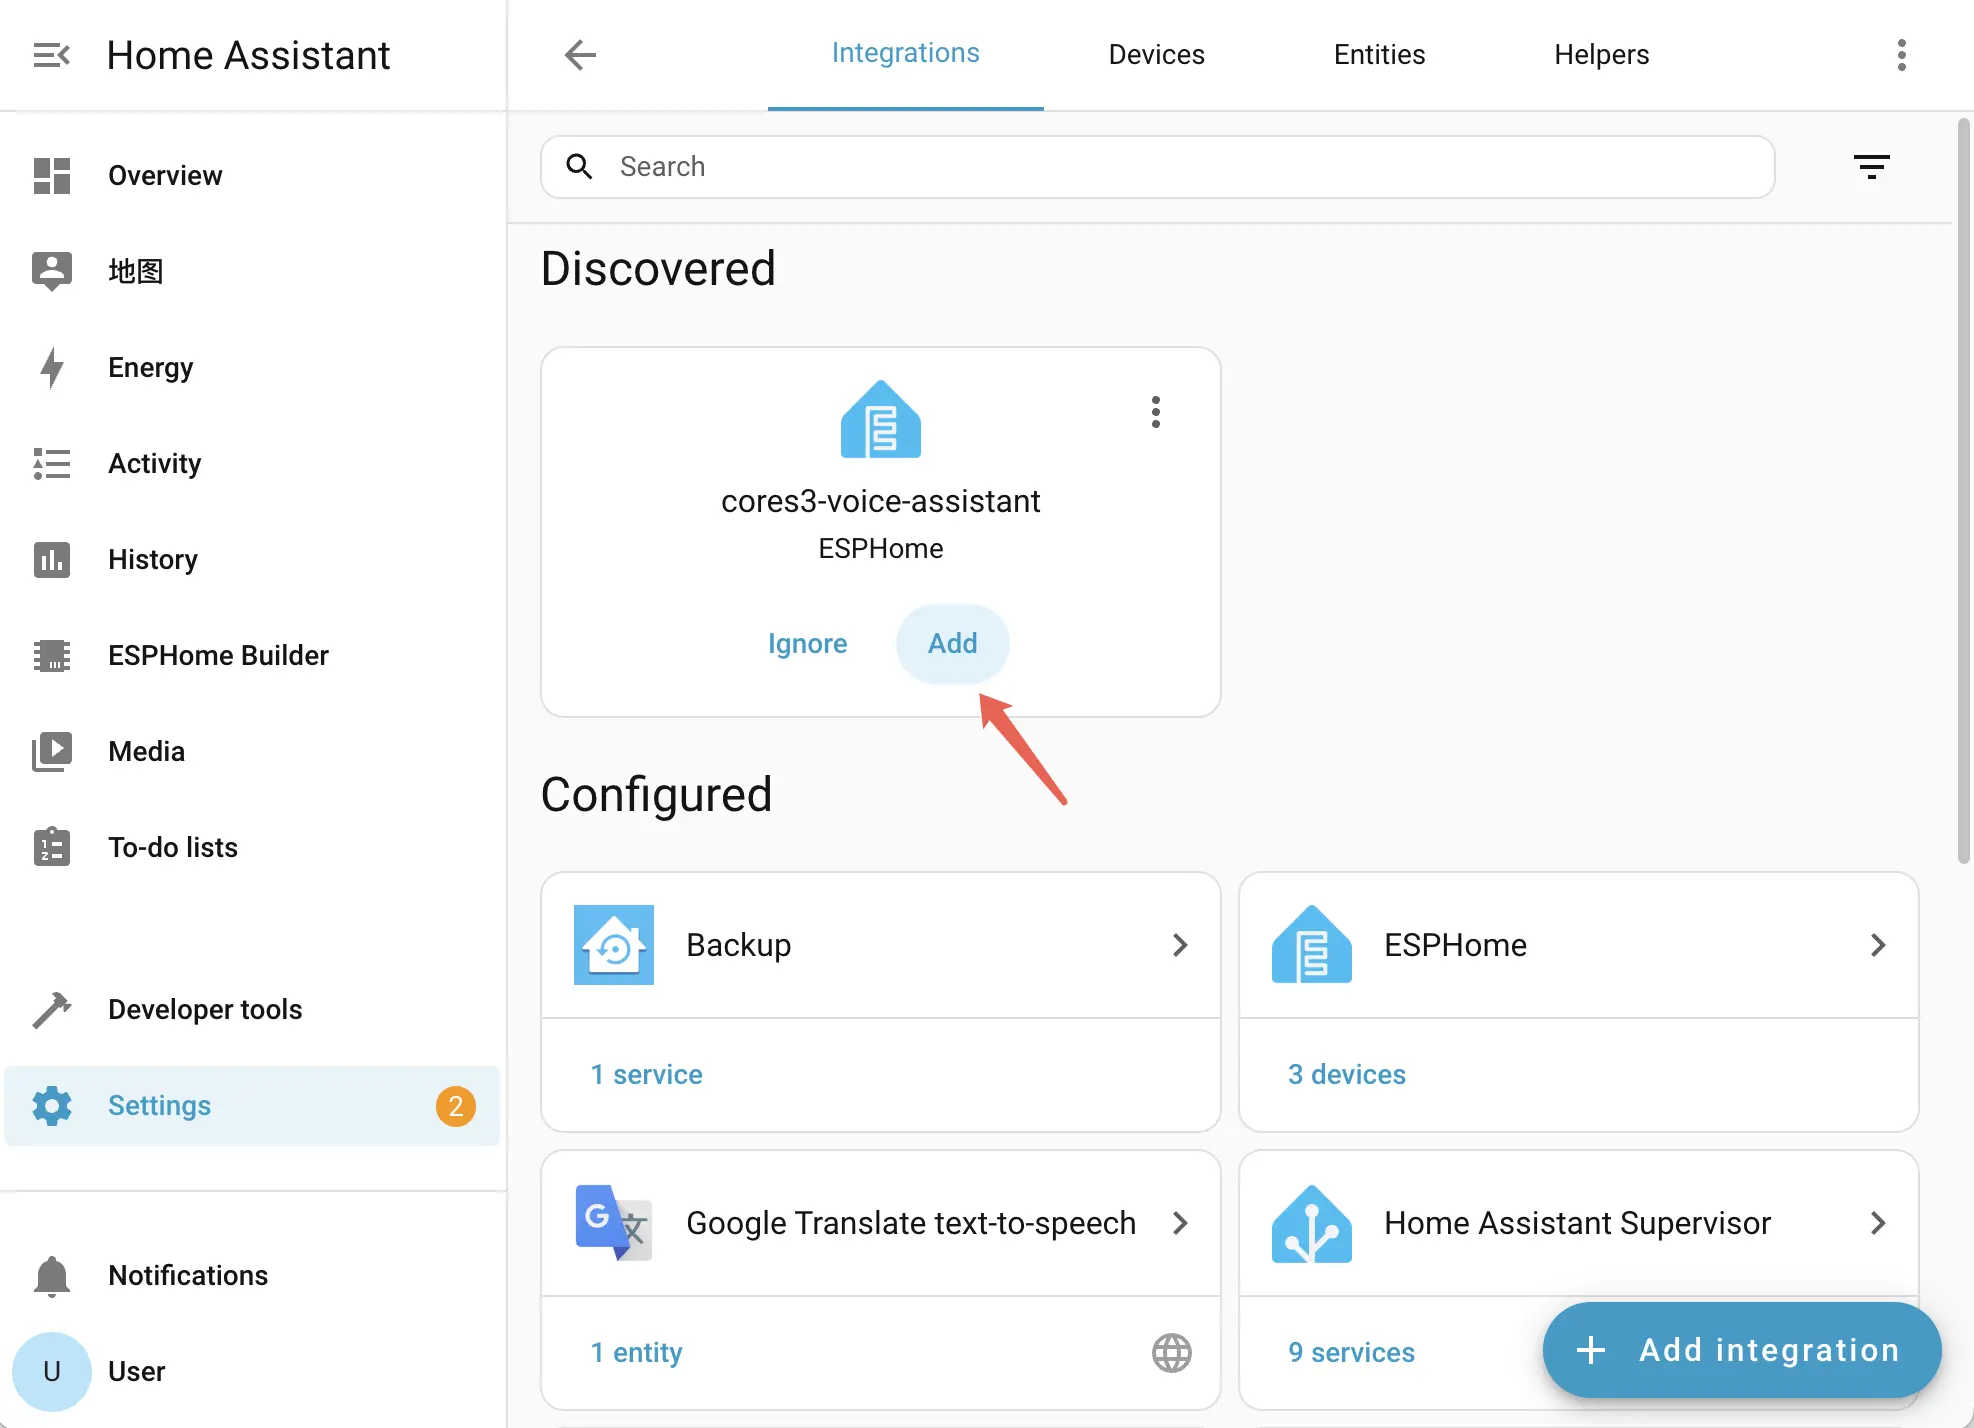
- After firmware burning is completed, the device will automatically connect to Wi-Fi when turned on. The Home Assistant service in the same local area network will prompt that a new device has been discovered. Select the new device in Notifications and click
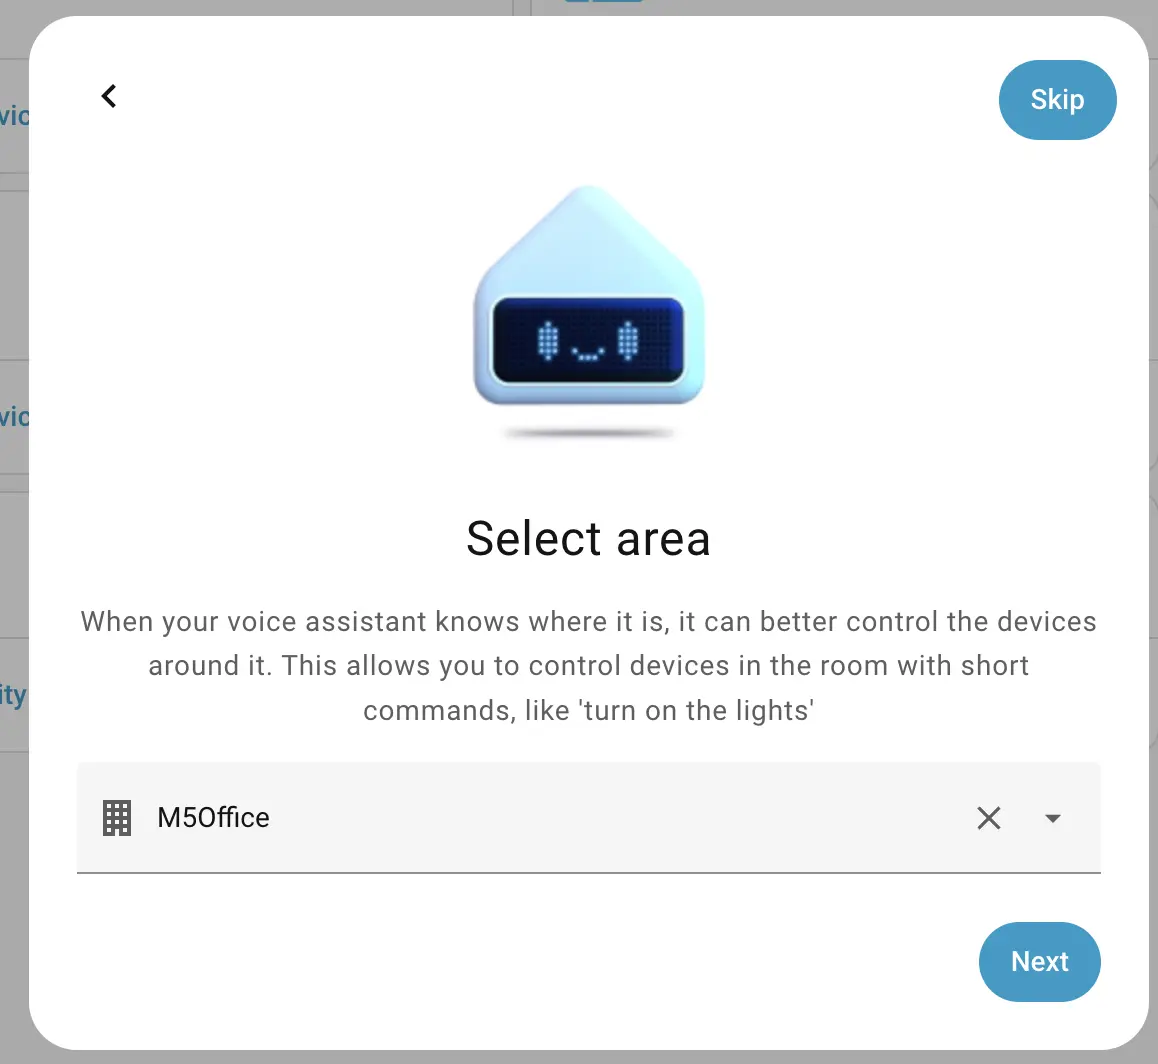
Check it out->CONFIGURE, and follow the pop-up steps to add the device to the specified area to complete the configuration. If you do not receive a new device prompt message, clickSettings->Device & servicesto view the device status.

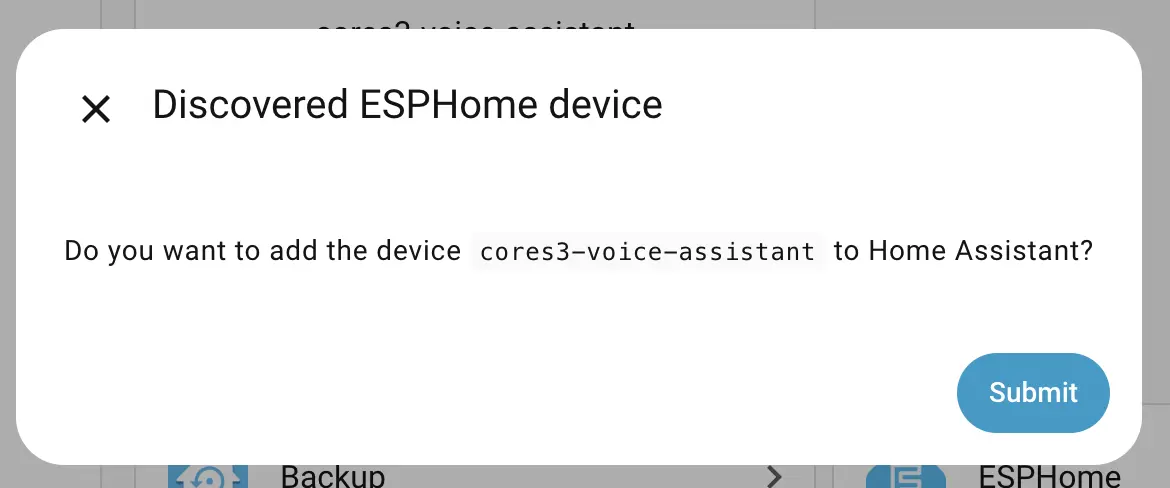
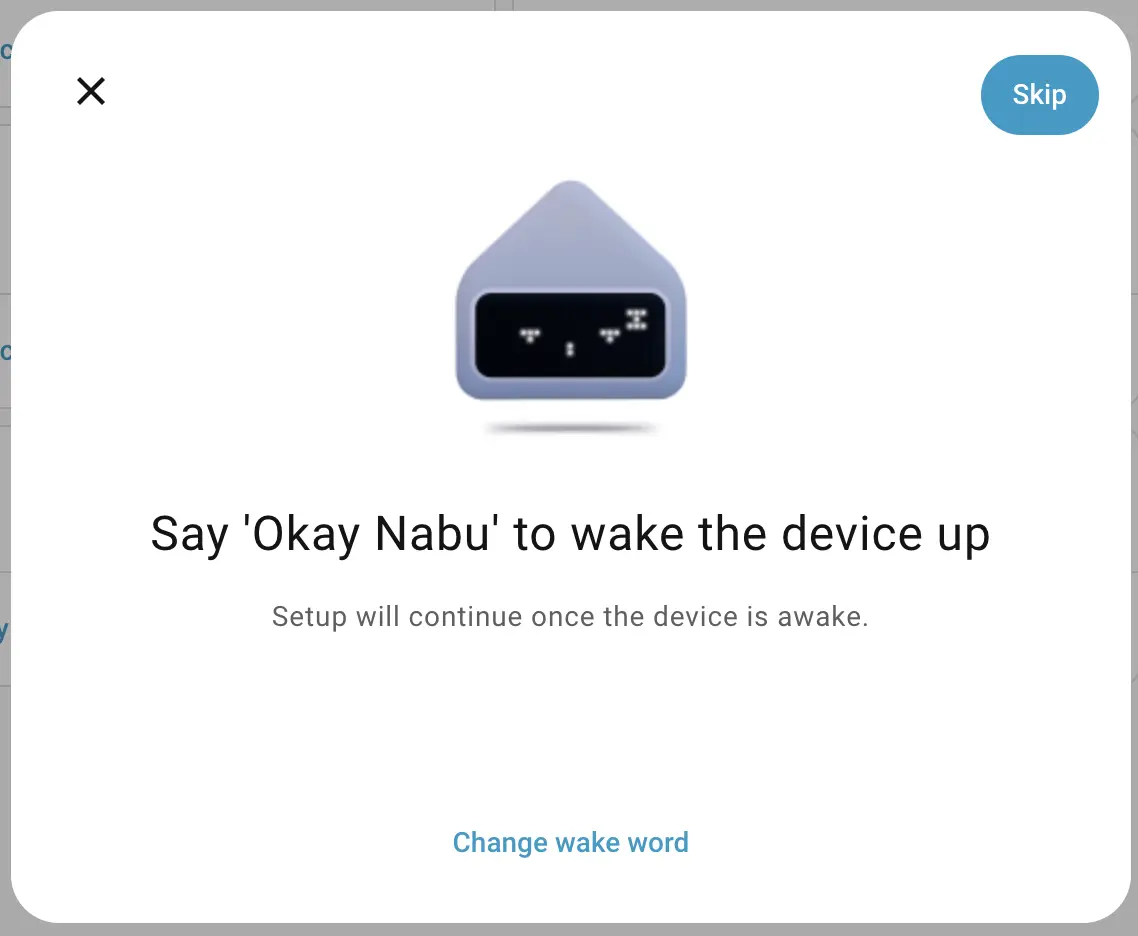
- Next, you can continue to set up the Voice Assistant, or skip this step and set it up later.
Test Wake Word.
Select Area.
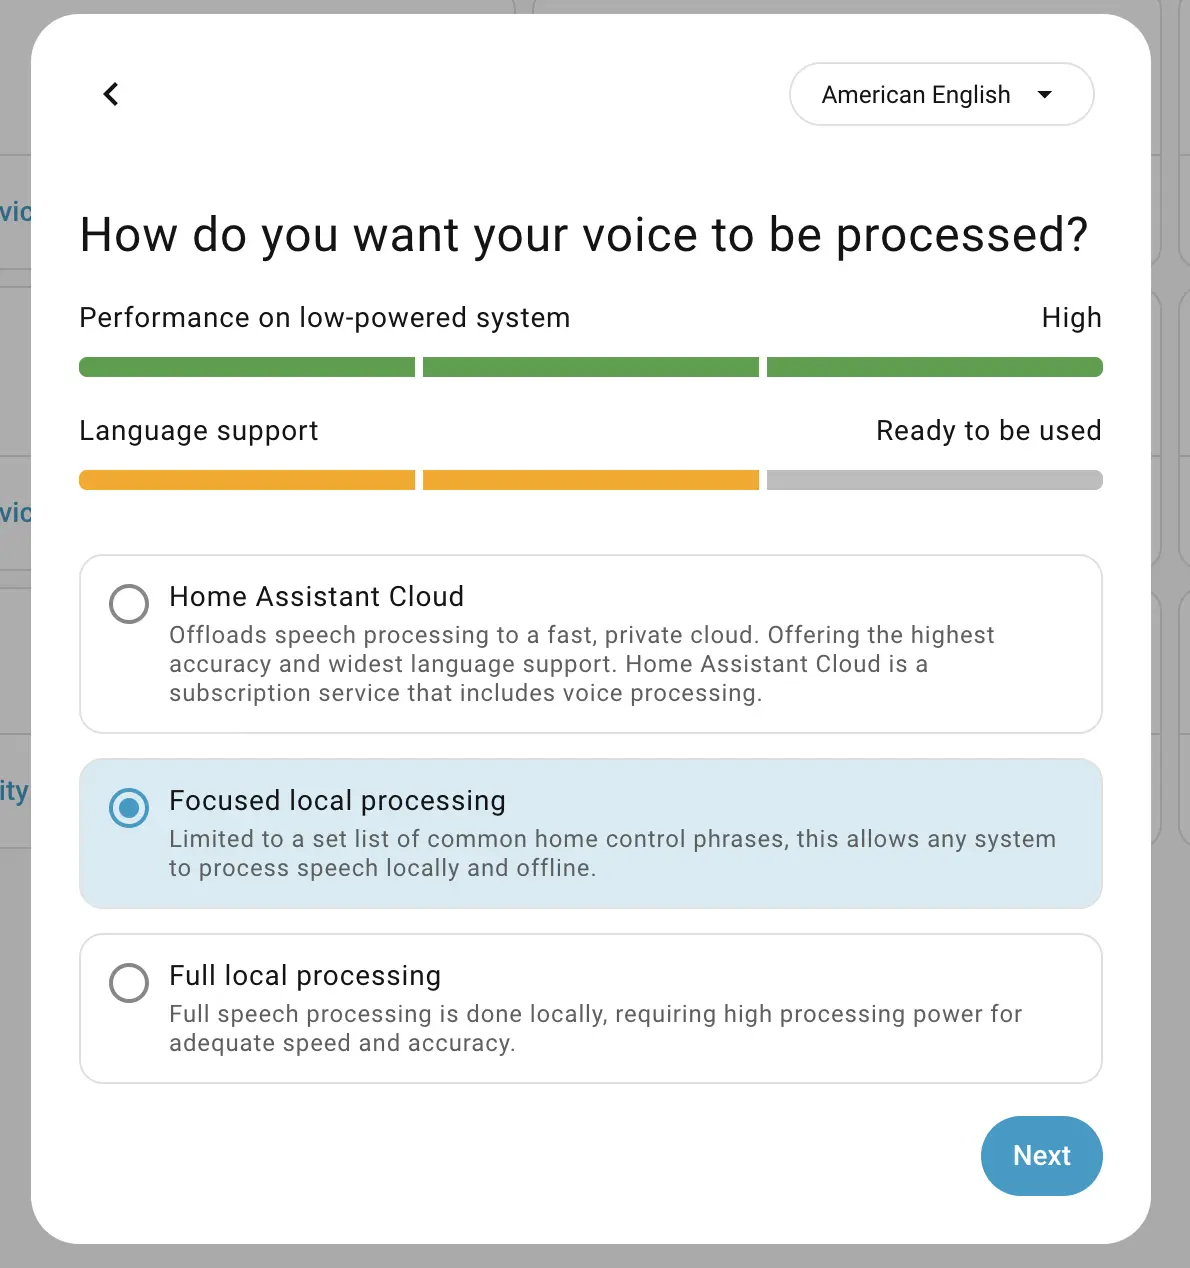
Select Pipeline.
Complete Setup.
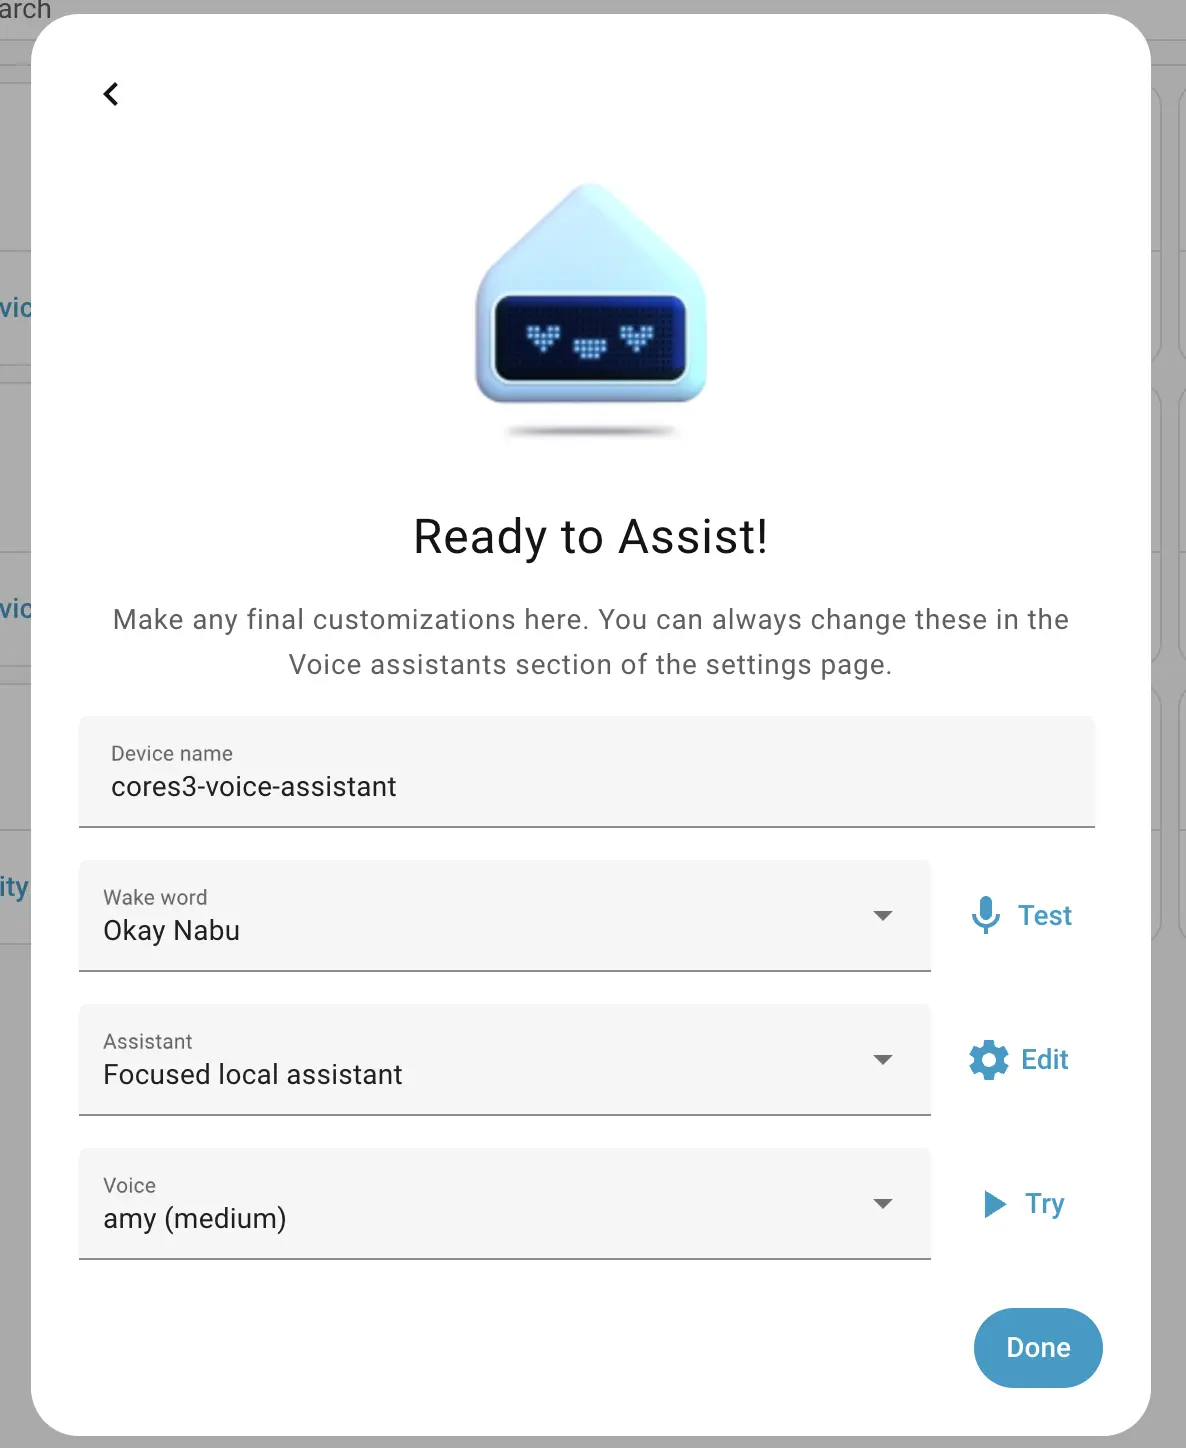
- After completing the device addition and configuring the Home Assistant Cloud and Assist pipeline plug-ins in the preparation steps, you can use the wake word "ok nabu" to wake up the voice assistant.
5. Video
Page Tools