


CM4Stack Image Usage Tutorial
1.Preparatory work
Hardware
CM4Stack and USB cable.

Soft Ware
1.Download the official CM4Stack custom image . After downloading, unzip the image file and store it in a local directory.
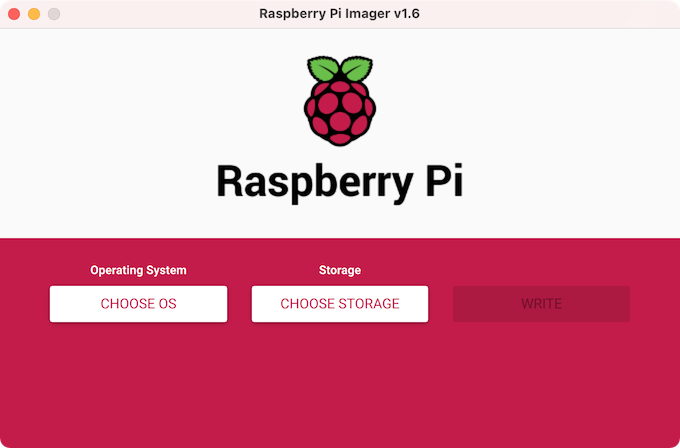
2.Before configuring CM4STACK, you need to download the official burning tool Raspberry Pi Imager. It can be downloaded from the Raspberry Pi official website at https://www.raspberrypi.org/software/ .
3.Download the SD card formatting tool, either the official SDFormatter or the SDFormatter linked to M5, to format and clean up the disk.
2.Burn the CM4Stack Raspberry PI image
Installation Steps for Windows
Step 1: Press the BOOT button on the device and connect it to the computer using a USB cable. Note: Do not connect the power supply while pressing the BOOT button.
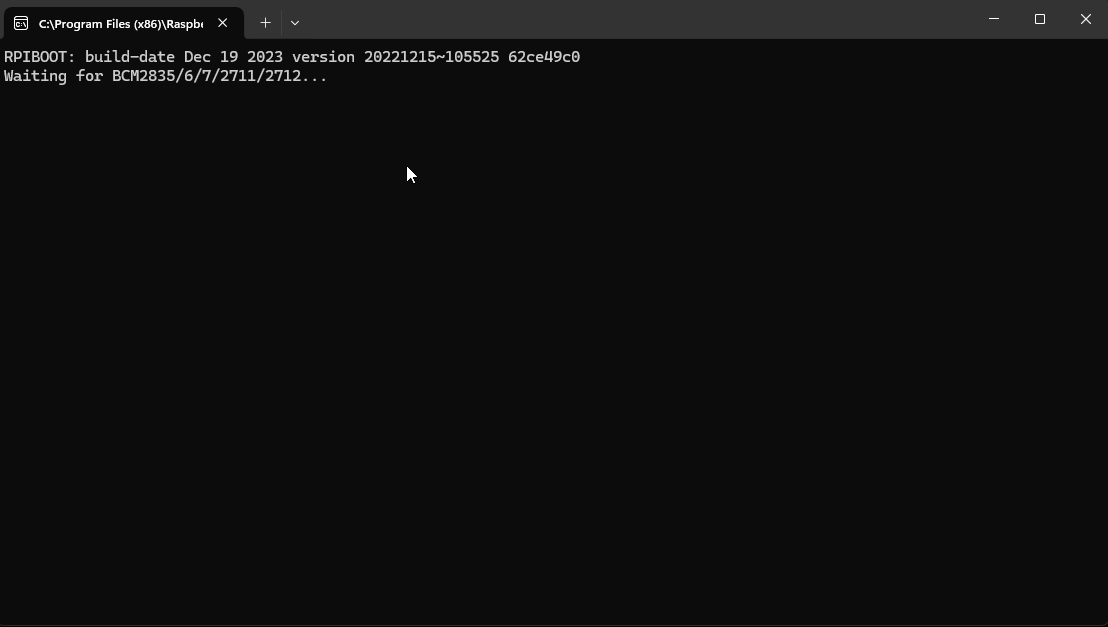
Step 2: Find the already installed rpiboot.exe program on the computer and double-click to run it. Afterward, a disk device will appear on the computer. As shown in the following figure:
Some browsers in the rpiboot.exe file may prompt that rpiboot_setup.exe is not usually downloaded and you need this file to be reported as safe to download. If you click the rpiboot_setup.exe file to check to the CM4Stack, you can also re-unplug the USB cable and hold down the BOOT to connect the device.
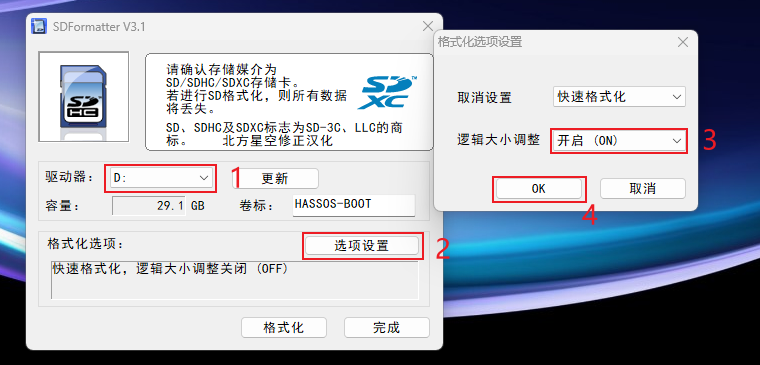
Step 3: Open the SDFormatter software, select the drive, click on the options settings, set the logical size adjustment to ON, click OK, and then proceed with the formatting operation. If the first formatting attempt is unsuccessful, repeat the operation and reformat.
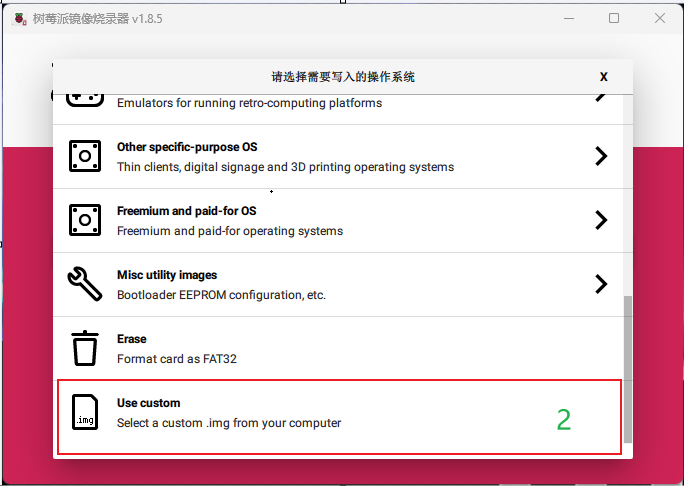
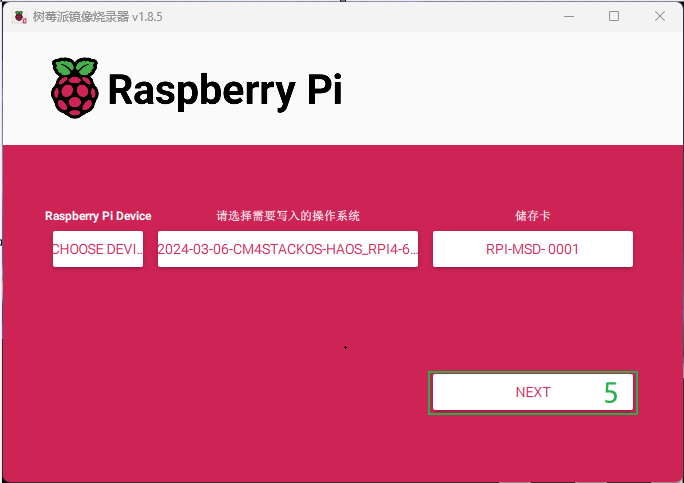
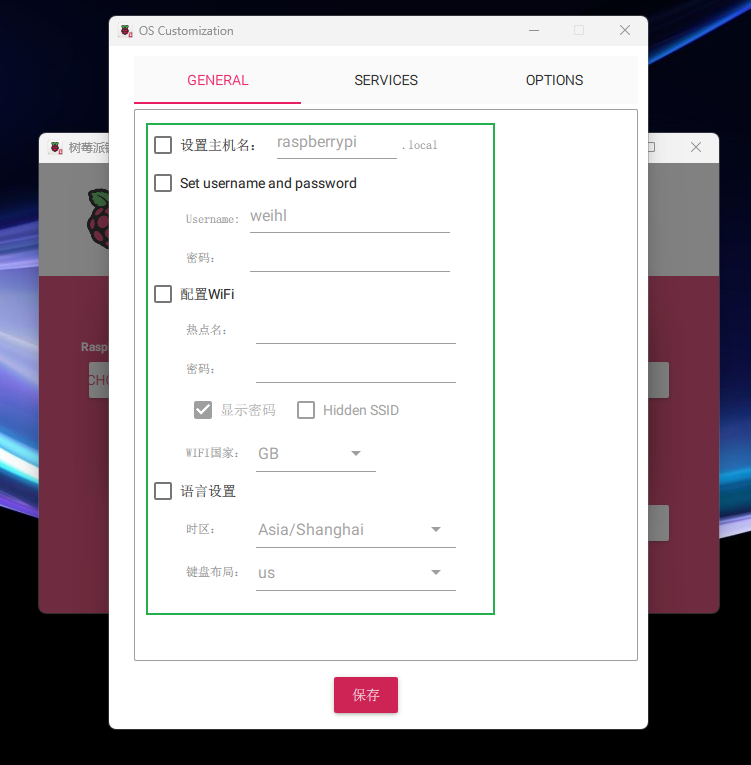
Step 4: Open the official burning software Raspberry Pi Imager, click on Custom System in the system selection, select the obtained image, then select the disk, click NEXT, configure the device information, click Yes, and proceed with the burning. Wait patiently for the burning to complete.


Step 5: Power on the device again to enter the system.
Installation Steps for Linux
Step 1: Press the BOOT button on the device and connect it to the computer using a USB cable.
Step 2: Execute the rpiboot program in rpiboot, and a disk device will appear on the computer.
sudo ./rpiboot
Step 3: Burn the system. You can use the official burning software Raspberry Pi Imager to perform the burning, and the steps are the same as the burning operation under Windows. Alternatively, you can directly use the dd command to perform the burning. The following burning command is for reference only, please replace the disk object before using it.
# Unzip firmware
gunzip 2023-03-08-CM4StackOS-canary-2023-02-21-raspios-bullseye-armhf.gz
# Firmware burning
sudo dd if=./2023-03-08-CM4StackOS-canary-2023-02-21-raspios-bullseye-armhf of=/dev/sda bs=1M status=progress oflag=dsync