

Product Guide
Linux PC
AI Accelerator Card
LLM-8850 Card
Large Language Models
AI & Agent
Real-Time AI Voice Assistant
XiaoZhi Voice Assistant
AtomS3R-M12 Volcengine Kit
Offline Voice Recognition
Industrial Control
IoT Measuring Instruments
Air Quality
PowerHub
Module13.2 PPS
VAMeter
T-Lite
Input & Output Devices
Ethernet Camera
PoECAM
Wi-Fi Camera
Unit CamS3/-5MP
AI Camera
LoRa & LoRaWAN
Motor Control
Restore Factory Firmware
DIP Switch Usage Guide
CM4Stack UIFlow local
Note
- Only for UIFlow 1.x.
Starting from 2023, UIFlow.local is based on UIFlow 1.x and does not support UiFlow2. - As of June 2023, this specification is still under development and may change.
- This document is described with Windows as the operating system for the prepared PC.
Supported M5Stack devices
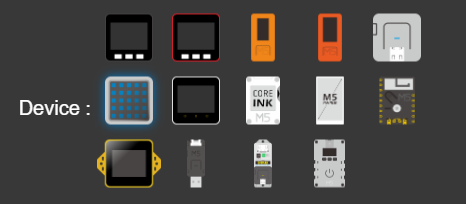
- Core series
- Fire
- StickC/StickC-Plus
- Atom-Lite/Atom-Matrix/AtomU
- Core2
- CoreInk
- Paper
- Stamp-Pico
- Tough
- Atom Display
- M5Station
Unsupported devices
- CoreS3
- AtomS3/AtomS3-Lite/AtomS3U
- Stamp-S3
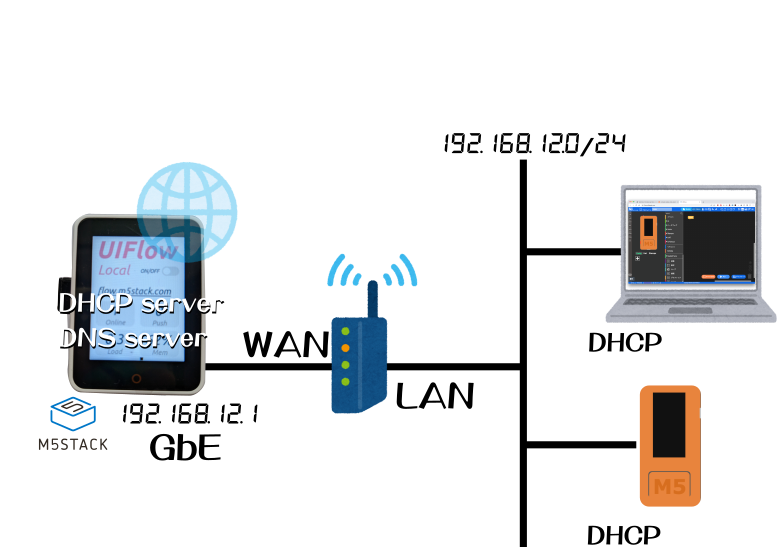
System Configuration
CM4Stack acts as a server on the WAN side; a wireless LAN router is connected to the wired LAN port of the CM4Stack, and the client PC operating UIFlow and M5Stack devices are connected to the wireless LAN router.
Preparing the Hardware
The environment required to run UIFlow.local is as follows.
- CM4Stack
This will serve as the server for UIFlow.local. - Wireless LAN router
A router with a wired LAN port is required; connect the CM4Stack to the WAN side terminal. Used in router mode. - LAN cable
For connecting the CM4Stack and the wireless LAN router.
Required Software
Preparation PC (Windows or Linux)
MacOS requires a build process for RPIBOOT.
The following software is required to write the image to CM4Stack.
- RPIBOOT
Used for recognizing the CM4Stack storage (eMMC) as a USB drive. - RaspberryPiImager
Used for writing the UIFlow.local image to the CM4Stack.
Client PC
- M5Burner
Used for writing UIFlow firmware to M5Stack devices.
Software Installation Instructions
RPIBOOT
Install by default, following the on-screen prompts.
RaspberryPiImager
Install by default, following the on-screen instructions.
Writing the Image
① Download and unzip the image file.
The image file is compressed into a Zip file, so it needs to be unzipped. The file to be written has an extension of img.
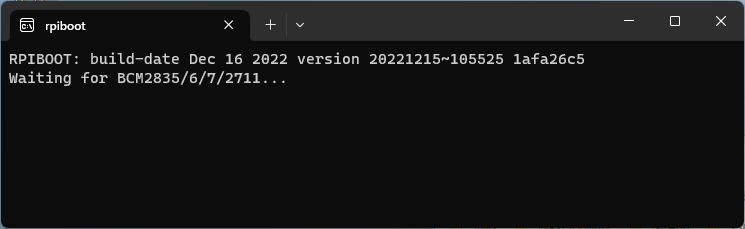
② Start RPIBOOT.
Search for RPIBOOT in the start menu and launch it. After launching, the following prompt will appear.
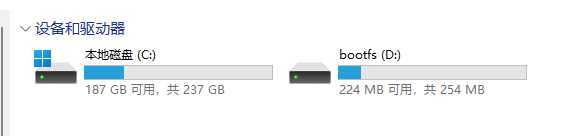
③ Connect the CM4Stack to the prepared PC.
Connect the CM4Stack to the **PC while holding down the left BOOT button from a powered-off state. Then, bootfs will be recognized as a drive.
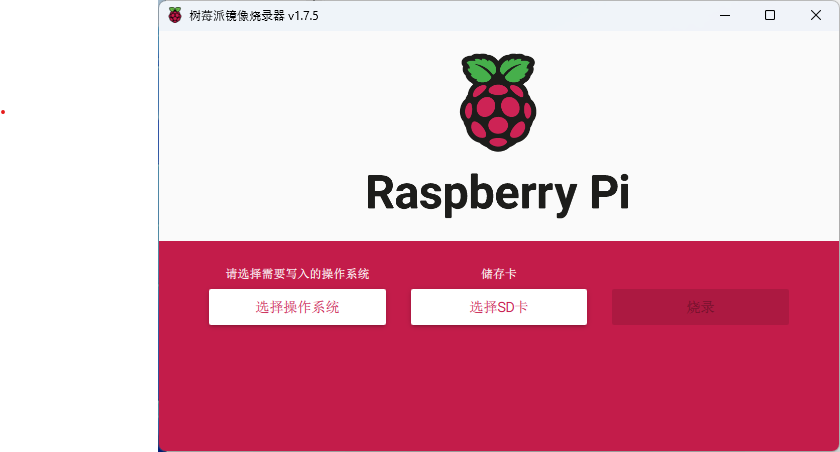
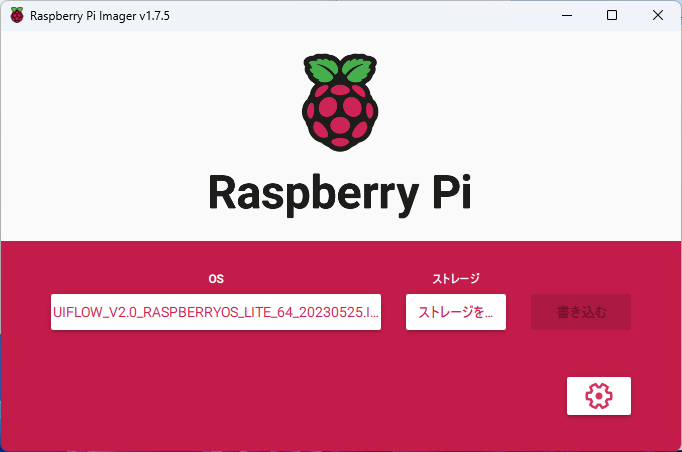
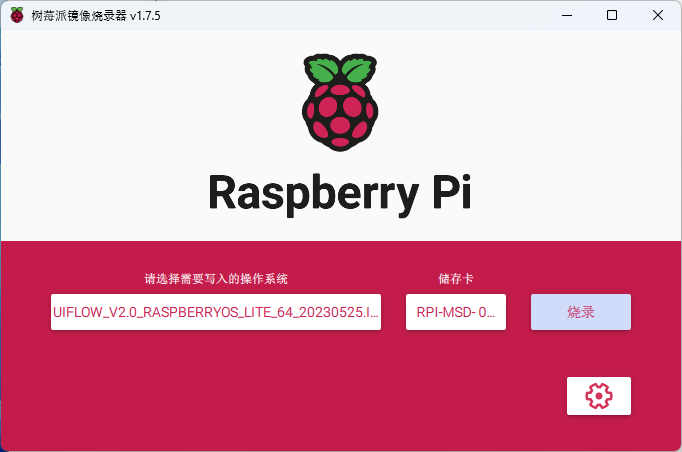
④ Launch Raspberry Pi Imager.
1. Choose OS
Select the operating system.
On the startup screen
Click 'Choose OS'.
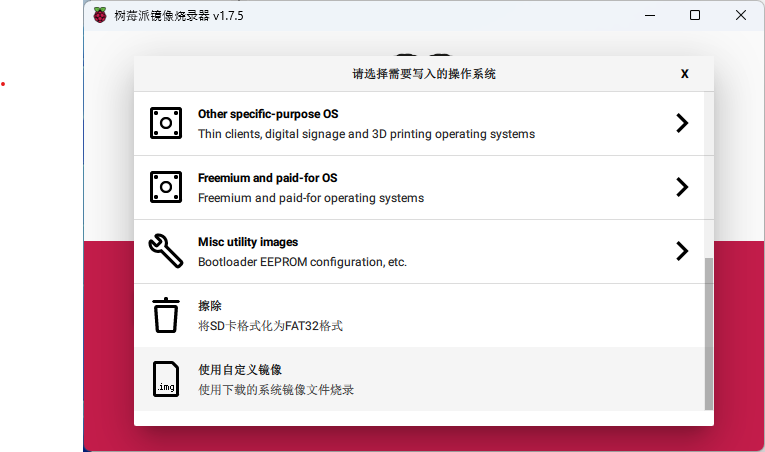
'OS' dialogue
Click 'Use custom image'.
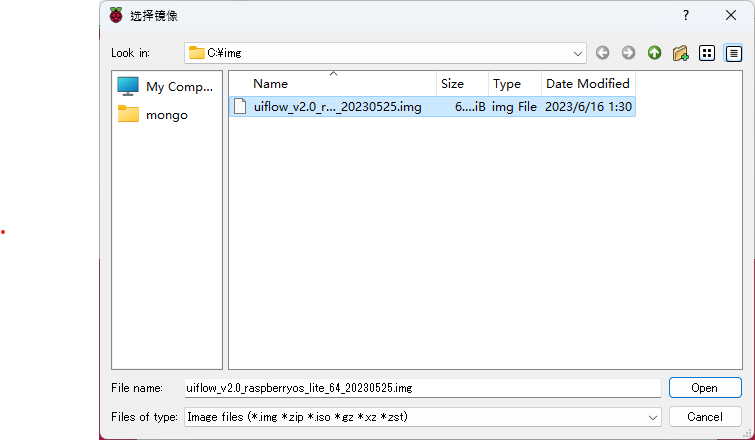
'Select Image' dialogue
Select the UIFlow.local image file for writing.
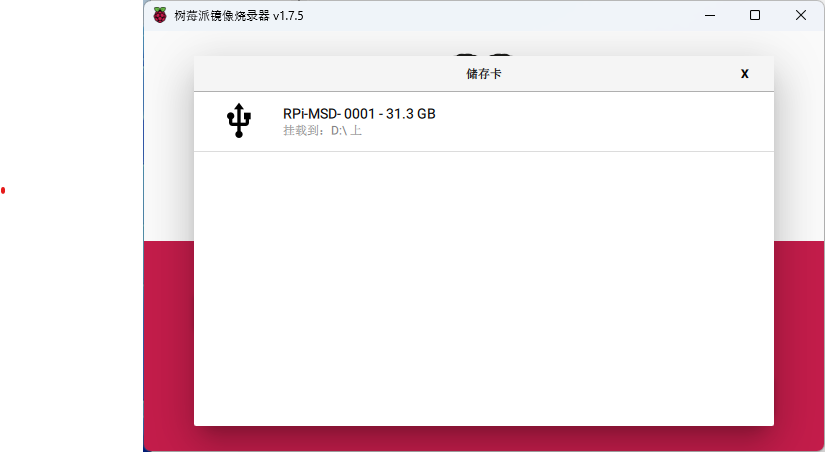
2. Select Storage
Select the storage named RPI-MSD-0001.
- Choose storage
Select the storage named RPI-MSD-0001. (*The name may vary. Please check carefully)
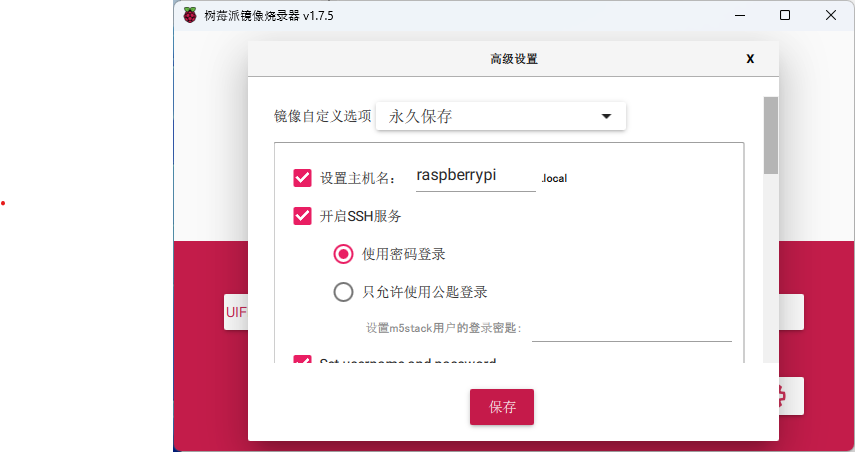
3. Set Preferences
- Click the
gear icon in the bottom right to configure detailed settings for RaspberryPiOS.
Hostname
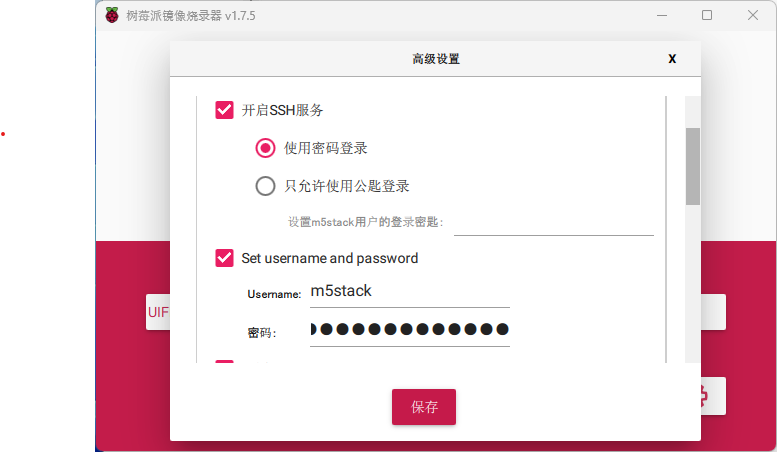
Specify the hostname for the CM4Stack.Enable SSH
Set detailed operations for the CM4Stack.
You can also set password authentication and public key authentication if you have a public key available.
Username and password
Set the username and password for the RaspberryPi operating system. (Optional)
 Configure WiFi
Set up WiFi.Configure WiFi
Set up WiFi
. **This is not the WiFi for UIFlow.local's wireless router, but for the internet side WiFi. **
If you only want to operate in a local environment, you do not need to set up WiFi. (UIFlow functions related to the network will not work).
Configure Locale
Specify the time zone and keyboard layout.
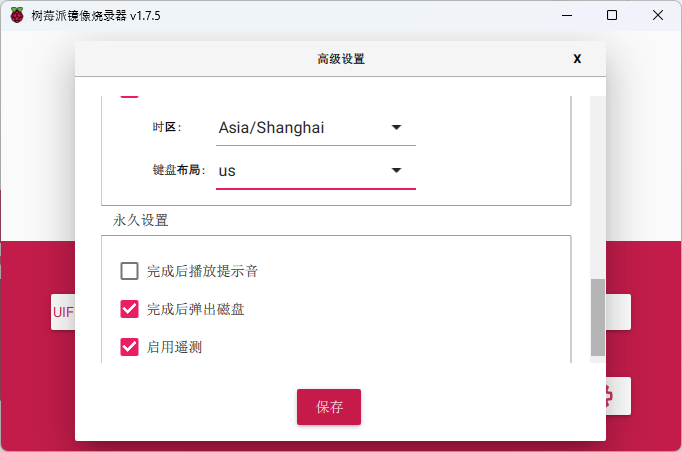
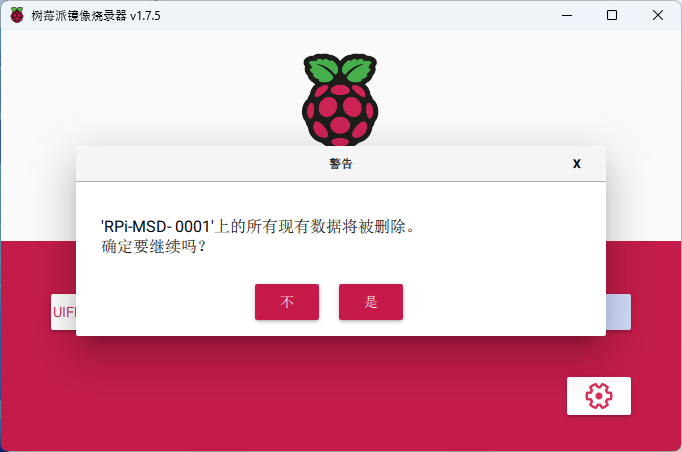
4. Writing
Once you have completed the settings, click "Write," and a confirmation dialog will appear. Click "Yes" to start writing.
Connecting the Wireless LAN Router to CM4Stack
Connect the wired LAN terminal on the CM4Stack with the "WAN" terminal of the wireless LAN router using a LAN cable.
Wireless LAN Router Configuration
Configure according to the instructions in the wireless LAN router manual. The following settings should be made, which vary by model.
Operation mode: Router mode
Does not work in bridge mode.WAN (Internet) side settings must be set up using DHCP. (CM4Stack acts as the DHCP server on the upper side).
Enable DHCP server configuration
The UIFlow firmware on M5Stack devices requires a DHCP server.
Client Connection
Client PC operating UIFlow
The PC used for UIFlow operations is also connected to the prepared wireless LAN router.M5Stack devices
Write UIFlow firmware to M5Stack devices using M5Burner. The WiFi configuration specifies the prepared wireless LAN router.
Running UIFlow
Start the M5Stack device in WiFi mode, and the APIKey will appear. If you open http://flow.m5stack.com on the client PC, a warning will appear, but if you connect as is, the UIFlow screen will appear.
Note, this is not https, but http.