Product Guide
Linux PC
AI Accelerator Card
LLM-8850 Card
Large Language Models
LLM
Real-Time AI Voice Assistant
XiaoZhi Voice Assistant
AtomS3R-M12 Volcengine Kit
Offline Voice Recognition
Industrial Control
IoT Measuring Instruments
Air Quality
Module13.2 PPS
VAMeter
T-Lite
Ezdata
Ethernet Camera
PoECAM
Wi-Fi Camera
Unit CamS3/-5MP
AI Camera
LoRa & LoRaWAN
Motor Control
Restore Factory Firmware
DIP Switch Usage Guide
Module GPS v2.0
Module GNSS
Module ExtPort For Core2
Module LoRa868 V1.2
Atom-Lite HA Light
1. Environment Setup
- Refer to the Home Assistant official documentation to install Home Assistant.
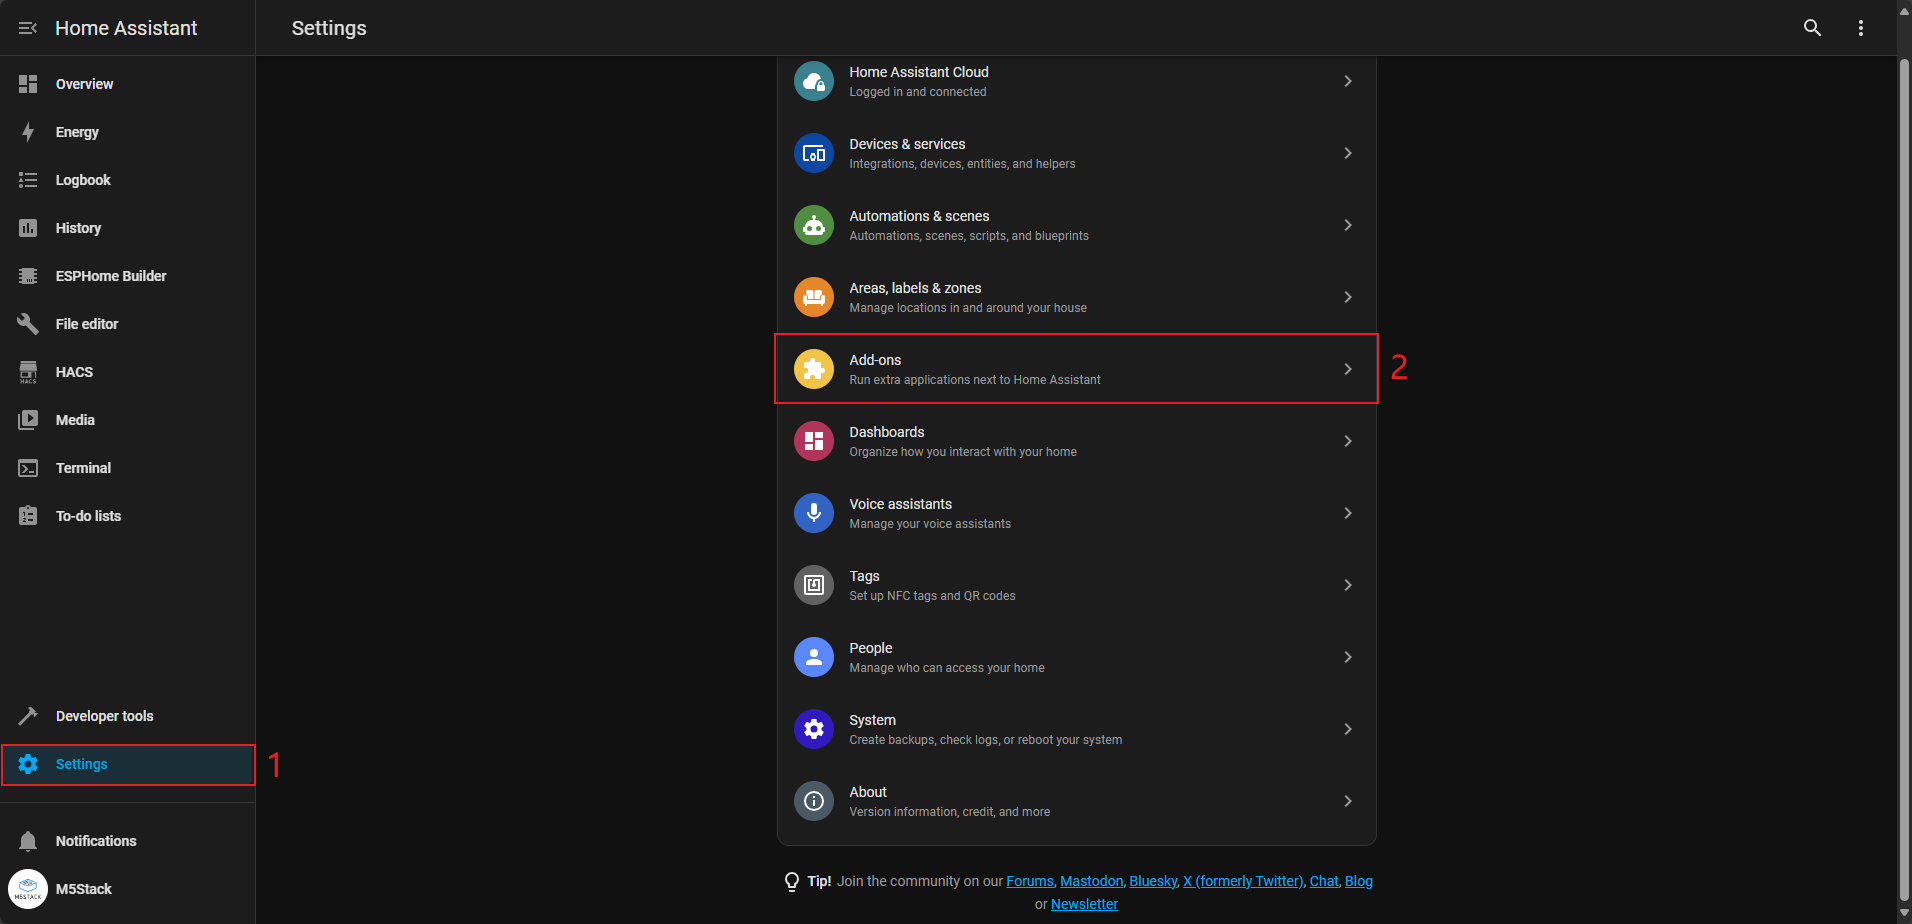
- Install the ESPHome Builder add-on via
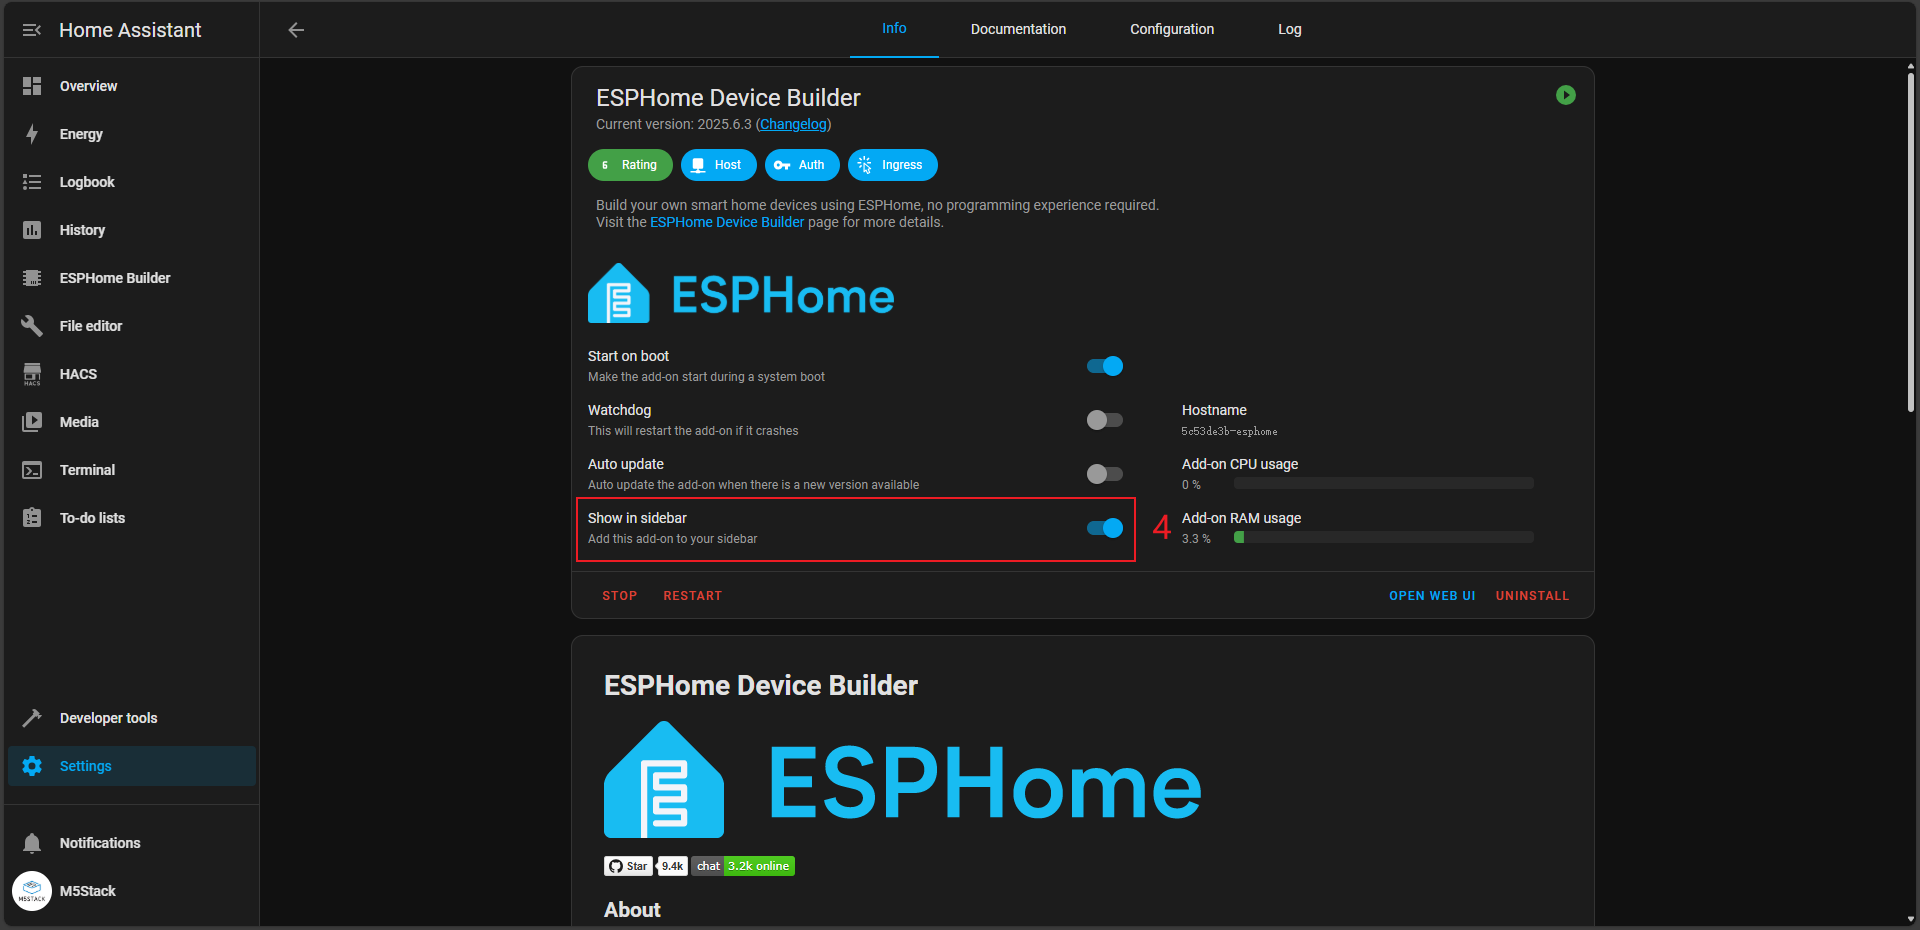
Setting->Add-ons->Add-ons STORE. - After successful installation, enable
Show in sidebarin the add-on's management page to add it to the left navigation bar. - This tutorial references the HA official documentation. Visit the link if needed.
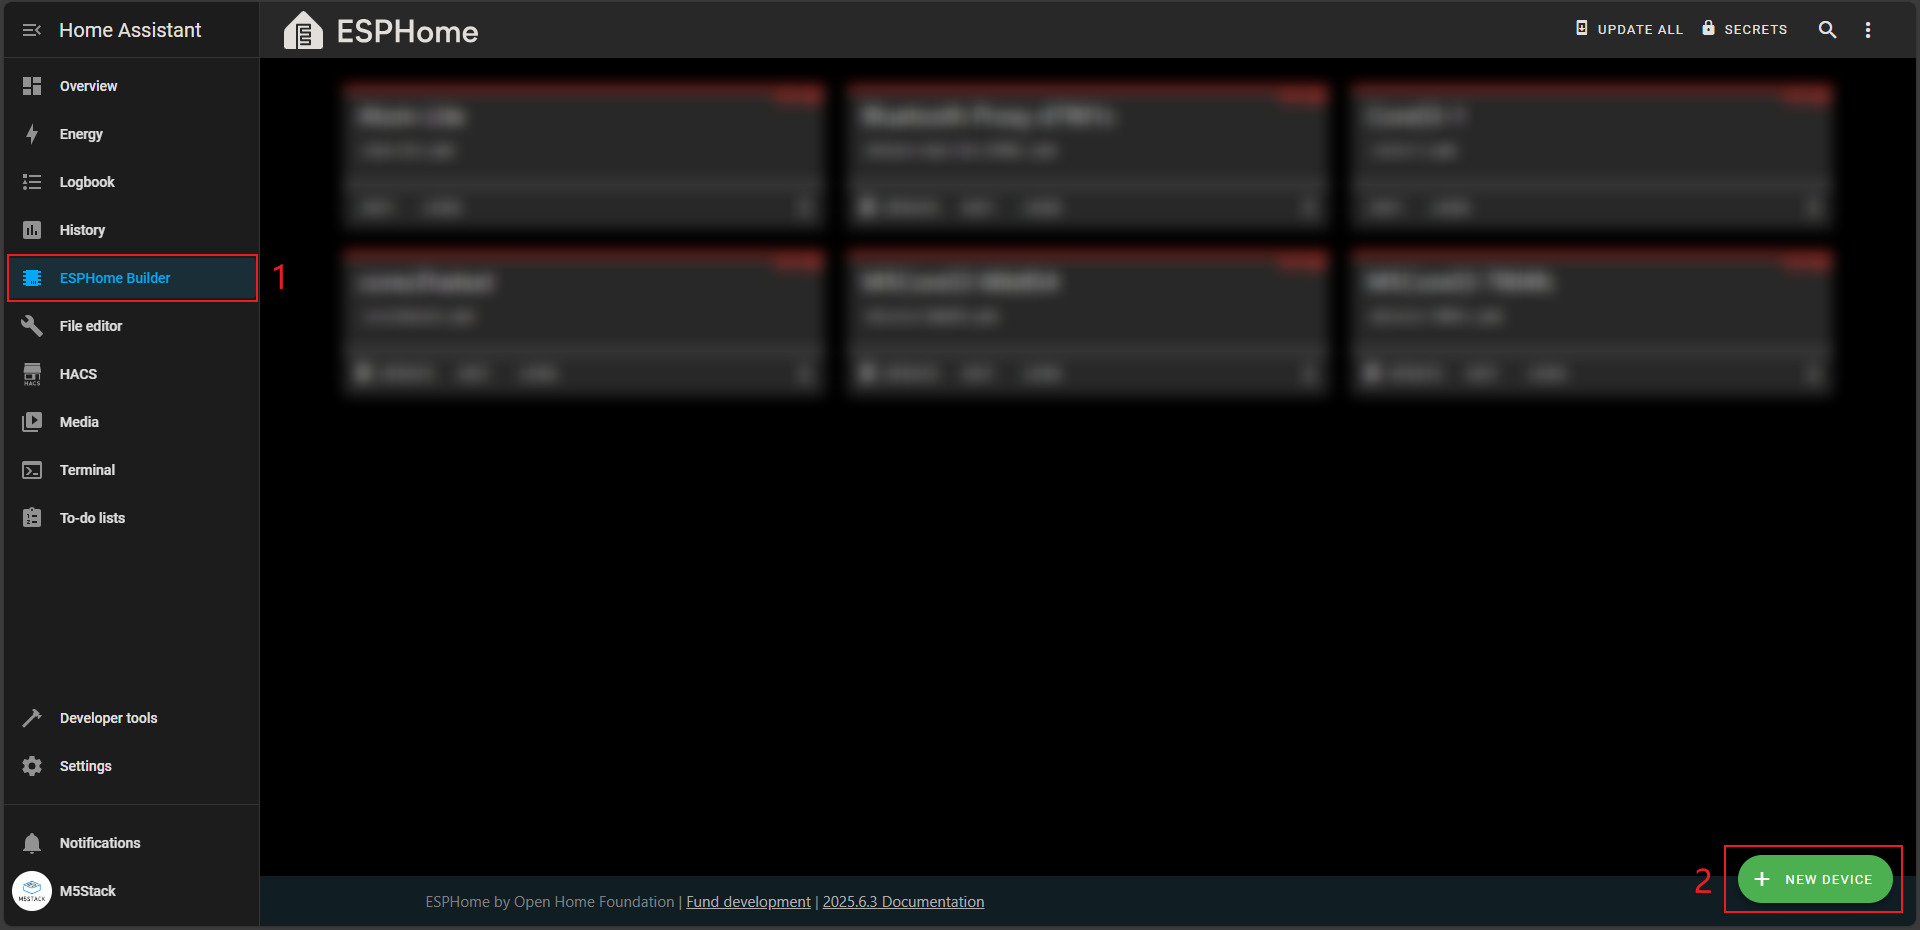
2. Adding a Device
Open the ESPHome add-on page and click NEW DEVICE at the bottom right to create a new device.
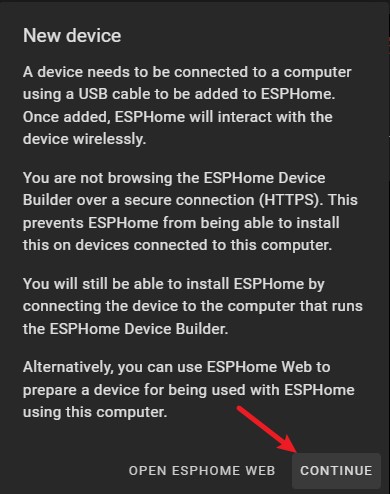
A "New device" prompt will appear. Click the CONTINUE button.
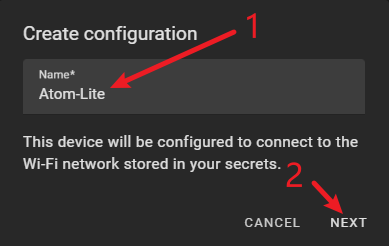
Enter a custom name for the device (e.g., Atom-Lite).
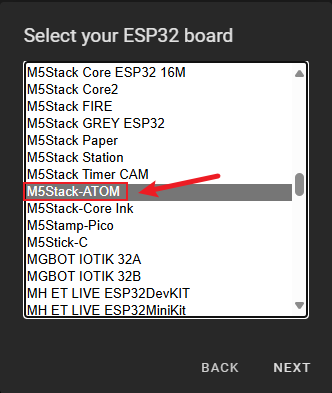
Next, the device type selection screen will appear. First, uncheck Use recommended settings, then select ESP32 to proceed.

On the details page, locate M5Stack-ATOM, select it, and click NEXT.
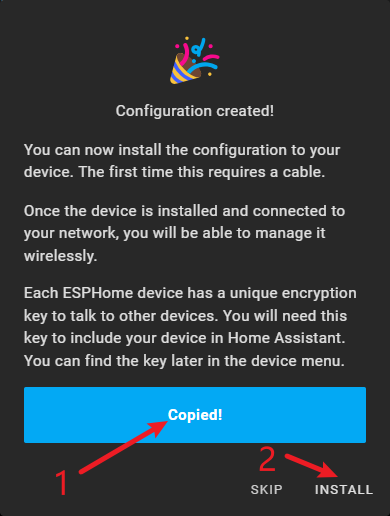
A "Device configured successfully" screen will appear. Copy the key and click INSTALL to proceed.
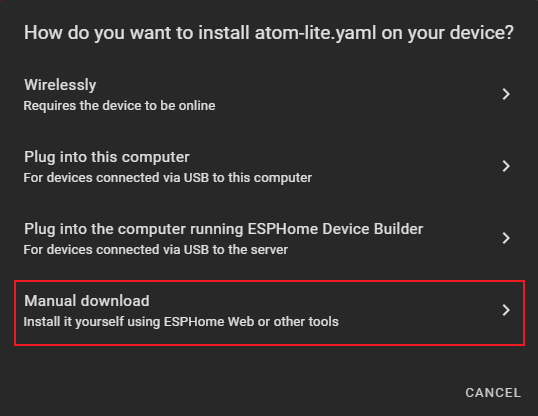
Choose Manual download to start compiling the program and wait for the installation to complete.
3. Code Writing and Compilation
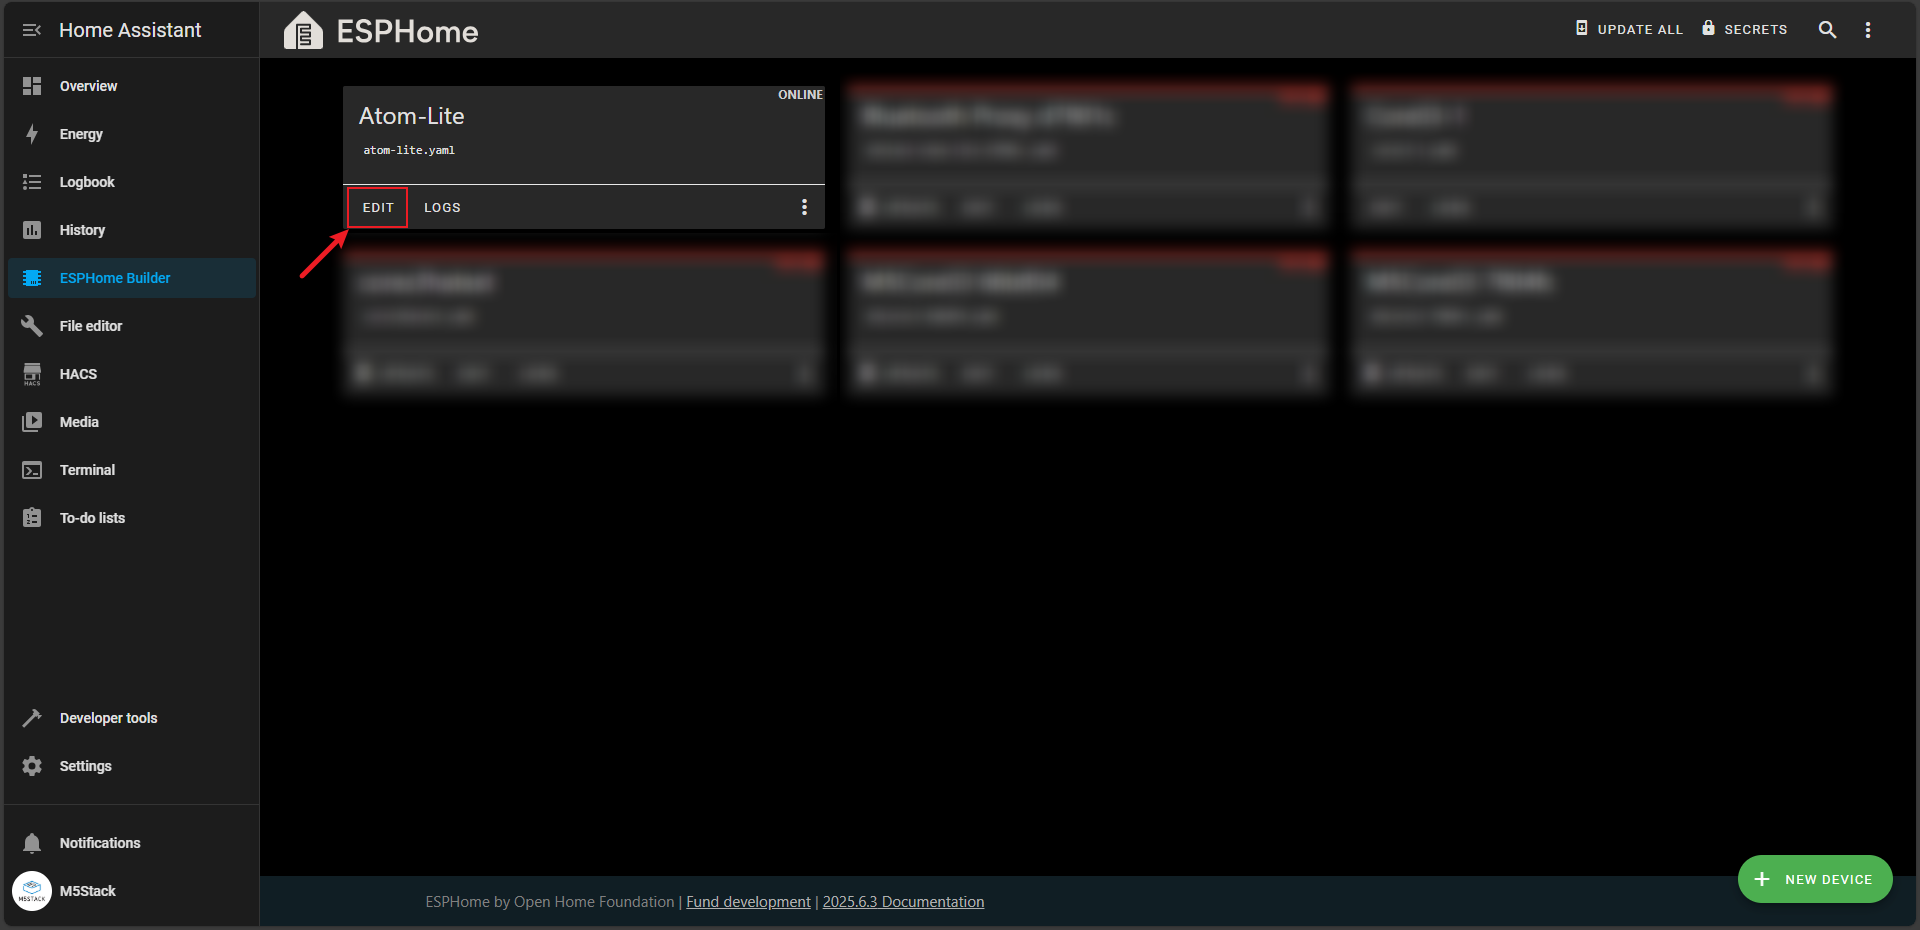
After completing the above steps, return to the ESPHome Builder main interface. You will see a new Atom-Lite device listed. Click the EDIT button to enter the YAML file editing page.
Copy the following code into the YAML file, and modify the ssid and password (as indicated in the image) with your Wi-Fi credentials.
esphome:
  name: atom-lite
  friendly_name: Atom-Lite

esp32:
  board: m5stack-atom
  framework:
    type: arduino

logger:
api:
  encryption:
    key: "****************"

ota:
  - platform: esphome
    password: "************"

wifi:
  ssid: "************"
  password: "**********"
  ap:
    ssid: "Atom-Lite Fallback Hotspot"
    password: "jFsIc2XGuKRe"

captive_portal:

binary_sensor:
  - platform: gpio
    pin:
      number: GPIO39
      mode: INPUT
      inverted: true
    name: "Atom Button"
    id: atom_button
    filters:
      - delayed_on: 50ms
      - delayed_off: 50ms
    on_multi_click:
      - timing:
          - ON for at most 0.8s
          - OFF for at most 0.5s
          - ON for at most 0.8s
          - OFF for at least 0.2s
        then:
          - logger.log: "Double Clicked"
          - light.turn_on:
              id: atom_light
              red: 100%
              blue: 50%
              green: 20%
              brightness: 50%
      - timing:
          - ON for at least 0.8s
        then:
          - logger.log: "Single Long Clicked"
          - light.turn_on:
              id: atom_light
              green: 100%
              blue: 50%
              red: 30%
              brightness: 100%

light:
  - platform: neopixelbus
    type: GRB
    pin: GPIO27
    num_leds: 1
    variant: sk6812
    name: "Atom RGB Light"
    id: atom_light
    restore_mode: RESTORE_DEFAULT_OFF
    effects:
      - random:
          name: "Random"
          transition_length: 1s
          update_interval: 1s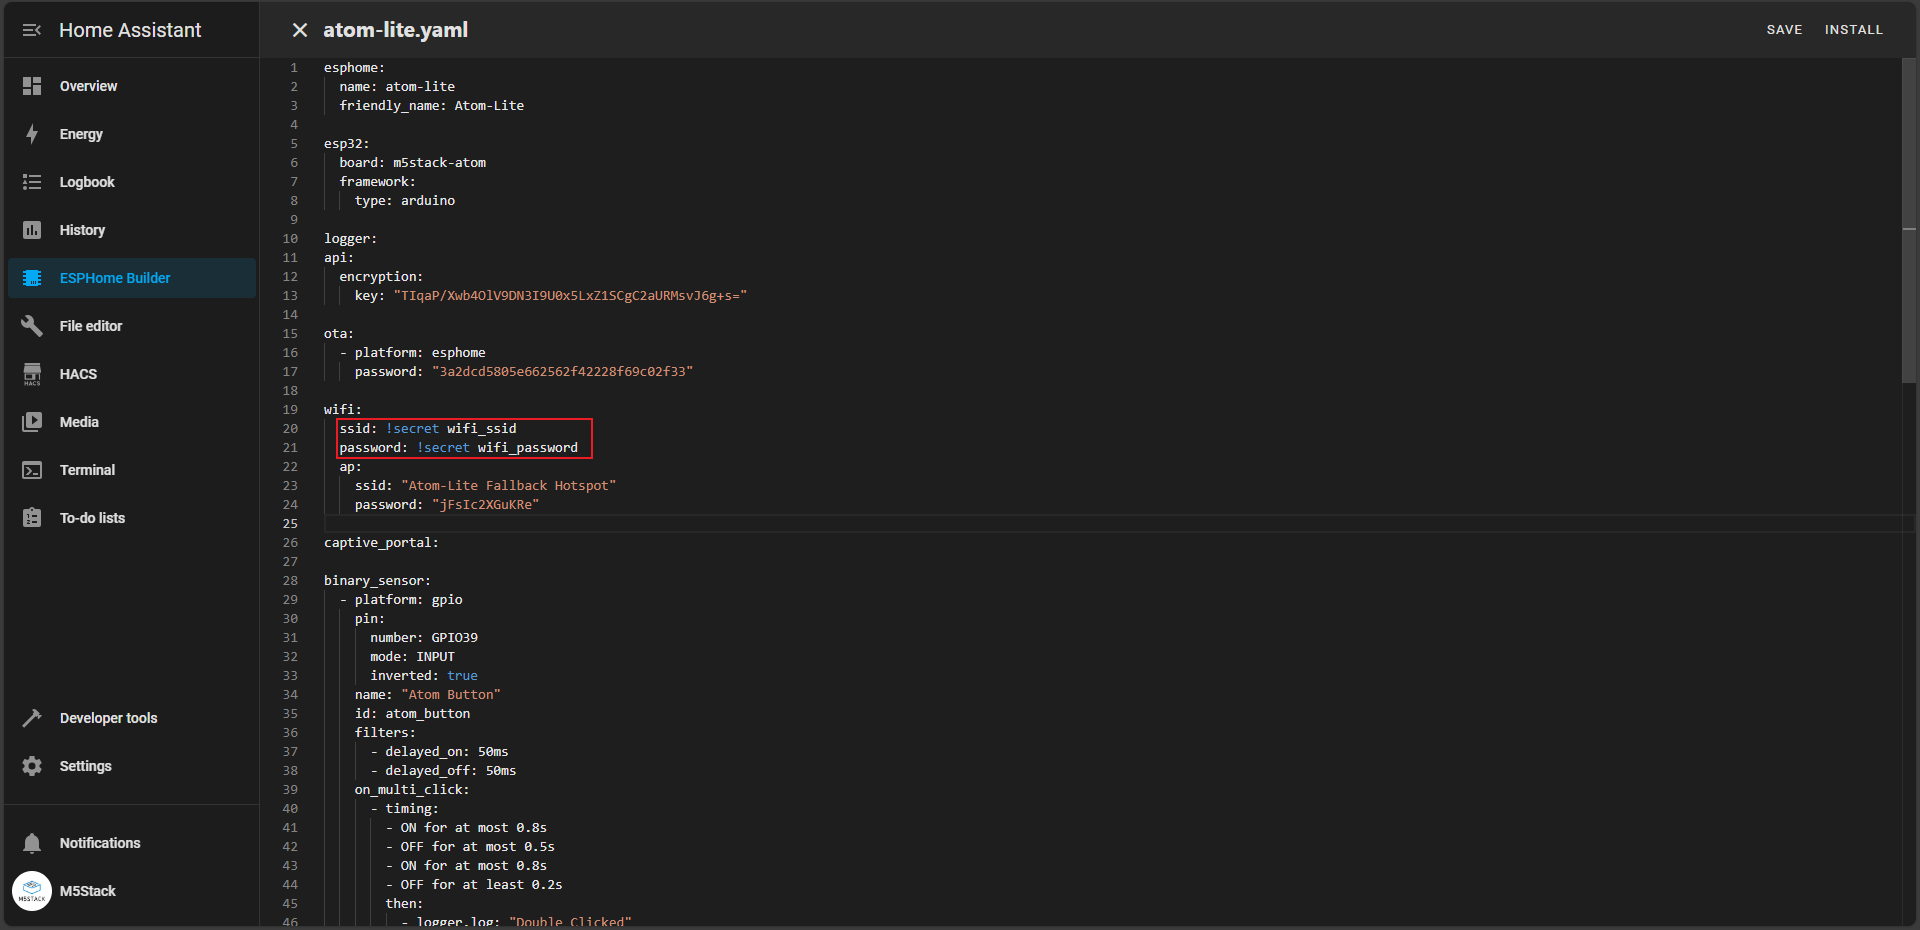
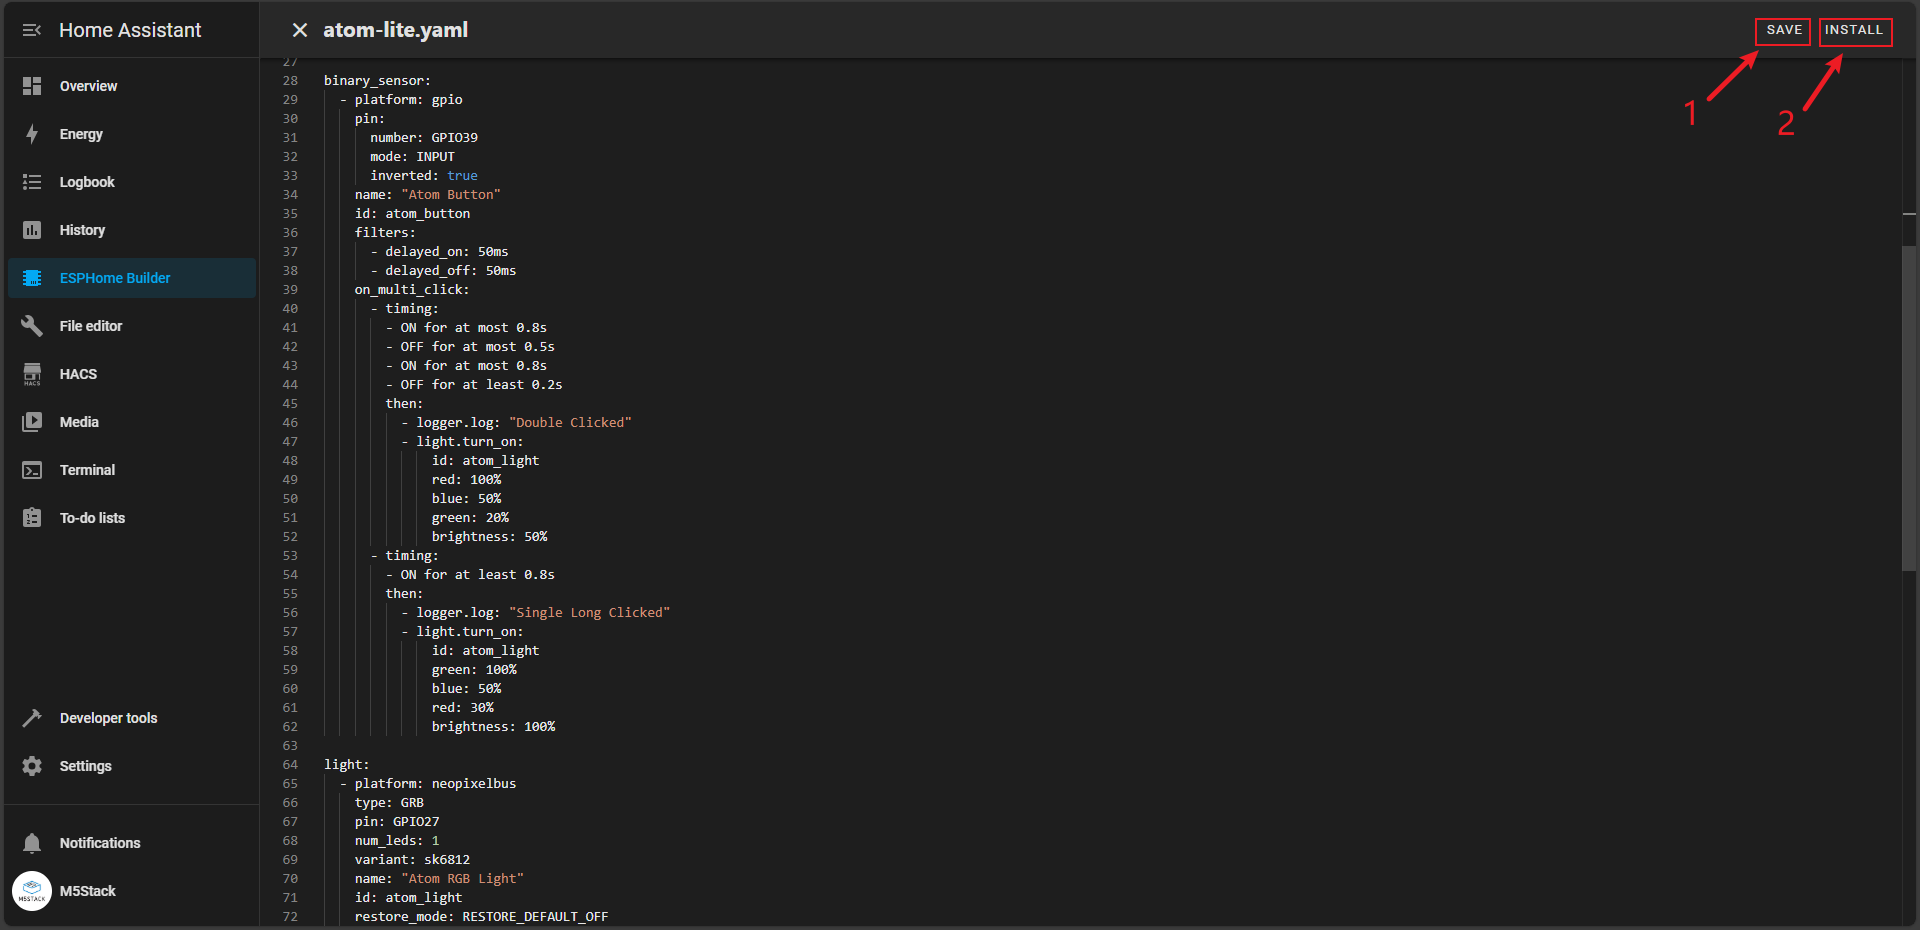
First click the SAVE button to save the YAML file, then click the INSTALL button to start compiling and flashing the firmware.
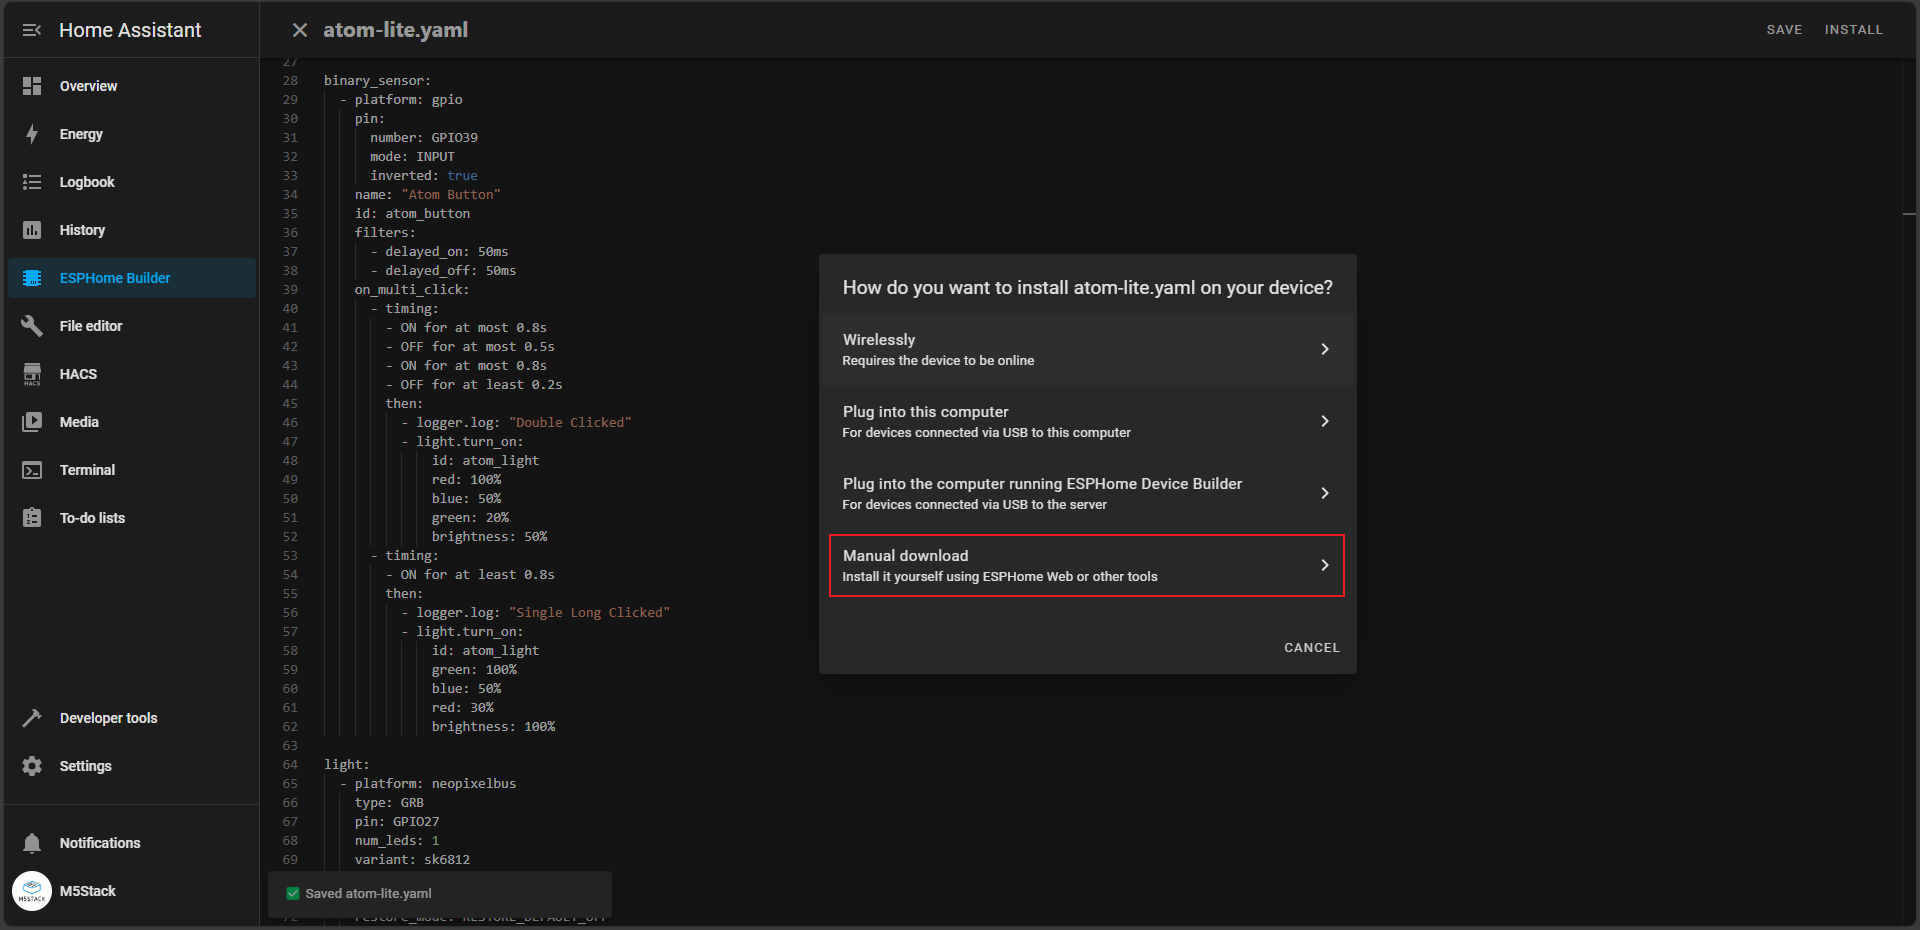
Click Manual download again to begin firmware compilation and wait for completion.
4. Firmware Flashing
Firmware Saving
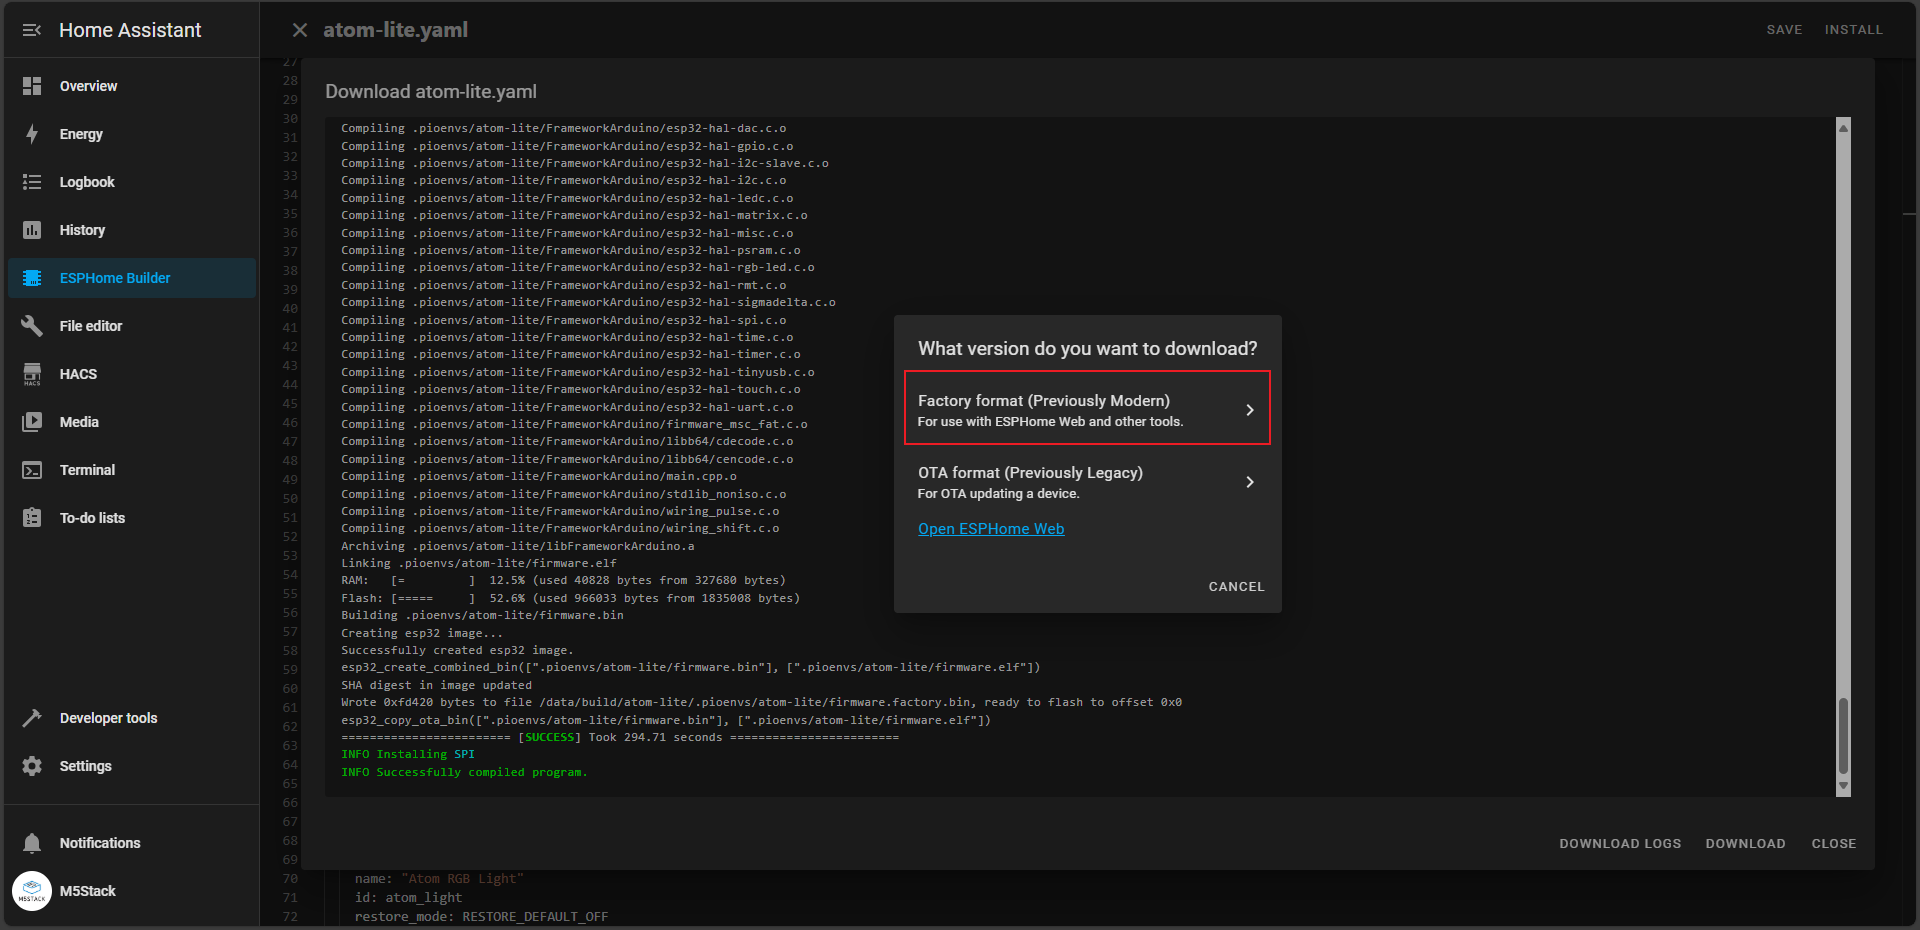
After compilation is complete, click the DOWNLOAD button to see the flashing method selection interface. Here we choose Factory format to save it locally.
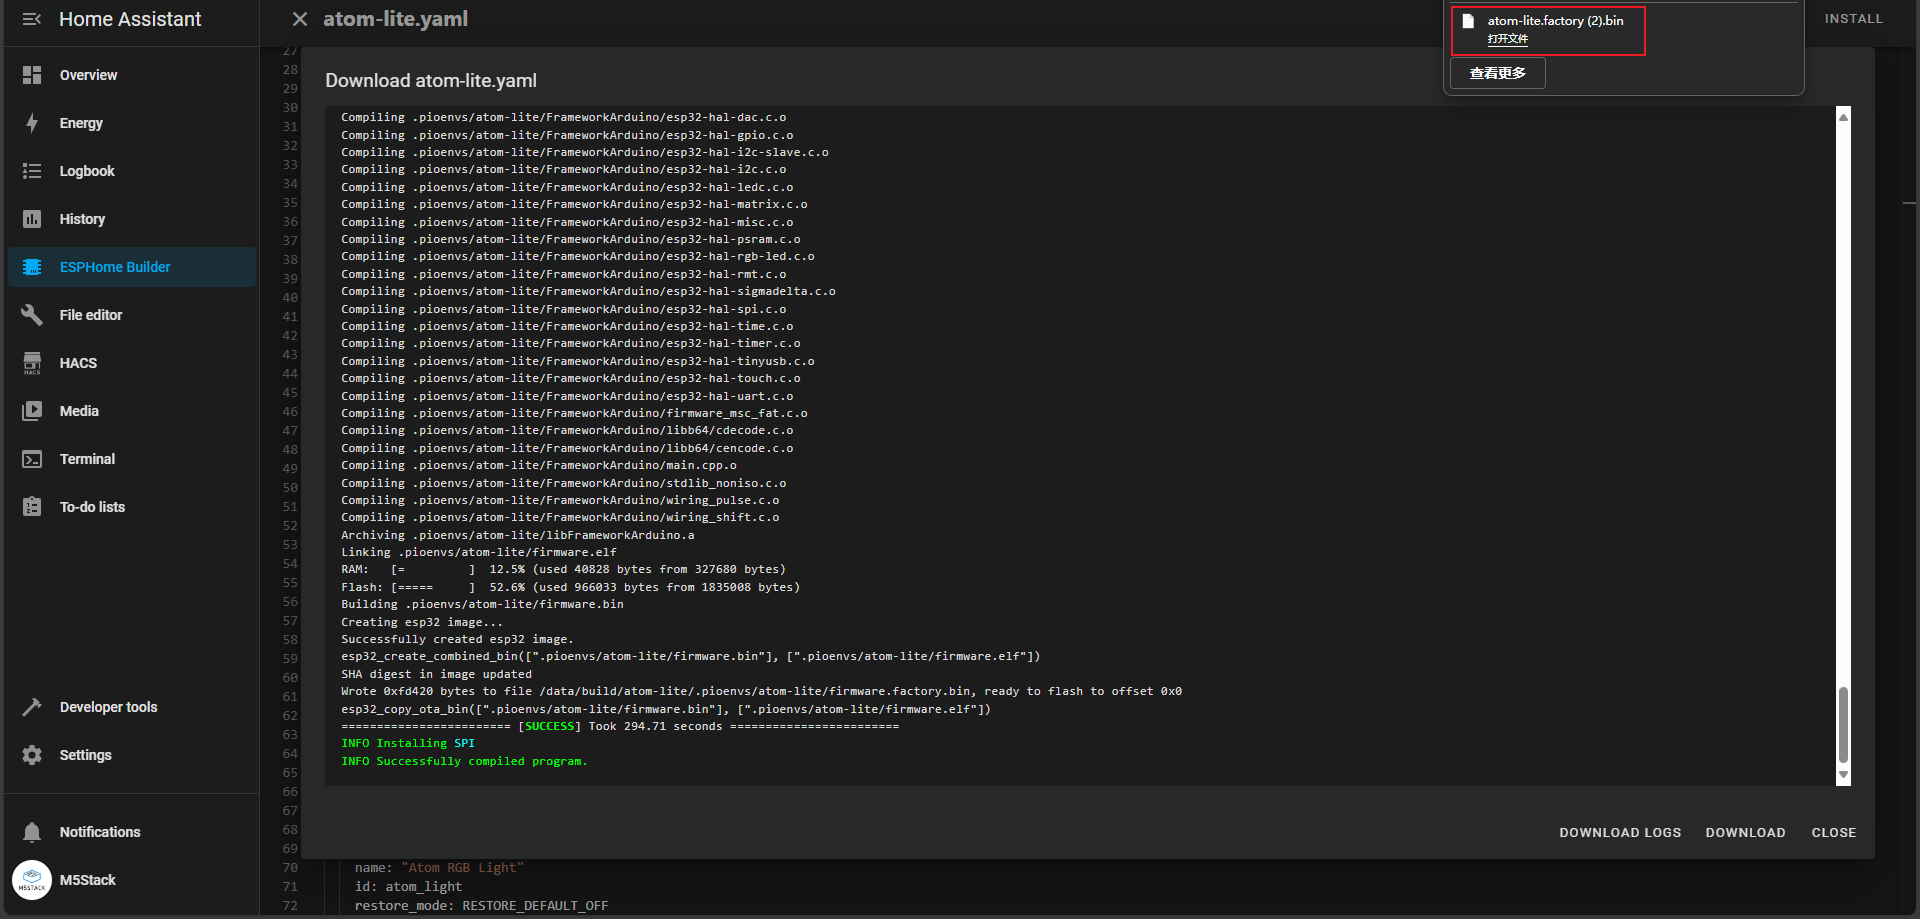
Wait for the local download to complete.
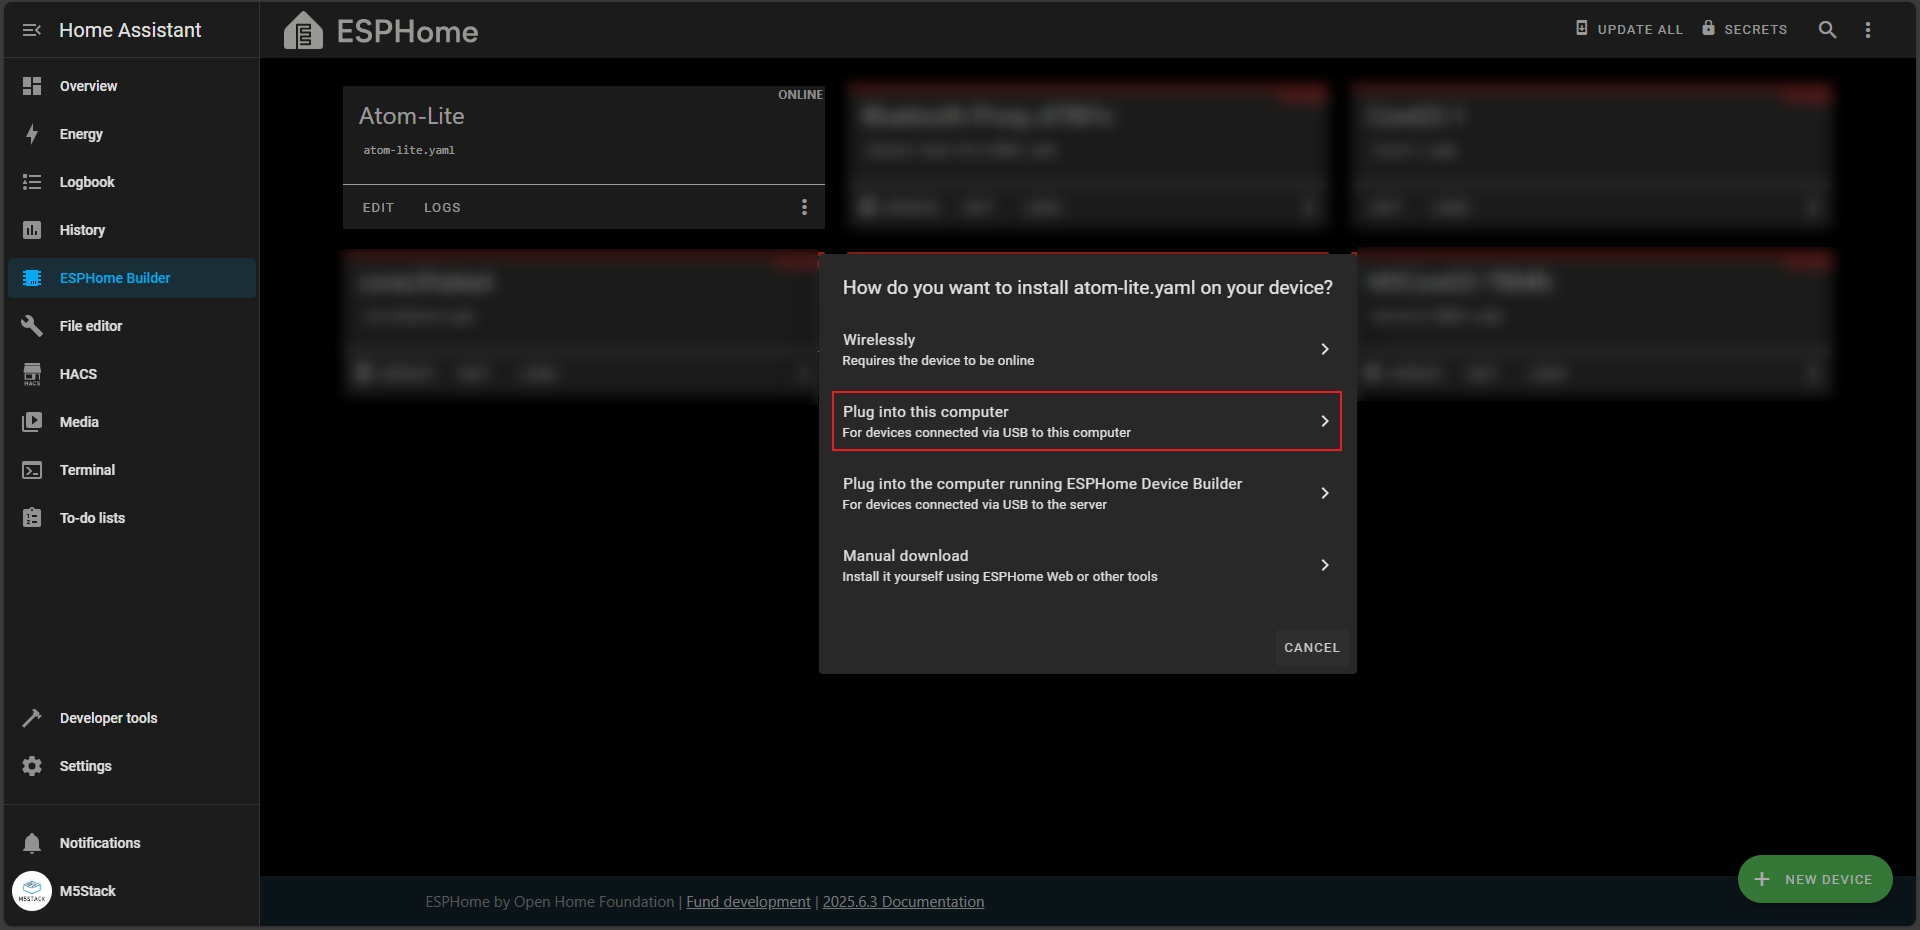
Return to the main interface, select INSTALL to enter the flashing method selection screen. This time choose Plug into this computer and connect the device to your computer via USB for flashing.
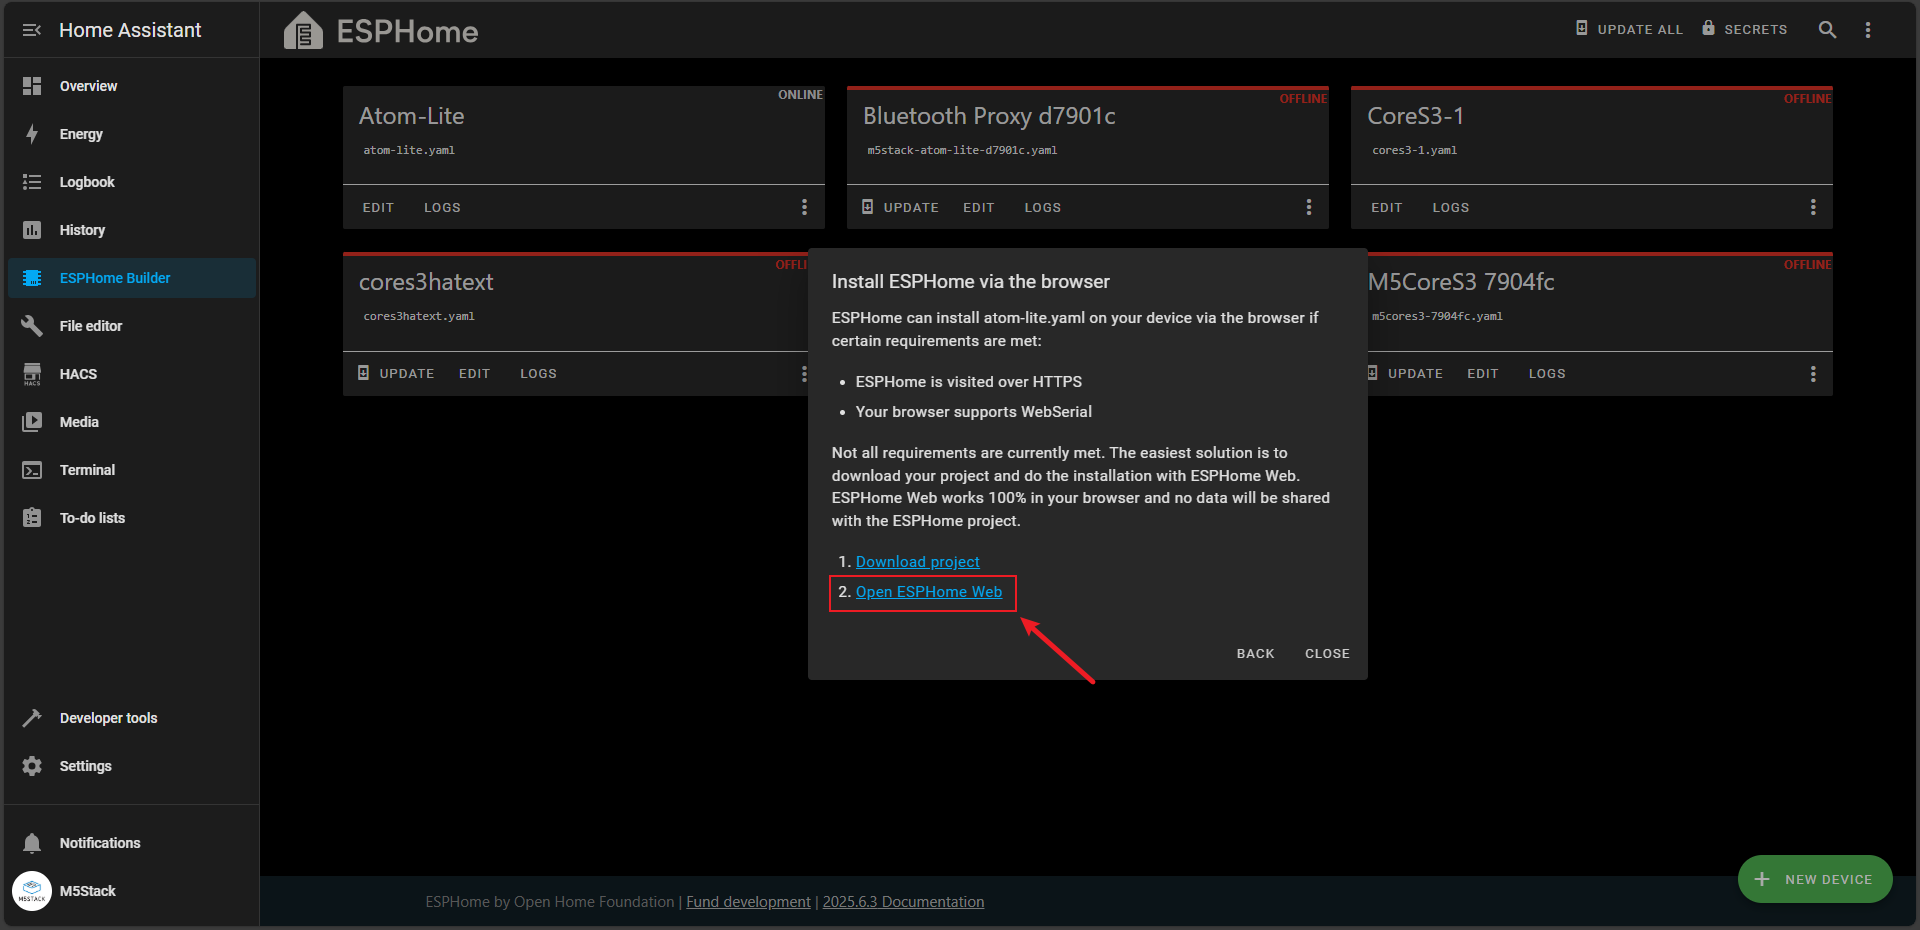
Select Open ESPHome Web to enter the flashing interface.
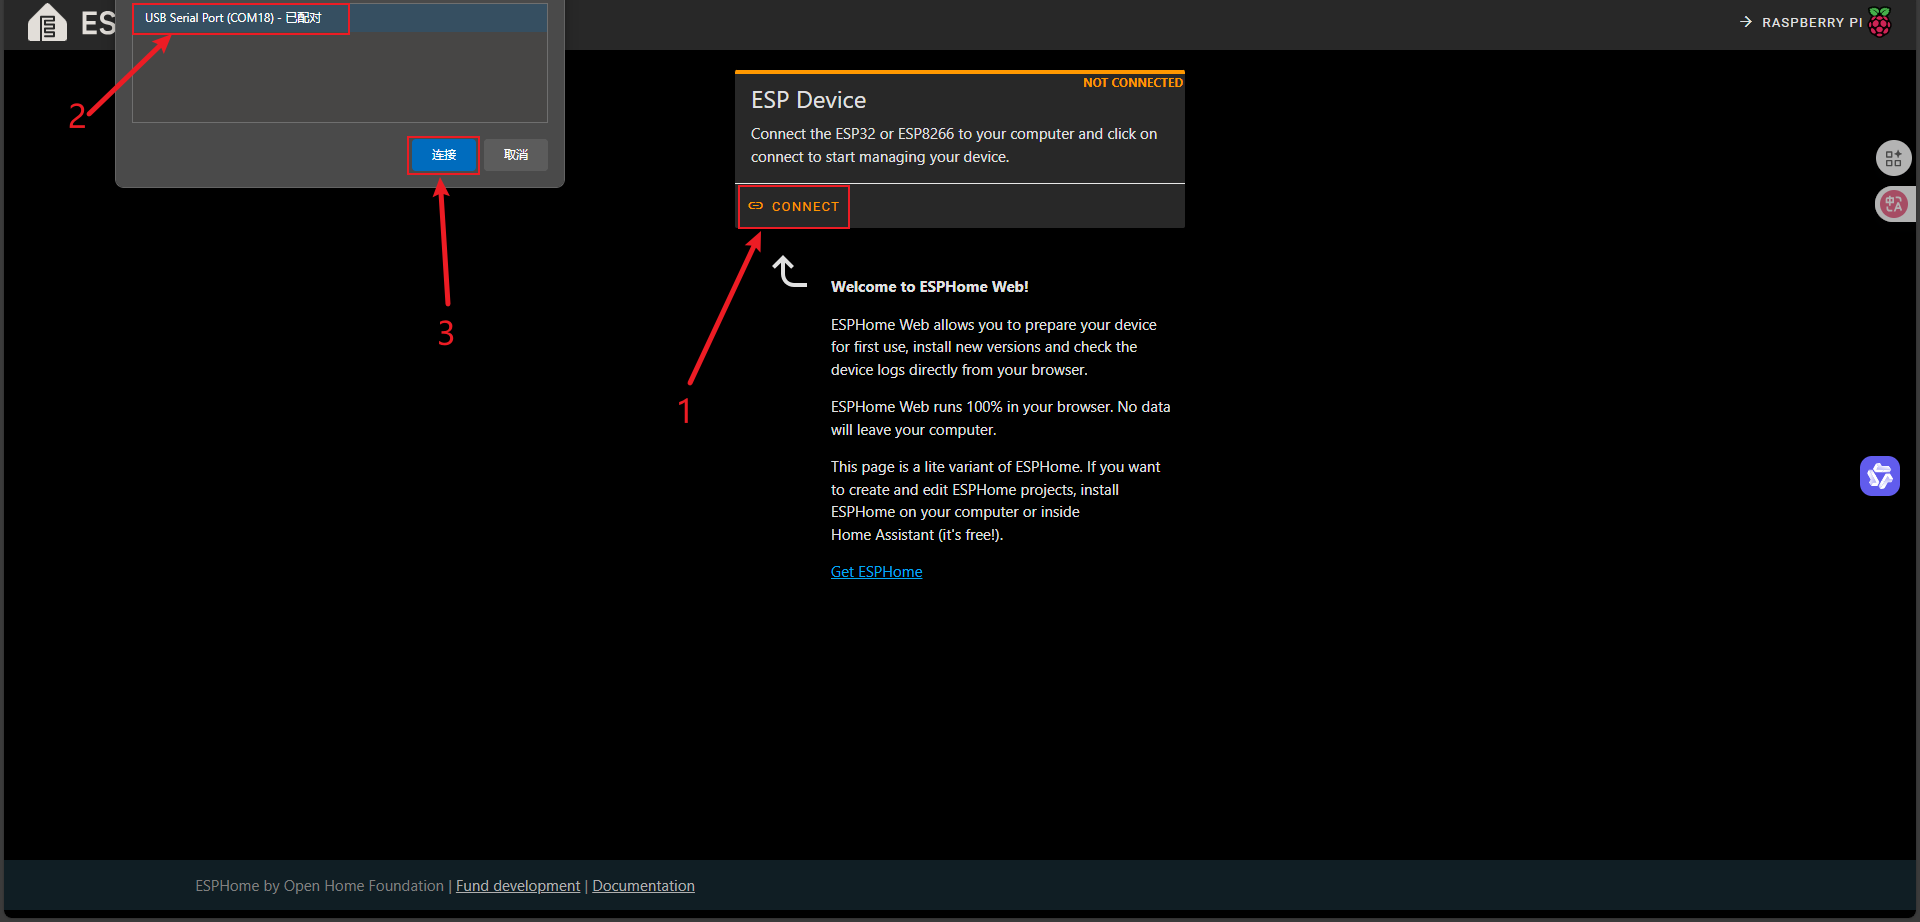
First click the CONNECT button, then select the serial port device connected to your computer (if no serial port appears here, please check your hardware connection).
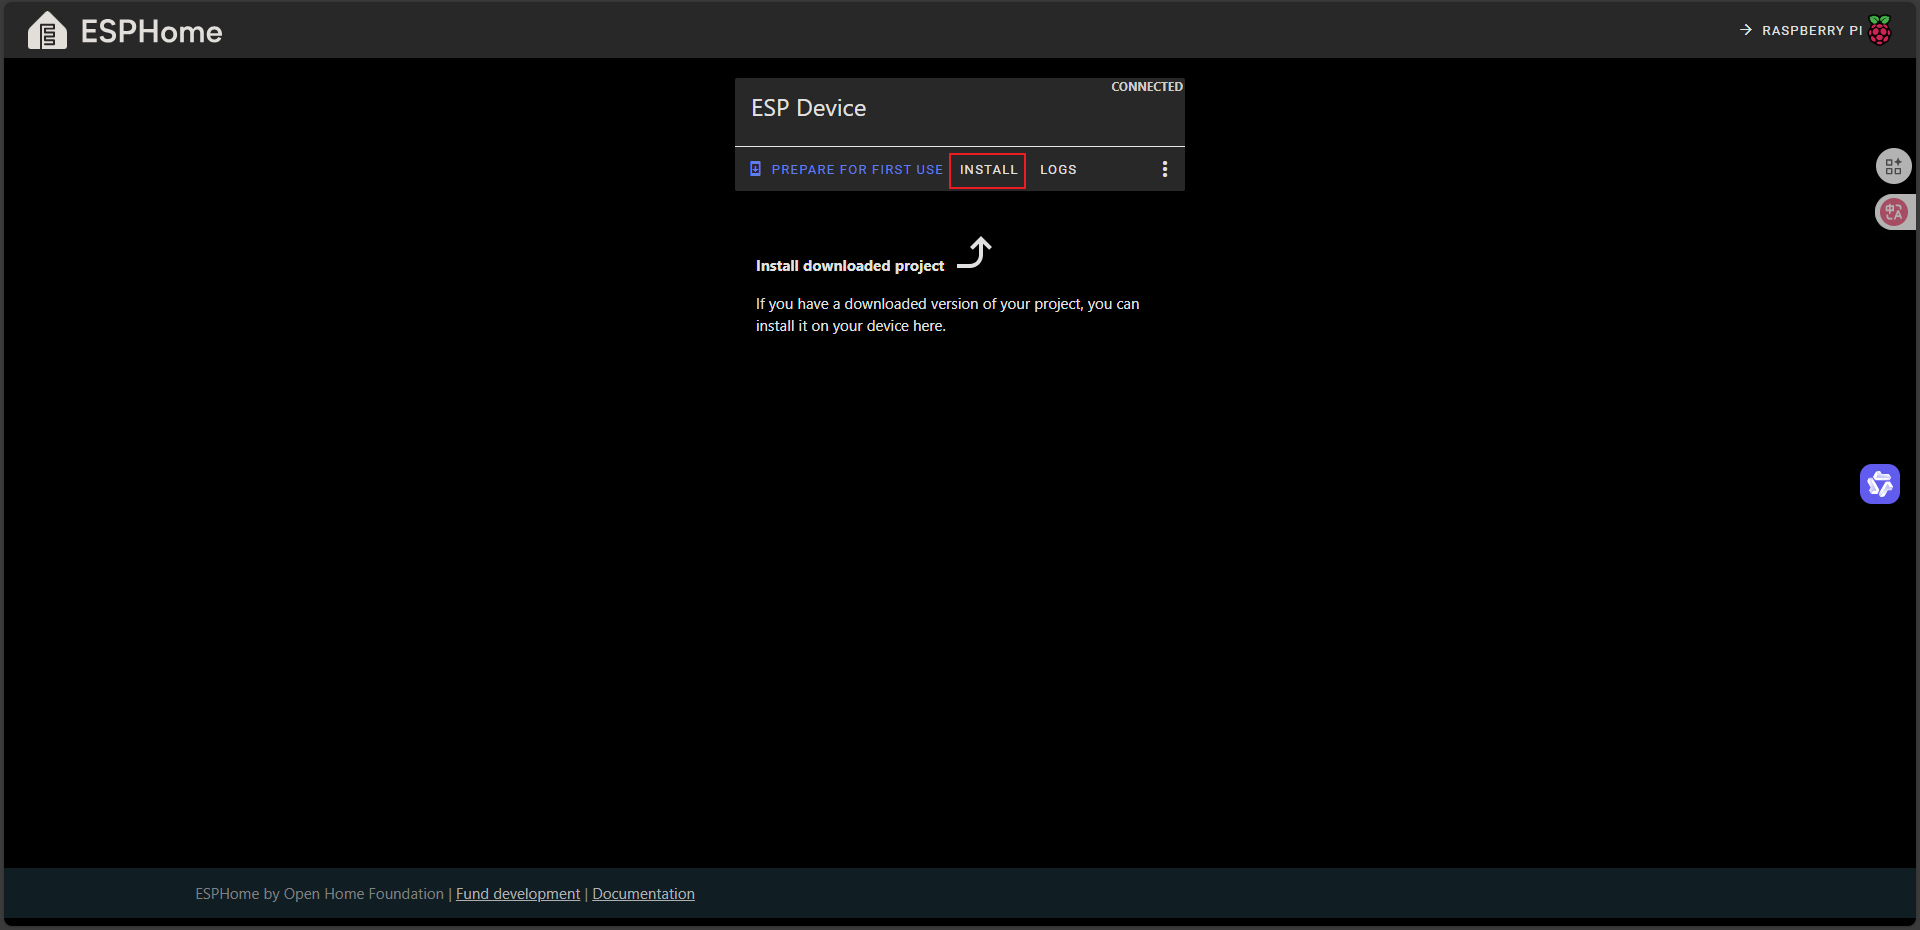
Click INSTALL to enter the local firmware file selection interface.
Select the firmware file you just saved locally, click INSTALL and wait for the flashing to complete.

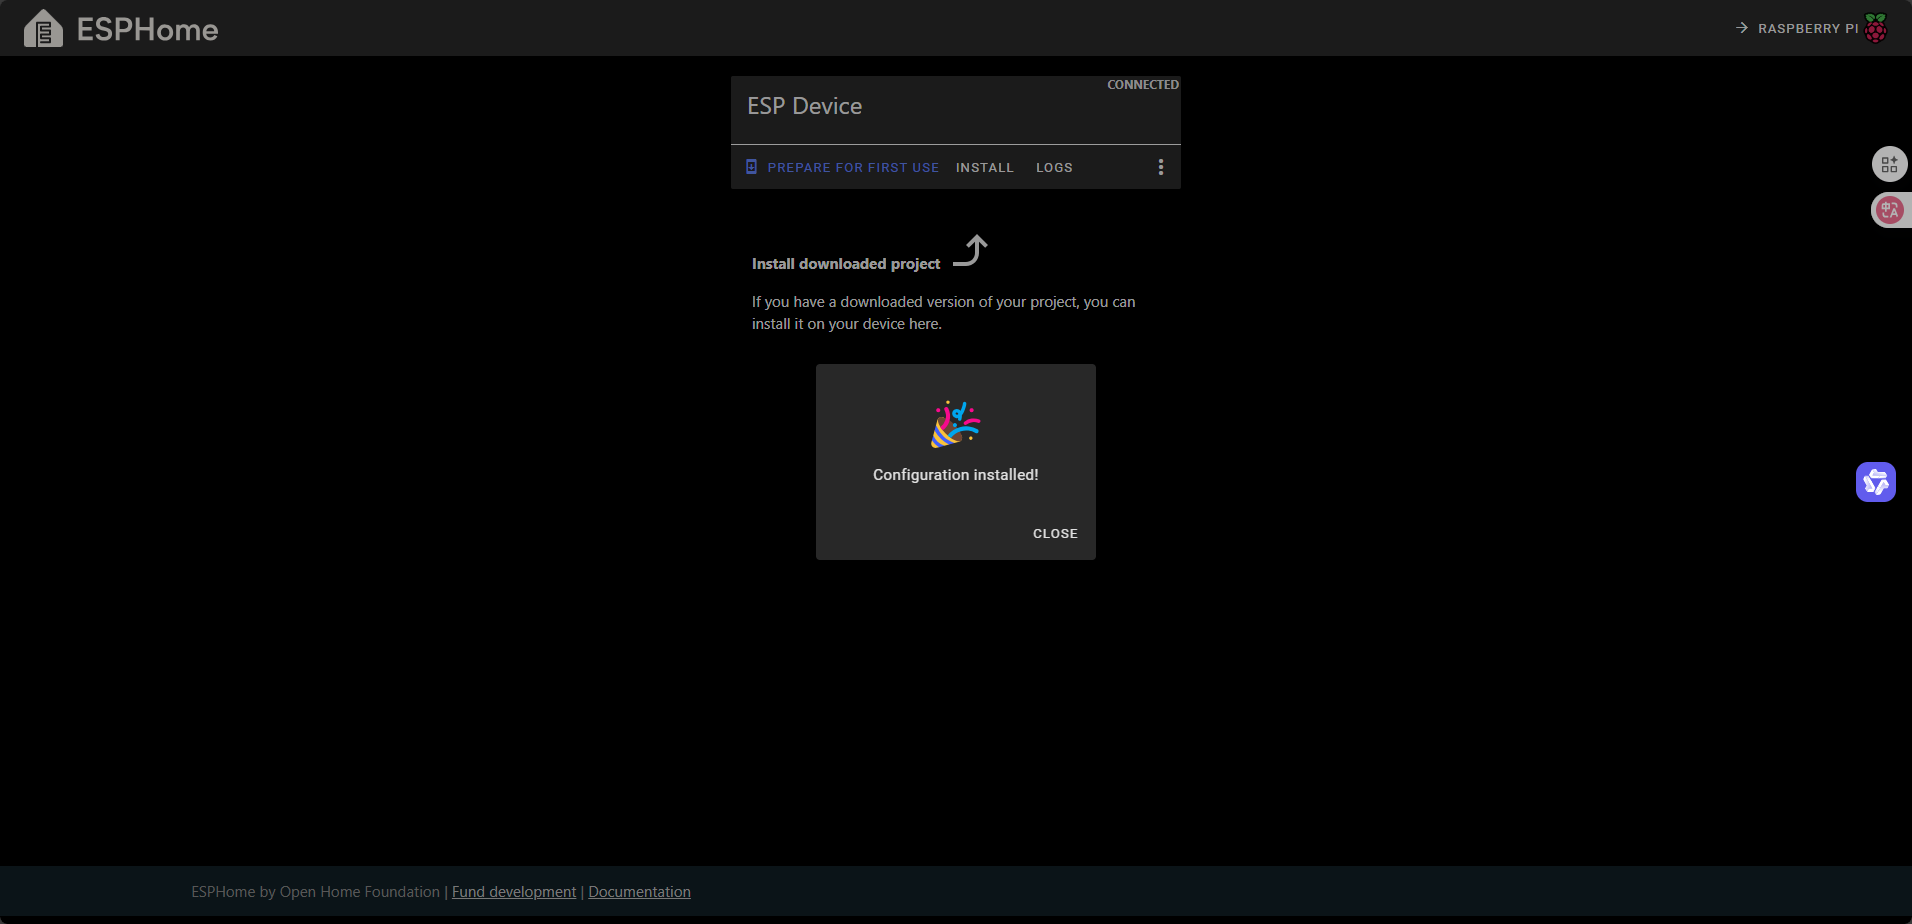
Flashing completed!
5. Device Connection Configuration
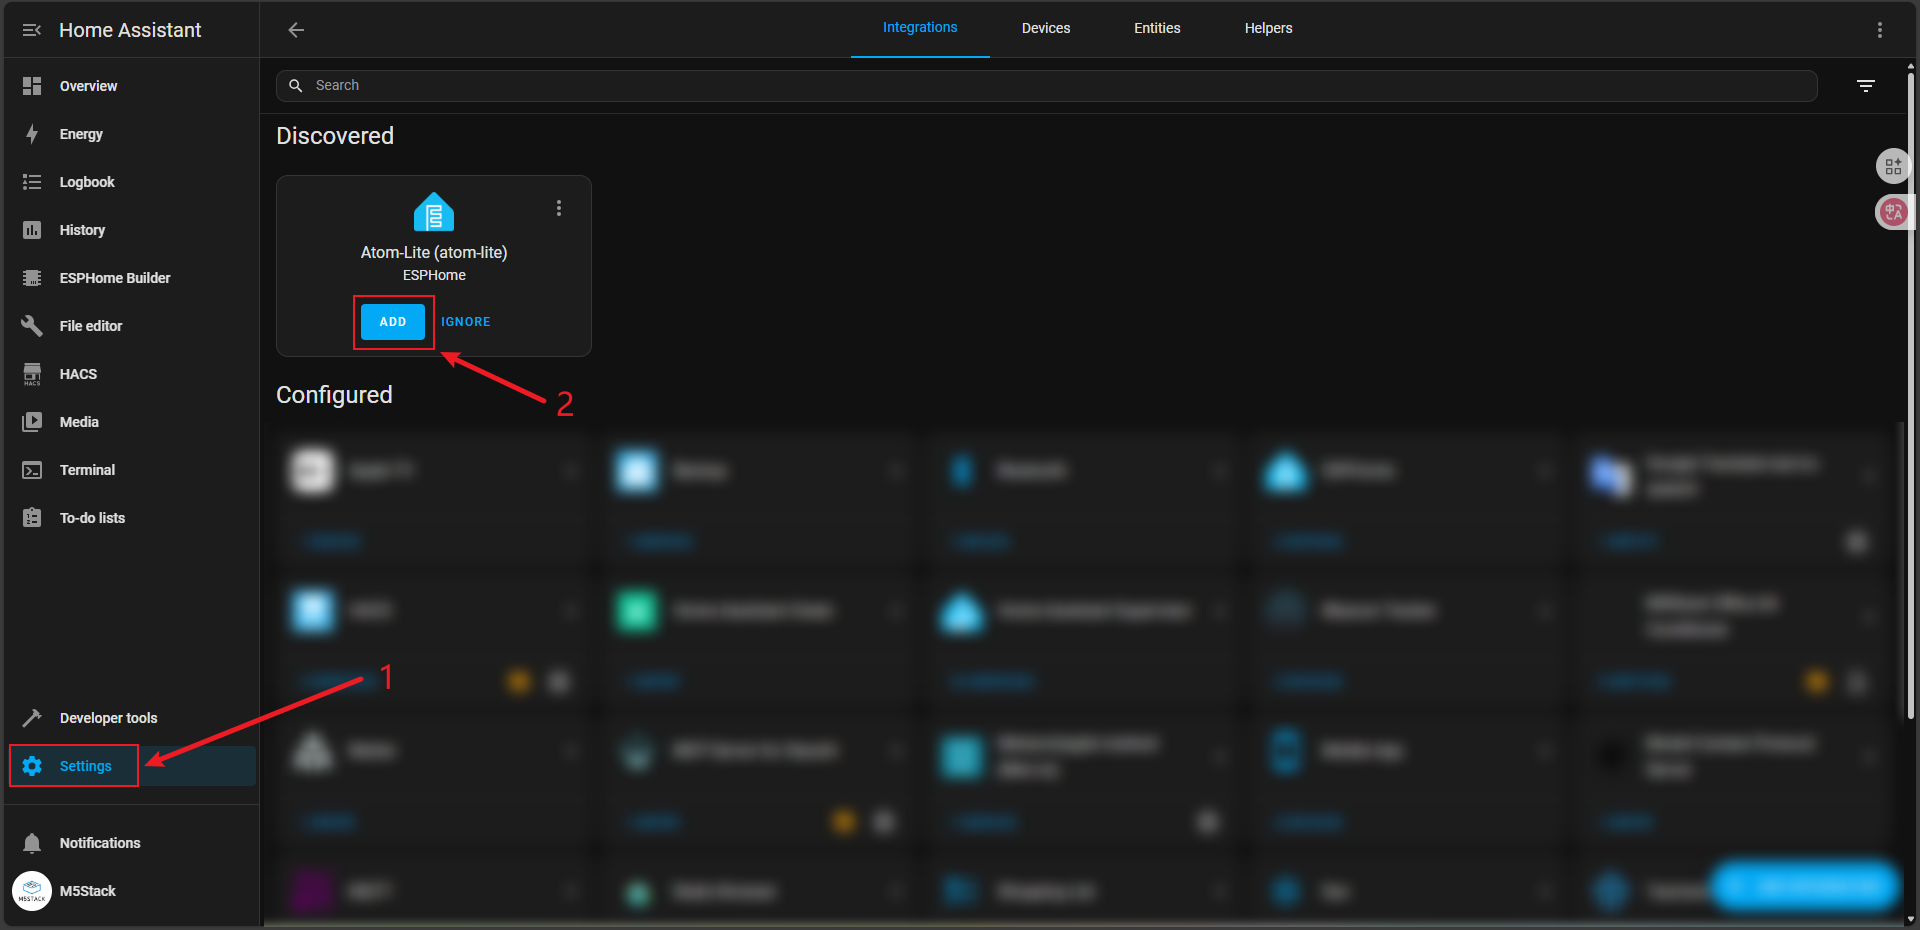
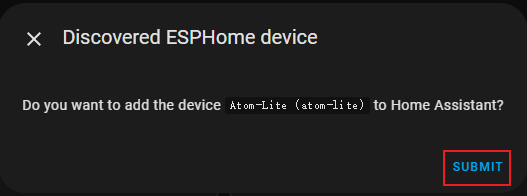
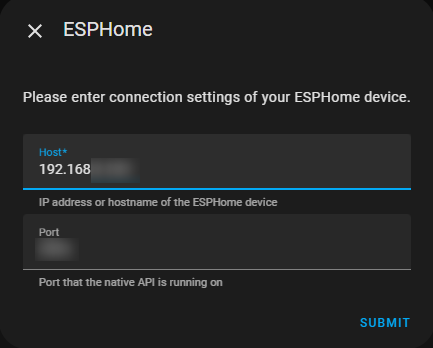
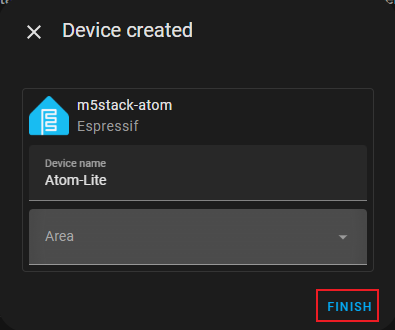
After completing the firmware flashing, the device will automatically attempt to connect to Wi-Fi when powered on. Go to Setting and check the Discovered section for new devices. Click ADD to add the device.
6. HA Automation Configuration
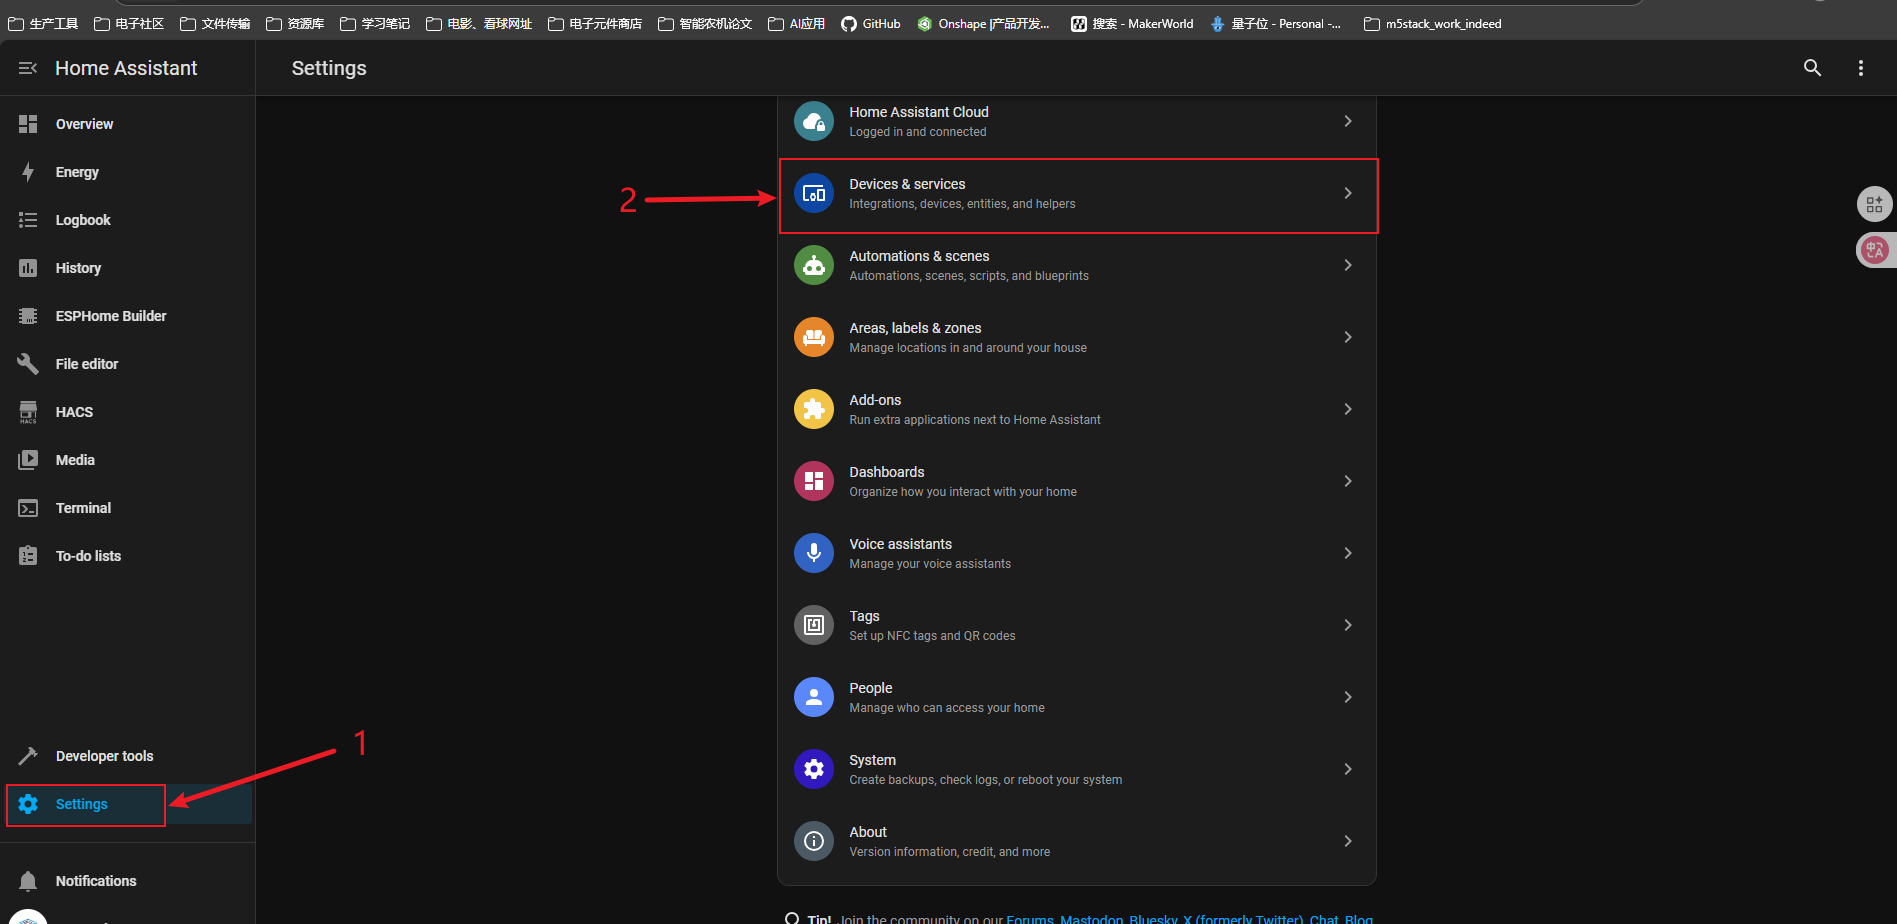
Click Settings to enter the configuration interface and select Devices & services.
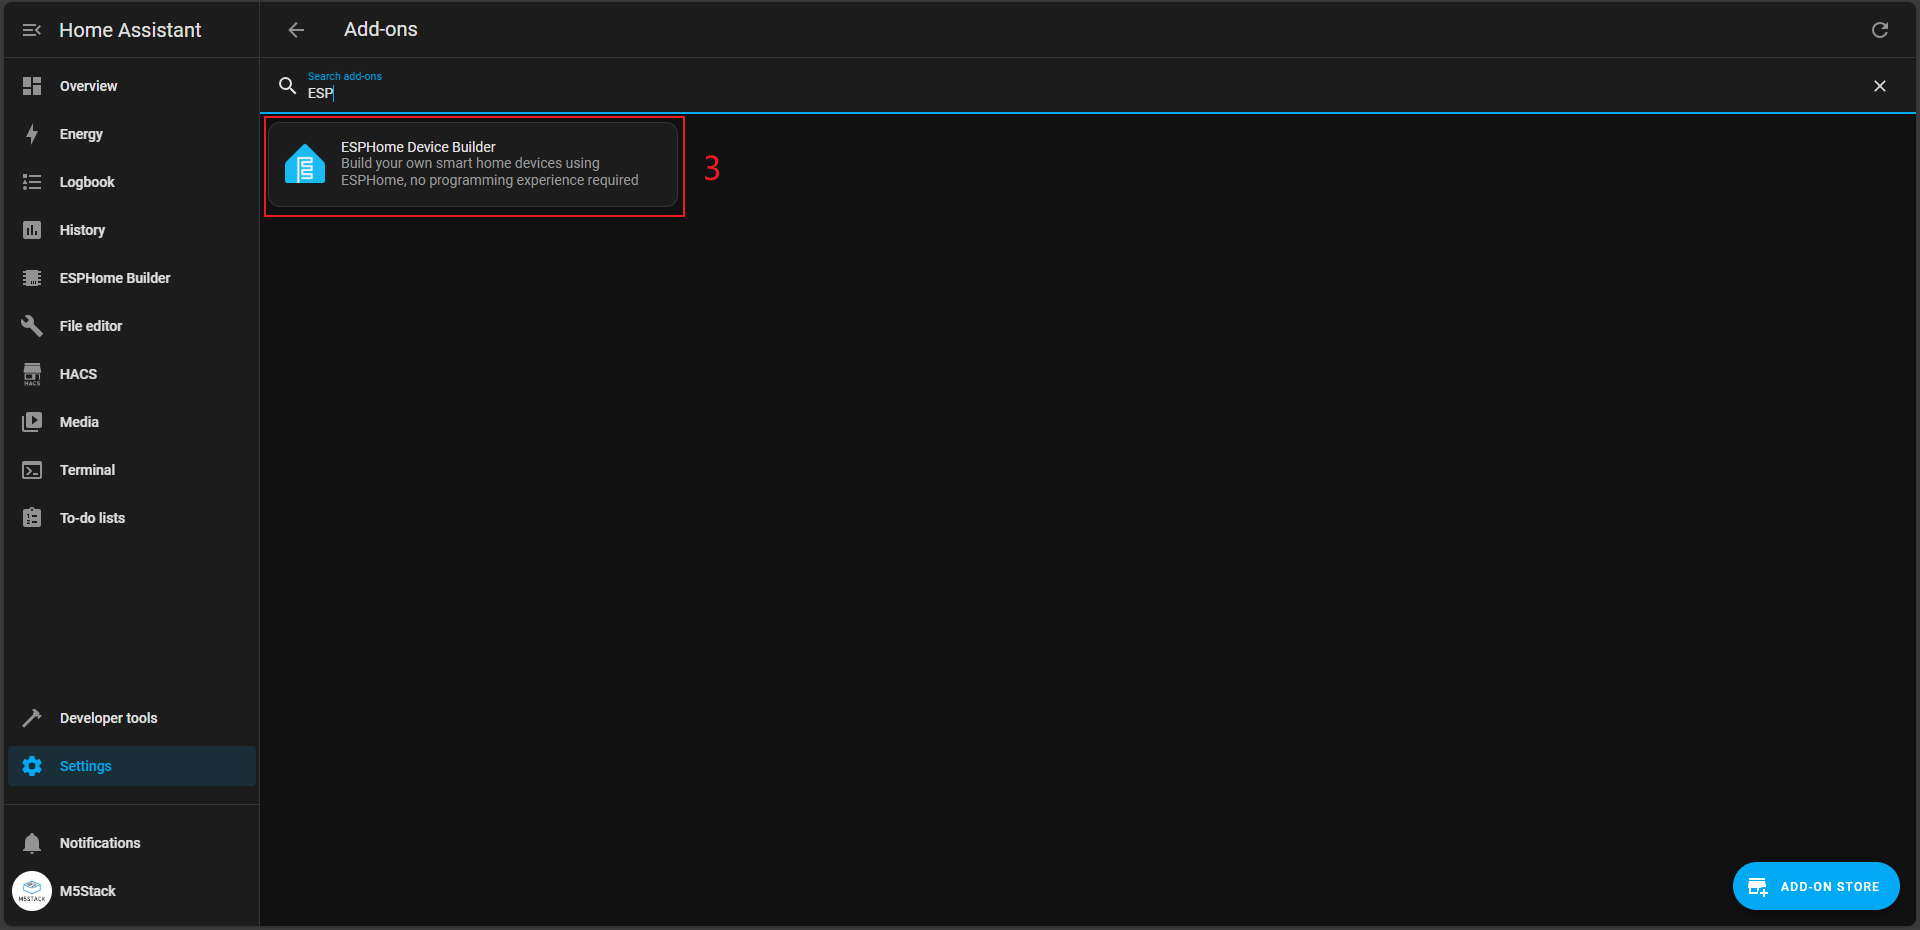
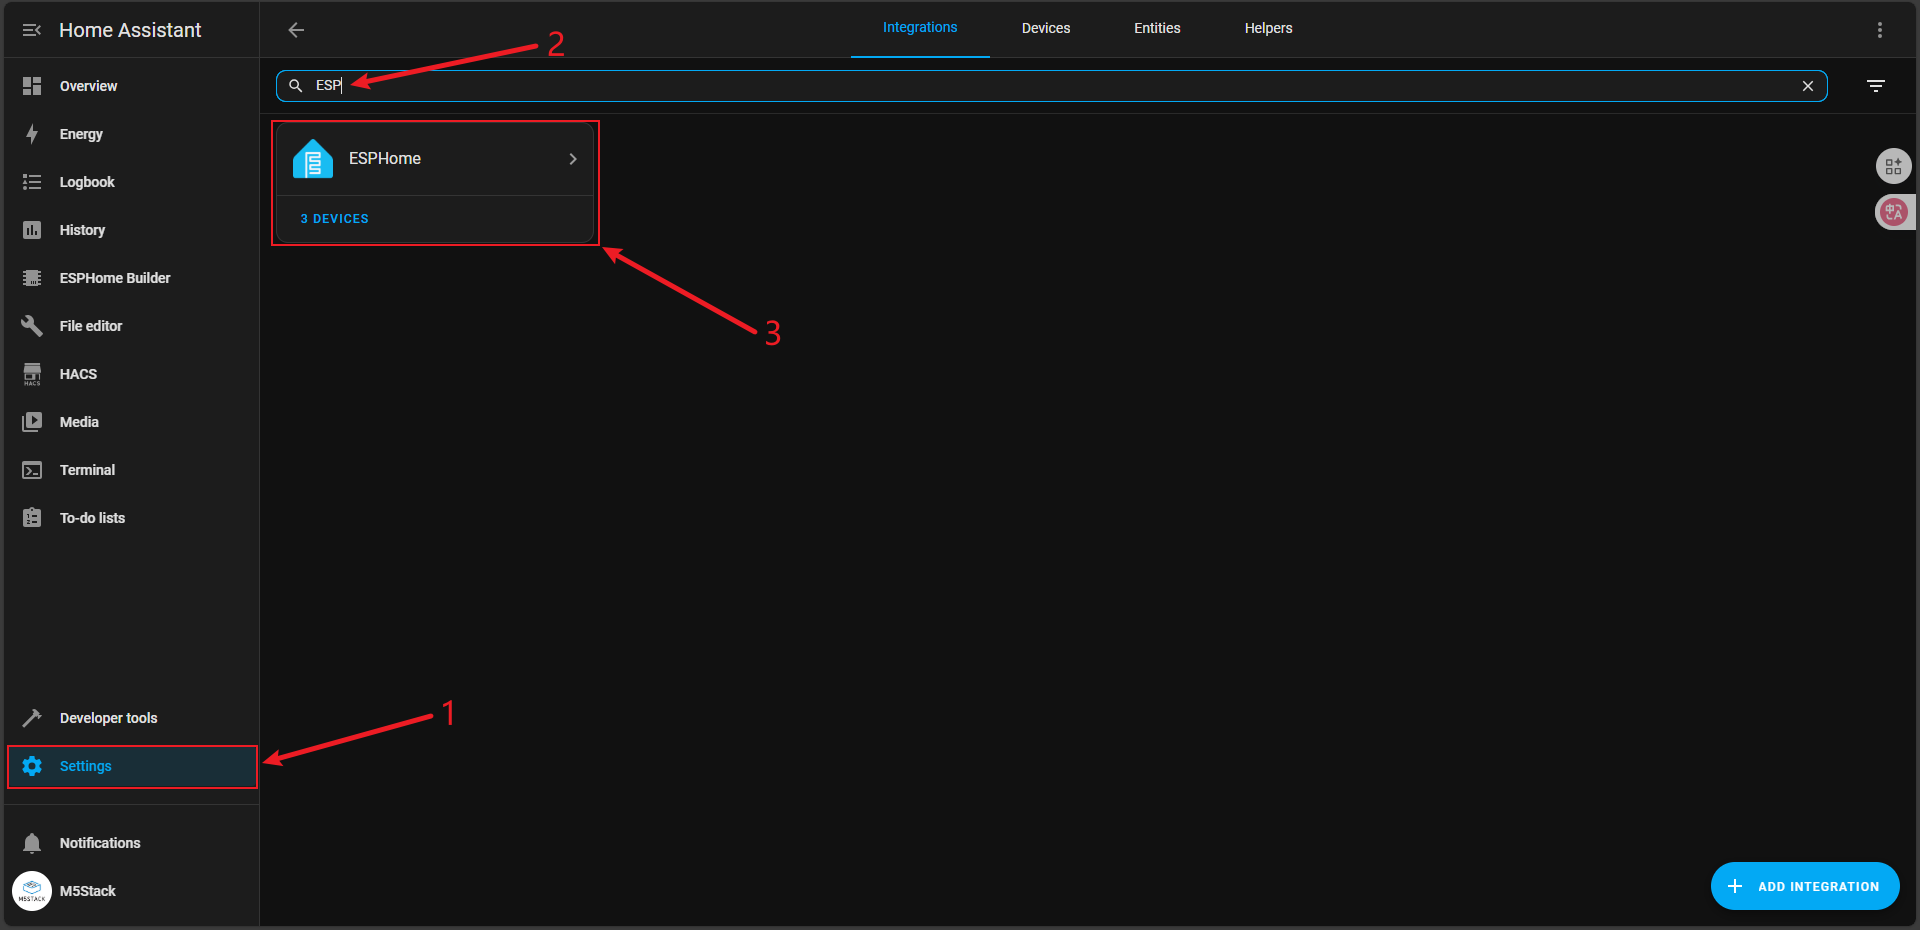
Search for ESP in the search bar to find ESPHome, then select Atom-Lite.
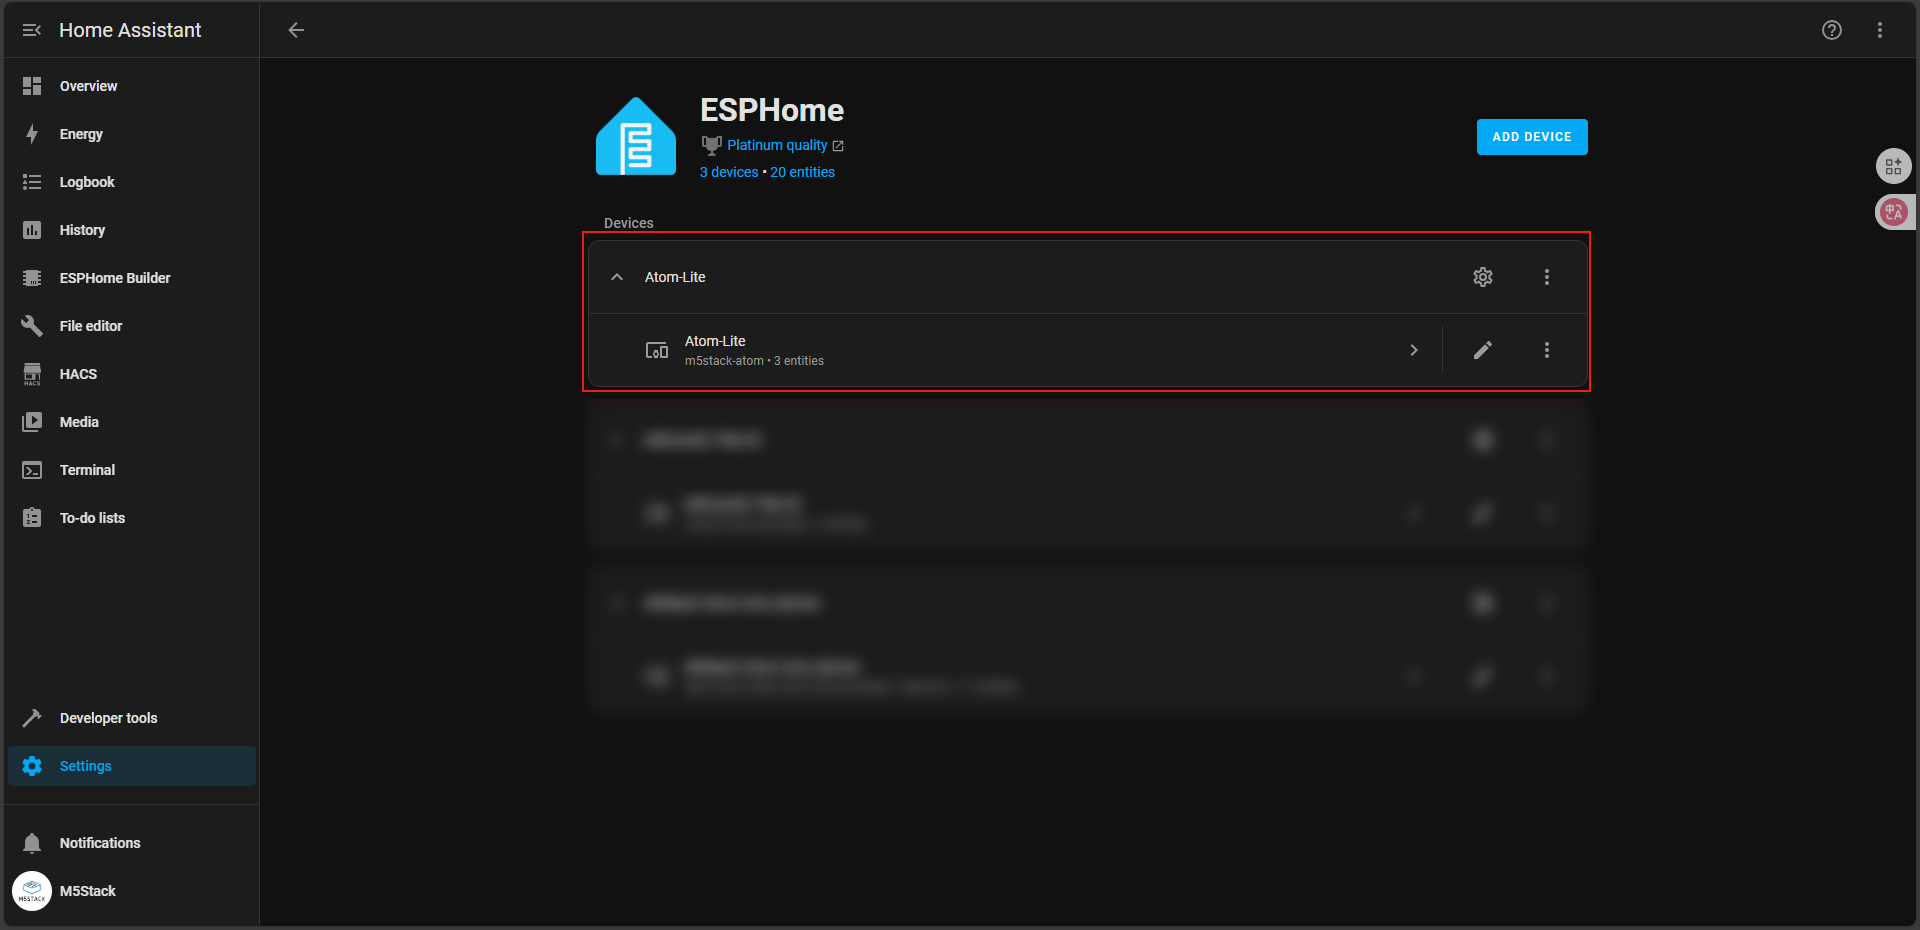
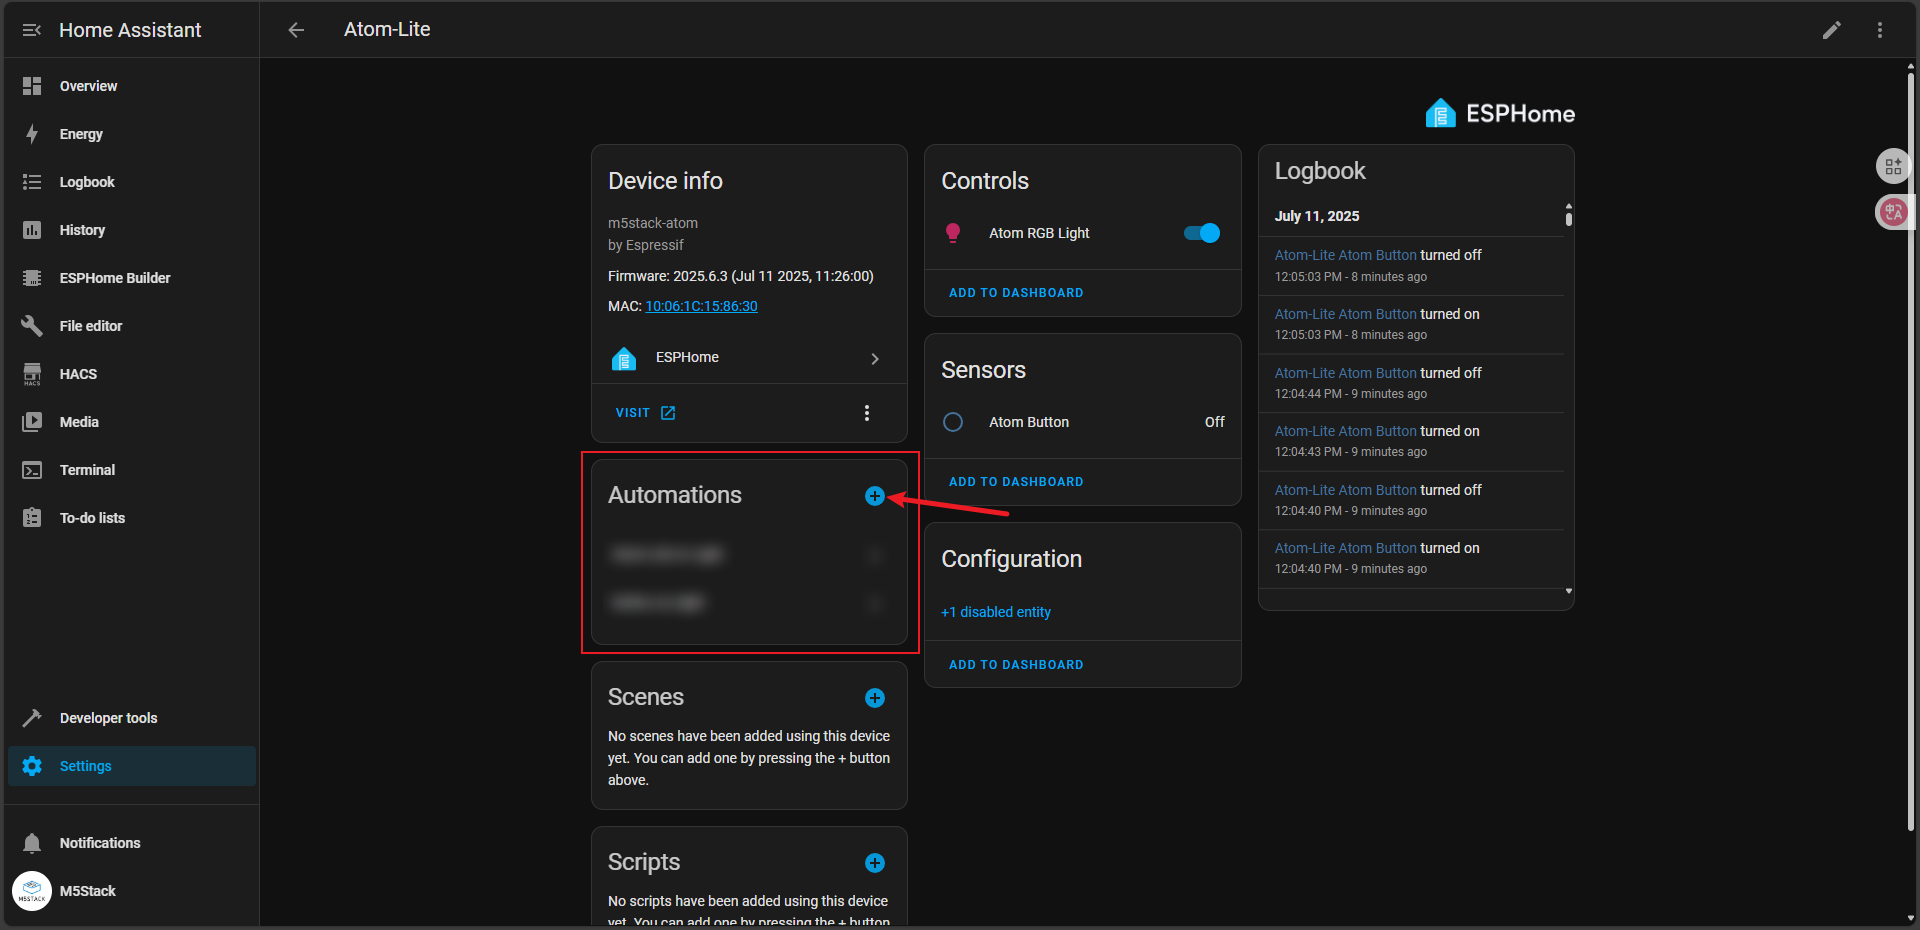
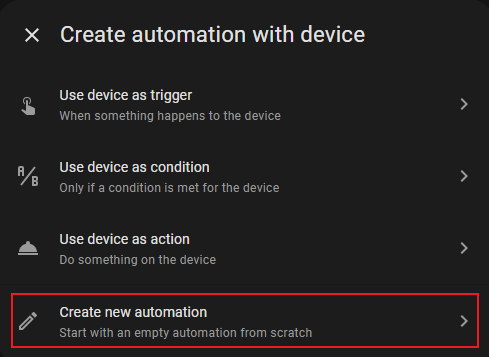
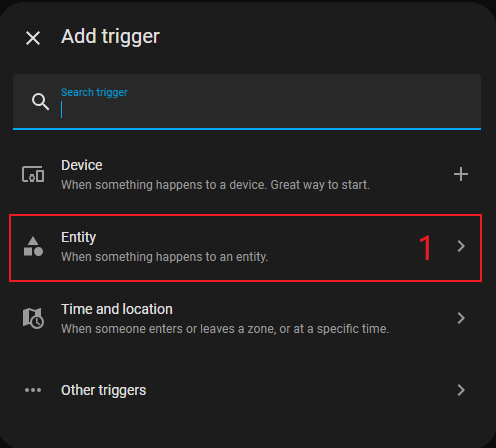
In the Atom-Lite configuration page, you can see two Entities: Atom RGB Light and Atom Button. Automation is achieved by configuring these entities. Click the + button to add Automations and follow the instructions.
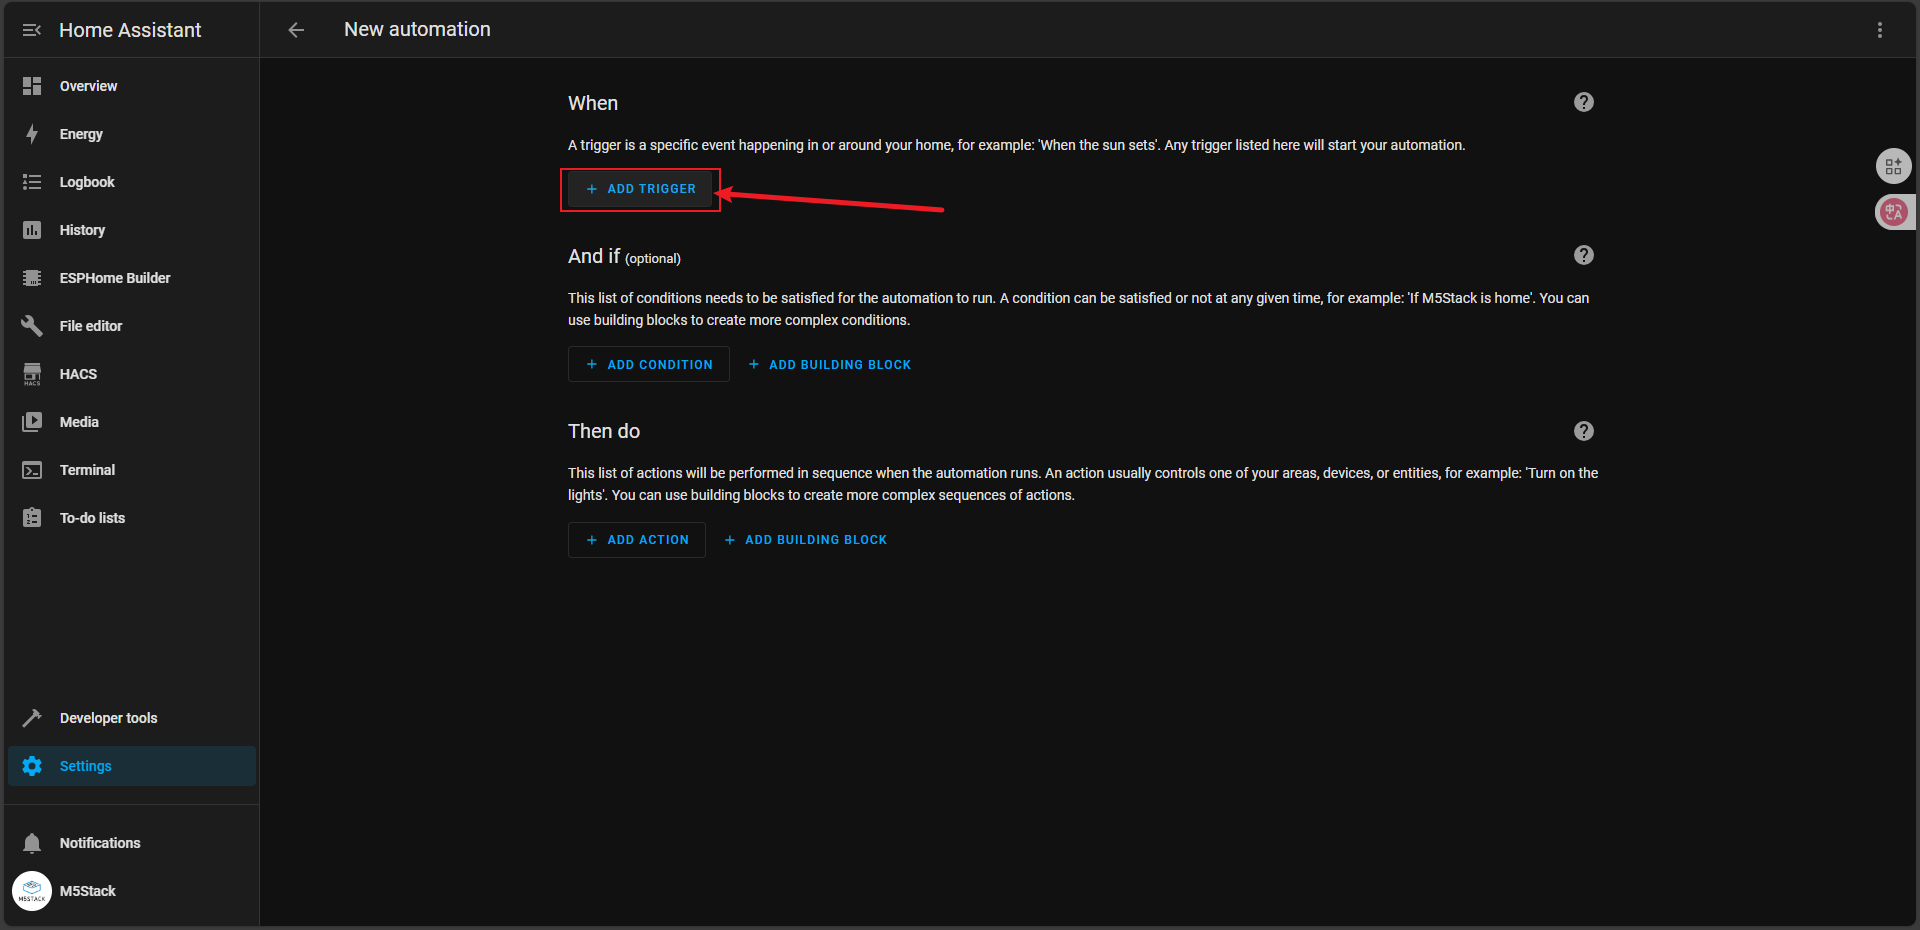
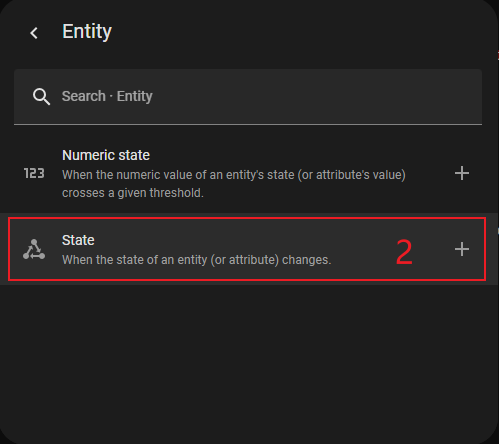
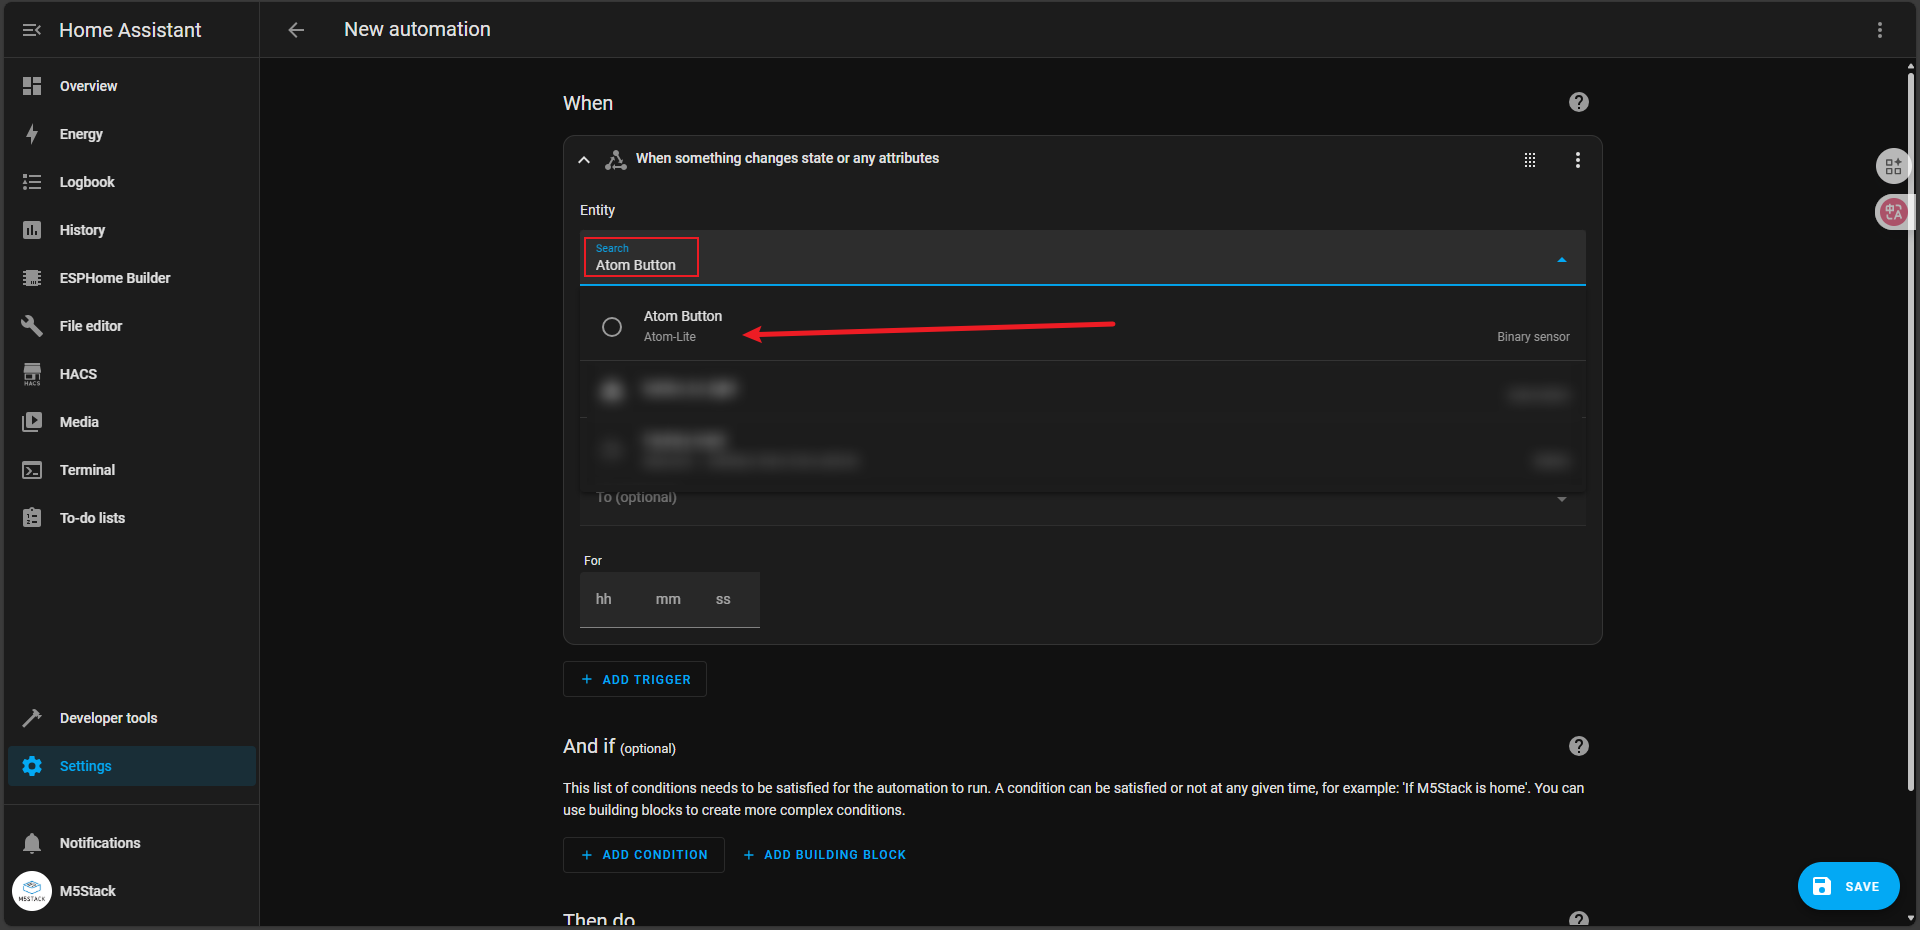

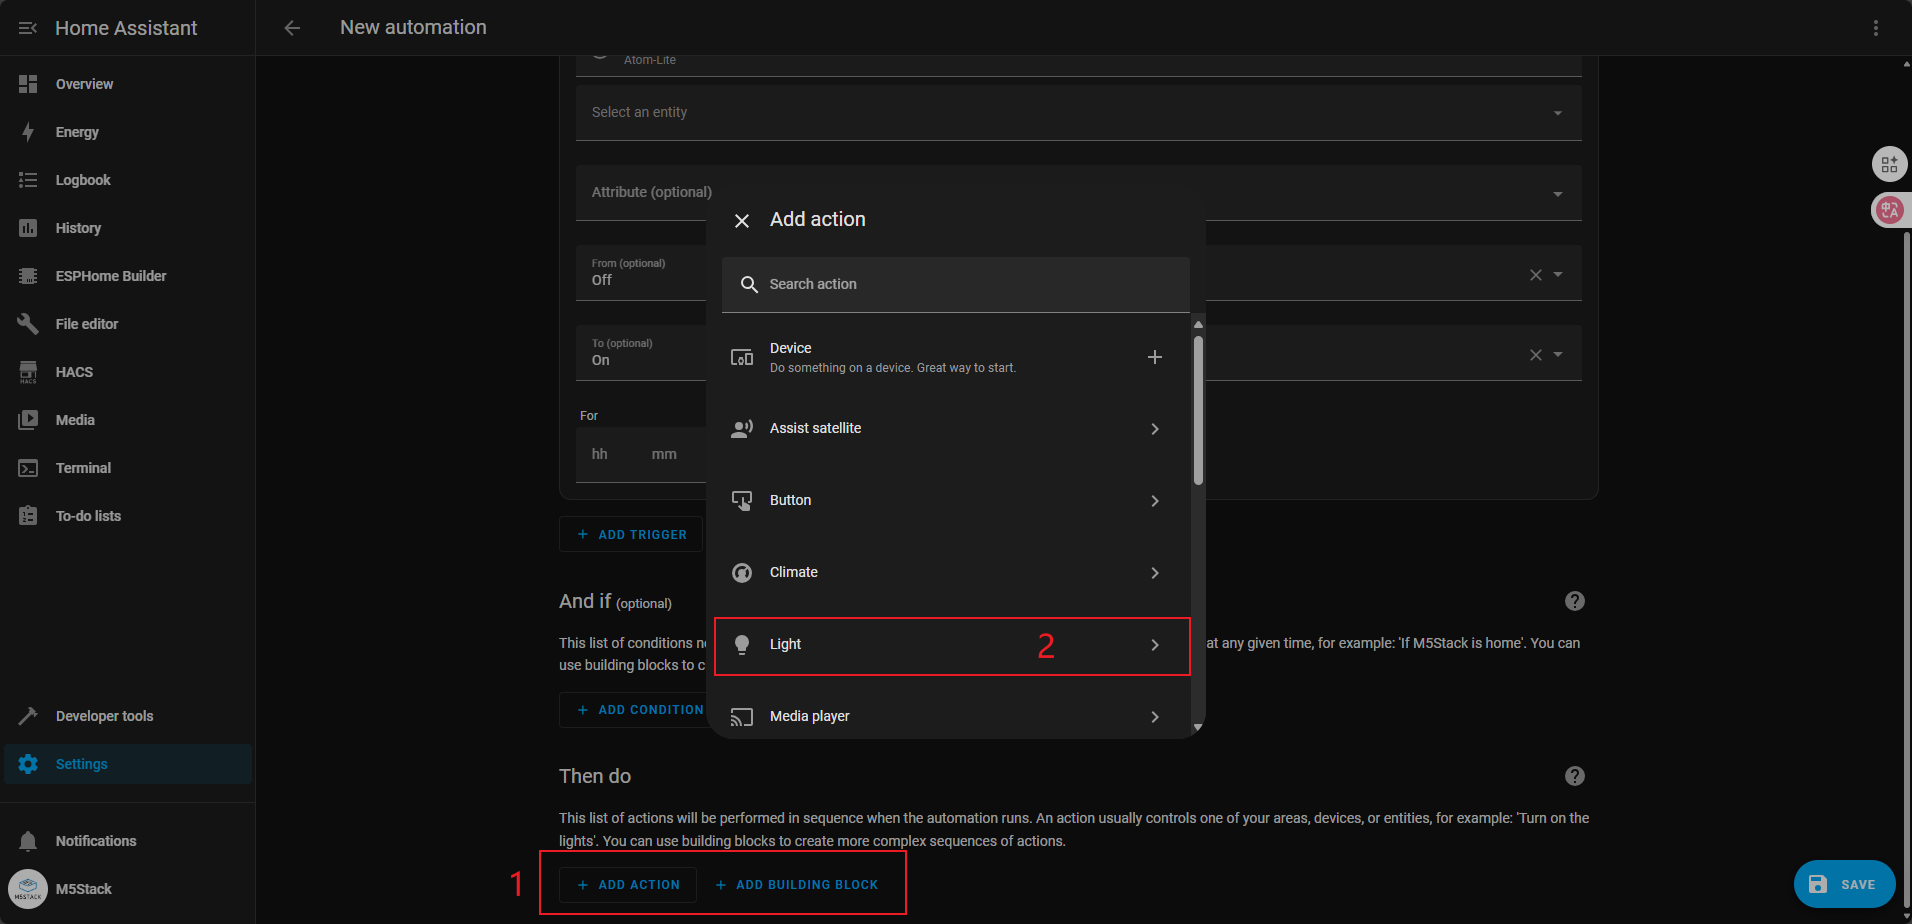


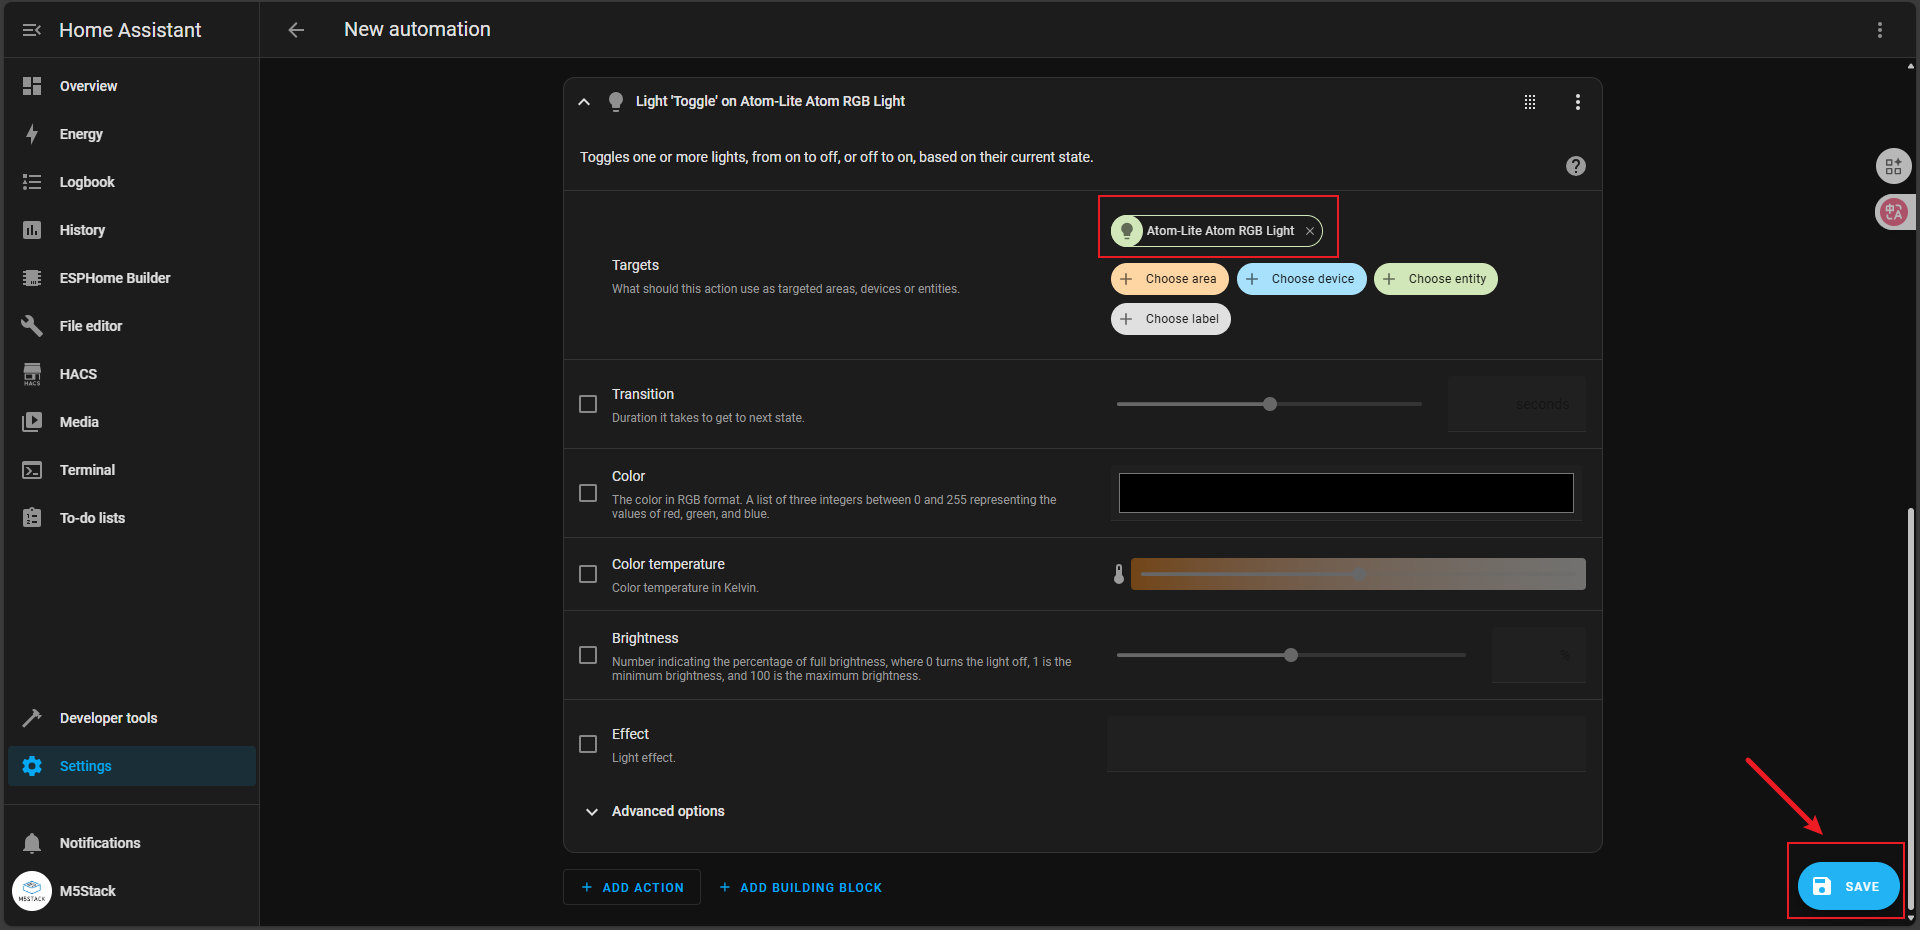
In this way, we've used the Atom Button and Atom RGB Light entities to create an Automation. The effect of this automation is to toggle the light state when the button is clicked.
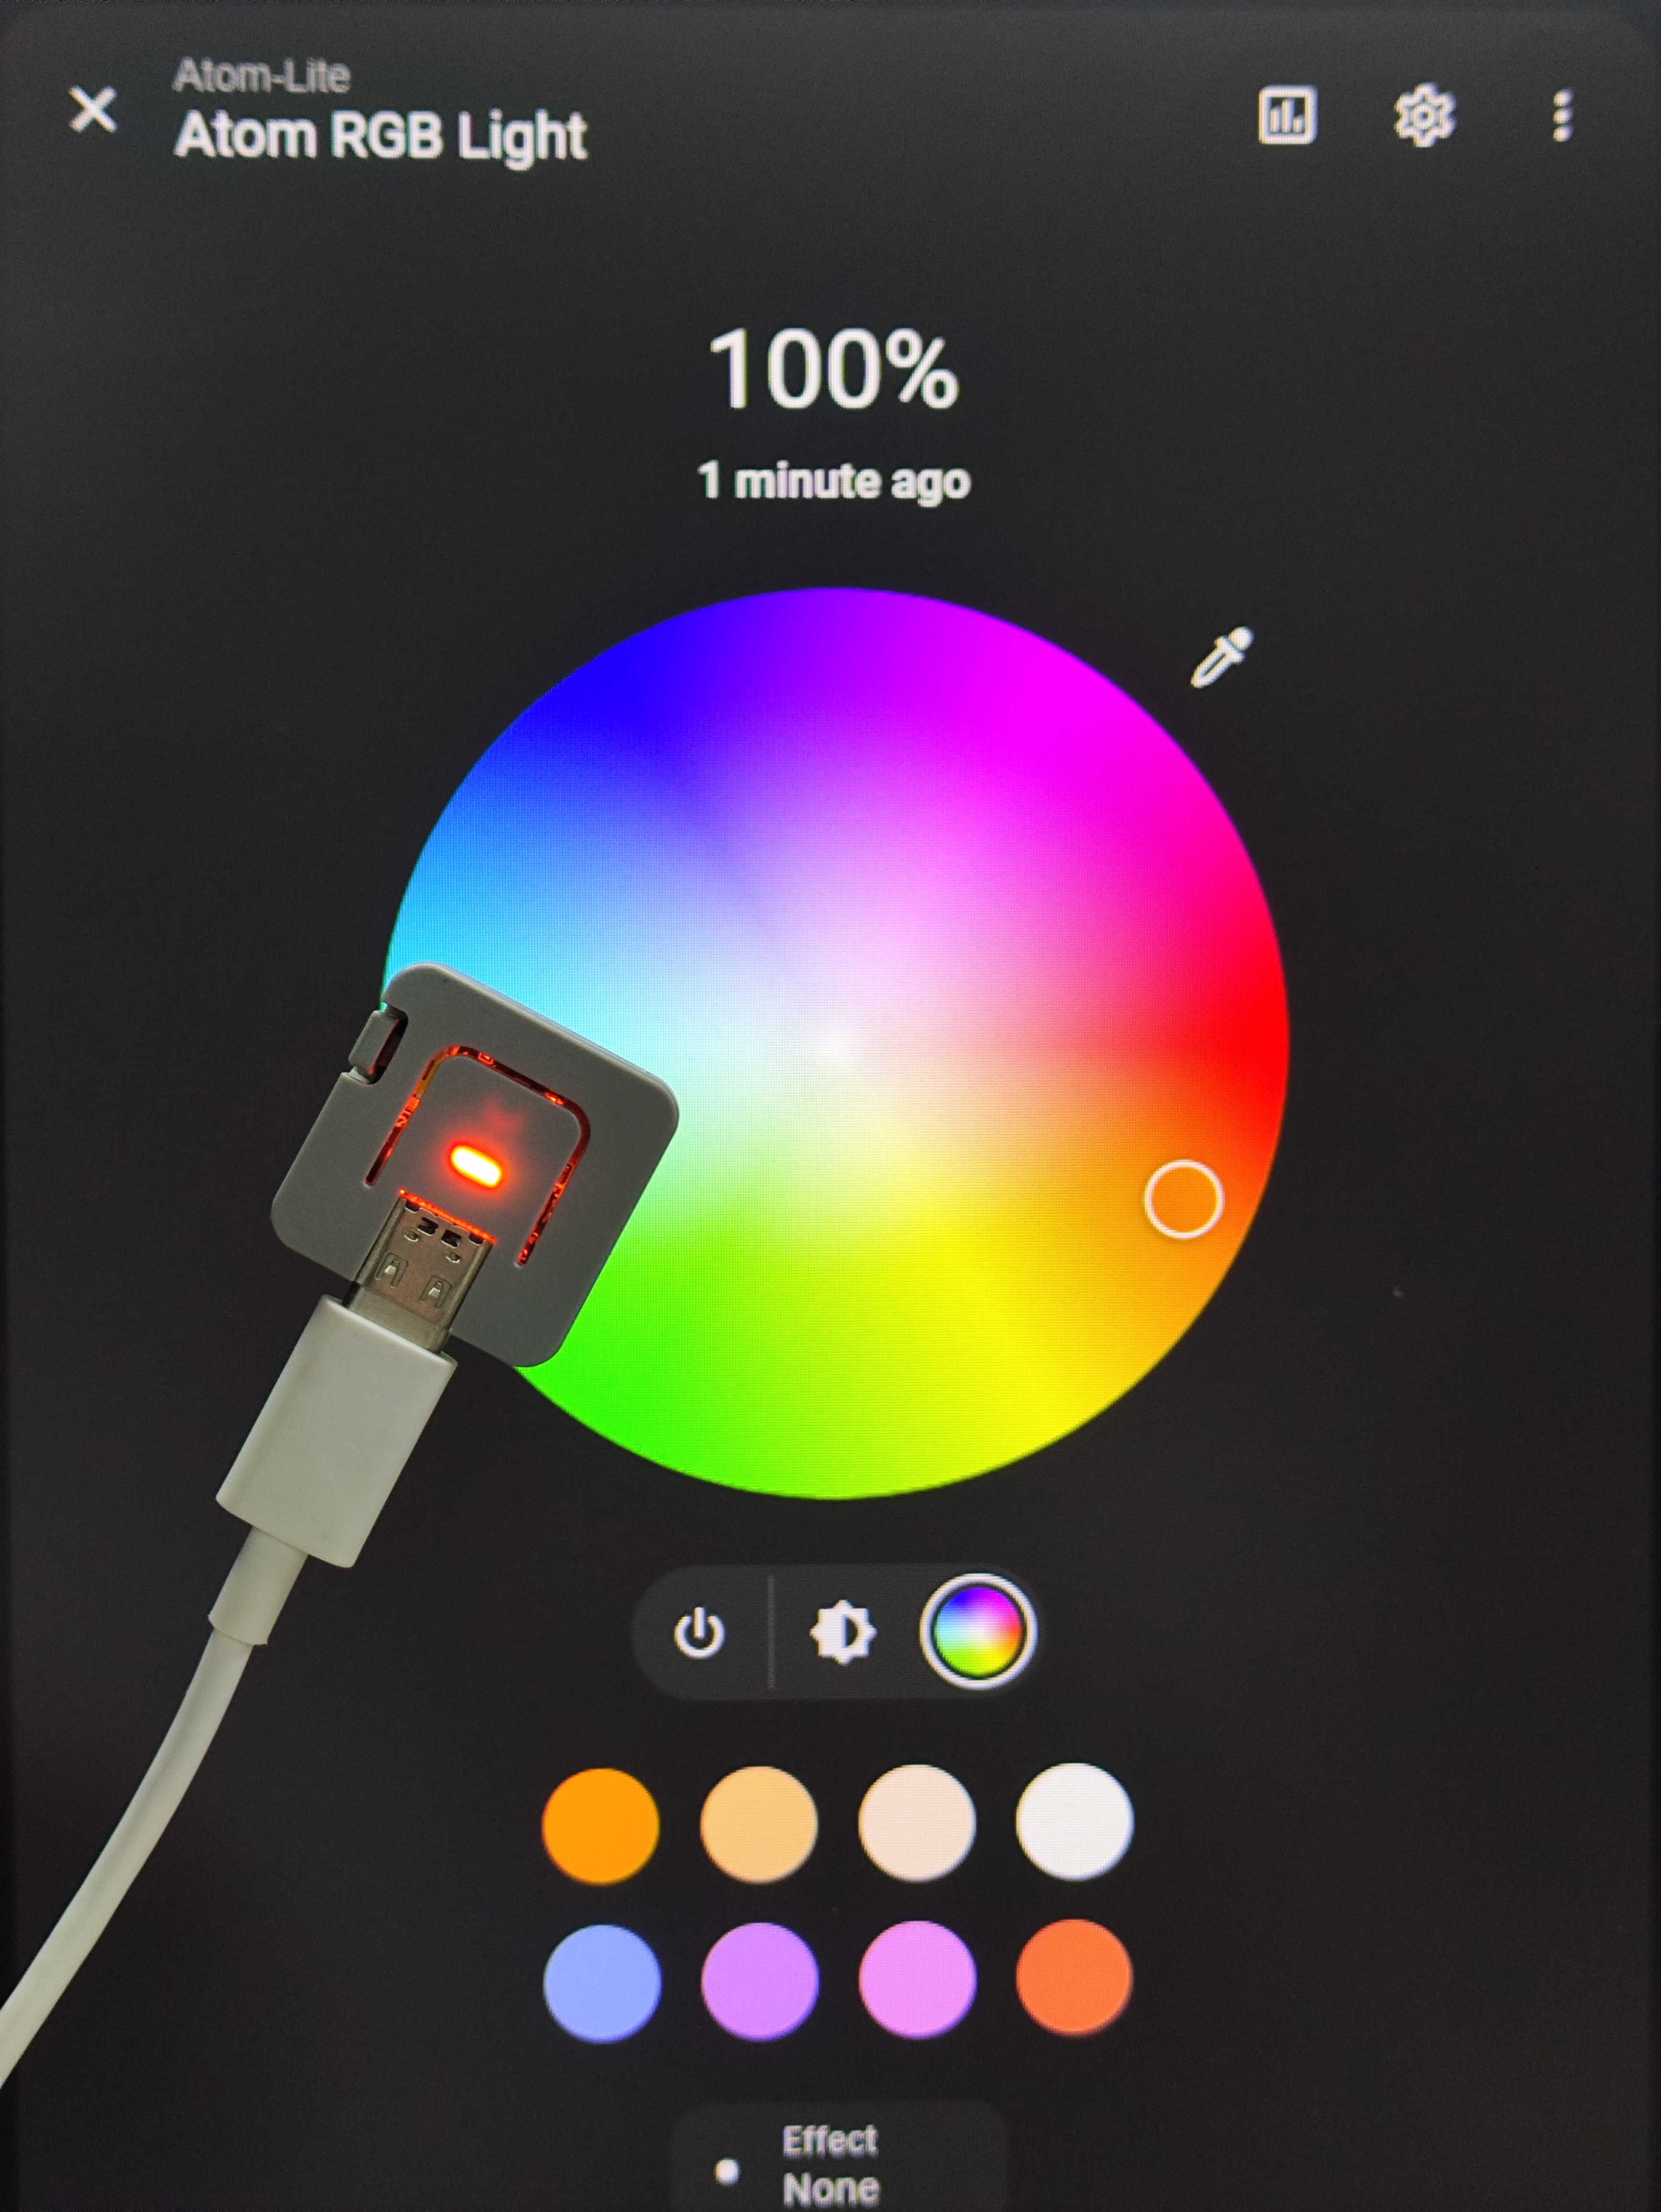
7. Controlling Atom RGB via HA Components
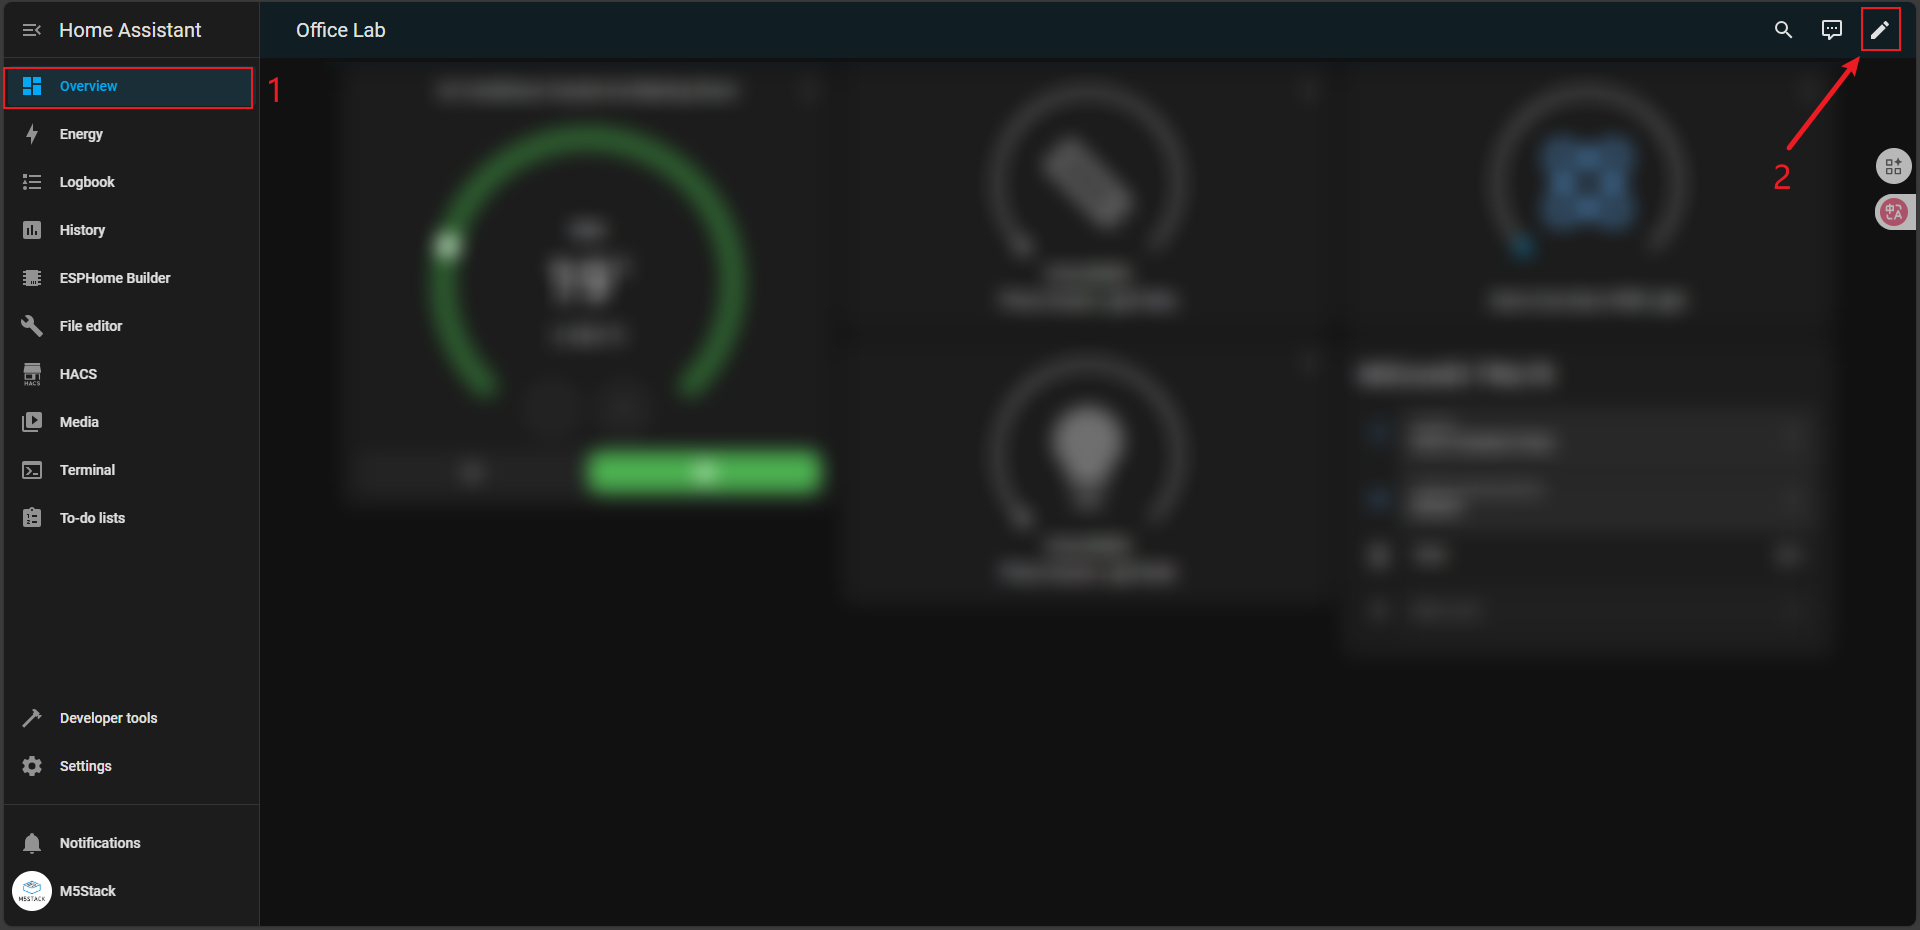
Click the Overview menu to enter the component control interface, then click the edit button in the upper right corner to enter edit mode.
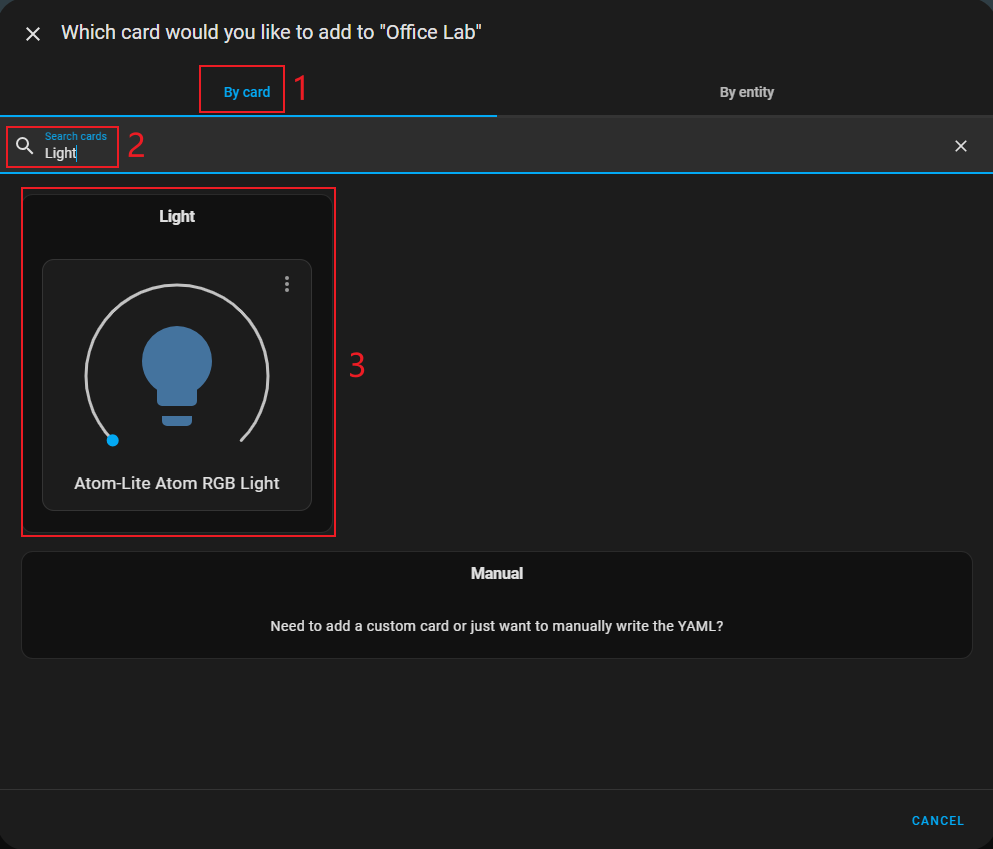
In the By card interface, search for Light and select the Atom RGB Light entity component.
Component configuration as shown below:

8. Demonstration
- Double-click the button to switch the RGB light to pink.
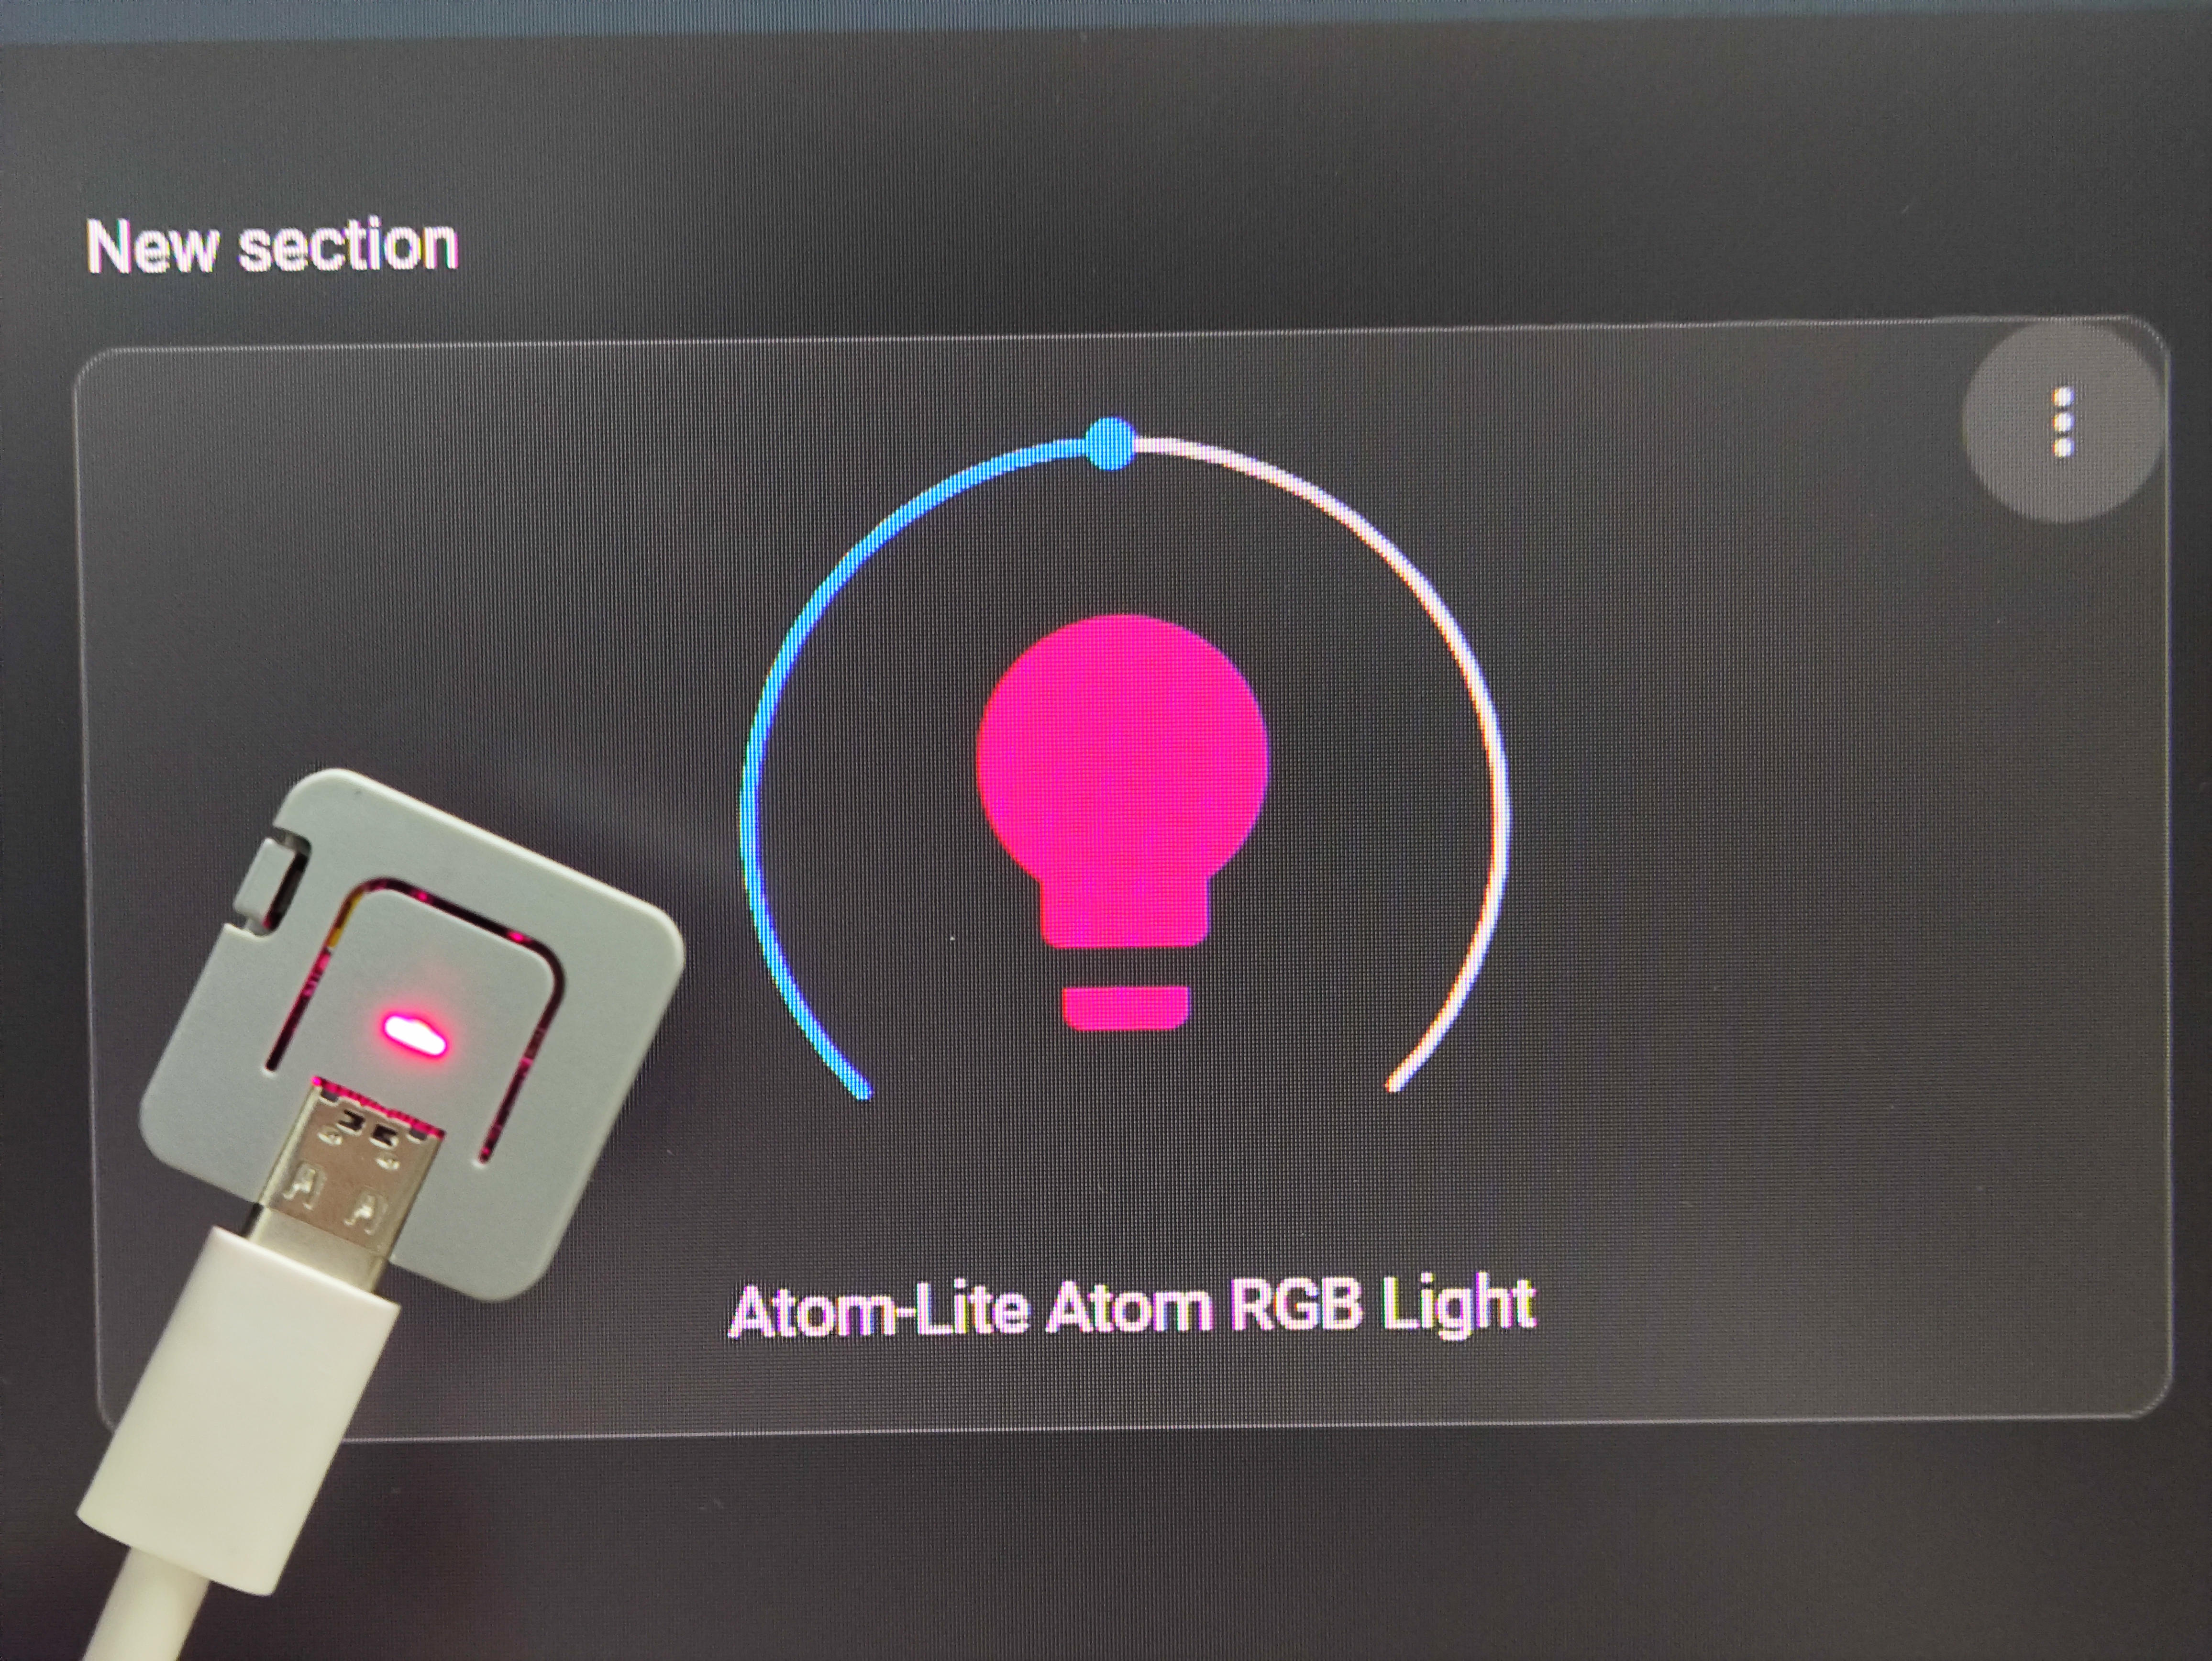
- Press and hold the button for 2+ seconds to switch the RGB light to green.

- The RGB light status is not only displayed in real-time on the component, but can also be directly controlled through the component.