Home Assistant
Home Assistant
コントローラーとデバイス
カメラ
コンポーネント
照明
インターフェース拡張
アプリケーション
ダッシュボード
Dial ESPHome 統合
Dial v1.1 の ESPHome 統合には、ディスプレイ、タッチ、ロータリーエンコーダー、NFC、ブザー、RTC コンポーネントが含まれます。

1. デバイス概要
| 項目 | 情報 |
|---|---|
| 製品名 | Dial v1.1 |
| SKU | K130-V11 |
| 主な機能 | 円形ディスプレイ、タッチ、ロータリーエンコーダー、NFC、ブザー、RTC |
| 通信インターフェース | I2C、SPI、GPIO |
| ESPHome コンポーネント | mipi_spi、ft5x06、rotary_encoder、binary_sensor.gpio、rc522、rtttl、pcf8563、monochromatic |
| 必要な ESPHome バージョン | / |
2. コンポーネントの説明
ディスプレイとタッチスクリーン
円形の GC9A01A ディスプレイには MIPI SPI Display Platform を使用し、タッチ入力には FT5x06 Touchscreen Platform を使用します。表示例では固定テキストのみを出力します。
i2c:
  - id: internal_i2c
    sda: GPIO11
    scl: GPIO12
    frequency: 400kHz

spi:
  id: spi_bus
  mosi_pin: GPIO5
  clk_pin: GPIO6

font:
  - file: "gfonts://Roboto"
    id: my_font
    size: 32

display:
  - platform: mipi_spi
    id: round_display
    model: GC9A01A
    cs_pin: GPIO7
    reset_pin: GPIO8
    dc_pin: GPIO4
    invert_colors: true
    data_rate: 40MHz
    update_interval: 1s
    auto_clear_enabled: true
    lambda: |-
      it.print(120, 120, id(my_font), TextAlign::CENTER, "Hello");

touchscreen:
  - platform: ft5x06
    id: touch
    i2c_id: internal_i2c
address: 0x38バックライト
ディスプレイのバックライトは Monochromatic Light Platform を使用し、GPIO9 で制御します。
output:
  - platform: ledc
    pin: GPIO9
    id: backlight_output
    frequency: 1000Hz

light:
  - platform: monochromatic
    name: "Backlight"
    output: backlight_output
    id: display_backlight
default_transition_length: 0sロータリーエンコーダーとボタン
ロータリーエンコーダーには Rotary Encoder Sensor Platform を使用し、ディスプレイ下部のボタンには GPIO Binary Sensor Platform を使用します。
sensor:
  - platform: rotary_encoder
    id: encoder
    name: "Rotary Encoder"
    pin_a:
      number: GPIO40
      mode: INPUT_PULLUP
    pin_b:
      number: GPIO41
      mode: INPUT_PULLUP
    resolution: 4
    min_value: -32768
    max_value: 32767
    publish_initial_value: true

binary_sensor:
  - platform: gpio
    name: Button
    id: front_button
    pin:
      number: GPIO42
      inverted: true
      mode:
        input: true
pullup: trueNFC リーダー
内蔵 WS1850S は RC522 I2C コンポーネントを使用して NFC/RFID タグを検出します。基本的なイベントではタグ UID のみを出力します。
rc522_i2c:
  - id: nfc_reader
    i2c_id: internal_i2c
    address: 0x28
    update_interval: 500ms
    on_tag:
      - lambda: |-
ESP_LOGD("rfid", "Card detected: %s", x.c_str());ブザー
内蔵ブザーは RTTTL コンポーネントを使用し、GPIO3 から音声を出力します。サンプルのボタンを押すと、短い通知音を 1 回だけ再生します。
output:
  - platform: ledc
    pin: GPIO3
    id: buzzer
    frequency: 4000Hz

rtttl:
  output: buzzer
  id: rtttl_player
  gain: 0.6

button:
  - platform: template
    name: "The buzzer beeps once"
    id: buzzer_button
    icon: mdi:bell-ring
    on_press:
      - rtttl.play:
          id: rtttl_player
rtttl: "beep:d=4,o=5,b=180:16e,16e"RTC
内蔵 RTC には PCF8563 Time Platform を使用します。起動時に RTC を読み取り、初期化中に表示時刻が空になるのを防ぎます。
time:
  - platform: pcf8563
    id: rtctime
    i2c_id: internal_i2c
    address: 0x51
update_interval: never3. 参考例
完全なサンプルは dial-example.yaml を参照してください。この例には、メインコントローラー、ネットワーク、API、ディスプレイ、タッチ、ロータリーエンコーダー、NFC、ブザー、RTC、バックライトの設定が含まれています。
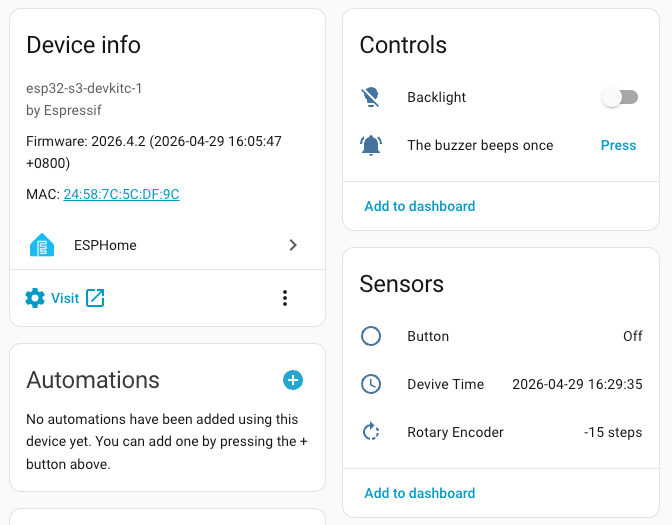
デバイス追加時の Home Assistant 画面:
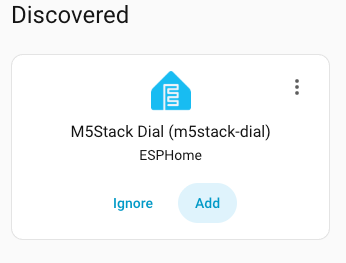
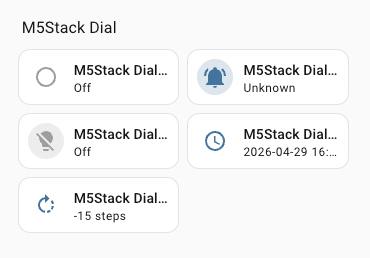
デバイスの追加後は、ロータリーエンコーダー、ボタン、NFC、ブザー、バックライト、RTC などのエンティティを確認し、Dashboard に追加できます。