

Home Assistant
Home Assistant
Controller & Devices
Cameras
Components
Lighting
Interfaces and Expansion
Applications
Media Playback
Dashboard
One-Click Flashing of Precompiled ESPHome Firmware
Selected M5Stack controllers, complete devices, and application solutions provide precompiled ESPHome firmware for quick evaluation. Click the one-click flashing button on the corresponding product page to write the firmware to the device, then configure the network and connect the device to Home Assistant using the options supported by that firmware. No YAML authoring or local firmware compilation is required.
1. Preparation
- An M5Stack device compatible with the firmware
- A USB cable that matches the device connector and supports data transfer
- A desktop browser with WebSerial API support. Google Chrome and Microsoft Edge are recommended.
- The appropriate USB serial driver. Check or install it only if the browser cannot detect the serial port.
One-click flashing uses the browser's serial-port access. Open the product page on a computer. Mobile browsers and browsers without WebSerial support cannot flash firmware over USB.
2. Flash the Firmware
- Connect the device to the computer with a USB data cable. If the product page requires download mode, enter it according to the product instructions.
- Click Online Flashing on the product page and select the target device from the serial-port list shown by the browser. When multiple serial devices are connected, verify the port name before selecting one.

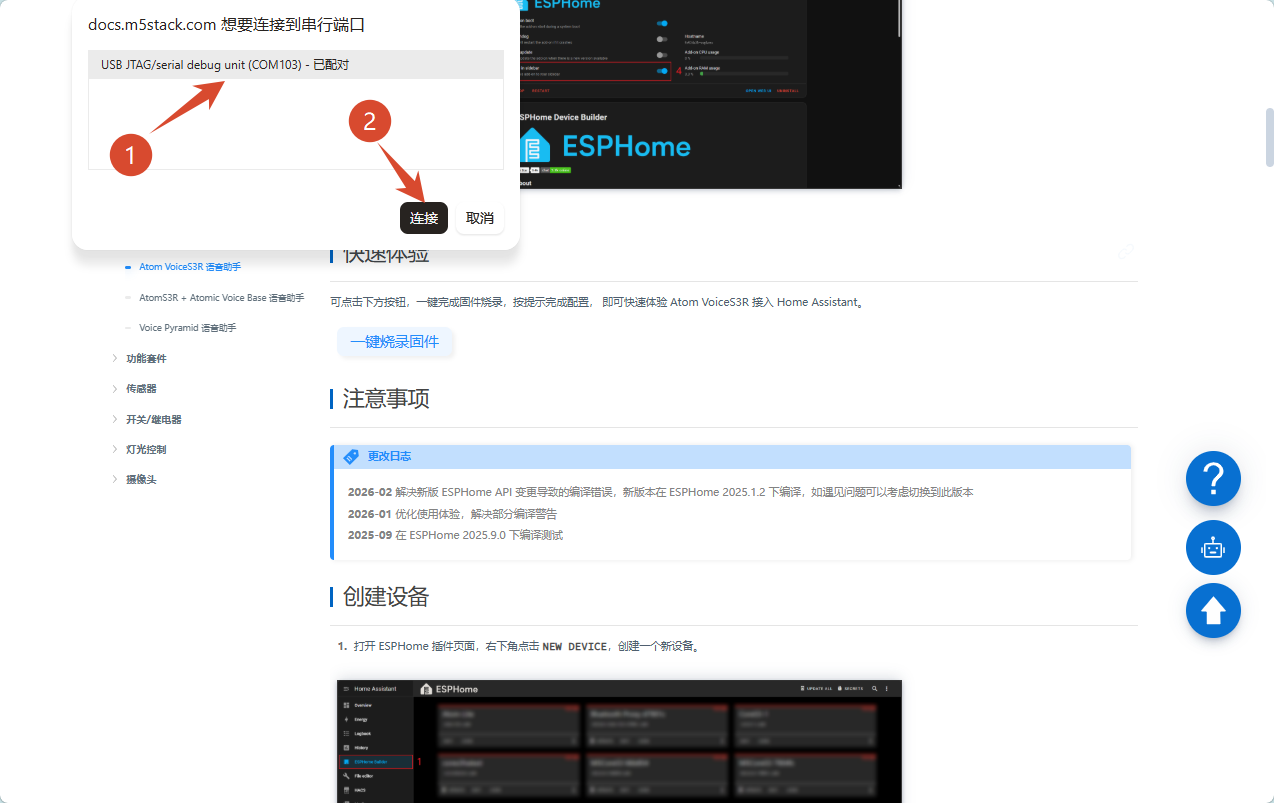
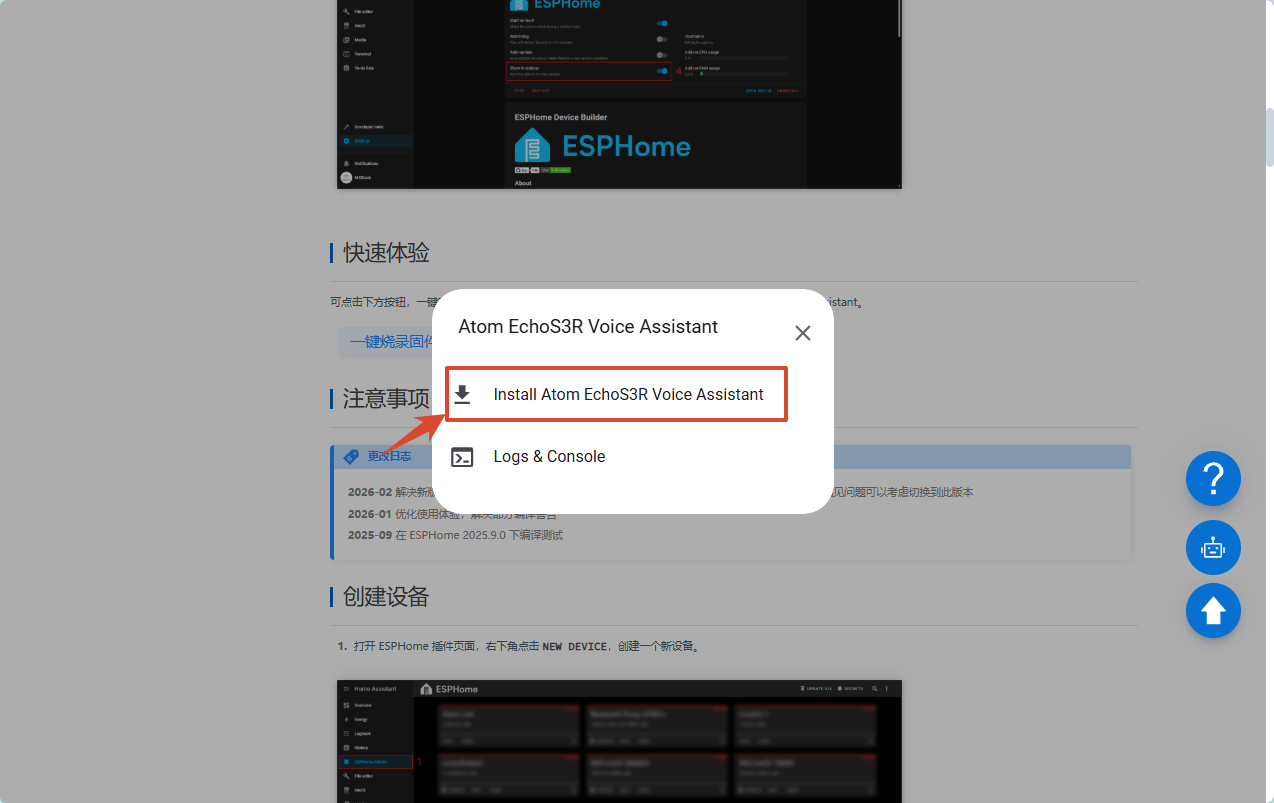
- After the serial connection is established, click the installation option.
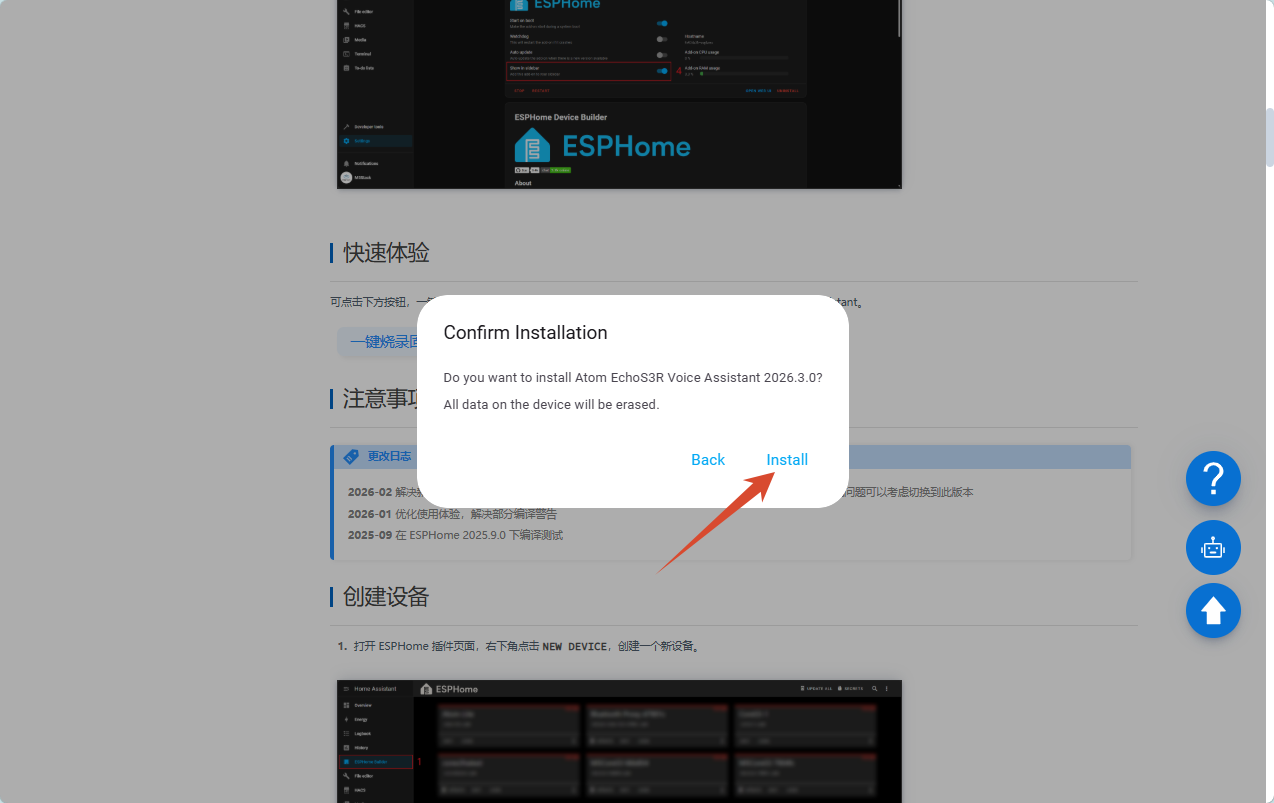
- Verify the firmware name and target device, then click
Installto start flashing.
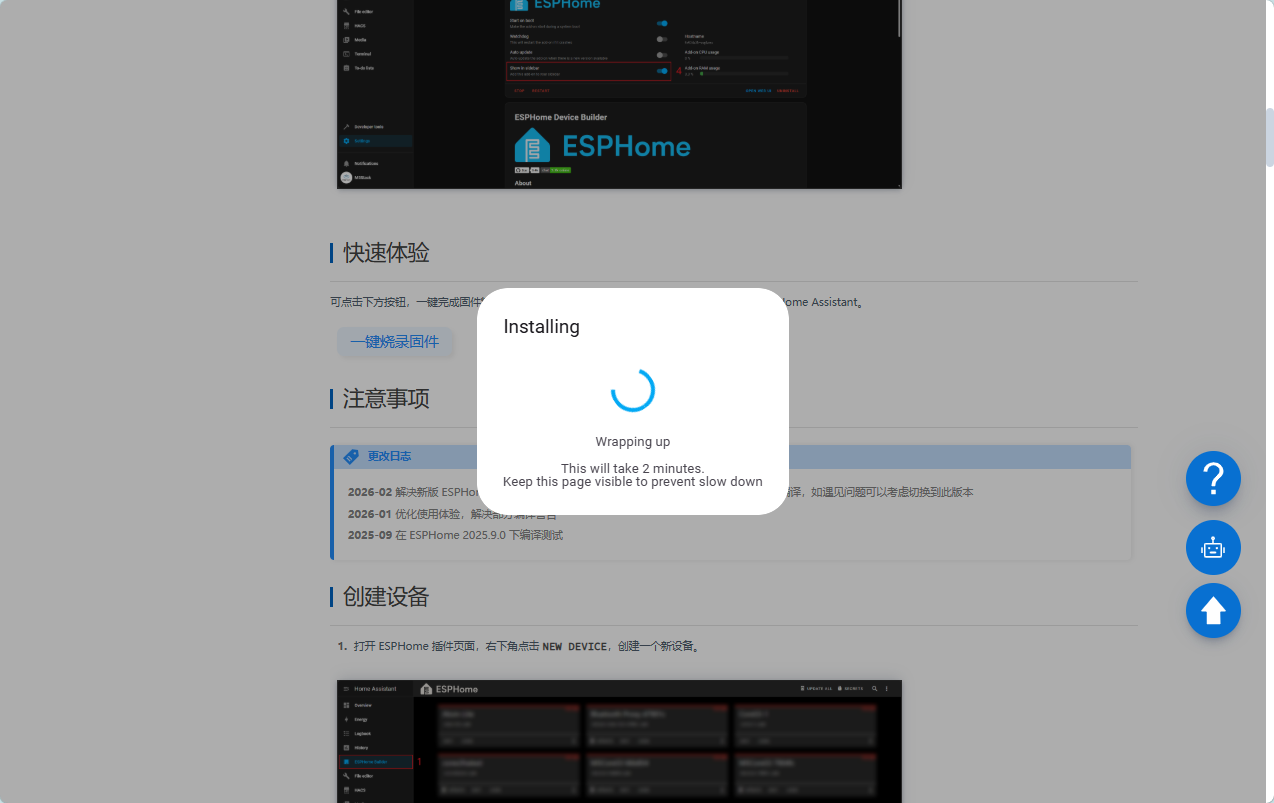
- Wait for the firmware to download, be written, and be verified. Do not close the page or disconnect USB until the page reports that installation is complete.
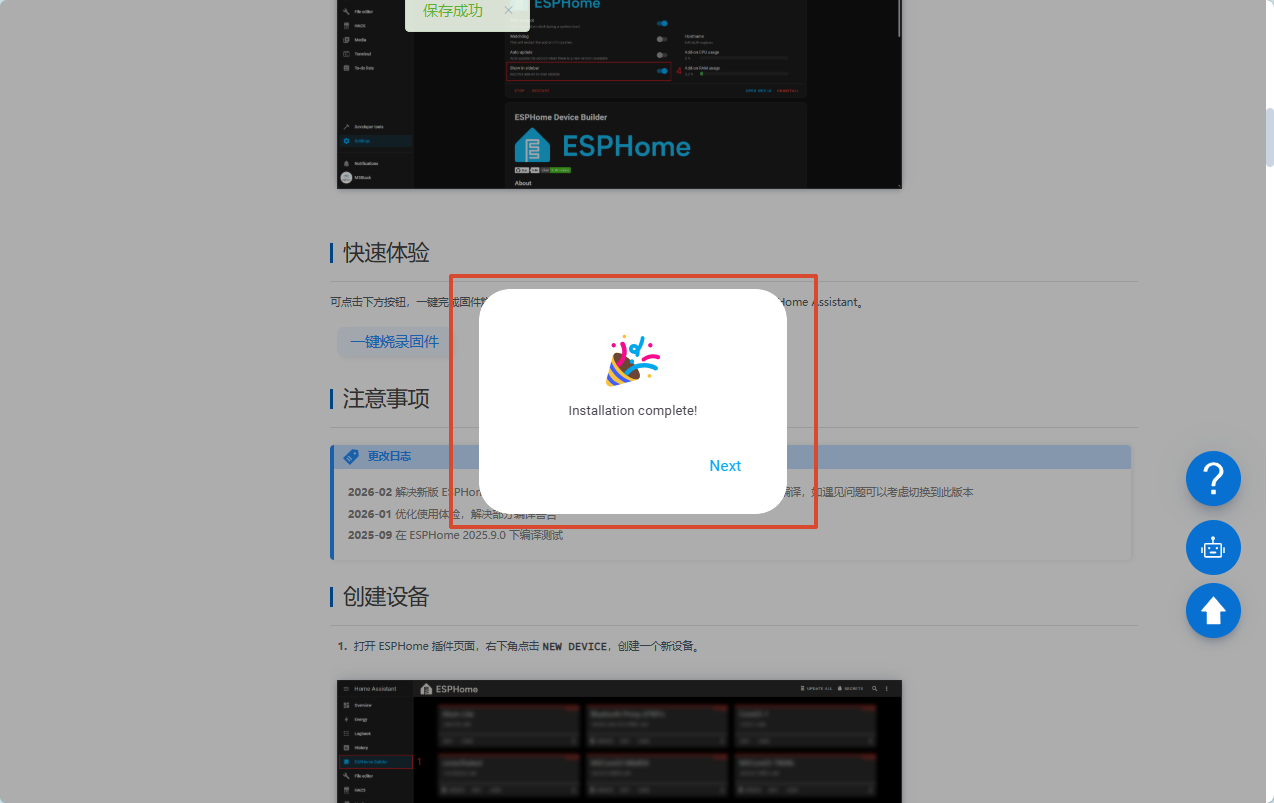
- The device normally restarts automatically when flashing is complete. If it does not start, press the reset button or power-cycle the device.
3. Configure the Network
The device must connect to a network that can communicate with Home Assistant. Depending on the firmware, provisioning may be available over the serial port, Bluetooth, or a fallback access point. Use one of the methods actually provided by the firmware.
3.1 Configure Wi-Fi over the Serial Port
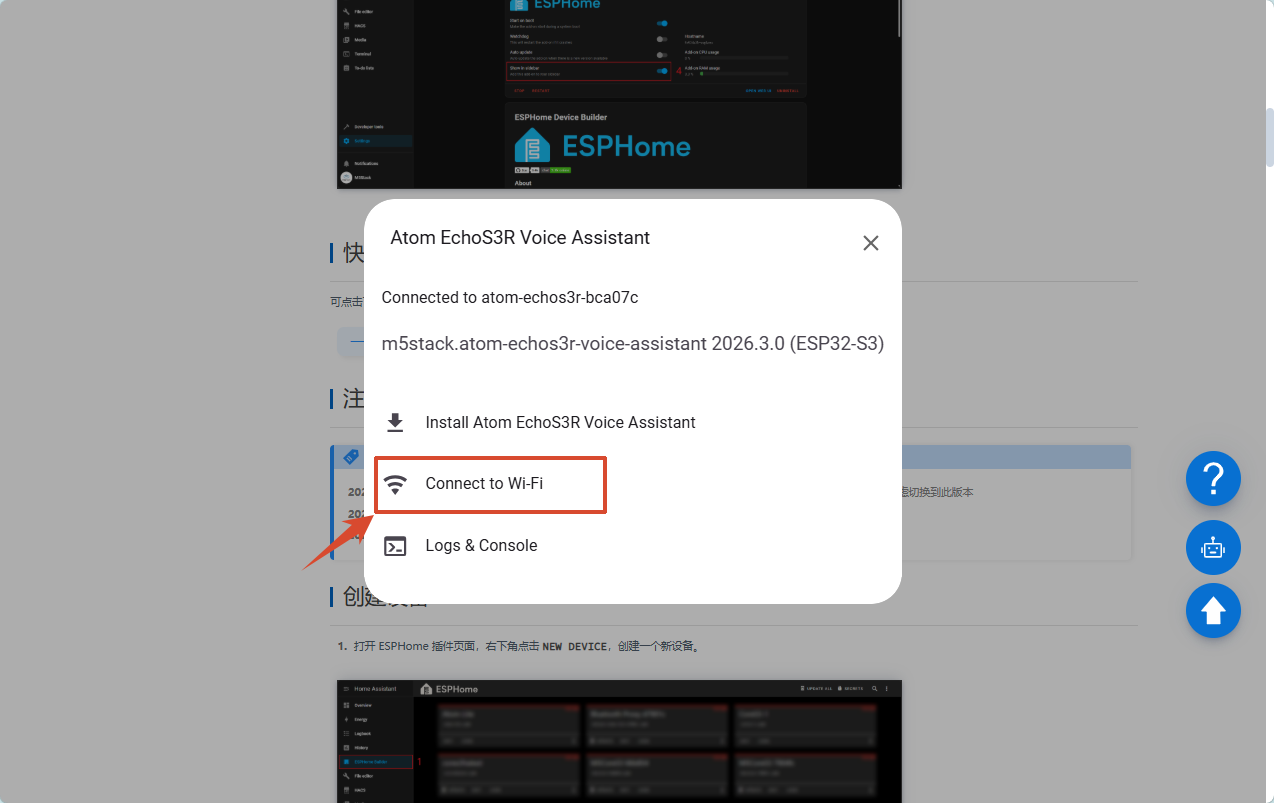
When serial provisioning is supported, the completed flashing page displays Connect to Wi-Fi. You can also click Online Flashing on the product page again and connect to the same serial port.
- Select
Connect to Wi-Fito open the network configuration page.
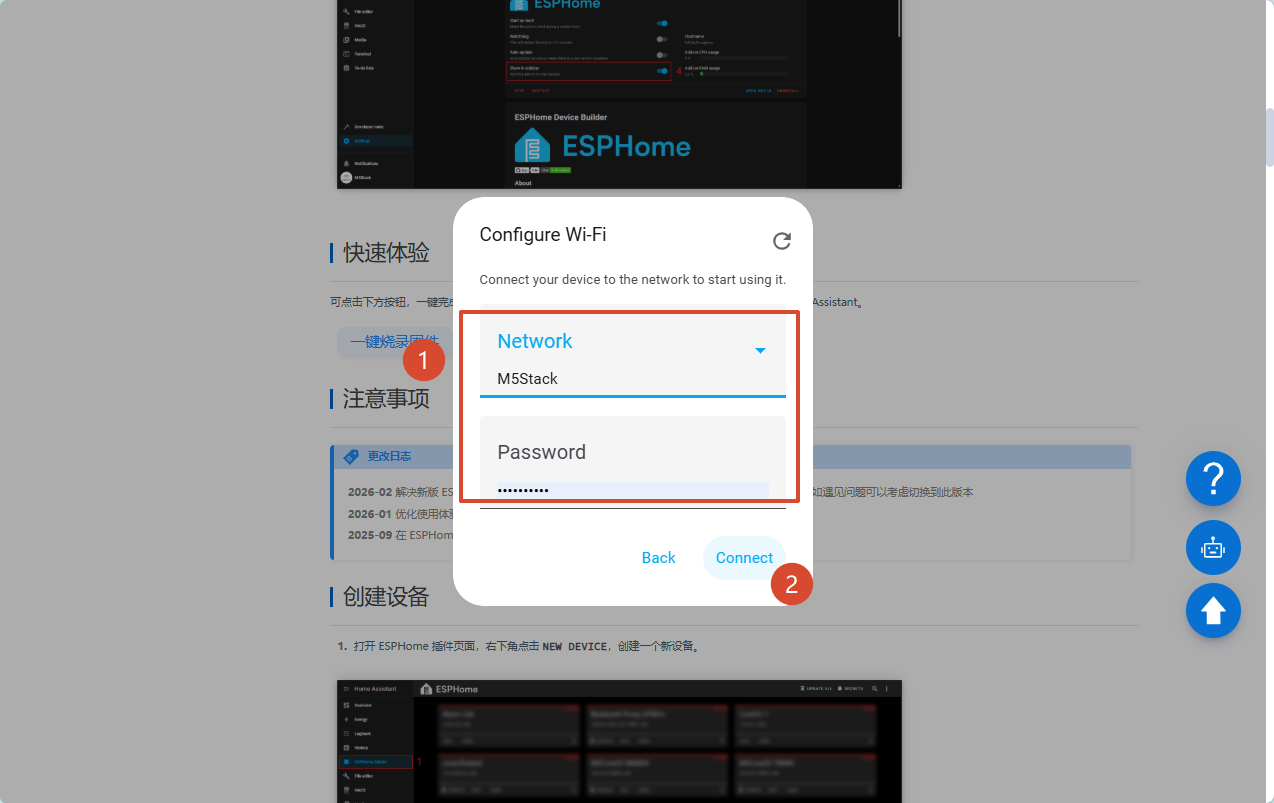
- Select the target network (SSID), enter the Wi-Fi password, and click
Connect.
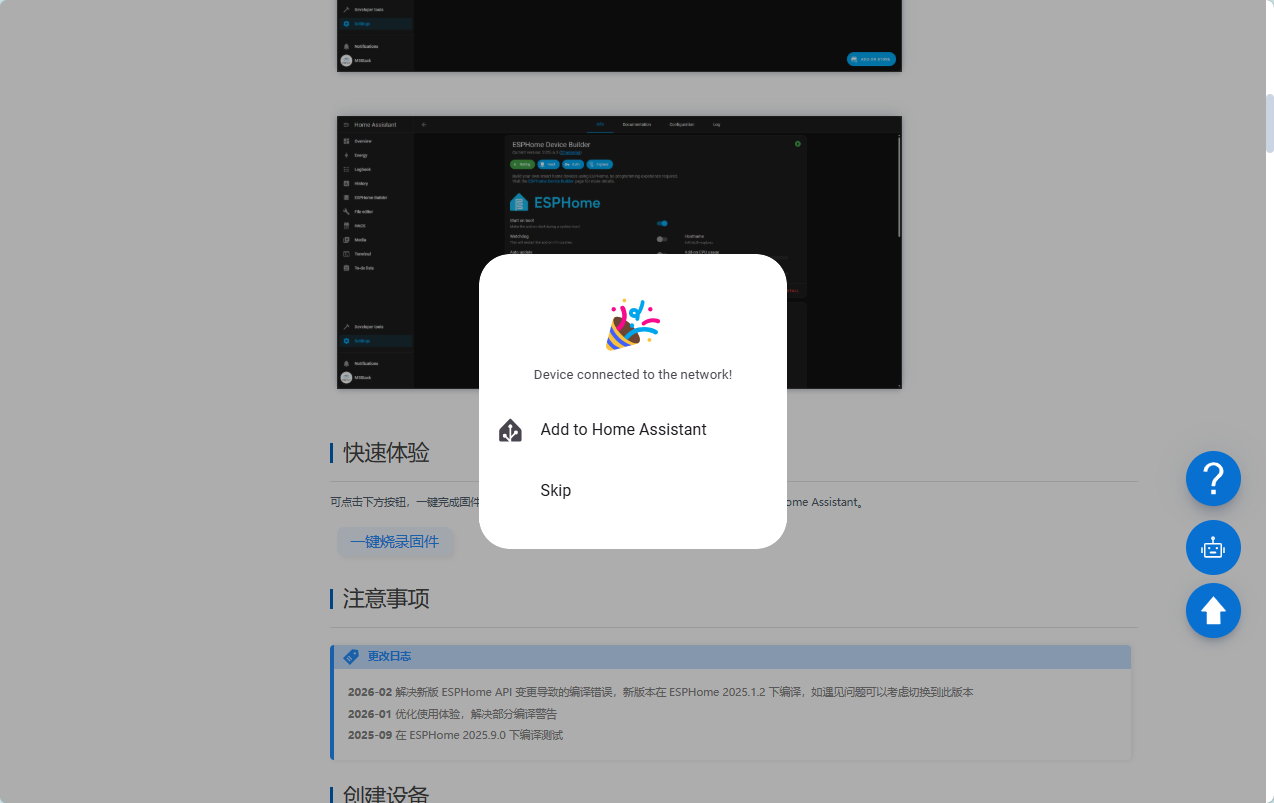
- Wait until the page confirms that the network connection is successful.
3.2 Configure Wi-Fi over BLE
If BLE provisioning is supported, use the Home Assistant Companion App to send Wi-Fi credentials to the device. If the device is not shown in the app, use serial or fallback access-point provisioning instead; this does not indicate a flashing failure.
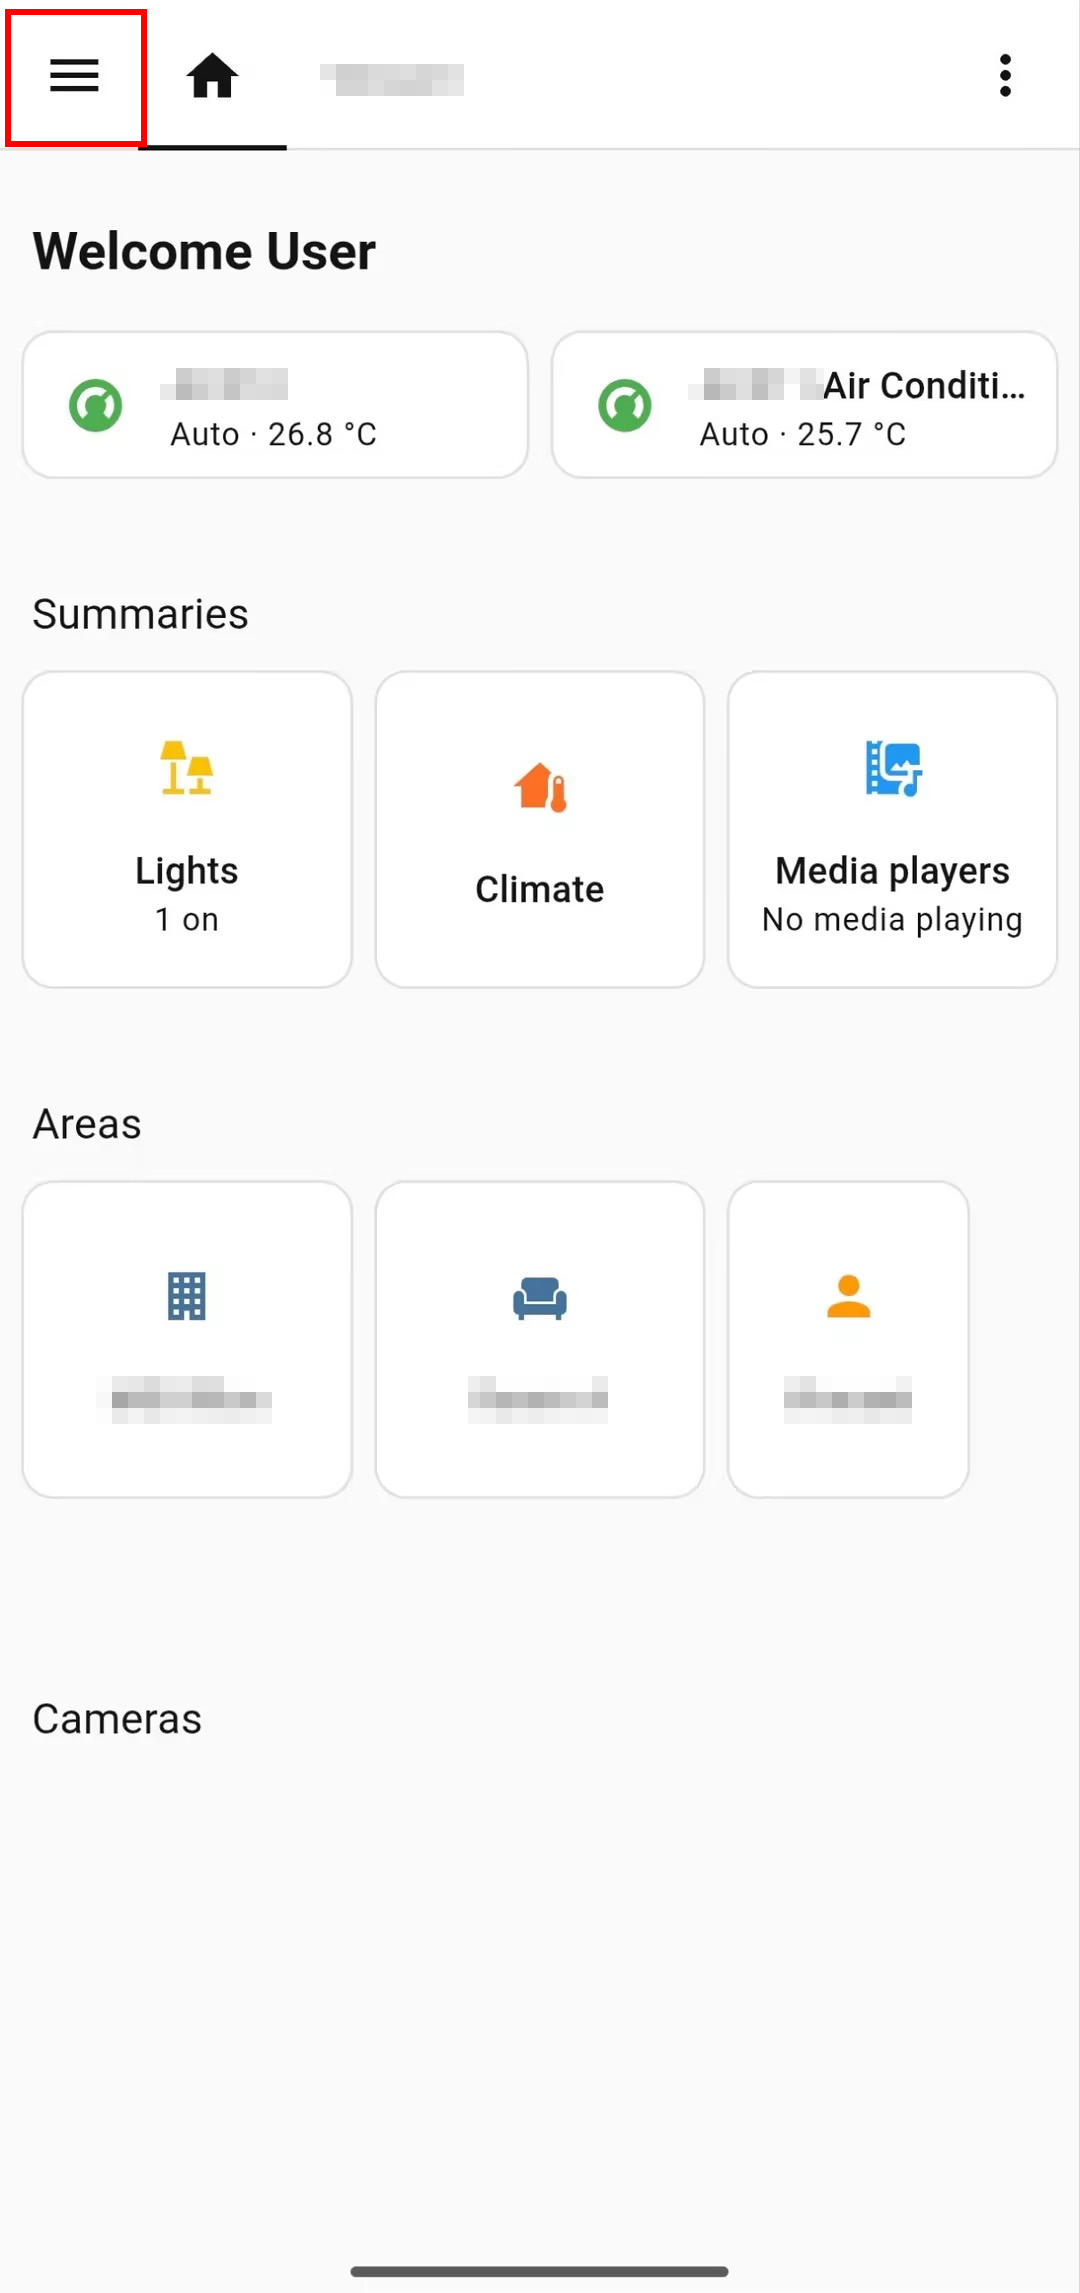
- Enable Bluetooth on the phone and open the Home Assistant Companion App.
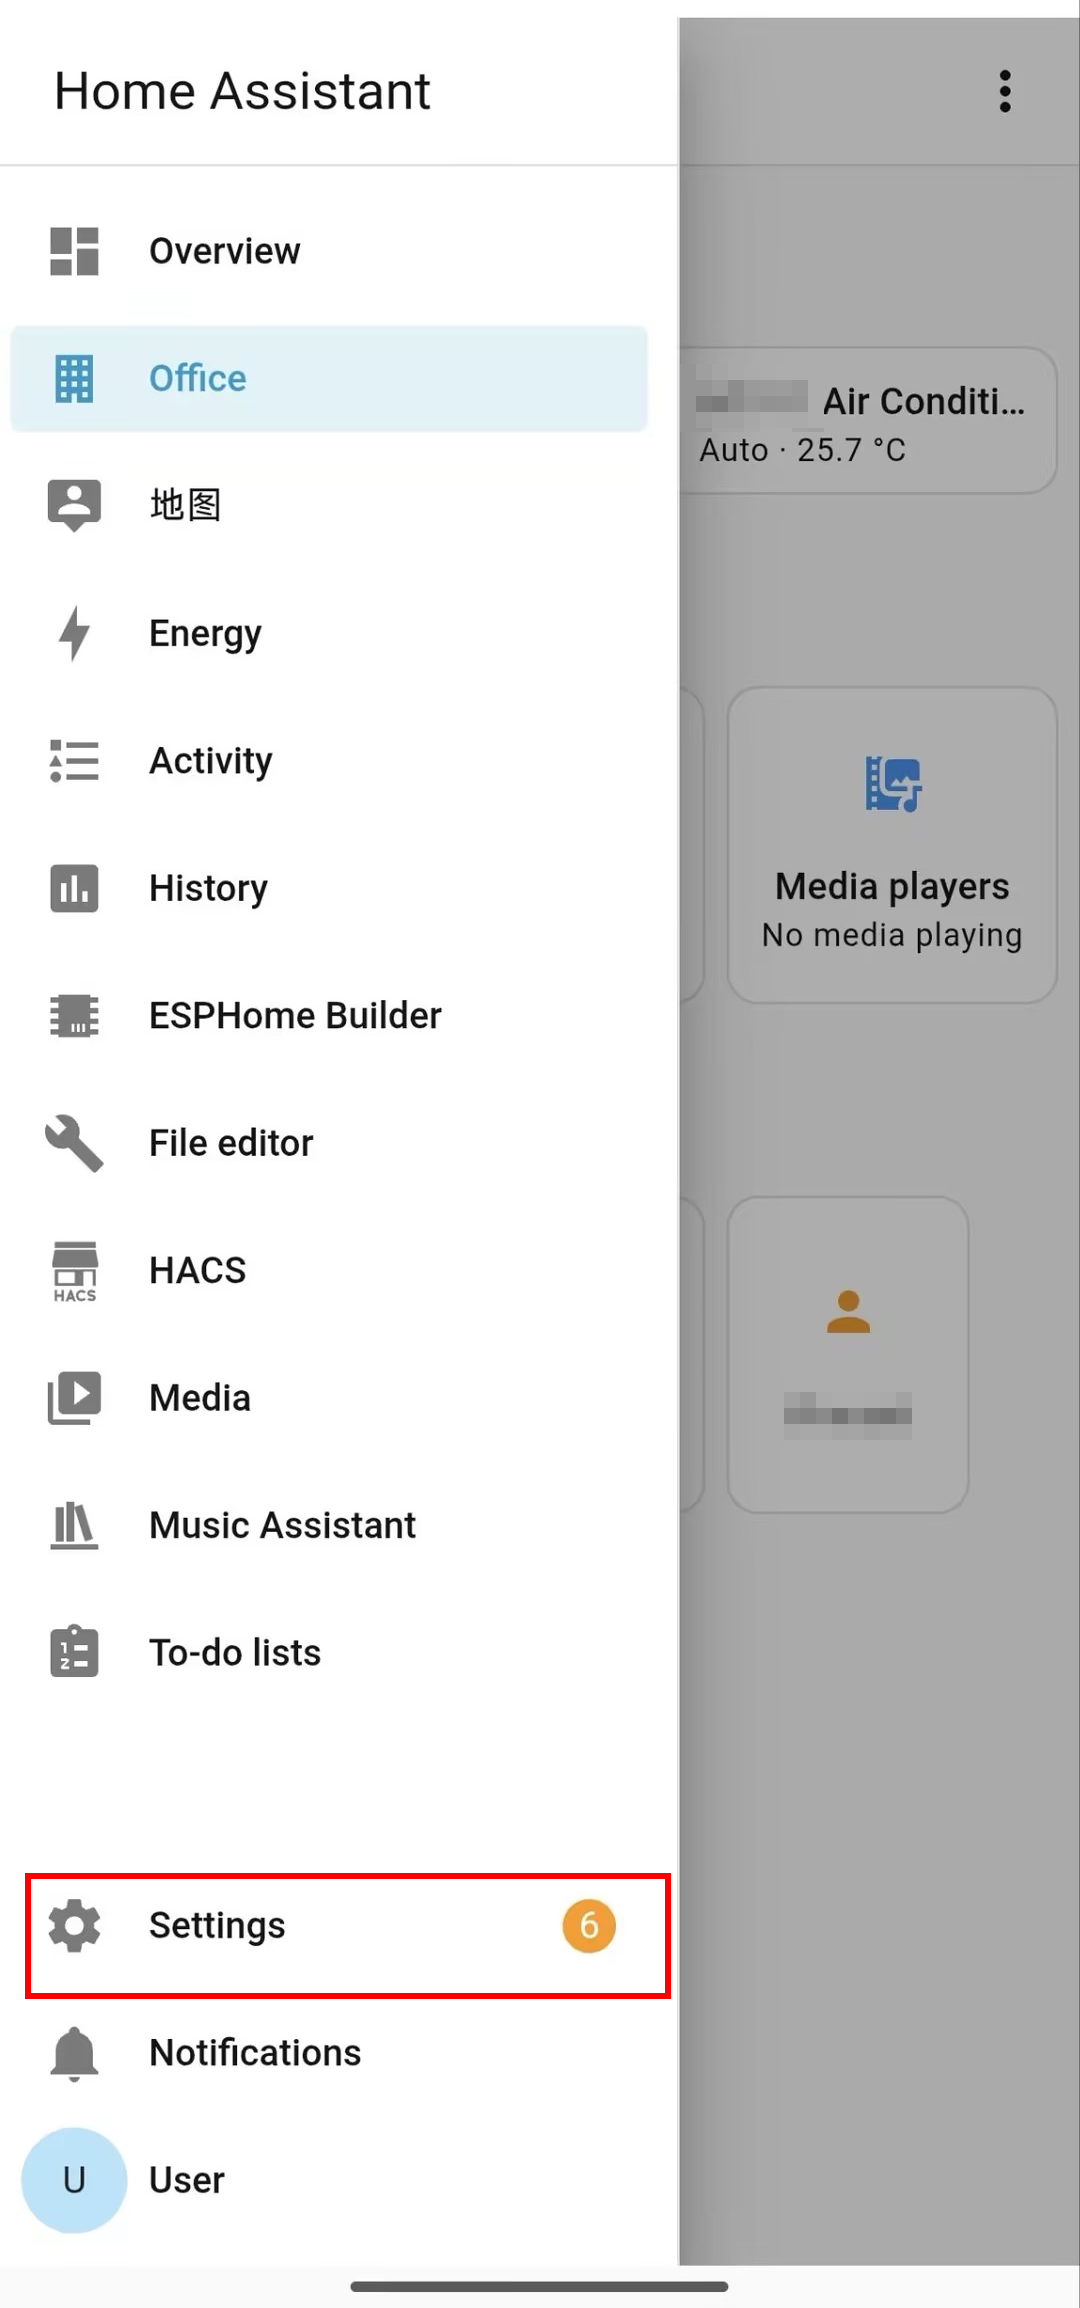
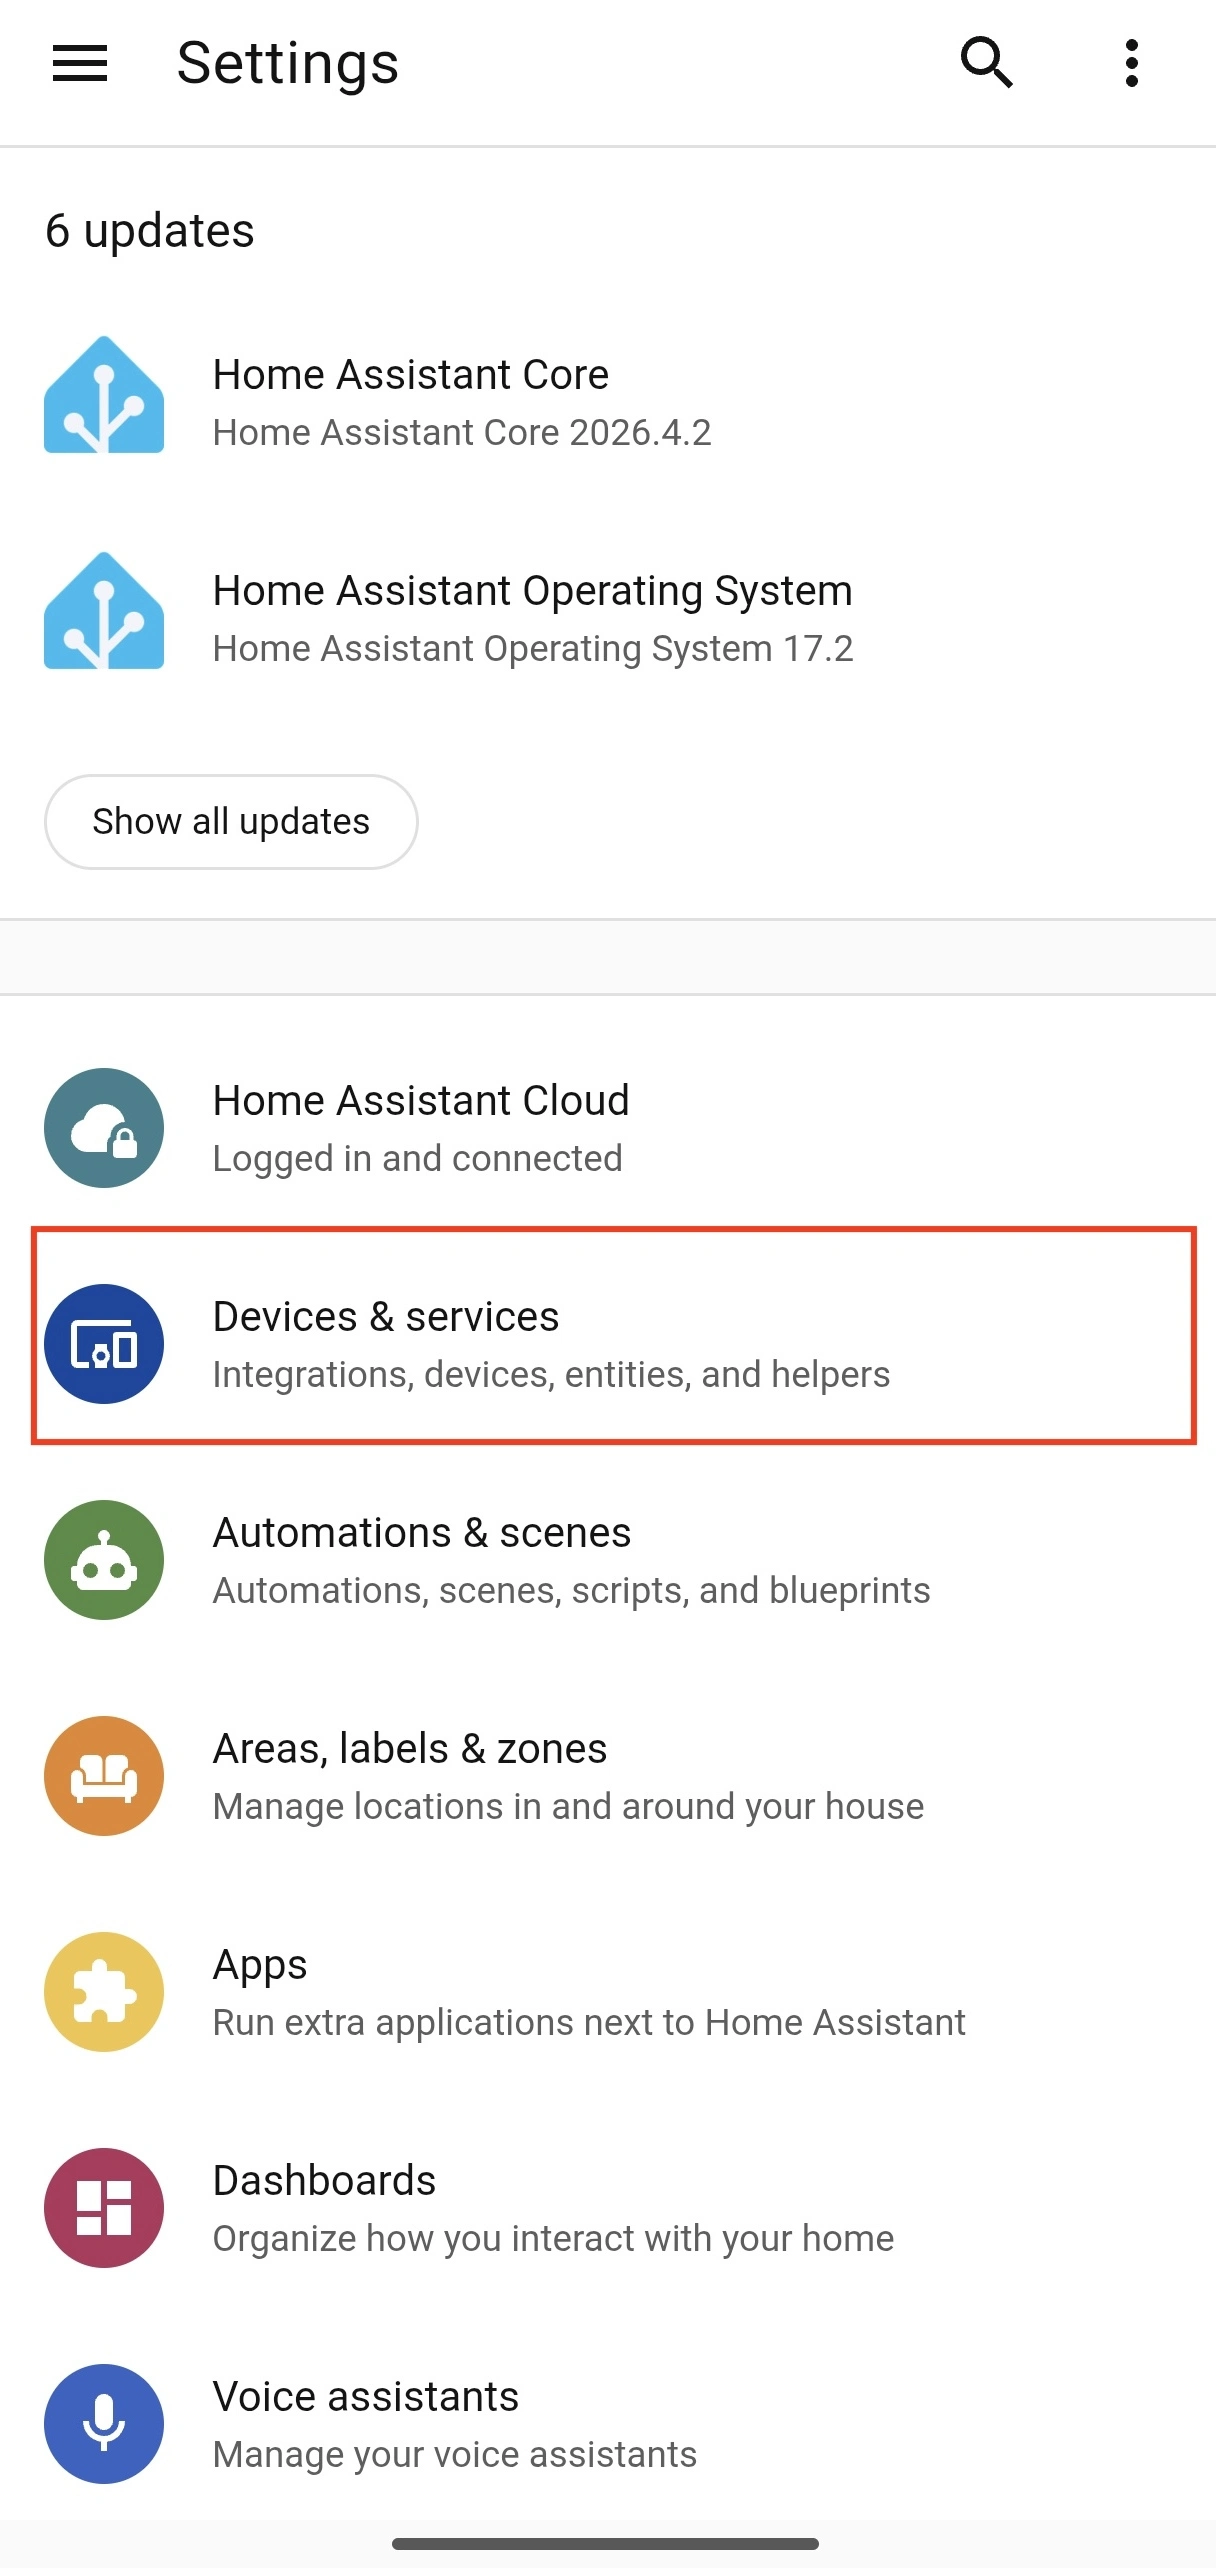
- Go to
Settings -> Devices & services.
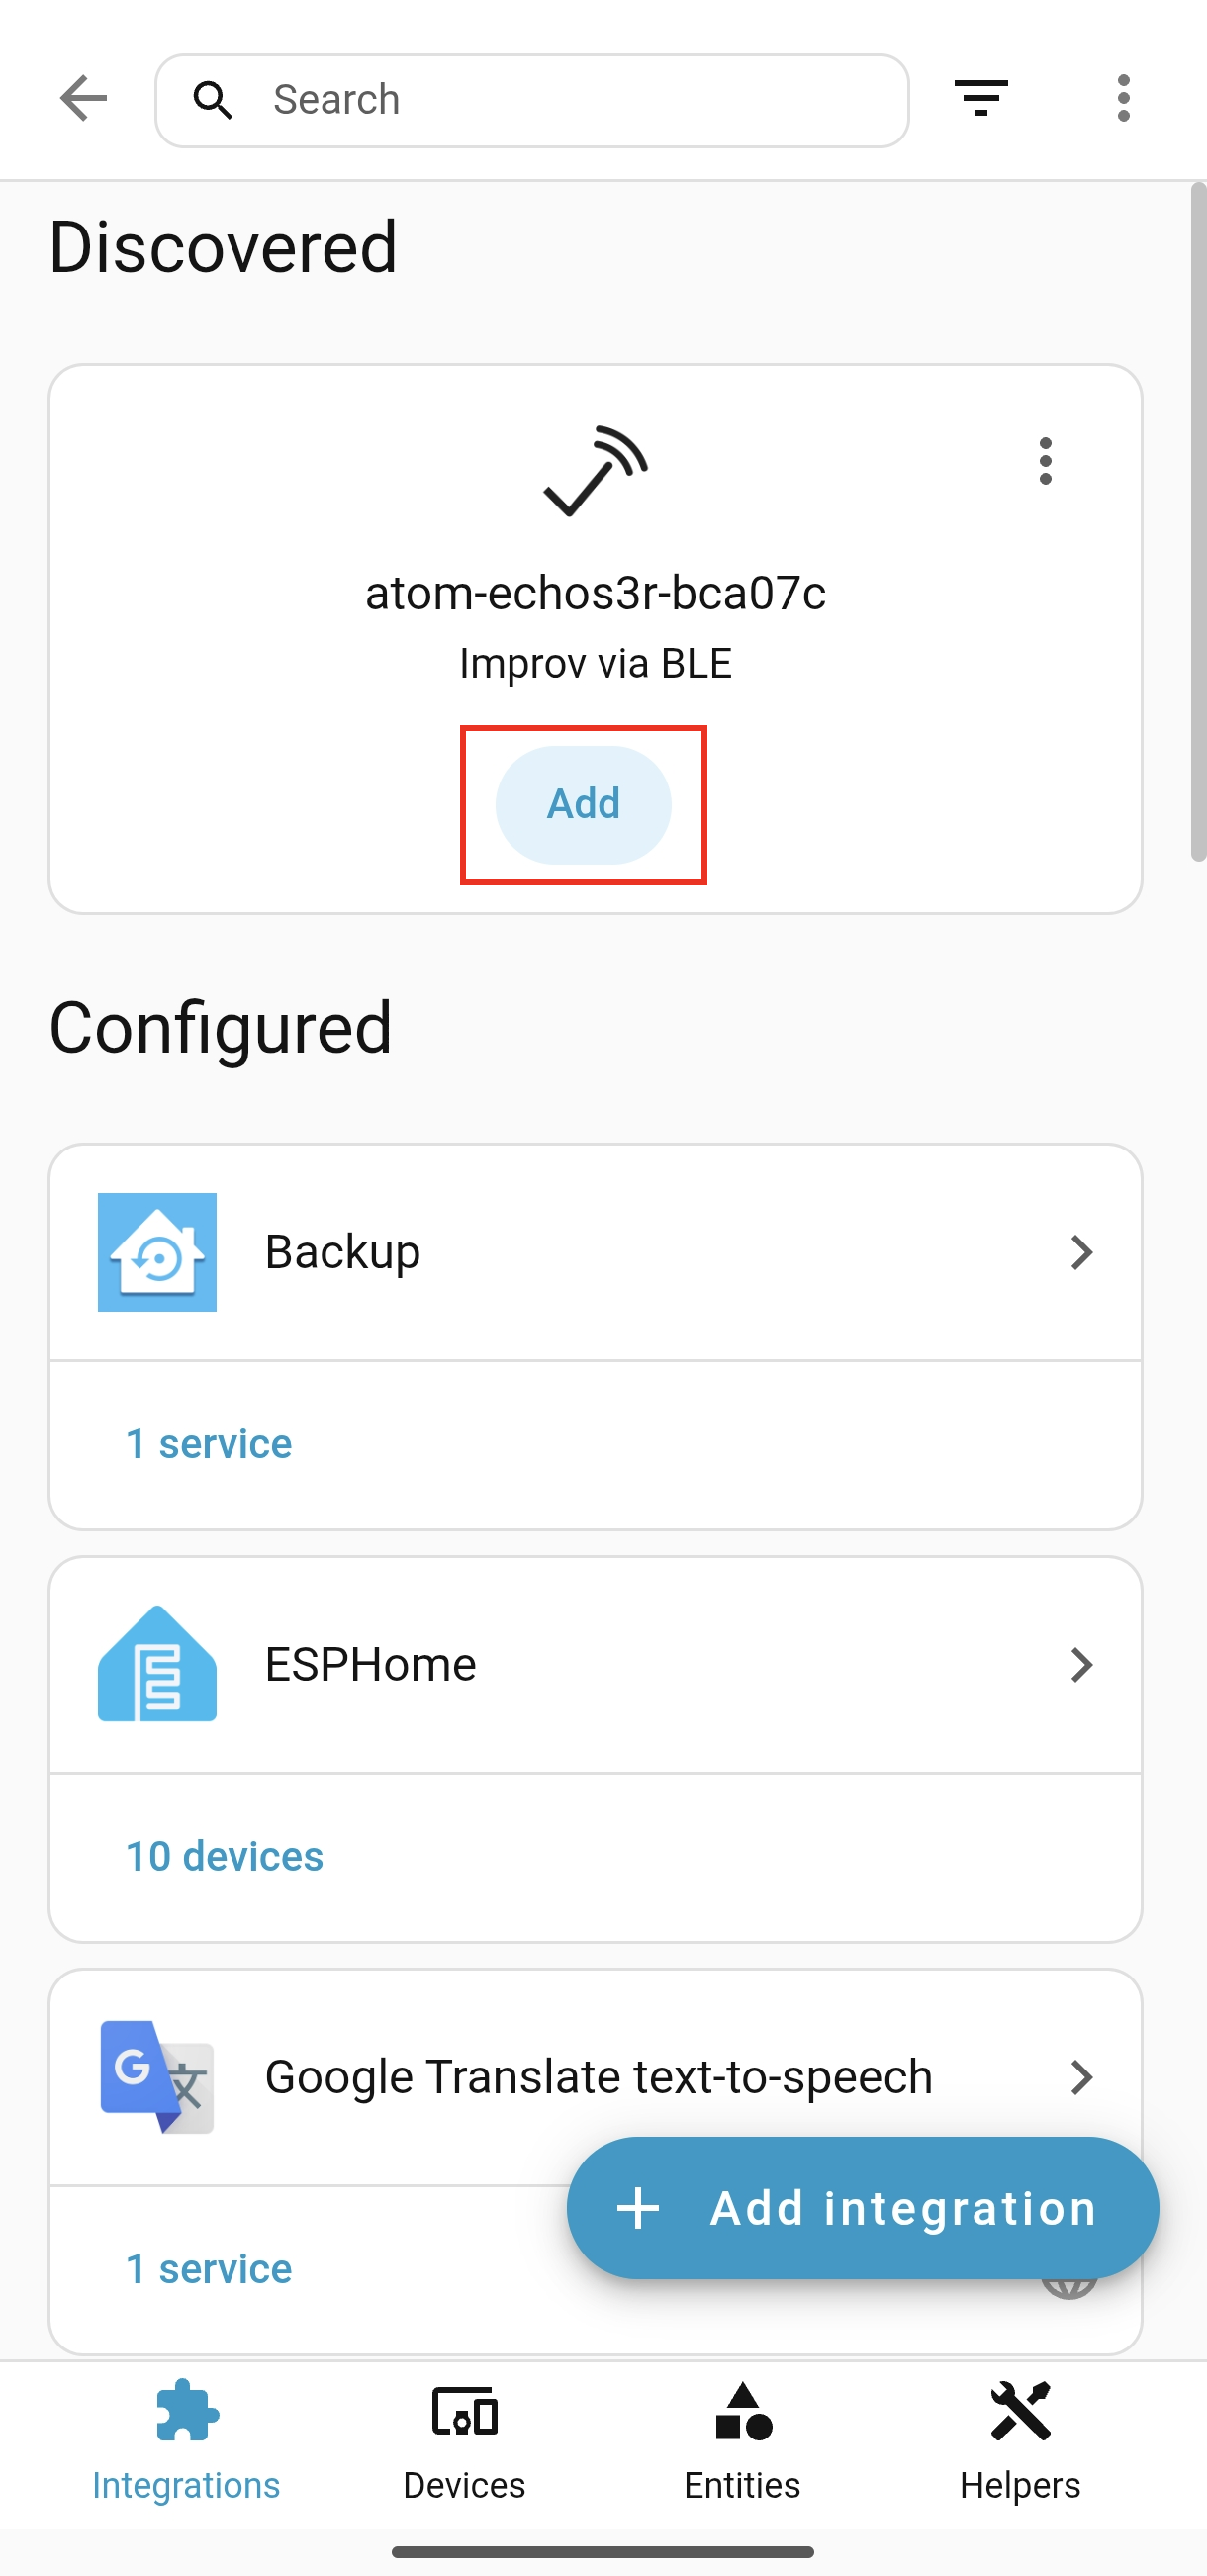
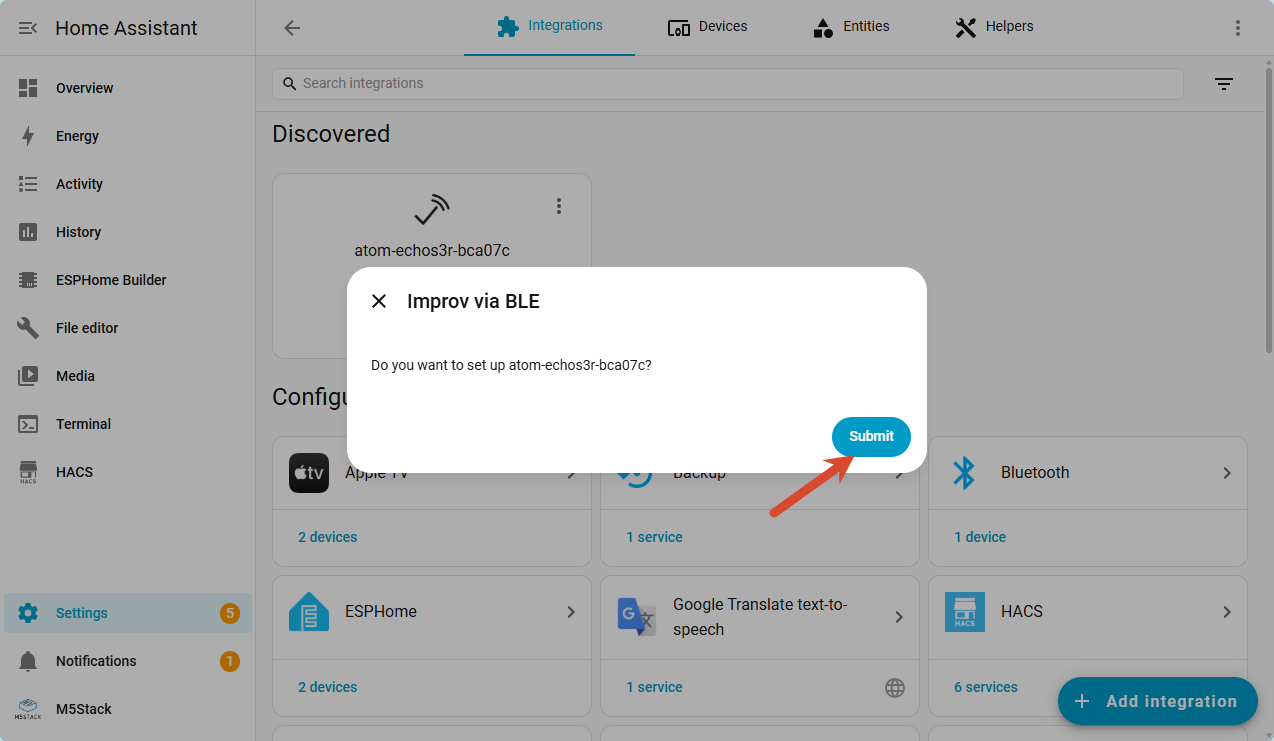
- In Discovered, locate the device, click
Add, and enter the Wi-Fi information as prompted.
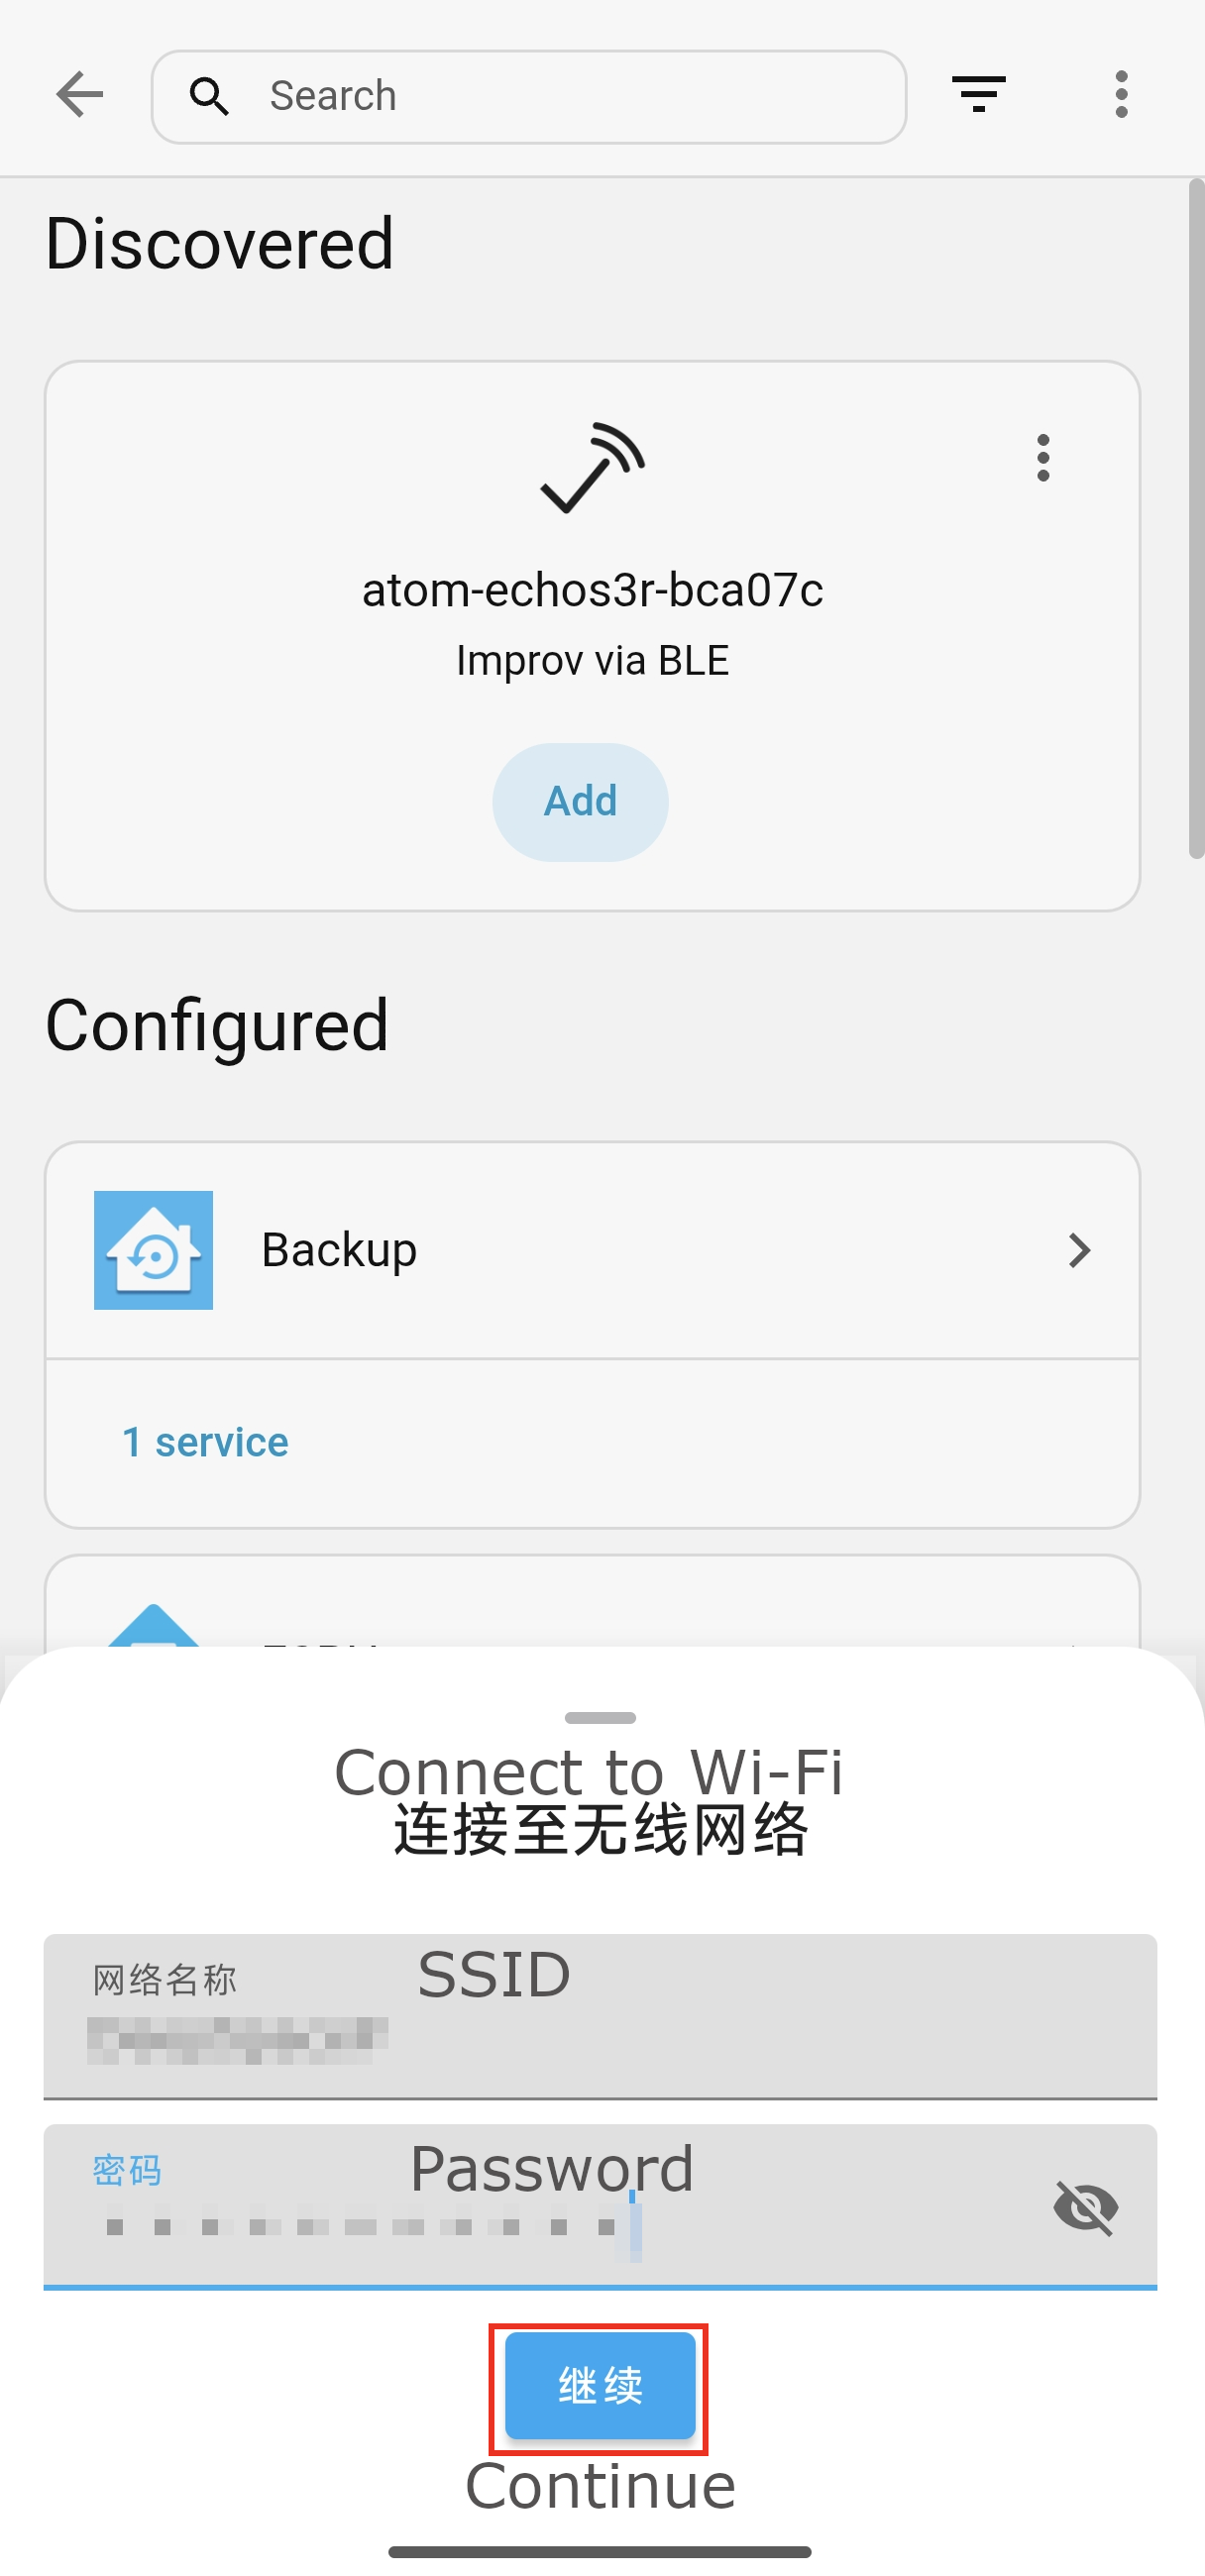
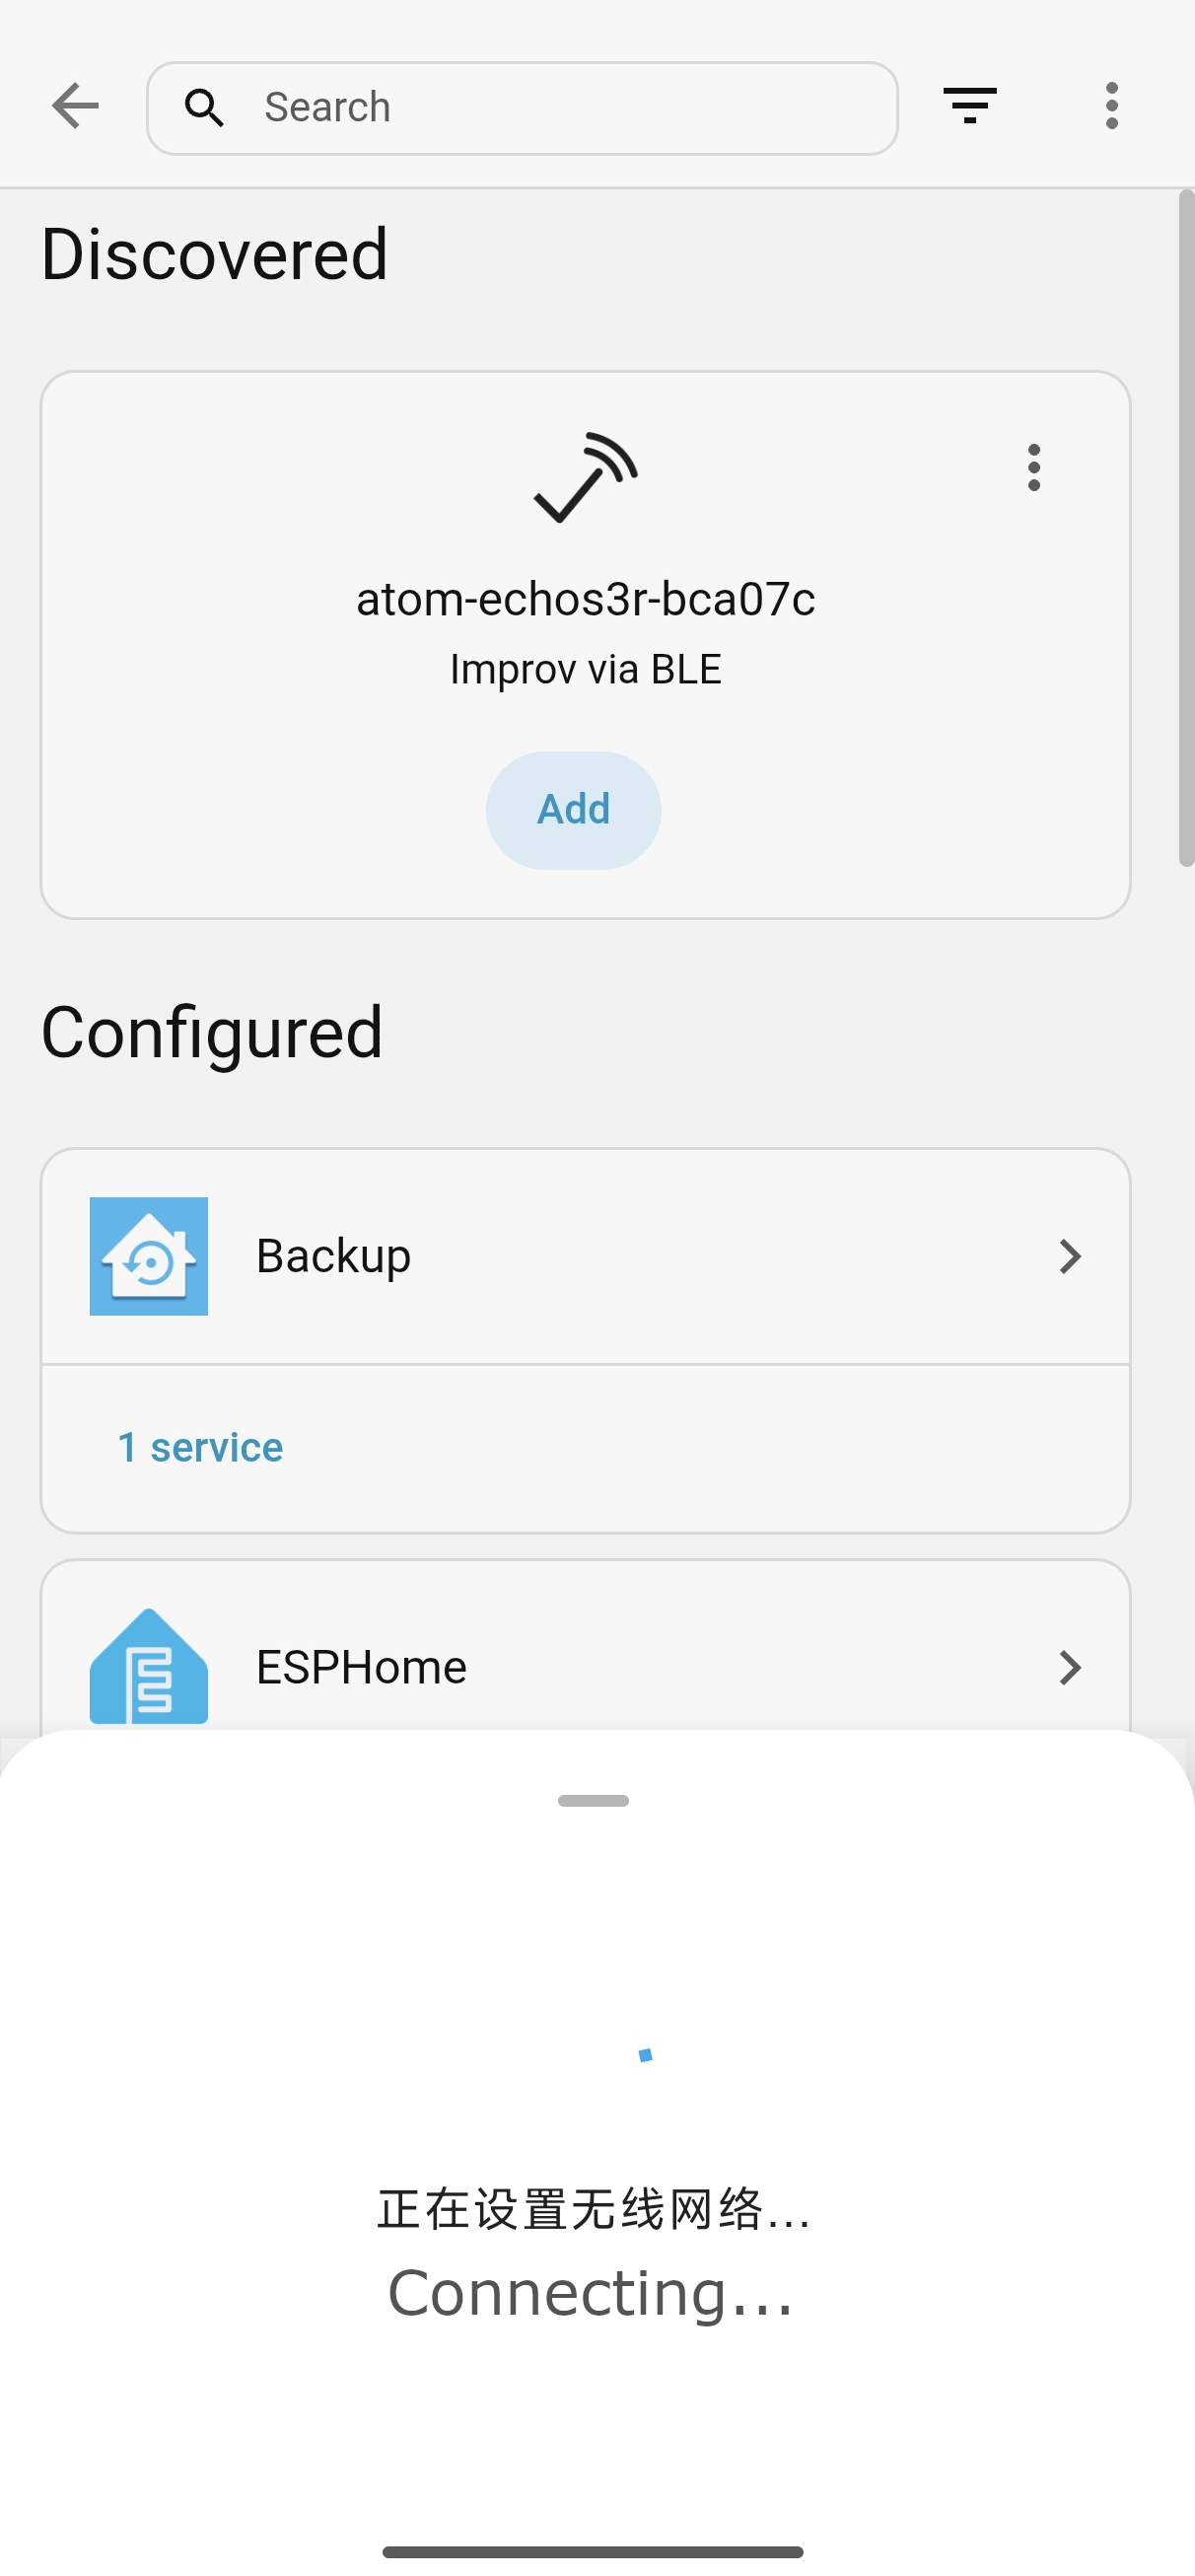
- Wait for the device to finish connecting to the network.
3.3 Configure Wi-Fi through a Fallback Access Point
When a fallback access point is enabled, the device creates a temporary Wi-Fi network if it cannot connect to the configured network. Use the network name displayed by the device.
- Connect a phone or computer to the access point created by the device.
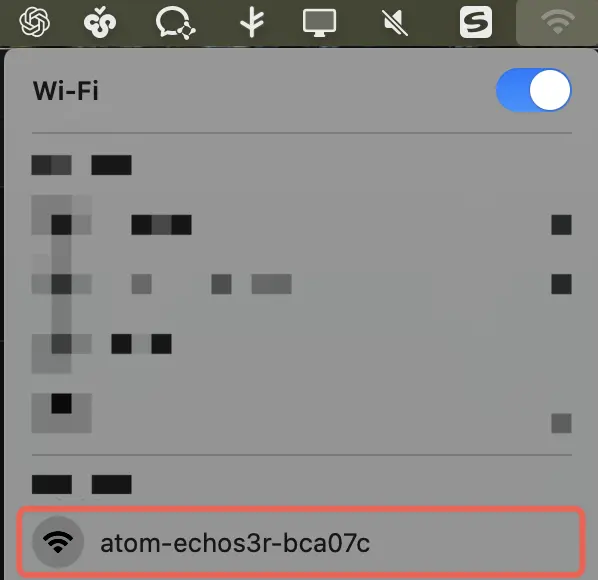
- The provisioning page normally opens automatically. If it does not, open
http://192.168.4.1in a browser.
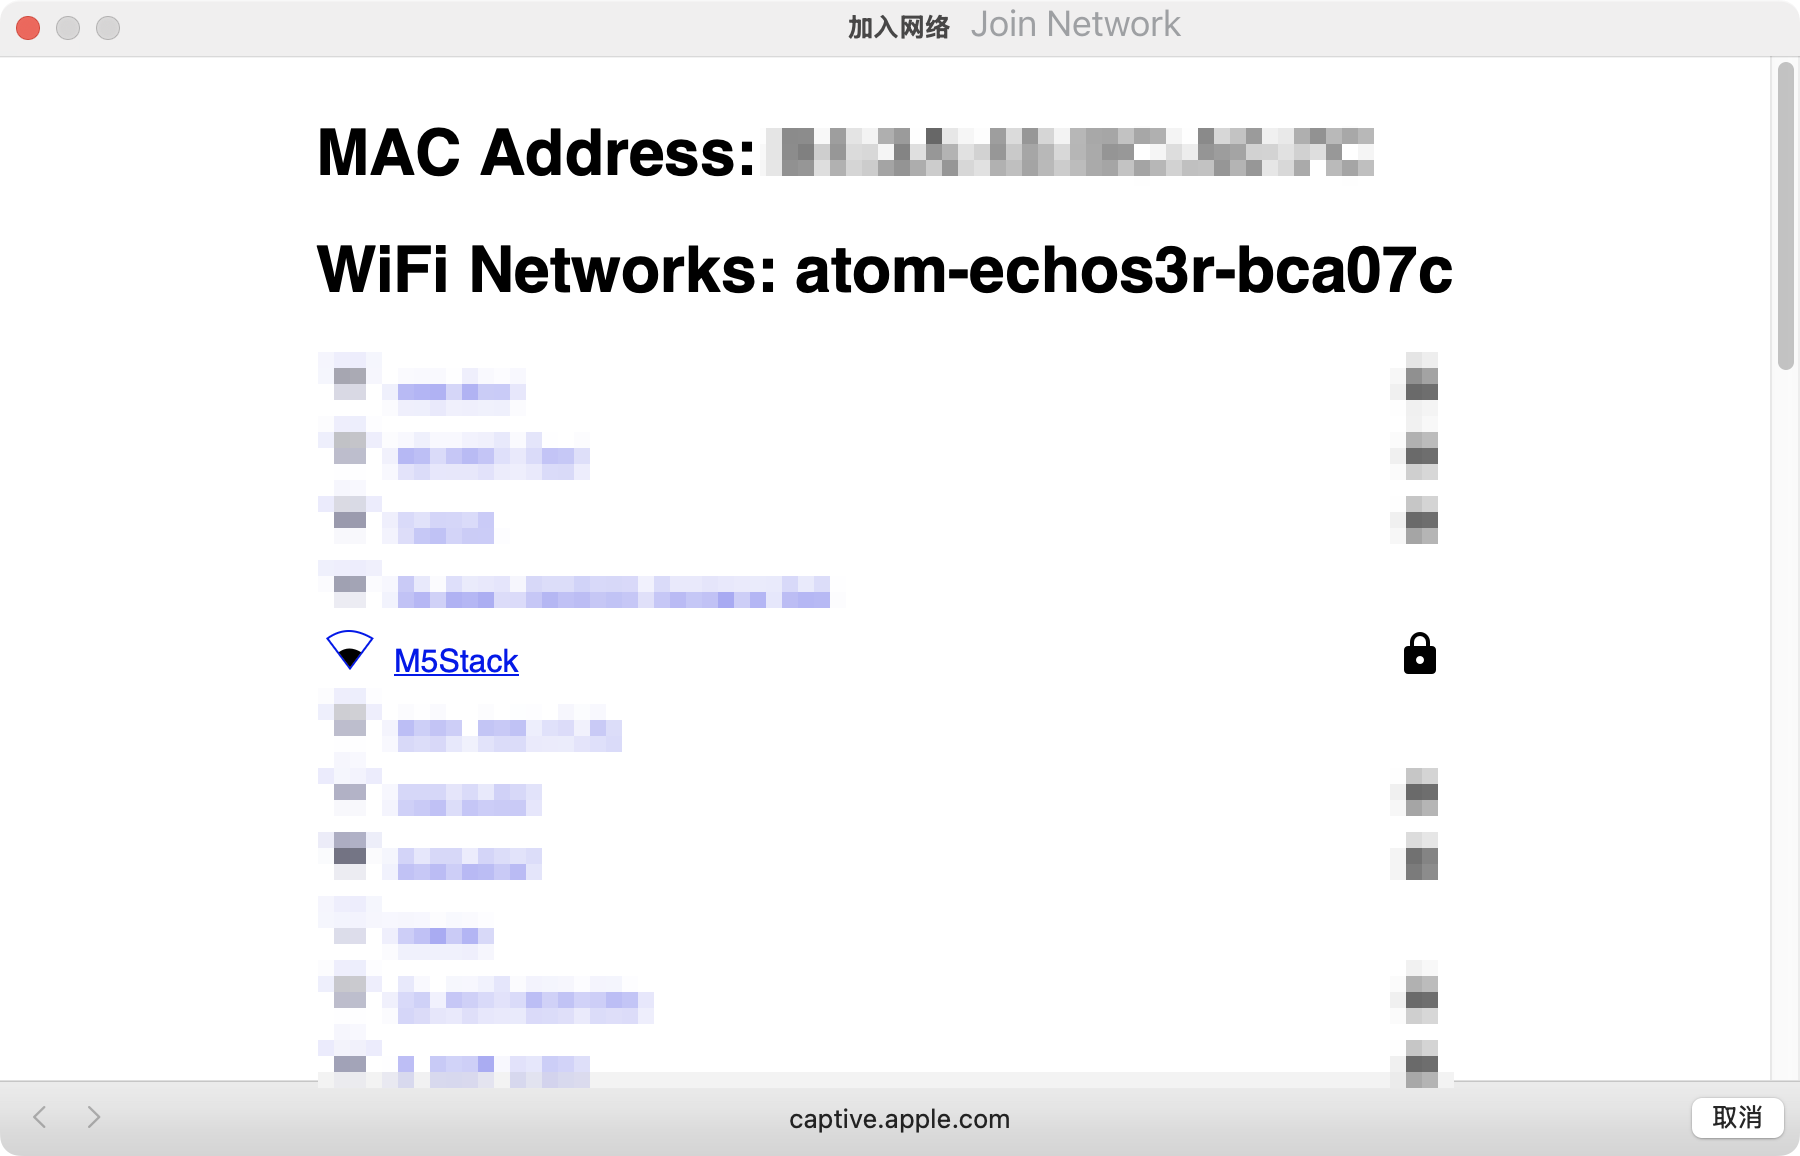
- Select the target network (SSID), enter the Wi-Fi password, and click
Save.
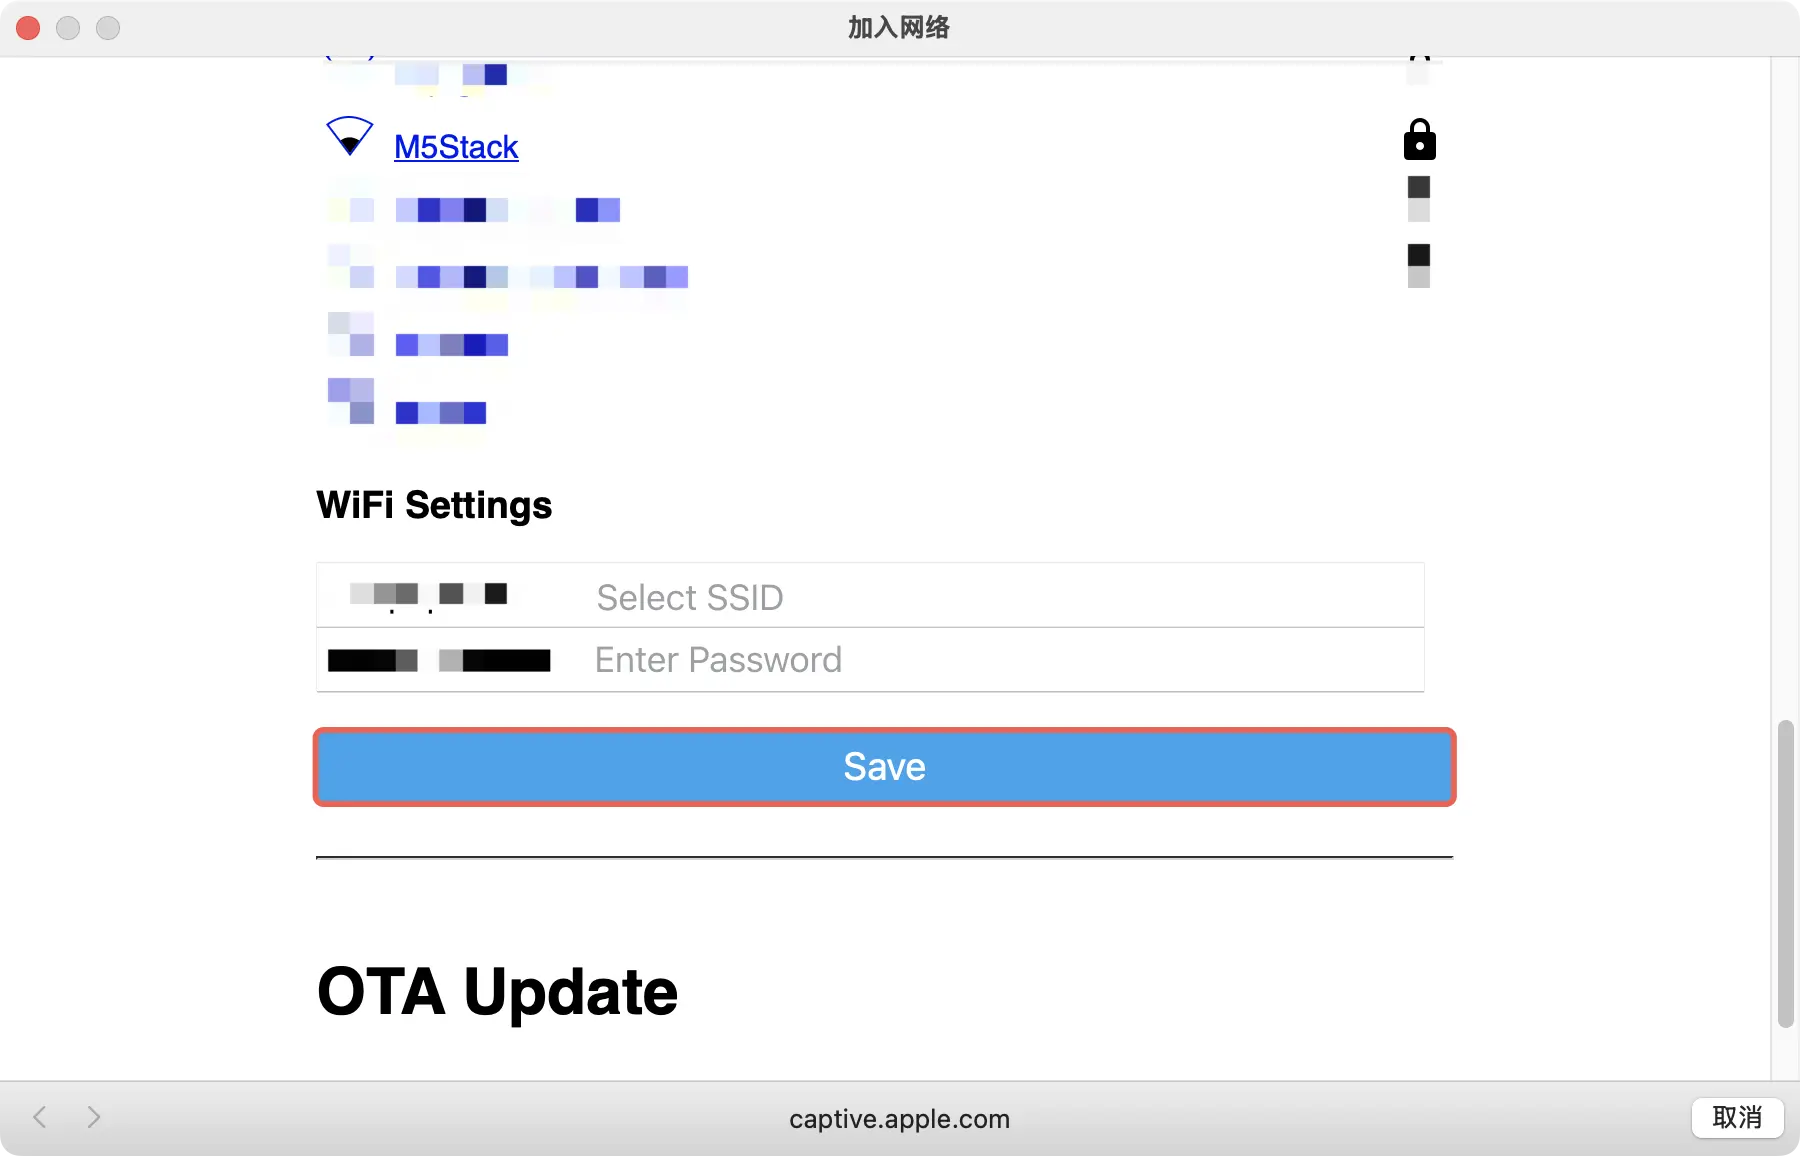
- Wait for the device to connect to the target network. The temporary access point normally closes automatically after a successful connection.
4. Add to Home Assistant
After the firmware starts and the device connects to the network, Home Assistant normally discovers ESPHome devices with the native API enabled.
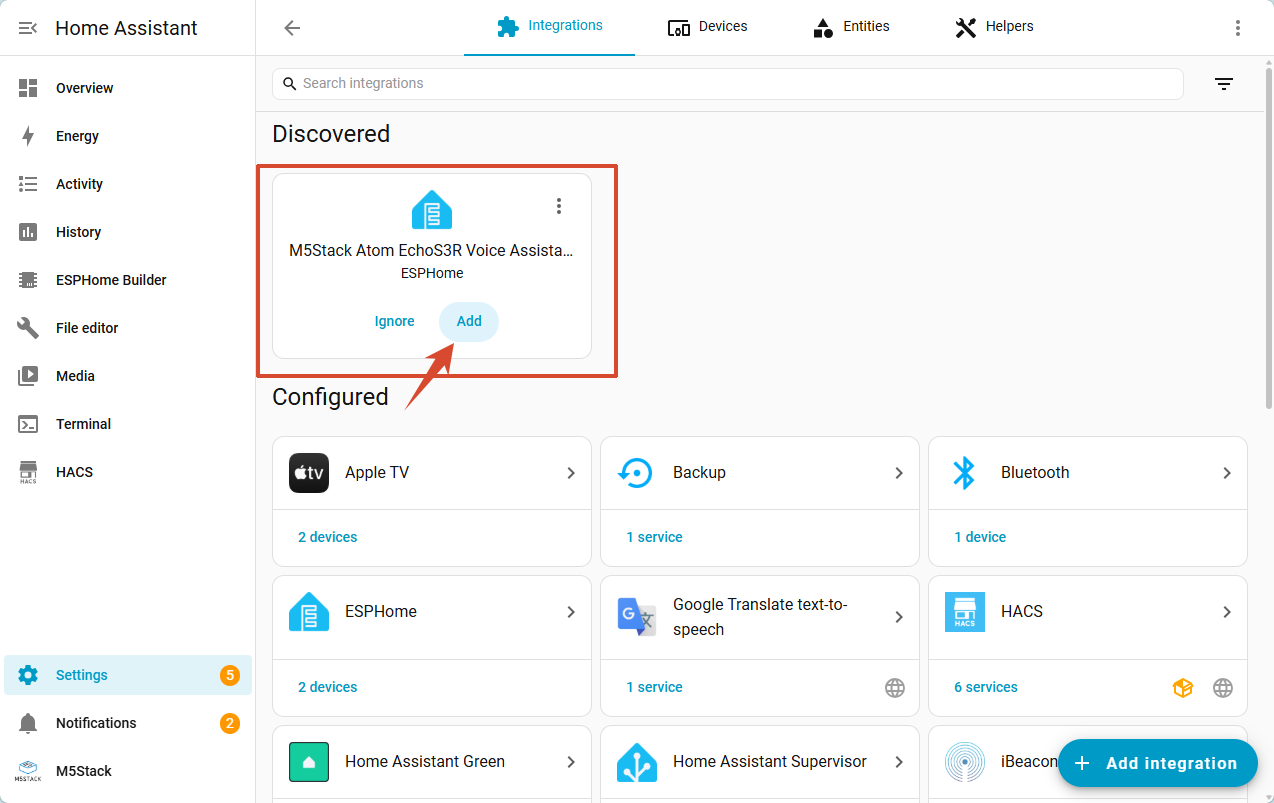
- Open Home Assistant and go to
Settings -> Devices & services. - In Discovered, locate the device, click
Add, and complete the setup as prompted.
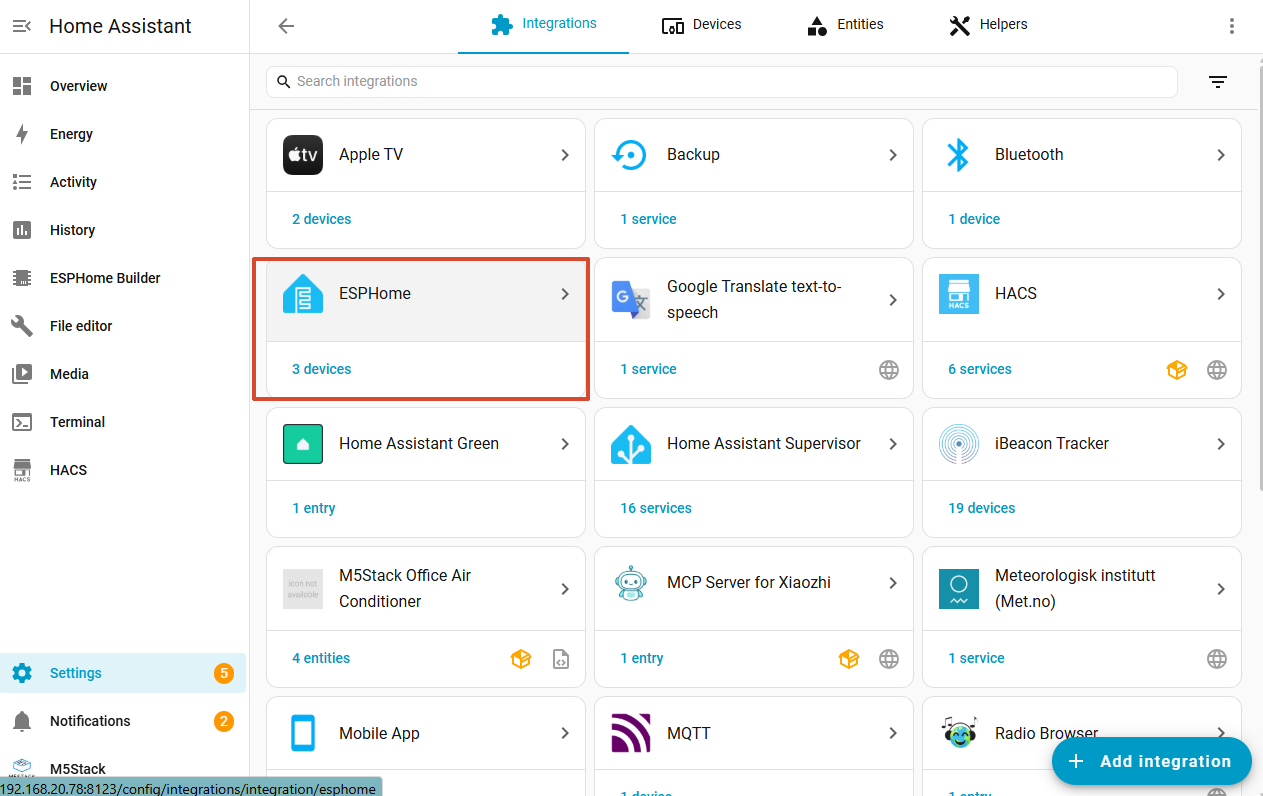
- Open the device from the ESPHome integration page and verify that its entities and sensor data are reported correctly.
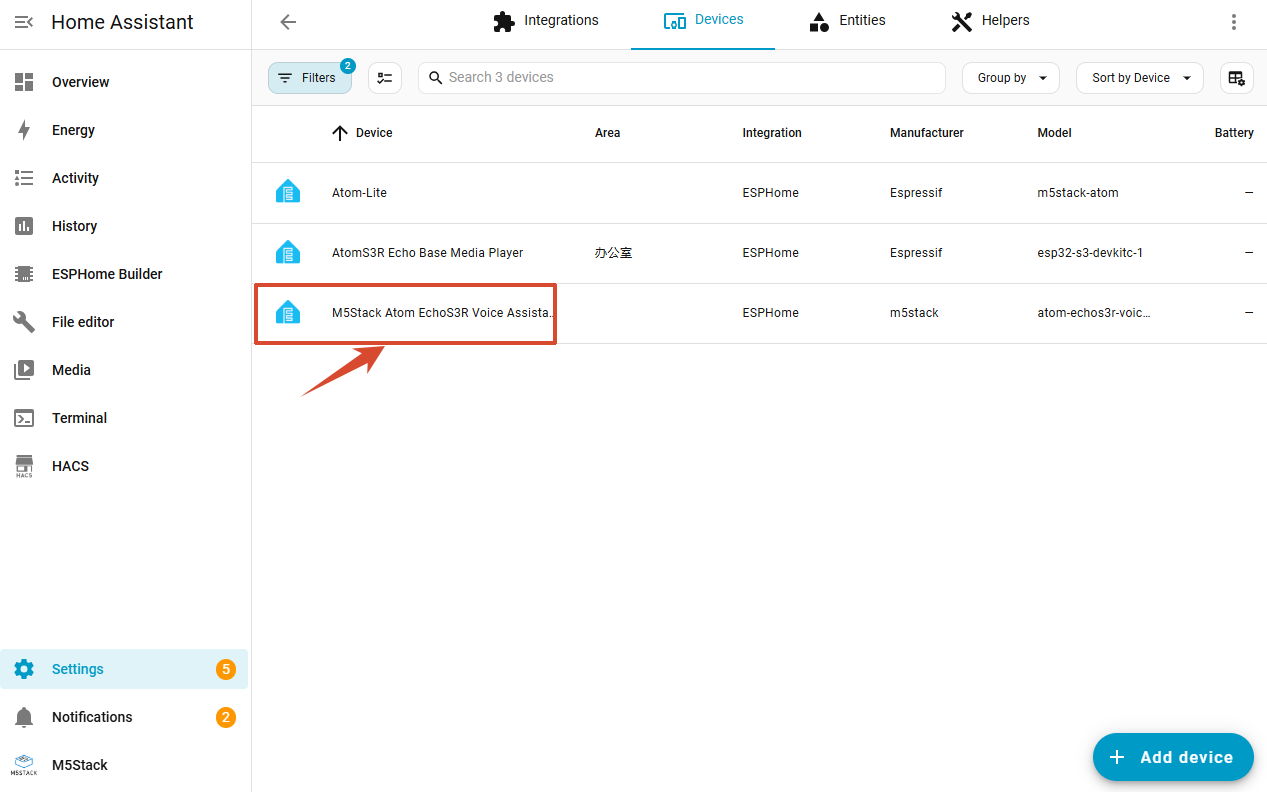
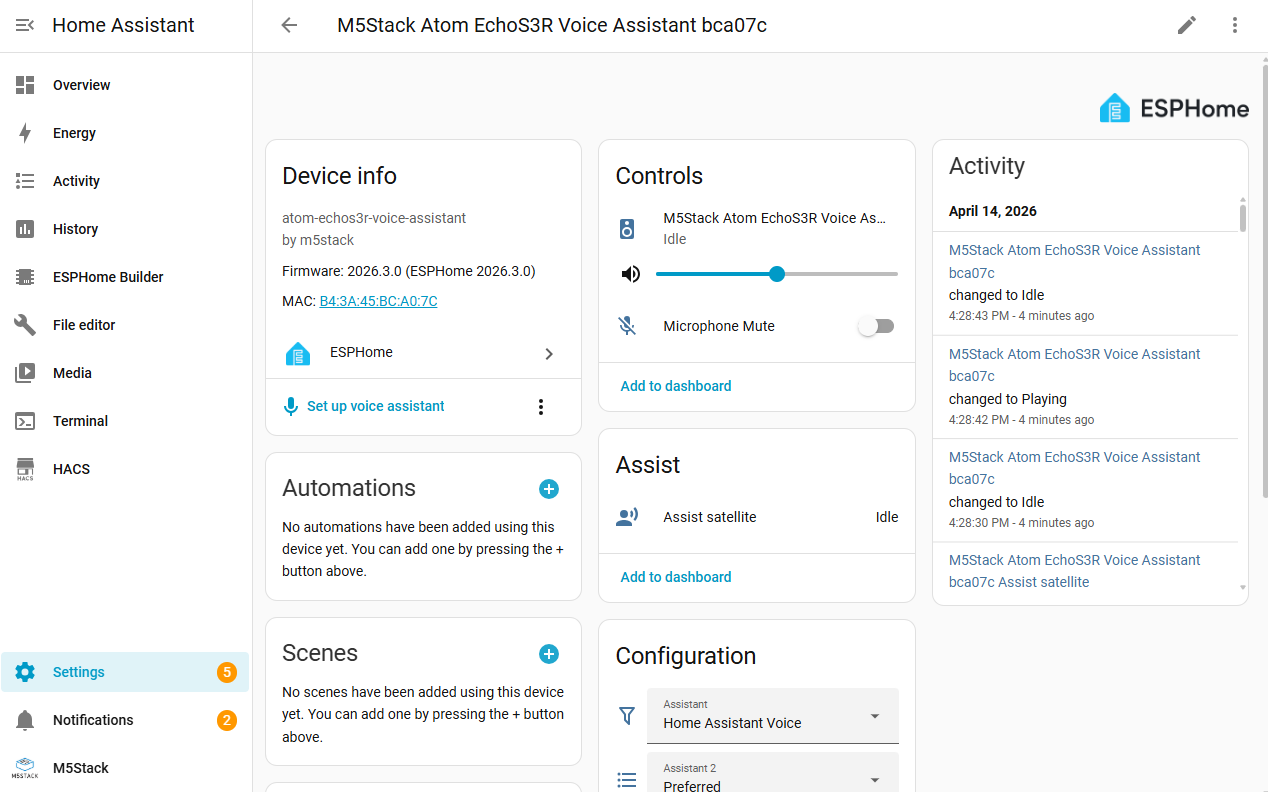
If Home Assistant does not discover the device automatically:
- Click
Add integration, search forESPHome, and select it. - Enter the device hostname or IP address. Find the IP address in the router's DHCP client list. Some firmware builds also show it in the startup log over USB serial.
- If prompted for an encrypted API key, use the key provided on the corresponding product page or in the firmware instructions.
5. Troubleshooting
No Serial Device Appears in the Browser
- Verify that the USB cable supports data transfer and try another USB port.
- Close other applications that may be using the serial port.
- Check that the driver for the USB-to-serial chip used by the device is installed.
- Re-enter download mode according to the product instructions, then reconnect the device.
No Provisioning Option after Flashing
Provisioning methods depend on the firmware. Reconnect the serial port and check whether Connect to Wi-Fi is displayed. If it is not, check whether the device has created a fallback access point, or confirm BLE support on the corresponding product page.
The Device Is Online but Cannot Be Added
- Verify that the device and Home Assistant are on networks that can communicate with each other.
- Add the ESPHome integration manually by IP address.
- Confirm the device IP address through the router or the serial log.
- Check whether the network blocks communication on the ESPHome native API port.
6. Further Changes
Precompiled firmware is intended for quickly evaluating the corresponding product or application. To change entities, features, network credentials, or encrypted API settings, follow the ESPHome Usage Tutorial to create or edit the YAML, then compile and flash firmware that matches the device.