

Home Assistant
Home Assistant
Controller & Devices
Cameras
Components
Lighting
Interfaces and Expansion
Applications
Media Playback
Dashboard
Unit AMeter ESPHome Component
The Unit AMeter component reads current measurement data over I2C.

1. Component Overview
| Item | Information |
|---|---|
| Product Name | Unit AMeter |
| SKU | U086 |
| Main Function | DC current measurement |
| Communication Interface | I2C |
| Default I2C Address | ADS1115: 0x48; EEPROM: 0x51 |
| ESPHome Components | ads1115, template |
| ESPHome Version Requirement | / |
2. Component Description
Including Official Components
Unit AMeter uses the official ESPHome ADS1115 sensor to read differential voltage, reads EEPROM calibration parameters through I2C Device, and converts the result to current using the Template sensor.
Unit AMeter configuration example:
- First configure the base ADS1115 component:
yaml
1 2 3 4 5 6 7 8 9 10 11
ads1115:
  - address: 0x48

sensor:
  - platform: ads1115
    multiplexer: "A0_A1"
    gain: 0.256
    sample_rate: 128
    name: "Unit AMeter A0_A1 Ref"
    id: diff
update_interval: 10sNotice
Unit AMeter uses only the
AIN0 and AIN1 channels, so up to three multiplexer values can be used: "A0_A1", "A0_GND", and "A1_GND". For current measurement, only A0_A1 is used in the current calculation.- Configure EEPROM calibration parameter reading and create a current entity with the
TemplateSensor. The followingsensorentry must be merged into the same list as the preceding ADS1115 entry:
yaml
1 2 3 4 5 6 7 8 9 10 11 12 13 14 15 16 17 18 19 20 21 22 23 24 25 26 27 28 29 30 31 32 33 34 35 36 37 38 39 40 41 42 43 44 45 46 47 48 49 50 51
i2c_device:
  id: eeprom
  address: 0x51

sensor:
  - platform: template
    name: "Input Current"
    id: input_cur
    unit_of_measurement: "A"
    icon: "mdi:current-dc"
    accuracy_decimals: 2
    update_interval: 10s
    lambda: |-
      float d = id(diff).state;

      if (isnan(d)) return NAN;

      const float PRESSURE_COEFF = 0.05f;

      const uint8_t EEPROM_REG = 0xF8;

      uint8_t calib[8];
      uint16_t hope, actual;

      if ( id(eeprom).read_register(EEPROM_REG, calib, 8) != i2c::ERROR_OK ) {
        ESP_LOGD("ameter.sensor", "Failed to read from EEPROM..");
        return NAN;
      }

      uint8_t xor_result = 0x00;

      for (uint8_t i = 0; i < 5; i++) {
          xor_result ^= calib[i];
      }

      if (xor_result != calib[5]) {
        return NAN;
      }

      hope   = (calib[1] << 8) | calib[2];
      actual = (calib[3] << 8) | calib[4];

      float calibration_ratio = (float)hope / actual;

      ESP_LOGD("ameter.sensor", "Factory calibration factor: %f", calibration_ratio);

      float ain = - d / PRESSURE_COEFF;

      ain = ain * calibration_ratio;

return ain;- When reading the EEPROM, update the
EEPROM_REGaddress in the lambda expression according to the ADS1115gainvalue:
c++
1 2 3 4
// In the lambda expression
// Update EEPROM_REG whenever gain is changed
// For example, when gain is 0.256
const uint8_t EEPROM_REG = 0xF8;| ADS1115 Gain | EEPROM Data Register | Max Input Current (theory) |
|---|---|---|
| 6.144 | 0xD0 | - |
| 4.096 | 0xD8 | - |
| 2.048 | 0xE0 | - |
| 1.024 | 0xE8 | - |
| 0.512 | 0xF0 | 10 A |
| 0.256 | 0xF8 | 5 A |
The recommended gain value is 0.256, providing 0.3 mA resolution. Only one of AIN0 or AIN1 can be measured at a time; do not connect inputs to both channels.
Warning
The product is designed for a measurement range of ±4 V and includes a fuse. A current above 4 A triggers the fuse. Do not input current outside this range, and avoid operating with no load to prevent damage. The EEPROM (0x51) contains factory calibration parameters; do not write to the EEPROM, or the calibration data may be overwritten and measurements may become inaccurate.
3. Reference Example
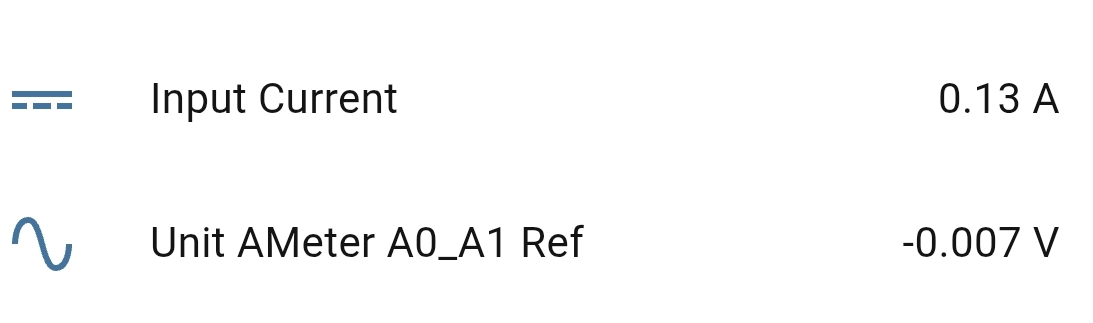
After adding the component to the Dashboard, you can view sensor data in Home Assistant.
4. Related Links
5. Related Video
Page Tools