

产品上手指引
Linux PC
AI 加速卡
LLM-8850 Card
AI 智能体
实时 AI 语音助手
火山引擎语音助手
工业控制
Ethernet 摄像头
PoECAM
Wi-Fi 摄像头
Unit CamS3/-5MP
AI 摄像头
LoRa & LoRaWAN
电机驱动
恢复出厂固件教程
拨码开关&引脚切换
UnitV2 Jupyter Notebook开发
准备工作
- 1.设备启动与连接: 参考UnitV2内置识别服务教程, 完成设备驱动安装并通过浏览器访问至设备Web控制页面。
Jupyter Notebook
UnitV2的出厂Linux镜像中集成了Jupyter Notebook开发调试工具, Jupyter Notebook是一款网页形式的开发工具,用户可以直接在网页上编写代码和运行代码。如在编程过程中需要编写说明文档,可在同一个页面中直接编写,便于作及时的说明和解释。非常方便设备的在线运行调试。访问 Jupyter Notebook 官网了解更多内容。在本教程中,将使用Jupyter Notebook编辑运行几个简单的案例程序,向你介绍如何控制UnitV2上的基础外设硬件。UnitV2与此Jupyter Notebook一起运行的是Python 3.8,该版本支持python的所有高级特性与语法糖!
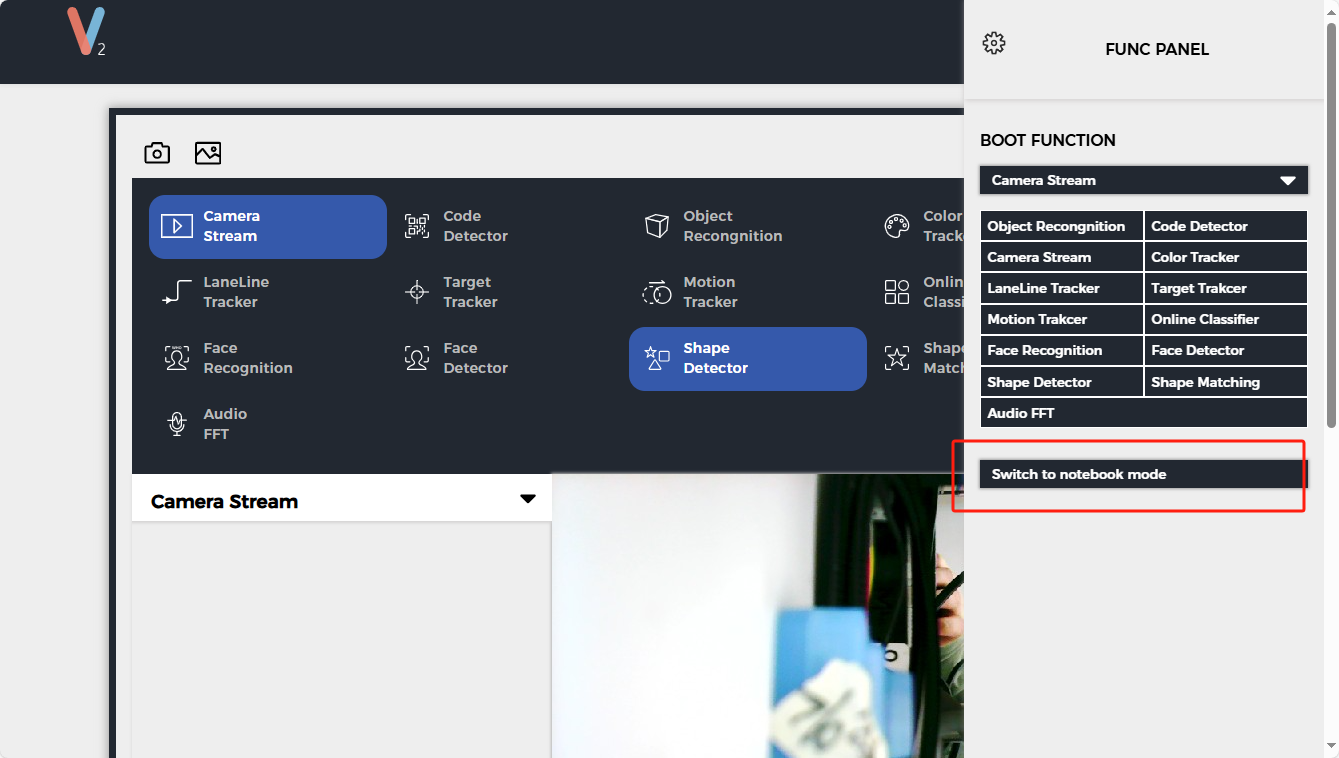
PC端与UnitV2建立连接后,通过浏览器访问域名unitv2.py或IP:10.254.239.1访问通过识别功能的预览网页->点击右上角的设置按钮->切换至 Jupyter Notebook,根据页面提示进行刷新。
进入Jupyter Notebook页面后,我们能够看到文件系统中内置了一个01-Introduction to M5Stack UnitV2.ipynb程序文件。该文件包含了驱动基础外设硬件的一些案例程序介绍(包含驱动LED灯与通过Camera拍摄照片并显示到Jupyter Notebook)->点击文件查看代码详情。
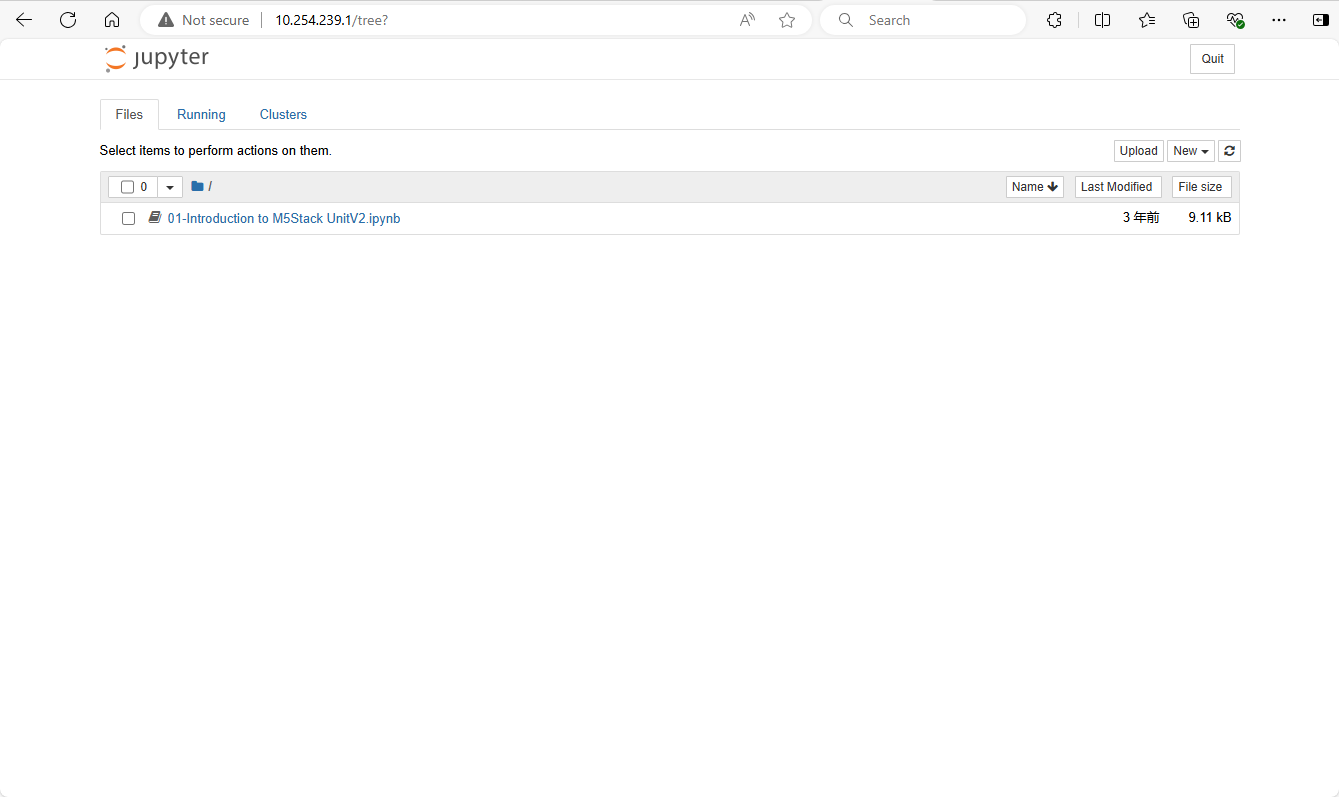
根据程序注释逐步选择程序,然后点击上方运行按钮,体验在线调试设备。

案例程序
LED
import time

def control_white_led(value):
    open('/sys/class/gpio/export', 'w').write('0') # Export the GPIO0
    open('/sys/class/gpio/gpio0/direction', 'w').write('out') # Set the direction of the GPIO
    open('/sys/class/gpio/gpio0/value', 'w').write(str(value)) # Set the calute, '1' or '0'

def control_red_led(value):
    open('/sys/class/gpio/export', 'w').write('1') # Export the GPIO0
    open('/sys/class/gpio/gpio1/direction', 'w').write('out') # Set the direction of the GPIO
    open('/sys/class/gpio/gpio1/value', 'w').write(str(value)) # Set the calute, '1' or '0'


for i in range(10):
    control_white_led(0)
    time.sleep(0.5)
    control_white_led(1)
    time.sleep(0.5)
Microphone
import subprocess
import audioop
import time

audio_cmd = ['arecord', '-D', 'plughw:0', '-f', 'S16_LE', '-c', '1', '-r', '48000', '-t', 'raw', '-q', '-']
audio_source = subprocess.Popen(audio_cmd, stdout=subprocess.PIPE)

while True:
    audio_source.stdout.flush()
    data = audio_source.stdout.read(512)
    rms = audioop.rms(data, 2)
    print(rms)
    time.sleep(0.1)
- 命令行执行该命令,录制音频并保存至文件
arecord -d 20 -r 48000 -c 2 -f S16_LE audio.wav
UART
import serial

# Open the serial port, and set the baudrate to 115200
uart_grove = serial.Serial('/dev/ttyS1', 115200, timeout=0.5)

# Send Something
uart_grove.write('hello'.encode('utf-8'))
# encode is for converting the string to bytes, or you can directly send bytes
uart_grove.write(b'hello')


# Receive soemthing
x = uart_grove.read()          # read one byte
s = uart_grove.read(10)        # read up to ten bytes (timeout)
line = uart_grove.readline()   # read a '/n' terminated line
Camera
M5Stack UnitV2的内置摄像头位于 /dev/video0. 您可以尝试捕获静态图像帧
import cv2

camera = cv2.VideoCapture(0)
ret, frame = camera.read()

if ret:
    print('Capture Successful!')
else:
    print('OOps, we get some trouble!')
使用matplotlib库将它展示到Jupyter notebook页面中
from matplotlib import pyplot as plt

# Magic to tell matplotlib display the image in jupyter notebook
%matplotlib inline

# Let show the image!
plt.imshow(frame)
将OpenCV使用的BGR转换为RGB,使得matplotlib显示的图像颜色正常。
# Convert from BGR to RGB
frame_rgb = cv2.cvtColor(frame, cv2.COLOR_BGR2RGB)

plt.imshow(frame_rgb)
尝试转换为灰阶图
# Convert from BGR to RGB
frame_gray = cv2.cvtColor(frame, cv2.COLOR_BGR2GRAY)

# We need to tell matplotlib it is a grey image. You can try to change to other cmap, refer here: https://matplotlib.org/stable/tutorials/colors/colormaps.html
plt.imshow(frame_gray, cmap='gray')
拍摄并保存图片
import cv2
camera = cv2.VideoCapture(0)
ret, frame = camera.read()

if ret:
    print('Capture Successful!')
    cv2.imwrite('test2.png',frame)
else:
    print('OOps, we get some trouble!')
SSH登录
打开命令行终端,输入下方指令,并输入默认密码,通过ssh访问设备。
ssh m5stack@10.254.239.1

//user: m5stack
//pwd: 12345678


//user: root
//pwd: 7d219bec161177ba75689e71edc1835422b87be17bf92c3ff527b35052bf7d1f
用户默认目录结构
//存储Jupyter Notebook中编辑的文件
/home/notebook

//存储识别功能服务文件资源,和一些模型文件
/home/m5stack