Product Guide
Linux PC
CardputerZero
AI Accelerator Card
LLM-8850 Card
Large Language Models
AI & Agent
Real-Time AI Voice Assistant
XiaoZhi Voice Assistant
AtomS3R-M12 Volcengine Kit
Offline Voice Recognition
Industrial Control
IoT Measuring Instruments
Air Quality
PowerHub
Module13.2 PPS
VAMeter
T-Lite
Input & Output Devices
Ethernet Camera
PoECAM
Wi-Fi Camera
Unit CamS3/-5MP
AI Camera
LoRa & LoRaWAN
Motor Control
Restore Factory Firmware
DIP Switch Usage Guide
Timer Folder Pusher
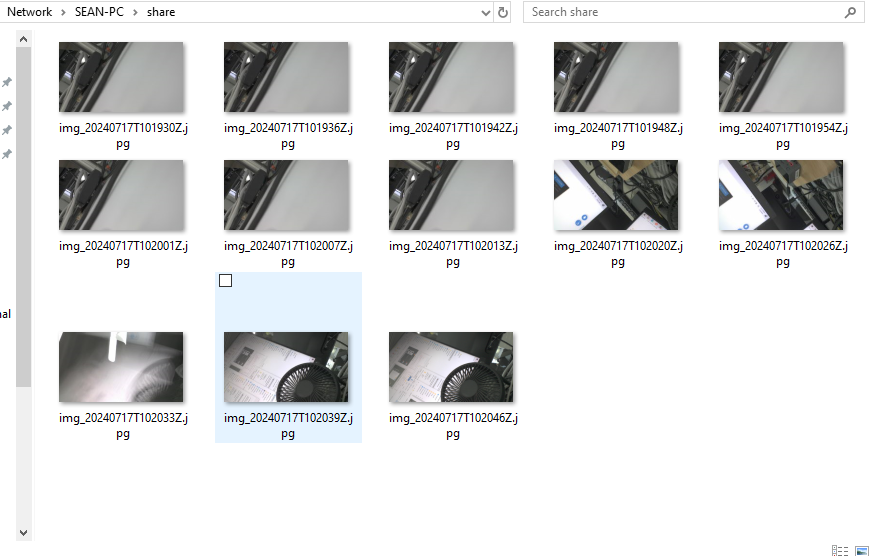
This tutorial will introduce you to how to periodically transfer images to a shared folder on a computer via the TimerCAM, based on the SMB file sharing protocol.
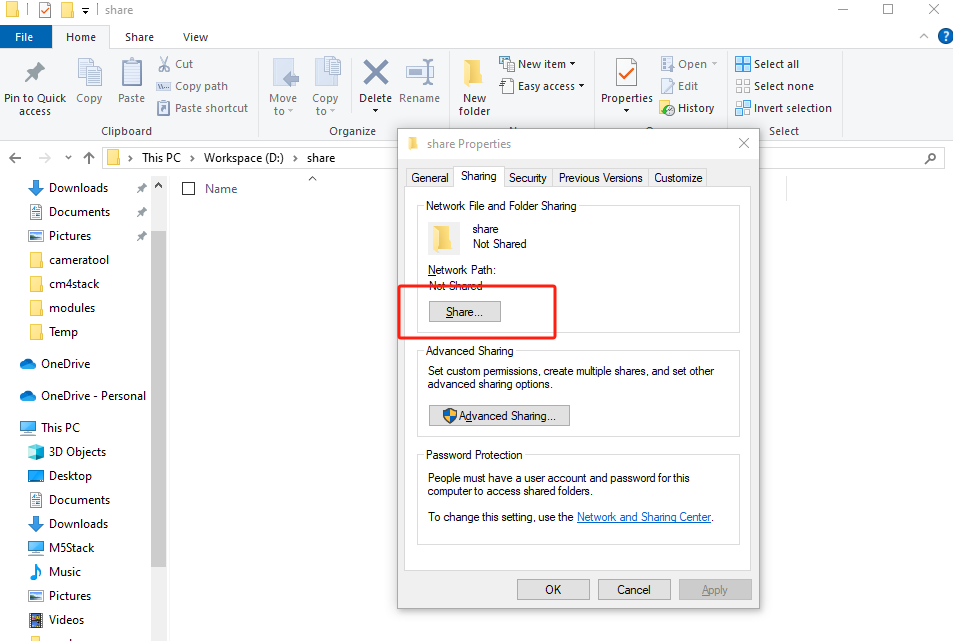
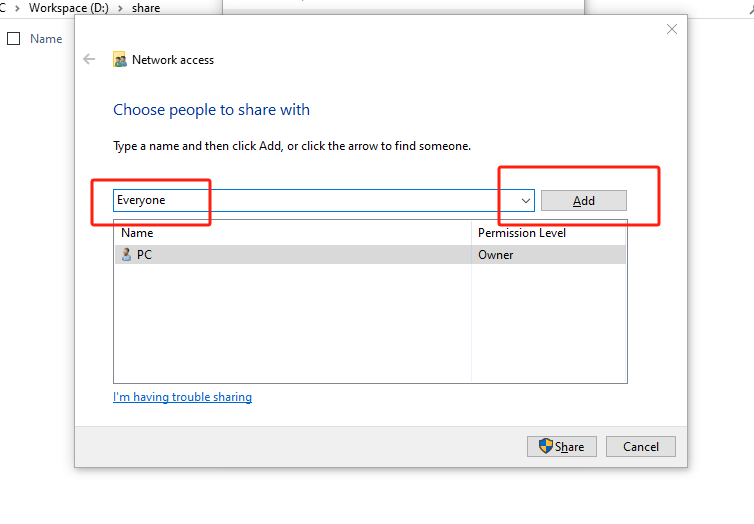
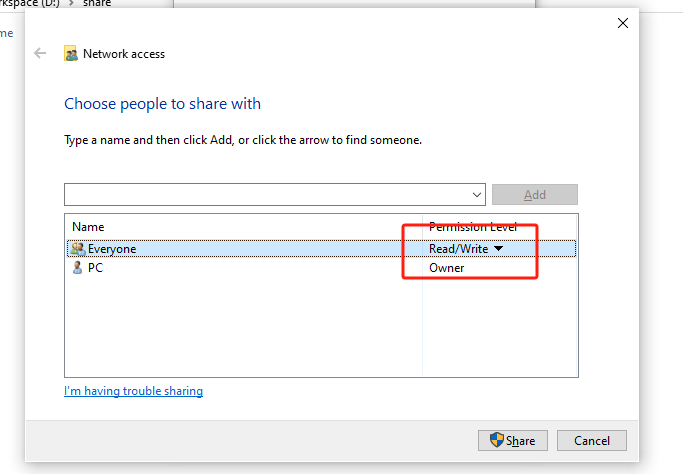
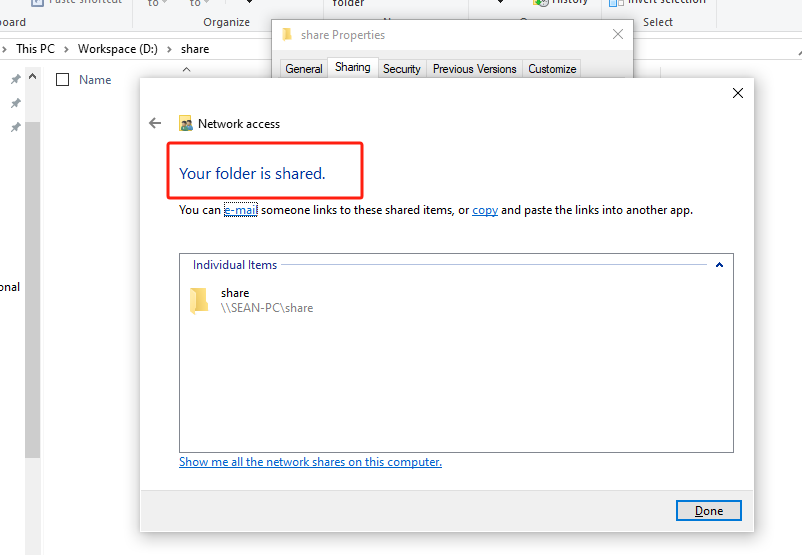
Creating a Shared Folder
As an example with Windows 10, create a folder -> right-click in the folder to open properties -> sharing settings -> add access permission -> click the dropdown menu in the input box, and select Everyone then click add -> click the permission level dropdown, enable read/write permissions -> confirm sharing.
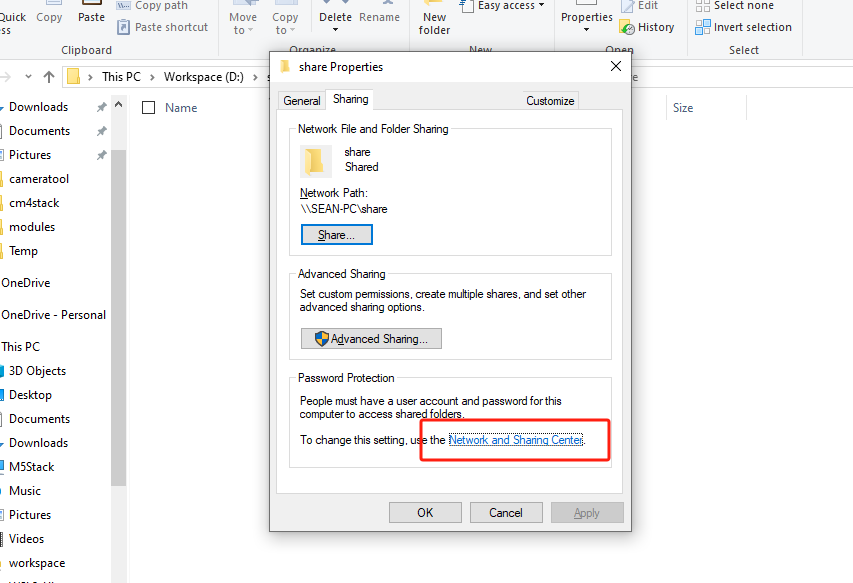
Modifying Sharing Settings
Right-click in the folder to open properties -> Network and Sharing Center
Change network discovery to Enable network discovery.
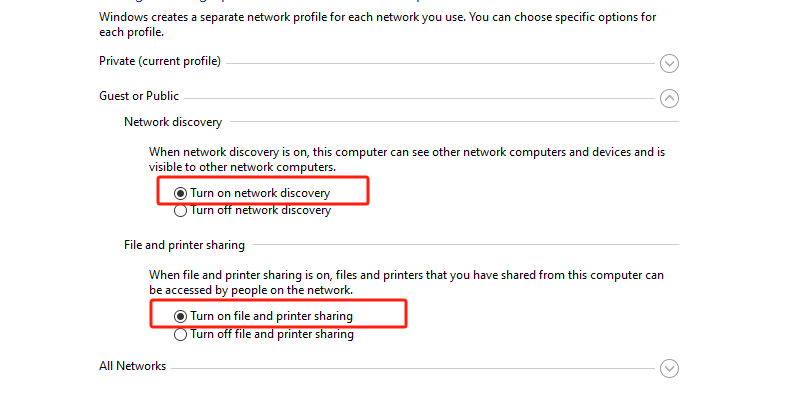
Click the dropdown icon for all networks, in password protected sharing select Turn off password protected sharing, finally click Save changes.

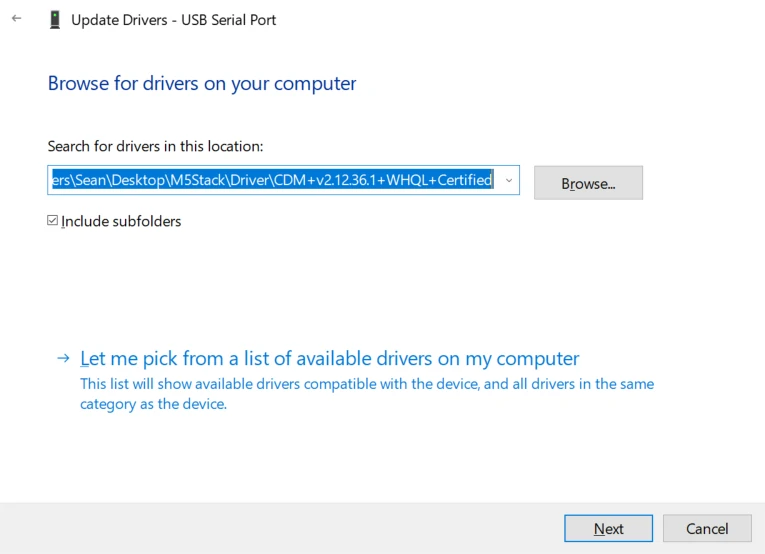
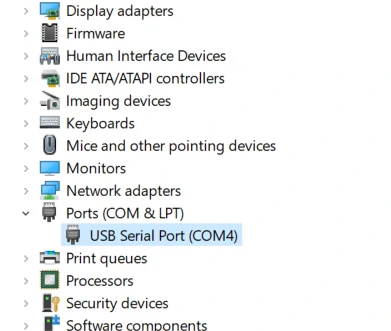
Driver Installation
1500000 bps / 750000 bps / 500000 bps / 250000 bps / 115200 bps
M5Stack or USB Serial, Windows recommends using the driver file for direct installation through device manager (custom update), the executable file installation method may not work properly). Click here to download the FTDI driver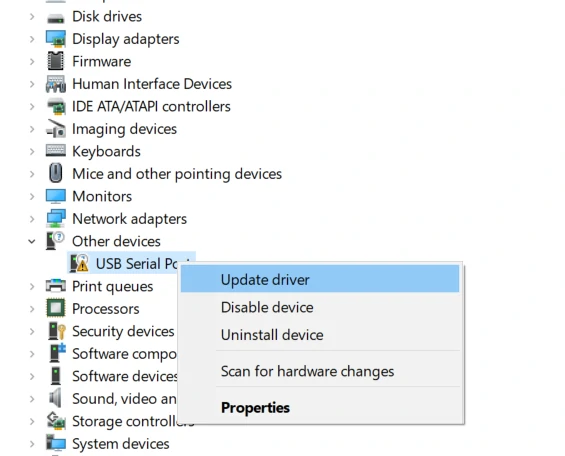
System Preferences -> Security & Privacy -> General -> Allow apps downloaded from -> App Store and identified developers.Downloading the Burning Tool
Please click the button below according to your operating system to download the corresponding M5Burner firmware burning tool. Unzip and open the application.
| Software version | Download link |
|---|---|
| M5Burner_Windows | Download |
| M5Burner_MacOS | Download |
| M5Burner_Linux | Download |
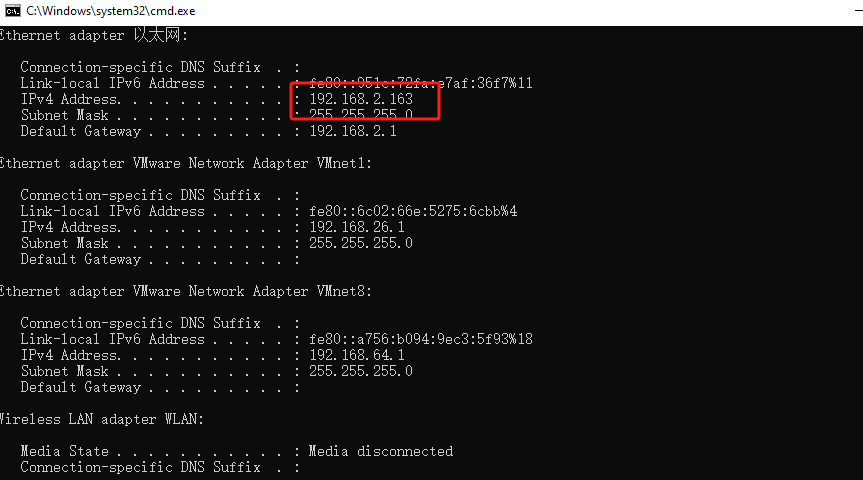
Obtaining Local IP Address
Press Win + R keys together to open the Run window, type cmd and press enter to open the command line, type ipconfig and press enter to confirm, view the current computer's IP address.
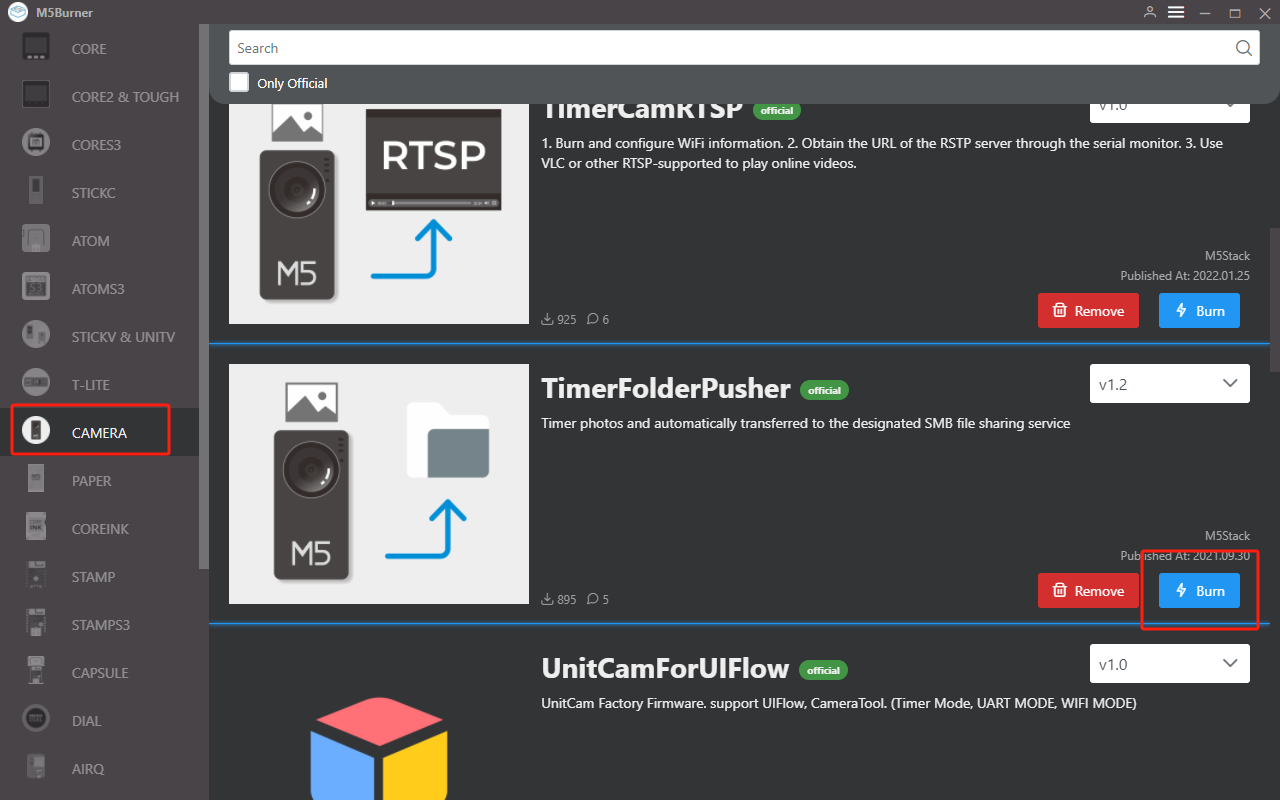
Burning Firmware
Open M5Burner --> connect the device to the computer --> select the corresponding port --> switch to the TimerCam option --> select the TimerFolderPusher firmware and click download --> click Burn to start burning --> wait for the successful popup to indicate burning is complete
Click Burn, before burning, you need to configure some related connection parameters for the device.
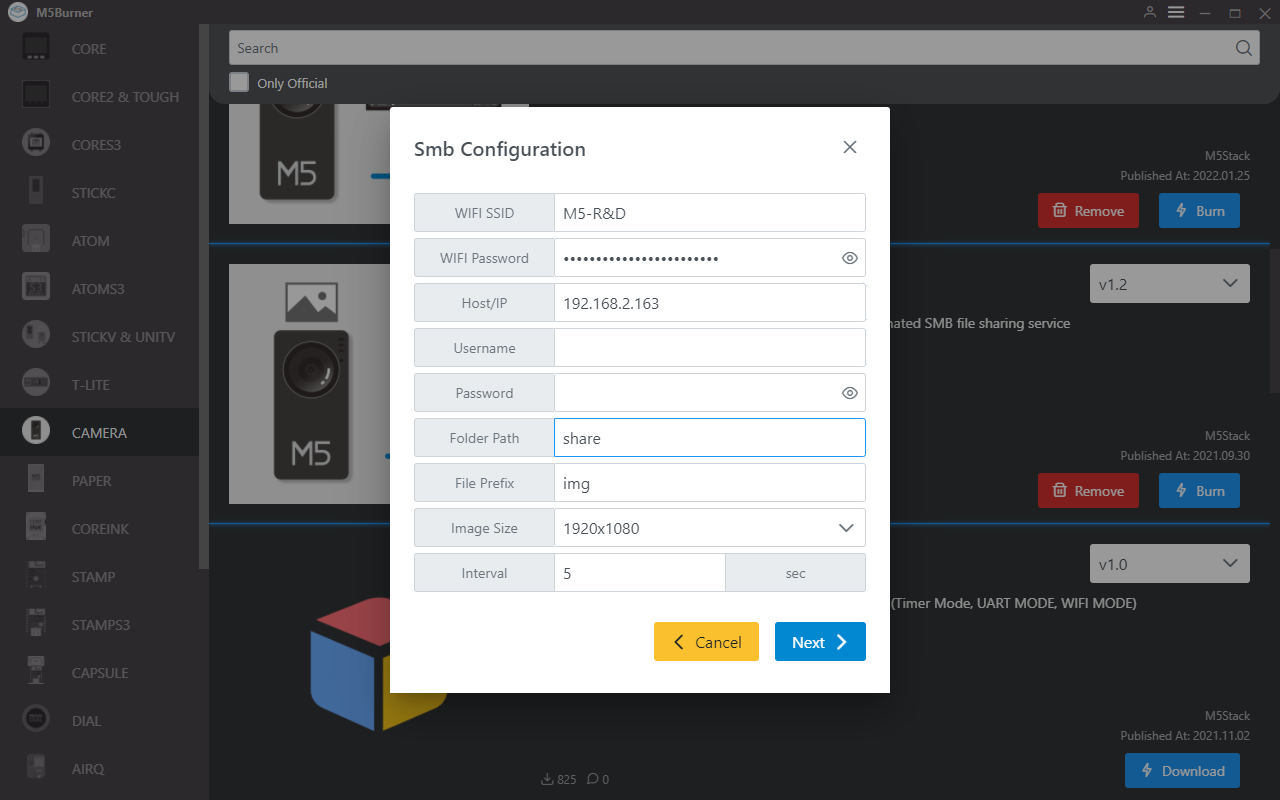
WIFI SSID: WIFI name, note to avoid special characters, the computer establishing the shared folder and the TimerCAM must be on the same networkWIFI PASSWORD: WIFI passwordHost/IP: The IP address of the file sharing serviceUsername: Username for accessing the file sharing service (if access permission is for everyone, this can be omitted)Password: Password for accessing the file sharing service (if access permission is for everyone, this can be omitted)Folder Path: Path to the shared folderFile Prefix: Default prefix name for imagesImage Size: Size of the imageInterval: Interval between sending imagesStarting Periodic Transfer