

Product Guide
Linux PC
CardputerZero
AI Accelerator Card
LLM-8850 Card
Large Language Models
AI & Agent
Real-Time AI Voice Assistant
XiaoZhi Voice Assistant
AtomS3R-M12 Volcengine Kit
Offline Voice Recognition
Industrial Control
IoT Measuring Instruments
Air Quality
PowerHub
Module13.2 PPS
VAMeter
T-Lite
Input & Output Devices
Ethernet Camera
PoECAM
Wi-Fi Camera
Unit CamS3/-5MP
AI Camera
LoRa & LoRaWAN
Motor Control
Restore Factory Firmware
DIP Switch Usage Guide
TTN (The Things Network) Platform Connection & Usage
Note: This tutorial only applies to areas covered by TTN gateways. Users in uncovered areas need to set up their own gateways for connection.
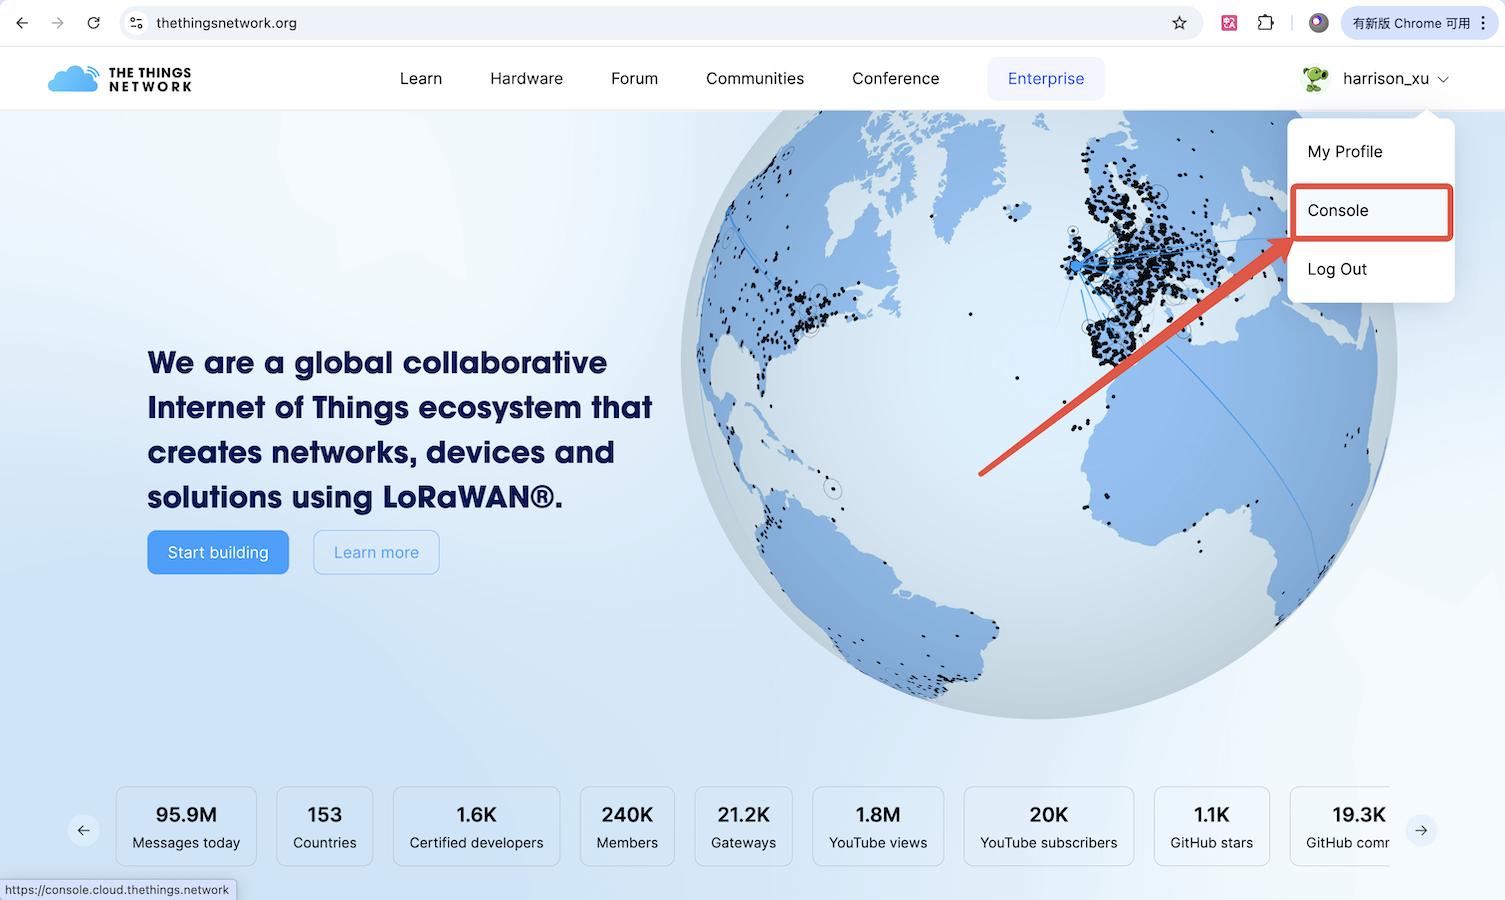
Register an Account
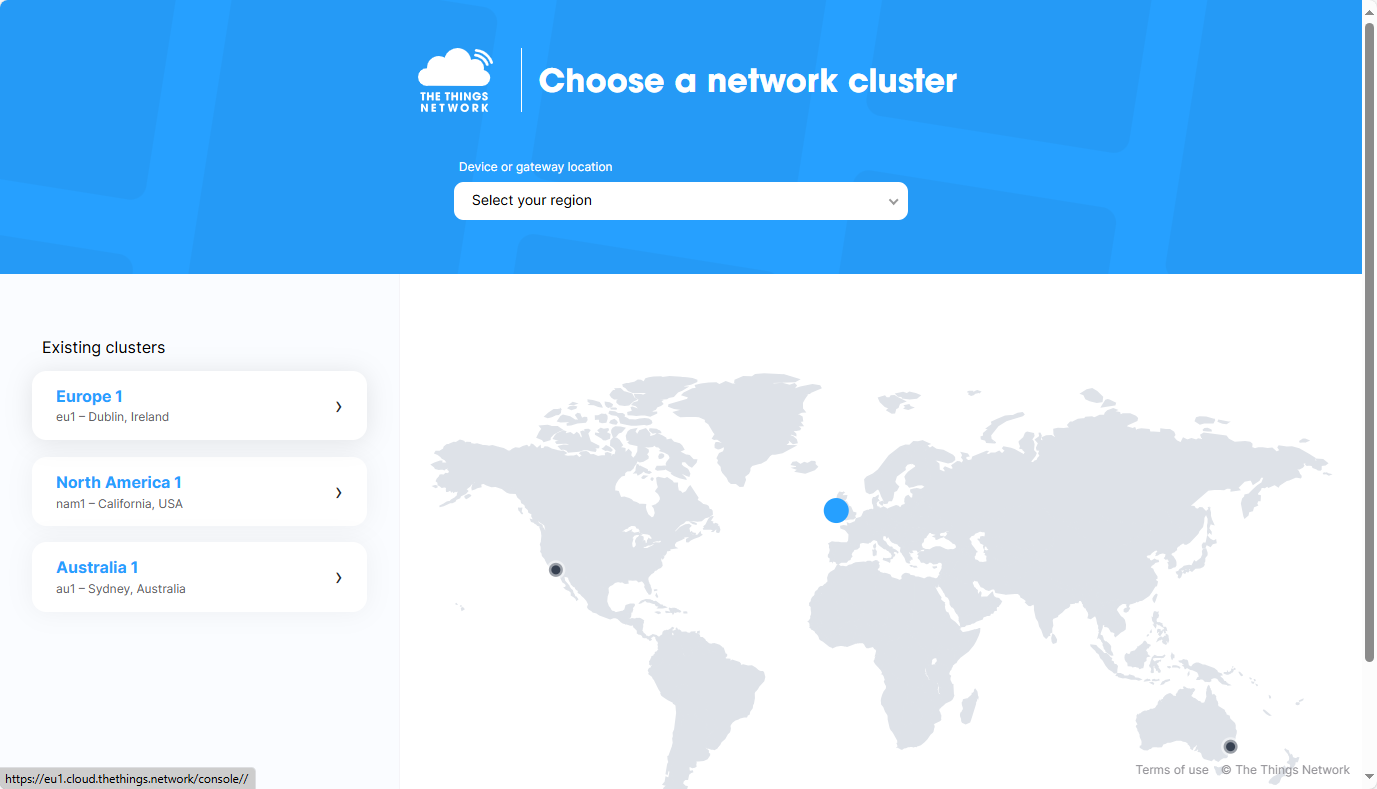
Visit the TTN website and register/log in with your personal account. In the Console, select a cluster based on your geographical location and other criteria.
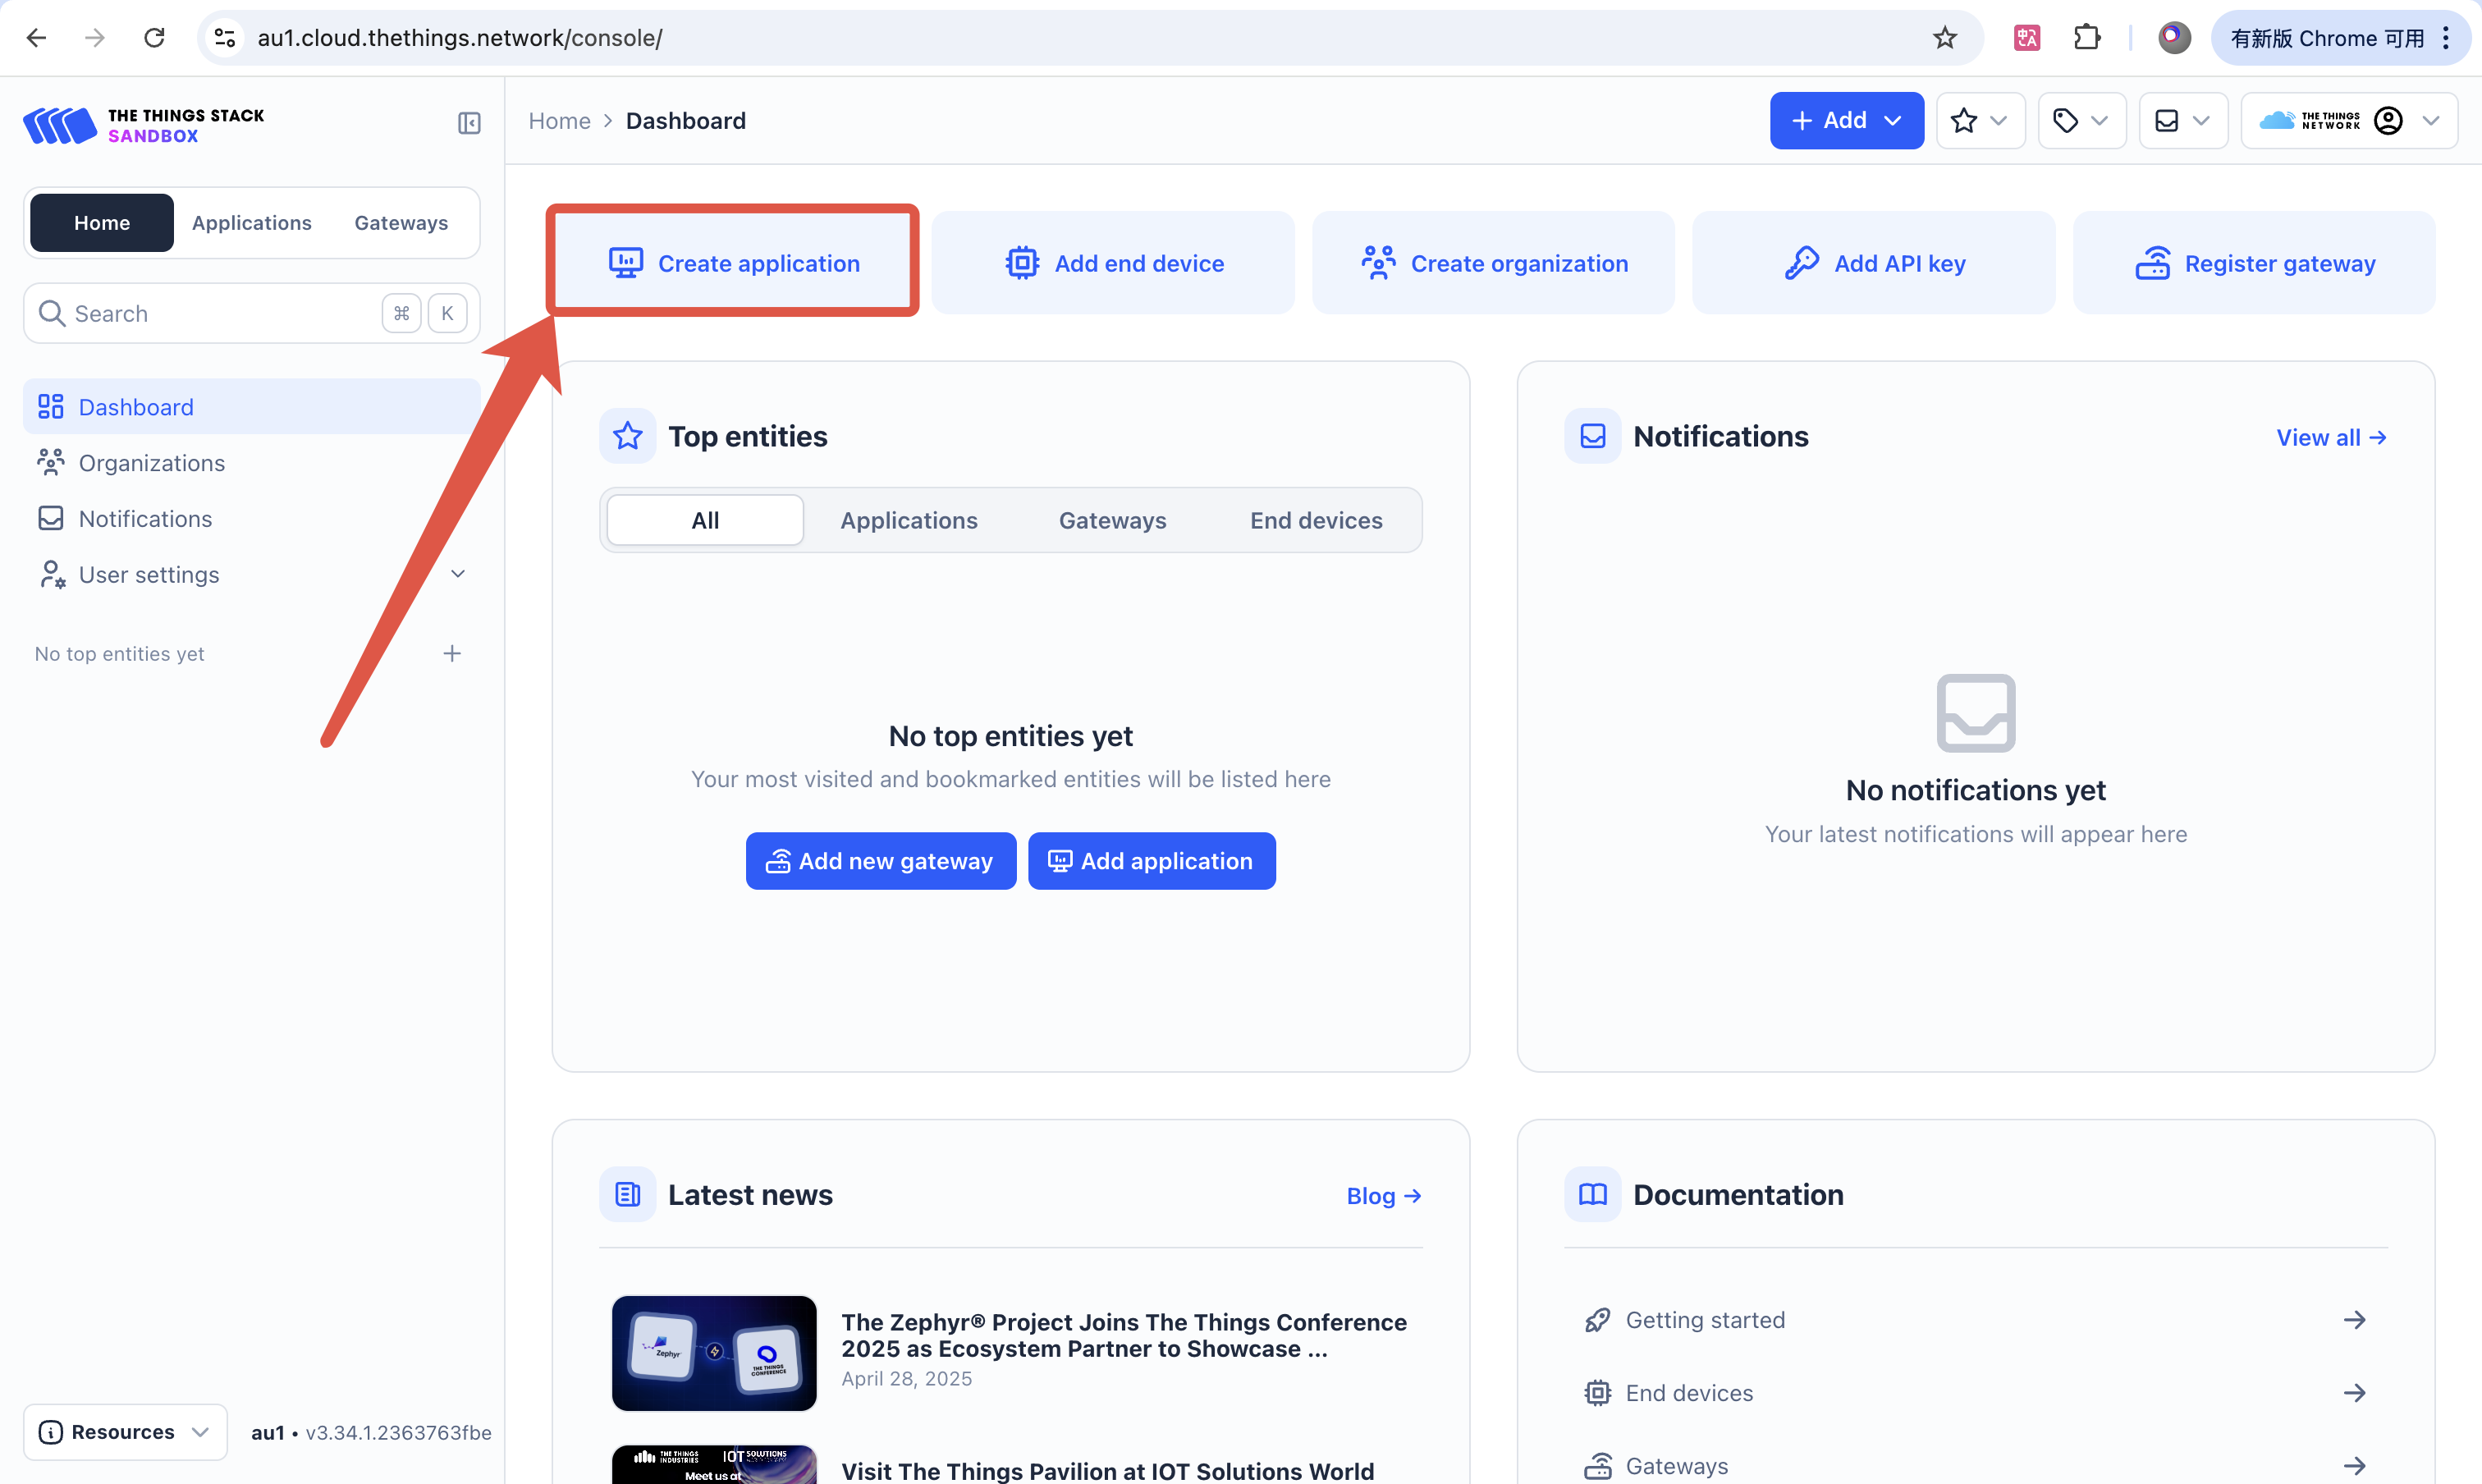
Create an Application
Click Create application, fill in Application ID and application name as desired, then click Create application to complete creation.

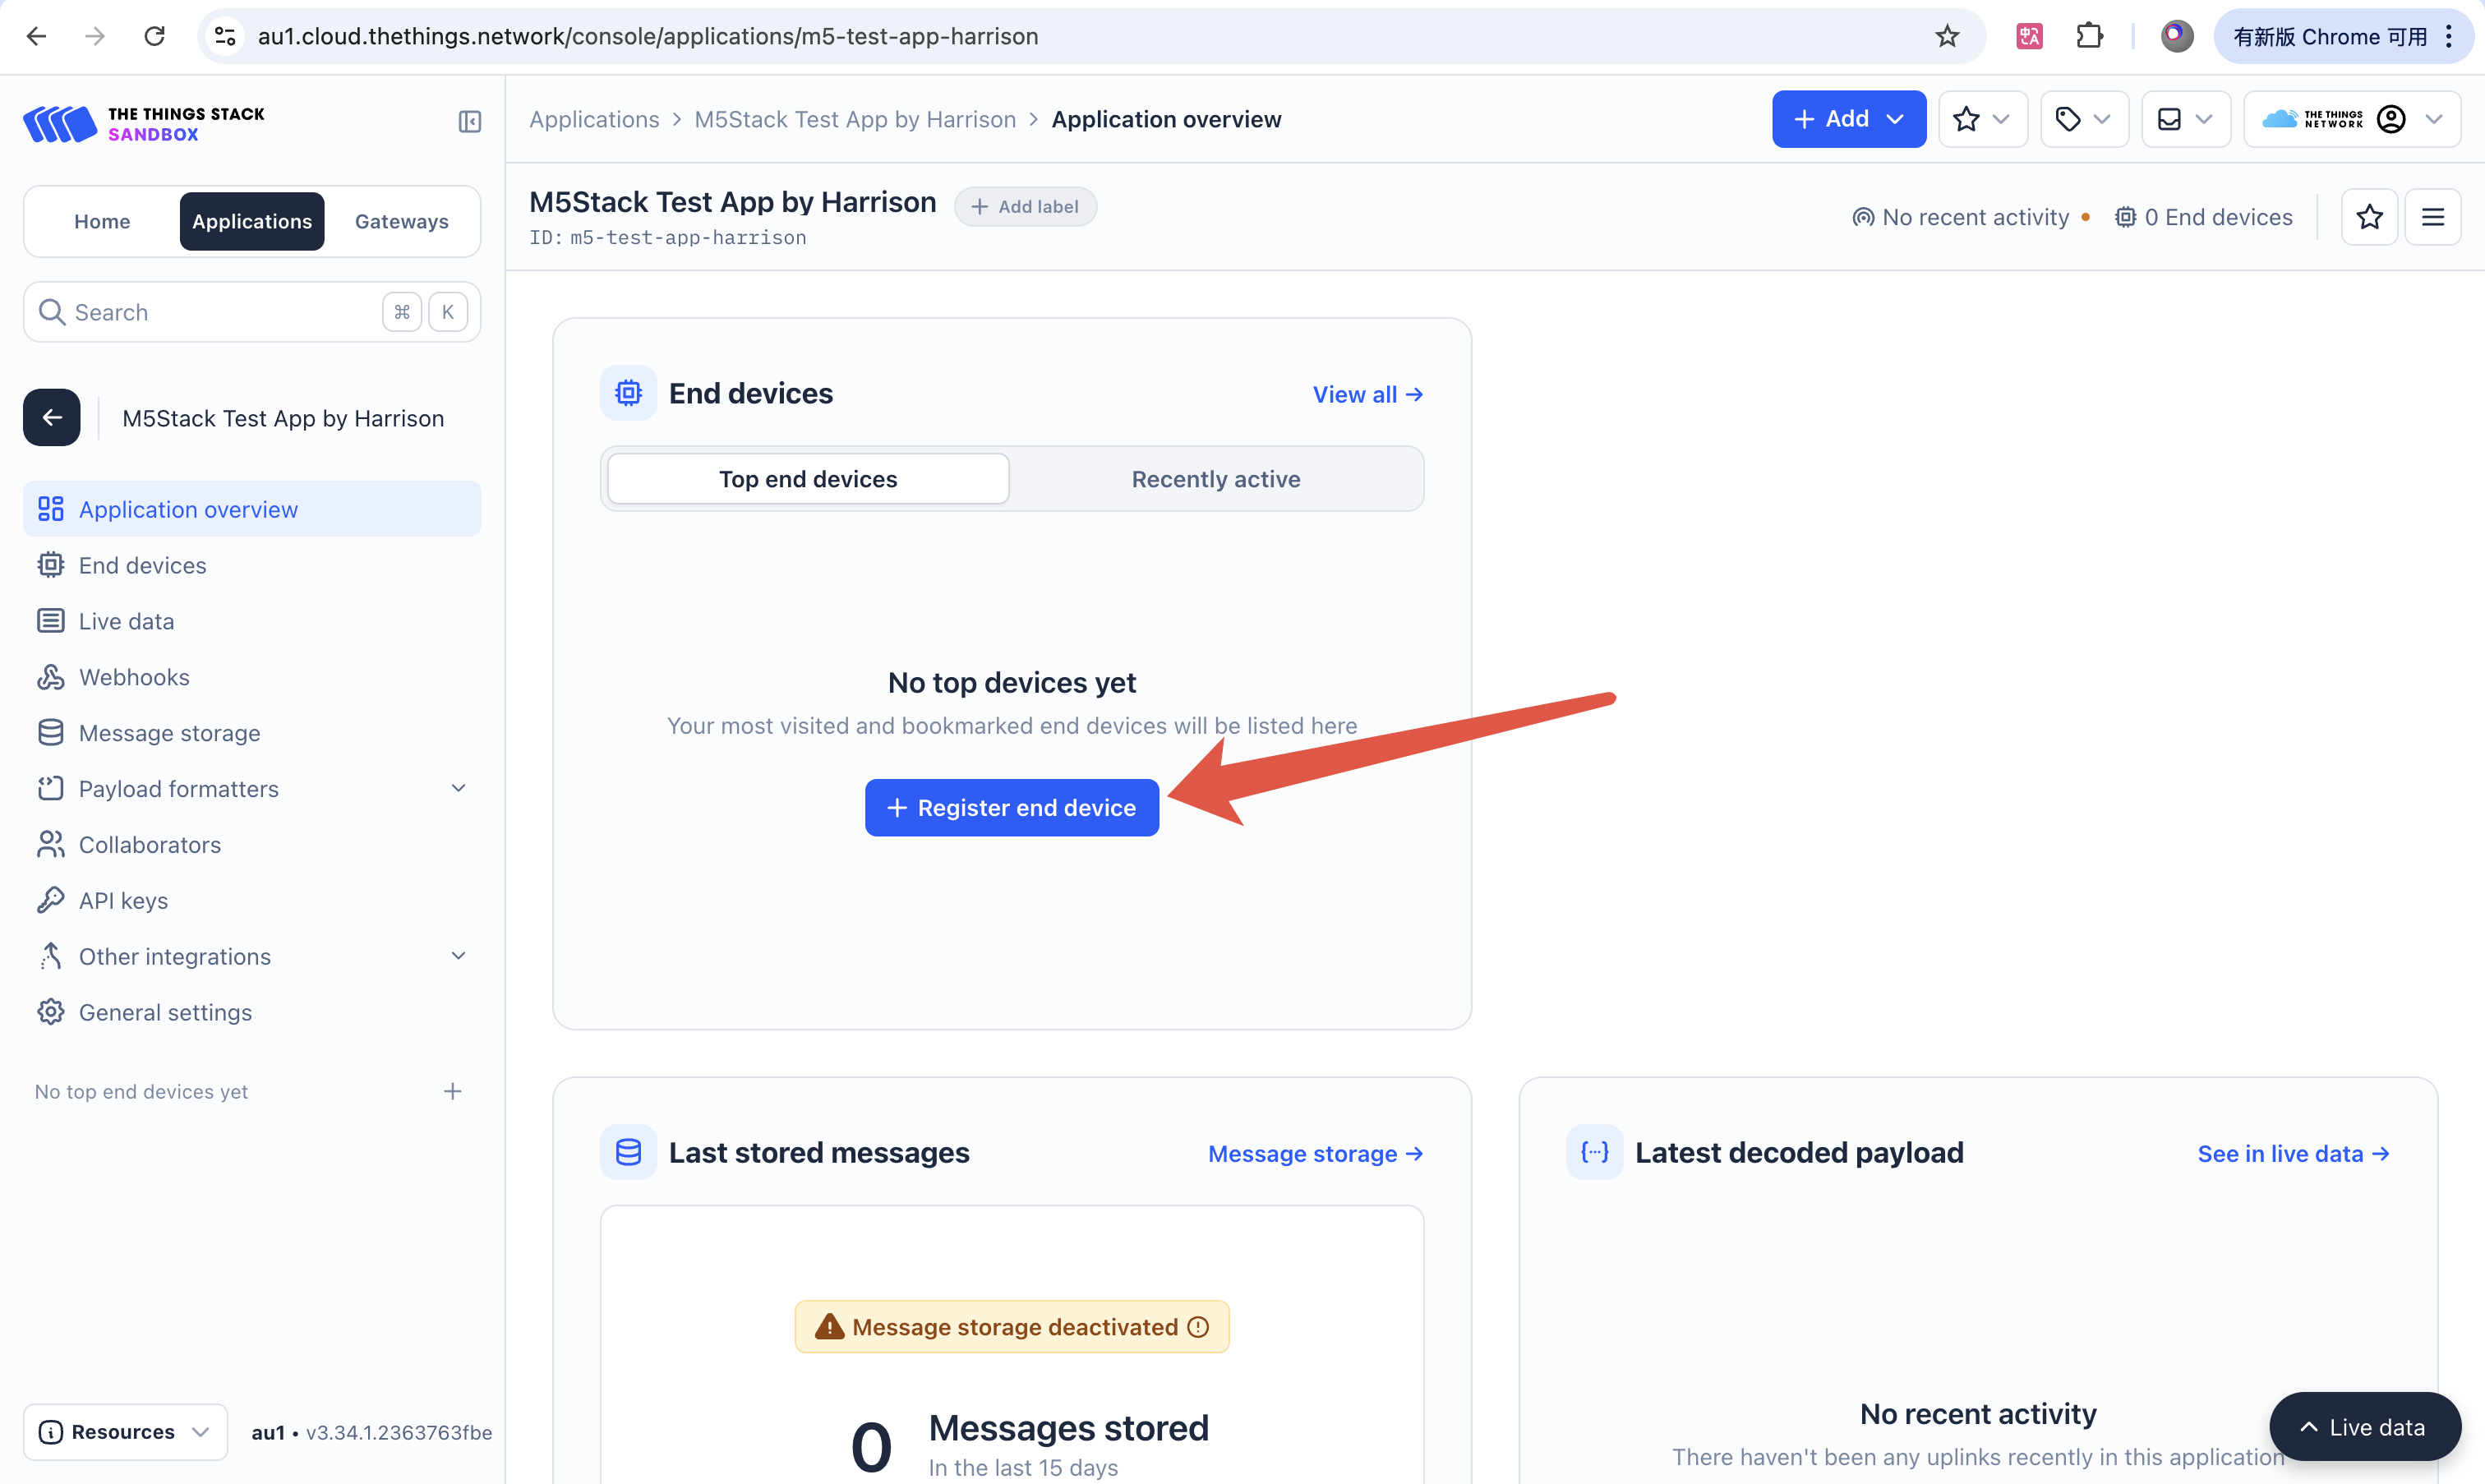
Add a Device
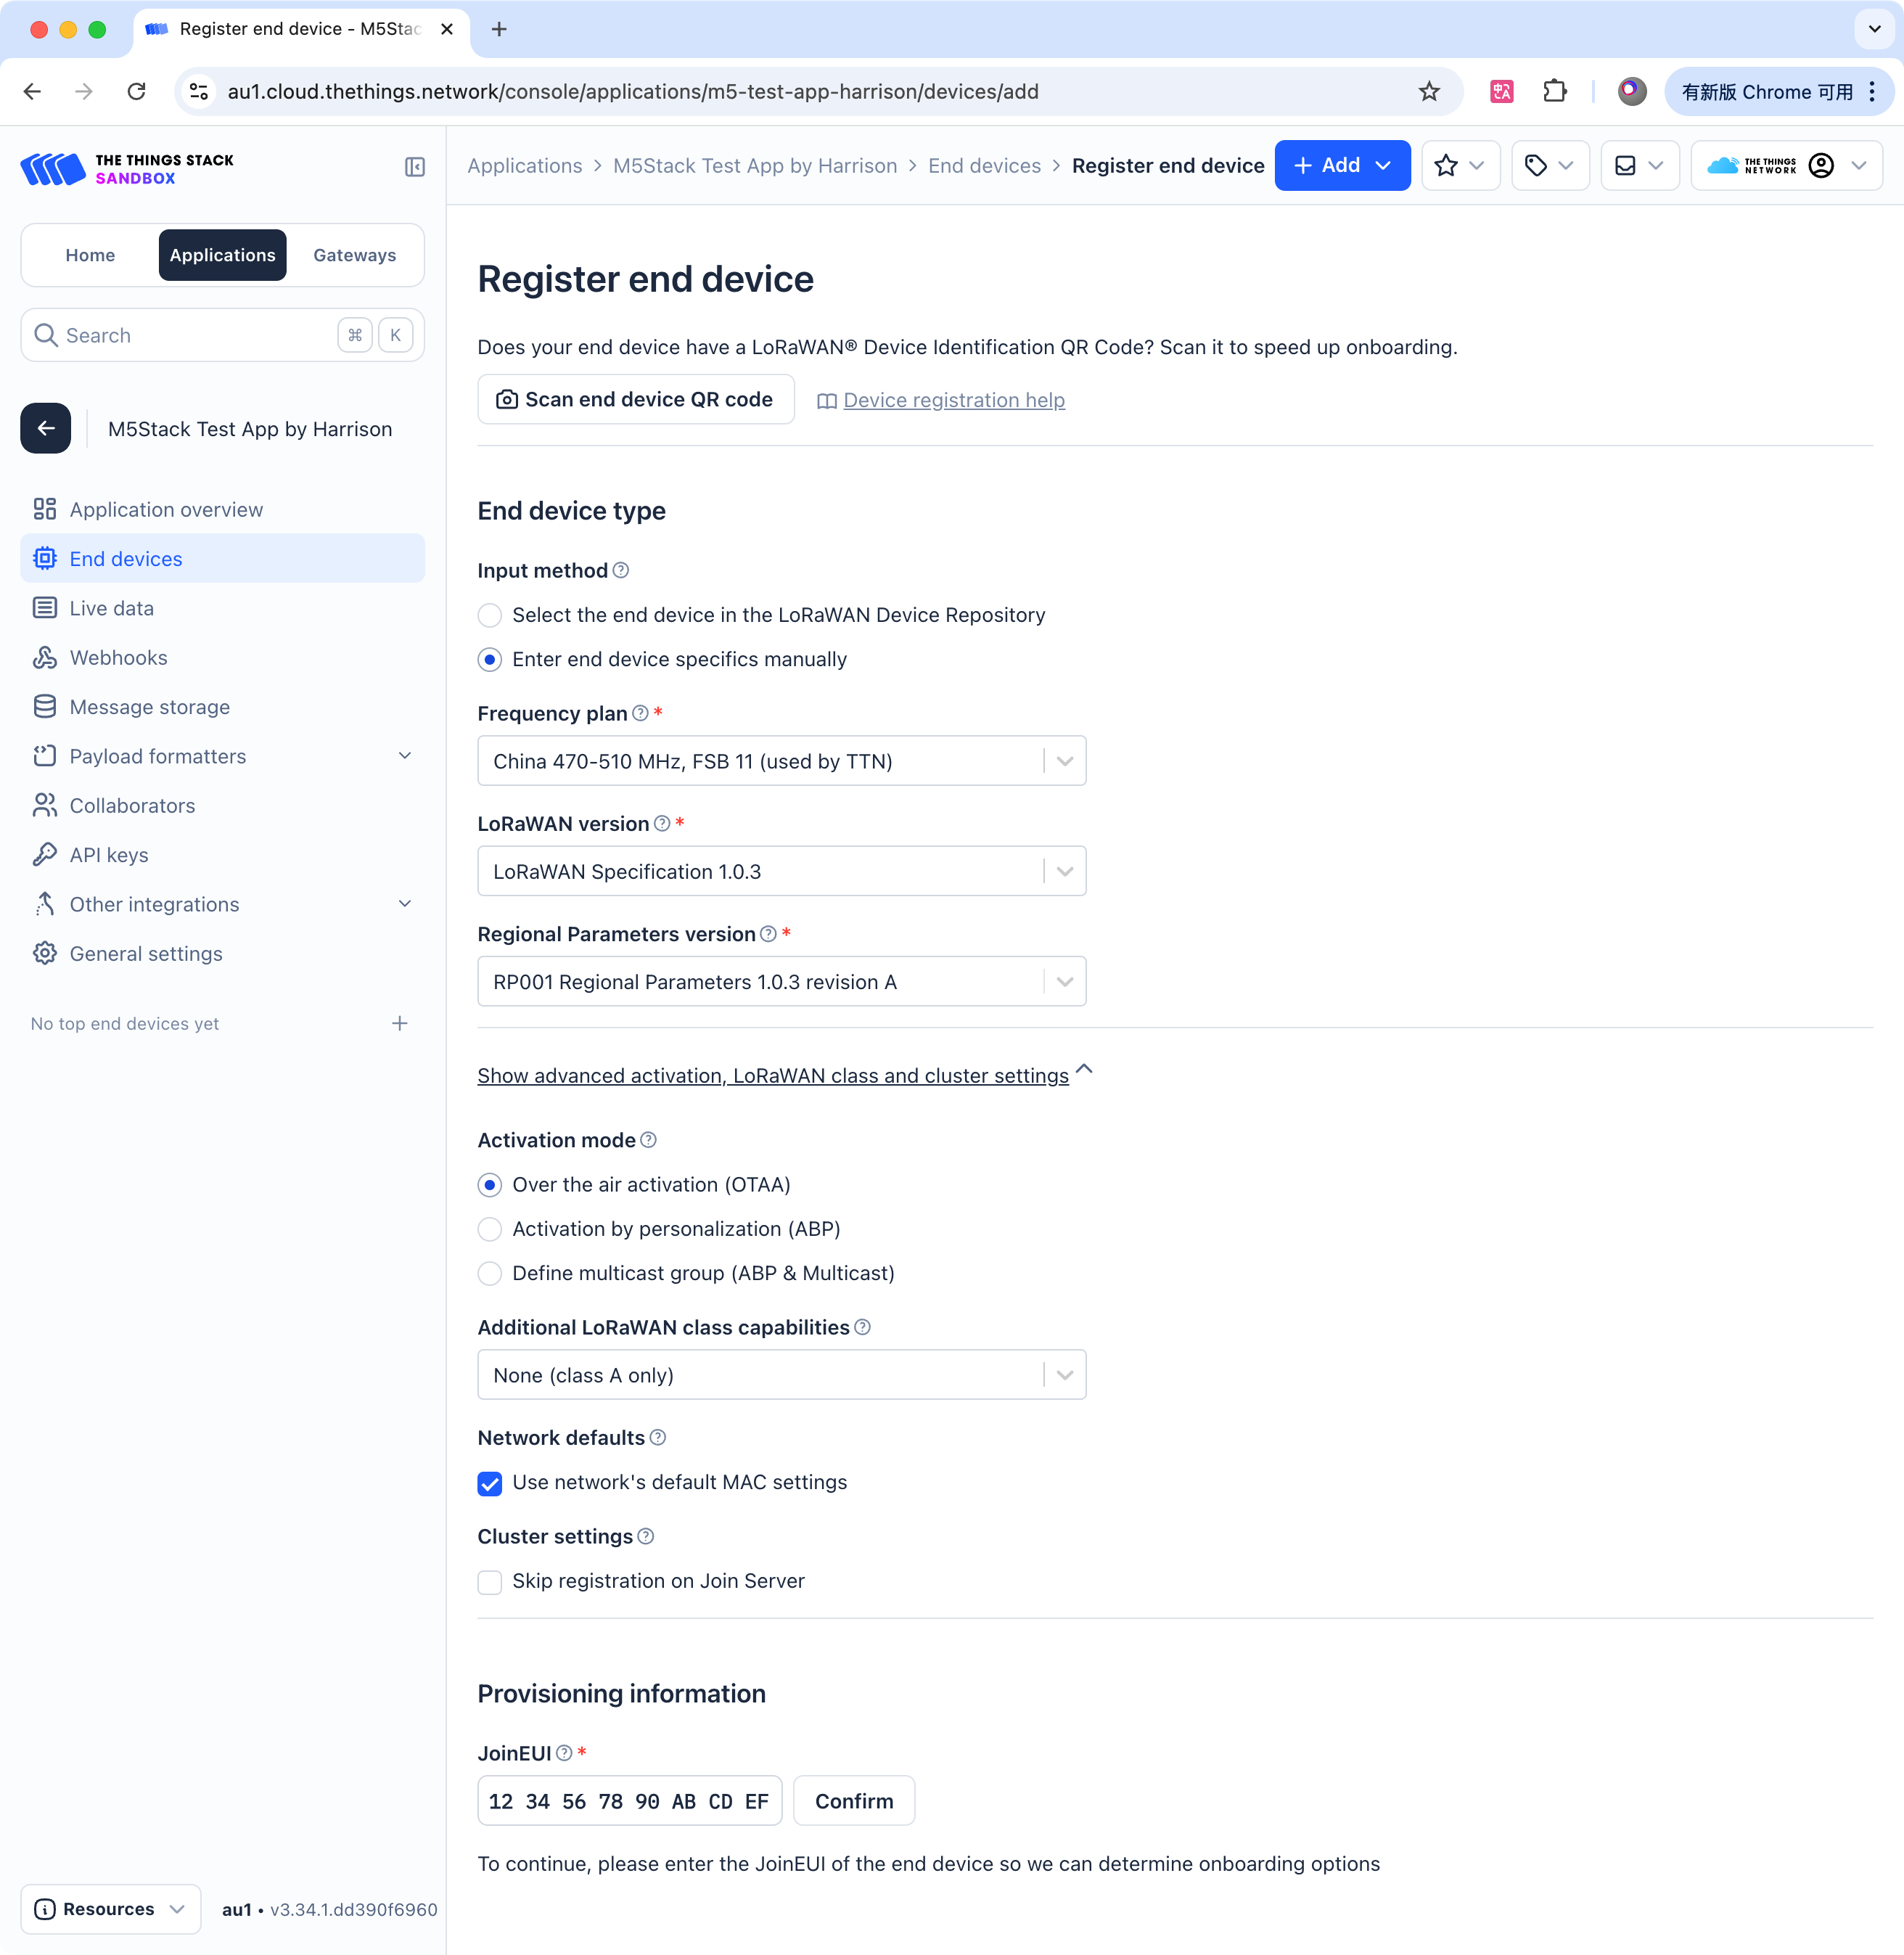
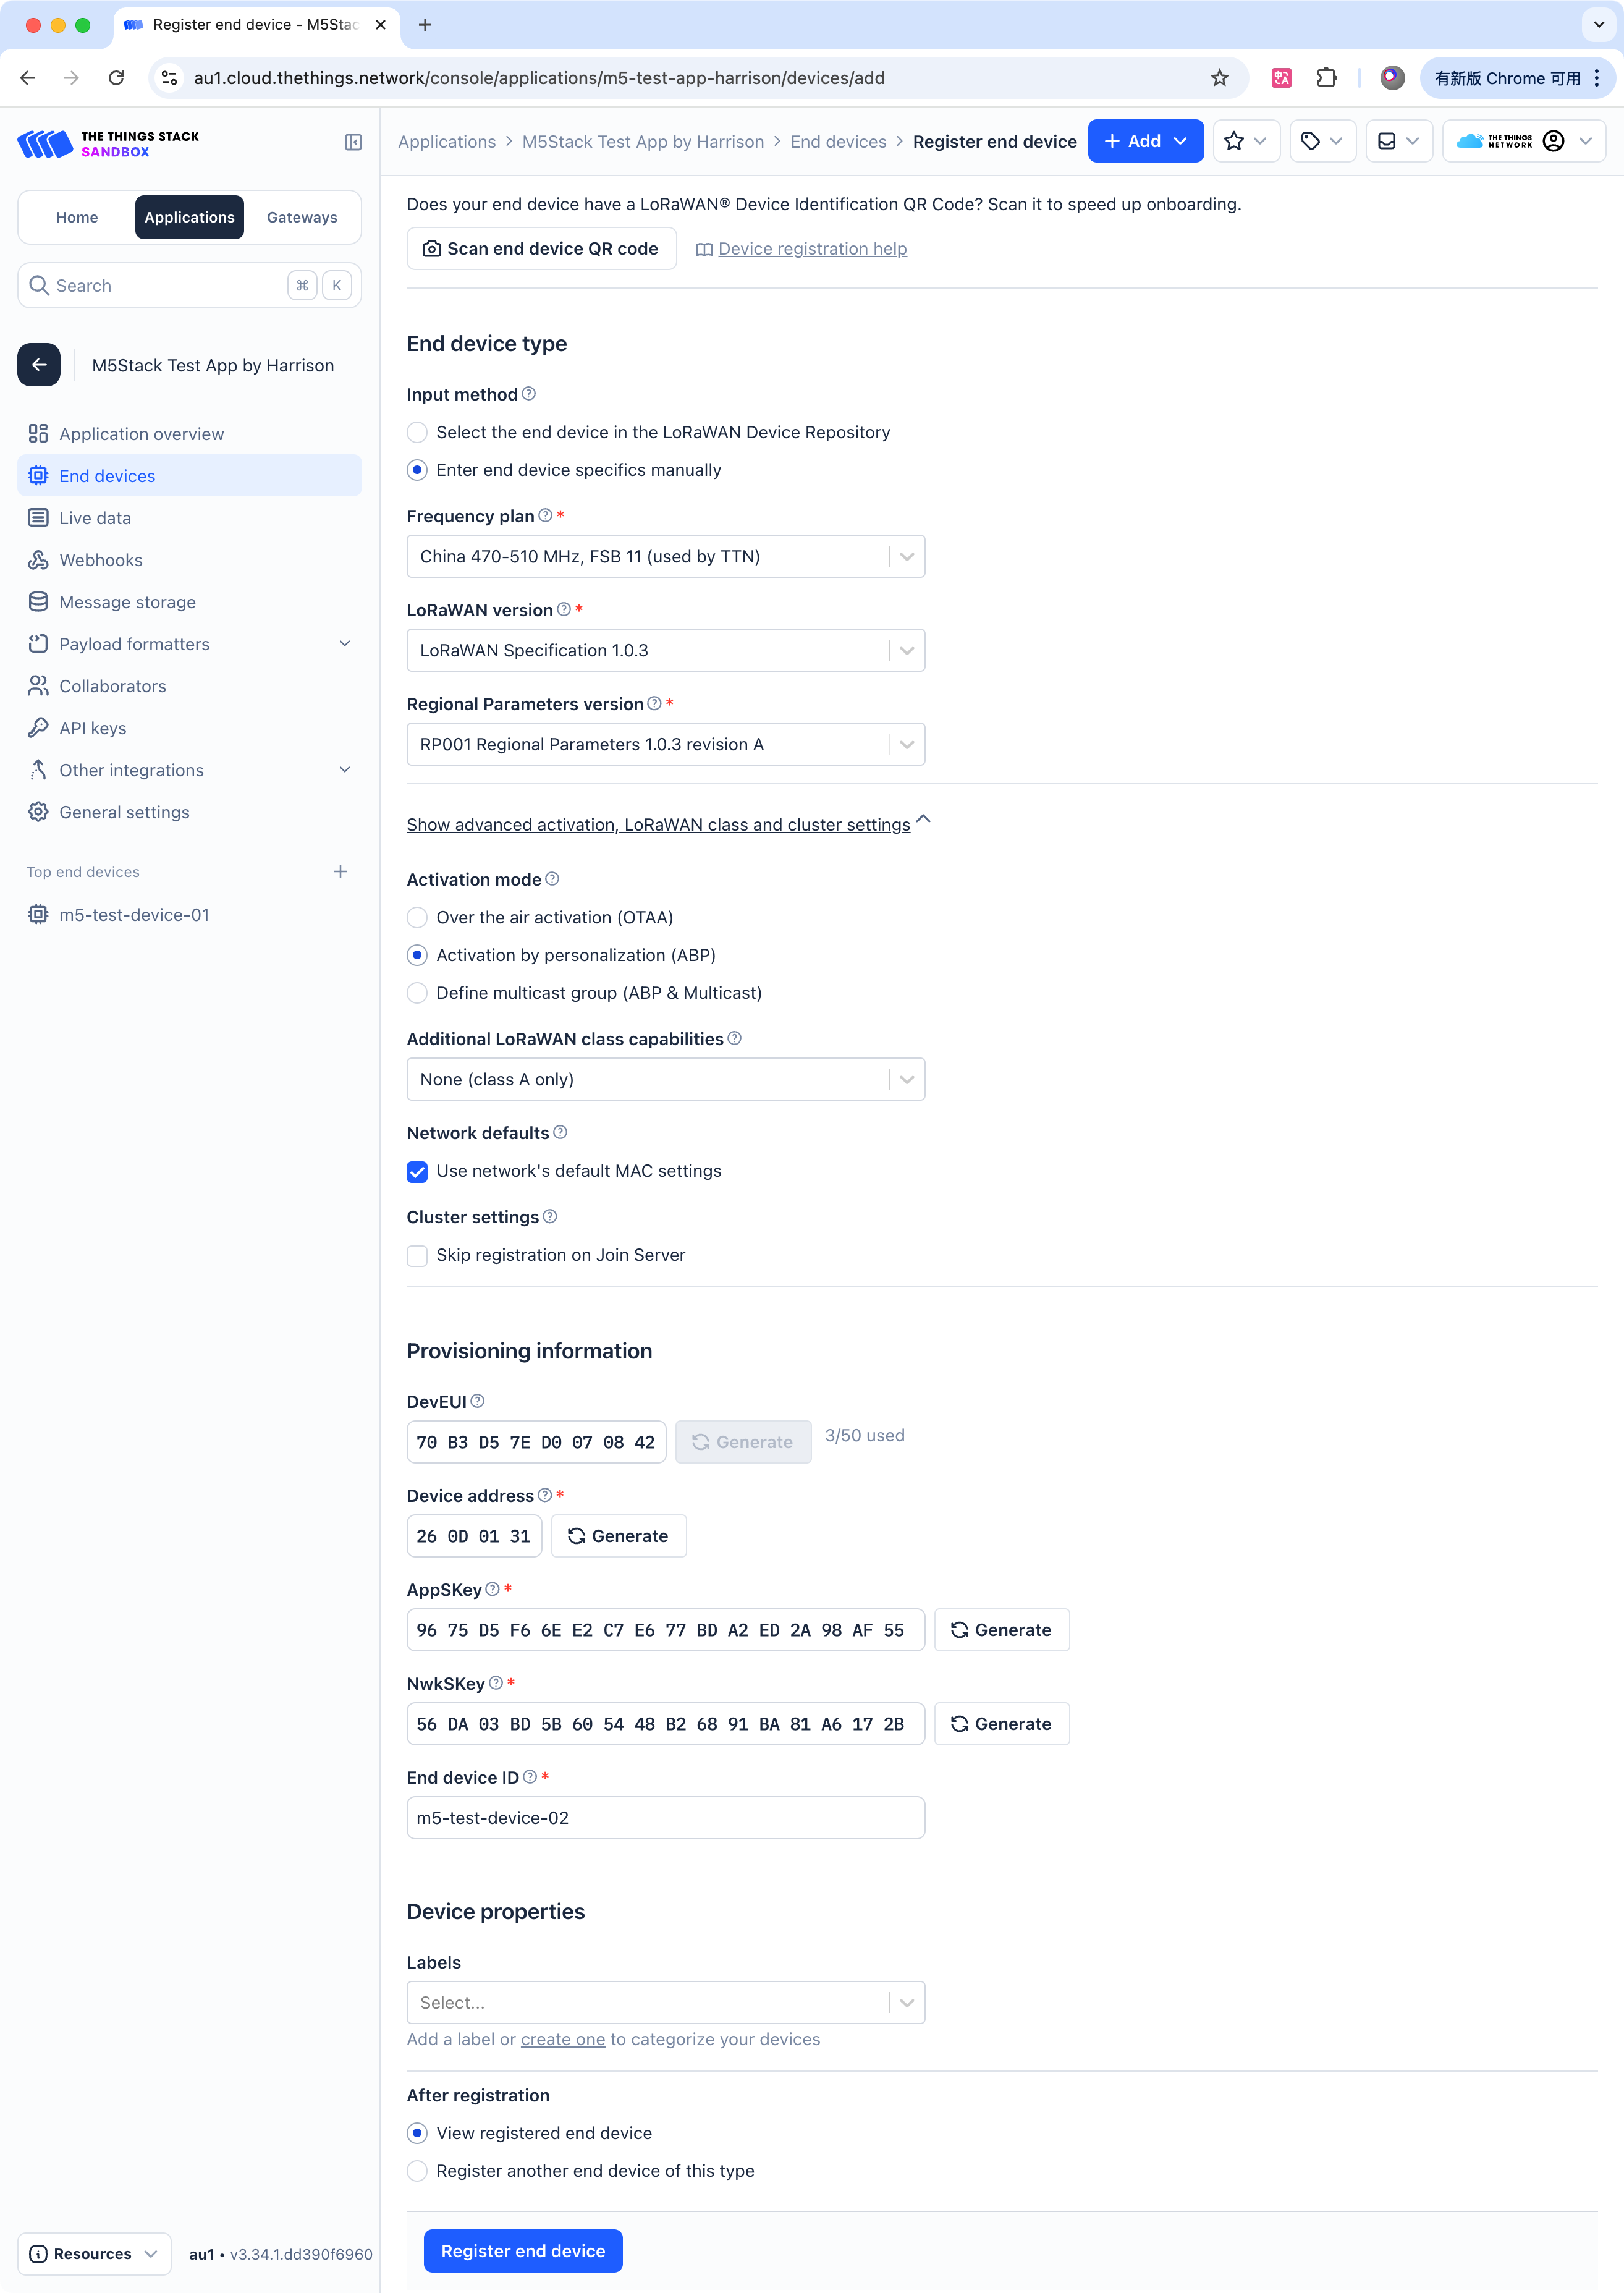
Go to the management page of the application you just created, click + Register end device to add a registered node device, and choose Enter end device specifics manually for custom configuration.
Determine each option based on the geographical location and the frequency band used by the device. Ensure the frequency band used by the node matches that of the gateway. Select the LoRaWAN version and regional parameters according to the protocol version supported by the actual hardware. For details, refer to the documentation page of the corresponding product.
In this step, you need to choose the activation (connection) mode for the end device. There are two options: OTAA / ABP.
In OTAA (Over the air activation) mode, the device dynamically negotiates the device address and session keys with the server when joining the network. This offers better security but slower join speed.
In ABP (Activation by personalization) mode, the device uses pre-configured device address and session keys to start communication directly without a join procedure. It is faster but less flexible, secure, and scalable.
For more detailed explanations of the two activation modes and their parameters, refer to the official documentation:
OTAA Mode Configuration
When using OTAA mode, you need to provide a JoinEUI (also known as AppEUI), which is usually preset by the device manufacturer. Since our product is a programmable device, the JoinEUI can be set arbitrarily, as long as the same value is used during programming. The format should be 16 hexadecimal characters (0~9, A~F).
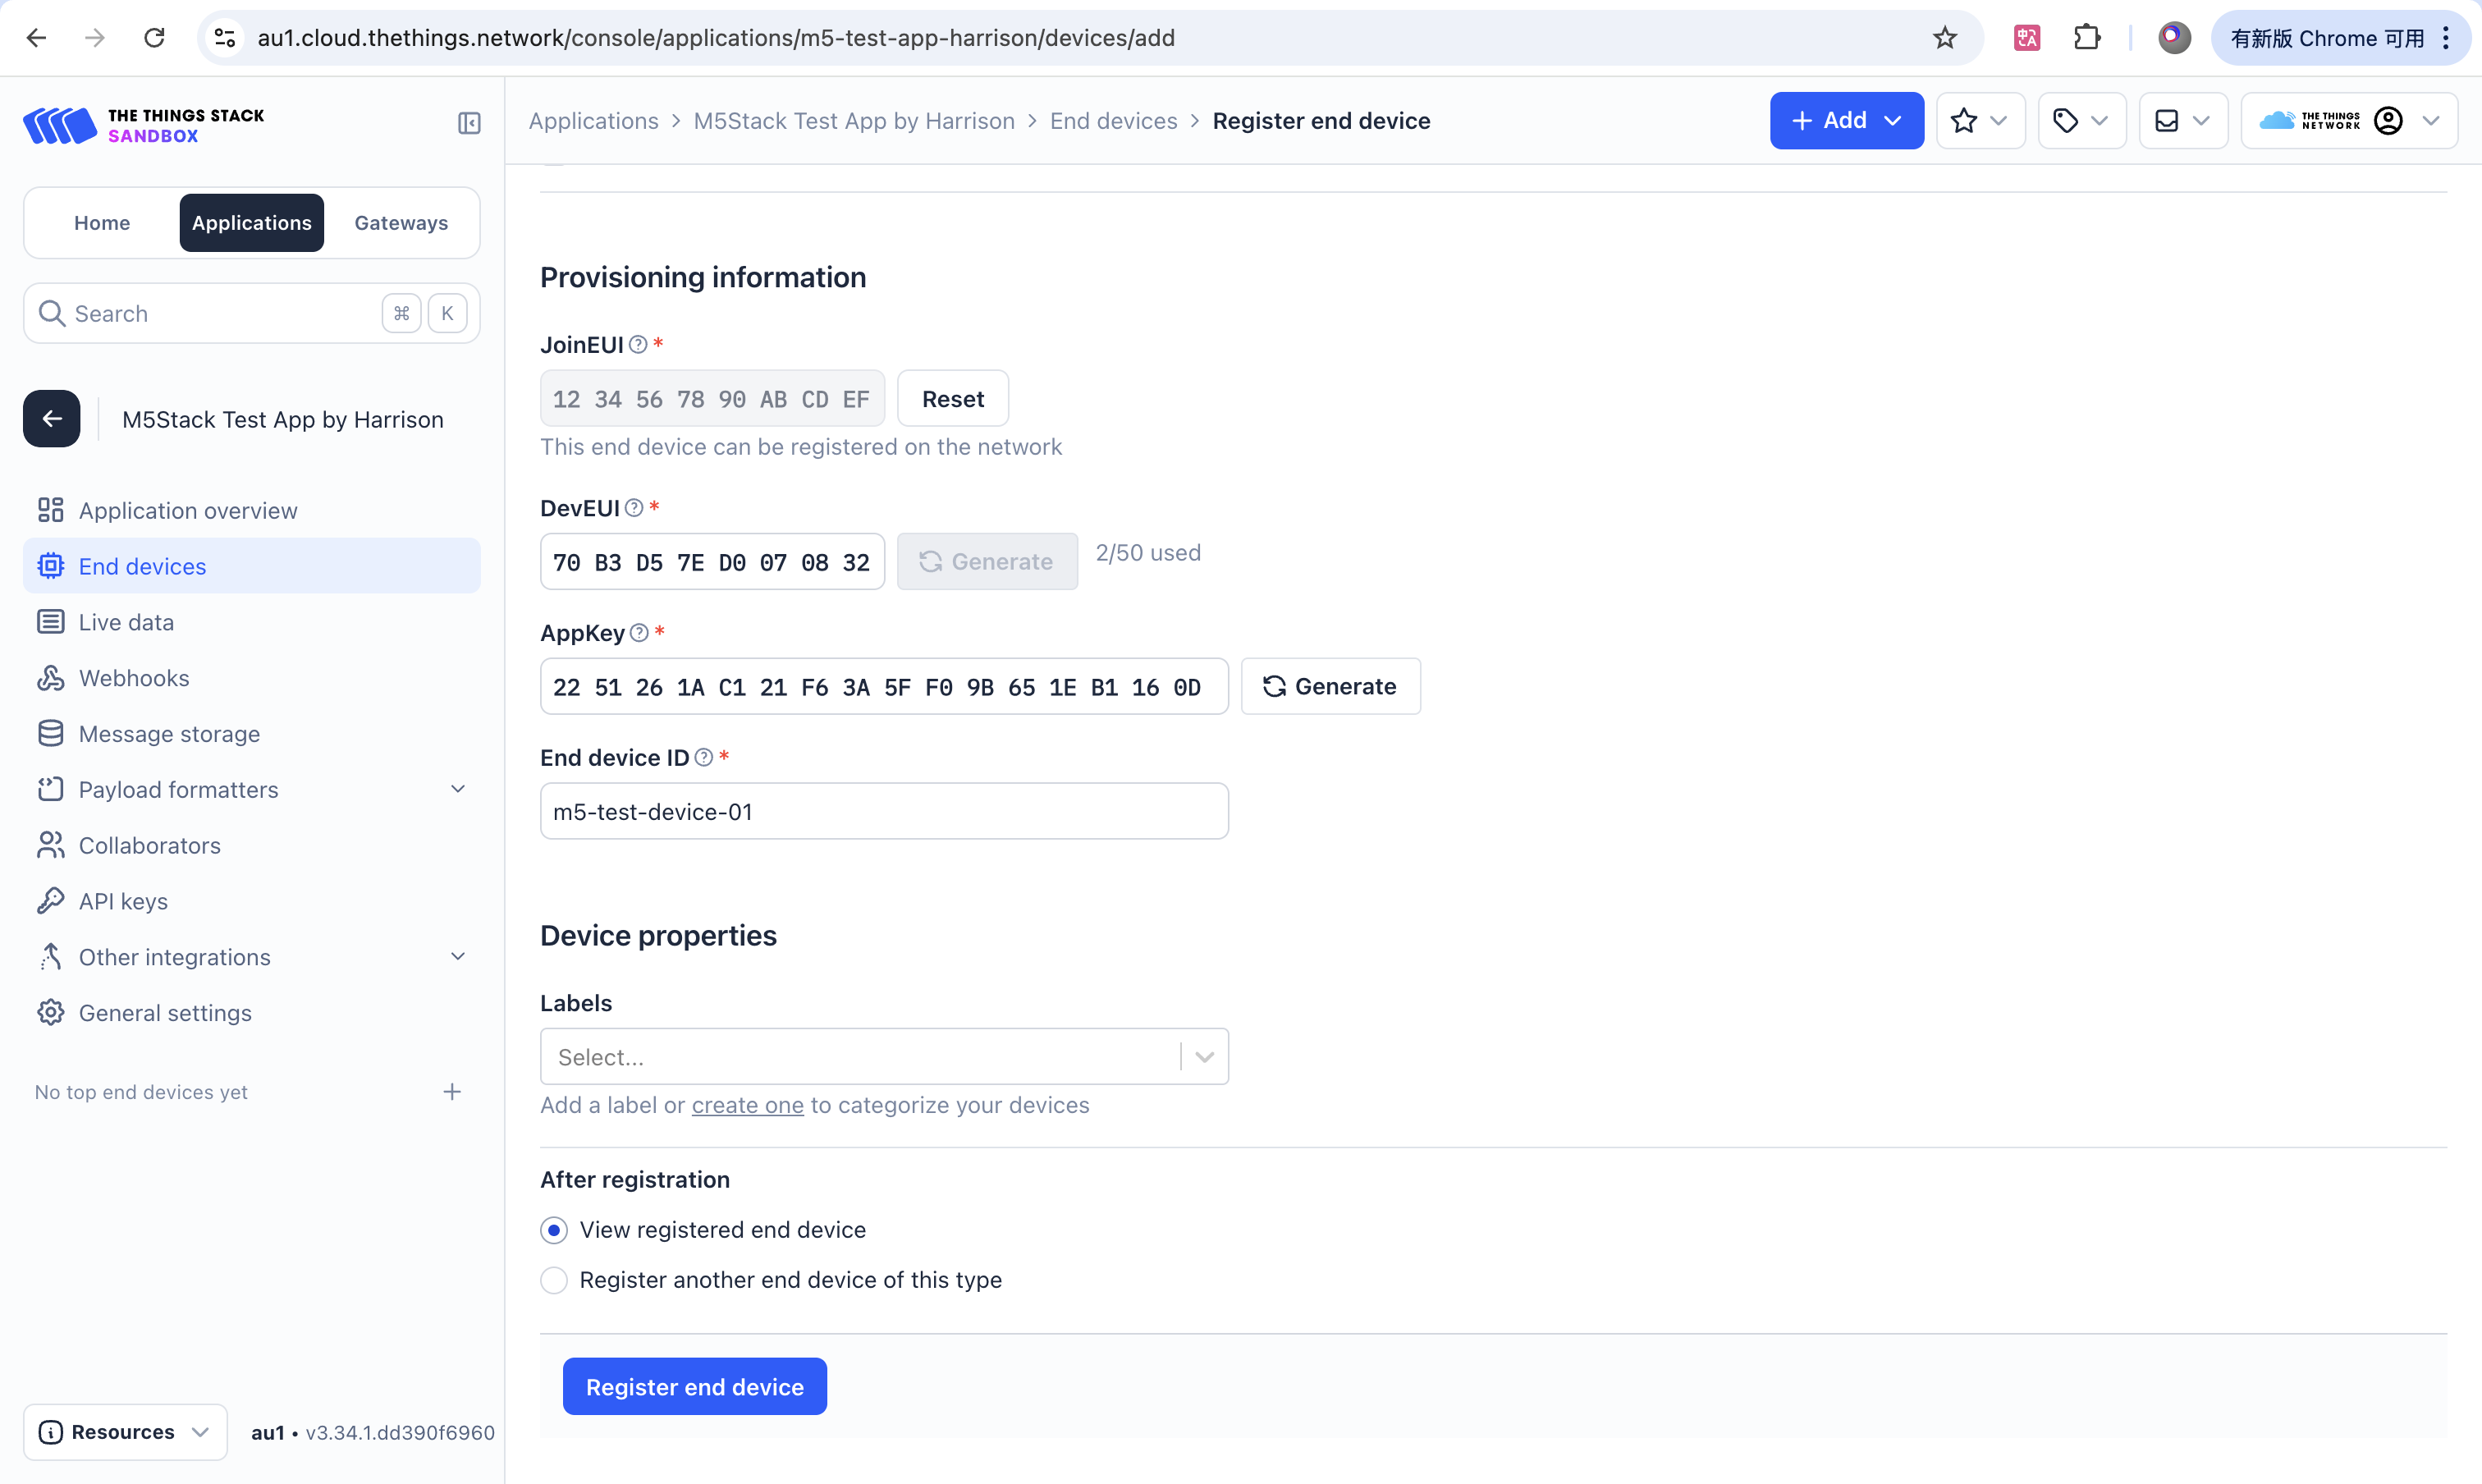
After filling in the values, click Confirm to see more configuration options. The DevEUI and AppKey can be generated by clicking the 🔁 Generate button. It is recommended to save these values for later use. Fill in the End device ID, then click Register end device to complete the registration.
ABP Mode Configuration
In ABP mode, the following four parameters can be generated by clicking the 🔁 Generate button: DevEUI, Device address, AppSKey, and NwkSKey. It is recommended to record these values for later use. Fill in the End device ID and click Register end device to complete the registration.
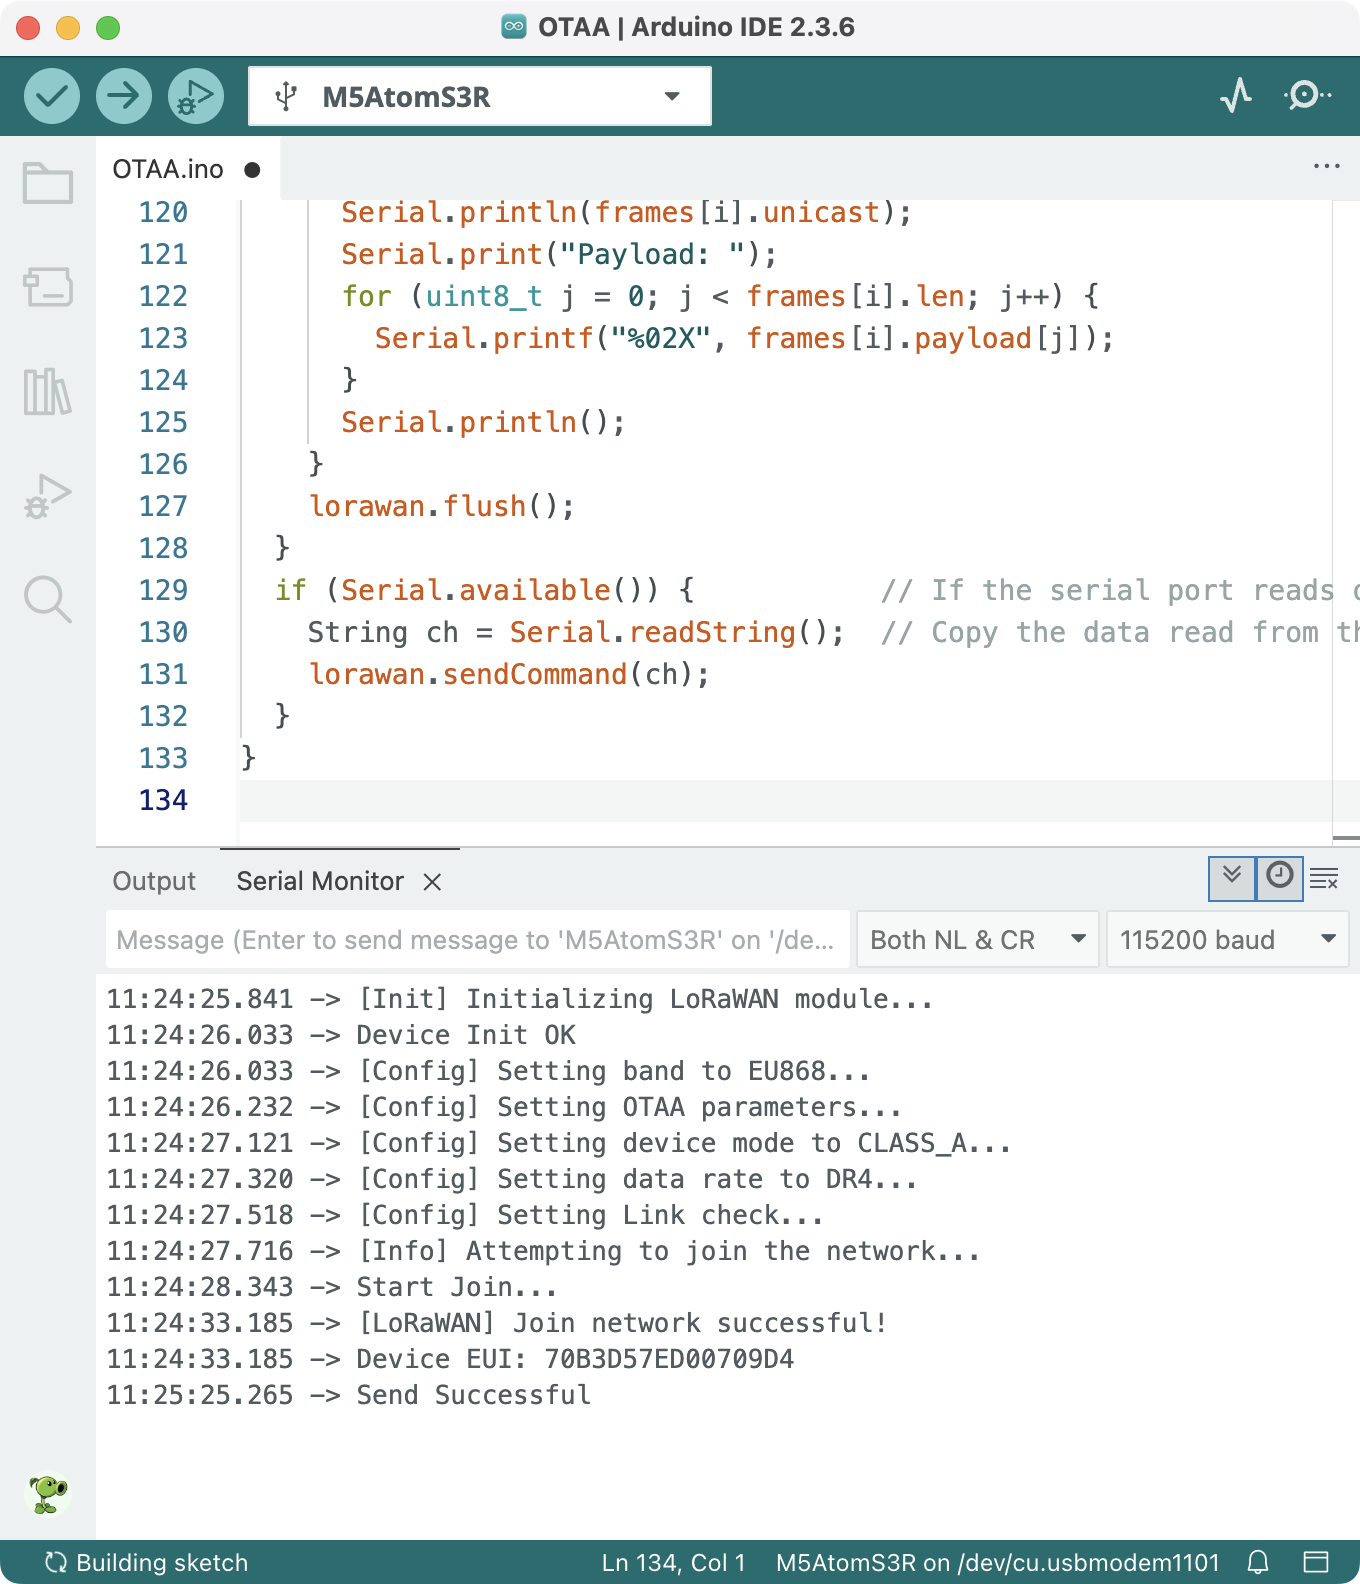
Device Programming and Network Join
After completing the previous steps of creating an application and adding a device on the TTN platform, the next step is to program the device to communicate with the platform via a gateway. You need to enter the corresponding parameters (either filled or generated earlier) into the example program below. If you did not save these parameters earlier, you can still find them in the TTN platform's device settings.
- For OTAA mode: use
JoinEUI,DevEUI, andAppKey. - For ABP mode: use
Device address,AppSKey, andNwkSKey.
Arduino
Click the tabs below to get the corresponding device’s driver library and example programs. Refer to the format and order of the configuration functions, and fill in the connection parameters obtained in the previous steps.
TTN Data Transmission
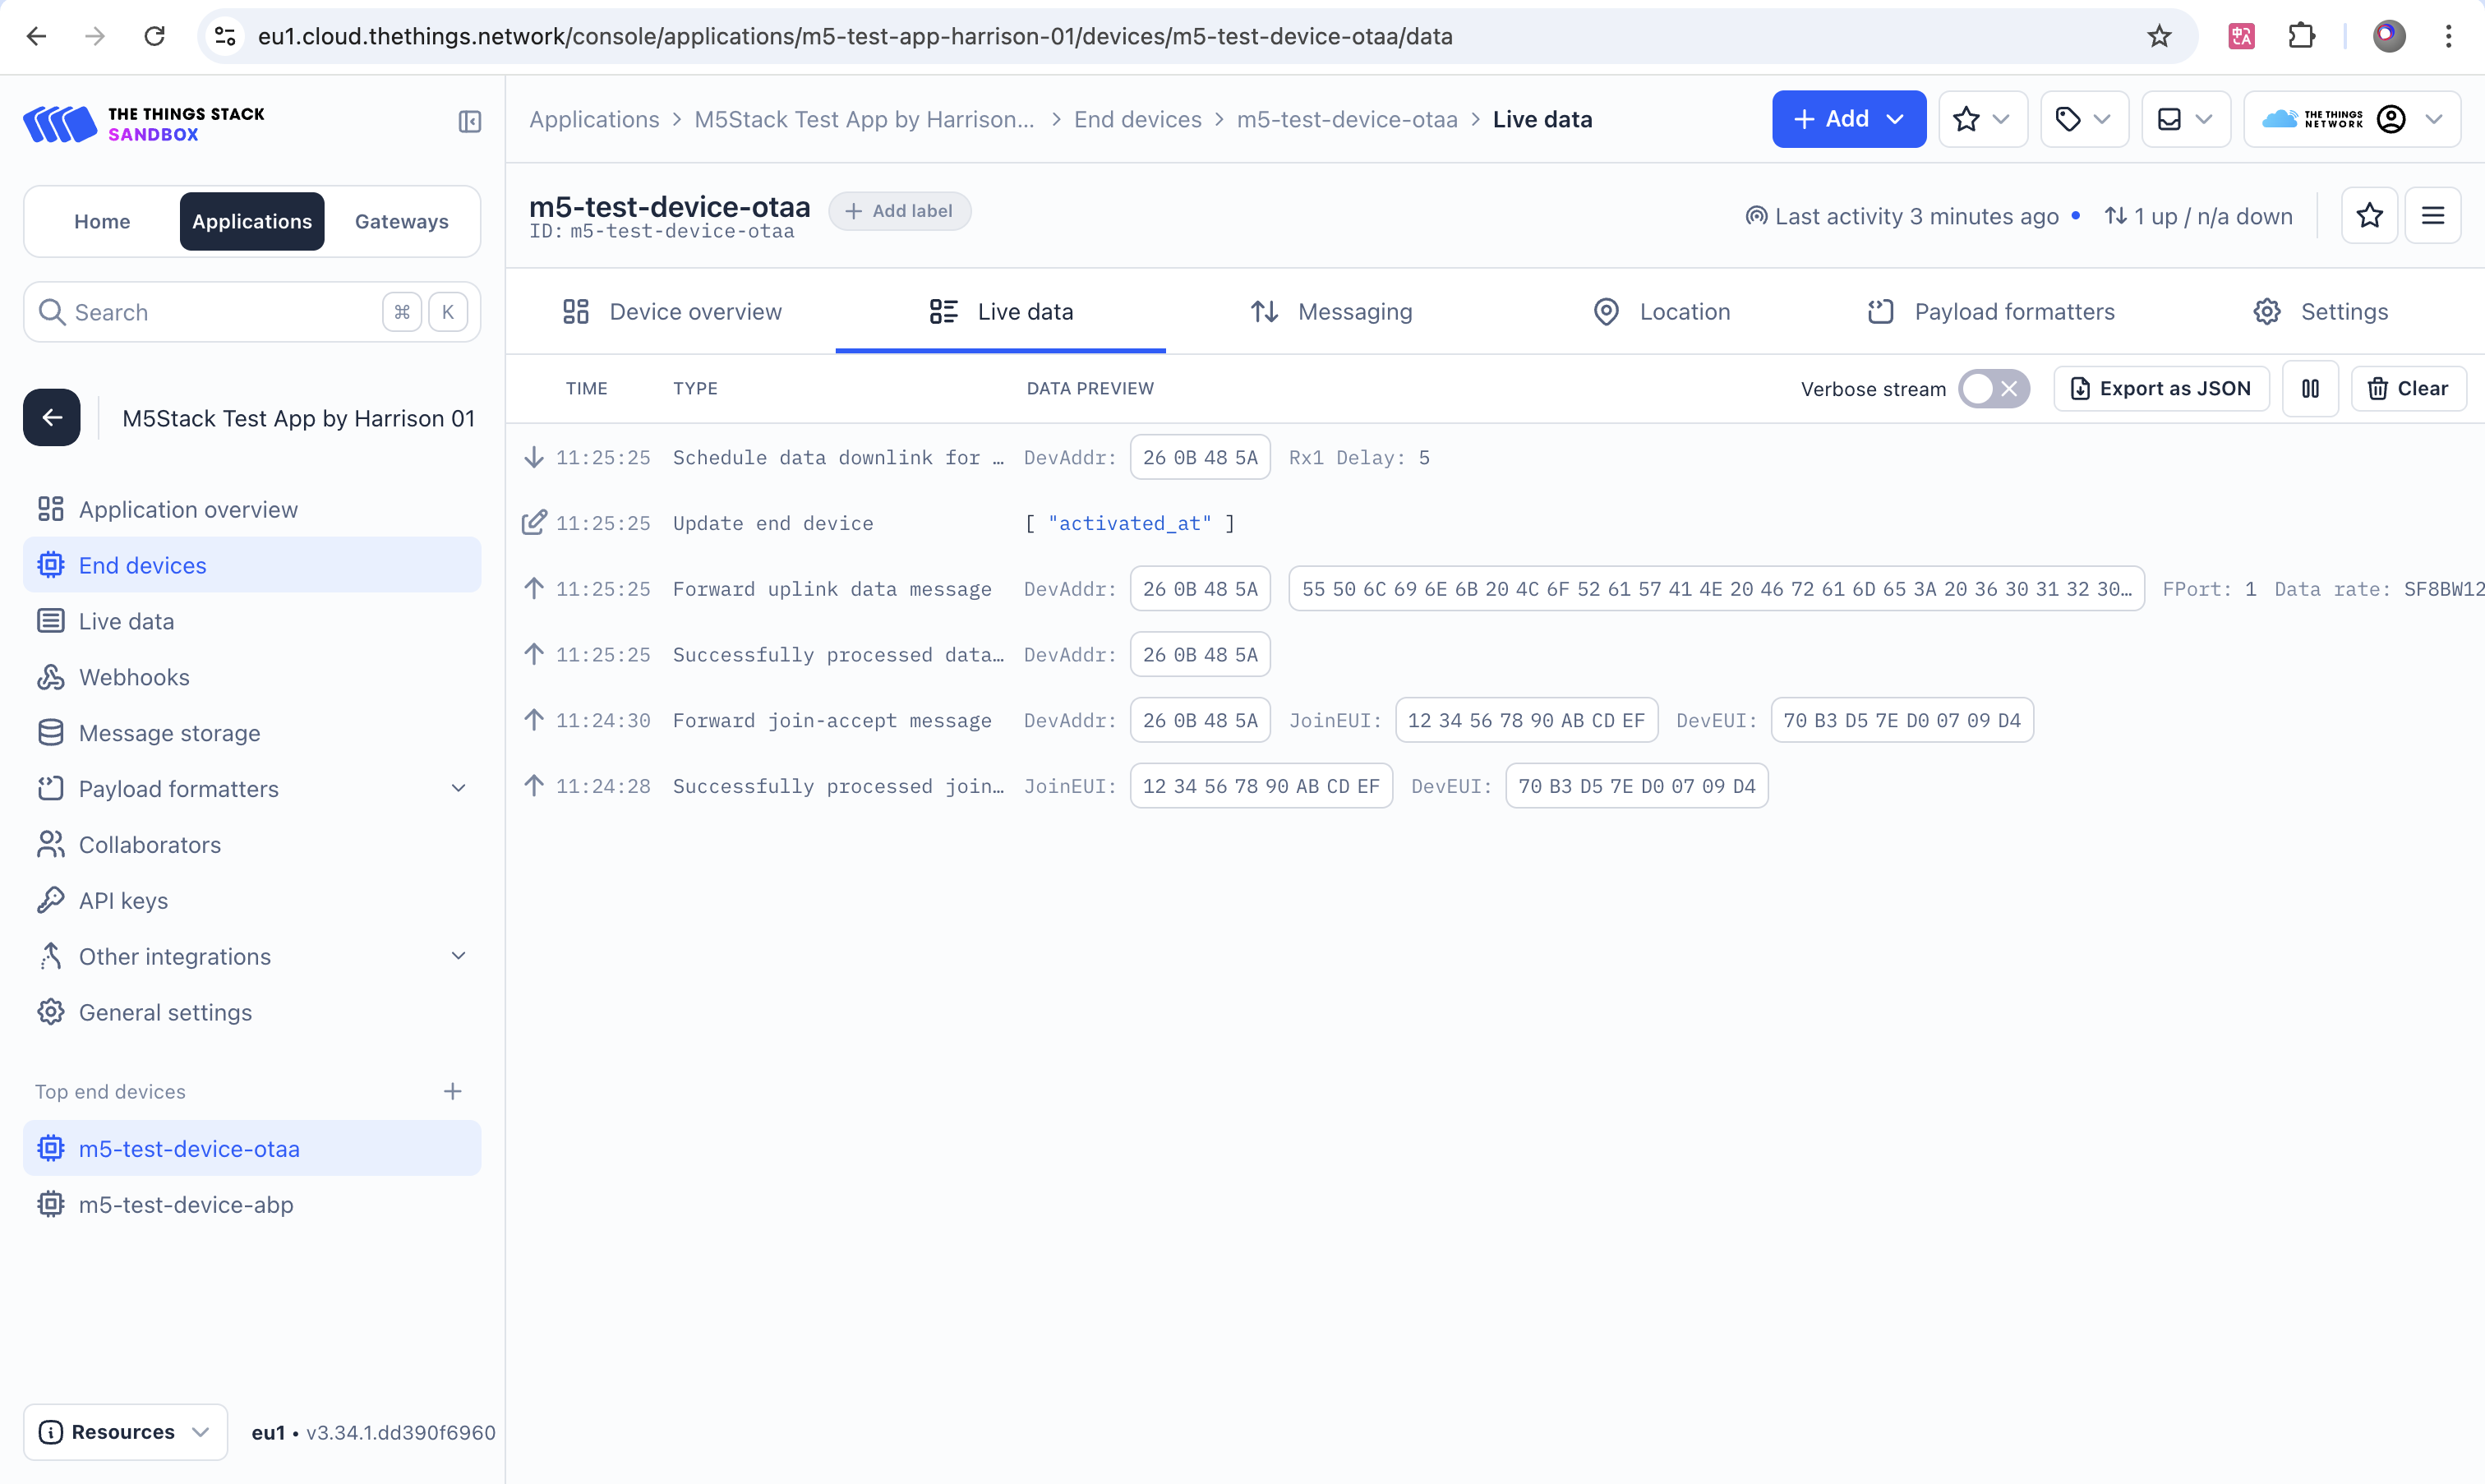
Live Data (Real-time Data)
After completing the above steps, if the device is properly connected to the gateway, you will be able to see the device's connection logs and uplink data on the TTN management page.
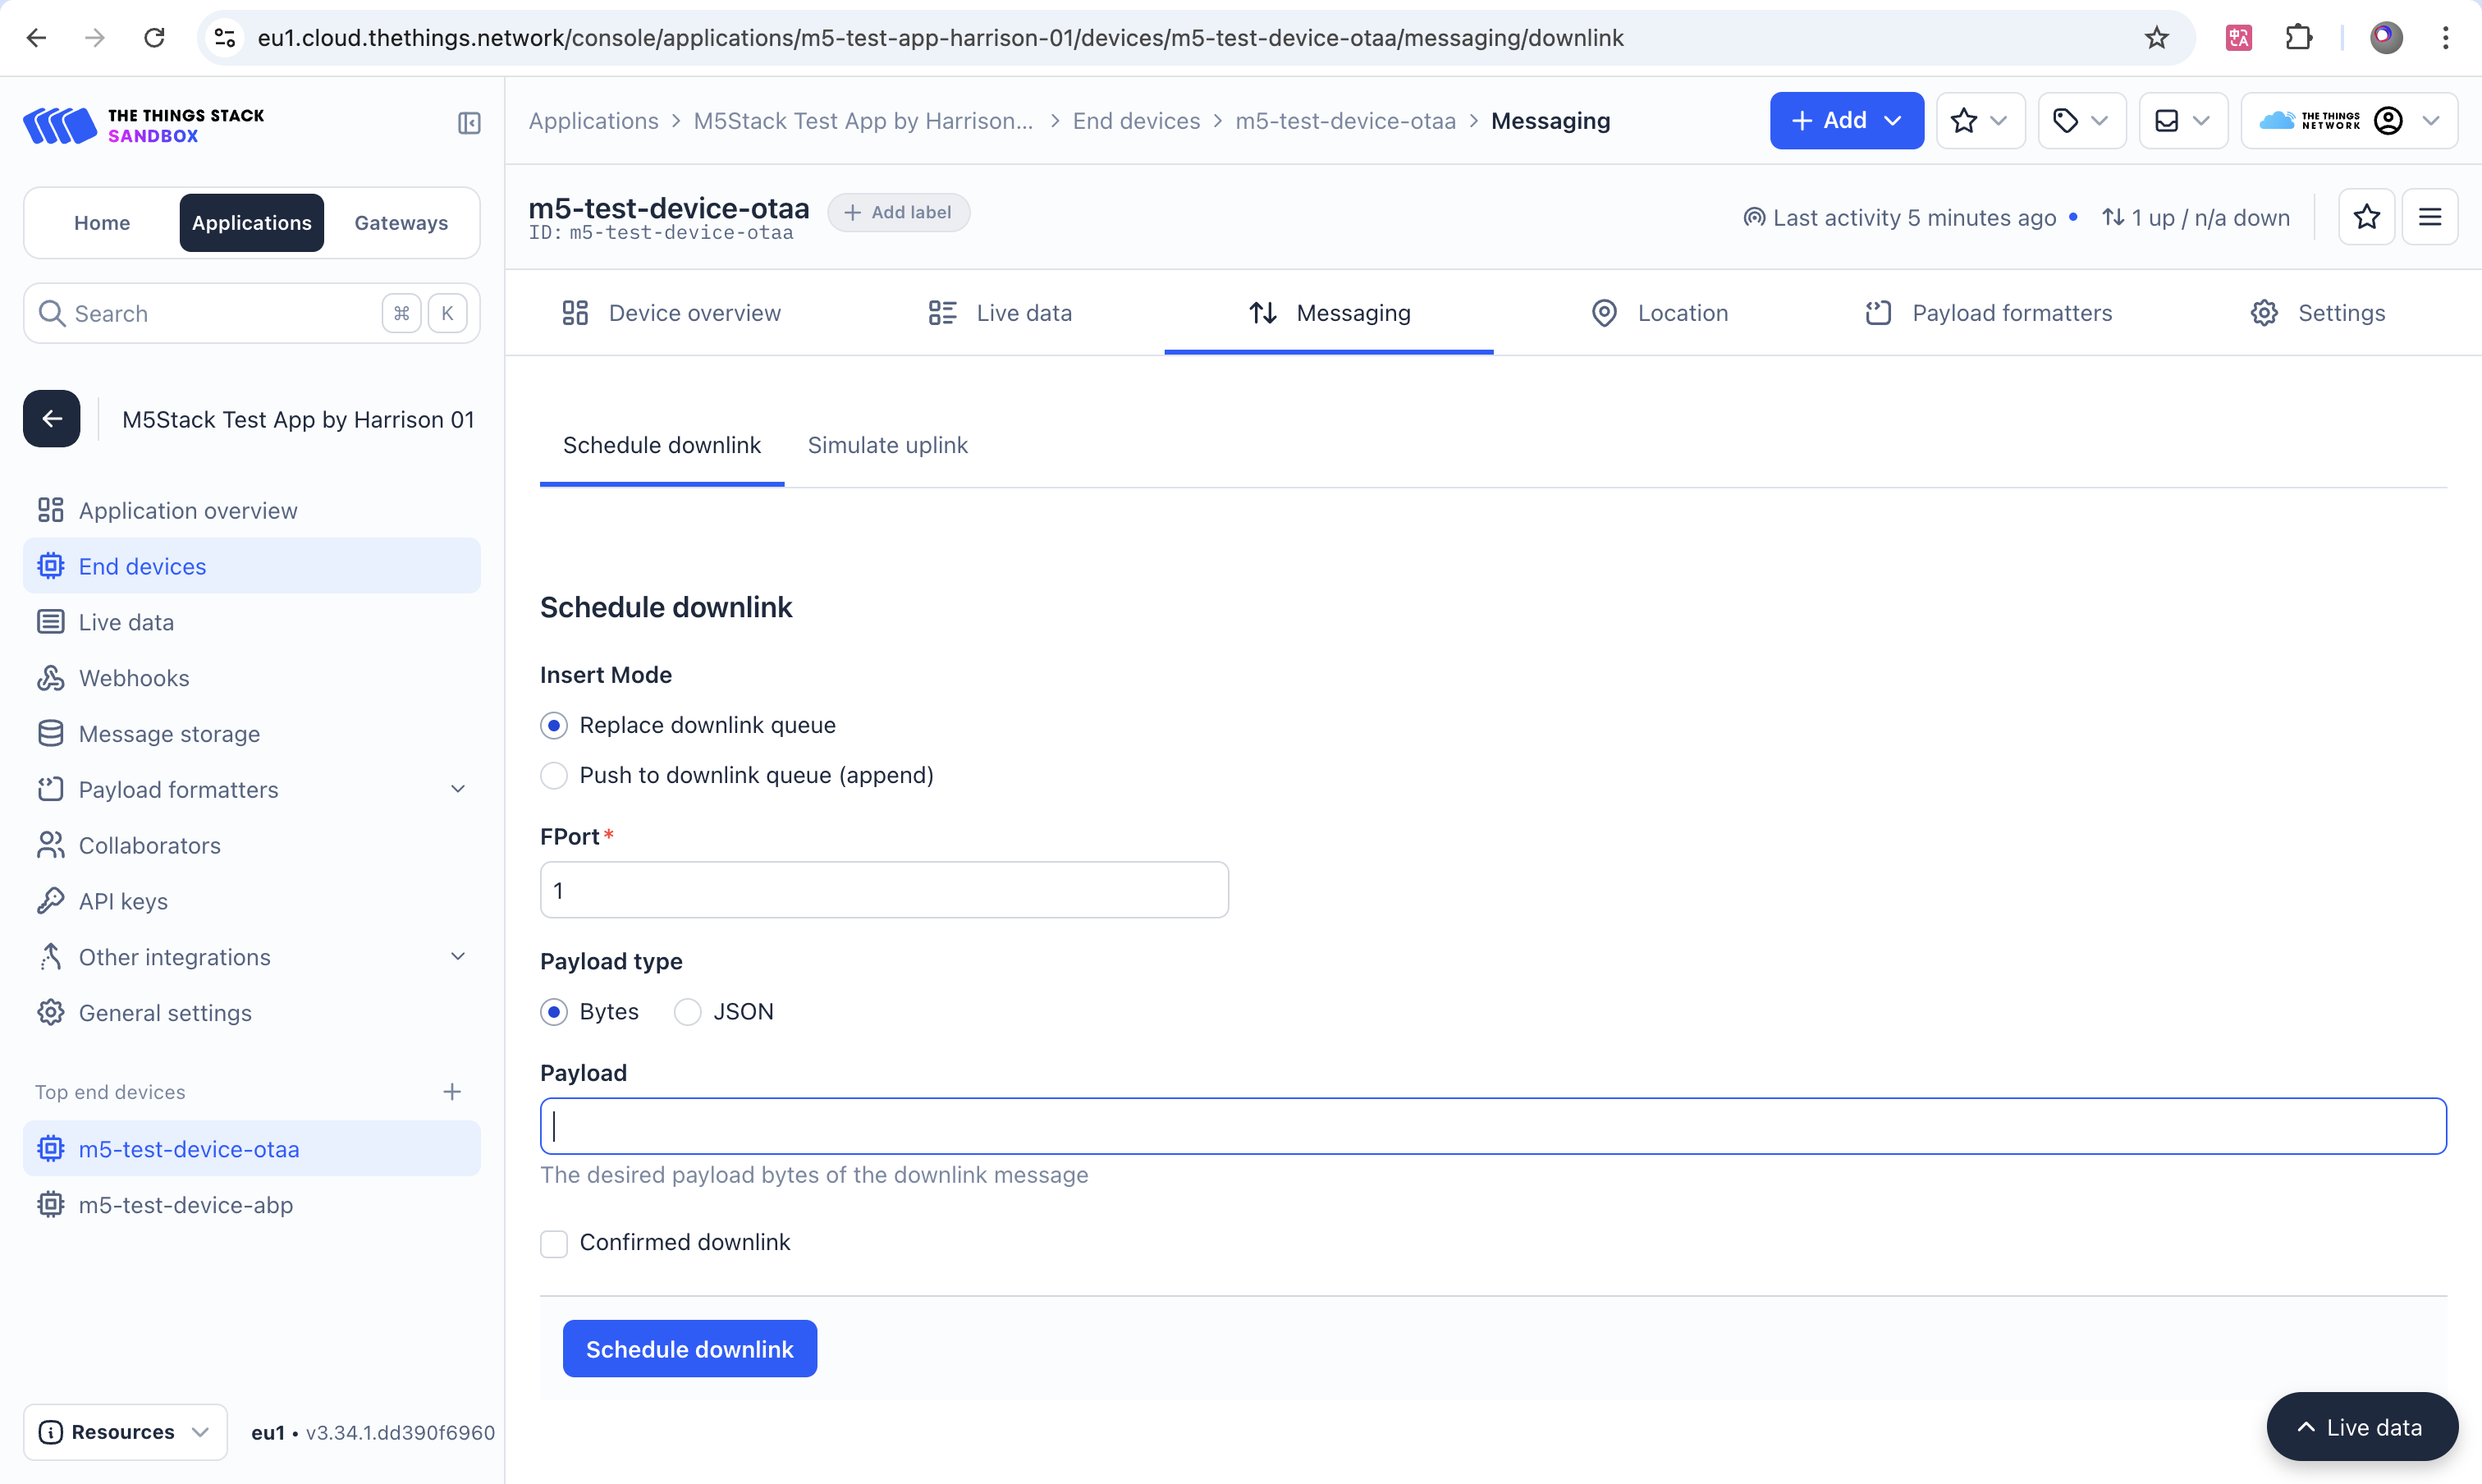
Messaging (Downlink Data)
Click on the Messaging feature to manually send data to the device from the web interface.
MQTT Client
Use an MQTT client to receive data from the TTN server and enable bidirectional communication. The MQTT server address, port, username, and password can be found in the TTN application management page under Other Integrations-MQTT.
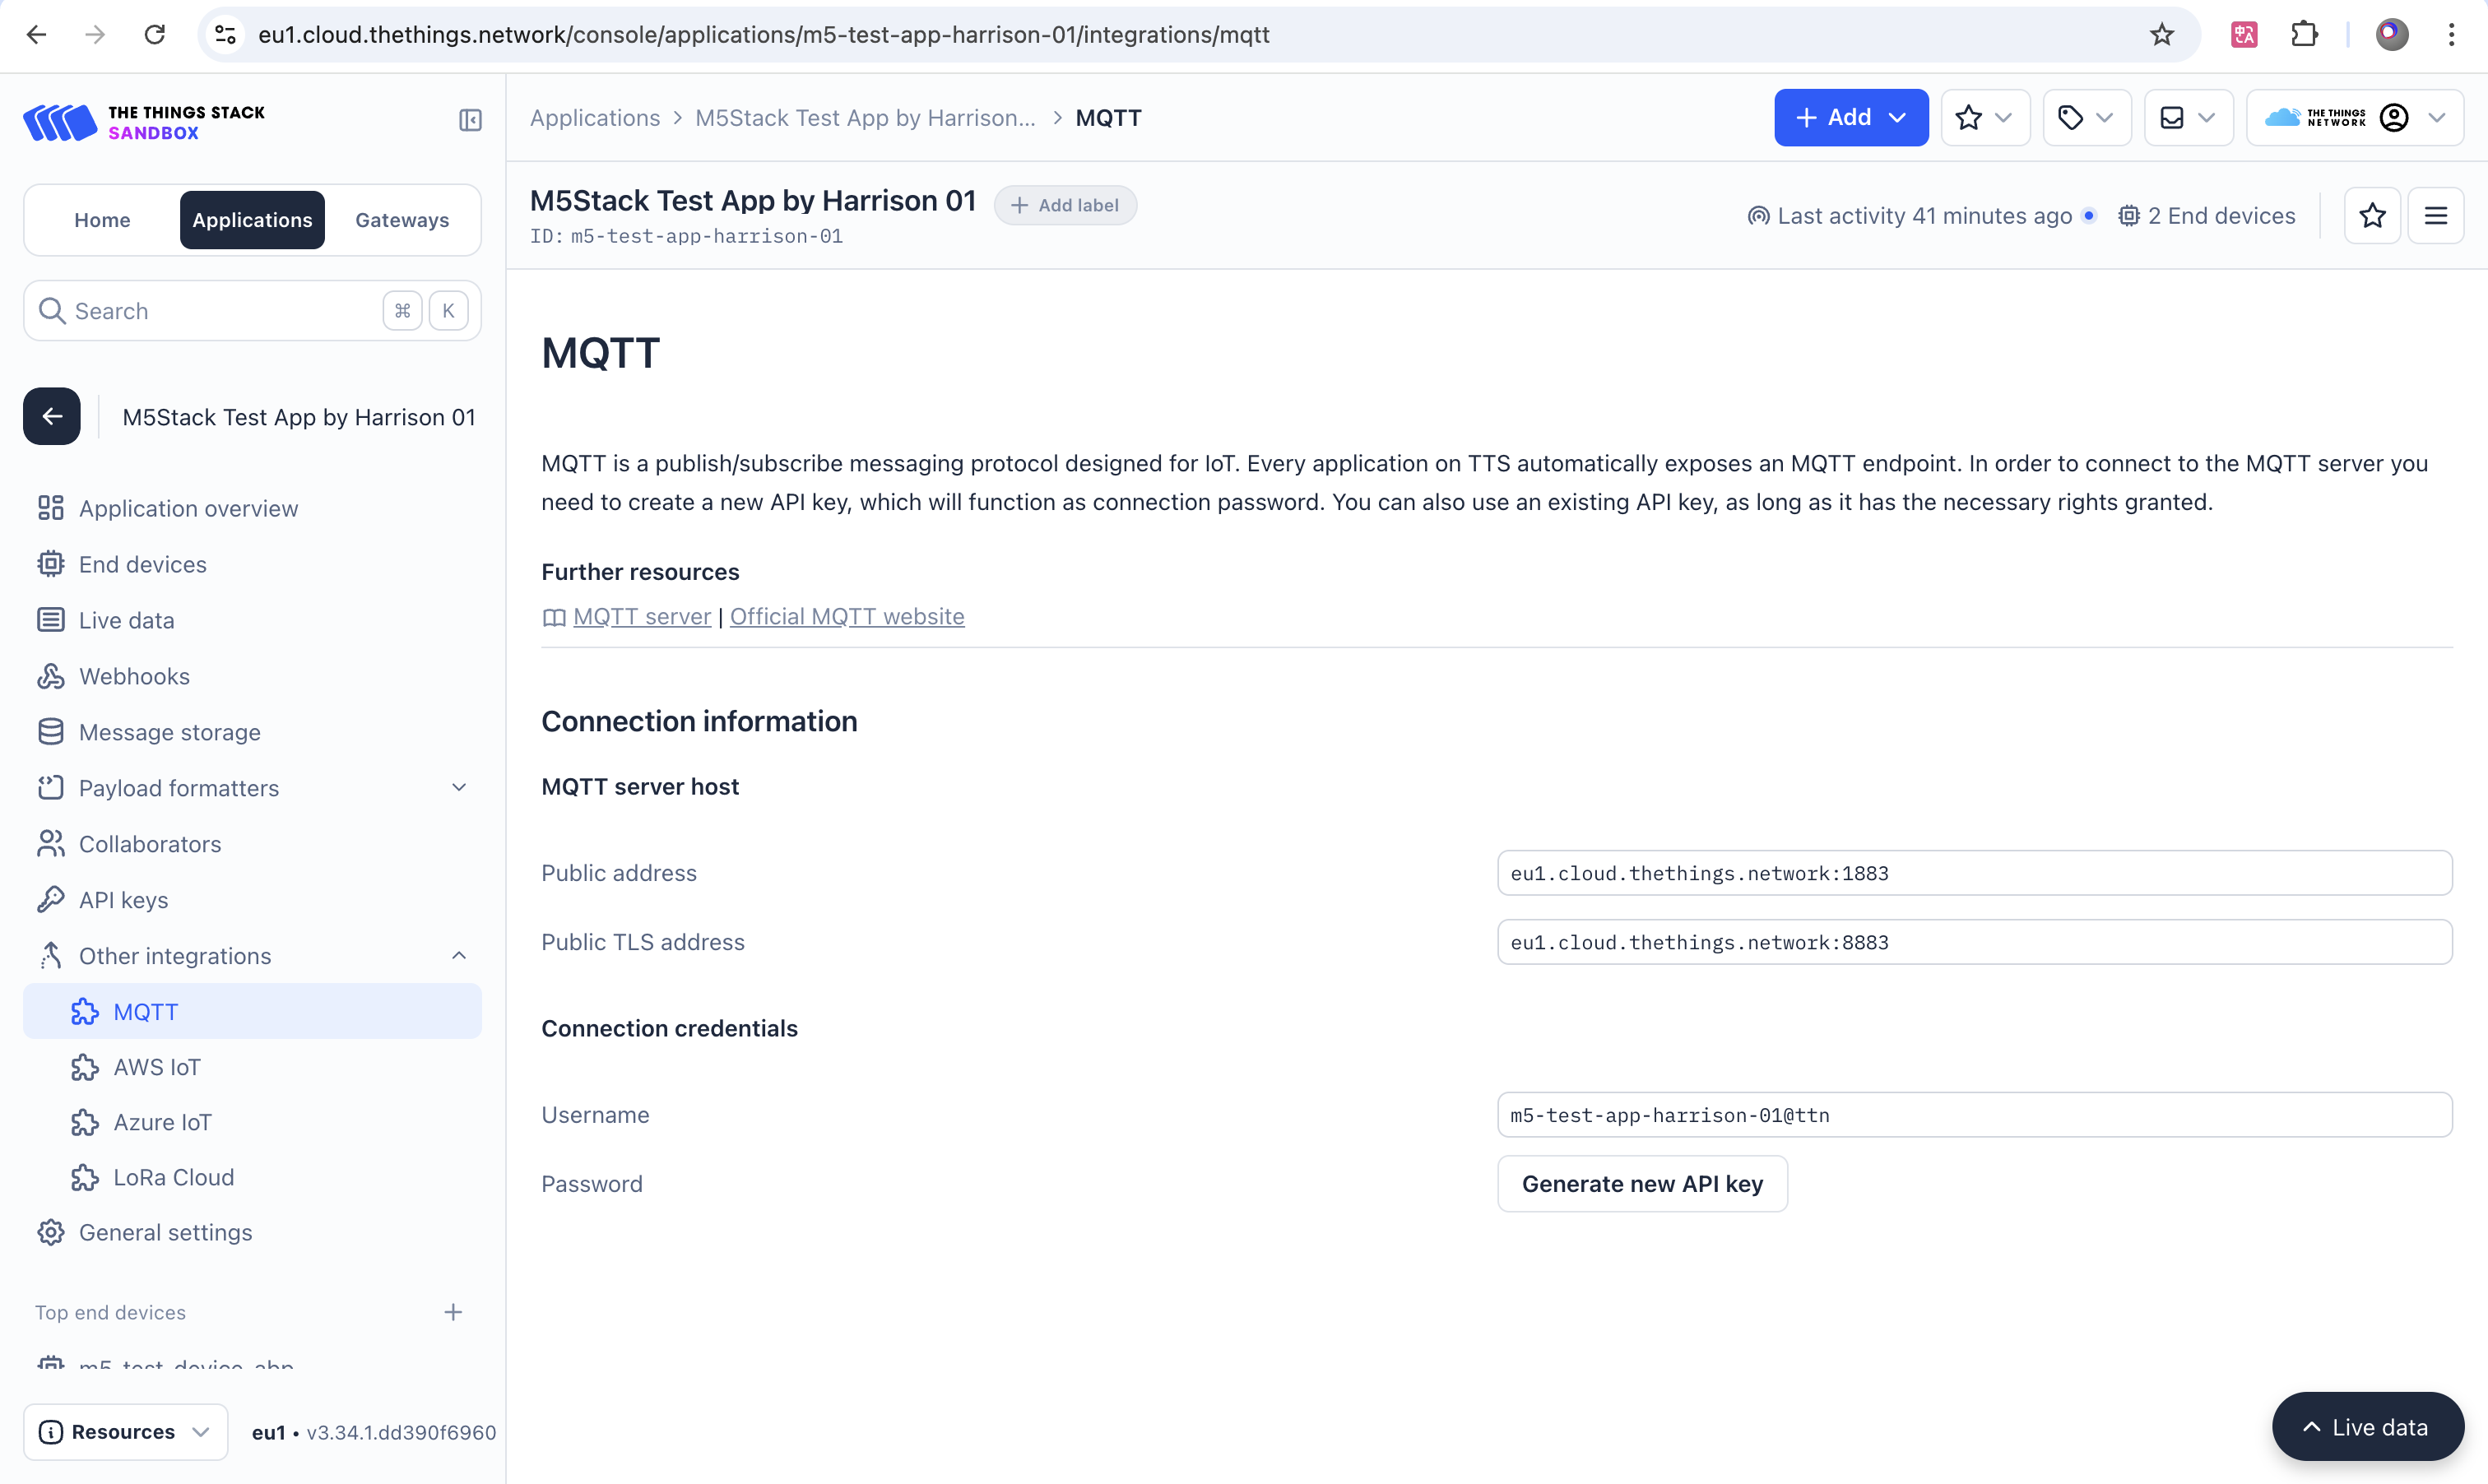
Uplink Topic:
v3/{application id}@{tenant id}/devices/{device id}/upDownlink Topic:
v3/{application id}@{tenant id}/devices/{device id}/down/pushThe default payload format for subscribed data is
base64encoded.
For more information about MQTT topics and formats, refer to the official documentation: