Product Guide
Linux PC
CardputerZero
AI Accelerator Card
LLM-8850 Card
Large Language Models
AI & Agent
Real-Time AI Voice Assistant
XiaoZhi Voice Assistant
AtomS3R-M12 Volcengine Kit
Offline Voice Recognition
Industrial Control
IoT Measuring Instruments
Air Quality
PowerHub
Module13.2 PPS
VAMeter
T-Lite
Input & Output Devices
Ethernet Camera
PoECAM
Wi-Fi Camera
Unit CamS3/-5MP
AI Camera
LoRa & LoRaWAN
Motor Control
Restore Factory Firmware
DIP Switch Usage Guide
T-LiTe User Manual
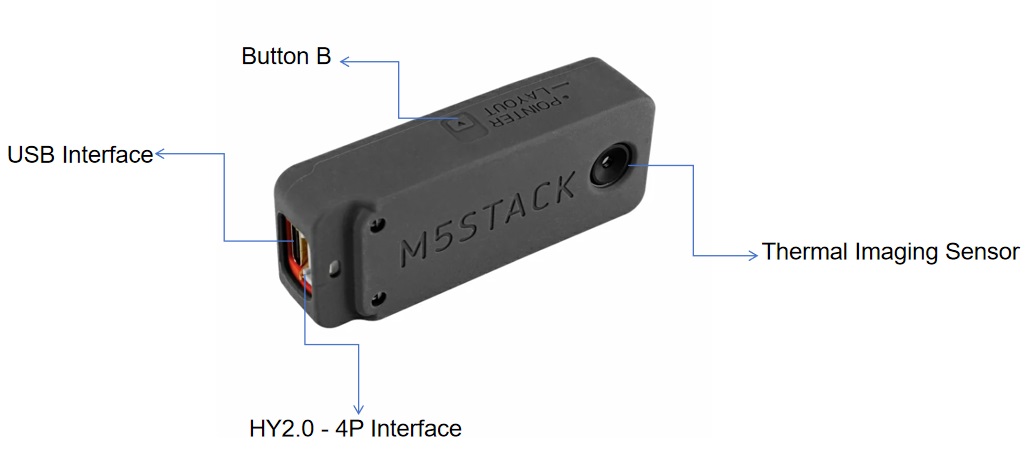
Product Introduction
T-Lite is an integrated online thermal imaging temperature measurement device, composed of M5StickC-Plus and HAT THERMAL, equipped with an MLX90640 infrared sensor and ESP32 microcontroller, supporting Wi-Fi, paired with a 135×240 screen and a 160mAh battery. It features high-temperature alerts, supports real-time data viewing via cloud/LAN, and can be applied in scenarios such as temperature detection alerts and biological movement monitoring.
Basic Operations
Power On/Off
- Single-click PWR to power on.
- Long-press PWR to power off.
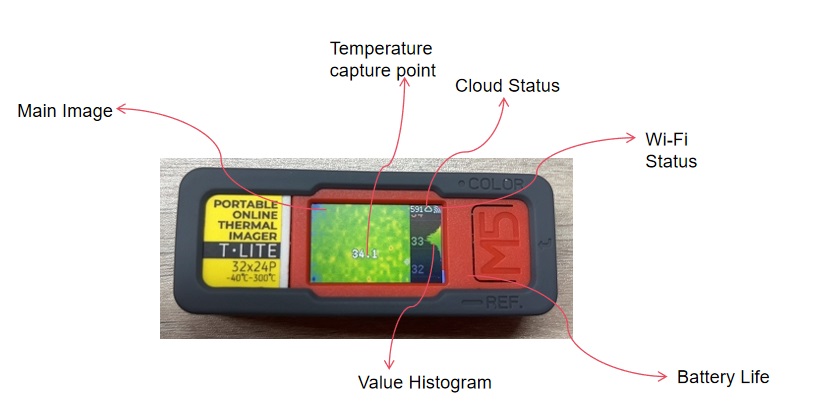
Switching Preview Modes
T-Lite supports switching UI layouts, temperature color display modes, and temperature value display modes.
- Switch UI Layout Mode: Long-press
Button B.
- Switch Temperature Color Display Mode: Single-click
Button A.
- Switch Temperature Value Display Mode: Single-click
Button B.

Entering Configuration Menu
Single-click the PWR button to enter the main menu interface.
The main menu interface is as follows:

- Network: Network settings, including operation mode, Wi-Fi settings, etc.
- Cloud: Cloud monitoring settings, such as data upload intervals.
- Alarm: Alert settings. Configure trigger conditions, including above/below thresholds or disabling alerts.
- Sensor: Sensor settings, including refresh rate, noise filtering, monitor, and emissivity.
- Range: Temperature range settings, including enabling/disabling auto-range and setting upper/lower limits.
- Others: Additional settings, such as language, CPU frequency, buzzer volume, screen brightness, LAN video stream quality, and factory reset.
Remote Viewing
Operation Modes
T-Lite offers four modes for viewing temperature data:
- Offline Mode: Standalone operation, only viewable on the device screen.
- LAN Mode: Connect to Wi-Fi for local network access via IP.
- Cloud Mode: Connect to Wi-Fi to upload image data to the Ezdata server for remote viewing.
- LAN + Cloud Mode: Supports both LAN preview and remote image viewing.
Network Configuration
- Single-click the power button to turn on the device.
- Single-click the
PWRbutton to enter the settings menu.
- Select
Networkand pressButton Ato confirm. - Under Network, select
Wi-Fi Settingand set it toAP modeusingButton A.
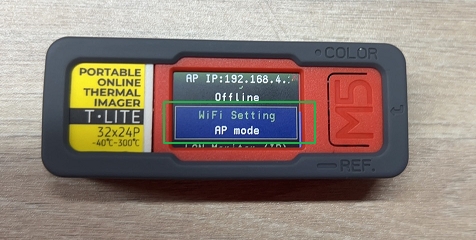
- Connect your phone or computer to the Wi-Fi: T-Lite_xxx (default password: 12341234).
The phone will automatically enter the Wi-Fi setup page.
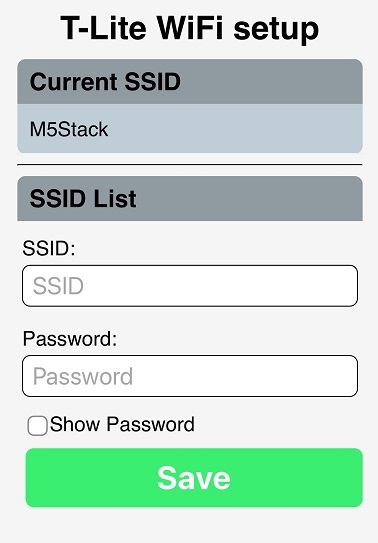
- Enter the available Wi-Fi name and password on your phone/computer, then click
Save. Wait for the device to connect to Wi-Fi.
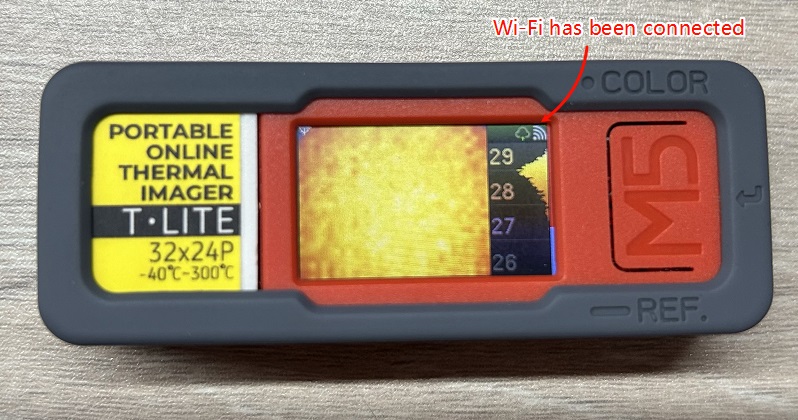
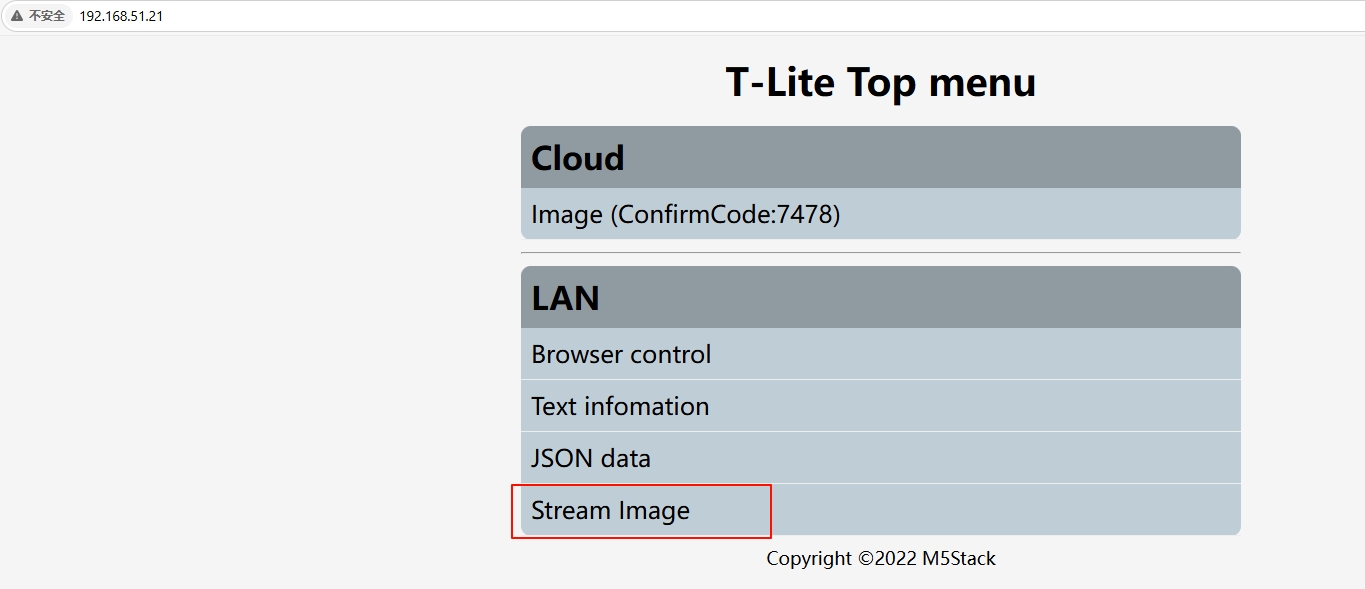
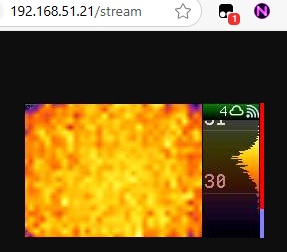
LAN Preview
- After connecting to Wi-Fi, access the device via its local IP:
192.168.x.x(visible in the top menu or underLAN Monitor). - Click
Stream Imageand enter the confirmation code to preview the current image.
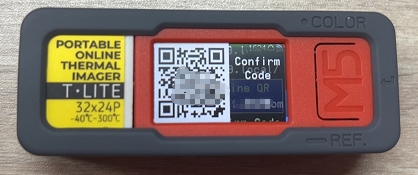
Cloud Preview
- After connecting to Wi-Fi, select
Networkand pressButton A. - Navigate to
Cloud Online QRusingButton Band pressButton A. - Scan the QR code to access the remote image URL, then enter the confirmation code to preview.
LAN + Cloud Mode
This mode enables both LAN and cloud preview simultaneously.
Setup: After connecting to Wi-Fi, select Running Mode on the T-Lite device and set it to LAN+CLOUD using Button A. Then follow the steps for LAN and Cloud preview.
Emissivity Configuration
Adjusting emissivity based on usage scenarios improves temperature measurement accuracy.
Steps:
- Power on the device by pressing
PWR. - Press
PWRto enter the settings menu.
- Select
SensorwithButton Band pressButton A. - Under Sensor, navigate to
Emissivityand pressButton Ato adjust.
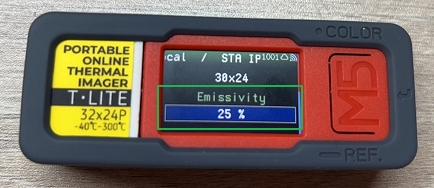
Button A: Decrease value.Button B: Increase value.
- Press
PWRto save.
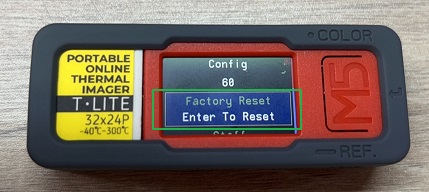
Factory Reset
- Power on the device with
PWR. - Press
PWRto enter settings. - Select
OtherswithButton Band pressButton A. - Choose
Factory Resetand confirm withButton A.