


Product Guide
Linux PC
CardputerZero
AI Accelerator Card
LLM-8850 Card
Large Language Models
AI & Agent
Real-Time AI Voice Assistant
XiaoZhi Voice Assistant
AtomS3R-M12 Volcengine Kit
Offline Voice Recognition
Industrial Control
IoT Measuring Instruments
Air Quality
PowerHub
Module13.2 PPS
VAMeter
T-Lite
Input & Output Devices
Ethernet Camera
PoECAM
Wi-Fi Camera
Unit CamS3/-5MP
AI Camera
LoRa & LoRaWAN
Motor Control
Restore Factory Firmware
DIP Switch Usage Guide
UnitV2 Jupyter Notebook
Preparation
- 1.Device startup and connection: Refer to the tutorial in UnitV2 Built-in Recognition Service to complete the installation of the device driver and access to the device web control page through the browser.
Jupyter Notebook
The factory Linux image of UnitV2 integrates the Jupyter Notebook development and debugging tool. Jupyter Notebook is a web-based development tool that allows users to write and run code directly on a webpage. If you need to write documentation during the programming process, you can write it directly on the same page for timely explanation and interpretation. It is very convenient for online debugging of the device. Visit the Jupyter Notebook official website for more information. In this tutorial, we will use Jupyter Notebook to edit and run several simple example programs to introduce how to control the basic peripheral hardware on UnitV2. UnitV2 runs Python 3.8 with this Jupyter Notebook, which supports all advanced features and syntax sugar of python!
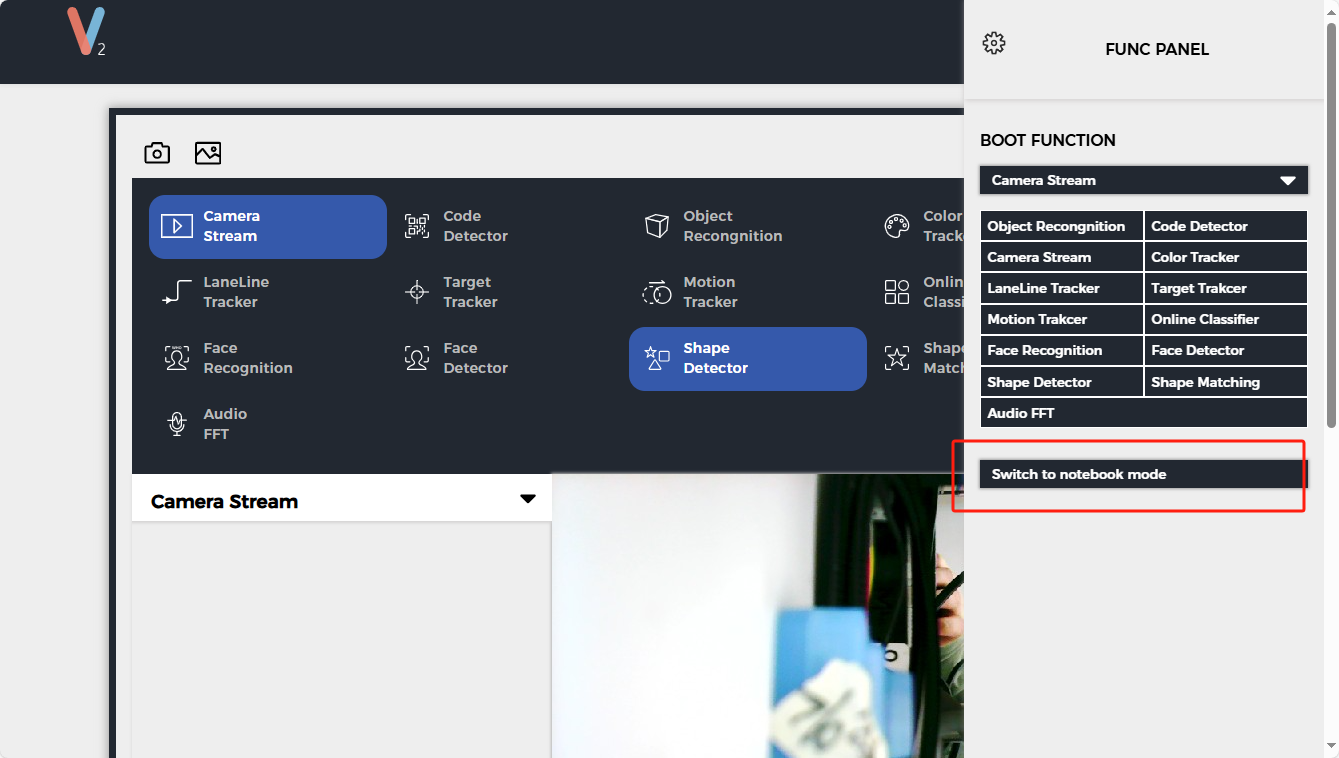
After establishing a connection between the PC and UnitV2, access the domain name unitv2.py or IP:10.254.239.1 through the browser to access the preview webpage with recognition functionality->Click
the settings button in the upper right corner->Switch to Jupyter Notebook, and refresh according to the page prompts.
After entering the Jupyter Notebook page, we can see that a 01-Introduction to M5Stack UnitV2.ipynb program file is built into the file system. This file contains some example programs for driving basic peripheral hardware (including driving the LED light and taking photos through the Camera and displaying them on Jupyter Notebook)->Click the file to view the code details.
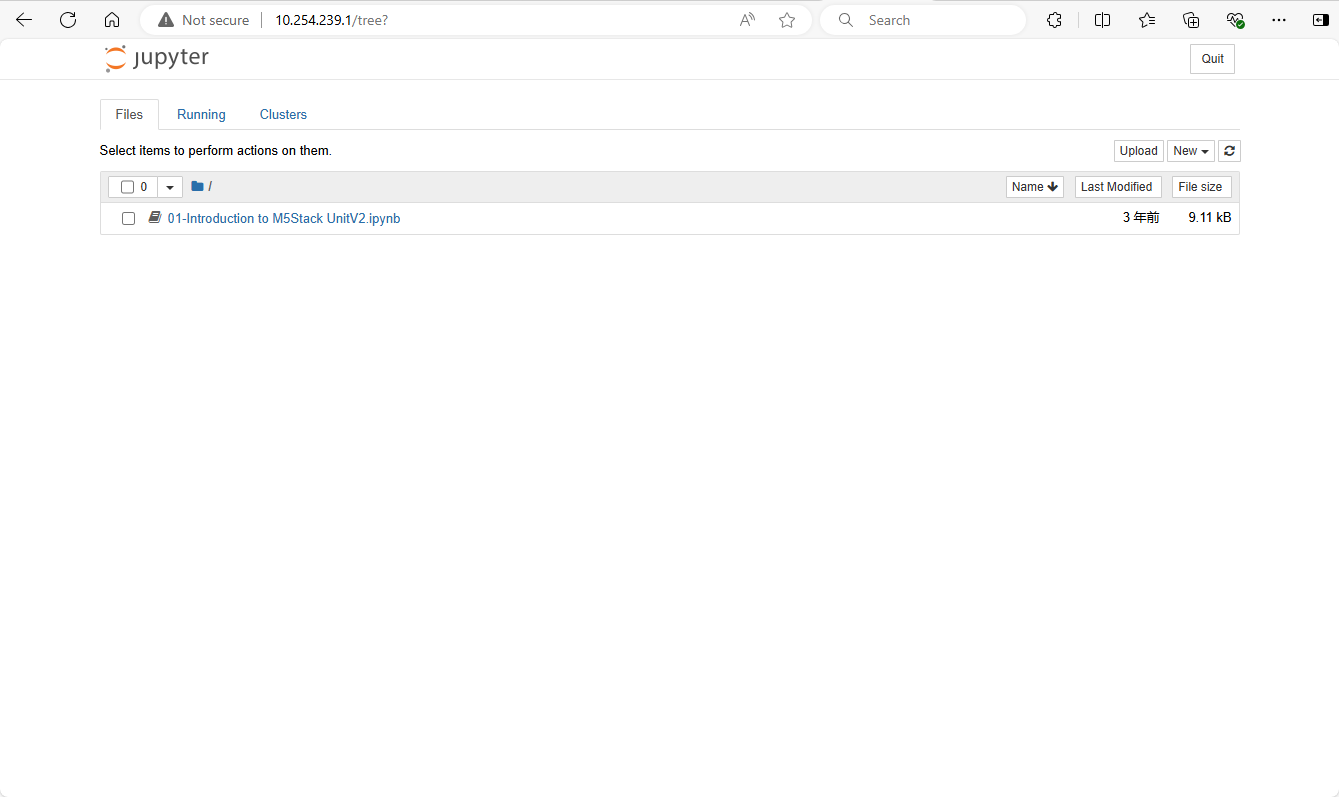
Select the program step by step according to the program comments, and then click the run button above to experience online debugging of the device.

Examples
LED
import time

def control_white_led(value):
    open('/sys/class/gpio/export', 'w').write('0') # Export the GPIO0
    open('/sys/class/gpio/gpio0/direction', 'w').write('out') # Set the direction of the GPIO
    open('/sys/class/gpio/gpio0/value', 'w').write(str(value)) # Set the value, '1' or '0'

def control_red_led(value):
    open('/sys/class/gpio/export', 'w').write('1') # Export the GPIO0
    open('/sys/class/gpio/gpio1/direction', 'w').write('out') # Set the direction of the GPIO
    open('/sys/class/gpio/gpio1/value', 'w').write(str(value)) # Set the value, '1' or '0'


for i in range(10):
    control_white_led(0)
    time.sleep(0.5)
    control_white_led(1)
    time.sleep(0.5)
Microphone
import subprocess
import audioop
import time

audio_cmd = ['arecord', '-D', 'plughw:0', '-f', 'S16_LE', '-c', '1', '-r', '48000', '-t', 'raw', '-q', '-']
audio_source = subprocess.Popen(audio_cmd, stdout=subprocess.PIPE)

while True:
    audio_source.stdout.flush()
    data = audio_source.stdout.read(512)
    rms = audioop.rms(data, 2)
    print(rms)
    time.sleep(0.1)
- Execute this command in the terminal to record audio and save it to a file
arecord -d 20 -r 48000 -c 2 -f S16_LE audio.wav
UART
import serial

# Open the serial port, and set the baudrate to 115200
uart_grove = serial.Serial('/dev/ttyS1', 115200, timeout=0.5)

# Send Something
uart_grove.write('hello'.encode('utf-8'))
# encode is for converting the string to bytes, or you can directly send bytes
uart_grove.write(b'hello')


# Receive something
x = uart_grove.read()          # read one byte
s = uart_grove.read(10)        # read up to ten bytes (timeout)
line = uart_grove.readline()   # read a '/n' terminated line
Camera
The built-in camera of the M5Stack UnitV2 is located at /dev/video0. You can try to capture a static image frame.
import cv2

camera = cv2.VideoCapture(0)
ret, frame = camera.read()

if ret:
    print('Capture Successful!')
else:
print('Oops, we get some trouble!')Use the matplotlib library to display it on the Jupyter notebook page.
from matplotlib import pyplot as plt

# Magic to tell matplotlib to display the image in jupyter notebook
%matplotlib inline

# Let's show the image!
plt.imshow(frame)Convert from OpenCV's BGR to RGB to make the color of the image displayed by matplotlib normal.
# Convert from BGR to RGB
frame_rgb = cv2.cvtColor(frame, cv2.COLOR_BGR2RGB)

plt.imshow(frame_rgb)Try converting to grayscale.
# Convert from BGR to RGB
frame_gray = cv2.cvtColor(frame, cv2.COLOR_BGR2GRAY)

# We need to tell matplotlib it is a grey image. You can try to change to other cmap, refer here: https://matplotlib.org/stable/tutorials/colors/colormaps.html
plt.imshow(frame_gray, cmap='gray') Capture and save the image.
import cv2
camera = cv2.VideoCapture(0)
ret, frame = camera.read()

if ret:
    print('Capture Successful!')
    cv2.imwrite('test2.png', frame)
else:
print('Oops, we get some trouble!')SSH Login
Open the command line terminal, enter the instructions below, and enter the default password to access the device via ssh.
ssh m5stack@10.254.239.1

//user: m5stack
//pwd: 12345678

//user: root
//pwd: 7d219bec161177ba75689e71edc1835422b87be17bf92c3ff527b35052bf7d1fUser default directory structure
//To store files edited in Jupyter Notebook
/home/notebook

//To store recognition service file resources, and some model files
/home/m5stack