

Product Guide
Linux PC
AI Accelerator Card
LLM-8850 Card
Large Language Models
AI & Agent
Real-Time AI Voice Assistant
XiaoZhi Voice Assistant
AtomS3R-M12 Volcengine Kit
Offline Voice Recognition
Industrial Control
IoT Measuring Instruments
Air Quality
PowerHub
Module13.2 PPS
VAMeter
T-Lite
Input & Output Devices
Ethernet Camera
PoECAM
Wi-Fi Camera
Unit CamS3/-5MP
AI Camera
LoRa & LoRaWAN
Motor Control
Restore Factory Firmware
DIP Switch Usage Guide
V-Training
V-Training is an online AI model training service launched by M5Stack, at present V-Training provides two model training modes "Classification" (identify the object and return its corresponding classification) "Detection (using Yolov3 algorithm, identifying the object's location in the image and drawing wireframes)", users can freely choose to use these two modes according to their own use scenarios. Users can choose to use according to their own use of the scene, the following will introduce the two modes of model training.
Driver installation
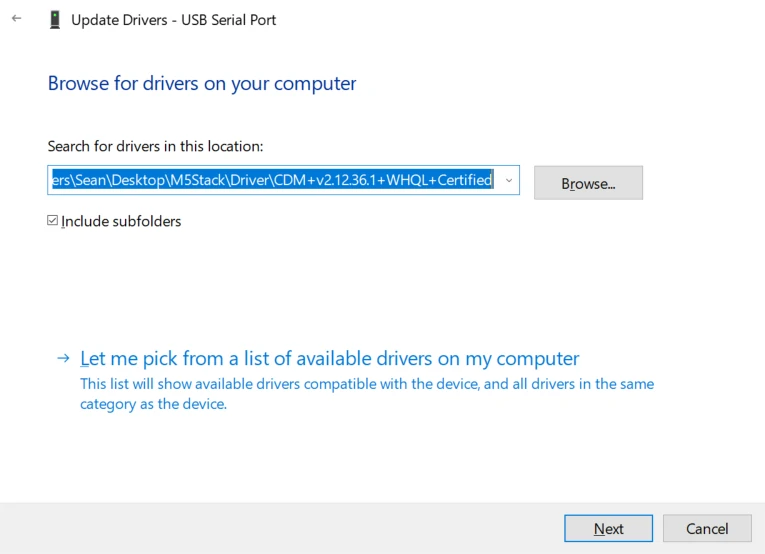
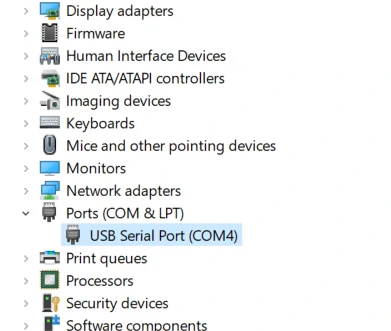
M5Stack or USB Serial, Windows recommend to use the driver file in the device manager to install it directly (customize the update), the executable file installation method may not work properly). Click here to go to download FTDI driver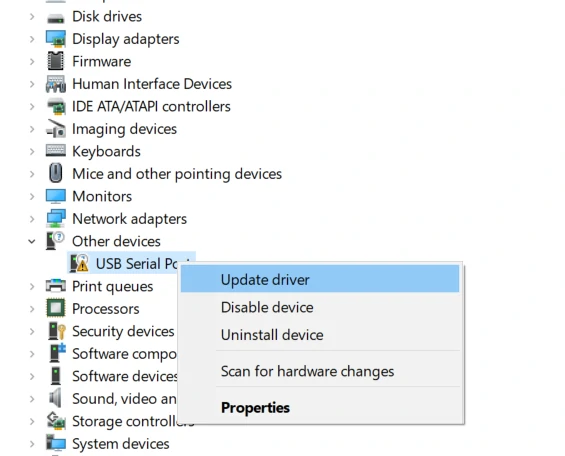
System Preferences - > Security & Privacy - > General - > Apps allowed to be downloaded from the following locations - > App Store and Approved Developer Options.Firmware burning
Kflash_GUI
- Download the firmware and Kflash_GUI burning tool.
| Firmware version | Download link |
|---|---|
| M5StickV_Firmware_v5.1.2.kfpkg | Download |
| Software version | Download link |
|---|---|
| Kflash_GUI_Windows | Download |
| Kflash_GUI_MacOS | Download |
| Kflash_GUI_Linux | Download |
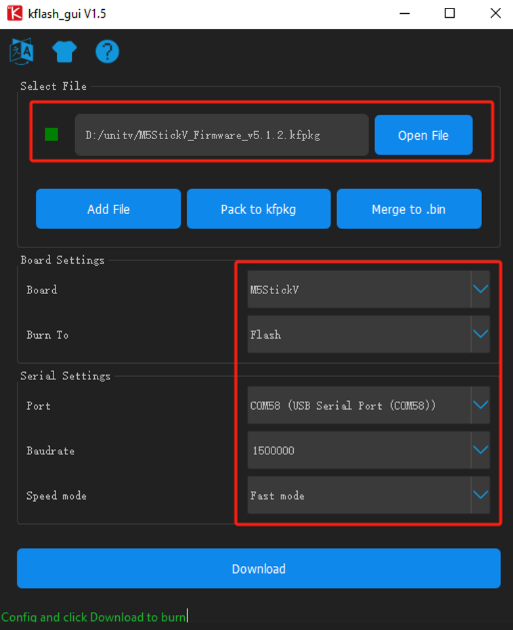
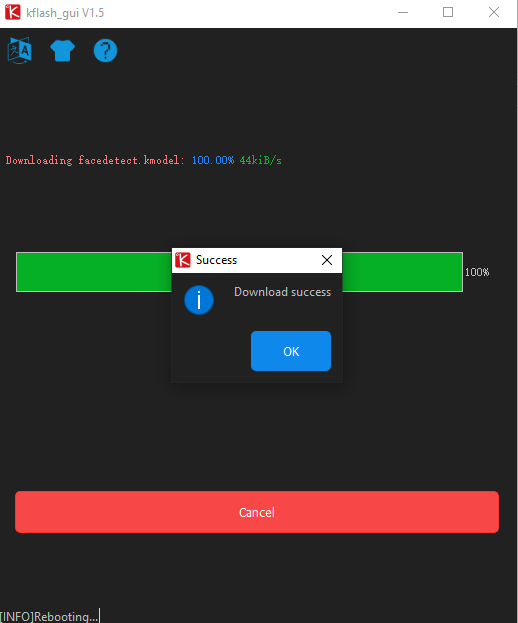
- Connect the device to the computer through the type-C cable, double-click to open the burning tool Kflash_GUI application, select the corresponding device port, board type (M5StickV), firmware program, baud rate. Click Download to start burning.
Classification Model
To train the model, we need to use a lot of training material, due to the difference of hardware between M5StickV and UnitV, the material shooting method is also different, please refer to the following instructions to shoot according to the actual hardware.
M5StickV-Shooting Footage
To shoot the training material, you need to download the boot-M5StickV program zip, and unzip all the files in the zip to the SD card (M5StickV requires a SD card, click here to see the support type).
Insert the SD card for storing picture material before booting up, long press the left power button to boot up the camera, when the screen appears, as shown in the figure below, the word Training, it means that you have successfully entered the shooting program.
The navigation bar at the top of the screen will display the current Class number and the number of pictures taken in real time, press the HOME button to take pictures, and the buttons on the right side of the camera body are used to switch the Class number.
At present, the program provides a total of 10 groups of Class for users to shoot training materials, each group of Class represents a kind of recognition object, in order to get better training results, users must shoot more than 3 groups of Class. In order to ensure the accuracy of the recognition, each group of Class needs to be shot more than 35 pictures, otherwise it will not be given through the training in the cloud. The higher the number of clips, the better the recognition training effect and the higher the recognition rate.
UnitV-boot-UnitV
The boot-UnitV program is an image capture program for UnitV, which is used to collect material for model training.
The recorded training material will be stored in SD card by default, so please insert the SD card into UnitV's card slot before running the boot program. (Note: UnitV requires an SD card, Click here to see the supported types)
Run the MaixPy IDE and connect the UnitV device. Click the "Open File" option, open the downloaded boot.py file, and click the Run button. After running successfully, the MaixPy IDE will monitor the camera screen in the upper right corner of the IDE.
To take a picture with the IDE's camera, press the A button to take a picture, and the B button to switch the class number. The output log corresponds to the class number of each operation and the number of pictures taken. Click "Serial Monitor" below to see the log output.
Currently, the program provides 10 groups of Classes for users to take training material, each group of Classes represents a kind of recognition object. In order to get better training results, the user must shoot more than 3 groups of Class. In order to ensure the accuracy of the recognition, each group of Class need to shoot more than 35 pieces of material, otherwise in the cloud training will not be given through. The higher the number of clips, the better the recognition training effect and the higher the recognition rate.
When shooting training materials, please try to keep the ambient light condition of the material shooting consistent with the actual recognition application scene, and the shooting distance is recommended to fill the screen with the recognized object just completely, and the background is free of other debris.
Note: In order to ensure the accuracy of the recognition, the number of clips taken by each group of Class needs to be more than 35, otherwise it will not be passed in the cloud training. The higher the number of clips, the better the recognition training and the higher the recognition rate.
Material checking and pressing
After you have finished shooting, turn off the M5StickV, take out the SD card, and copy the SD files ("train" and "vaild" folders) to your computer through the card reader.
The class number folder directories in the "train" and "vaild" folders are the same, when switching the class and taking pictures, the program will create the folder with the same class number in the "train" and "vaild" folders at the same time, and store the pictures in the class folder in the respective directories of the "train" and "vaild" folders in accordance with the storage rules. and "vaild" according to the rules of storage, and store the pictures in the Class folder in each directory.
In addition to checking the correctness of the content of the images, we must make sure that the total number of images in the same Class number directory in the "train" and "vaild" folders is more than 35. If the total number of images is less than 35, please delete the Class number directory or back up the images. After checking the files, the next step is to compress them. Compress the "train" and "vaild" folders into a "zip" file using the compression tool.
Data upload to the cloud
Click here to visit the data upload page, fill in your personal e-mail address according to the message prompts, and click Upload file (the size of the uploaded file can be controlled within 200MB, and it must be in zip format).
After successful upload, the file will enter the request queue, and the table at the bottom left of the page will show the current queue.
Download the model
Wait for the training to complete, the download address of the program file will be sent to the email address reserved when uploading the file. Copy the download address from the email, unzip the program file locally, and copy it to the SD card.
Run the recognition program
Finally insert the SD card into M5StickV, then the program will run automatically when you turn on the computer.
The default program will identify the objects according to the class number and display them on the screen, you can modify the information displayed by modifying the boot.py file.
Program modification
Since UnitV does not integrate the screen, users can modify the existing program according to their needs. The program can be modified to output the recognition data or execute the corresponding function after successful recognition. For example, print out the recognition information through the serial port.
The following boot program with the addition of the serial port printing program, only for some of the contents of the comments, not the complete program, the actual use of the boot program file based on the return of the training program modifications.
    ...

    task = kpu.load("/sd/c33723fb62faf1be_mbnet10_quant.kmodel")

    labels=["1","2","3","4","5","6"] #The list corresponds to the Class order of the training material, for each identifier, and you can change the elements of the list to other string fields.


    while(True):
        img = sensor.snapshot()
        fmap = kpu.forward(task, img)
        plist=fmap[:]
        pmax=max(plist)
        max_index=plist.index(pmax)
        a = lcd.display(img)
        if pmax > 0.95:
            lcd.draw_string(40, 60, "Accu:%.2f Type:%s"%(pmax, labels[max_index].strip()))
            print(labels[max_index])

....Detection mode (Yolov3)
Footage capture
Similar to the classification mode training above, in the detection mode (Yolov3) we still need to use the camera to capture the material (we can continue to use the same capture procedure as in the classification mode). The difference is that in this training mode, multiple recognized objects are allowed to appear in the same image frame. Therefore, there is no need to shoot multiple objects in groups. The total number of captured clips needs to be greater than 100.''
LabelIMG clip labeling
After shooting, we use the labeling tool LabelIMG to label the objects in the clips and generate the labeling file. Users can install Python environment by themselves, run the following command in the command line, and install LabelIMG through its own pip package management tool.
pip install LabelIMGAfter installation, run "LabelIMG" on the command line to open the labeling tool.
LabelIMG- Switch the marking tool to
Yolo mode-> 2.Open the picture storage directory-> 3.Select the marking file storage directory->Set the auto-save mode.
Press the W key to start drawing the object border and naming the object. (After adding the name, the record will be added to the list, and you can choose to use it directly in the subsequent markups without having to repeat the input.) Click the next button to switch the pictures until all the materials are marked.
In addition to adding marking files, we also need to manually add a v-training.config file, which is used to tell the training service how many recognition objects are included in our training. (such as the above figure in the case of marking two recognition objects, we need to fill in the configuration file for the number of classes 2, the format is as follows)
{
    "classes":2
}After completing the above operations, place all the files in the same folder, refer to the directory structure below. Select all the files and compress them into a zip file for uploading.
folder----------------------
        |--v-training.config
        |--1.jpg
        |--1.txt
        |--2.jpg
        |--2.txt
.....After completing the above operations, place all the files in the same folder, refer to the directory structure below. Select all files and compress them into a zip file for uploading.
Please refer to the above operation of classification mode training for the way of uploading zip file and downloading model. After the detection mode is trained, the boot.py and xxxx.model files will be returned. Copy them to SD card, then insert the SD card into the device, and boot the device to run the recognition program.