

Product Guide
Linux PC
CardputerZero
AI Accelerator Card
LLM-8850 Card
Large Language Models
AI & Agent
Real-Time AI Voice Assistant
XiaoZhi Voice Assistant
AtomS3R-M12 Volcengine Kit
Offline Voice Recognition
Industrial Control
IoT Measuring Instruments
Air Quality
PowerHub
Module13.2 PPS
VAMeter
T-Lite
Input & Output Devices
Ethernet Camera
PoECAM
Wi-Fi Camera
Unit CamS3/-5MP
AI Camera
LoRa & LoRaWAN
Motor Control
Restore Factory Firmware
DIP Switch Usage Guide
UnitV Maixpy
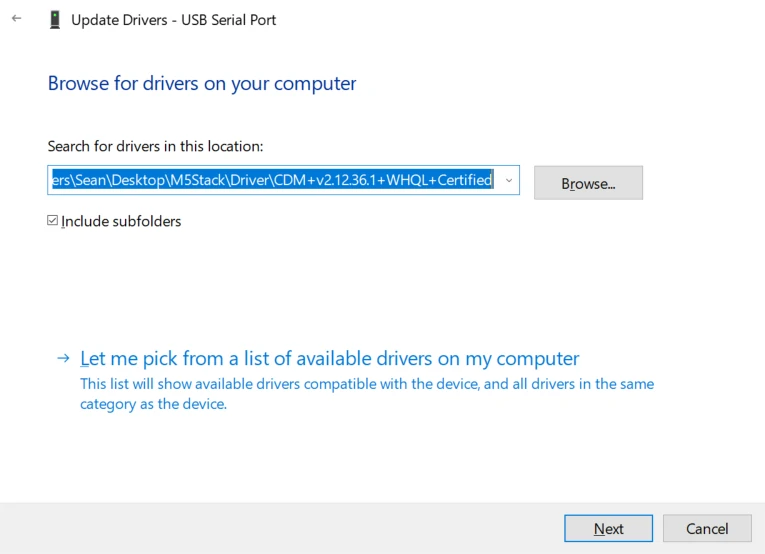
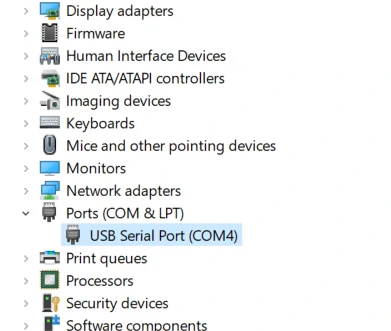
Driver installation
M5Stack or USB Serial. For Windows users, we recommend to install it through Windows Device Manager using the .zip file, because the executable file installation method may not work properly).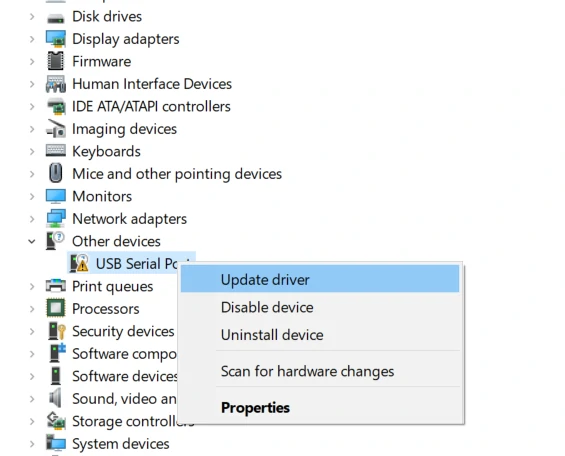
System Settings - > Privacy & Security - > Allow applications from - > Anywhere before the installation.Firmware burning
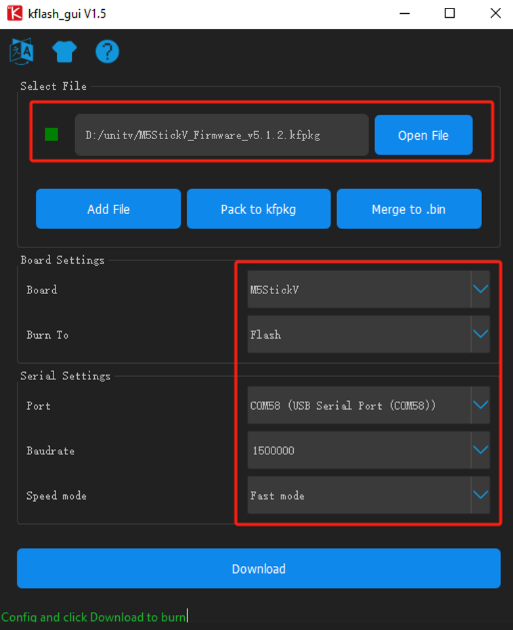
Kflash_GUI
- Download the firmware and Kflash_GUI burning tool (UnitV is using the same firmware as StickV).
| Firmware version | Download link |
|---|---|
| M5StickV_Firmware_v5.1.2.kfpkg | Download |
| Software version | Download link |
|---|---|
| Kflash_GUI_Windows | Download |
| Kflash_GUI_MacOS | Download |
| Kflash_GUI_Linux | Download |
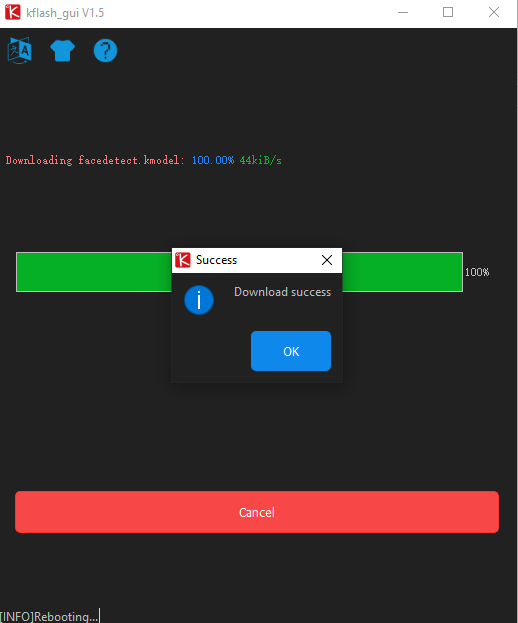
- Connect the device to the computer, open the Kflash_GUI, select the correct device port, choose board type M5StickV, firmware file, baud rate, and click Download to start burning.
MaixPy IDE
MaixPy IDE can edit/run programs, see the camera frames and transfer files easily. It's a very easy-to-use software for beginners and those want to develop the project quick and easily.
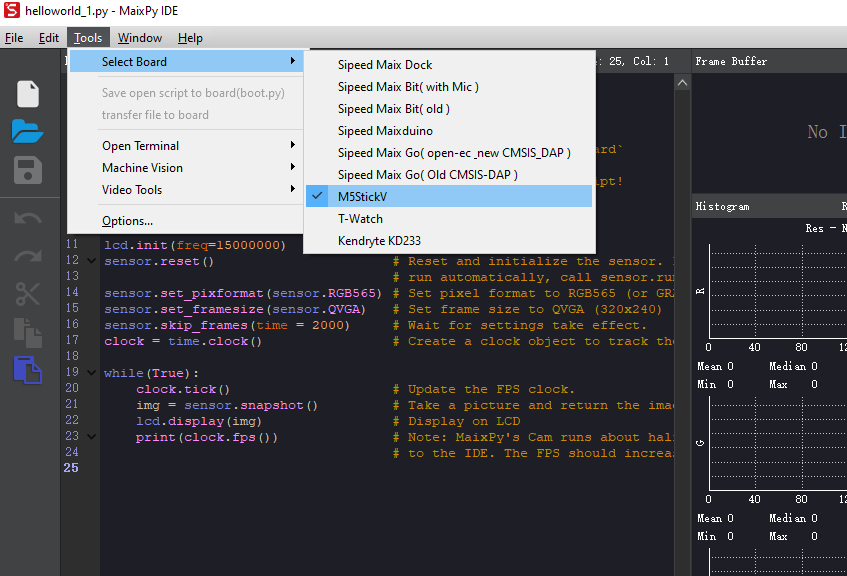
Run MaixPy IDE, click on the toolbar and select the device type. Tools-> Select Board-> M5StickV
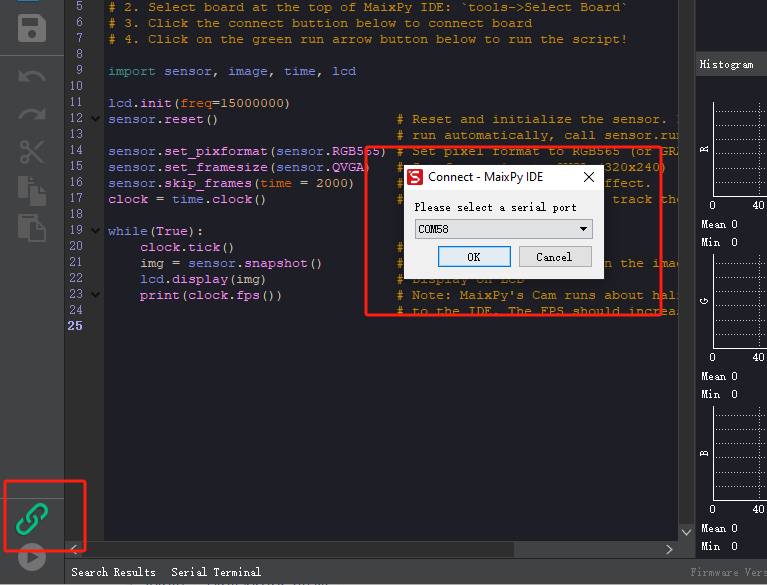
Click the Connect button in the lower left corner and select the correct connection port, click OK.
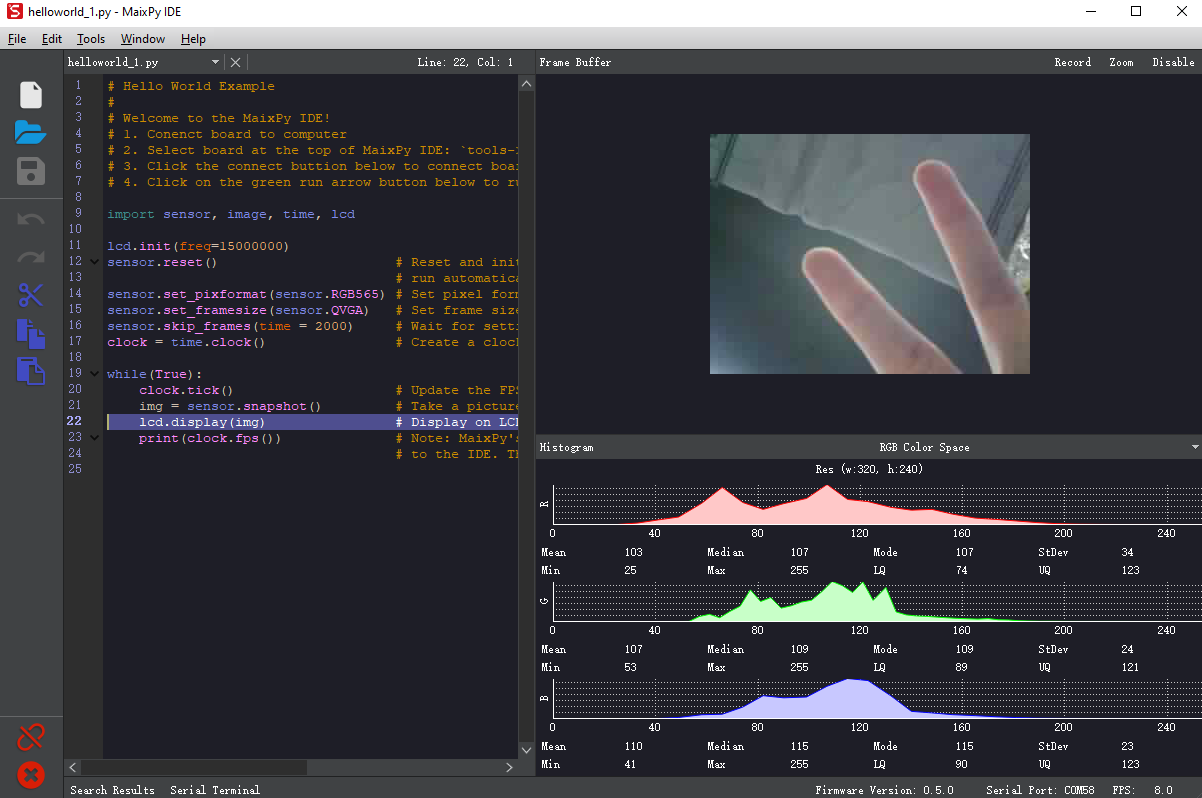
The connection button will turn into red when connection succeed. Now you can edit your codes and run them by clicking the Run button at the lower left corner.
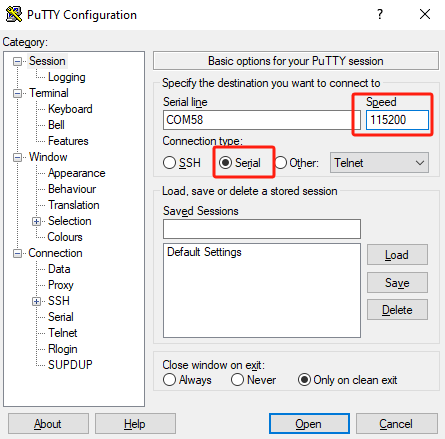
Serial debugging
- USB connection for UnitV will be enabled as system log port by default. Users can use this interface to connect UnitV to the computer using any serial tools, and the default baud rate is
115200bps. The following operation is based on Putty.
- After running Putty, connect the UnitV to the computer, set the port number and baud rate, then click "open" to start the connection.
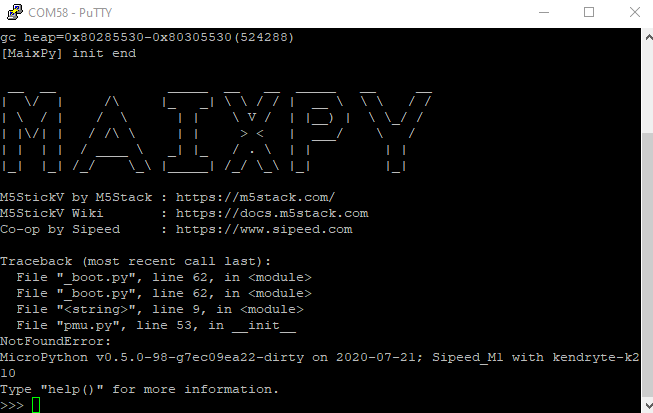
- You will automatically enter the interactive interface of MaixPy after connection succeed. The device will run factory program by default, you can interrupt it by pressing the shortcut key "Ctrl+C".
Editing programs
In MaixPy firmware, there is a built-in open-source editor Micropython Editor(pye), which makes it easy to modify program files.
You can use os.listdir() to list the files in the current directory.
Use pye("hello.py") to create a file and enter editing mode.
After finishing editing, press Ctrl+S > Enter to save, press Ctrl+Q to exit the editor.
Note: You will need to use key Del for backspace, the key Backspace will trigger Ctrl+H by default.
Run the program
Use os.chdir() to switch from the current directory to the file directory, e.g. os.chdir("/flash").
Method 1: Run the codes line by line
Run import hello, then you can see the output hello maixpy.
Please note that import can only execute at once. If you need to execute it more than once, it is recommended to run the .py file as following:
Method 2: Run the .py file
with open("hello.py") as f:
    exec(f.read())
Auto-run programs on boot
The system will create a boot.py file in the /flash or /sd directory. System will run this file while booting.
WS2812
The firmware has a built-in WS2812 RGB LED driver library, the following is an example program. Note: Since the expansion port of UnitV does not have the ability to drive loads, this program is only suitable for driving the built-in RGB LEDs.
from modules import ws2812
from fpioa_manager import *
fm.register(8)
class_ws2812 = ws2812(8,100)
r=0
dir = True
while True:
    if dir:
        r += 5
    else:
        r -= 5
    if r>=255:
        r = 255
        dir = False
    elif r<0:
        r = 0
        dir = True
    for i in range(100):
        a = class_ws2812.set_led(i,(0,0,r))
    a=class_ws2812.display()