UiFlow Tutorial
UiFlow1 Quick Start
2. Firmware & Program 1.0
UiFlow1 Development Guide
Project Management
Use LTE network
UiFlow1 Blockly
Event
UI
Unit
Module
Hat
UiFlow2 Quick Start
2. Firmware & Program 2.0
UiFlow2 Development Guide
UI Editor
Device Security & Sharing
UiFlow2 Video Column
UiFlow2 File Management
UiFlow2 provides a file management feature, offering a unified and convenient platform for developers to handle and manage various project files.
File Management System
The file management system is divided into USB mode and WiFi mode, with the following differences:
- USB: Material resources are only saved locally on the current device, and are not saved to the cloud project. IDE online preview is not supported. When other devices run the same project program, you need to manually import related resources. Suitable for single device development.
- Wi-Fi: Material resources will be saved to the project, support IDE online preview, when the same type of device runs the program, will automatically pull and download related resources. Suitable for multi-device development.
USB Mode Resource Reference
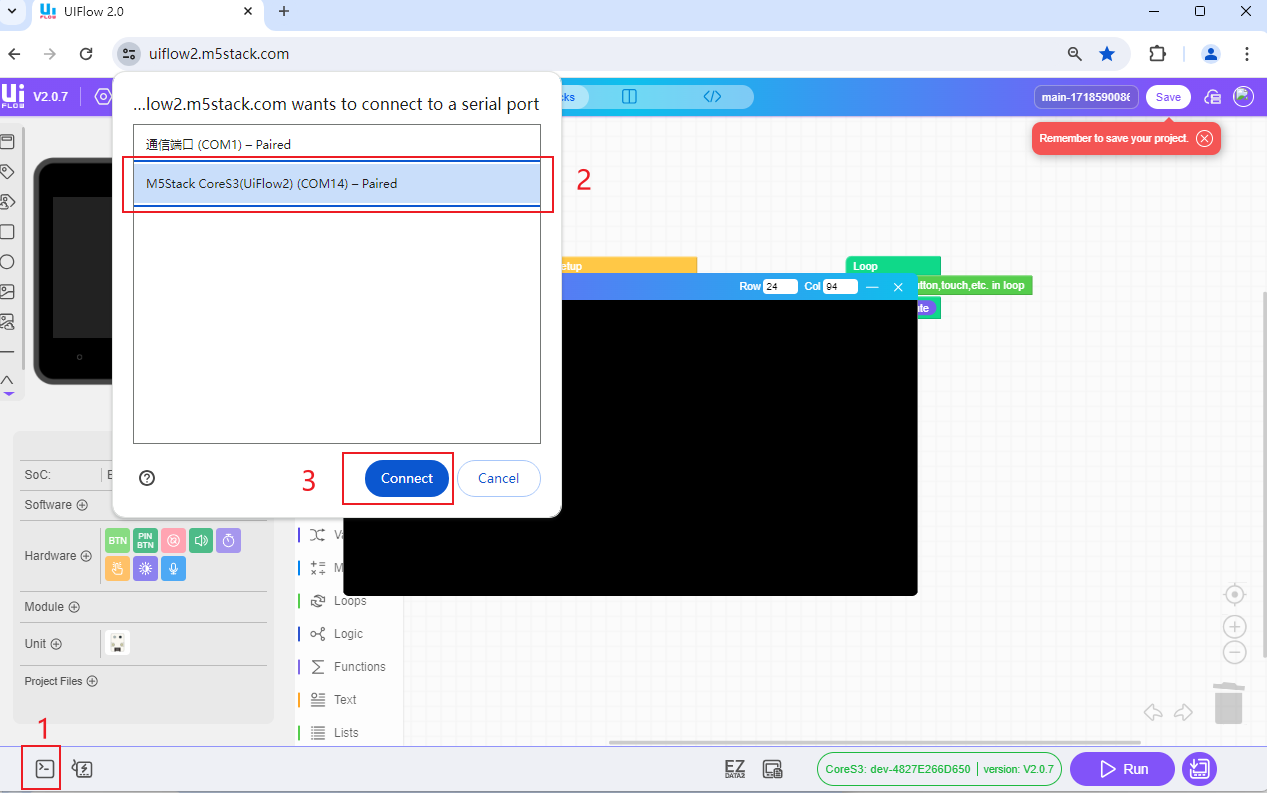
1. Connecting the Device
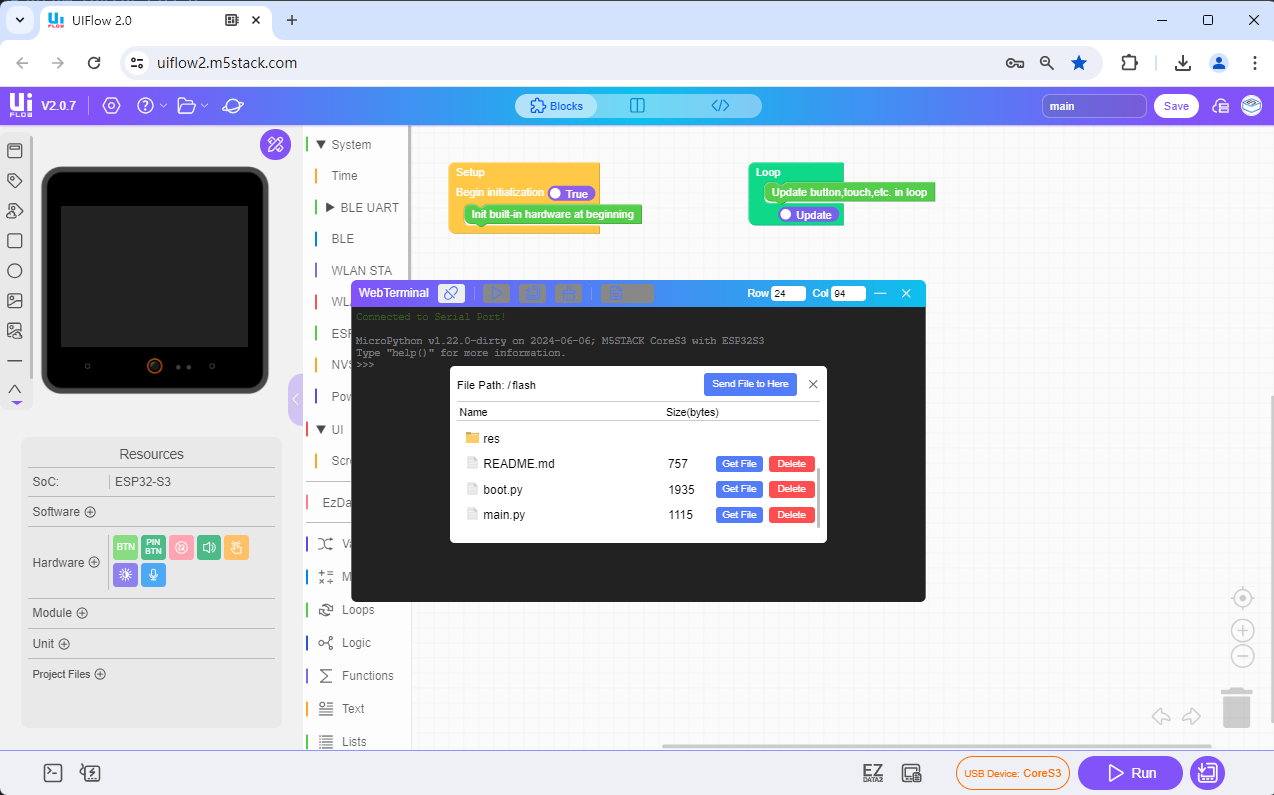
Connect the device to the computer via a USB cable, click the webterminal button on the left, and after successful connection, click File to open the file management system.
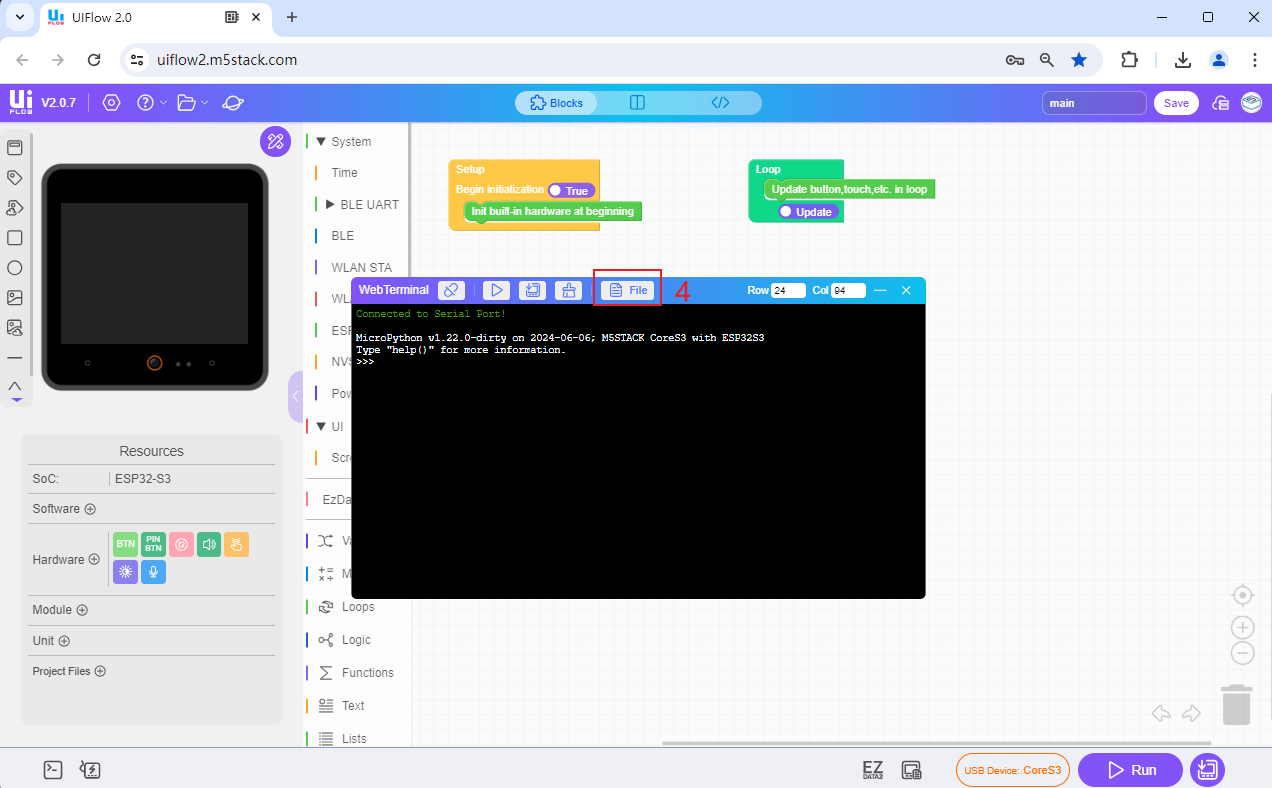
In the file management system, you can view files stored in all devices and perform operations such as adding, deleting, and previewing documents. Click Get File and Delete to add or remove files from the settings. Click Send File to Here to upload files from your computer to the device's storage.
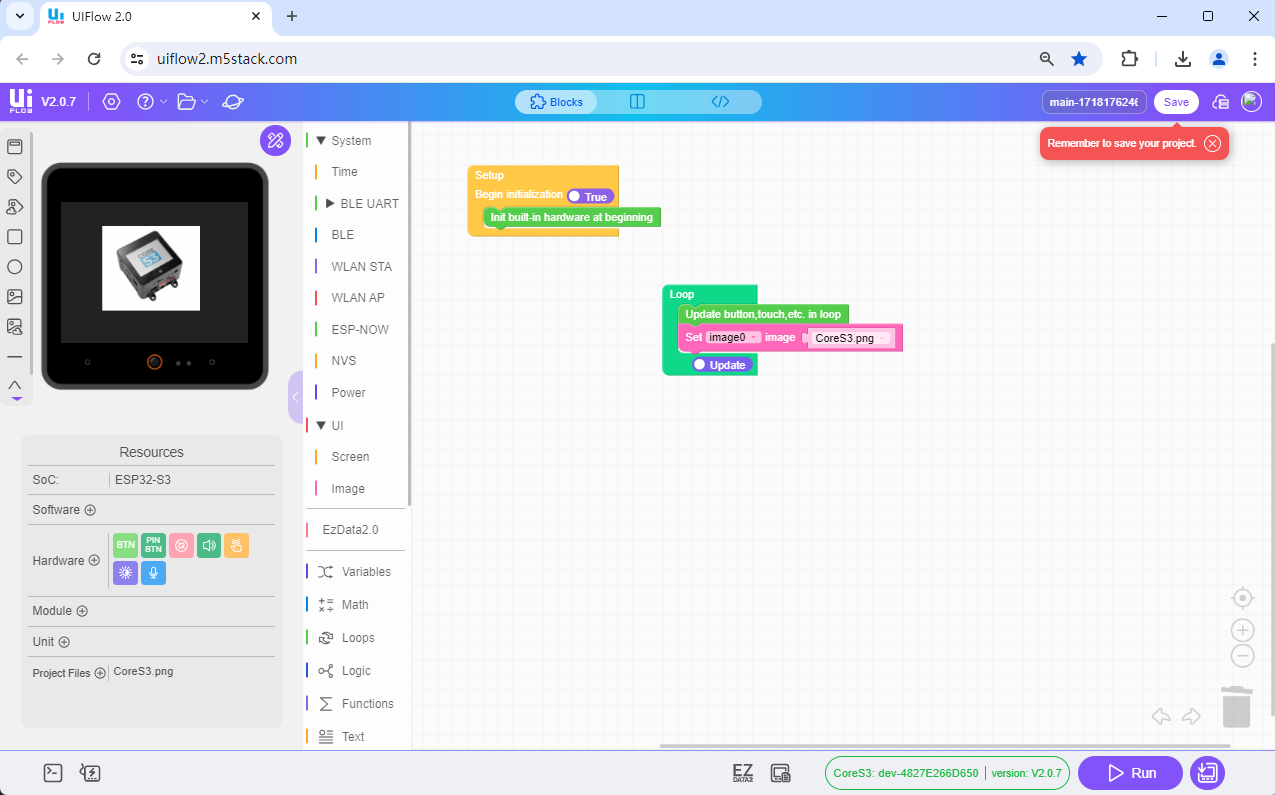
2. Introducing Images with Blocks
Drag the Image Block, fill in the image name and format, and click Run to preview the result.

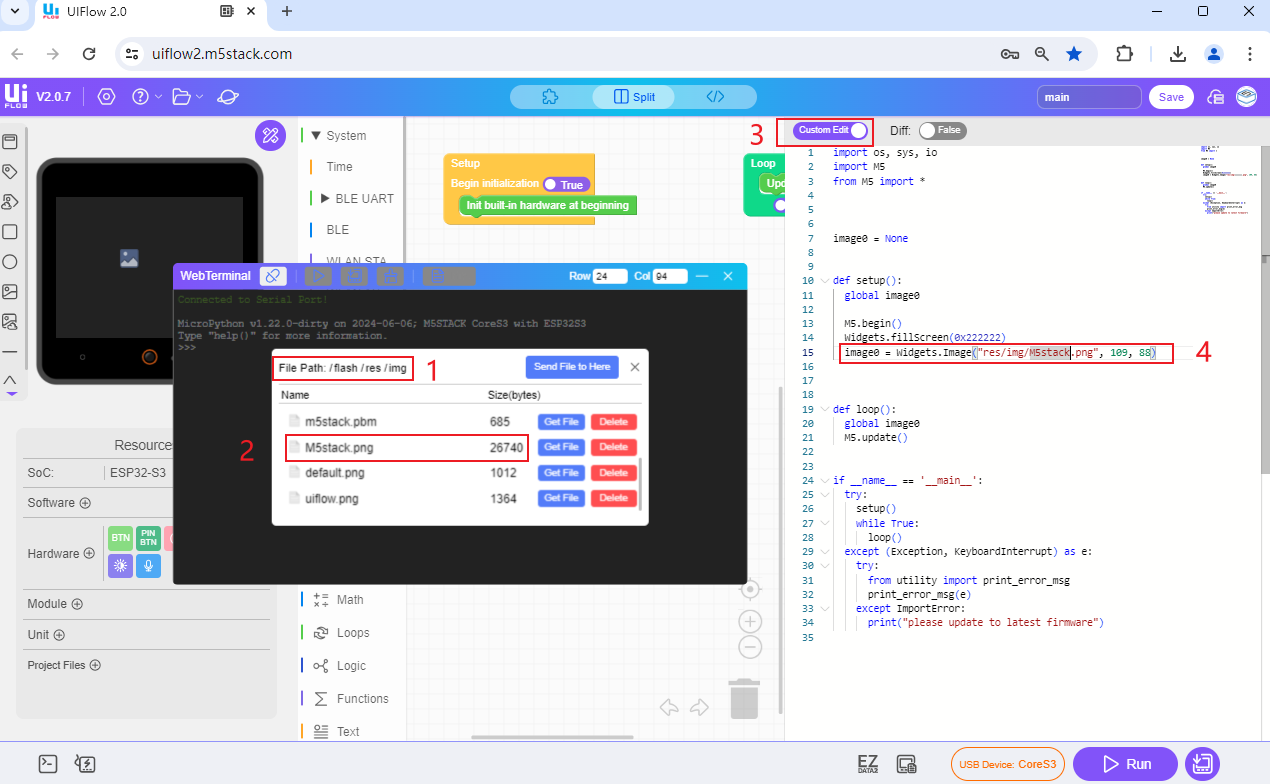
3. Introducing Images through Code
Find the default address for the specified image to be modified, change the default address to the desired image, open WebTerminal, and click the triangle to run and preview the result. For example, if the address of the M5stack.png image in the figure below is flash/res/img/M5stack.png, modify the default image0 introduction resource and replace it with the image path of M5stack.png.
WiFi Mode Resource Reference
Wi-Fi resource reference modes are divided into local preview mode and cloud project reference mode. The differences are as follows:
- File resources imported via local preview will be immediately downloaded to the currently connected device and will not be saved in the cloud project.
- File resources imported via cloud project reference will be saved in the cloud project, and image resources can be previewed online. After running the program, the relevant runtime file resources will be downloaded to the device.
1.Local preview
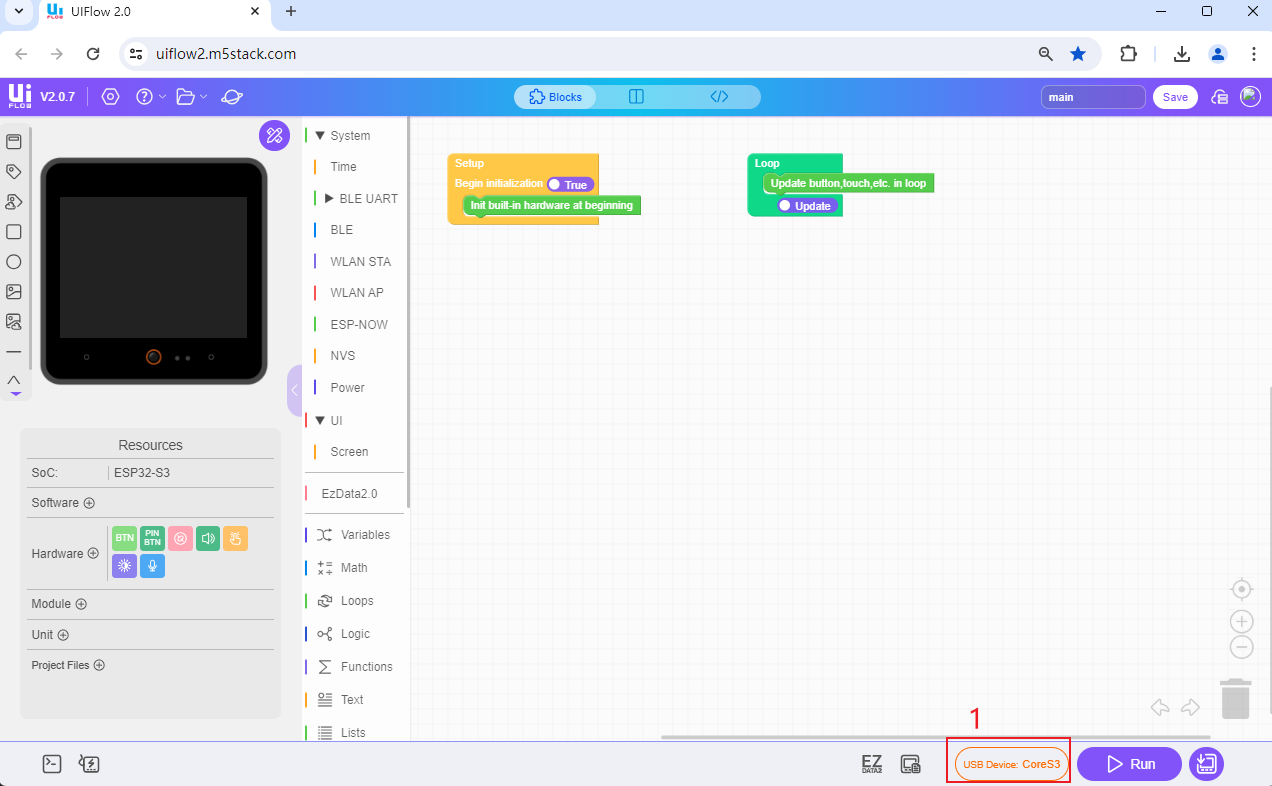
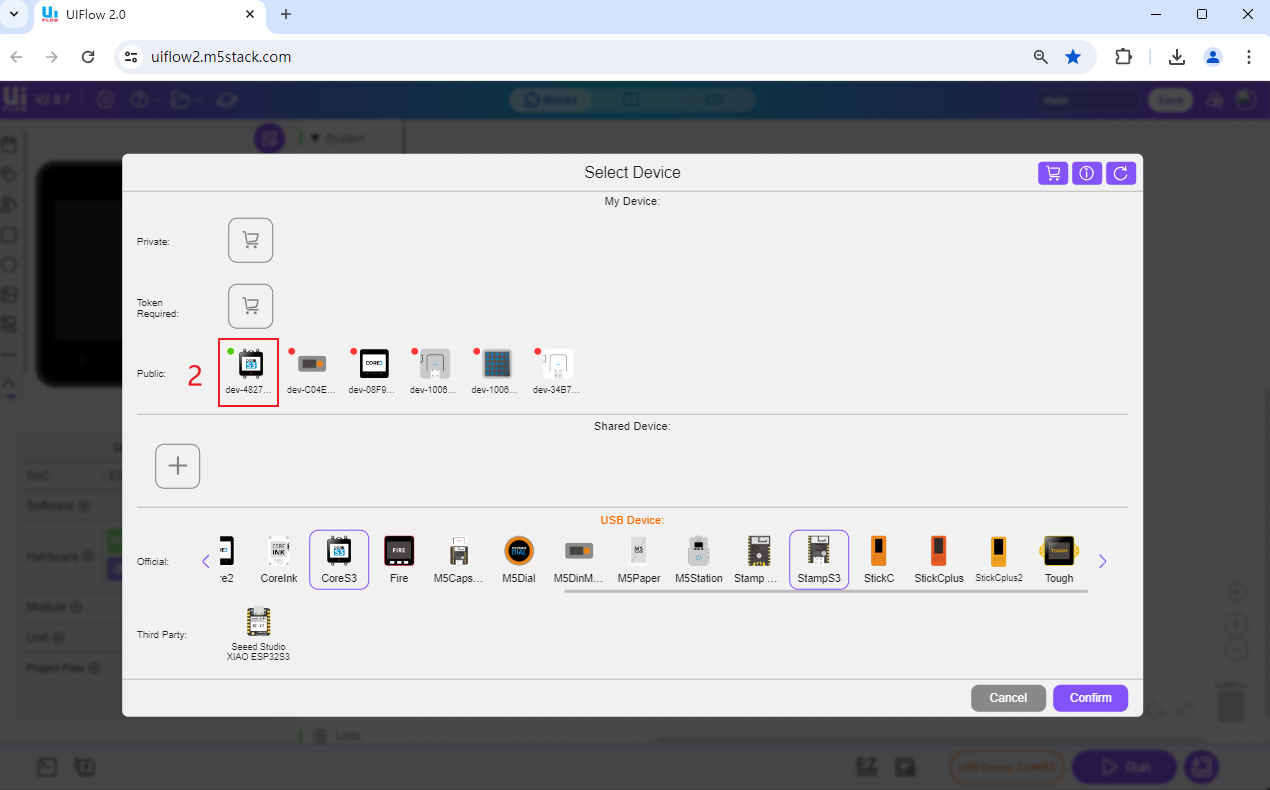
Before connecting the device to the computer via WiFi, ensure that the device is powered on and connected to WiFi. When the device is online, click the Device Management button in the UiFlow2 Web IDE to connect to the current online device you want to use.
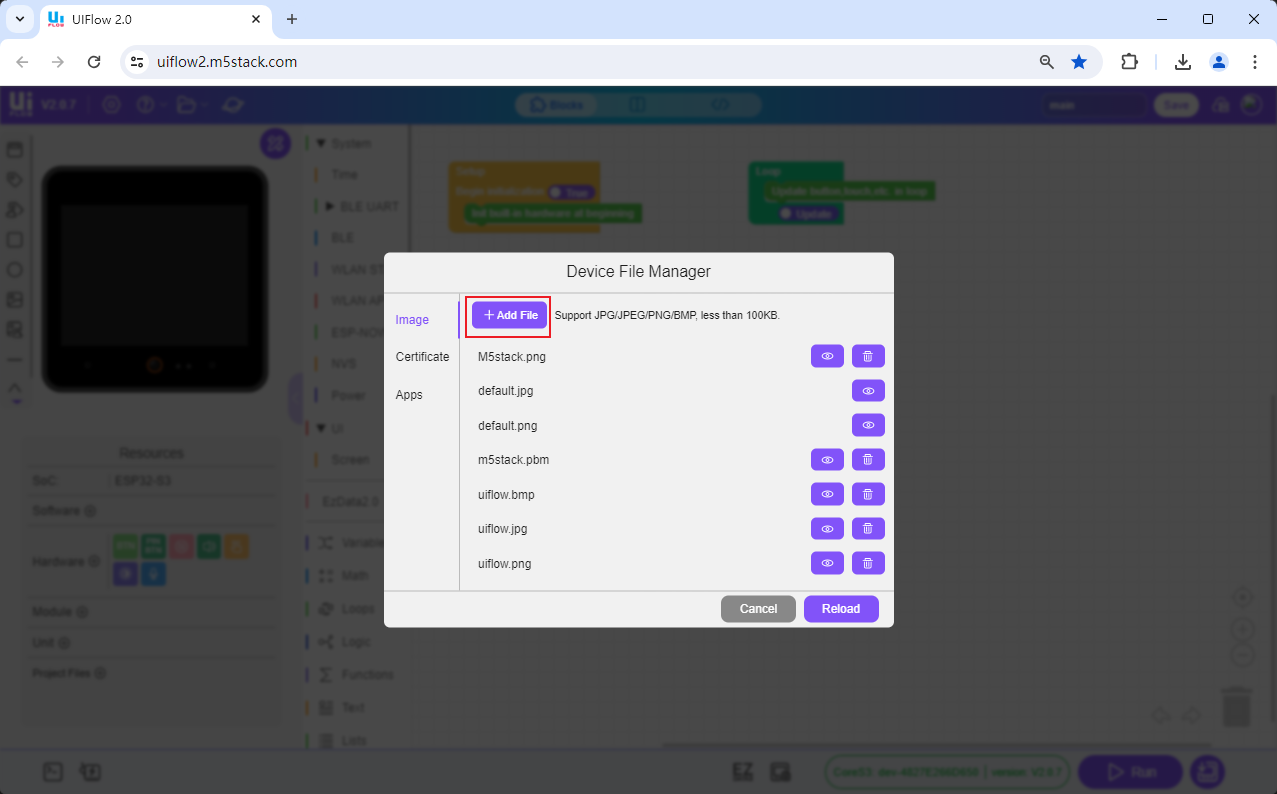
Click on the Device File Management System. In the Device File Management System, you can upload project files and static resource files. Once the file upload is successful, it will all be downloaded to the device. Meanwhile, the files in the device can also be previewed in the Web IDE. Note: The uploaded document should be less than 100kb. If the file to be used is too large, it is recommended to store it on an SD card.

2.Cloud project reference
Click the project file management system, in the project management system, you can upload project files and static resource files, file upload success, resources will be saved in the project, at the same time, other devices of the same type can also share file resources.
Note: The project saved in the cloud is a separate storage space. The successful operation of the program will not upload the files in the device to the cloud project, but will download the file resources of the run to the device.

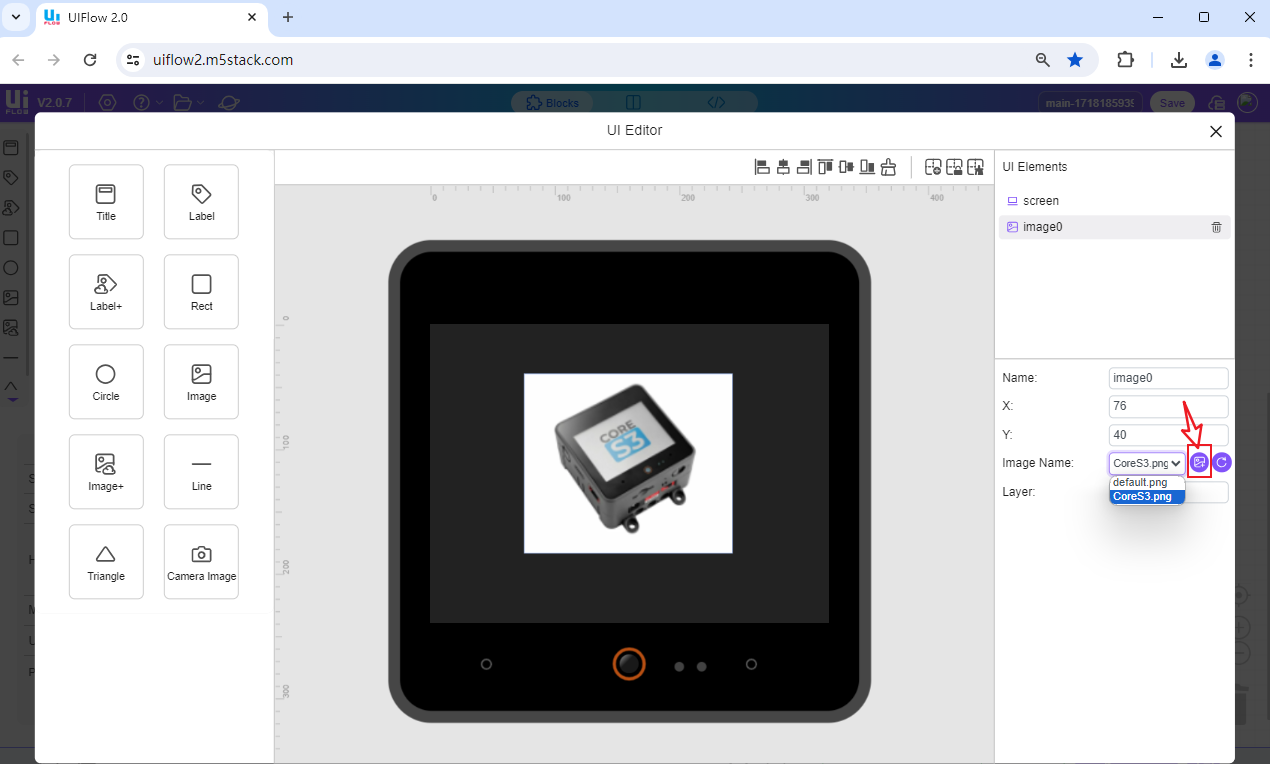
On the UI editing page, you can add image resources to the device by clicking the image add button. Additionally, with a network connection, the Web IDE supports online preview of images, and you can directly introduce them through code blocks.