UiFlow Tutorial
UiFlow1 Quick Start
2. Firmware & Program
UiFlow1 Development Guide
Project Management
Use LTE network
UiFlow1 Blockly
Event
UI
Unit
Module
Hat
UiFlow2 Quick Start
2. Firmware & Program
UiFlow2 Development Guide
UI Editor
UiFlow2 Video Column
ToughC5: Flash Firmware & Run Code
1. UiFlow2 Firmware Flashing
Connect ToughC5 to the computer's USB port.
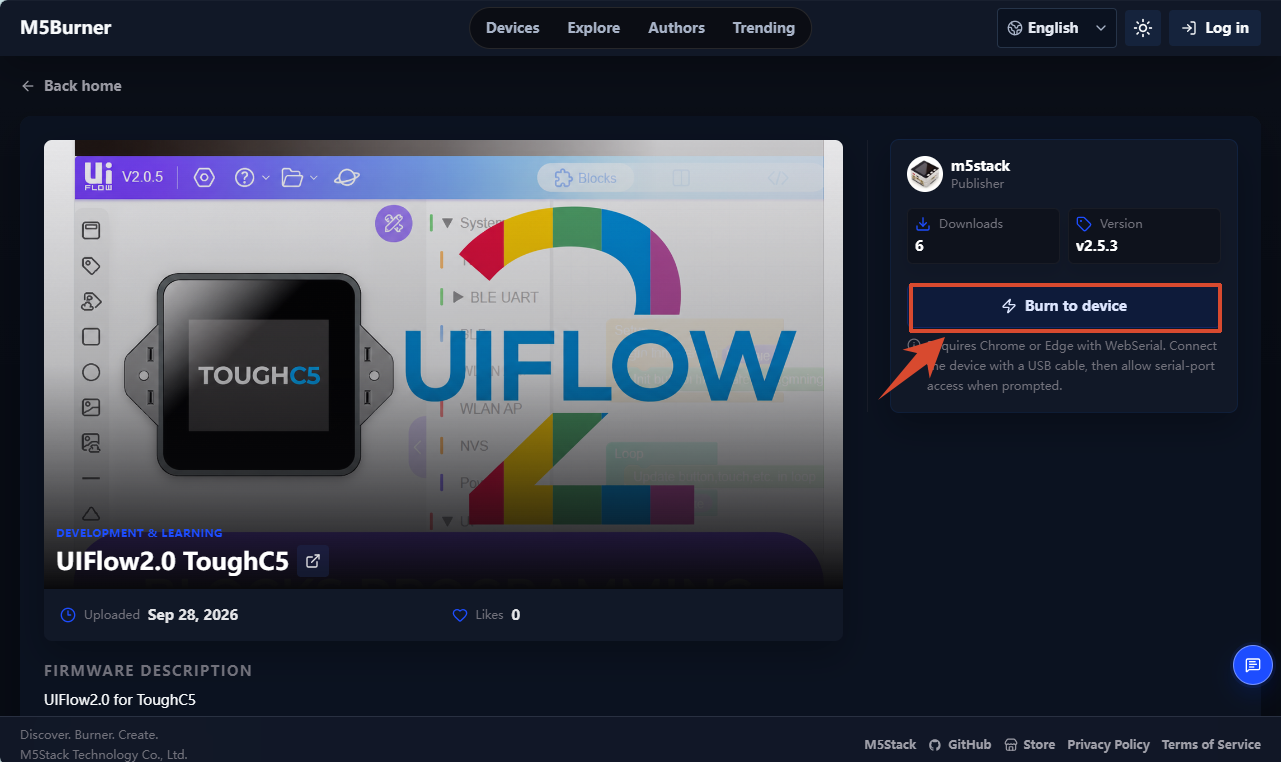
Open the ToughC5 UiFlow2 firmware page on the M5Burner website, and click
Burn to devicein the interface to start flashing the UiFlow2 firmware.
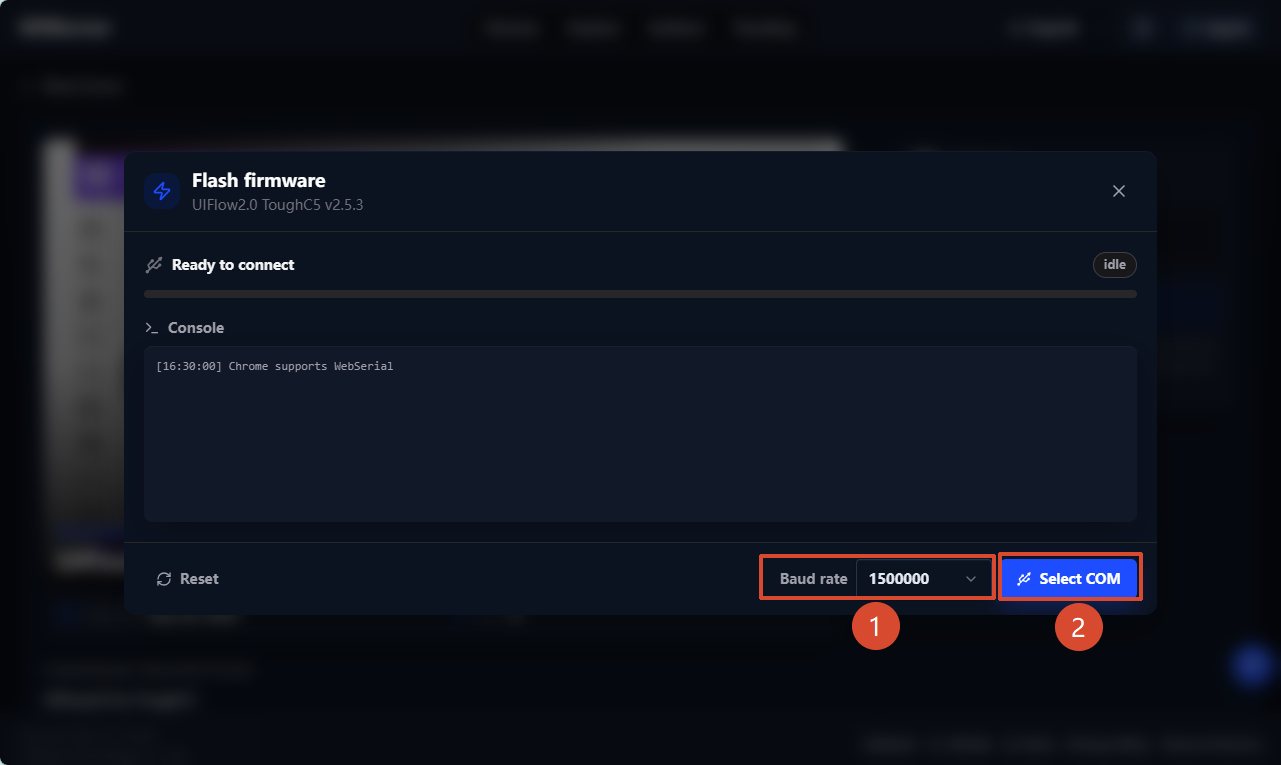
- In the pop-up window, select the baud rate for serial communication, then click
Select COM.
- Select the port corresponding to the device, then click
Connect.
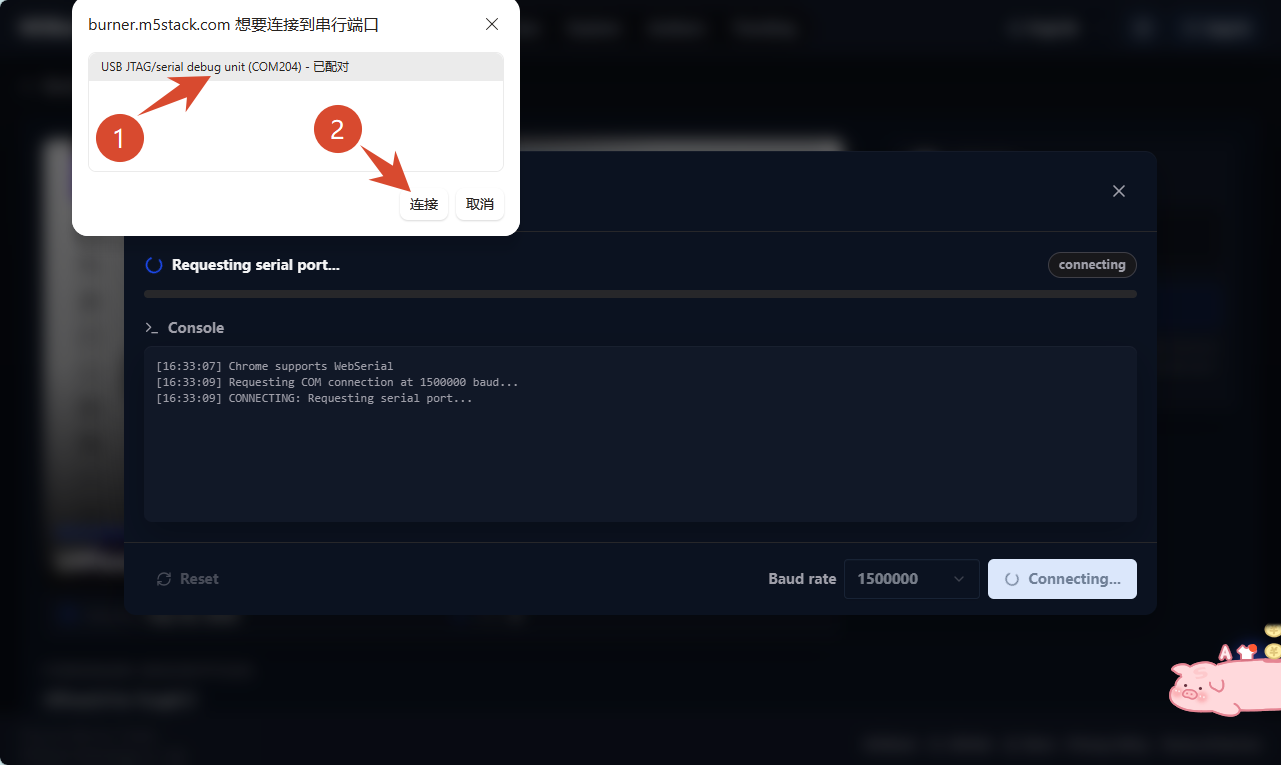
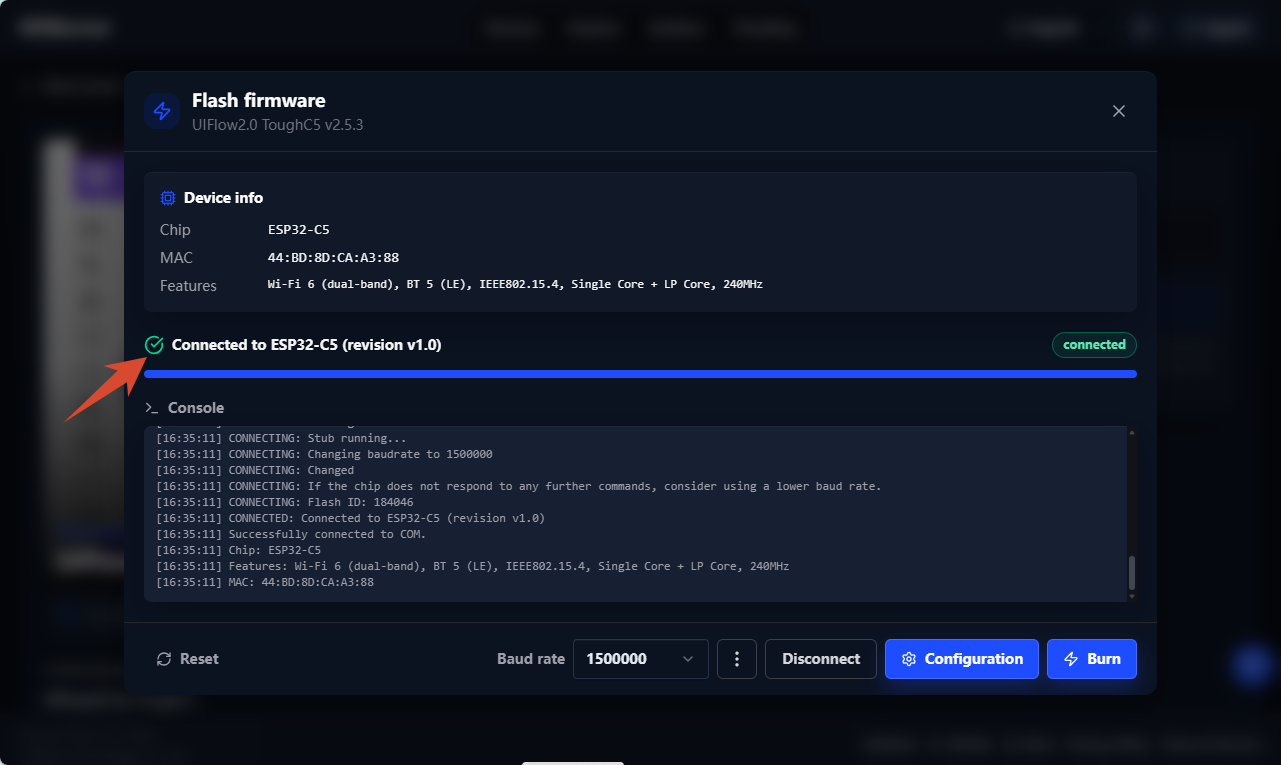
When the interface displays Connected to xxx, the port is connected successfully.
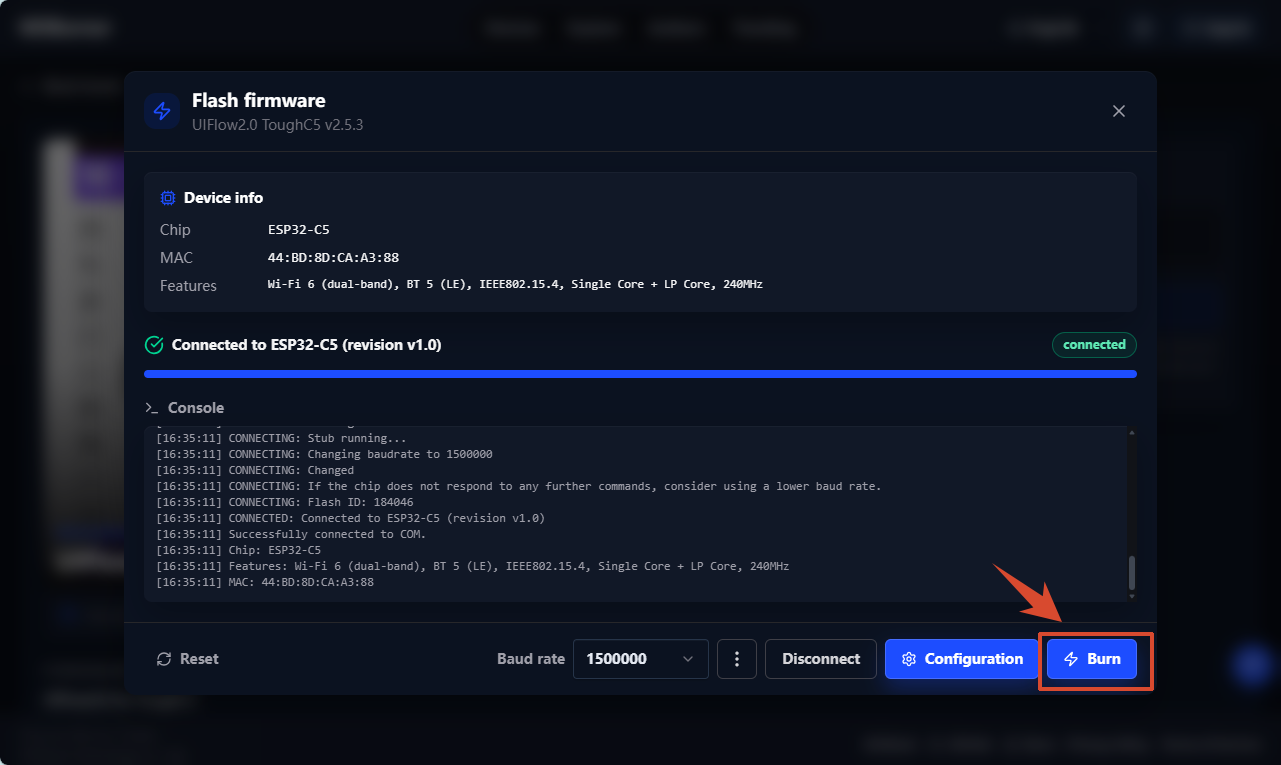
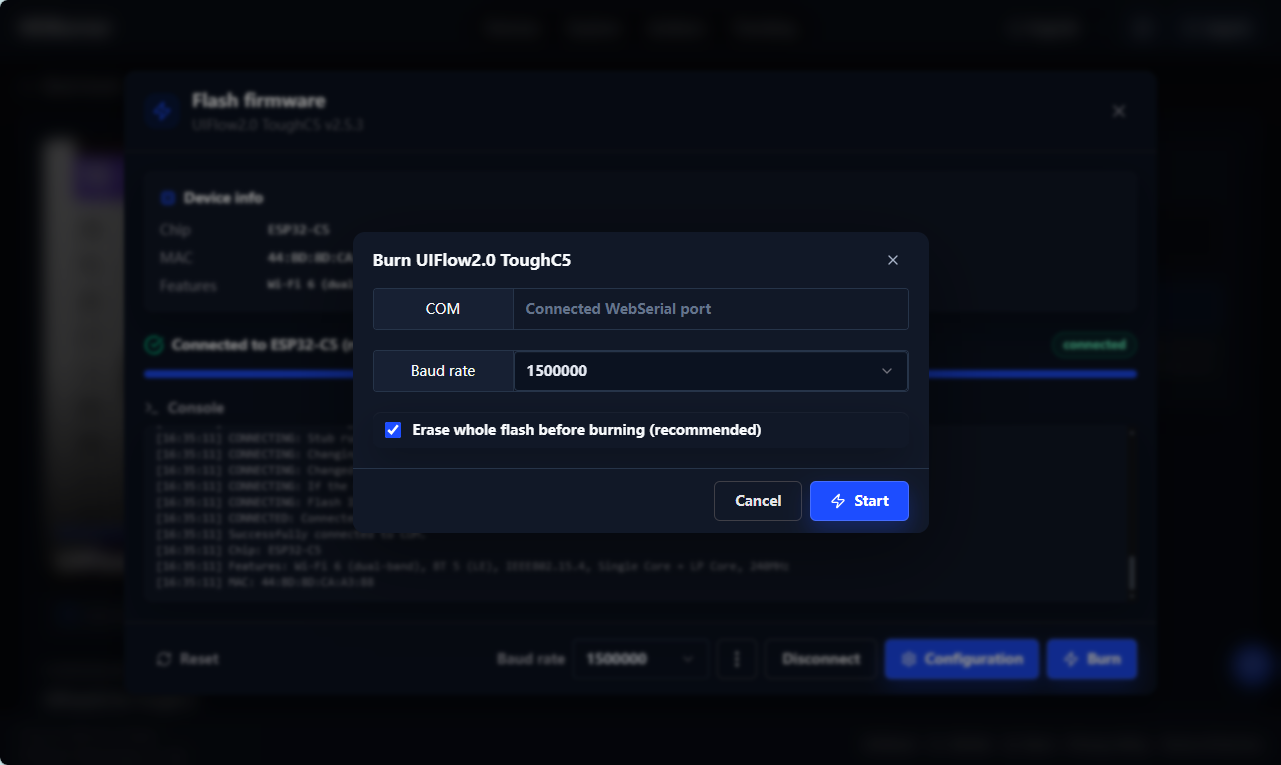
- Click
Burn, and clickStartin the pop-up window.
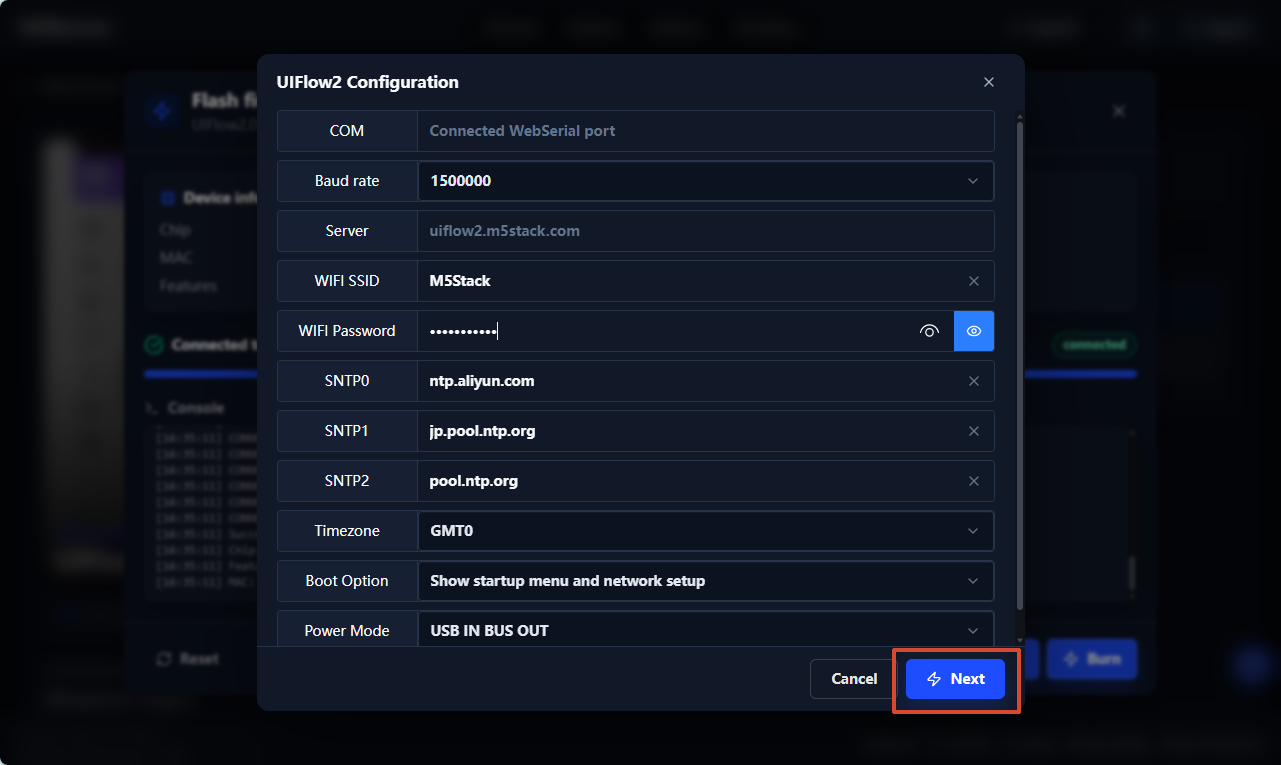
- Fill in the Wi-Fi configuration that the device needs to connect to, including Wi-Fi SSID and Wi-Fi Password, as well as any other device configuration that needs to be added or modified, then click
Next.
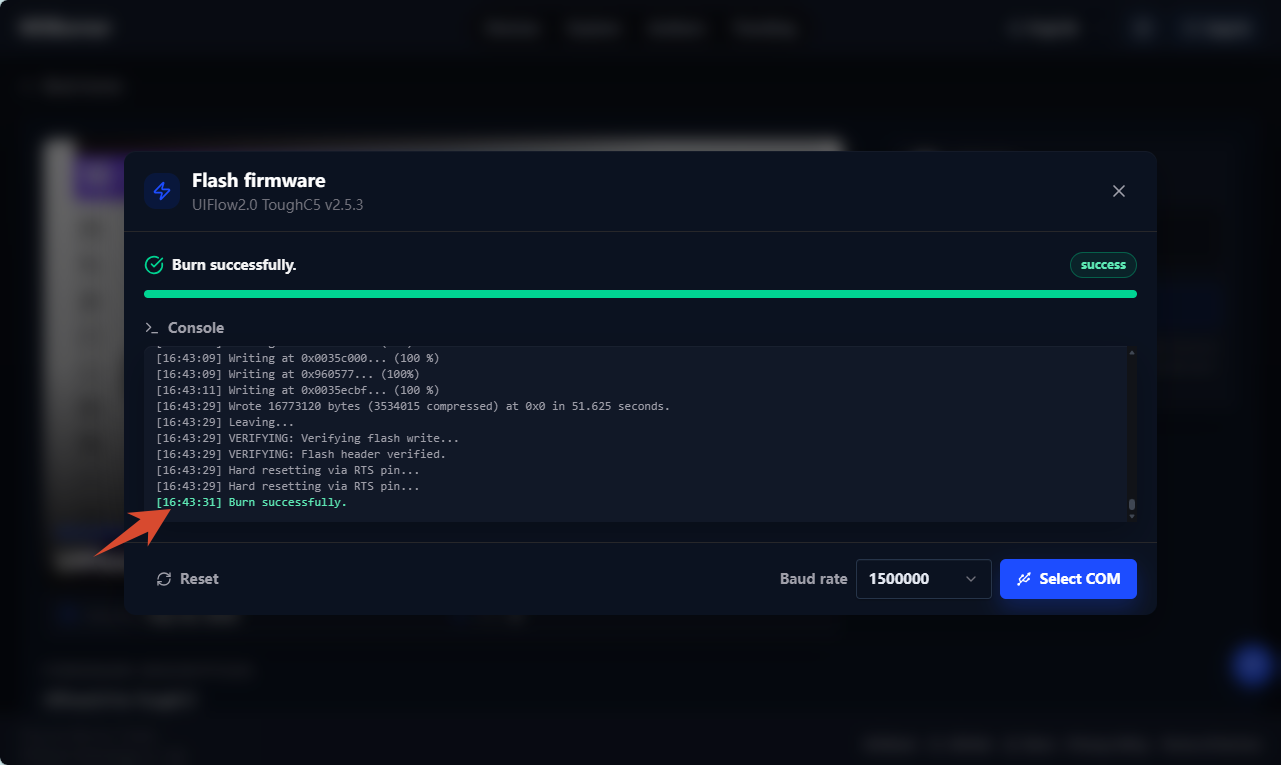
When Burn successfully is displayed, flashing is successful. Please reset the device at this point.
2. Device Connection
ToughC5 supports connecting to UiFlow2 via Access Code (over a wireless network) or USB (wired connection to a computer) to push and debug programs. Refer to the following tutorial:
Access Code Wireless Connection
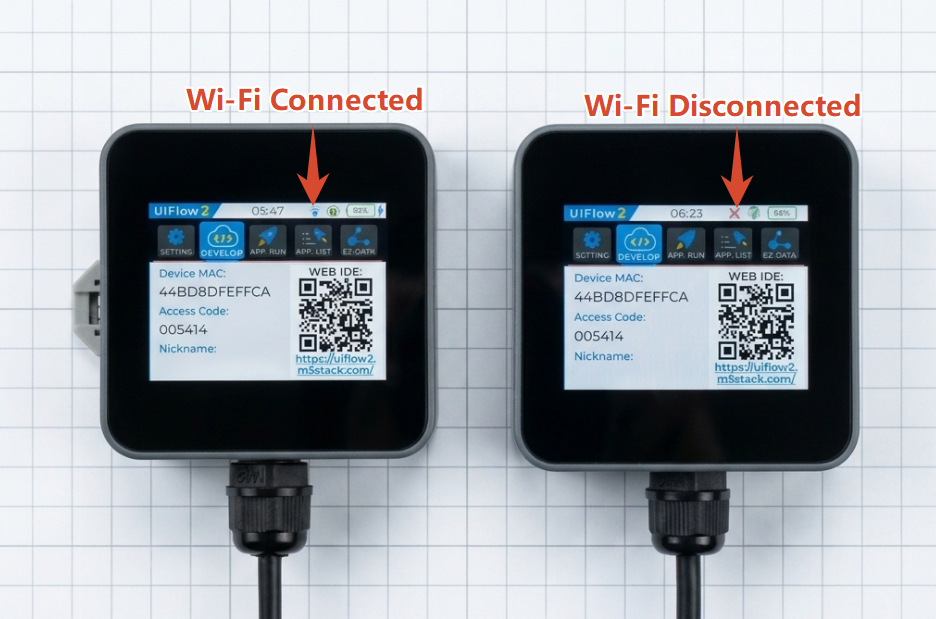
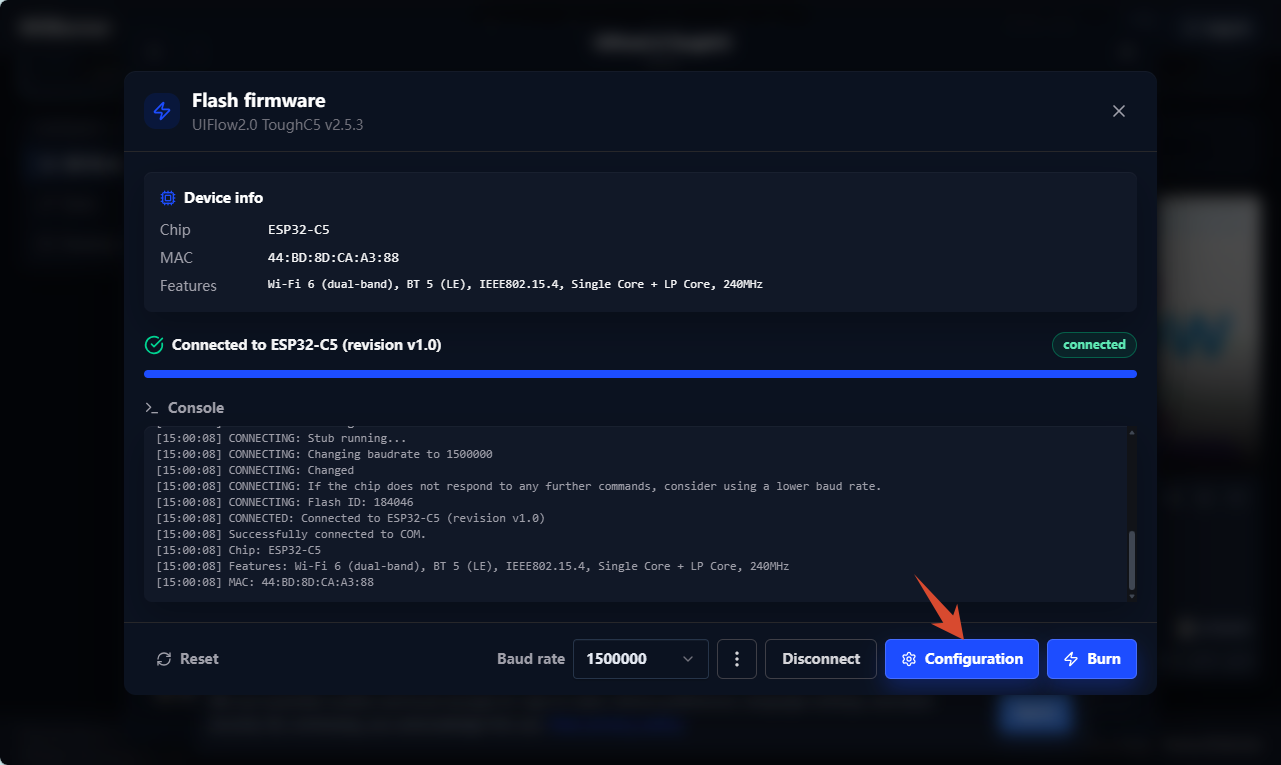
- Before connecting, check the Wi-Fi icon on the screen to confirm that the device is connected to the network. If the network connection fails, check whether the Wi-Fi name and password entered during firmware flashing are correct, then modify them through the
Configurationoption on the WebBurner and flash again.
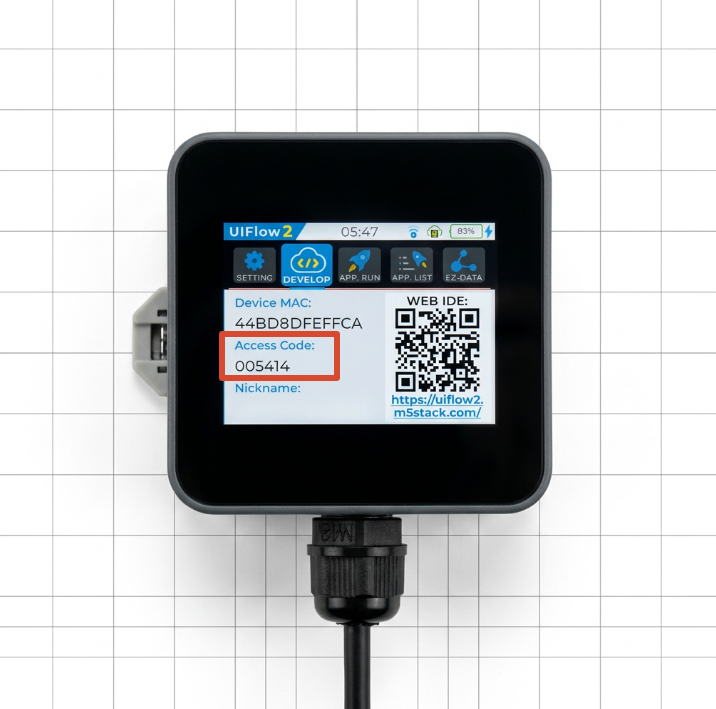
- Check the currently generated valid
Access Codeon the device's UiFlow2 startup screen.
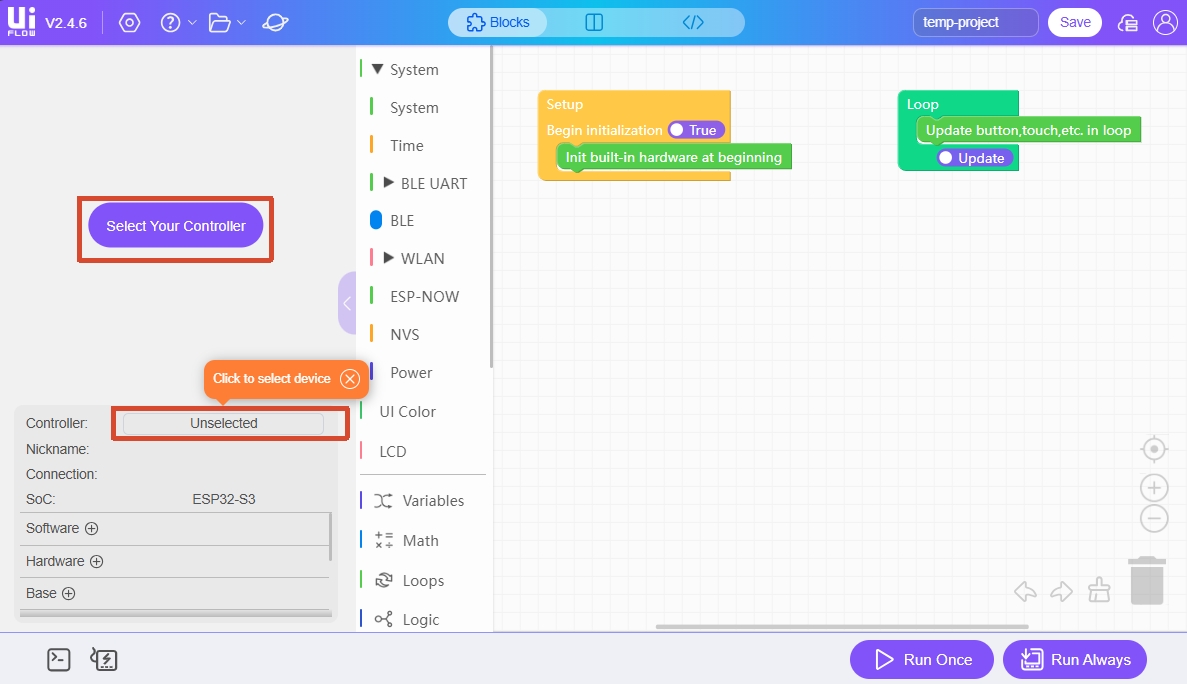
Visit uiflow2.m5stack.com to open the UiFlow2 Web IDE.
Click
Select Your Controller(shown on first visit) or theControllerbutton on the page to enter theSelect Devicepage.
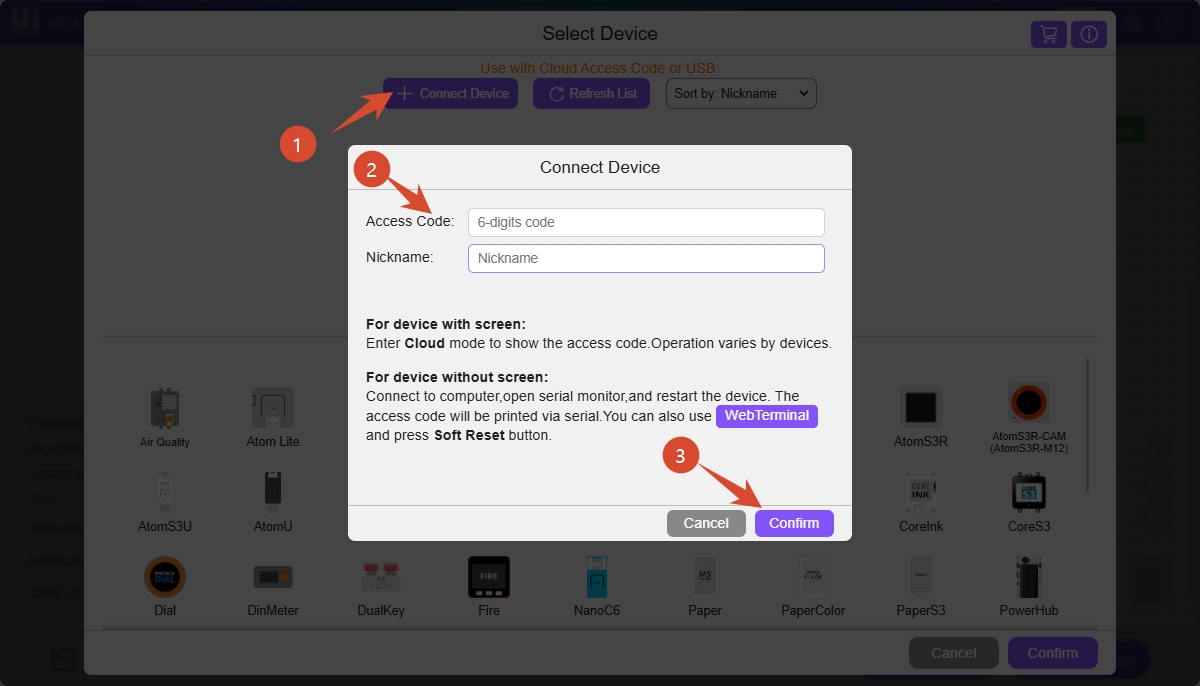
- Click
Connect Device, enter the access code and a custom device name, then clickConfirmto connect ToughC5 to UiFlow2.
2. Closing only the tab, restarting the browser, logging in, or logging out will not affect an established pairing relationship.
3. Once the device is paired by another browser, the original browser's pairing relationship becomes invalid immediately.
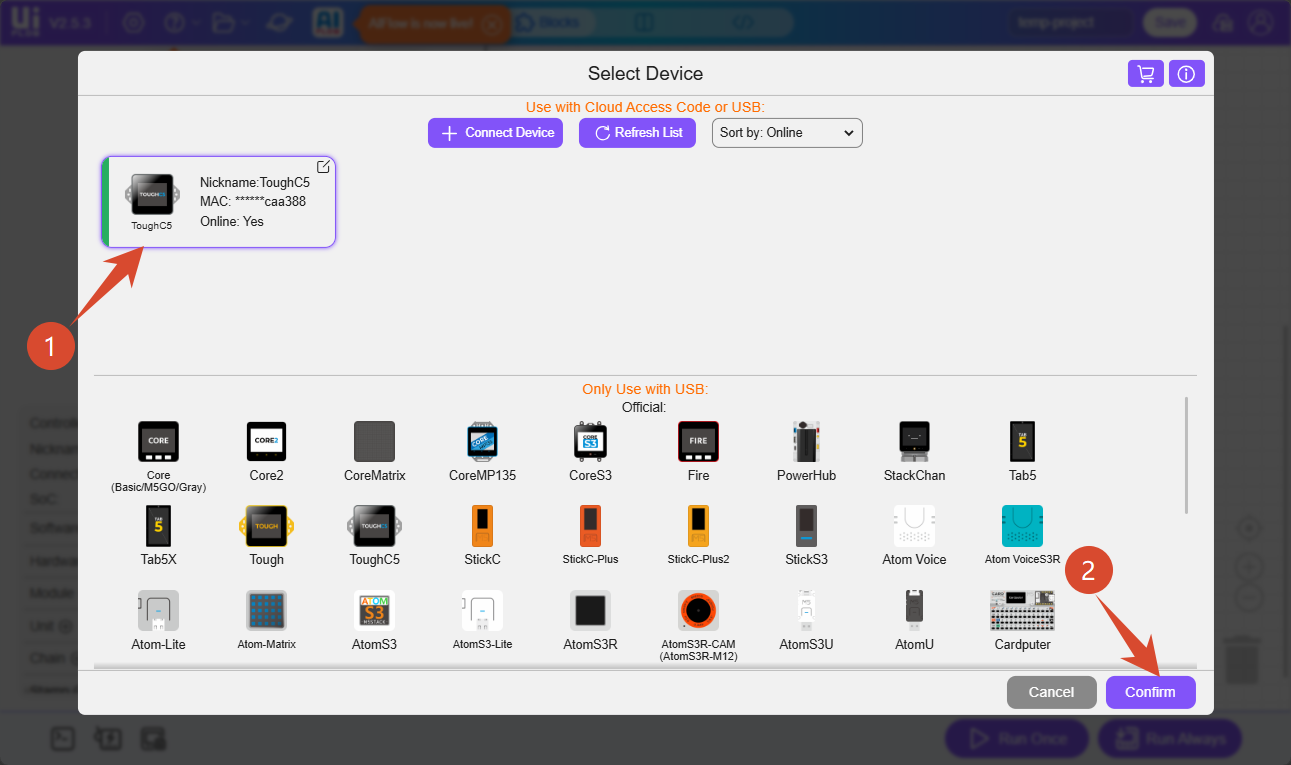
- On the
Select Devicepage, select the connectedToughC5device and clickConfirmto enter the UiFlow2 programming interface.
USB Wired Connection
- Visit uiflow2.m5stack.com to open the UiFlow2 Web IDE, and connect ToughC5 to the computer's USB port.
- Click
Select Your Controller(shown on first visit) or theControllerbutton on the page to enter theSelect Devicepage.
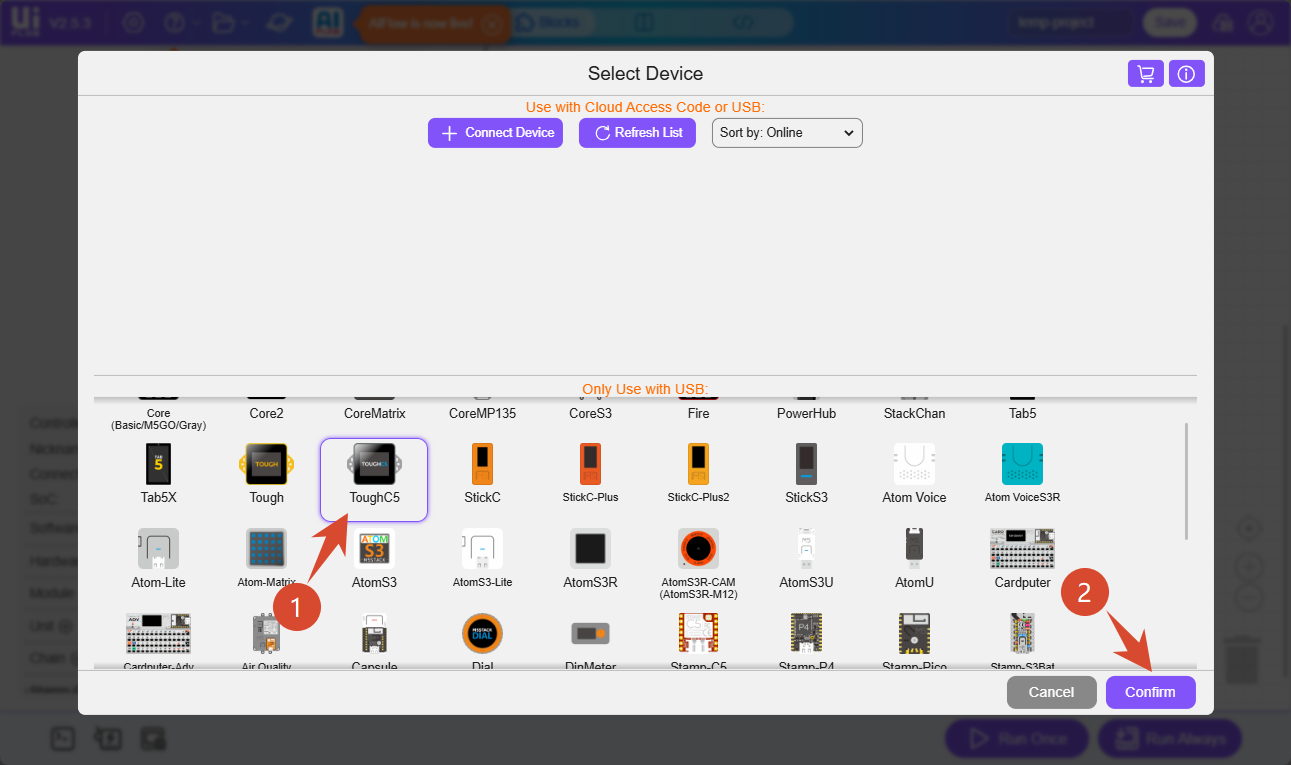
- Select the ToughC5 device in the device list, then click
Confirm.
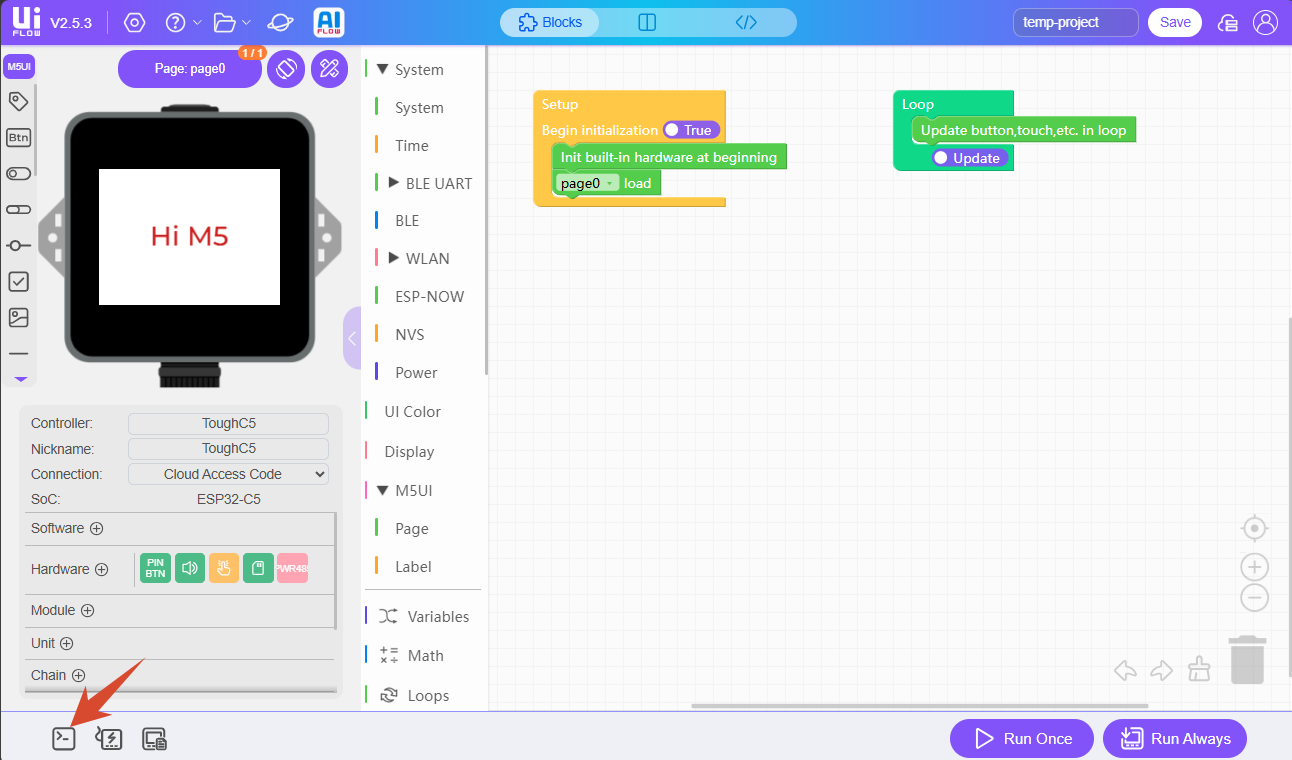
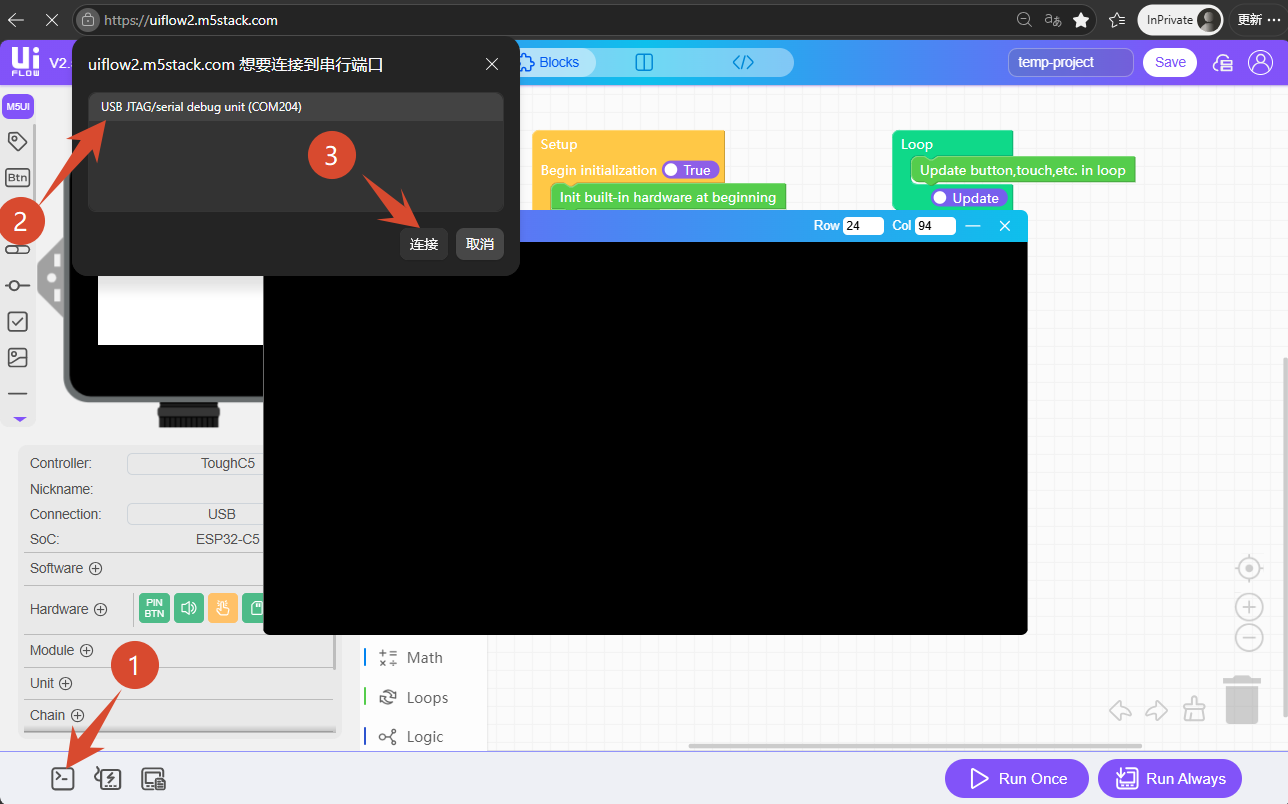
- Click the
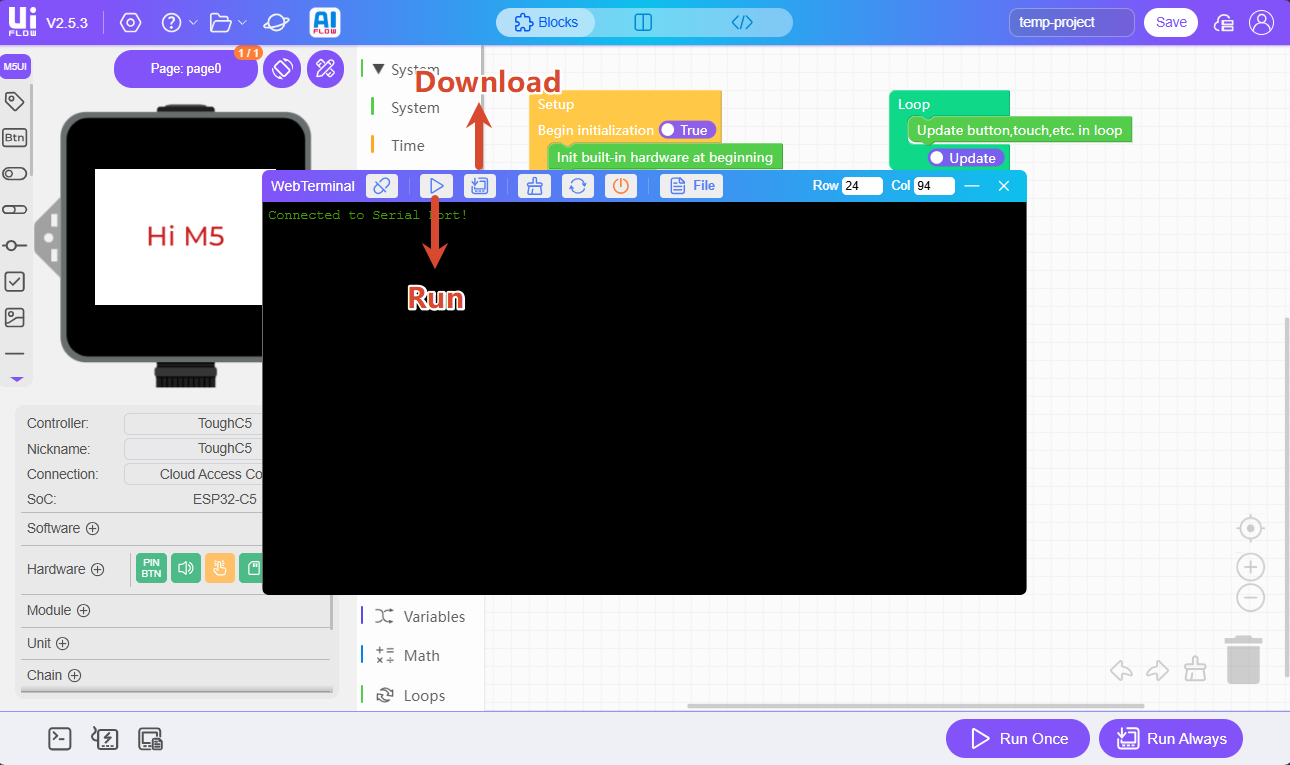
WebTerminalbutton, select the serial port forToughC5in the dialog, and clickConnect.
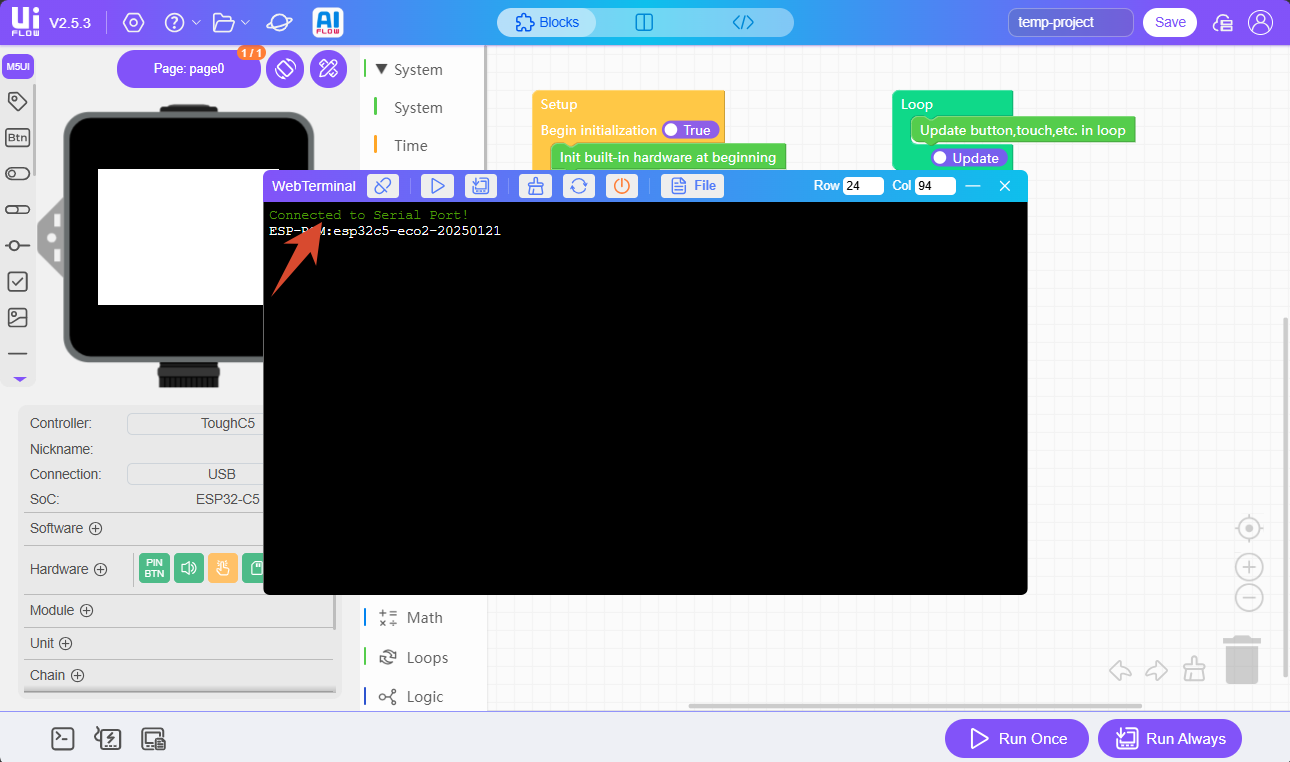
When the WebTerminal screen displays Connected to Serial Port!, the USB connection is successful.
3. Program Run and Download
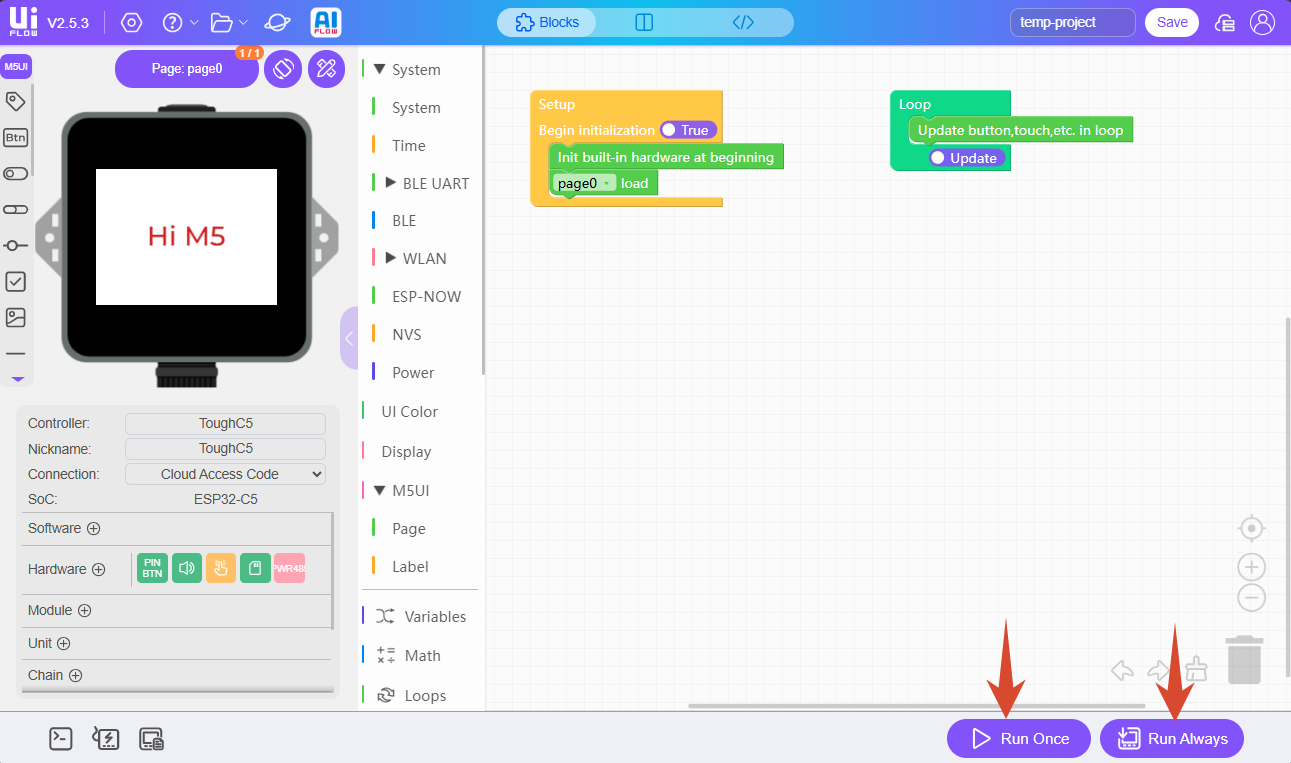
After the device is connected to UiFlow2, you can drag Blockly blocks to edit programs.
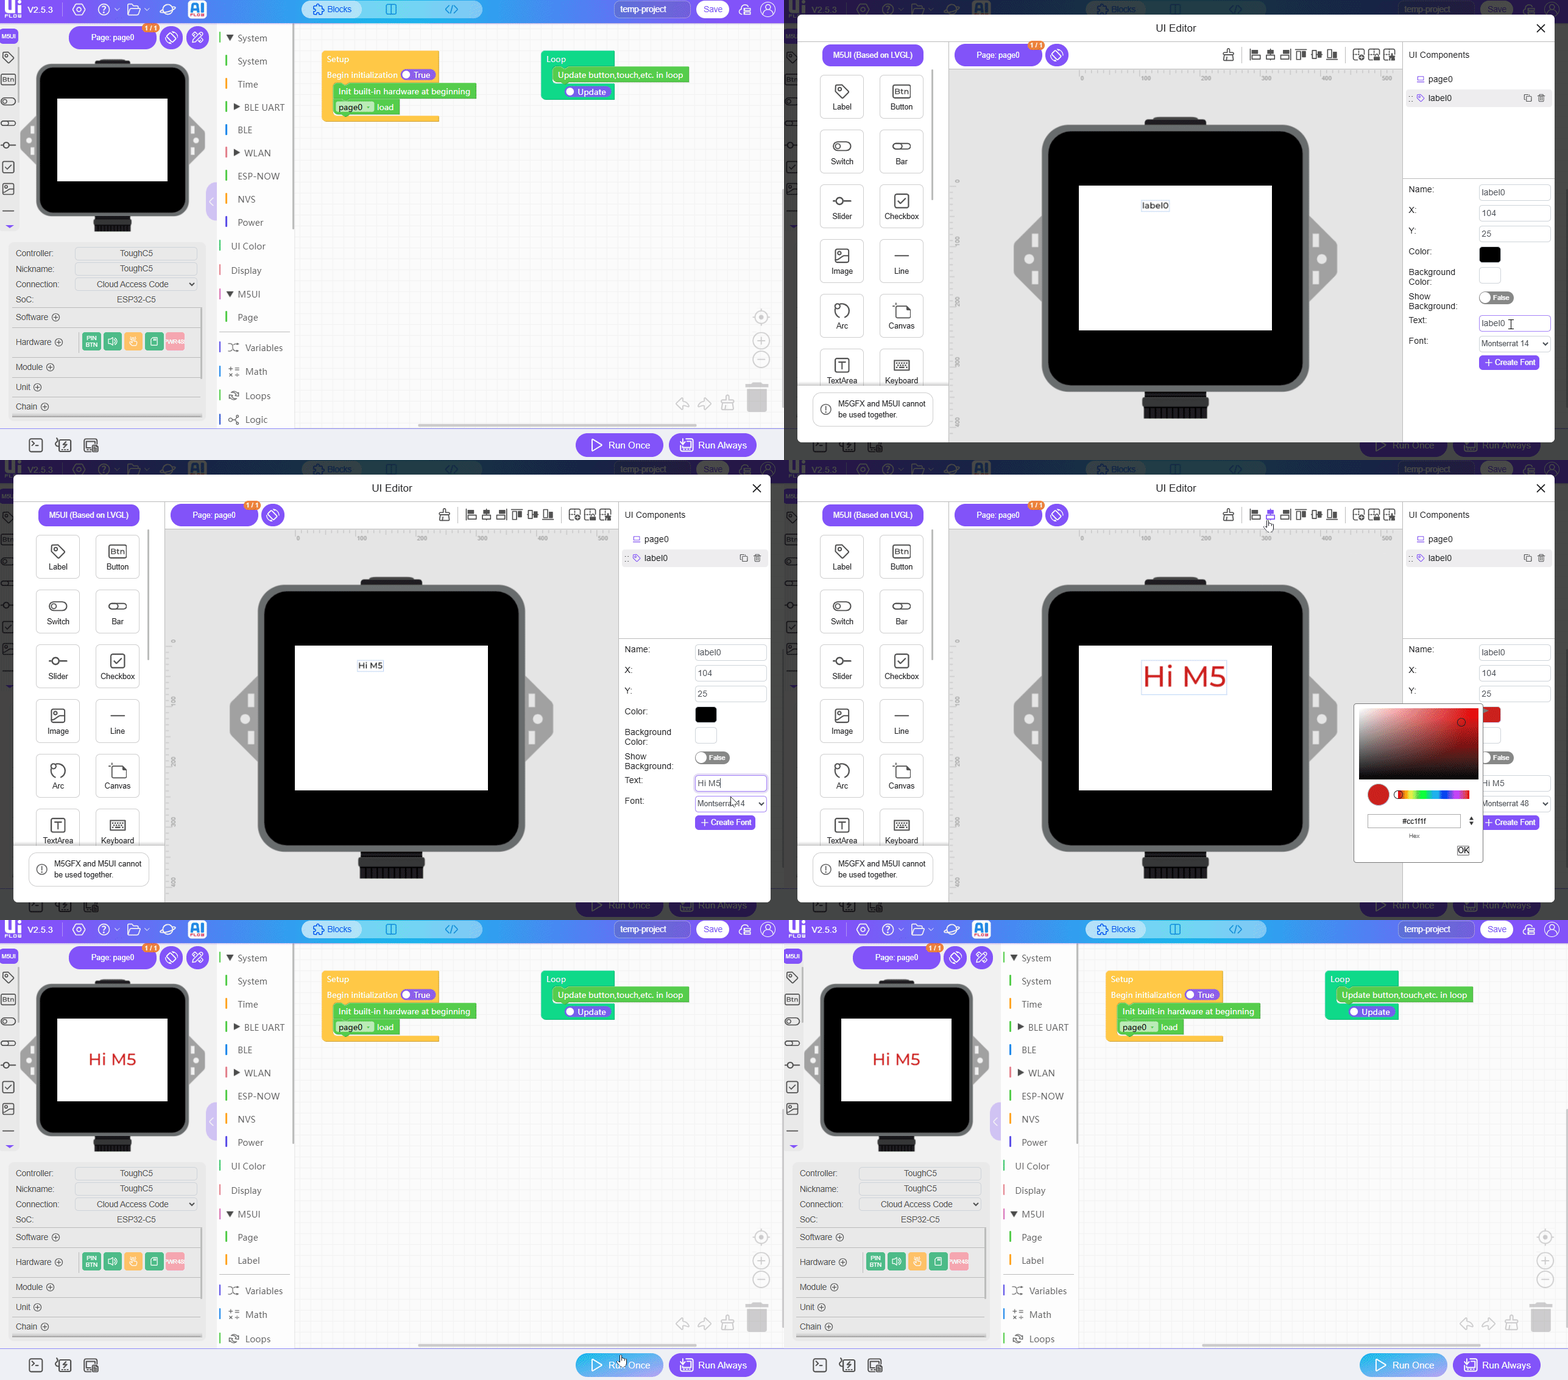
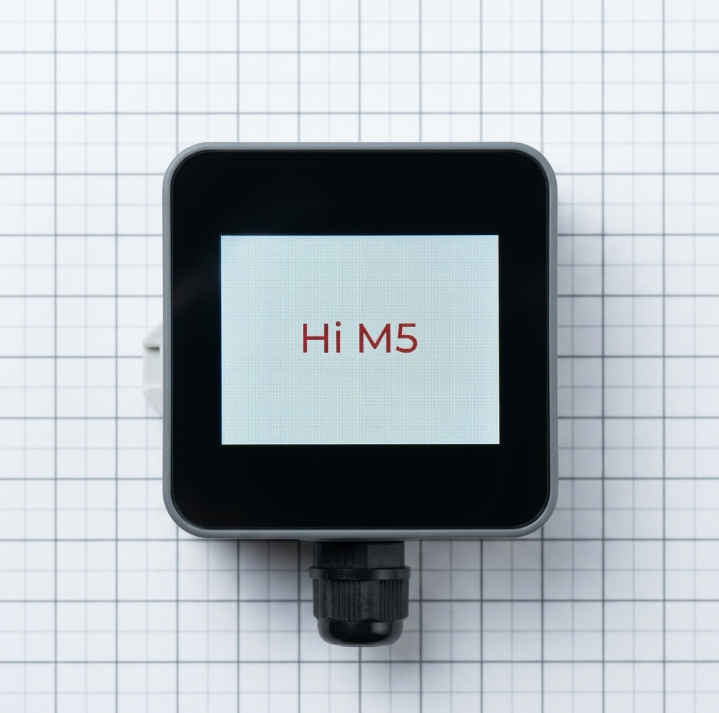
After editing the program, click the Run Once button in the lower-right corner to run the program once for testing. Click Run Always to download the program to the device.
You can also run once or download the program in the WebTerminal window.