StackFlow AI Platform
Devices & Quick Start
Models
Qwen3
DeepSeek-R1
AI Pyramid Applications
Module LLM Applications
CV Vision Application
Vision Language Model (VLM)
Large Language Model (LLM)
Voice Assistant
AI Pyramid Deployment of OpenClaw
1. Introduction
OpenClaw is an open-source AI Agent framework that can connect to local or cloud Large Language Models (LLMs) to achieve automated tasks and intelligent interaction. This document will introduce how to perform image flashing, initial configuration, and initial access for OpenClaw on AI Pyramid.
2. OpenClaw Image Burning
Download the OpenClaw image file below and refer to AI Pyramid Image Burning to complete the burning.
| Firmware Version | Download Link |
|---|---|
| AI_Pyramid_openclaw_emmc_ubuntu_rootfs_desktop_V3.6.4 | Download |
3. Logging into the Device
After completing the image burning, the device will automatically enable the OpenClaw initialization boot page (only displayed when the initialization is not completed).
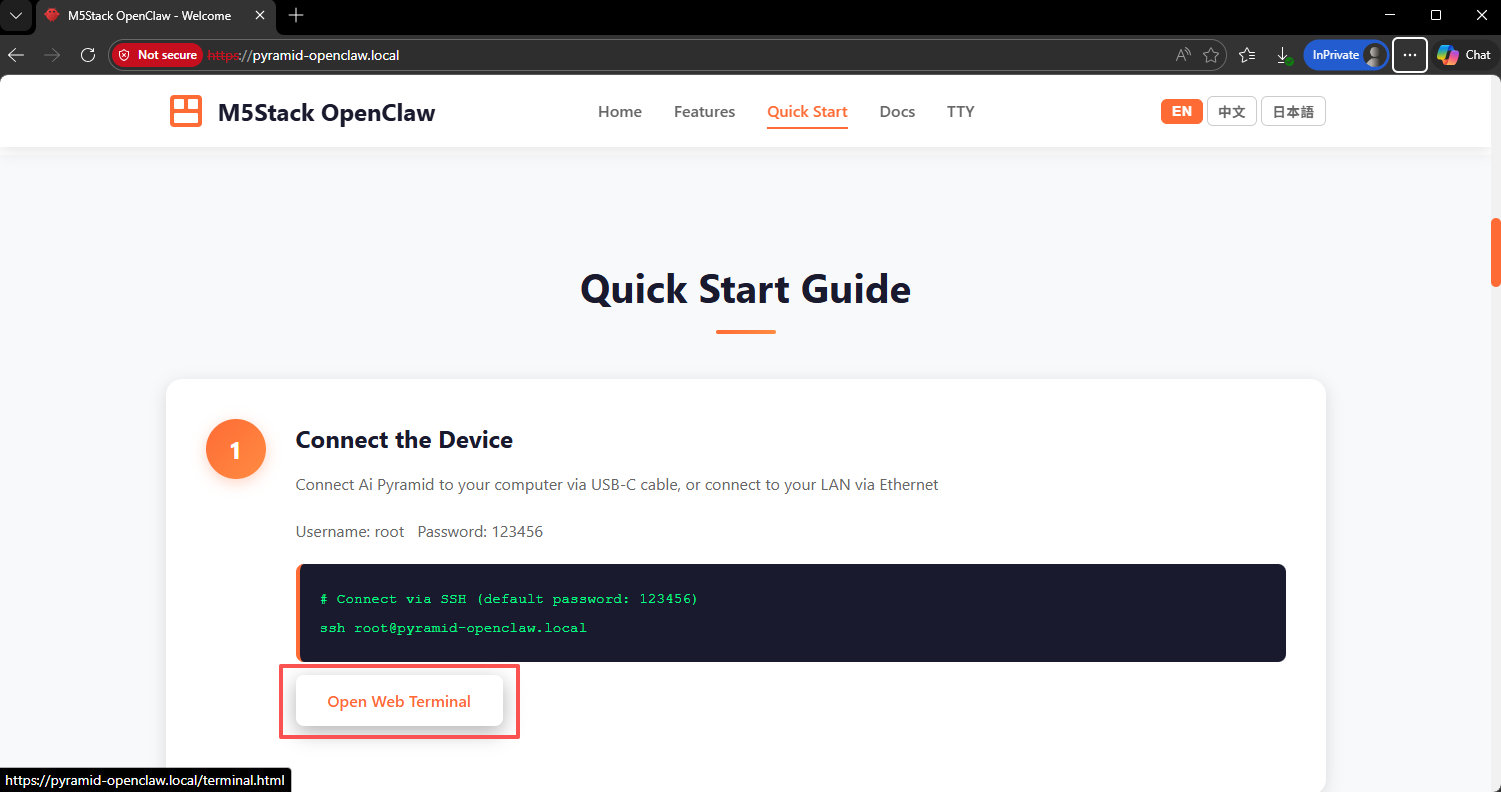
3.1 Entering the Web Terminal
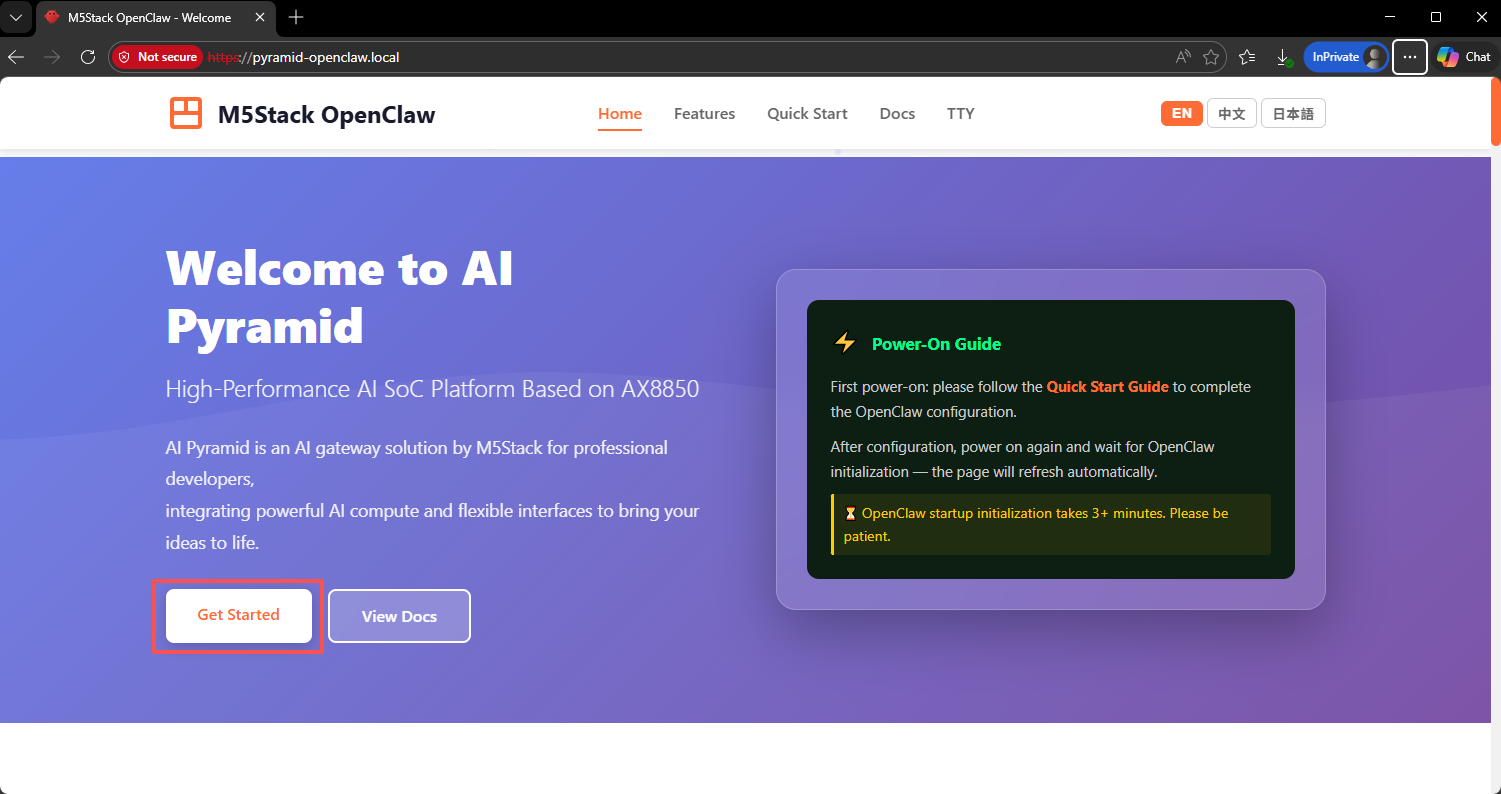
LAN Access (Recommended)
- Power on the AI Pyramid and connect it to the Ethernet.
- On a computer within the same local area network, access
https://pyramid-openclaw.localthrough a browser. - Scroll down to
Get Startedand clickOpen Web Terminalto enter the terminal.
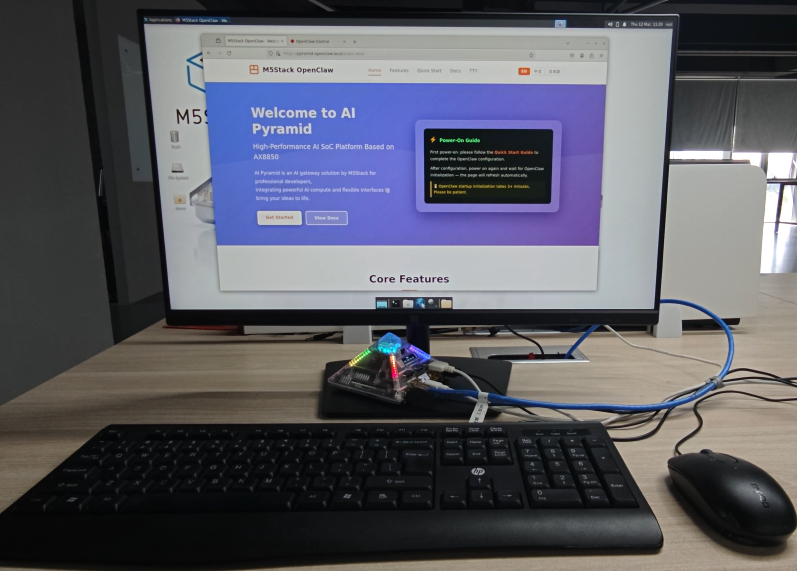
Local Desktop Access
Connect a monitor, mouse, and keyboard to the AI Pyramid. In the desktop browser, access https://pyramid-openclaw.local. The operation method is the same as LAN access.
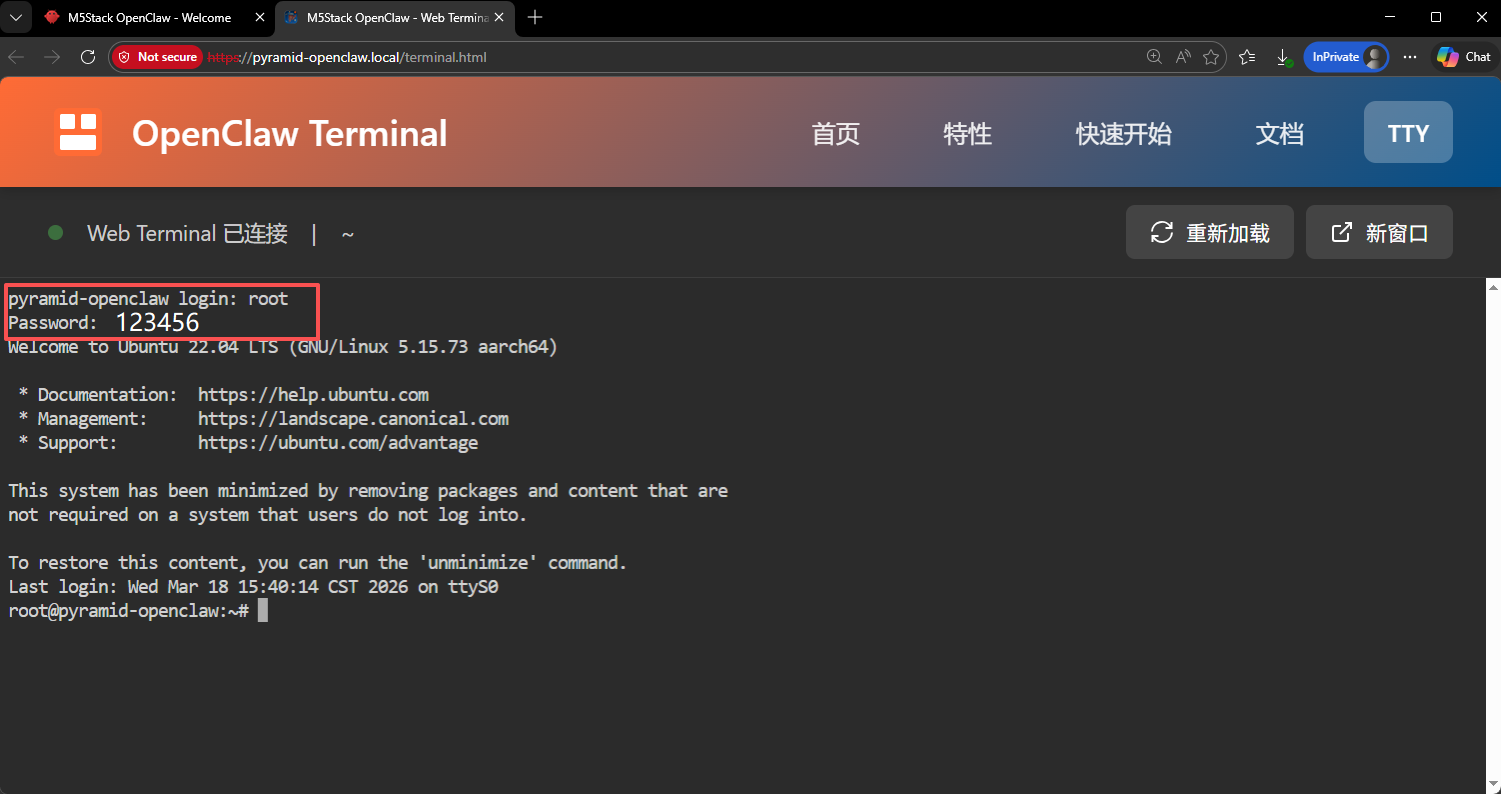
3.2 Logging into the Terminal
In the Web Terminal, enter the username root and password 123456 to log into the device terminal:
4. OpenClaw Initialization
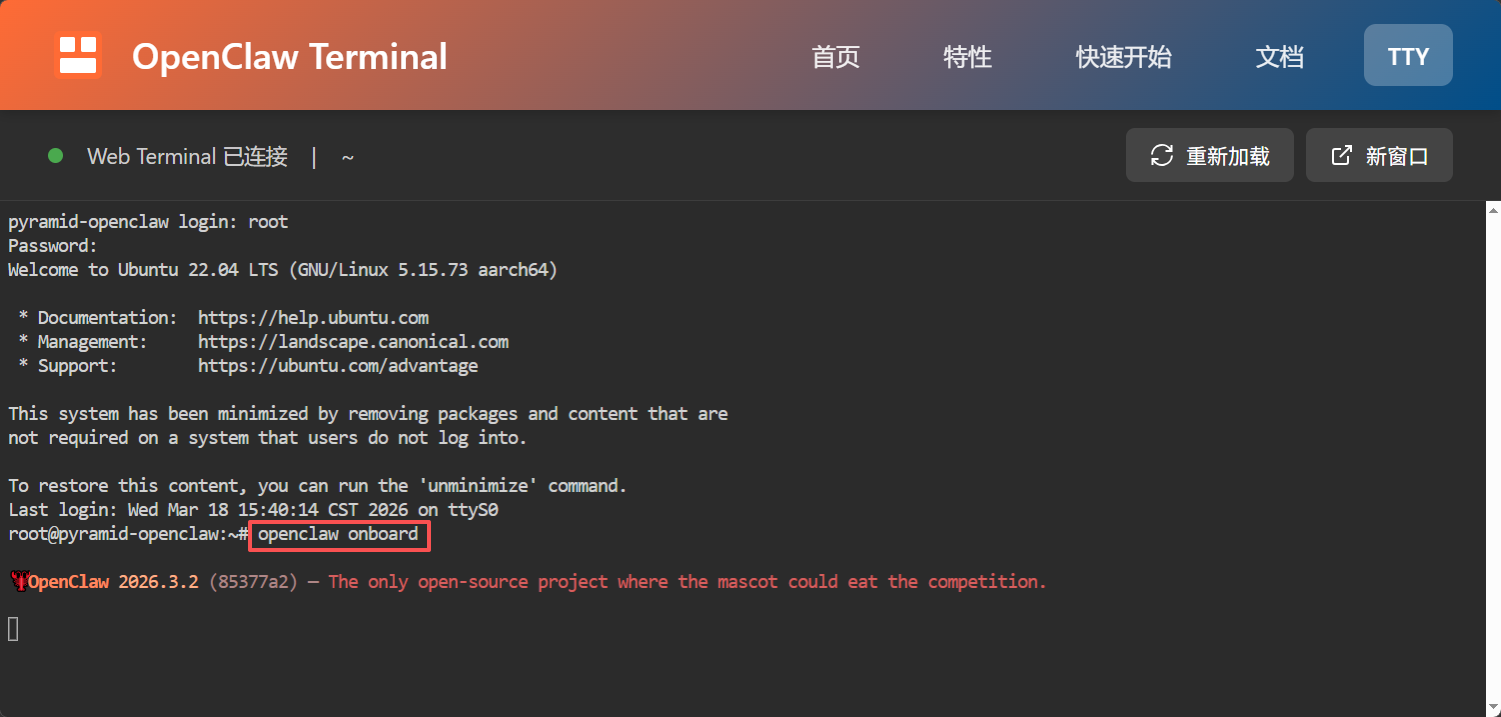
Take the QuickStart configuration method to access the Qwen API as an example. Directly run the following commands to start the initialization (the device is pre - installed with the OpenClaw service):
- Execute the initialization command.
openclaw onboardTip: Initialization usually takes about 2 minutes. Please be patient.
- Agree to the security prompt: After reading the security prompt, select
Yesto continue:
◆ I understand this is personal - by - default and shared/multi - user use requires lock - down. Continue?
● Yes / ○ No- Select the configuration mode: Select
QuickStart:
◆ Onboarding mode
│ ● QuickStart (Configure details later via openclaw configure.)
│ ○ Manual- Select the AI model provider.
In this case, Qwen (OAuth) is used as an example. You can also choose other providers according to your subscription:
◆ Model/auth provider
│ ○ OpenAI
│ ○ Anthropic
│ ● Qwen (OAuth)
│ ○ OpenRouter
│ ○ Skip for now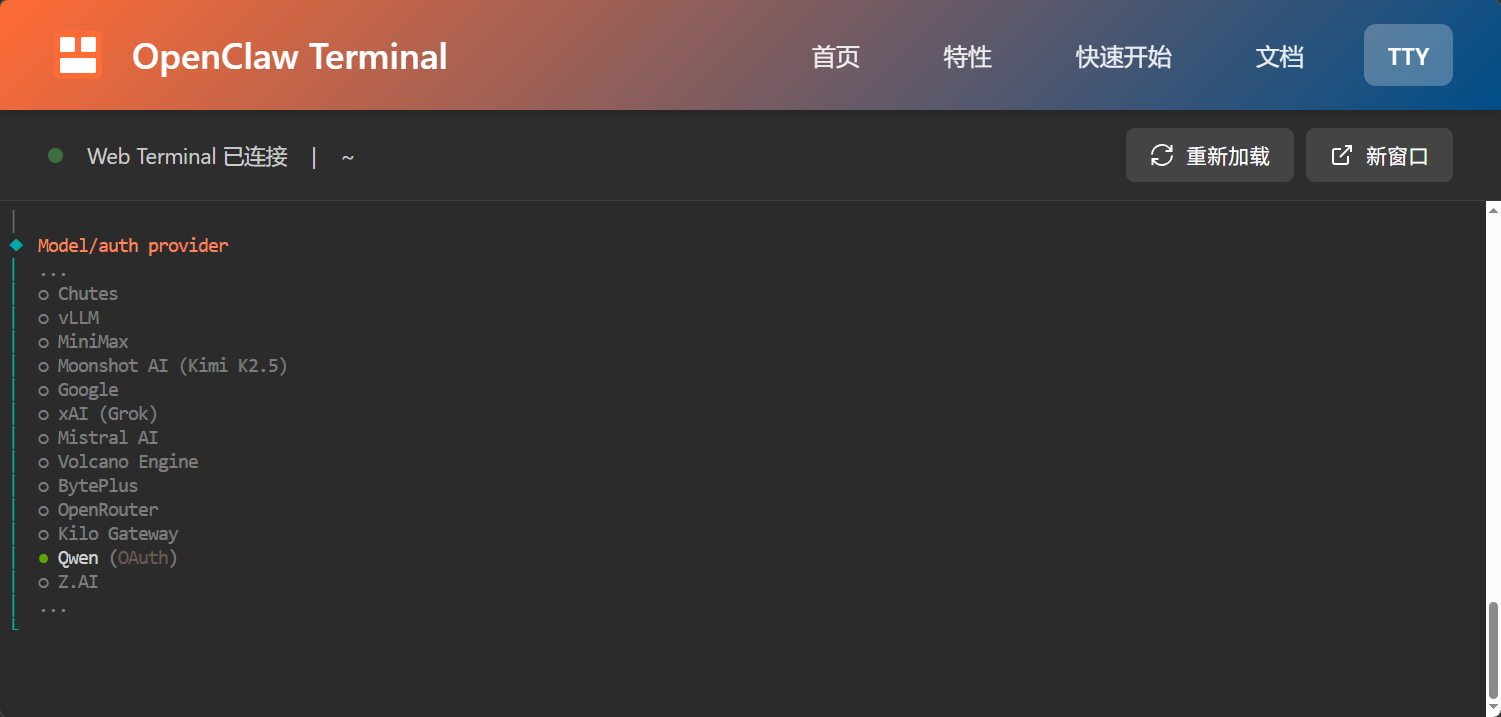
- Complete the OAuth authentication: Copy the displayed link and open it in a browser to complete the Qwen OAuth authentication (register first if you don't have an account):
◇ Qwen OAuth
│ Open https://chat.qwen.ai/authorize?user_code = 1 - _VFKMX&client = qwen - code to approve access.
│ If prompted, enter the code 1 - _VFKMX.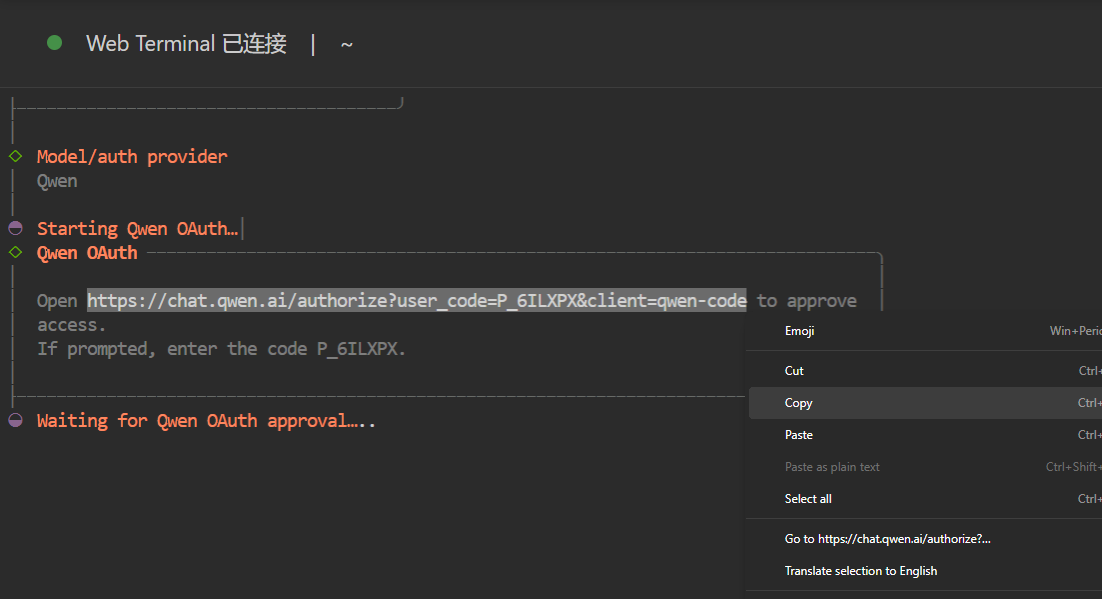
- Confirm the default model: After successful authentication, select
Keep currentto keep the default model:
◆ Default model
│ ● Keep current (qwen - portal/coder - model)
│ ○ Enter model manually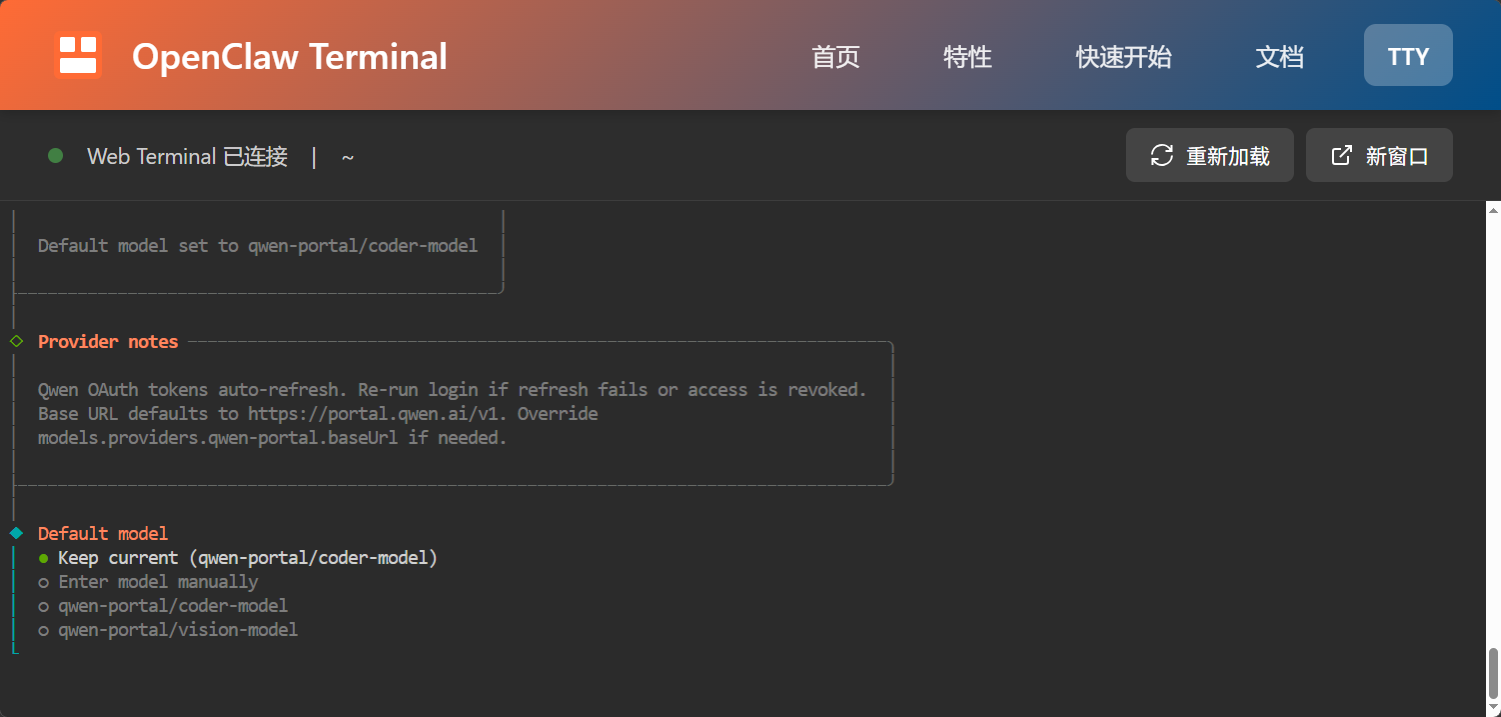
- Skip the channel configuration: Select
Skip for nowto skip the communication channel configuration:
◆ Select channel (QuickStart)
│ ○ Telegram (Bot API)
│ ○ Discord (Bot API)
│ ● Skip for now- Skip the Skills installation: Select
Noto not install Skills for now:
◆ Configure skills now? (recommended)
│ ○ Yes / ● No- Skip the Hooks configuration: Press the spacebar to select
Skip for nowand press Enter to confirm:
◆ Enable hooks?
│ ◼ Skip for now
│ ◻ 🚀 boot - md
│ ◻ 📝 command - logger- Save the Token: After the initialization is completed, be sure to save the displayed
tokenvalue. This is the credential for accessing the OpenClaw console later:
◇  Dashboard ready
│  Dashboard link (with token):
│  http://127.0.0.1:18789/#token = 0c4a936a196d3be5812e7624d5cb419b0b364c308f68b799
│  Copy/paste this URL in a browser on this machine to control OpenClaw.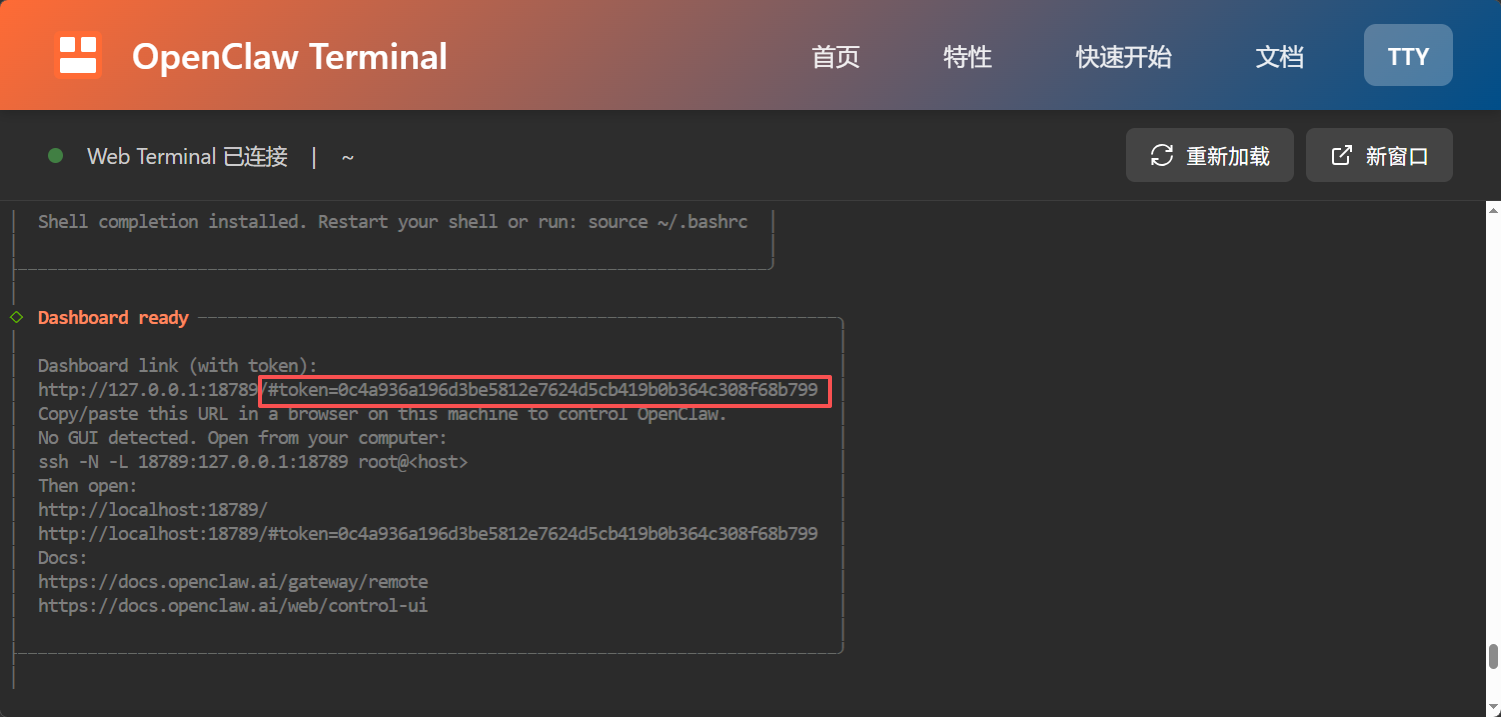
- Configure LAN access: Execute the following commands in sequence in the terminal to enable LAN access:
openclaw config set gateway.bind lan
openclaw config set gateway.controlUi.allowInsecureAuth true
openclaw config set gateway.controlUi.allowedOrigins '["http://127.0.0.1","http://127.0.0.1:18789","https://pyramid-openclaw.local"]'
openclaw config set gateway.controlUi.enabled true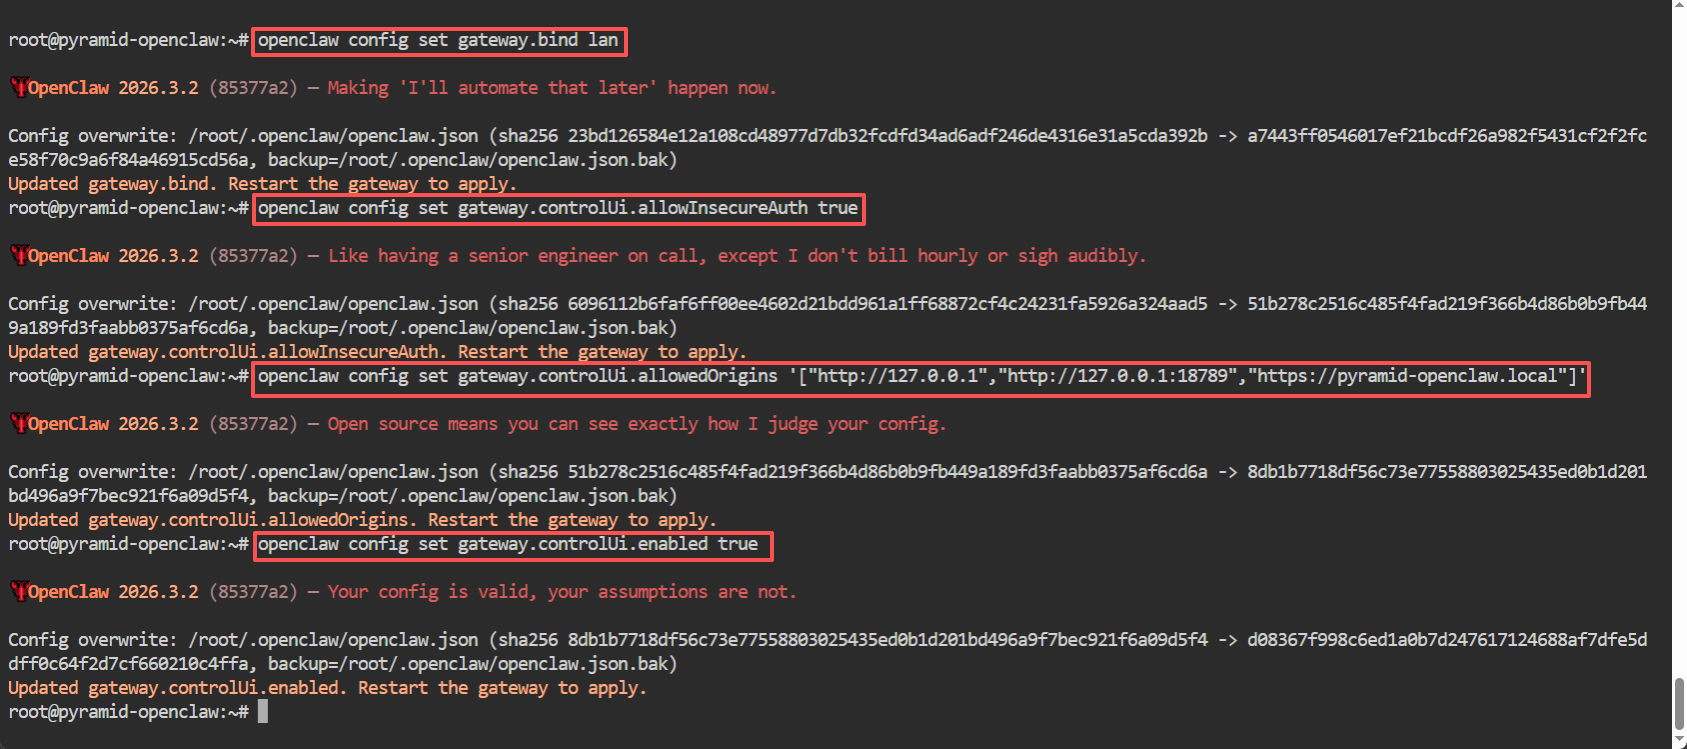
- Access the OpenClaw console: Open the console address in a computer browser (replace
YOUR_TOKEN_VALUEwith the token saved in step 10):
Within the same local area network, access through the following domain name plus the token parameter:
https://pyramid-openclaw.local#token = YOUR_TOKEN_VALUE- Device pairing: The first time you access the console, you need to complete device pairing. Execute the following command in the device terminal to view the devices to be paired:
openclaw devices listThen approve the pairing request (replace <requestId> with the actual device ID):
Note: The requestId is only valid for the current browser. If you change the device or browser, you need to view the requestId again and re - initiate the pairing.
openclaw devices approve <requestId>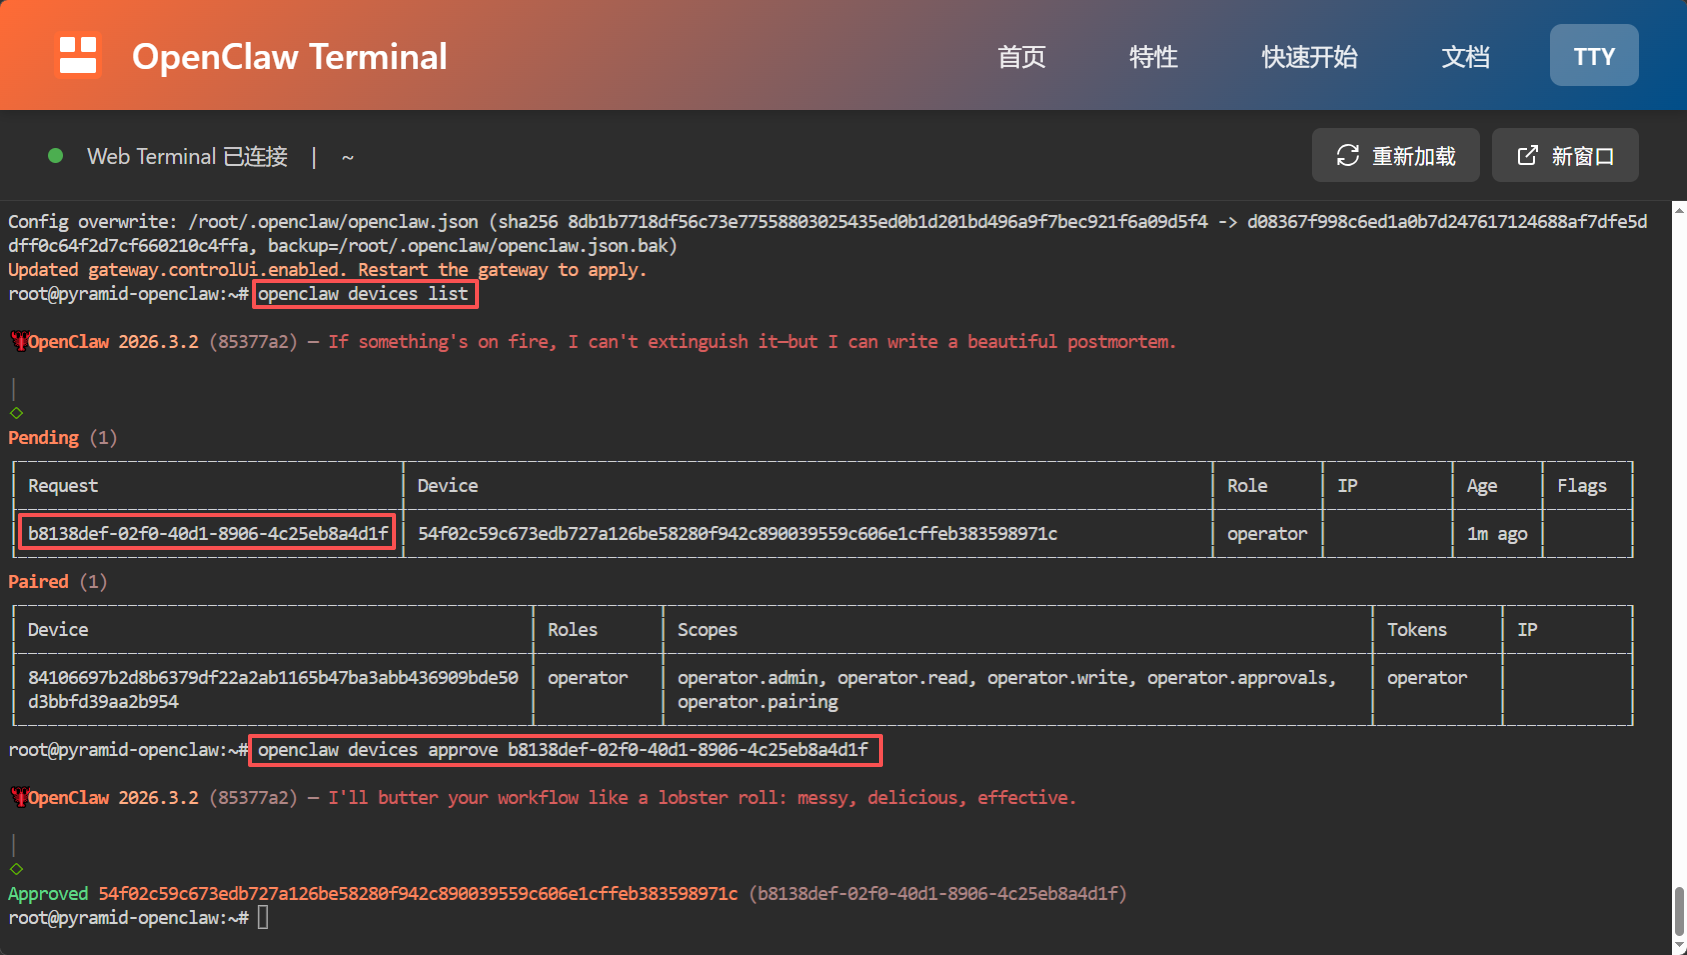
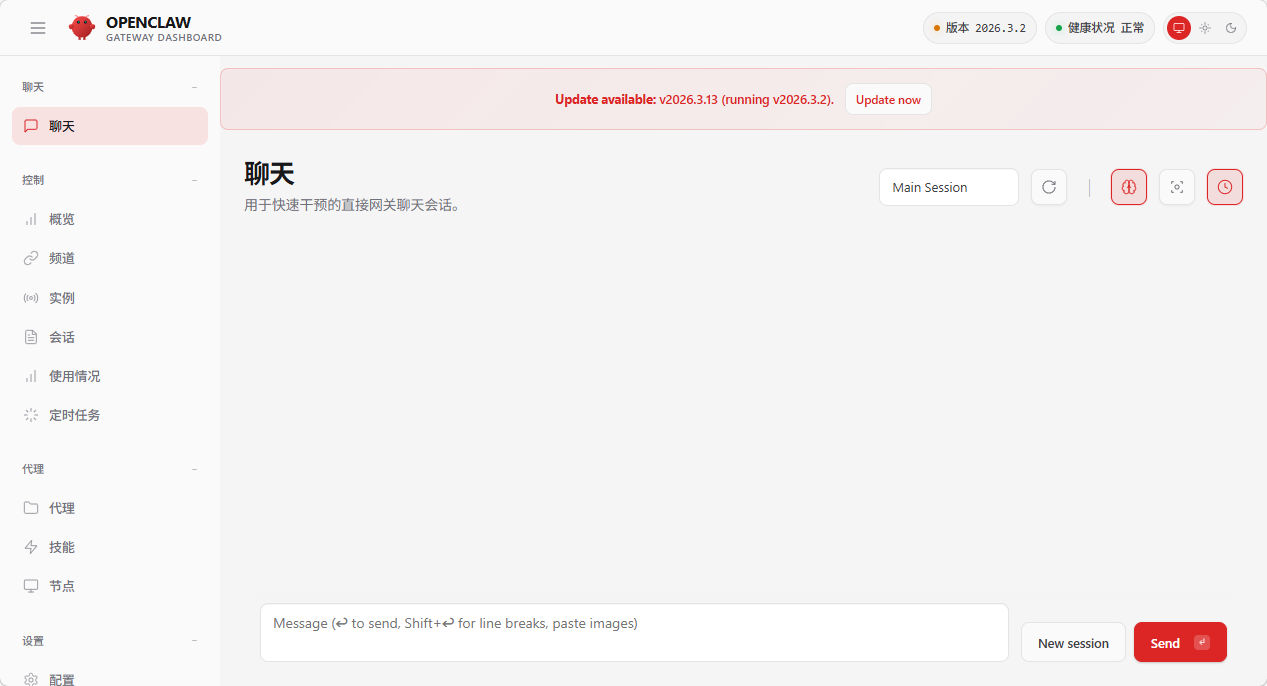
After the configuration is completed, the console can be accessed normally on the web - side.
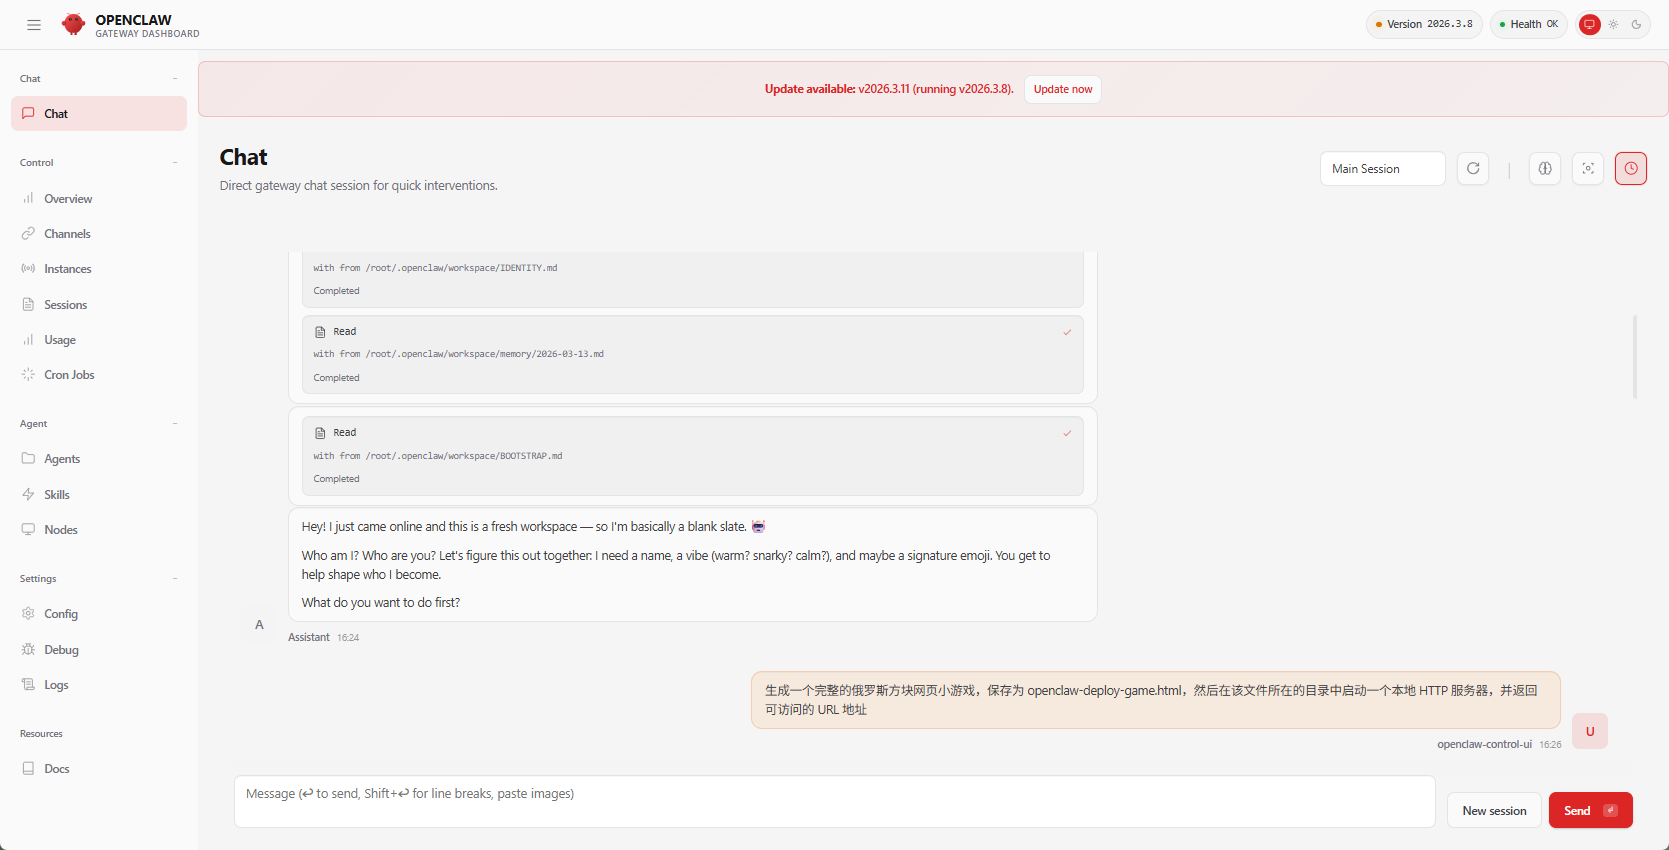
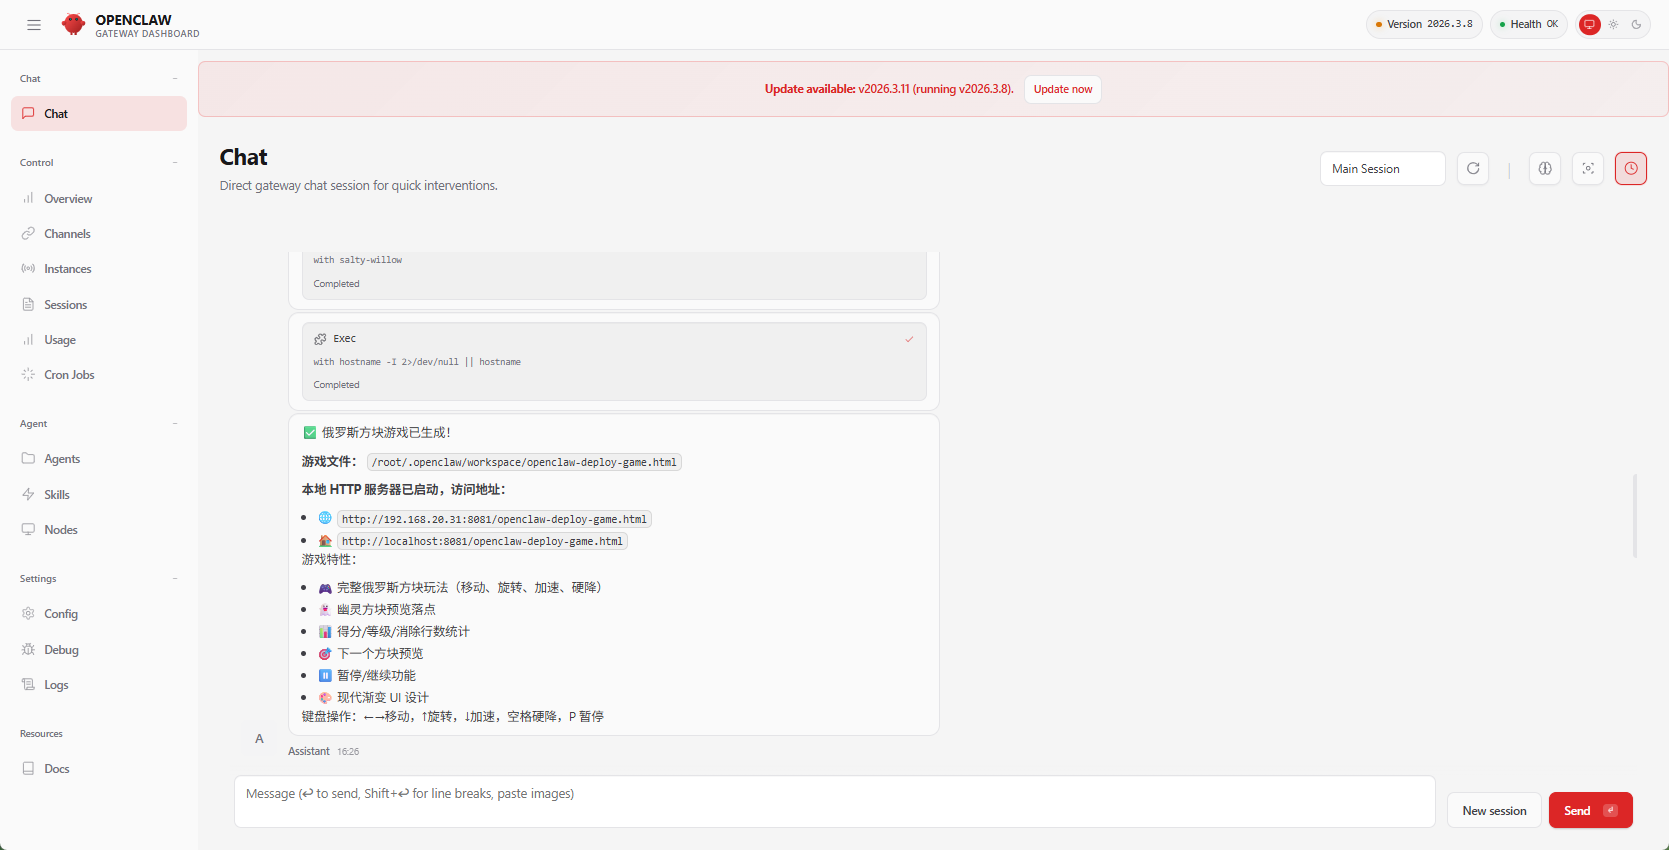
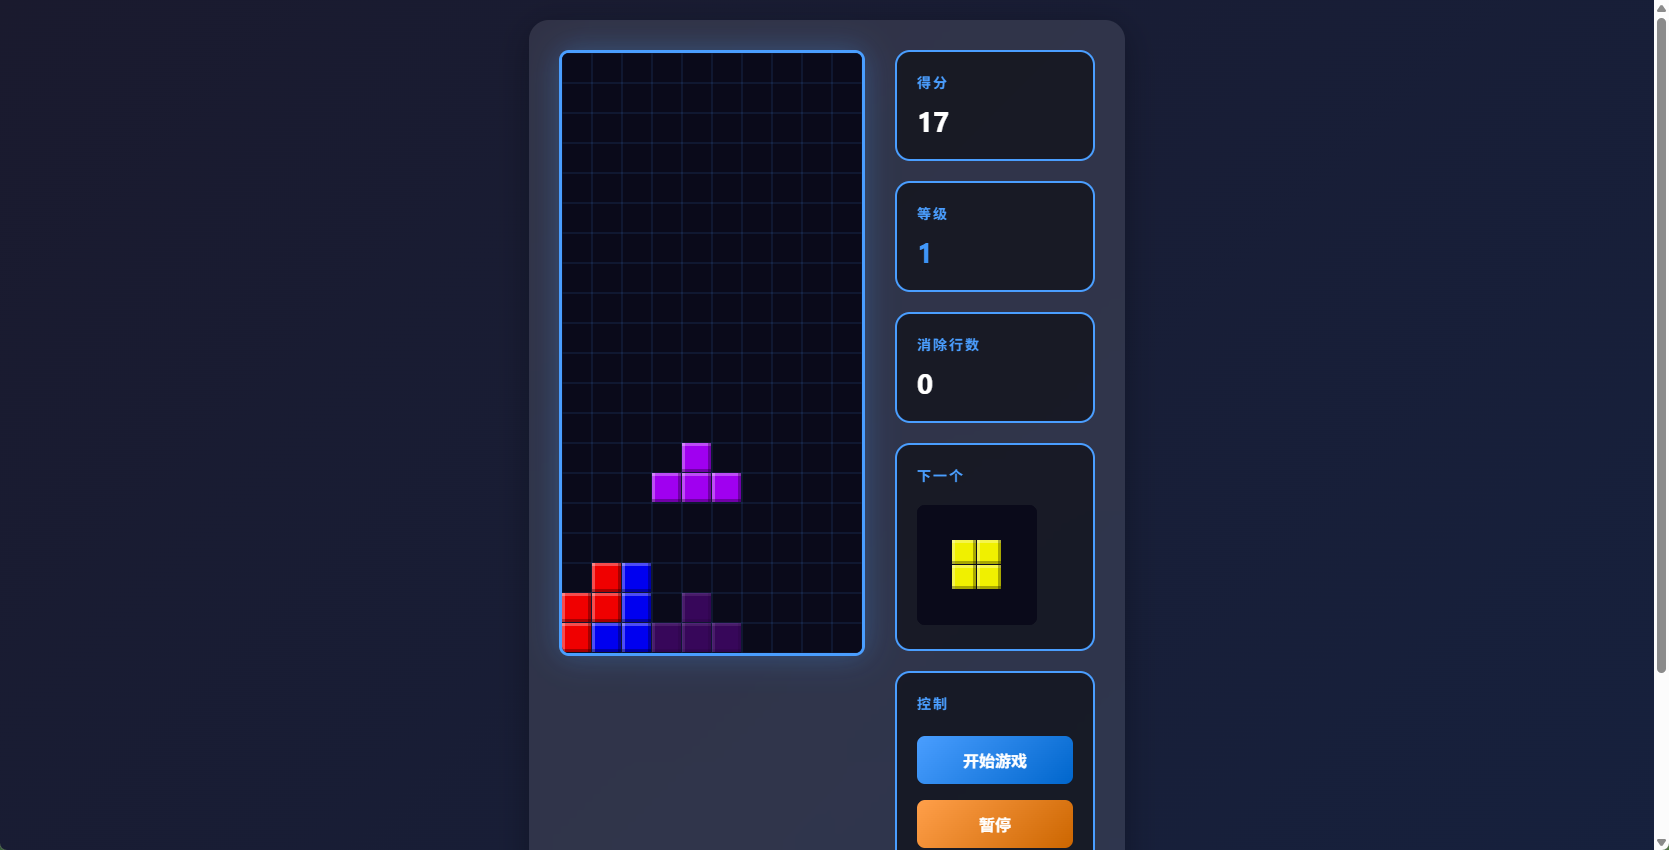
5. Effect Demonstration
Submit the following task in the OpenClaw console to verify the deployment effect:
Generate a complete Tetris web mini - game, save it as openclaw - deploy - game.html, then start a local HTTP server in the directory where the file is located, and return the accessible URL address.
After OpenClaw completes the task, copy the returned URL and open it in a browser to view the mini - game effect.