

Arduino Quick Start
2. Devices & Examples
3. M5Unified
4. M5GFX
5. Extensions
Unit
Atomic
Tab5
IoT
Accessories
Arduino Library Management
The Arduino IDE Library Manager is used to manage the driver libraries called by the program. M5Stack provides corresponding driver libraries for each product, allowing you to choose the installation method that best suits your needs.
Installing Arduino Library Management
1. Open Arduino IDE 2.X, and select Library Manager from the sidebar. Based on the device you are using, search for the relevant library name in the search box (such as M5CoreS3, M5Core2, M5Unified), and click Install.
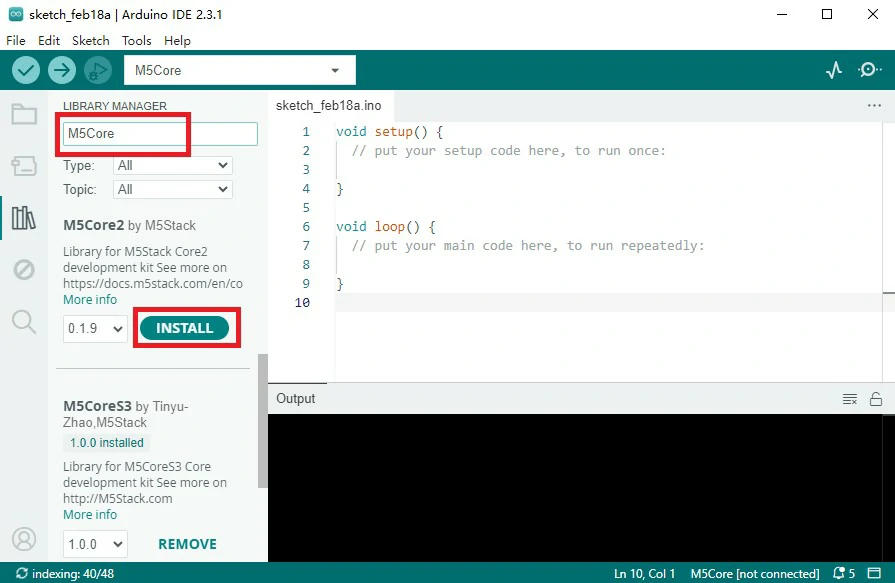
Note: When installing libraries, if prompted to install other libraries as dependencies, you must click
Install All to avoid potential issues with some example programs or drivers not compiling correctly.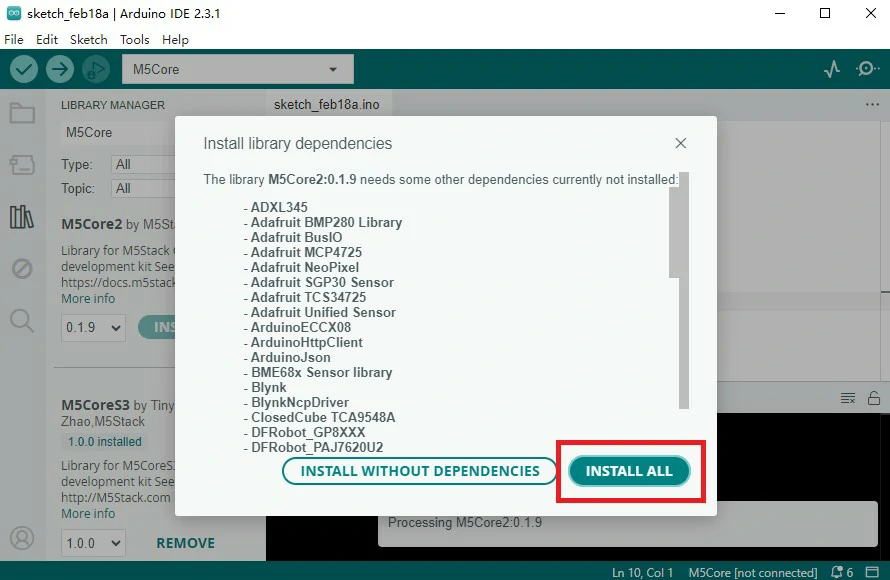
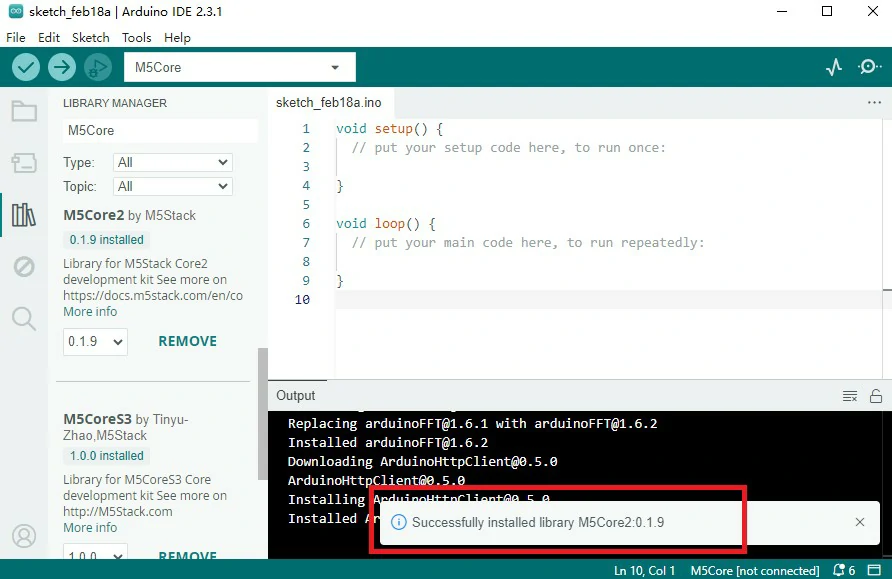
3. Wait for the installation to complete, and then you can start using it
Manual Installation with Git
Manually install using the git version control tool to the library management path. Note: The path to Arduino libraries may vary across different systems. Manual installation does not automatically fetch the dependencies for the driver library. You can view the library.properties file in the driver library to get dependency information and then install them manually.
Windows:
macOS:
Linux:
C:\Users\{username}\Documents\ArduinomacOS:
/Users/{username}/Documents/ArduinoLinux:
/home/{username}/Arduinogit clone https://github.com/m5stack/M5Unified.gitExamples
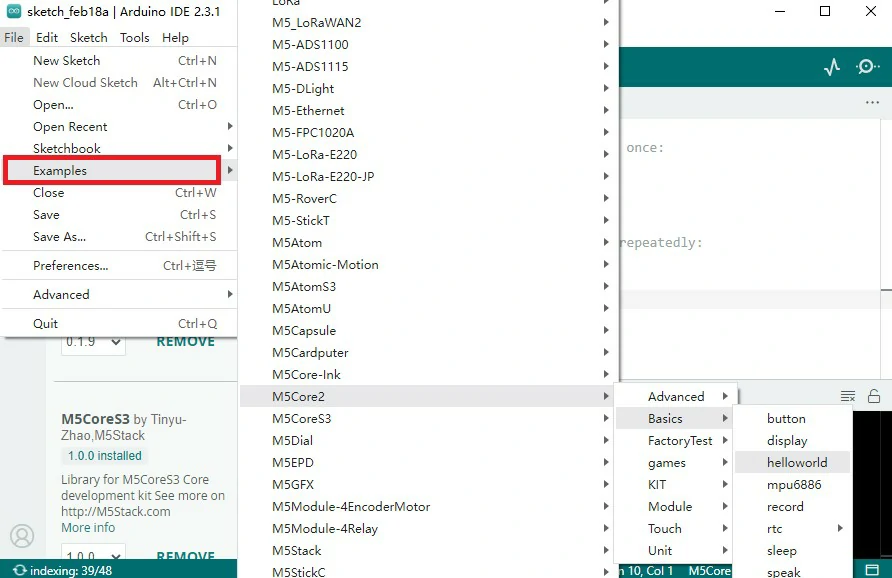
- After completing the library installation, restart the Arduino IDE and select the relevant M5Stack development board option. You can find the example programs provided by the corresponding library under
File->Examples-> {library name}, as shown in the image below.
Related Links
Page Tools