


Arduino Quick Start
2. Devices & Examples
3. M5Unified
4. M5GFX
5. Extensions
Unit
Atomic
Base
Tab5
IoT
Accessories
M5Unified PlatformIO User Guide
This article provides a detailed explanation on how to set up a development environment for M5Unified using Visual Studio Code and its PlatformIO extension.
1. Environment Preparation
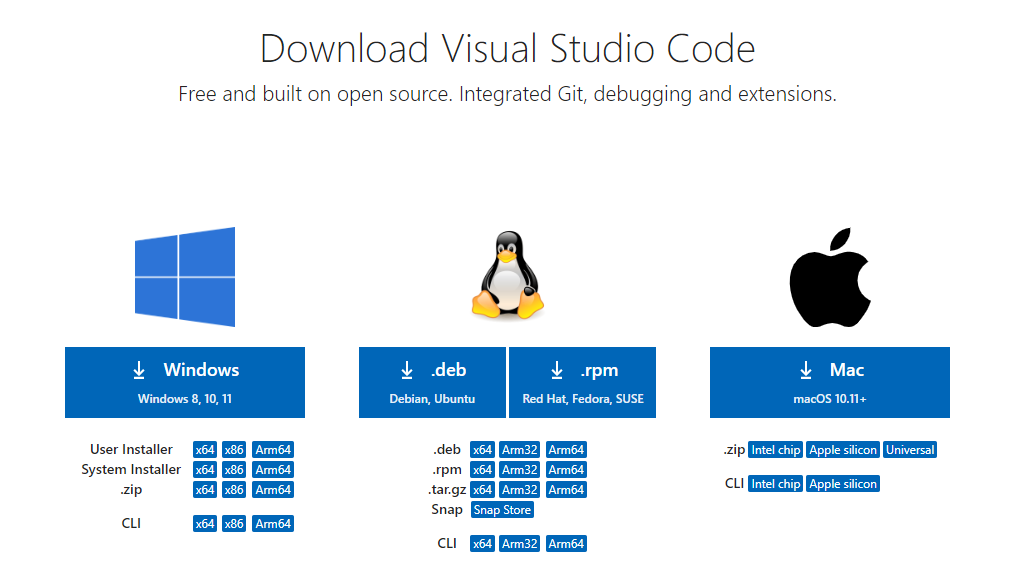
Download and Install VSCode
Visit the VSCode official download page, select the installation package for your operating system, then download and install it.
Install PlatformIO Plugin
Launch VSCode and install the embedded development environment plugin PlatformIO
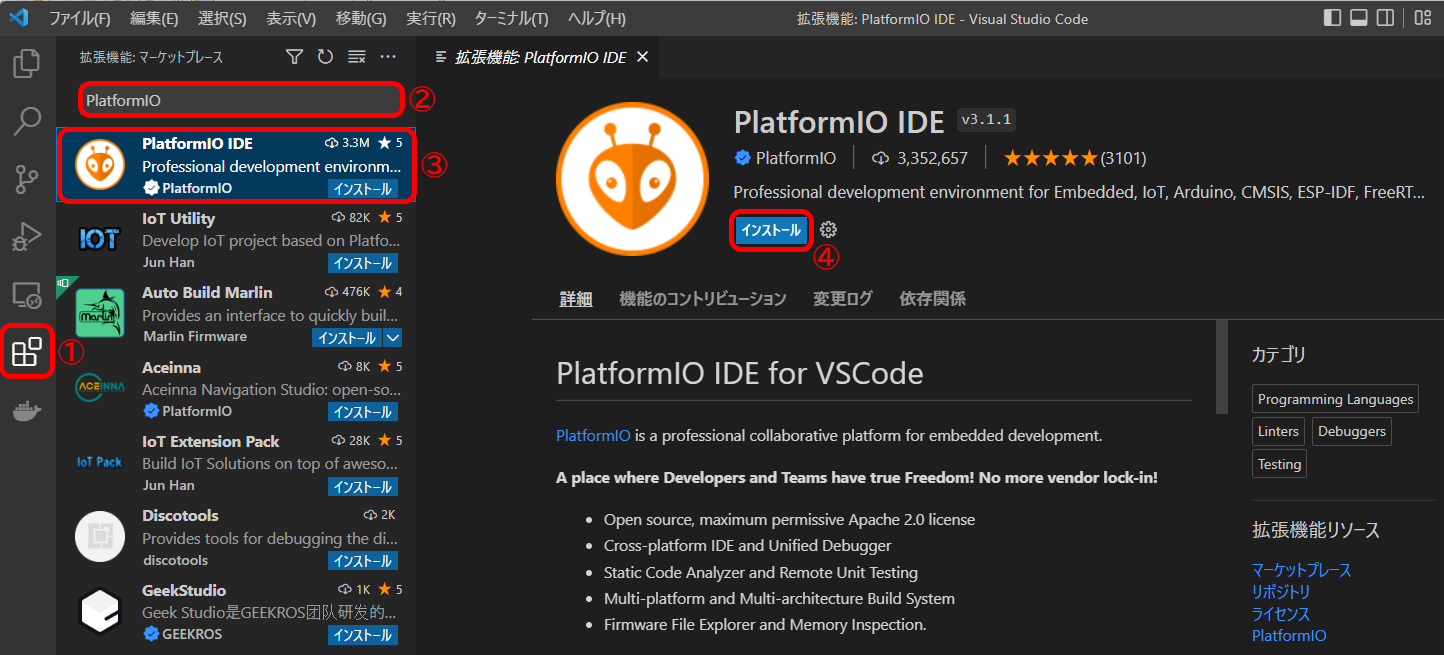
Steps:
- Click the "Extensions" icon in the left activity bar
- Enter "PlatformIO" in the search box
- Select "PlatformIO IDE" from the search results
- Click the install button
2. Project Creation and Configuration
Create New Project
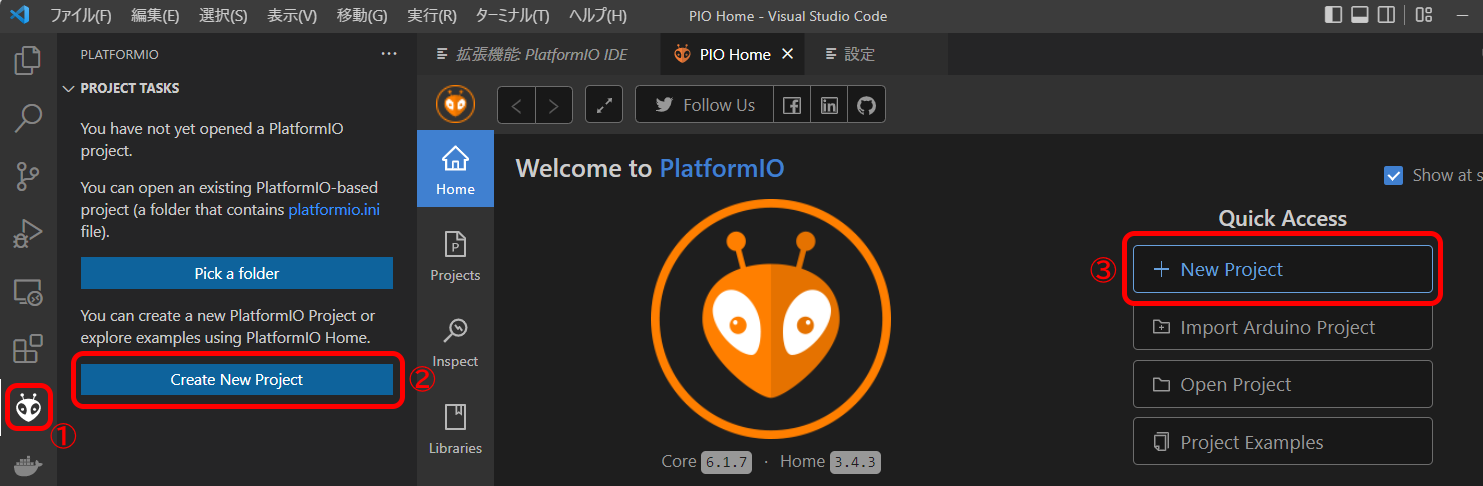
Steps:
- Click the "PlatformIO" icon in the left activity bar
- Select "Create New Project"
- Click "New Project" in the PIOHome tab
Project Configuration Wizard
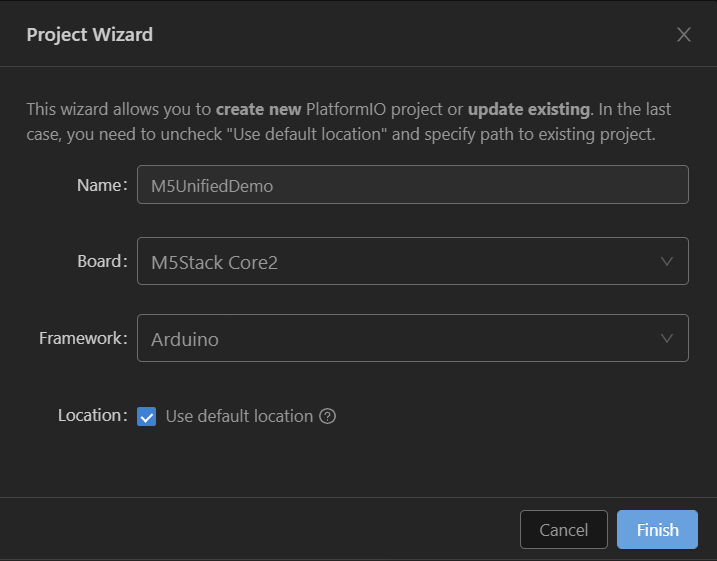
Configuration Items:
- Name: Enter project name
- Board: Select target development board (e.g. M5Stack Core2, M5Stack AtomS3, etc.)
- Framework: Select Arduino framework
Click "Finish" after completing the configuration
3. Adding M5Unified Library
Add Library to Project
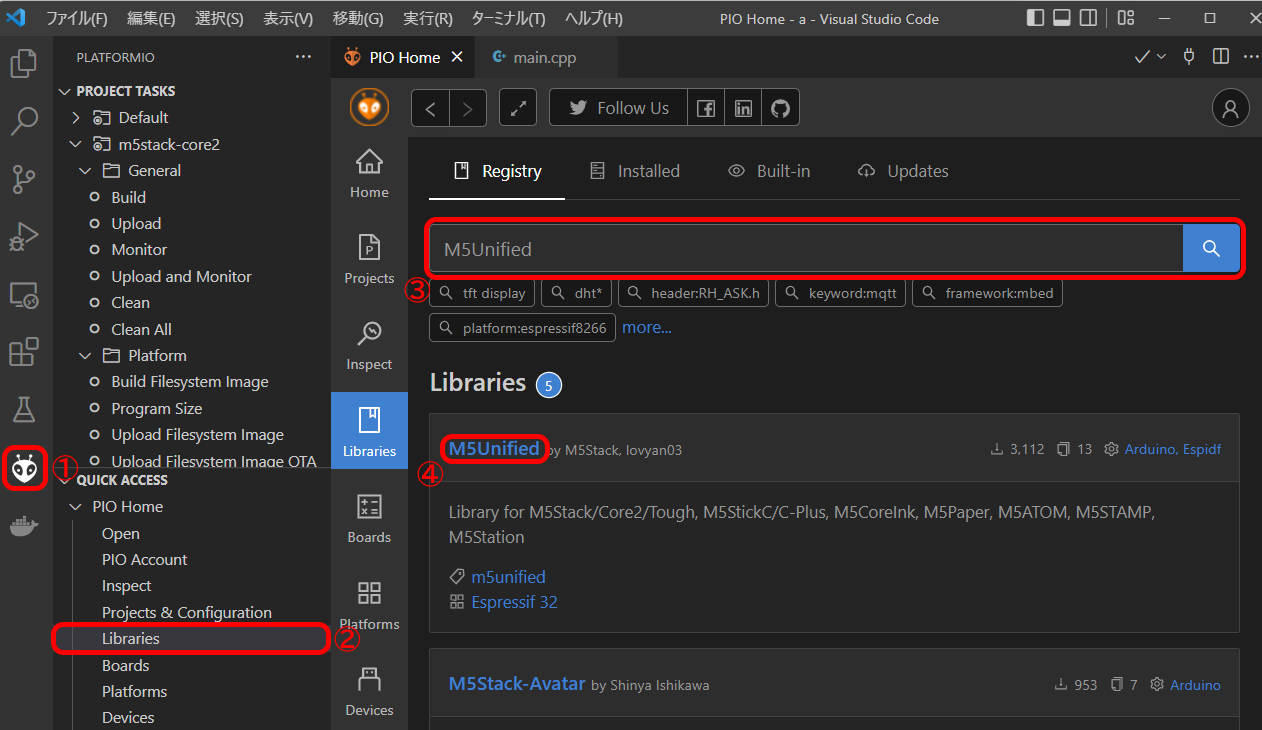
Steps:
- Click the "PlatformIO" icon in the left activity bar
- Select "Libraries"
- Enter "M5Unified" in the search box
- Select "M5Unified" from search results
- Locate the official M5Unified library by M5Stack (author lovyan03)
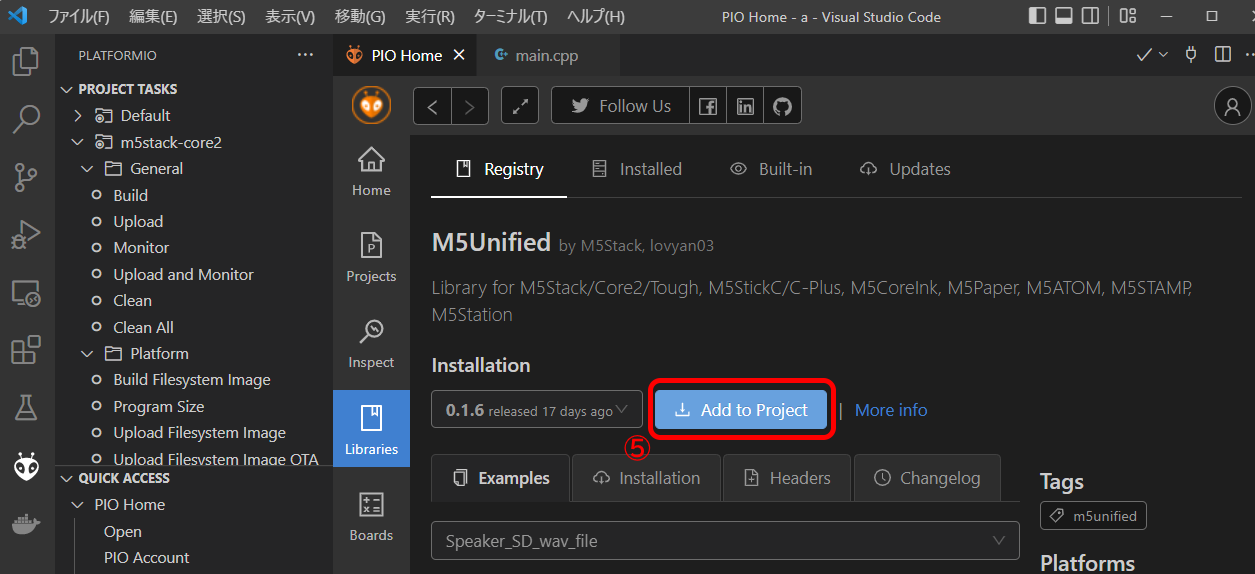
- Click "Add to Project"
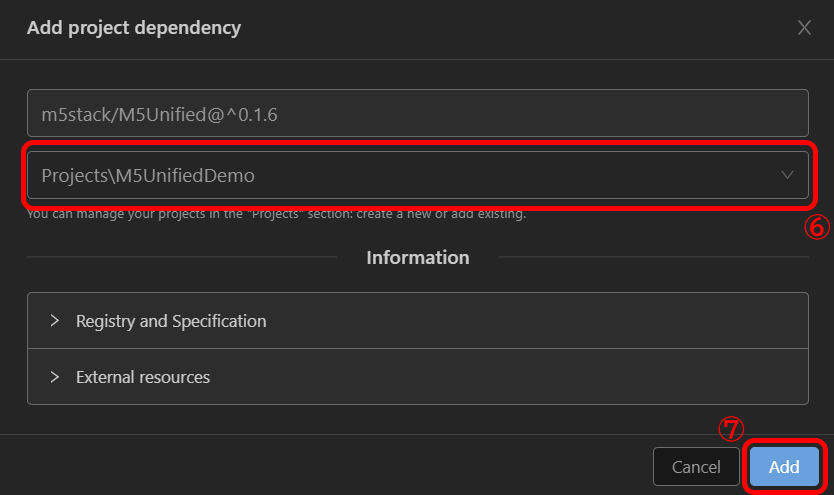
- Select the previously created project
- Click "Add" button
A "Congrats" dialog will appear upon successful installation, indicating the library has been added to the project.
4. Program Compilation and Flashing
Compile and Flash Program
Steps:
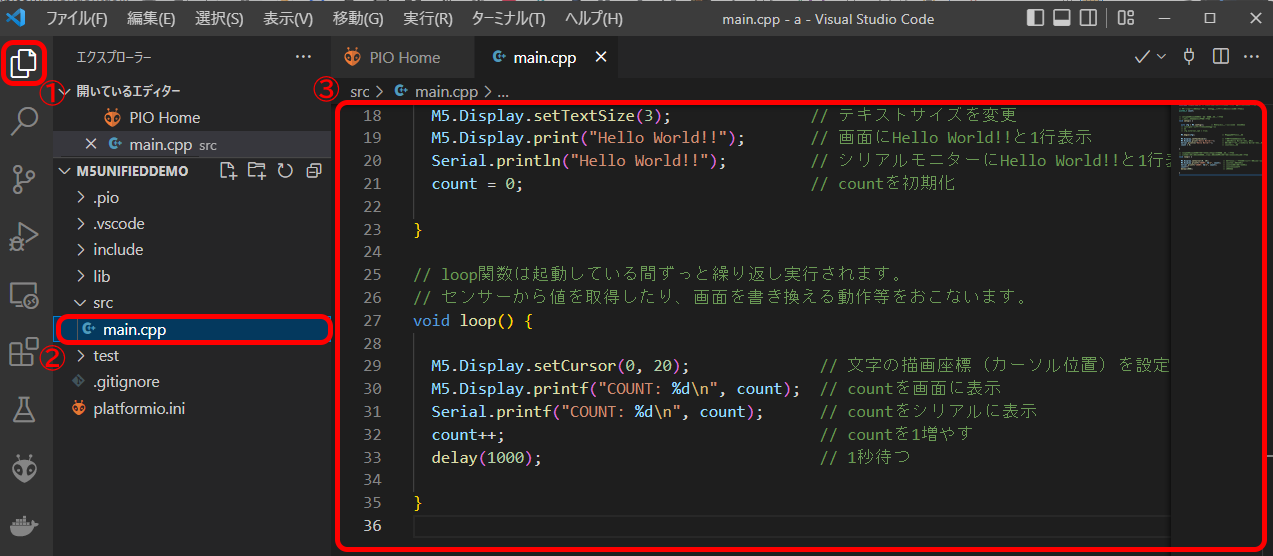
- Click the "Explorer" icon in the left activity bar
- Open the "src/main.cpp" file and paste the following sample program
cpp
1 2 3 4 5 6 7 8 9 10 11 12 13 14 15 16 17 18 19 20 21 22 23 24 25 26 27 28 29 30 31 32 33 34 35
#include <M5Unified.h> // Make the M5Unified library available to your program.

// global variables (define variables to be used throughout the program)
uint32_t count;


// setup function is executed only once at startup.
// This function mainly describes the initialization process.
void setup() {

  auto cfg = M5.config(); // Assign a structure for initializing M5Stack
  // If config is to be set, set it here
  // Example.
  // cfg.external_spk = true;

  M5.begin(cfg);                        // initialize M5 device

  M5.Display.setTextSize(3);            // change text size
  M5.Display.print("Hello World!!!") ;  // display Hello World! and one line is displayed on the screen
  Serial.println("Hello World!!!") ;    // display Hello World! and one line on the serial monitor
  count = 0;                            // initialize count

}

// loop function is executed repeatedly for as long as it is running.
// loop function acquires values from sensors, rewrites the screen, etc.
void loop() {

  M5.Display.setCursor(0, 20);             // set character drawing coordinates (cursor position)
  M5.Display.printf("COUNT: %d\n", count); // display count on screen
  Serial.printf("COUNT: %d\n", count);  // display count serially
  count++;                              // increase count by 1
  delay(1000);                          // wait 1 second(1,000msec)

}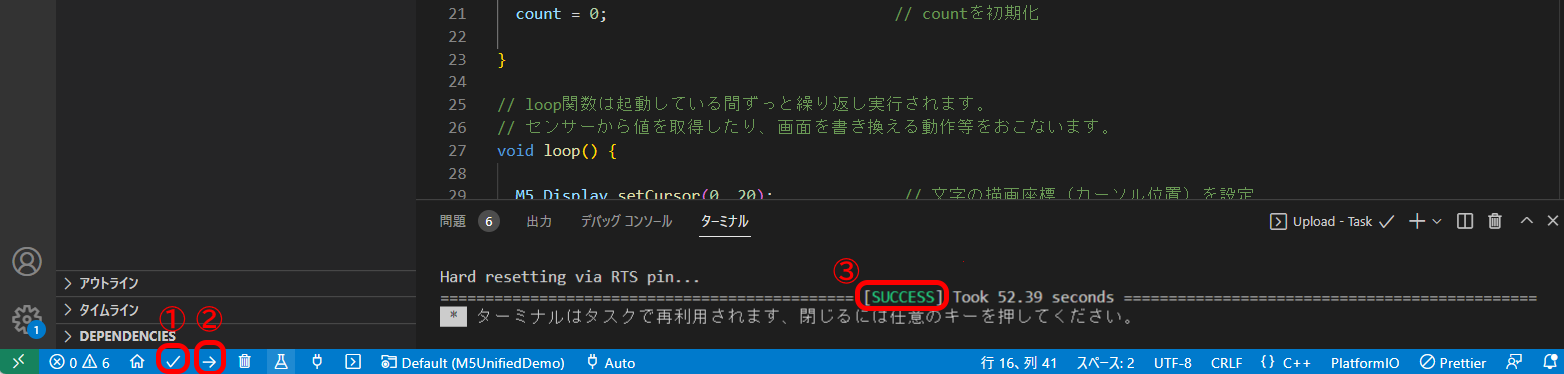
Compile and Flash:
- Click (1) to compile only
- Click (2) to compile and flash to device
- Terminal will show (3) "Success" message when completed