Arduino Quick Start
2. Devices & Examples
3. M5Unified
4. M5GFX
5. Extensions
Unit
Atomic
Tab5
IoT
Accessories
Unit HBridge Arduino Tutorial
1. Preparation
1.Environment Setup: Follow the Arduino IDE Getting Started Guide to complete the IDE installation, and install the necessary board manager and required driver libraries based on the development board you are using.
2.Libraries Used:
3.Hardware Products Used:

2. Example
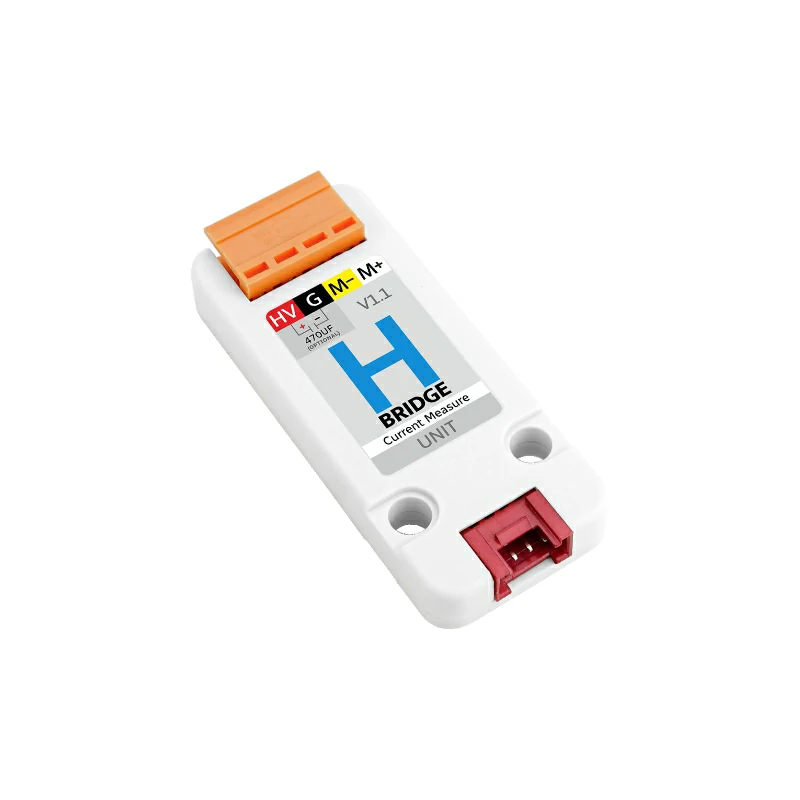
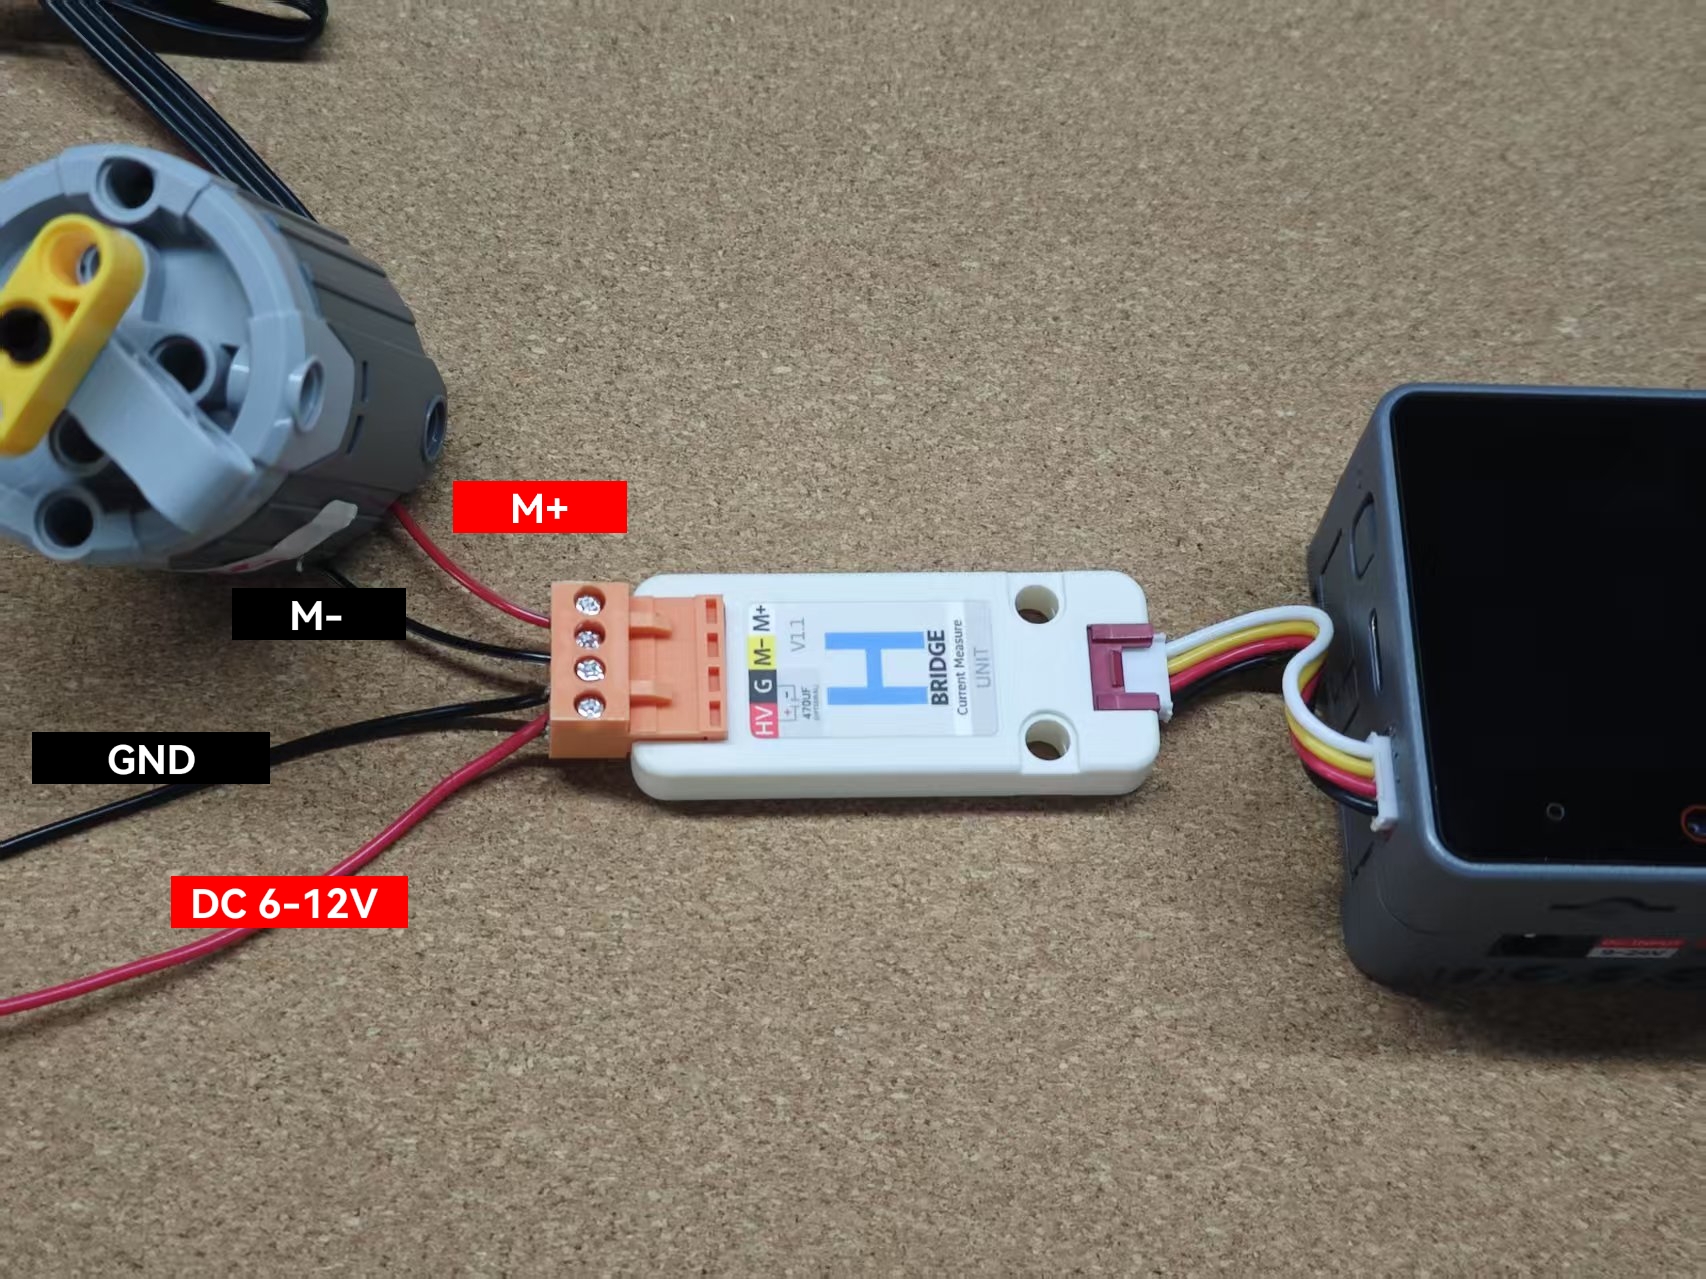
Unit HBridge v1.1 version also supports reading the current motor value.Power Switch
Motor Wiring
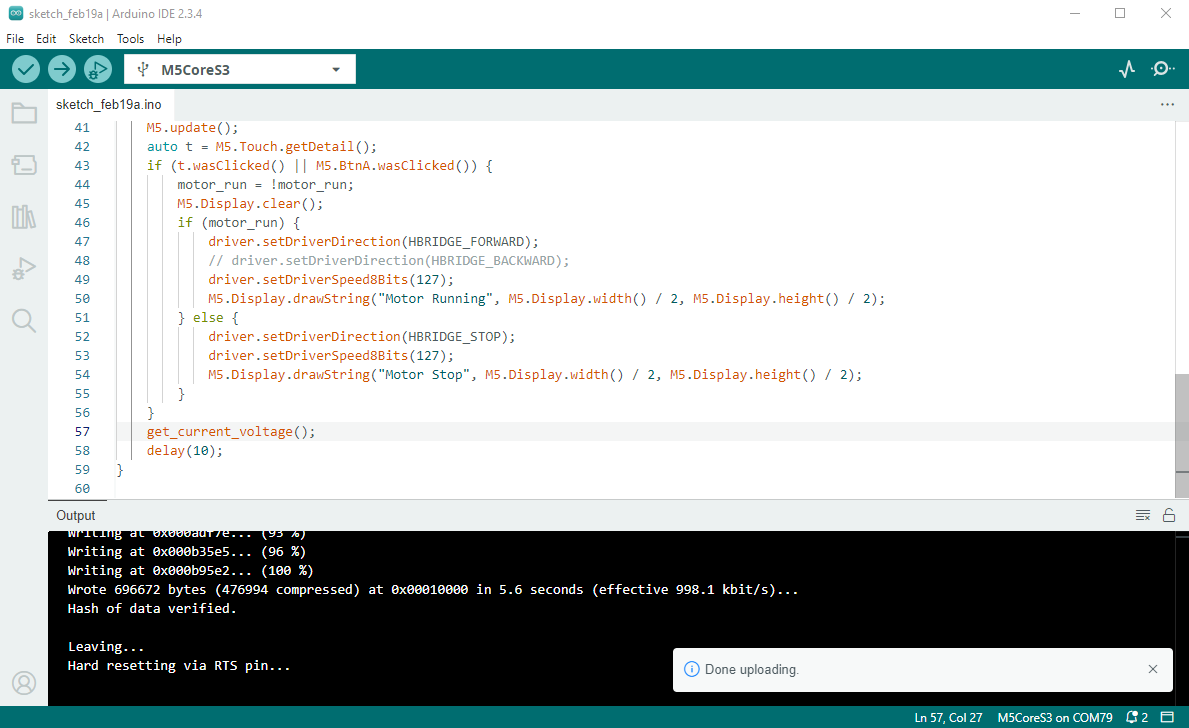
Complete Program
#include "M5Unified.h"
#include "Wire.h"
#include "M5UnitHbridge.h"
M5UnitHbridge driver;
uint8_t fw_version = 0;
bool motor_run = false;
void get_current_voltage()
{
// getMotorCurrent() function only support in Hbridge V1.1 version
if (fw_version >= 2) {
Serial.printf("%.2fA\r\n", driver.getMotorCurrent());
}
Serial.printf("%.2fV\r\n", driver.getAnalogInput(_12bit) / 4095.0f * 3.3f / 0.09f);
}
void setup()
{
M5.begin();
Serial.begin(115200);
M5.Display.setTextDatum(middle_center);
M5.Display.setFont(&fonts::lgfxJapanMinchoP_24);
while (!driver.begin(&Wire, HBRIDGE_I2C_ADDR, 2, 1, 100000L)) {
M5.Display.drawString("Unit HBridge init Fail!", M5.Display.width() / 2, M5.Display.height() / 2);
delay(1000);
}
fw_version = driver.getFirmwareVersion();
Serial.printf("Hbridge Firmware Version: %d\r\n", fw_version);
M5.Display.clear();
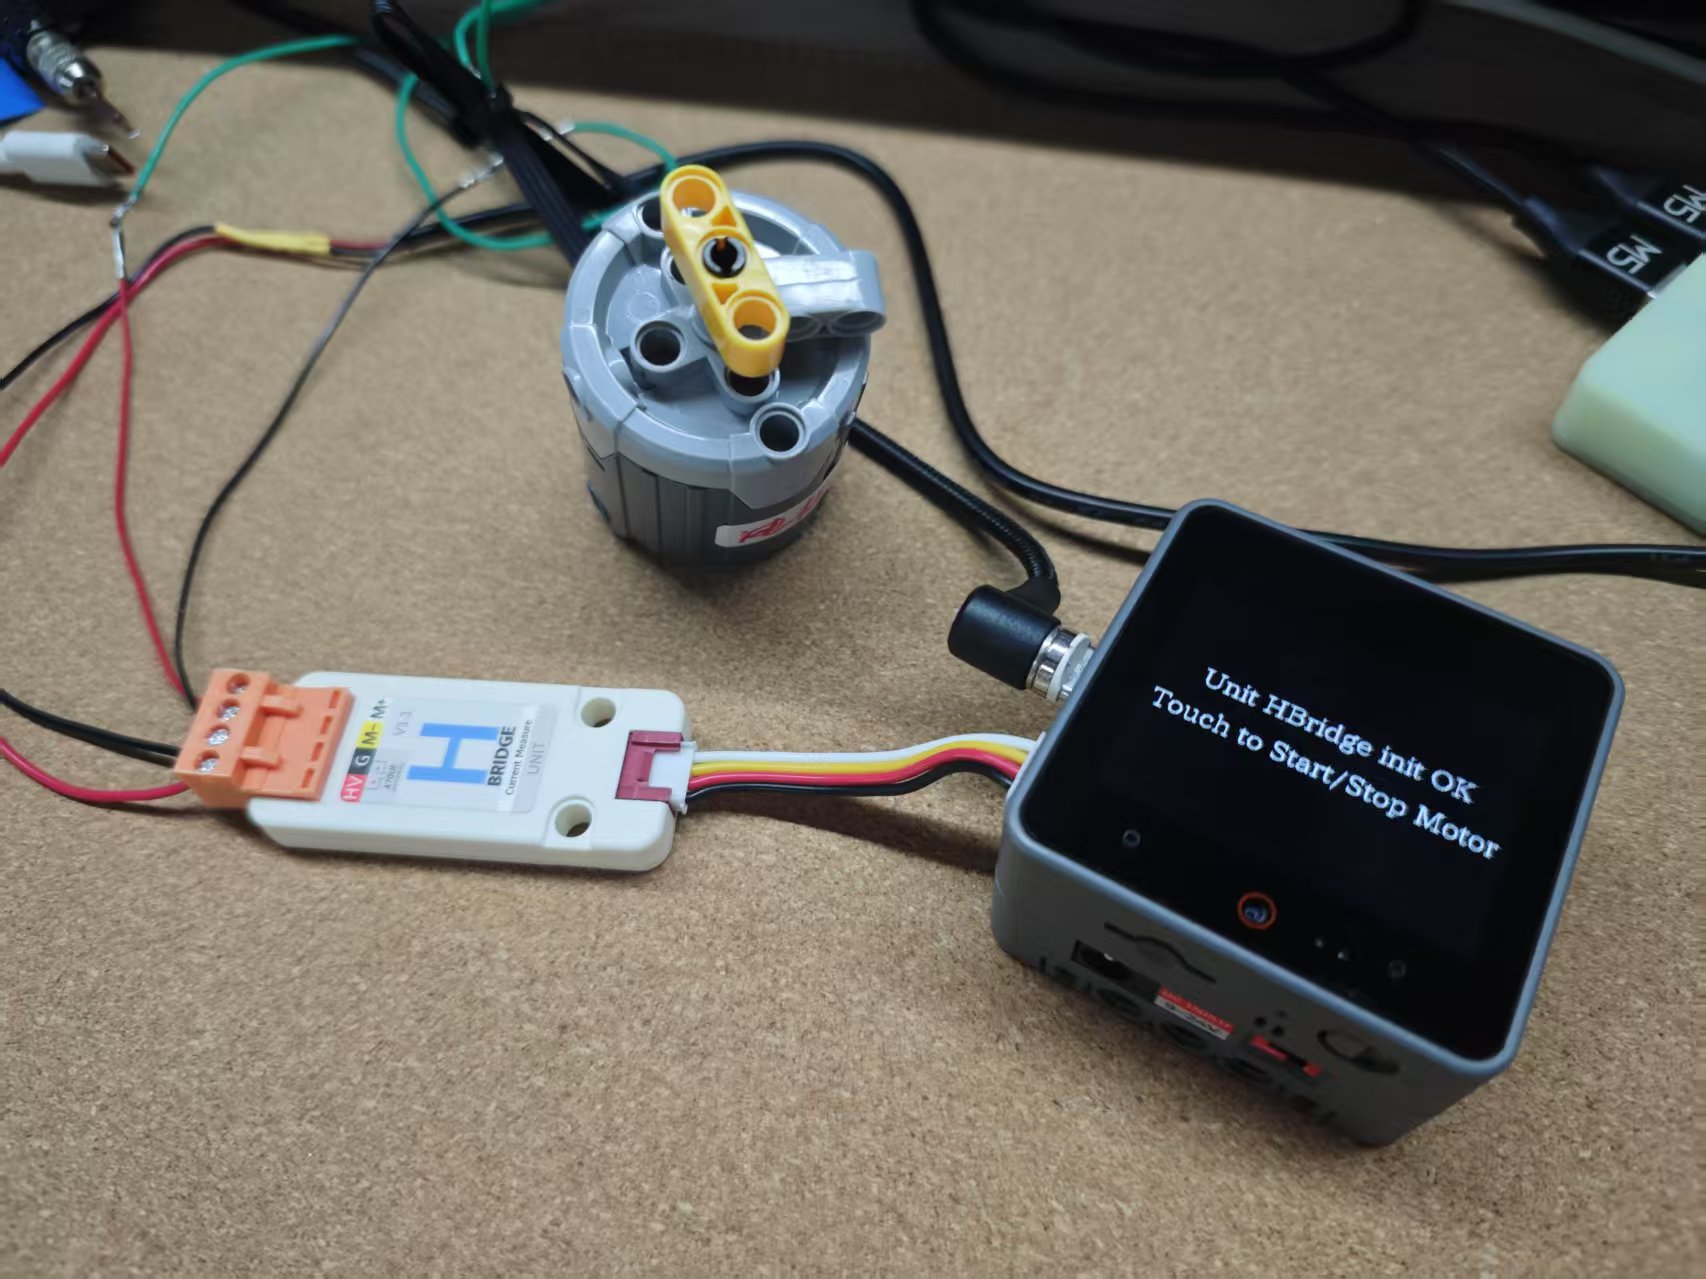
M5.Display.drawString("Unit HBridge init OK", M5.Display.width() / 2, M5.Display.height() / 2 - 20);
M5.Display.drawString("Touch to Start/Stop Motor", M5.Display.width() / 2, M5.Display.height() / 2 + 20);
}
void loop()
{
M5.update();
auto t = M5.Touch.getDetail();
if (t.wasClicked() || M5.BtnA.wasClicked()) {
motor_run = !motor_run;
M5.Display.clear();
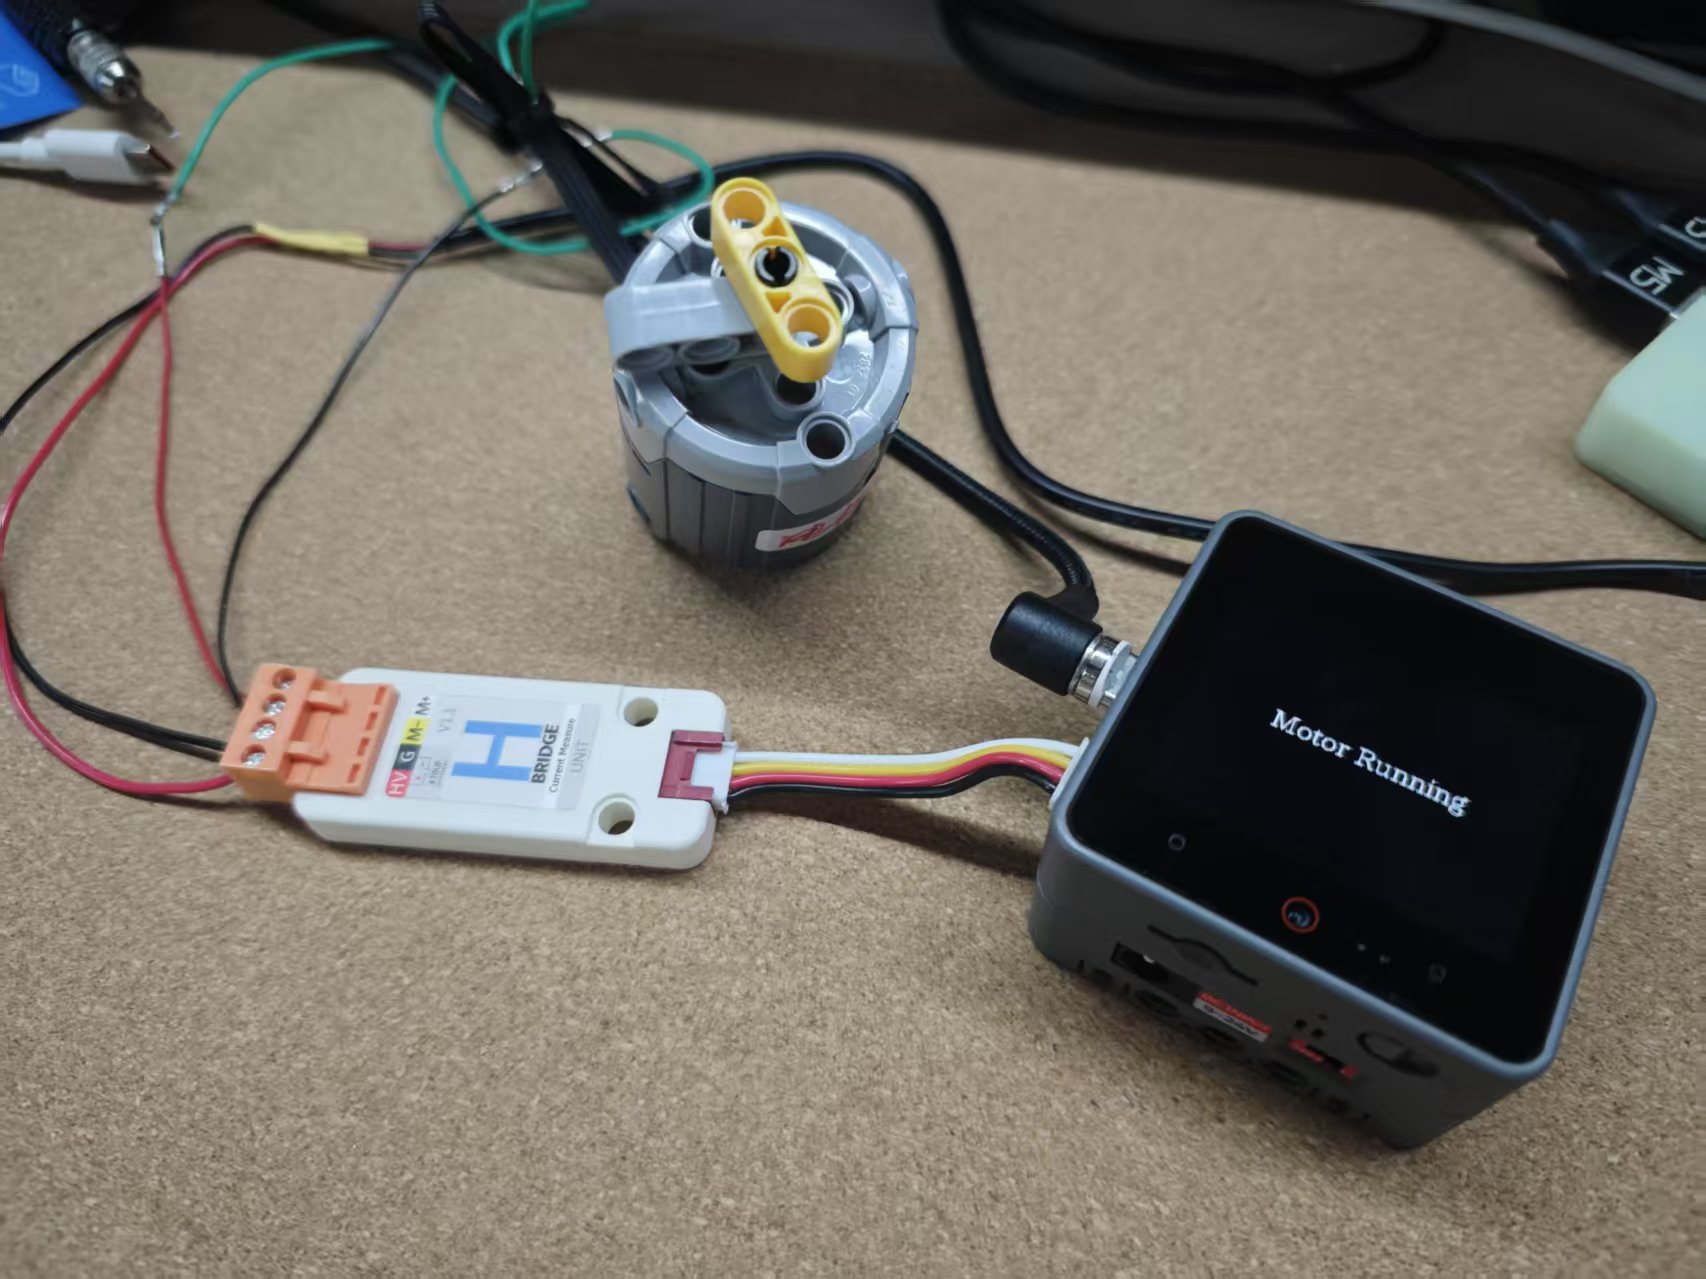
if (motor_run) {
driver.setDriverDirection(HBRIDGE_FORWARD);
// driver.setDriverDirection(HBRIDGE_BACKWARD);
driver.setDriverSpeed8Bits(127);
M5.Display.drawString("Motor Running", M5.Display.width() / 2, M5.Display.height() / 2);
} else {
driver.setDriverDirection(HBRIDGE_STOP);
driver.setDriverSpeed8Bits(127);
M5.Display.drawString("Motor Stop", M5.Display.width() / 2, M5.Display.height() / 2);
}
}
get_current_voltage();
delay(10);
}3. Compile and Upload
1.Download Mode: Different devices may require entering download mode before programming. The steps for this may vary depending on the main control device. For more details, refer to the Arduino IDE Getting Started Guide, which includes specific download tutorial lists for each device.
For CoreS3, press and hold the reset button (for about 2 seconds) until the internal green LED lights up, and then release it. This indicates the device is in download mode and ready for programming.
.gif)
- 2.Select the device port and click the compile and upload button in the top left corner of Arduino IDE, then wait for the program to compile and upload to the device.
4. Motor Control
Use the Unit HBridge to control the motor's rotation and stop.