Home Assistant
Voice Assistant
オーディオ再生
拡張ボード
センサー
キット
アプリケーション
Atomic Audio-3.5 Base (Echo Base) Home Assistant 連携

1. 準備
- ハードウェア
- 1 x AtomS3R
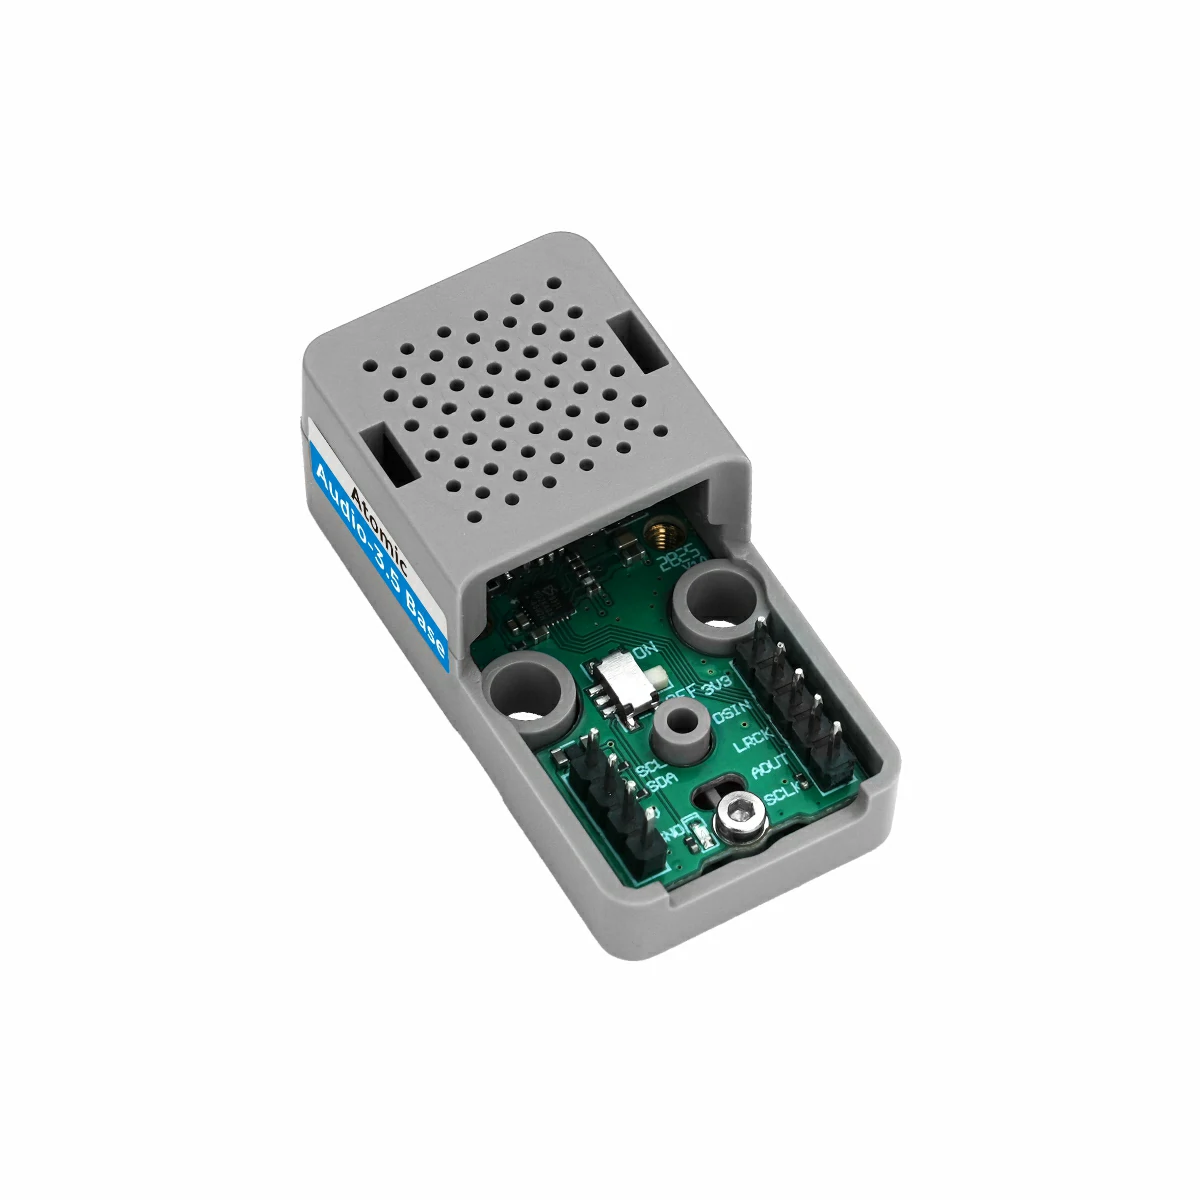
- 1 x Atomic Audio-3.5 Base (Echo Base)
- 1 x Home Assistant ホスト(サーバー、ミニ PC、NAS など)
- ソフトウェア・バージョン
- ESPHome Device Builder 2026.4.0 以降
2. デバイスの作成
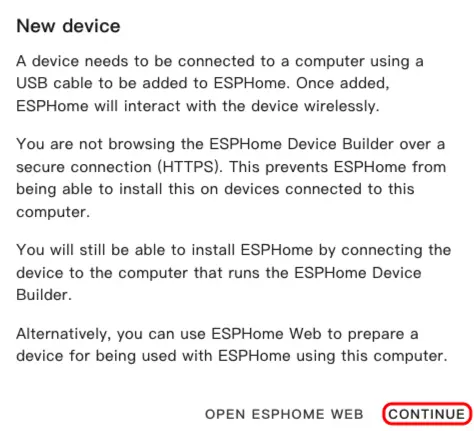
- ESPHome ダッシュボードを開きます。初回起動ウィザードが表示された場合は
CONTINUEをクリックします。
- 右下の緑の + ボタンをクリックして新しいデバイスを作成します。
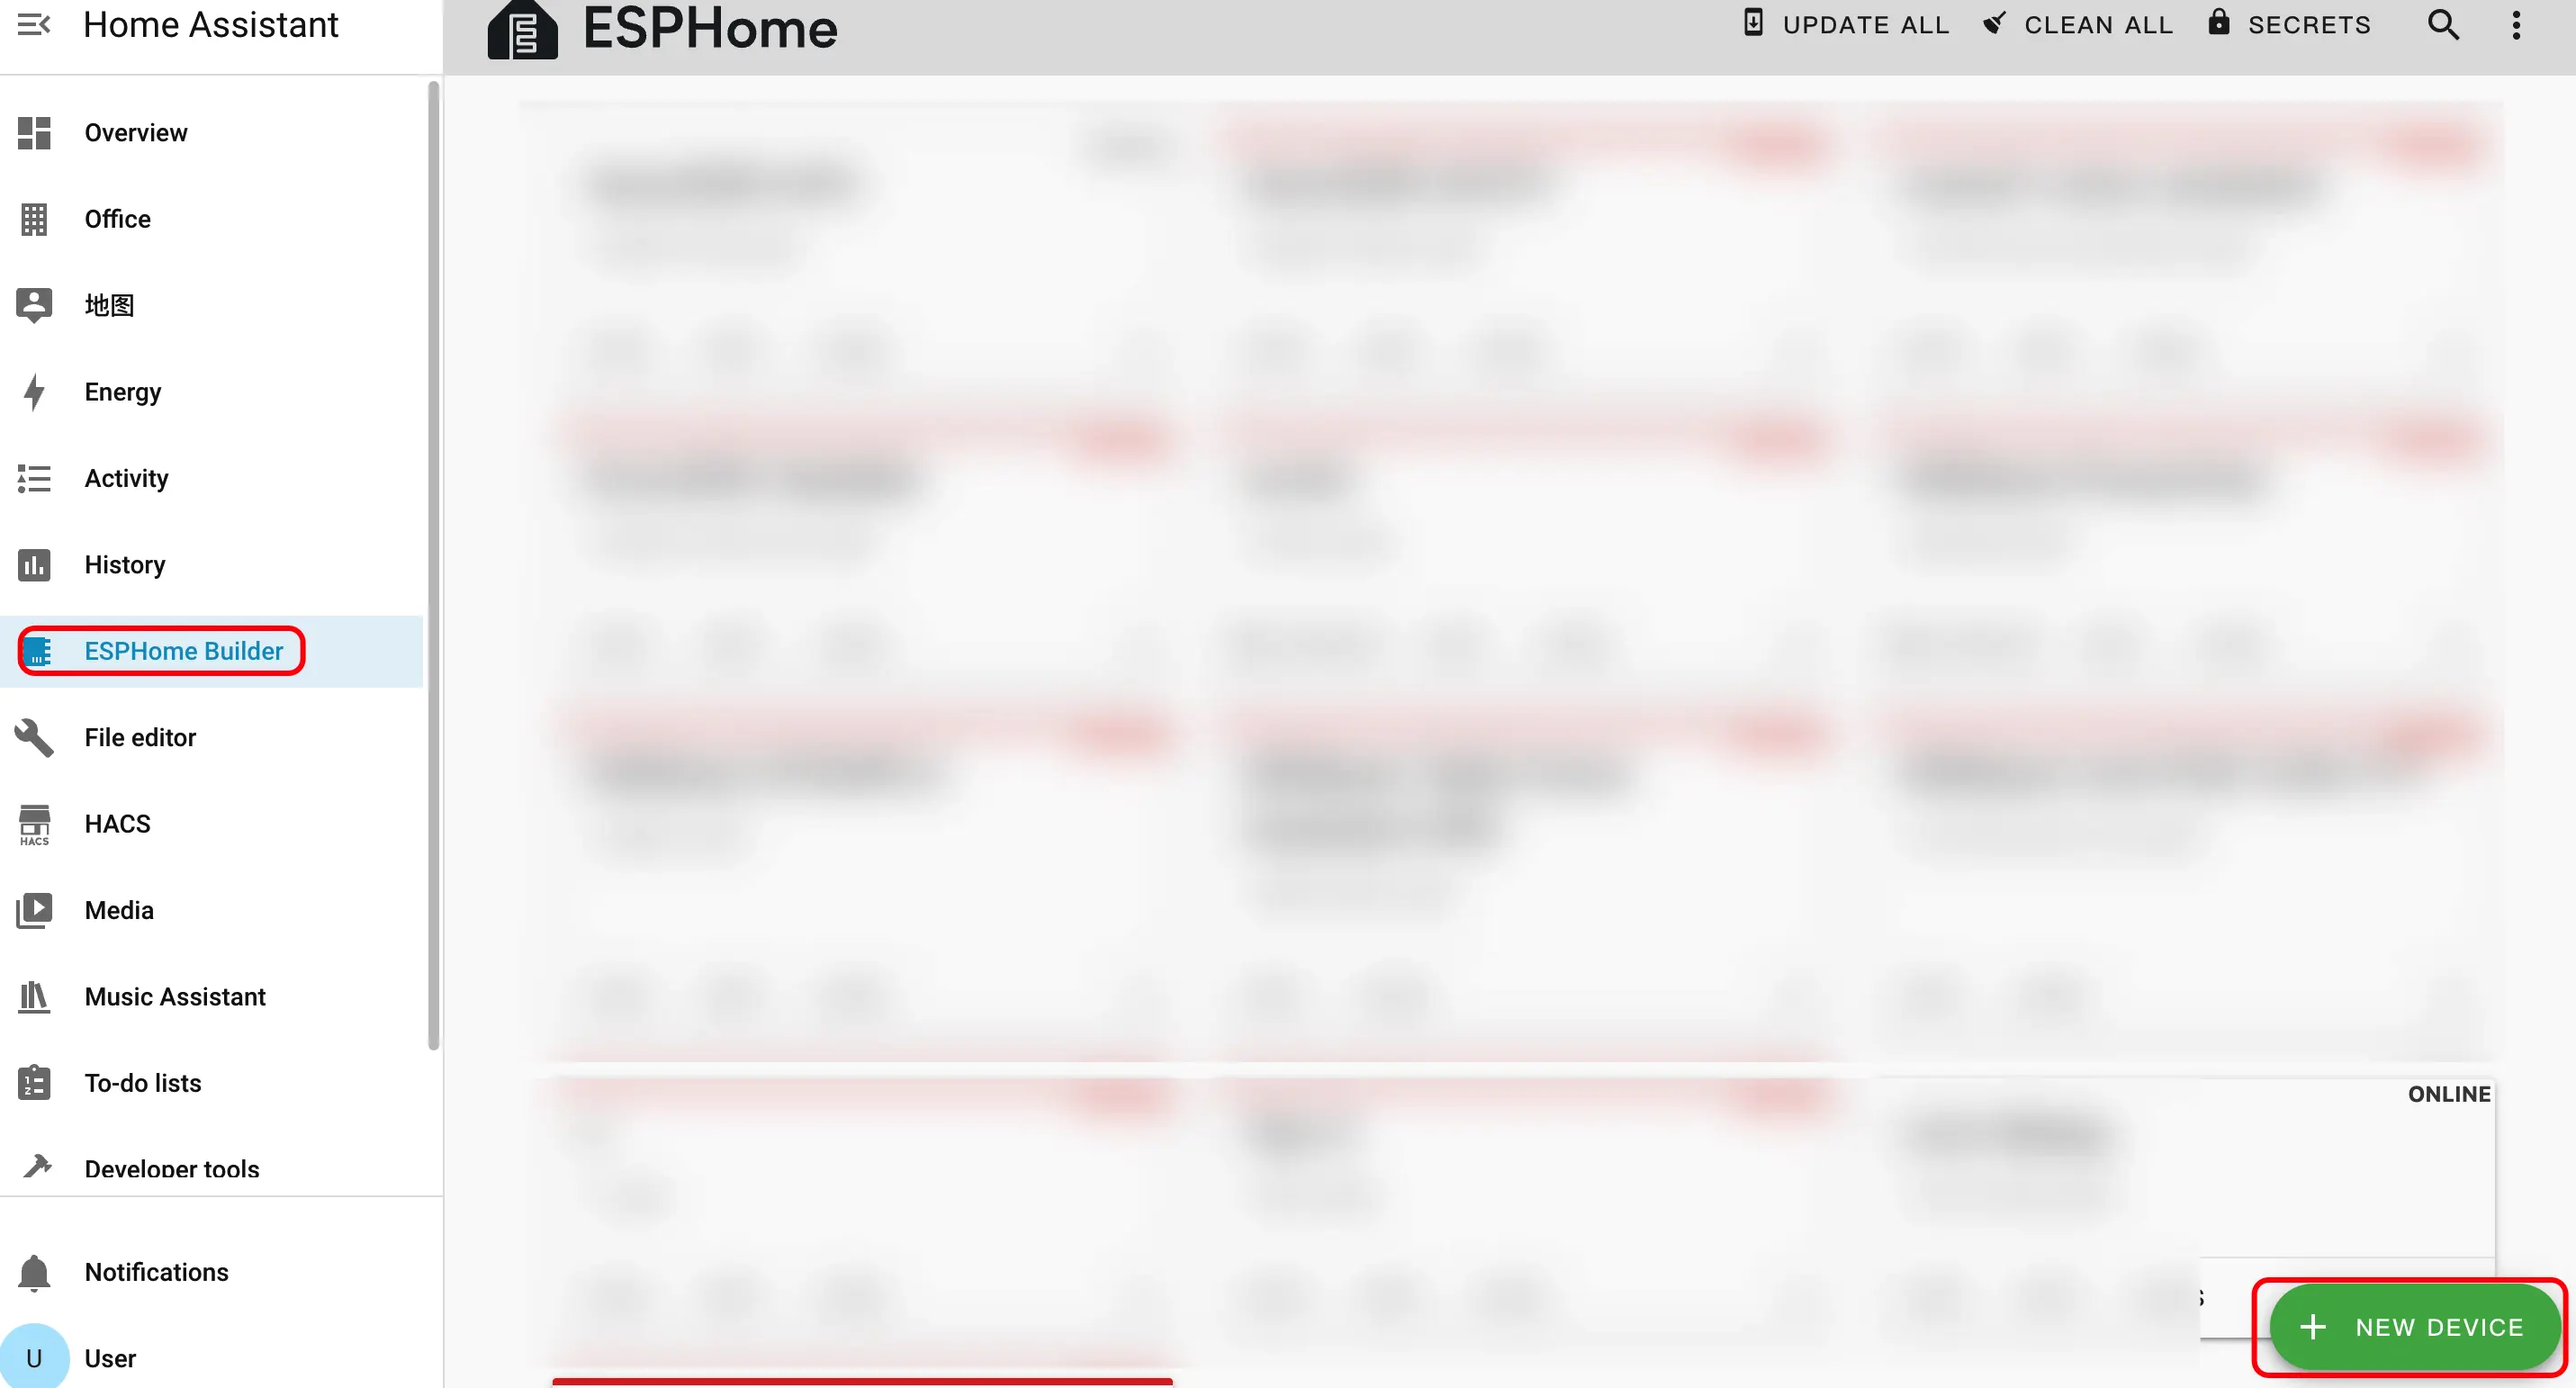
New Device Setupをクリックしてデバイス作成ウィザードを開きます。

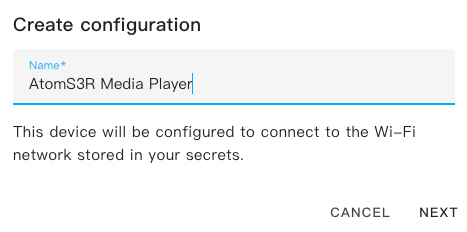
- デバイス名を入力し、
NEXTをクリックします。
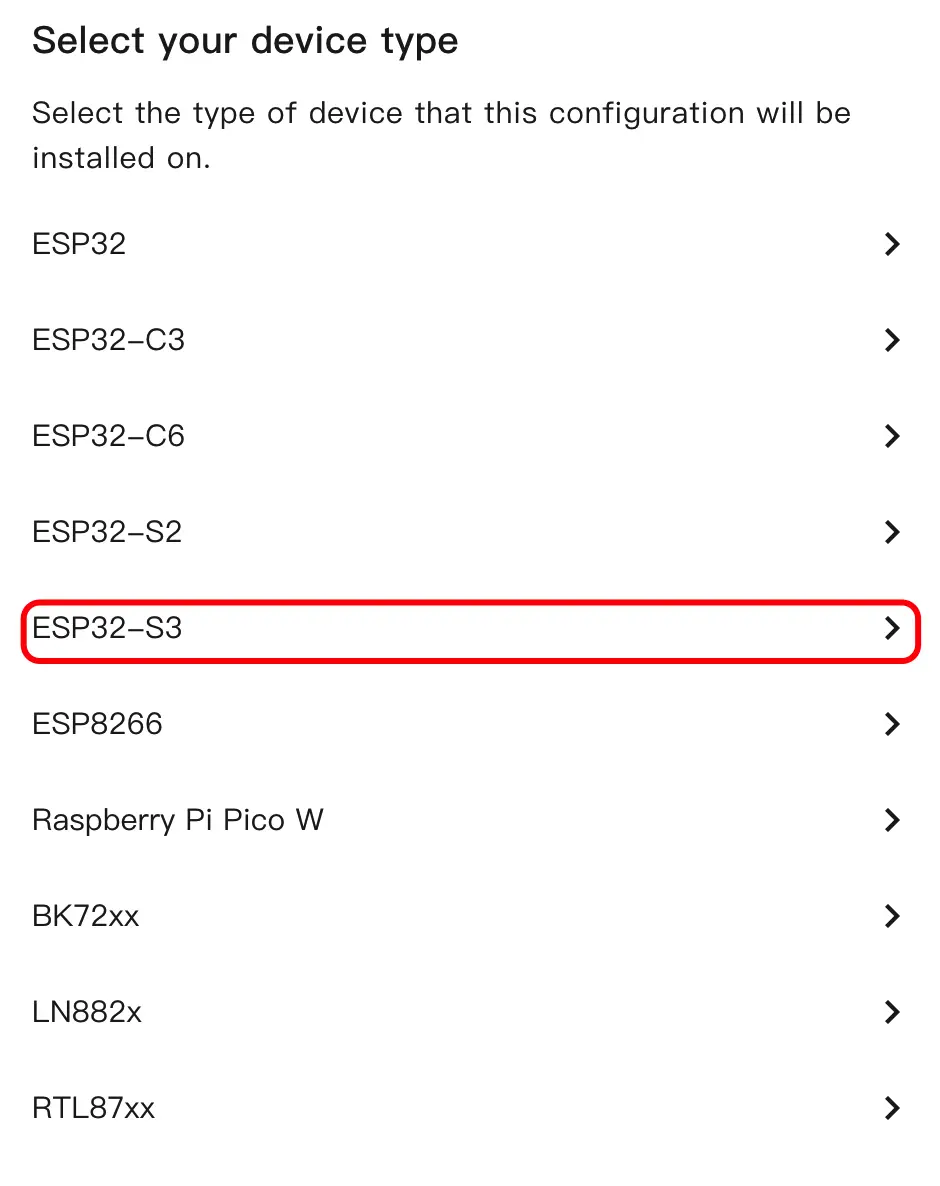
- デバイスタイプを選択し、
ESP32S3をクリックします。
SKIPをクリックして暗号化キーの設定をスキップします。
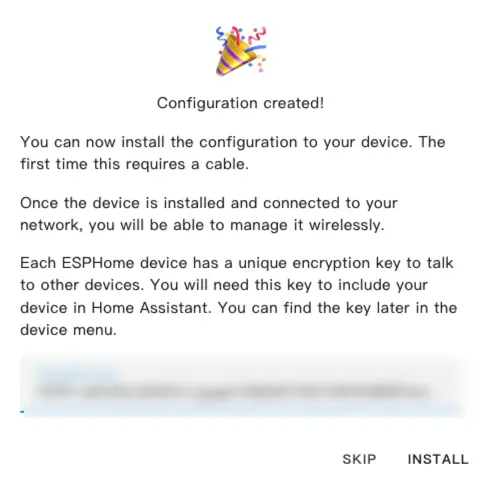
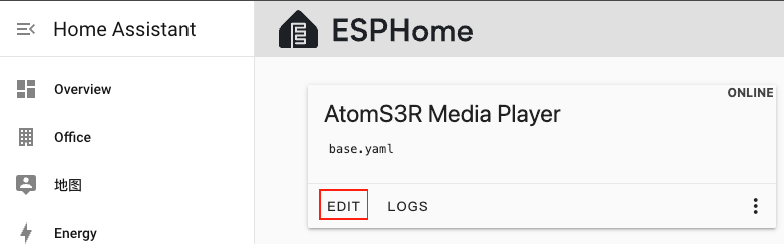
EDITをクリックして YAML エディターを開き、デバイス設定をカスタマイズします。
3. デバイス設定
3.1 基本設定
esp32:
  variant: esp32s3
  flash_size: 8MB
  cpu_frequency: 240MHz
  framework:
    type: esp-idf
    sdkconfig_options:
      CONFIG_ESP32S3_DEFAULT_CPU_FREQ_240: "y"
      CONFIG_ESP32S3_DATA_CACHE_64KB: "y"
      CONFIG_ESP32S3_DATA_CACHE_LINE_64B: "y"

psram:
  mode: octal
  speed: 80MHz

i2c:
  - id: bsp_bus
    sda:
      number: GPIO45
      ignore_strapping_warning: true
    scl:
      number: GPIO0
      ignore_strapping_warning: true
    scan: true
  - id: ext_bus
    sda: GPIO38
scl: GPIO39注意
AtomS3R は SDA: GPIO38、SCL: GPIO39 に対応しています。他のインターフェースを使用する場合は、実際のピンに従って調整してください。
3.2 オーディオ設定
i2s_audio:
  - id: i2s_audio_bus
    i2s_lrclk_pin: GPIO6
    i2s_bclk_pin: GPIO8

audio_dac:
  - platform: es8311
    id: es8311_dac
    i2c_id: ext_bus
    bits_per_sample: 16bit
    sample_rate: 48000
    use_microphone: false
    use_mclk: false

speaker:
  - platform: i2s_audio
    id: i2s_speaker
    i2s_audio_id: i2s_audio_bus
    i2s_dout_pin: GPIO5
    dac_type: external
    audio_dac: es8311_dac
    sample_rate: 48000
channel: left3.3 メディアプレイヤー設定
- media_player コンポーネントを追加
media_player:
  - platform: speaker
    name: "${friendly_name}"
    id: speaker_media_player
    volume_min: 0.5
    volume_max: 0.8
    announcement_pipeline:
      speaker: i2s_speaker
      format: FLAC
      sample_rate: 48000
num_channels: 13.4 SPI とフォント設定
spi:
  clk_pin: GPIO15
  mosi_pin: GPIO21

font:
  - file: "gfonts://Roboto"
    id: font_medium
size: 143.5 スピーカーアンプ設定
pi4ioe5v6408 コンポーネントを追加
switch コンポーネントを追加
pi4ioe5v6408:
  - id: pi4ioe5v6408_hub
    i2c_id: ext_bus
    address: 0x43

switch:
  - platform: gpio
    name: "Speaker Enable"
    id: speaker_enable
    pin:
      pi4ioe5v6408: pi4ioe5v6408_hub
      number: 0
      mode:
        output: true
    icon: "mdi:volume-high"
restore_mode: RESTORE_DEFAULT_ON3.6 ディスプレイと LED 設定
lp5562:
  id: lp5562_led
  i2c_id: bsp_bus
  use_internal_clk: true
  white_current: 17.5

output:
  - platform: lp5562
    id: lp5562_white_channel
    lp5562_id: lp5562_led
    channel: white

light:
  - platform: monochromatic
    name: "LCD Backlight"
    id: lcd_backlight
    output: lp5562_white_channel
    icon: "mdi:television"
    restore_mode: RESTORE_DEFAULT_ON

display:
  - platform: mipi_spi
    id: atoms3r_lcd
    model: ST7789V
    dc_pin: GPIO42
    reset_pin: GPIO48
    cs_pin: GPIO14
    data_rate: 40MHz
    update_interval: 1s
    dimensions:
      height: 128
      width: 128
      offset_width: 2
      offset_height: 1
    invert_colors: true
    rotation: 180°
    lambda: |-
      it.fill(Color::BLACK);
      it.print(
        it.get_width() / 2,
        it.get_height() / 2,
        id(font_medium),
        Color::WHITE,
        TextAlign::CENTER,
        "Audio-3.5 Base"
);4. ファームウェアのビルドと書き込み
4.1 ファームウェアのビルド
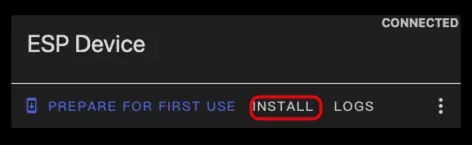
YAML 設定の編集後、右上の
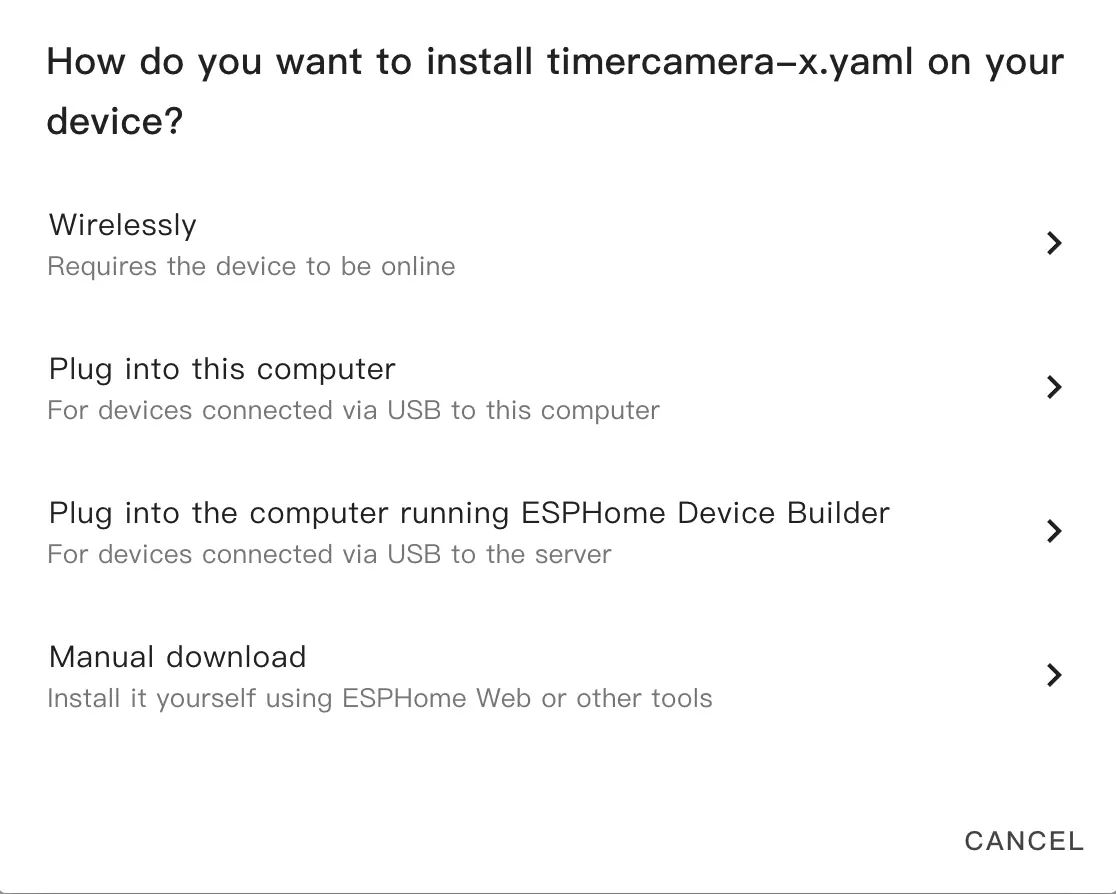
SAVEをクリックし、次にINSTALLをクリックします。ポップアップダイアログで
Manual Downloadを選択します。
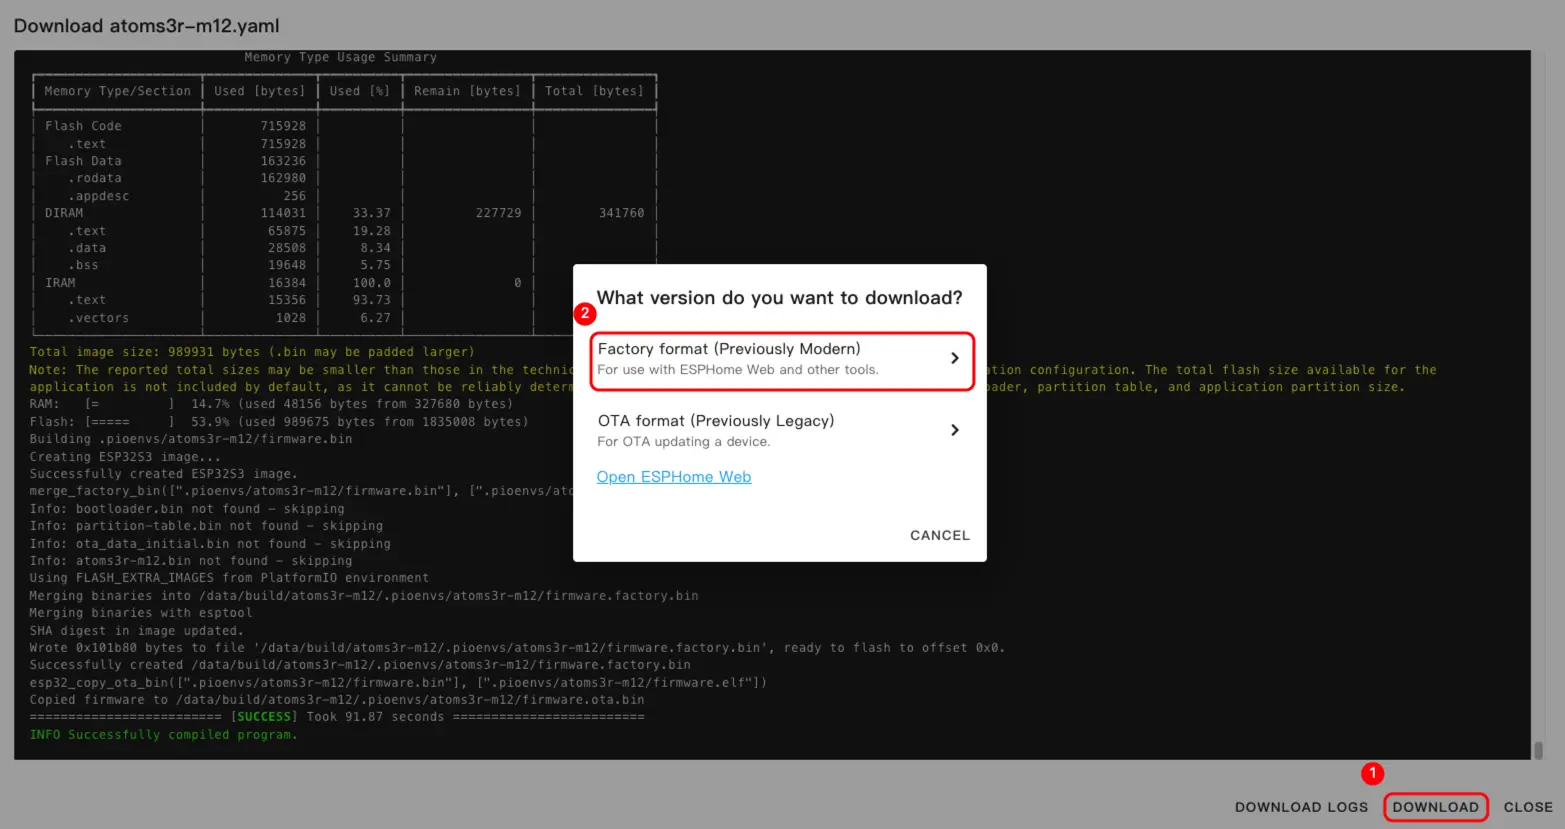
- ファームウェアのコンパイル完了後、
Downloadをクリックし、Factory format (Previously Modern)を選択してファームウェアファイルをローカルに保存します。
情報
完全な設定例は atomic-audio3.5-base.yaml を参照してください。初回のビルドは、Home Assistant ホストの性能やネットワーク環境によって時間がかかる場合があります。
4.2 ファームウェアの書き込み
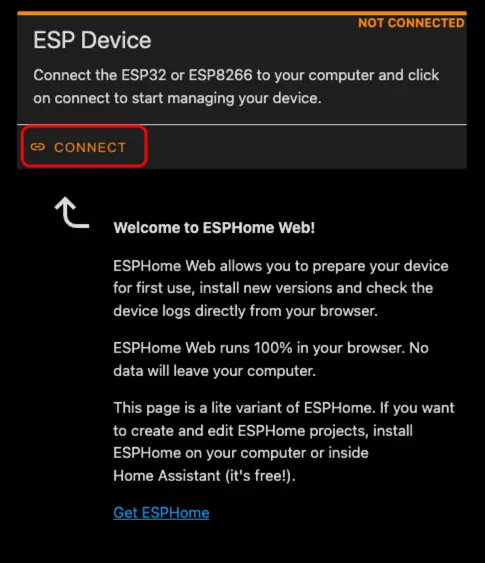
- USB Type-C ケーブルで AtomS3R をコンピューターに接続します。ESPHome Web を開き、
CONNECTをクリックします。
- シリアルポート選択ダイアログで、正しいポートを選択します。
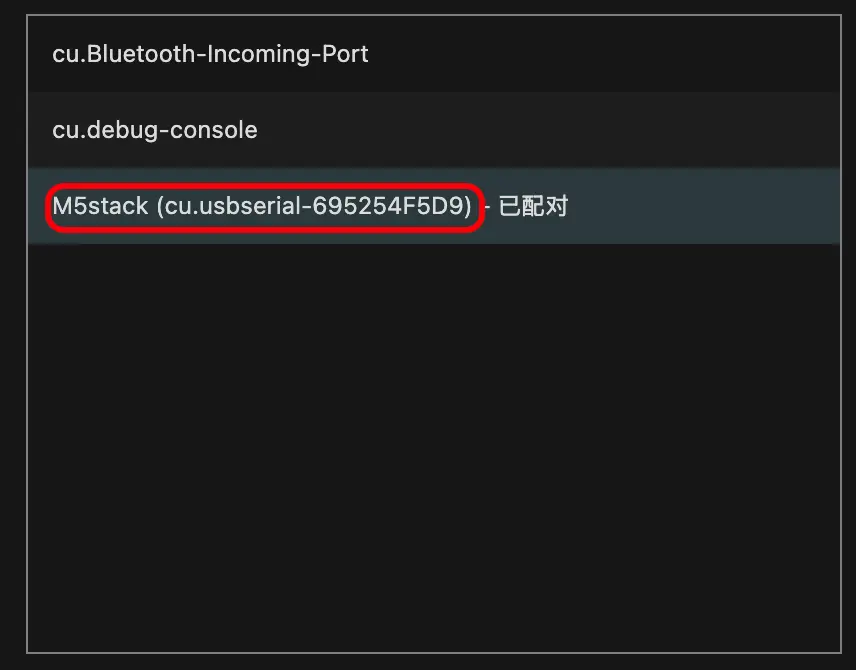
INSTALLをクリックします。
- ステップ 3 でダウンロードしたファームウェアファイルを選択し、書き込みを開始します。
警告
書き込み完了後は必ずデバイスをリセットしてください。リセットしないとファームウェアが正常に起動しない場合があります。
5. Home Assistant での使用開始
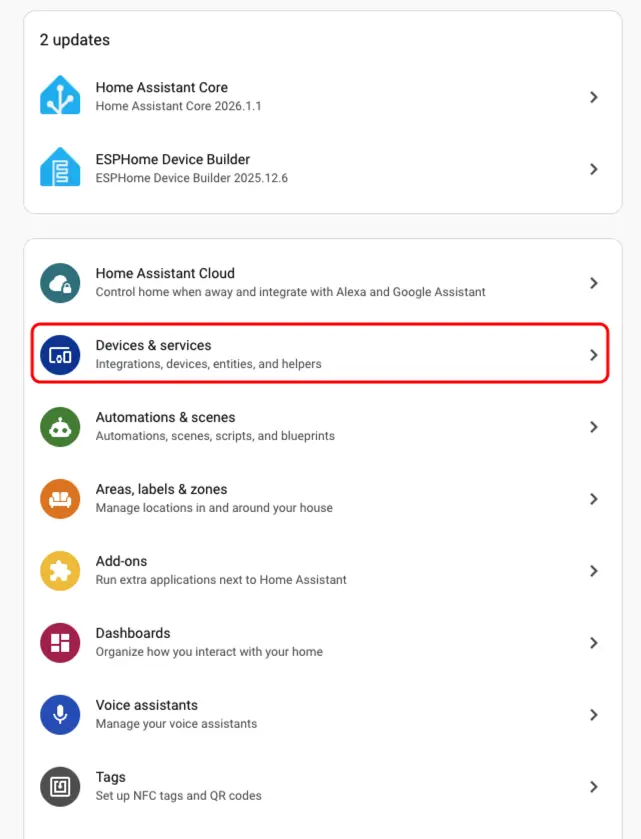
- Home Assistant で、
設定>デバイスとサービスに移動してインテグレーション管理ページを開きます。
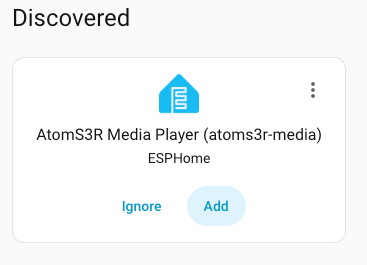
検出済みエリアでオンラインのデバイスを見つけ、設定をクリックしてプロンプトに従って追加を完了します。
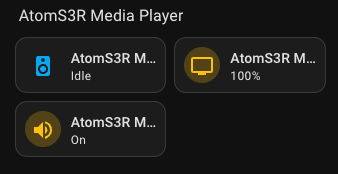
- 追加が完了すると、デバイスページに3つのセンサーエンティティが表示されます。

- 最後に、センサーエンティティをダッシュボードに追加します。