

Home Assistant
Media Player
Expansion
Sensor
Atom VoiceS3R Voice Assistant
This chapter describes how to configure the Atom VoiceS3R as a Home Assistant voice assistant.
Preparation
- Refer to the Home Assistant Official Documentation to install Home Assistant.
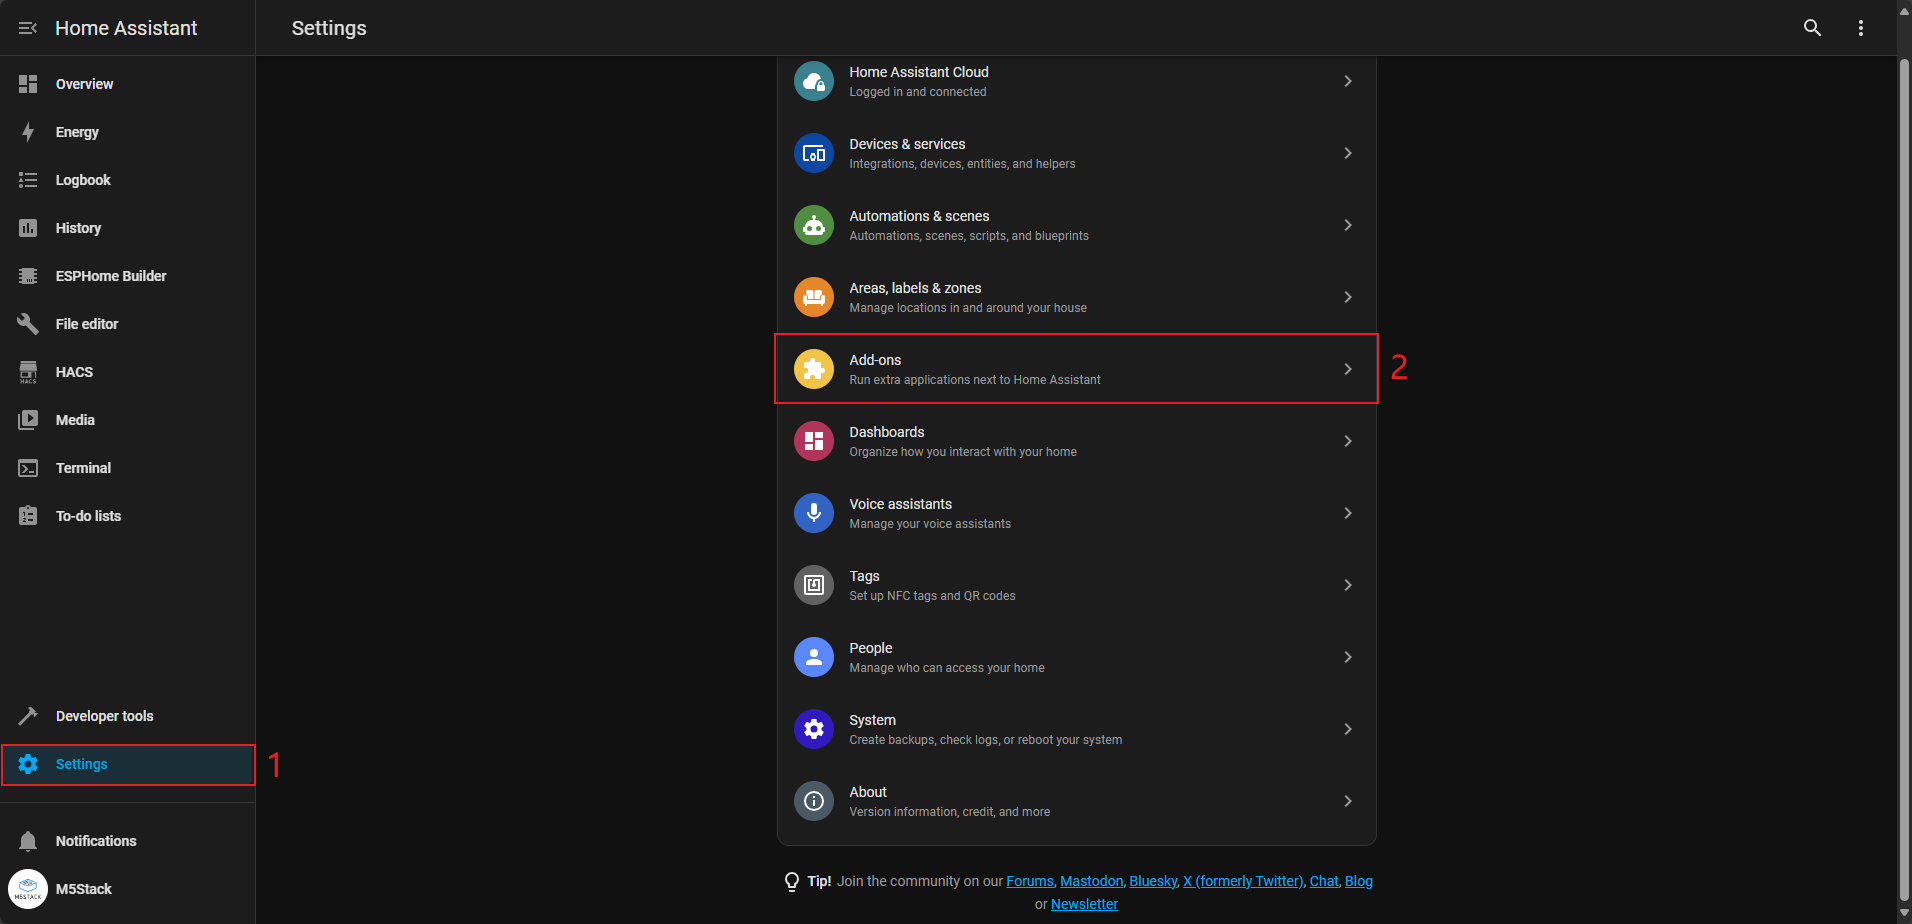
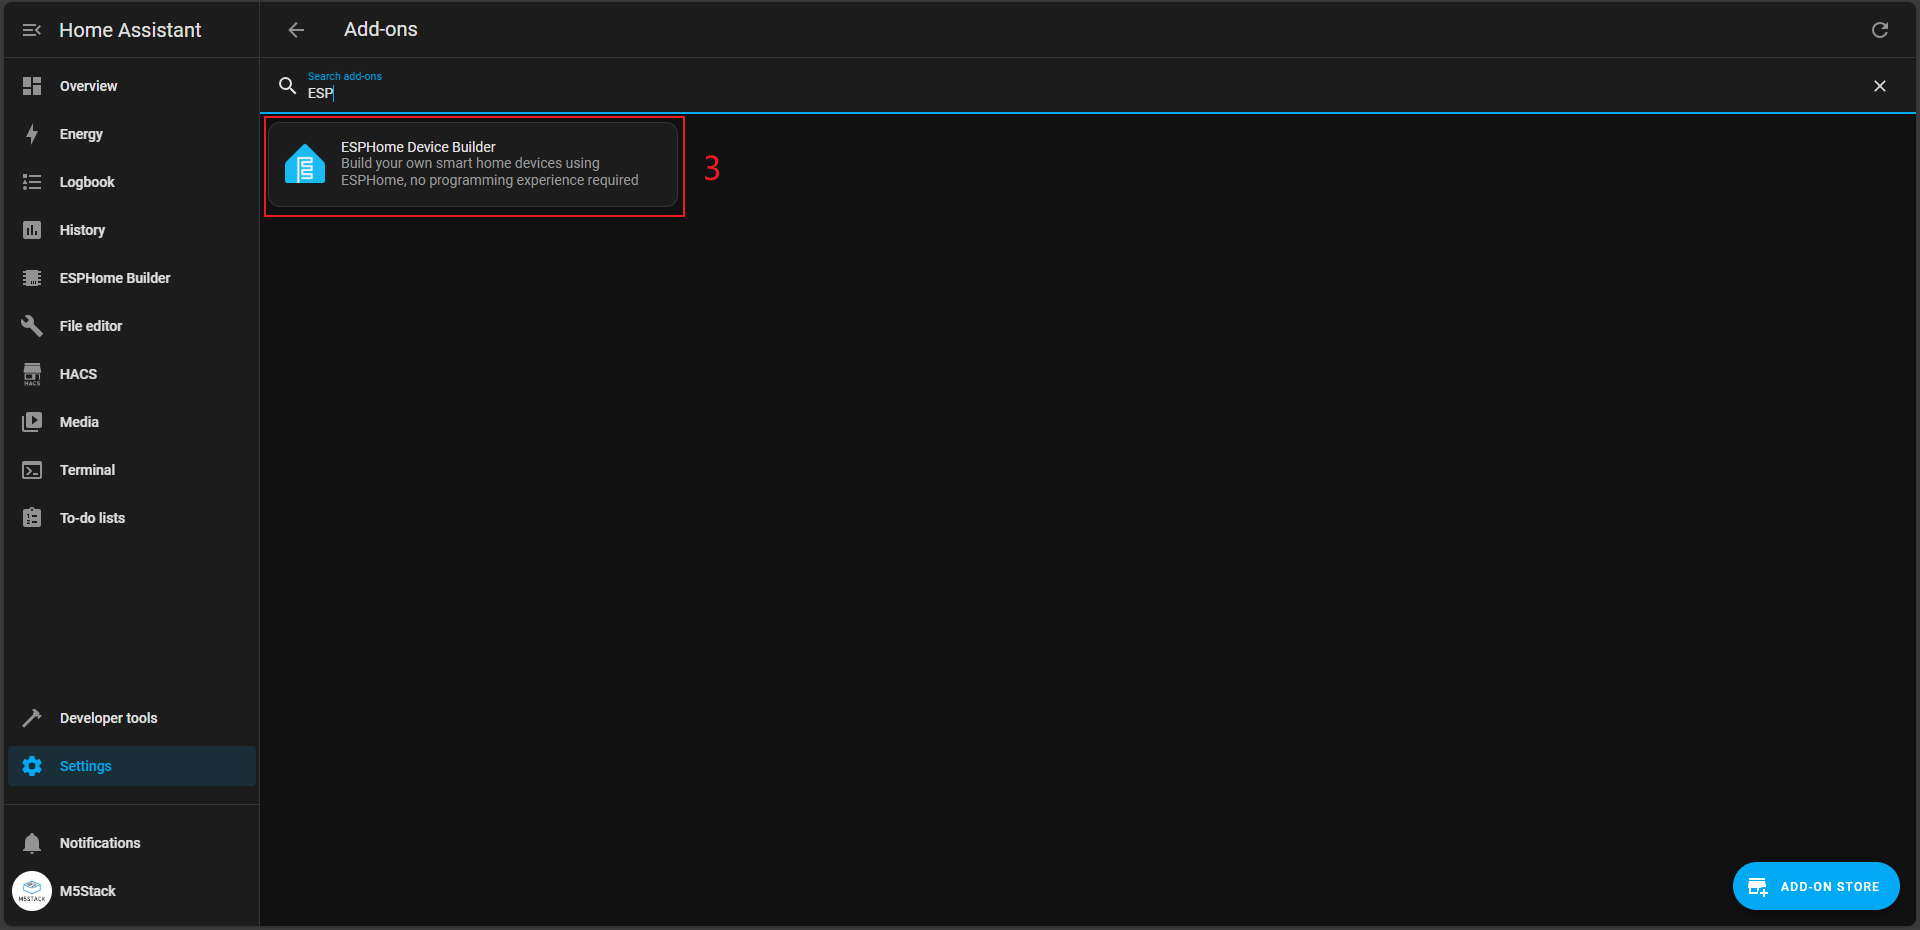
- Install the ESPHome Builder add-on in
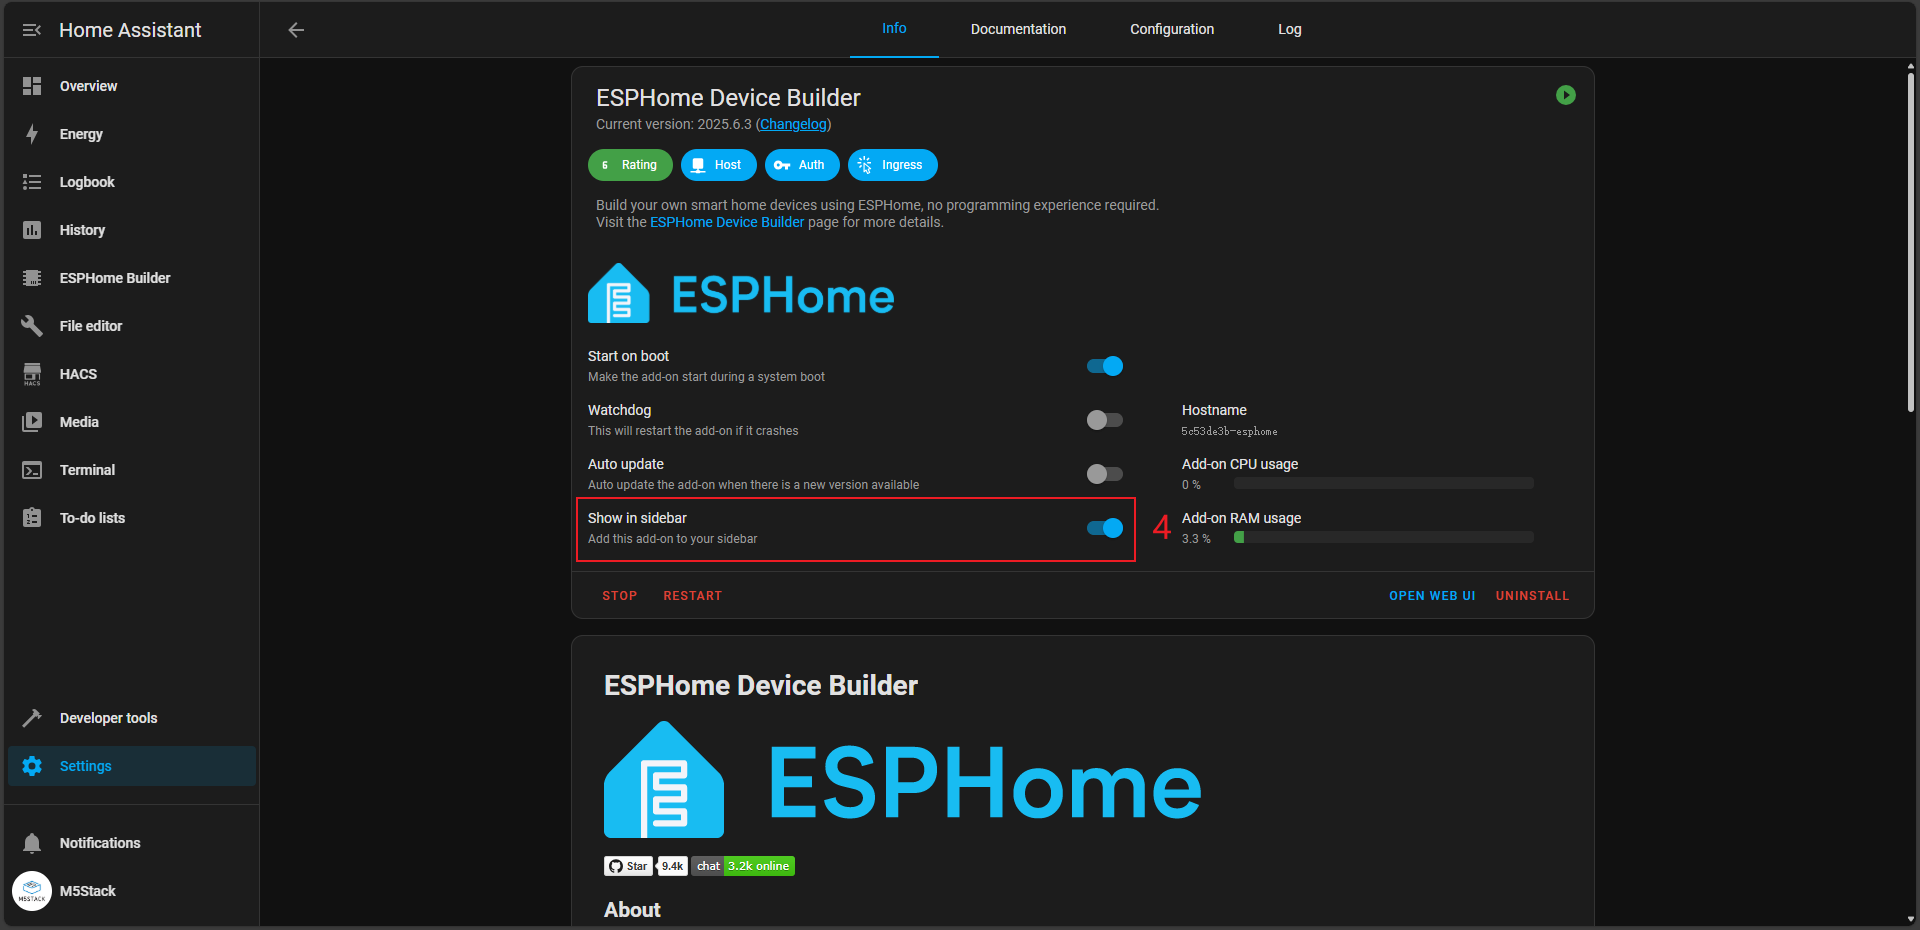
Setting->Add-ons->Add-ons STORE. - Once the ESPHome Builder add-on is installed, select
Show in sidebaron its management page to add it to the left navigation bar. - This tutorial refers to the ESPHome Official Documentation; you can visit it if needed.
- Refer to the following tutorials to complete the installation and configuration of voice recognition related add-ons.
Quick Start
Click the button below to flash the firmware with one click. Follow the on-screen instructions to complete the configuration and quickly experience Atom VoiceS3R integration with Home Assistant. For one-click flashing and subsequent configuration, please refer to the tutorial.
Note
Change Log
2026-02 Fixed compilation errors caused by changes in the new version of the ESPHome API. The new version is compiled under ESPHome 2025.1.2. If you encounter problems, consider switching to this version.
2026-01 Optimized user experience and resolved some compilation warnings.
2025-09 Compiled and tested under ESPHome 2025.9.0.
2026-01 Optimized user experience and resolved some compilation warnings.
2025-09 Compiled and tested under ESPHome 2025.9.0.
Create Device
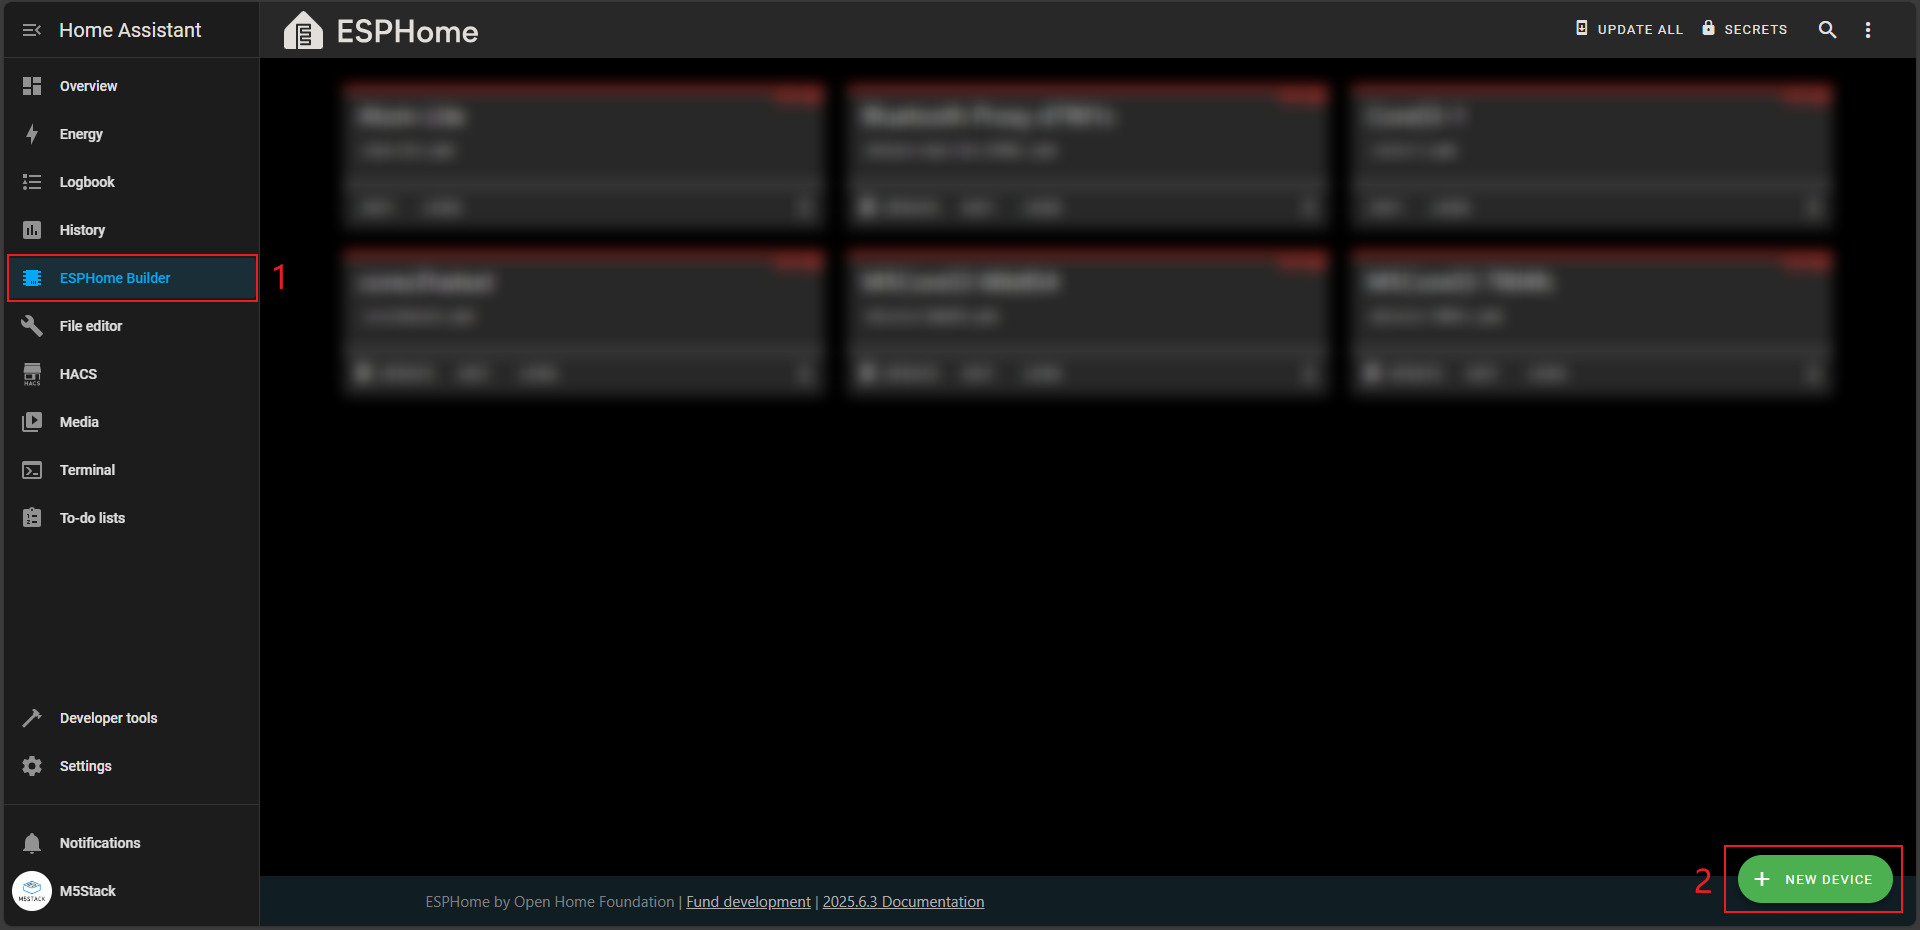
- Open the ESPHome add-on page and click
NEW DEVICEin the bottom right corner to create a new device.
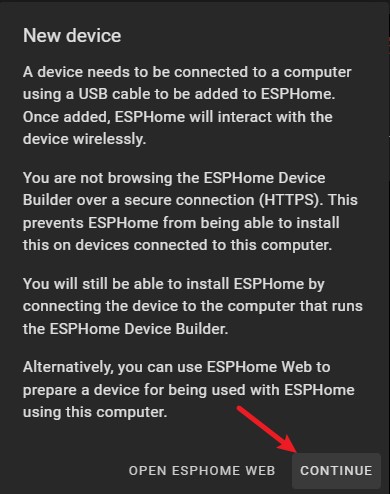
- When the New device prompt appears, click the
CONTINUEbutton.
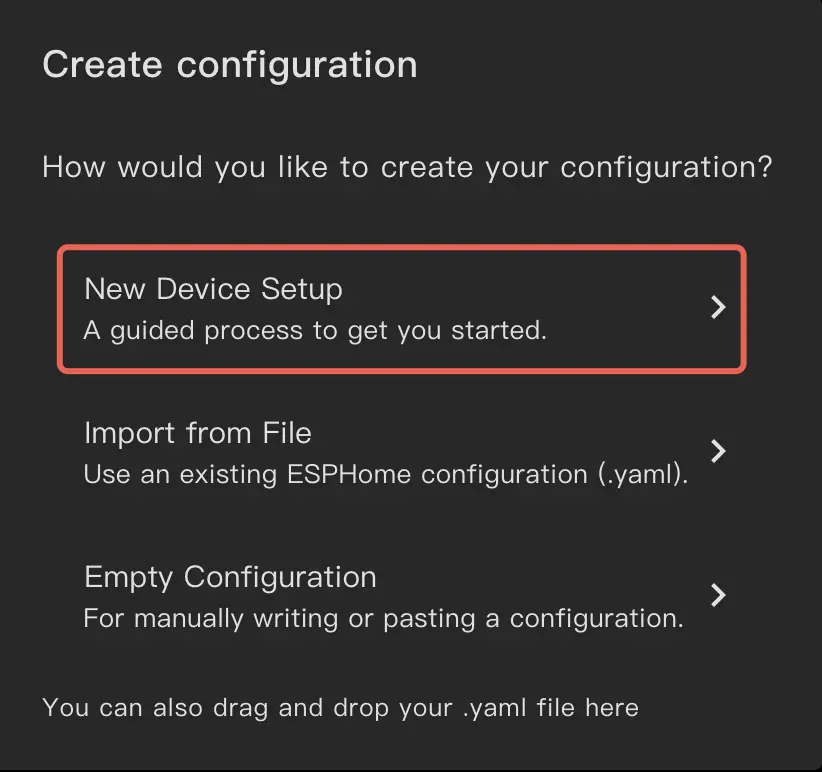
- Click
New Device Setup.
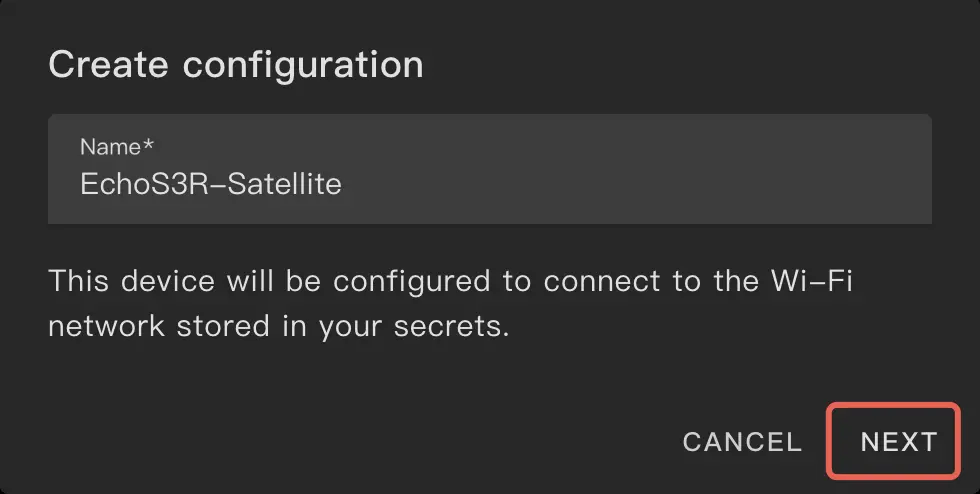
- Give the configuration a suitable name.
- First, uncheck
Use recommended settings, then selectESP32S3as the device.
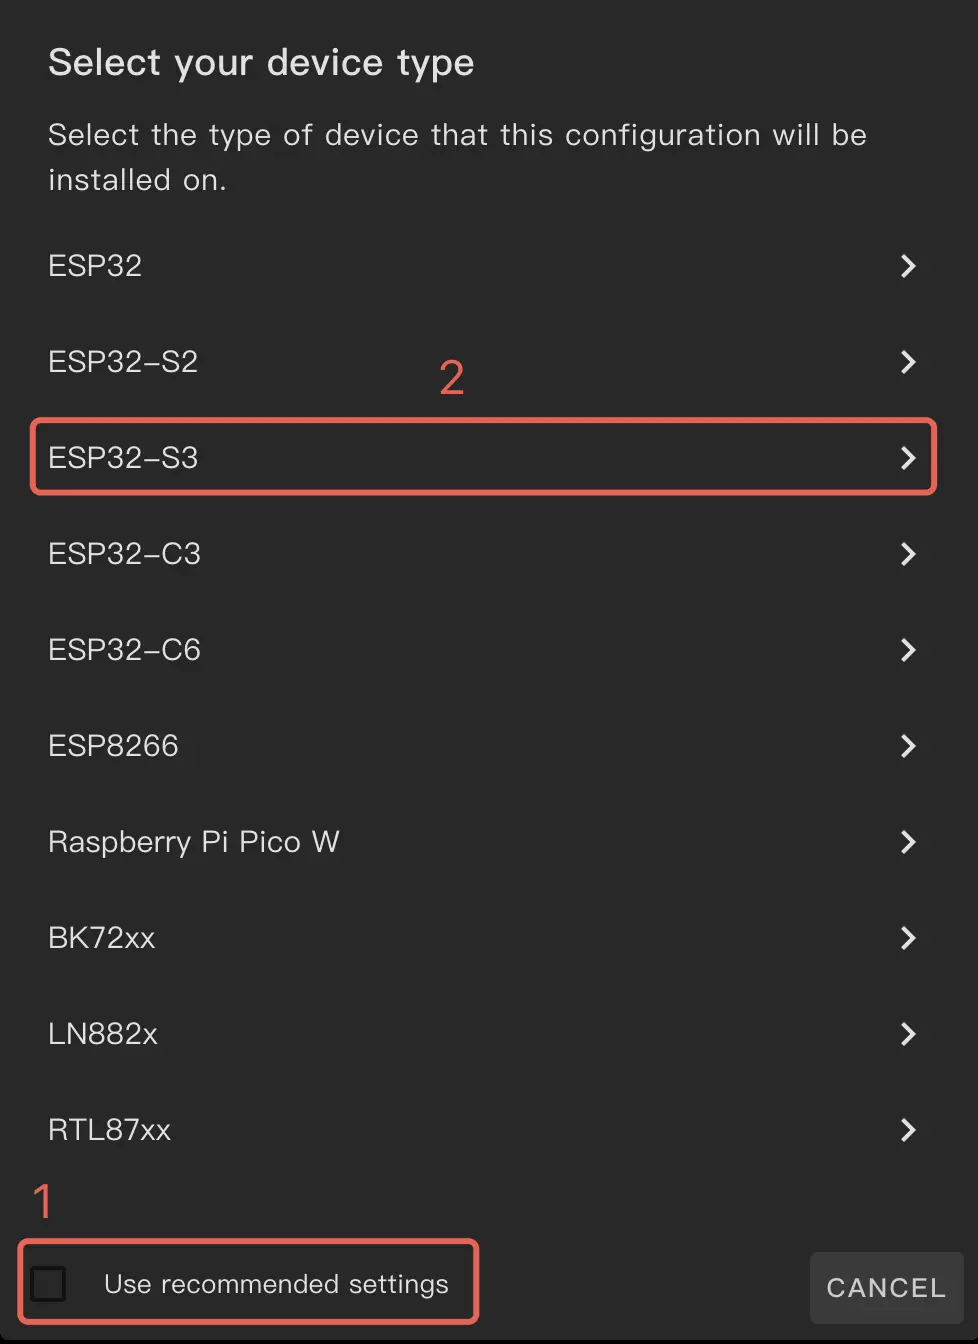
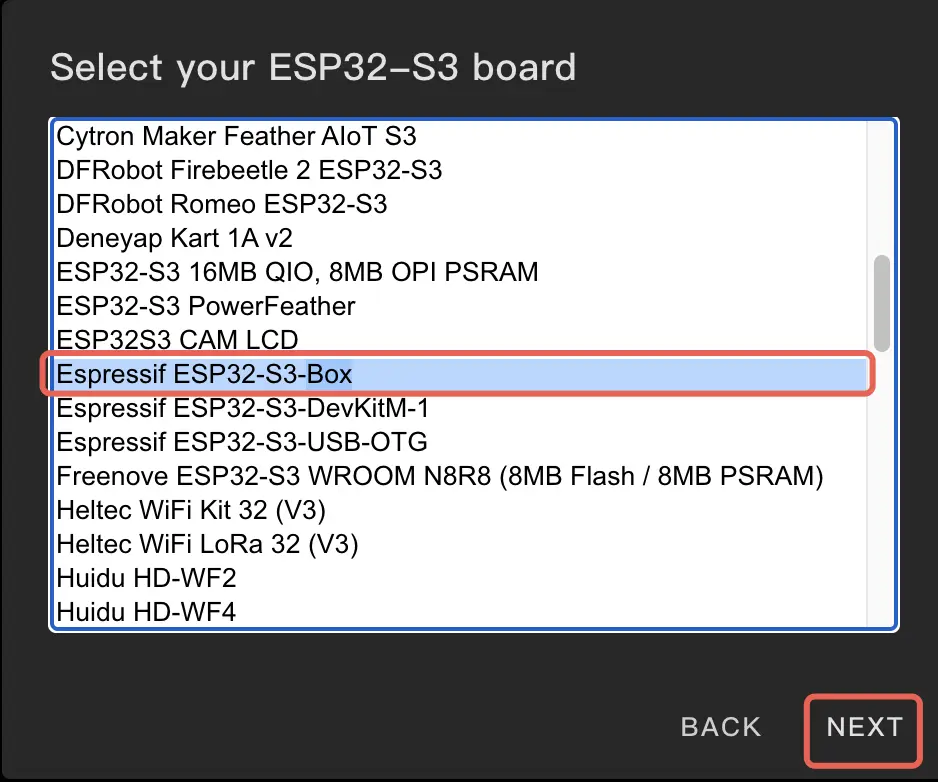
- A pop-up will prompt you to select the appropriate device. Here we choose
Espressif ESP32-S3-Box, then continue to the next step to set the Home Assistant API Key and YAML configuration file.
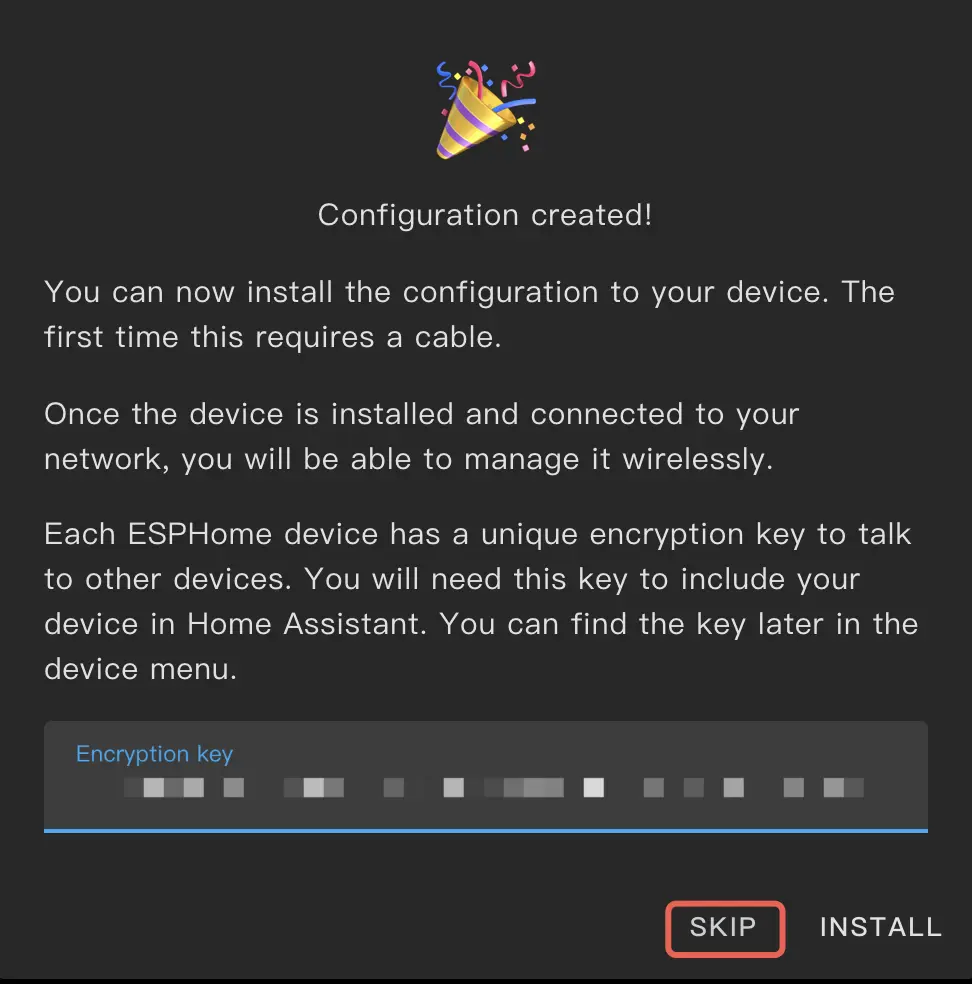
- Copy the API Key for later use, then click
Skip.
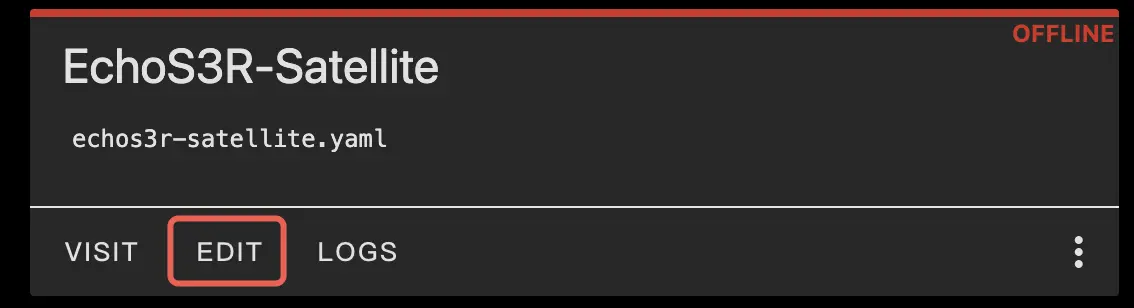
- Under the generated configuration file, click
Editto continue modifying the generated YAML file.
Modify Configuration
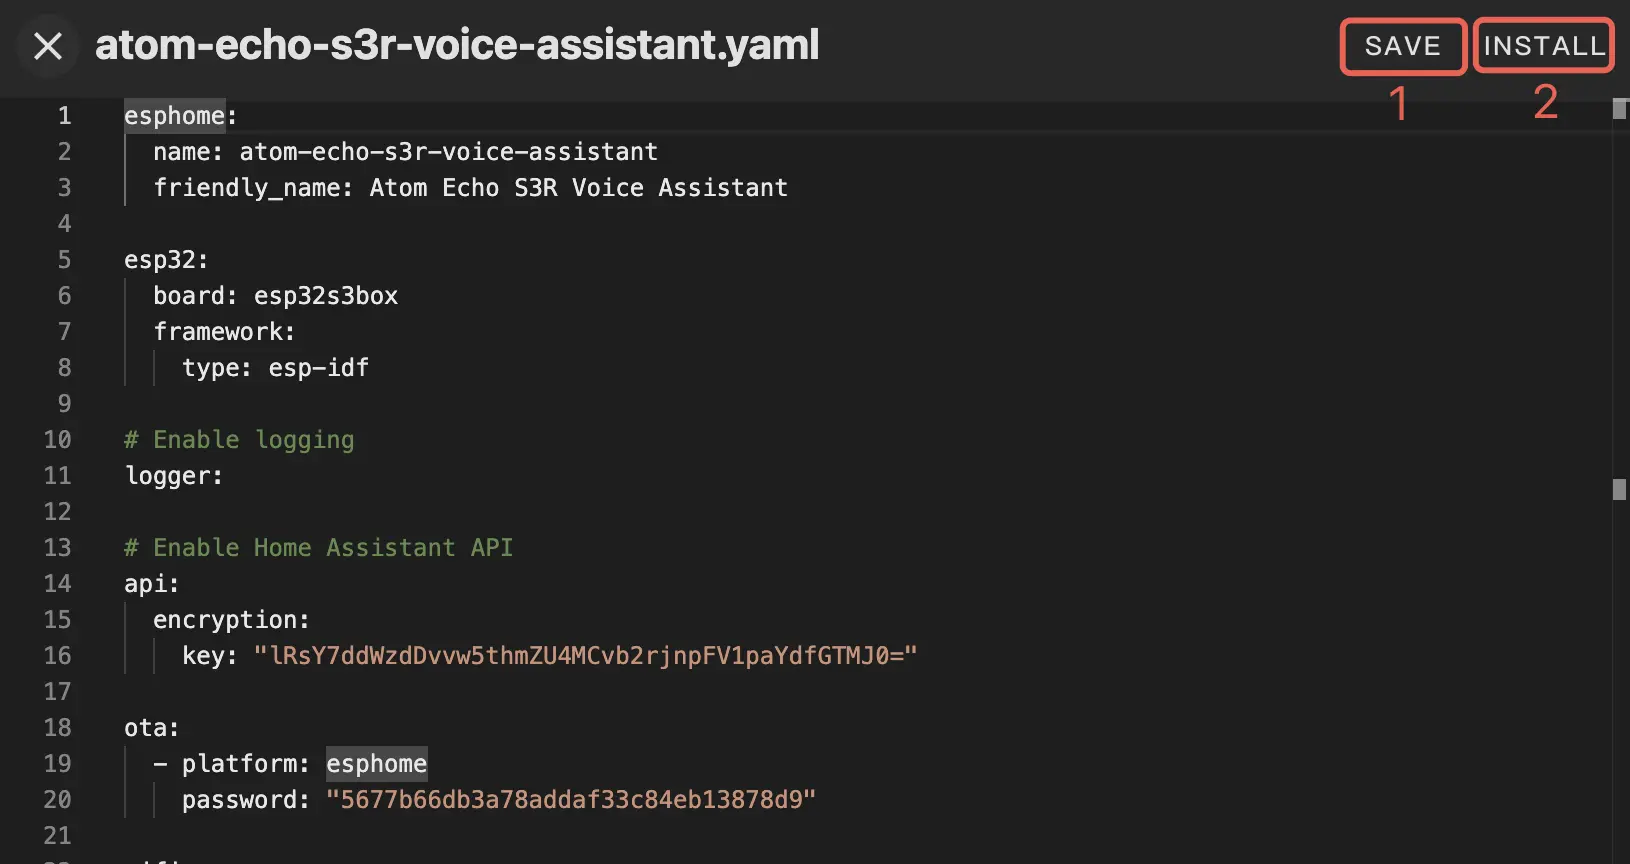
- The YAML configuration file example is as follows. Add the
packagesoption to the end.
esphome:
  name: atom-echos3r-voice-assistant
  friendly_name: Atom Echo S3R Voice Assistant

esp32:
  board: esp32s3box
  framework:
    type: esp-idf

# Enable logging
logger:

# Enable Home Assistant API
api:
  encryption:
    key: "***********************"

ota:
  - platform: esphome
    password: "************************"

wifi:
  ssid: !secret wifi_ssid
  password: !secret wifi_password

  # Enable fallback hotspot (captive portal) in case wifi connection fails
  ap:
    ssid: "Atom-EchoS3R-Voice-Assistant"
    password: ""

captive_portal:

# Add the external package here
packages:
  remote_package_files:
    url: https://github.com/m5stack/esphome-yaml
    files: [common/atom-echos3r-satellite-base.yaml]
    ref: main
refresh: 0s- Click
Save, thenInstallto perform the installation.
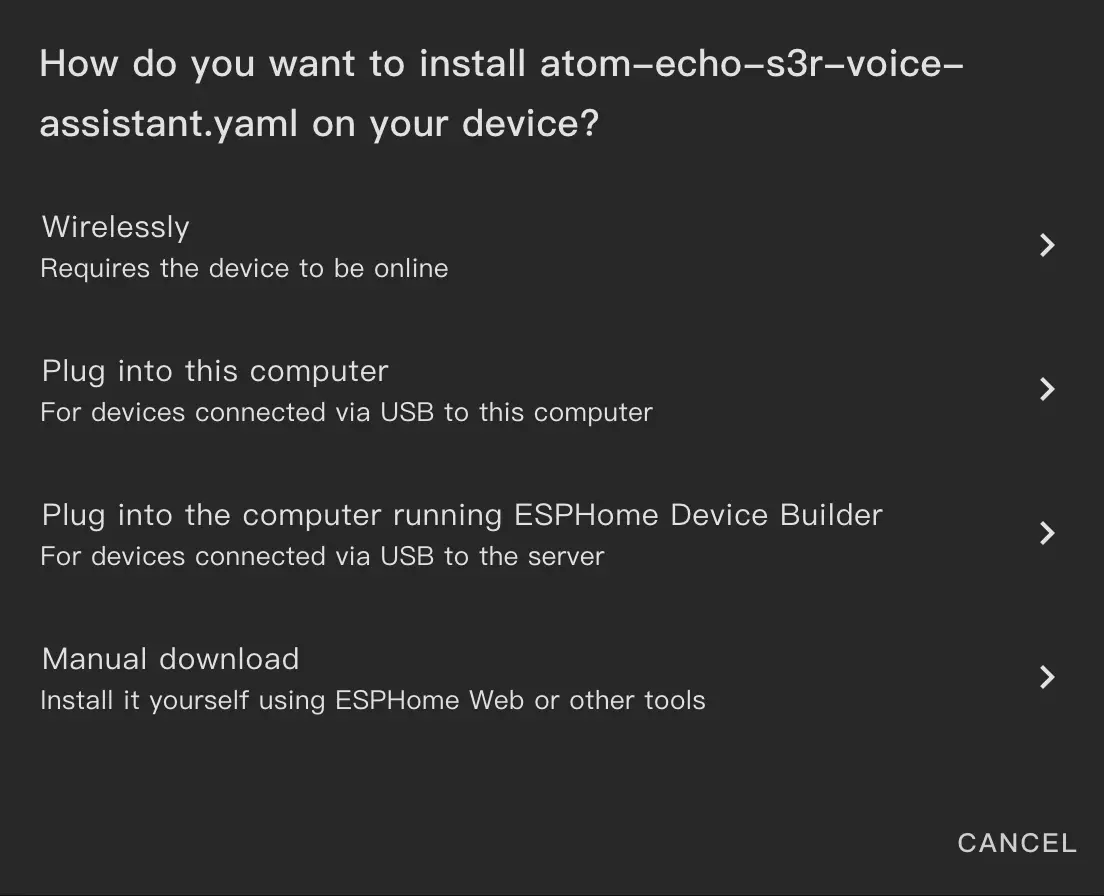
- Choose your installation method according to the actual situation. Generally, if the device is already connected to the Home Assistant host and has entered download mode, you can select
Plug into the computer running ESPHome Device Builder, then select the serial device to compile and upload.
Here we use Manual download as a demonstration:
Note
The initial installation may take a long time, depending on your network connection and Home Assistant host performance.
Download and Burn Firmware
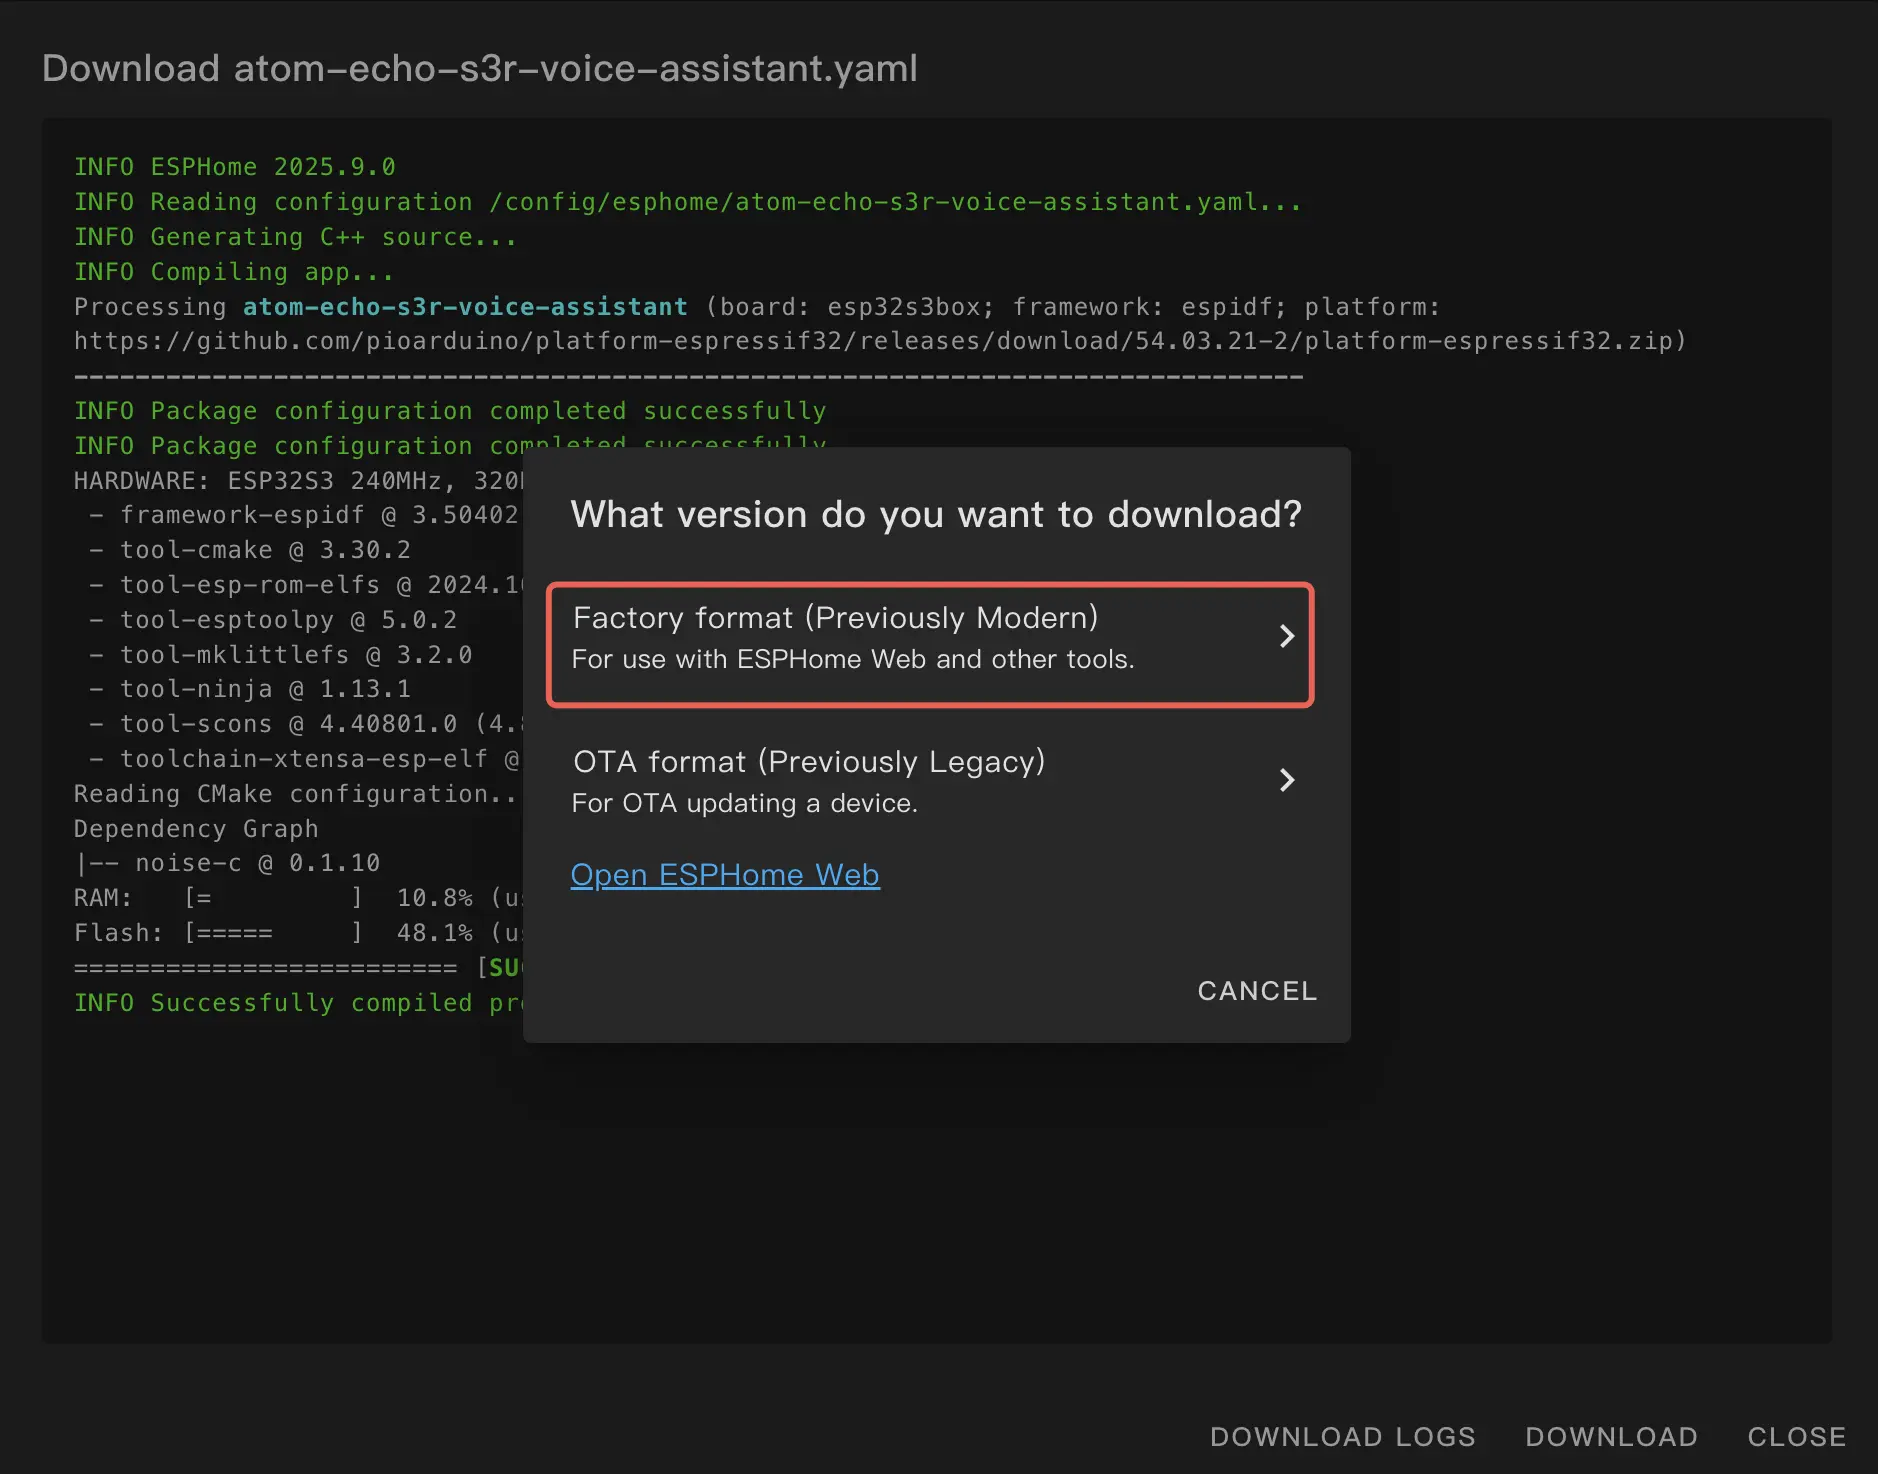
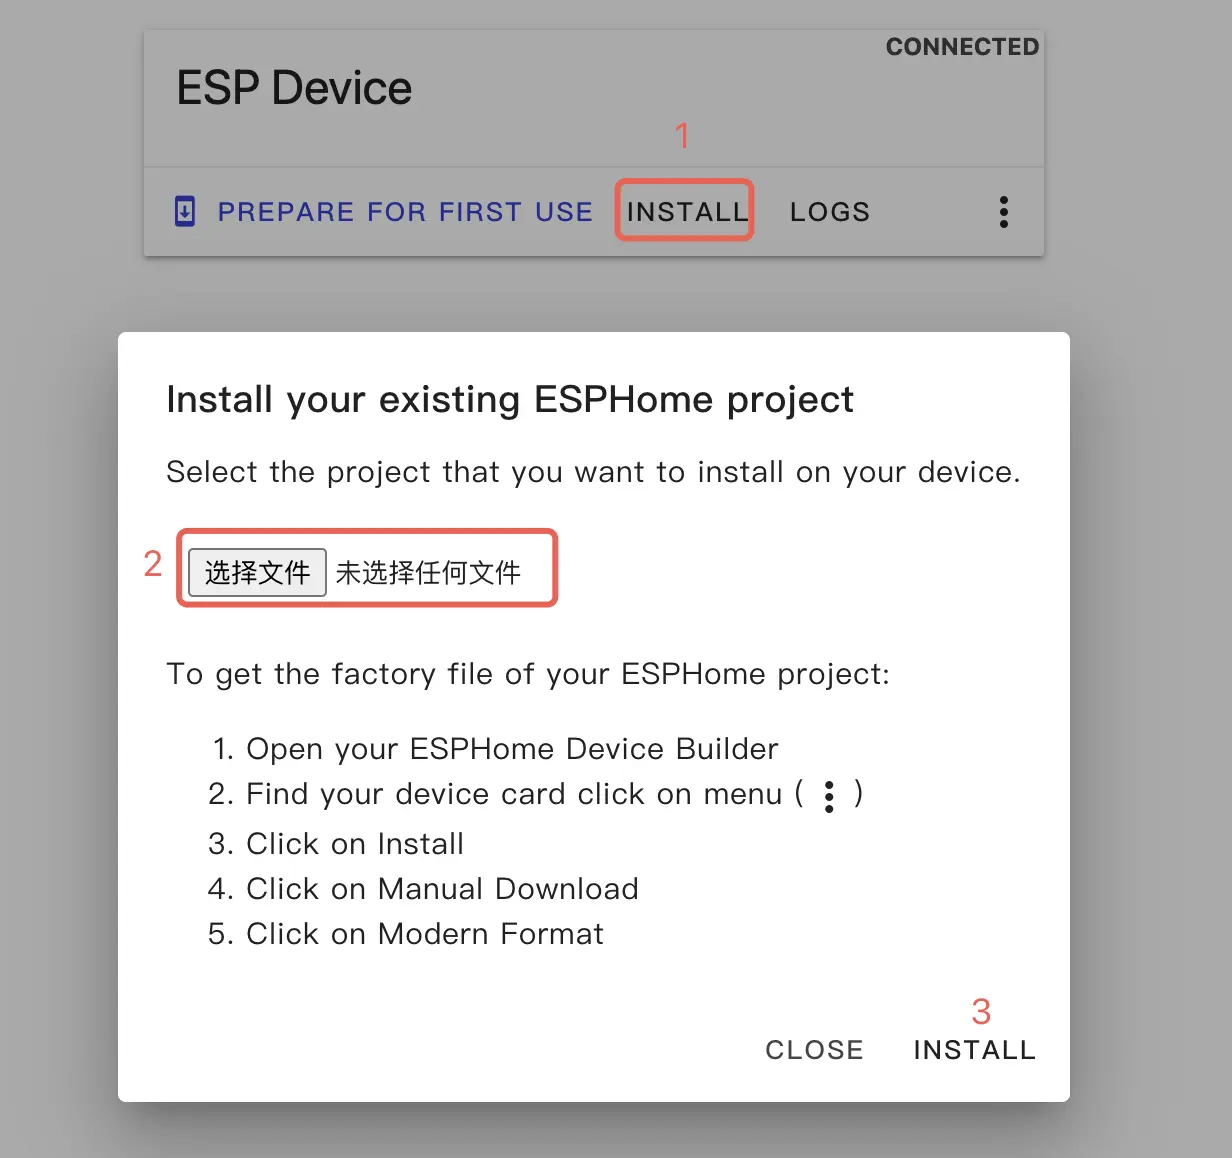
- Once the compilation is complete, click
Open ESPHome Web. Meanwhile, selectFactory formatto download the firmware.
- On the ESPHome Web page, click
CONNECTto connect your device.
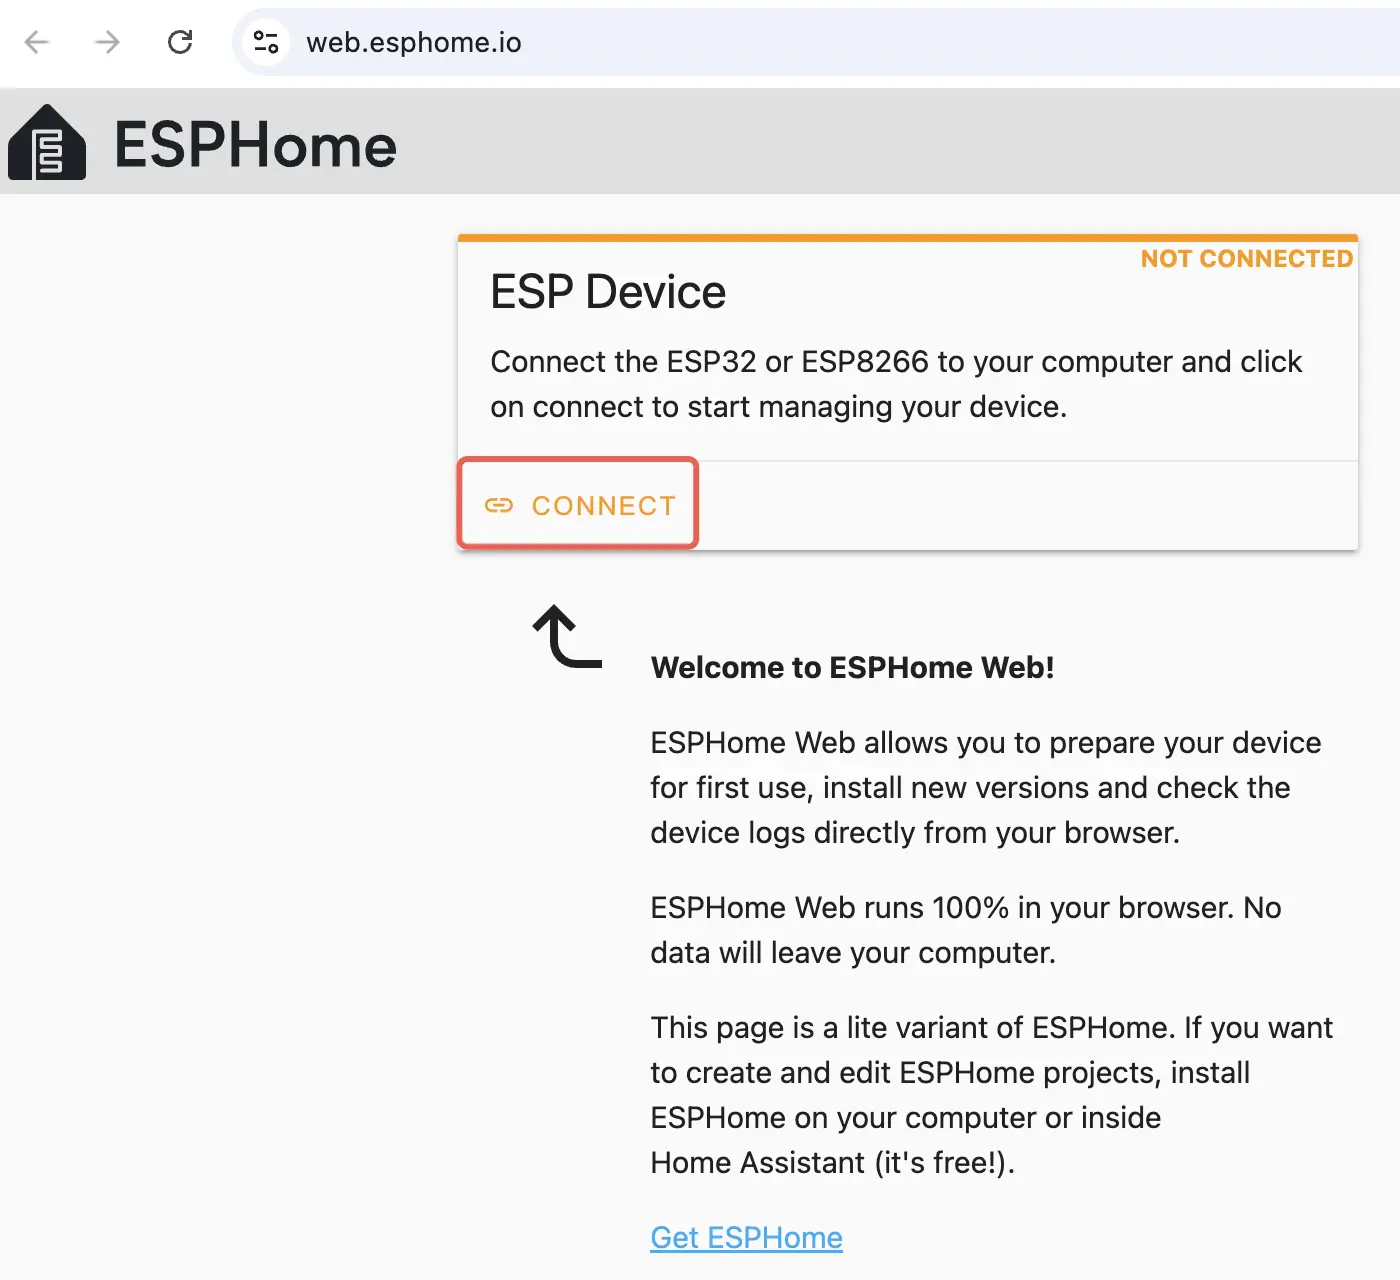
- Select the correct serial port.
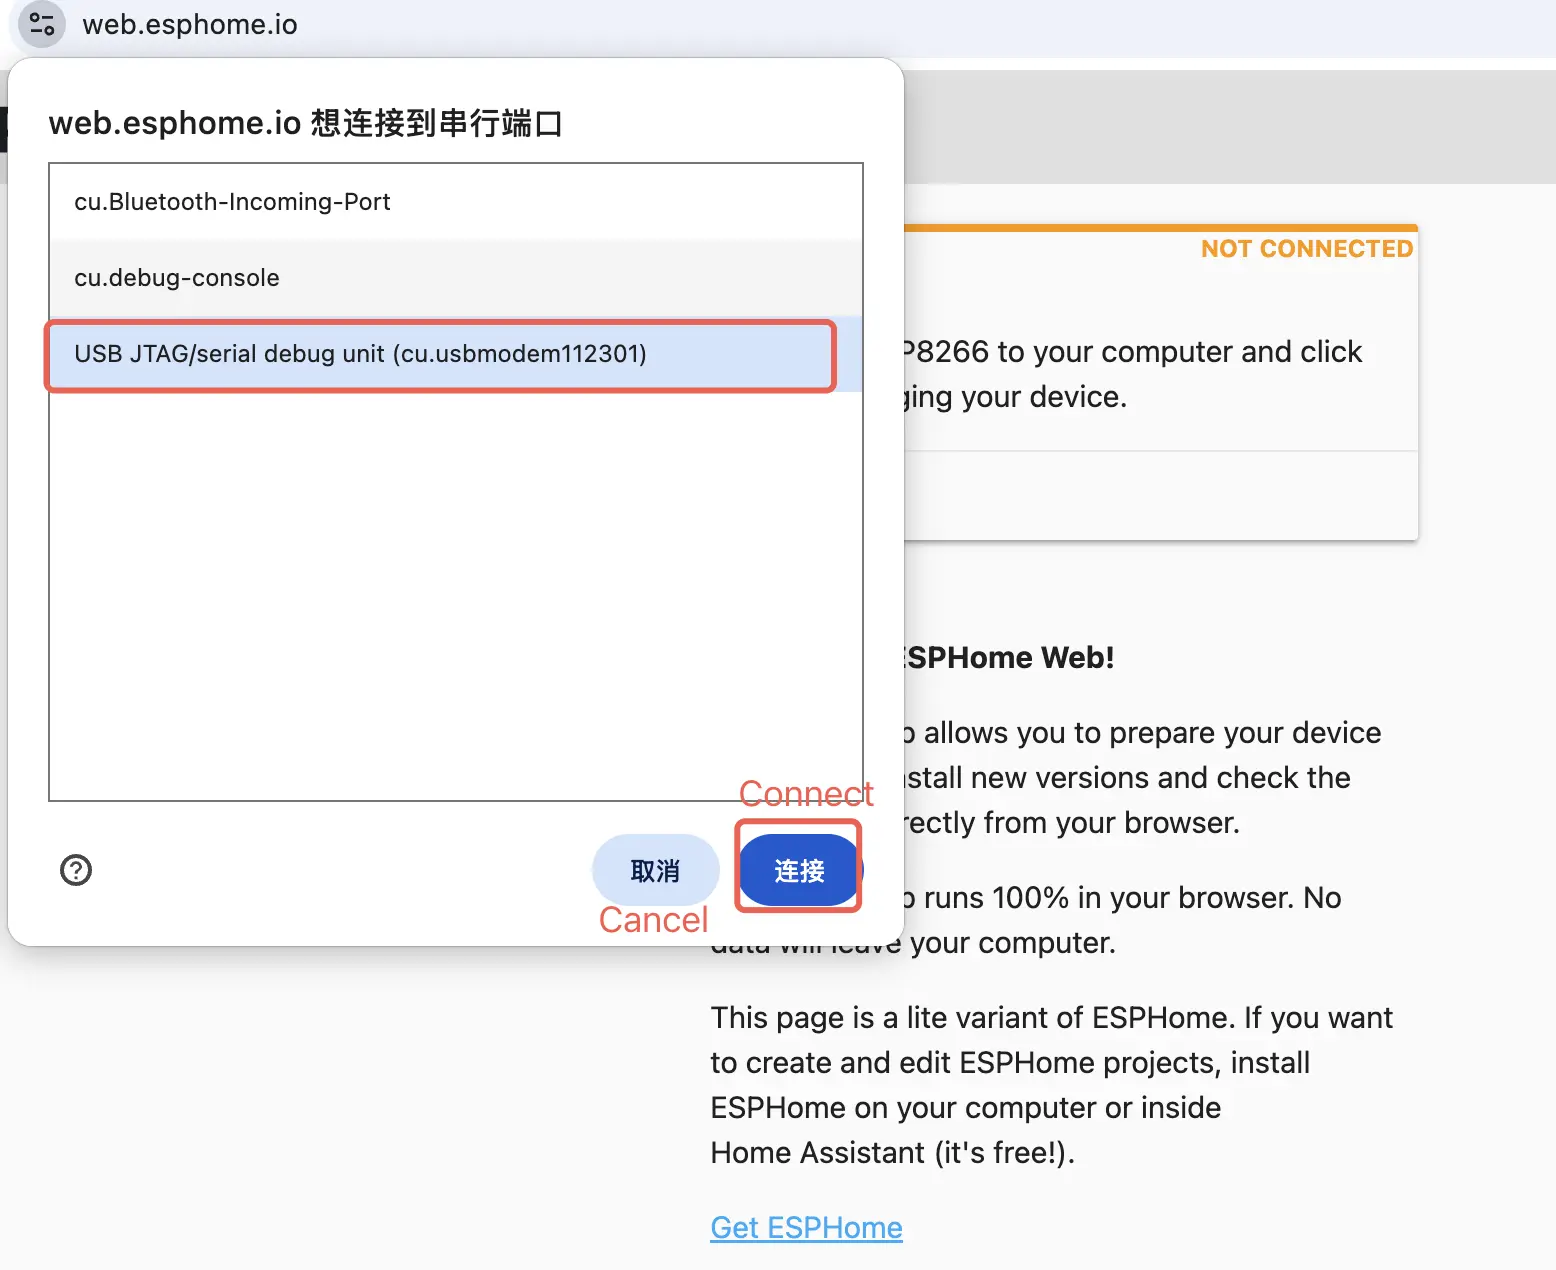
- Click
INSTALLto upload the firmware.
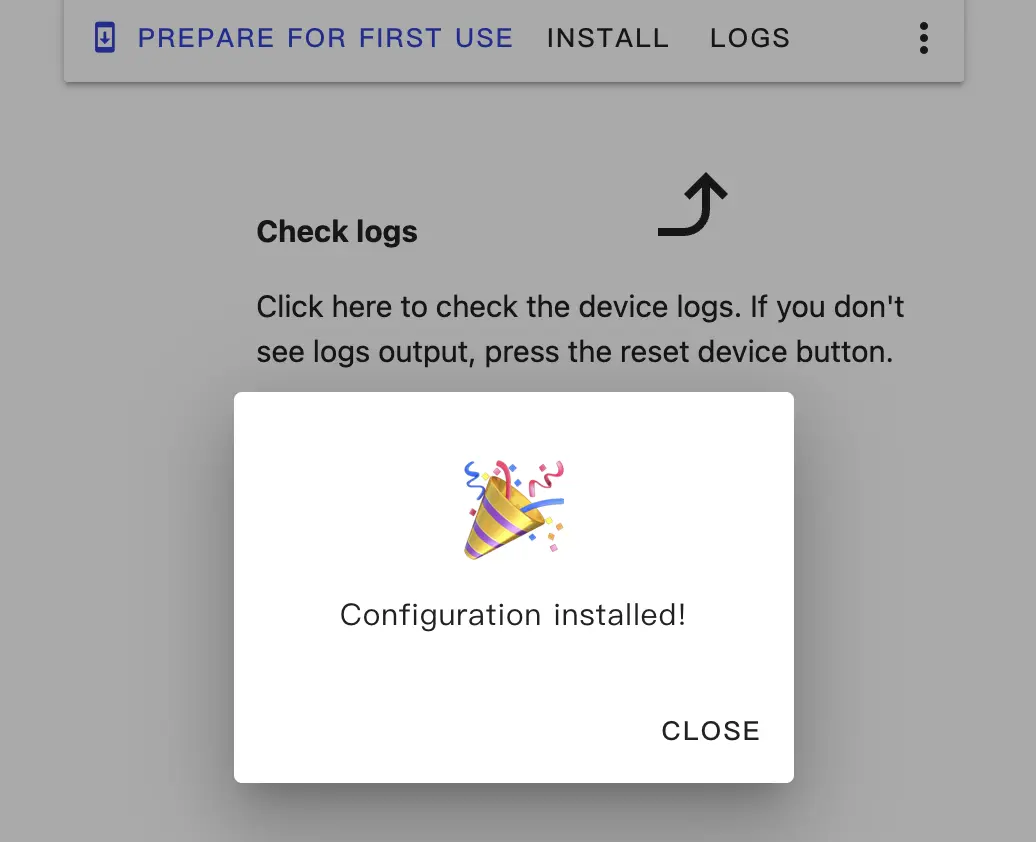
- Wait for the burning to complete, then RESET the device.
Learn
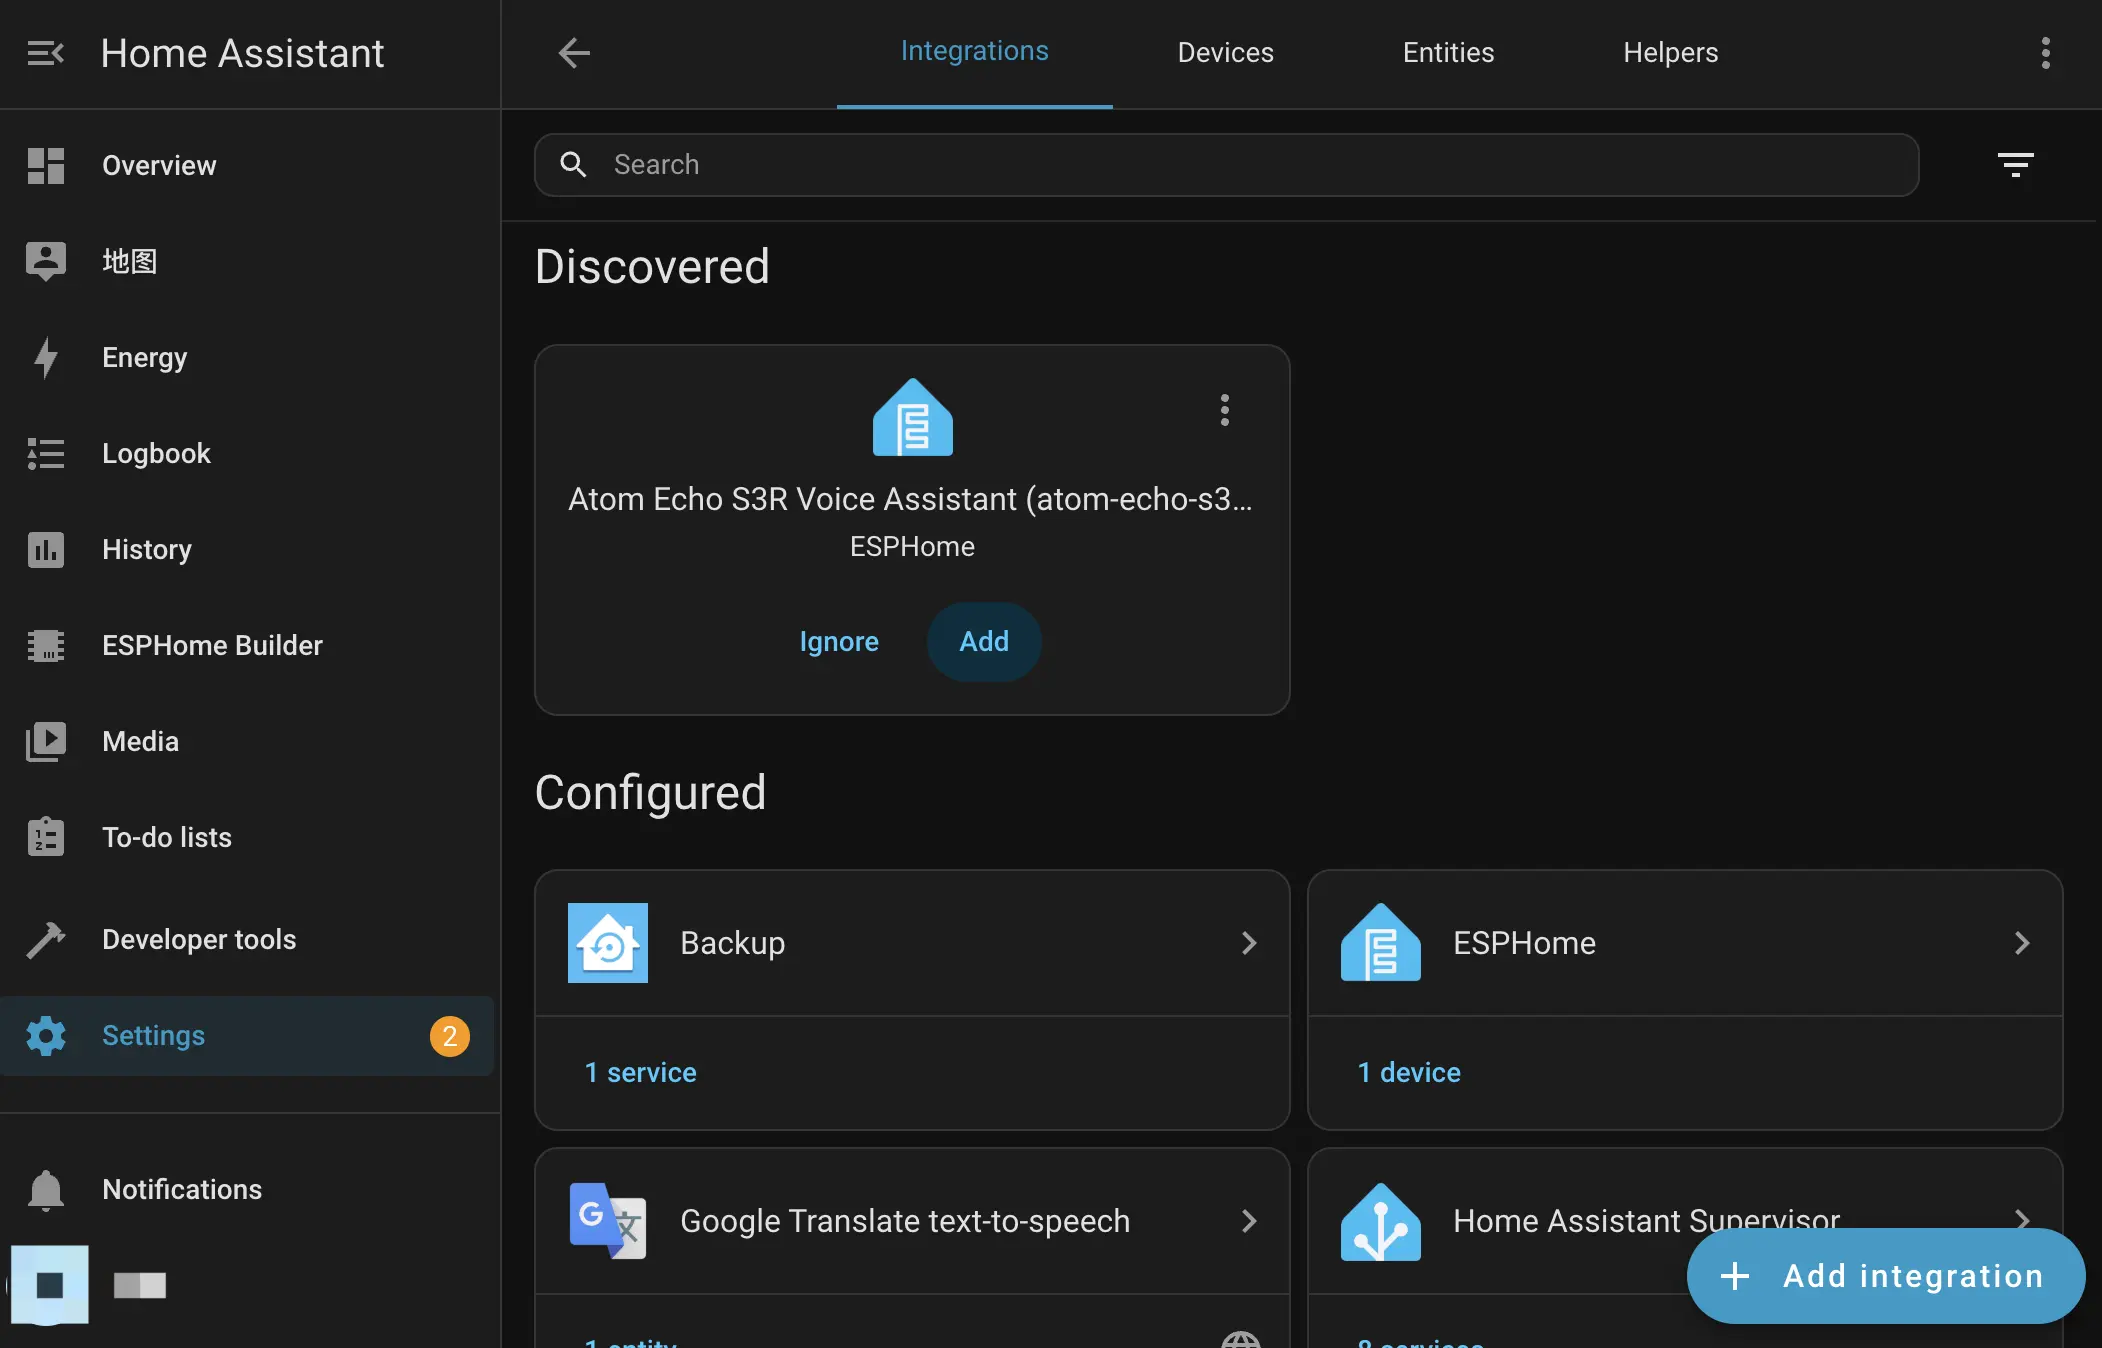
- After the device powers on, it will automatically connect to WiFi. Home Assistant devices on the same local network will prompt that a new device has been discovered. You can find the device in Notifications and click
Check it outto configure it. - If there is no notification reminder, you can go to
Settings -> Devices & Servicesto find the device and configure it.
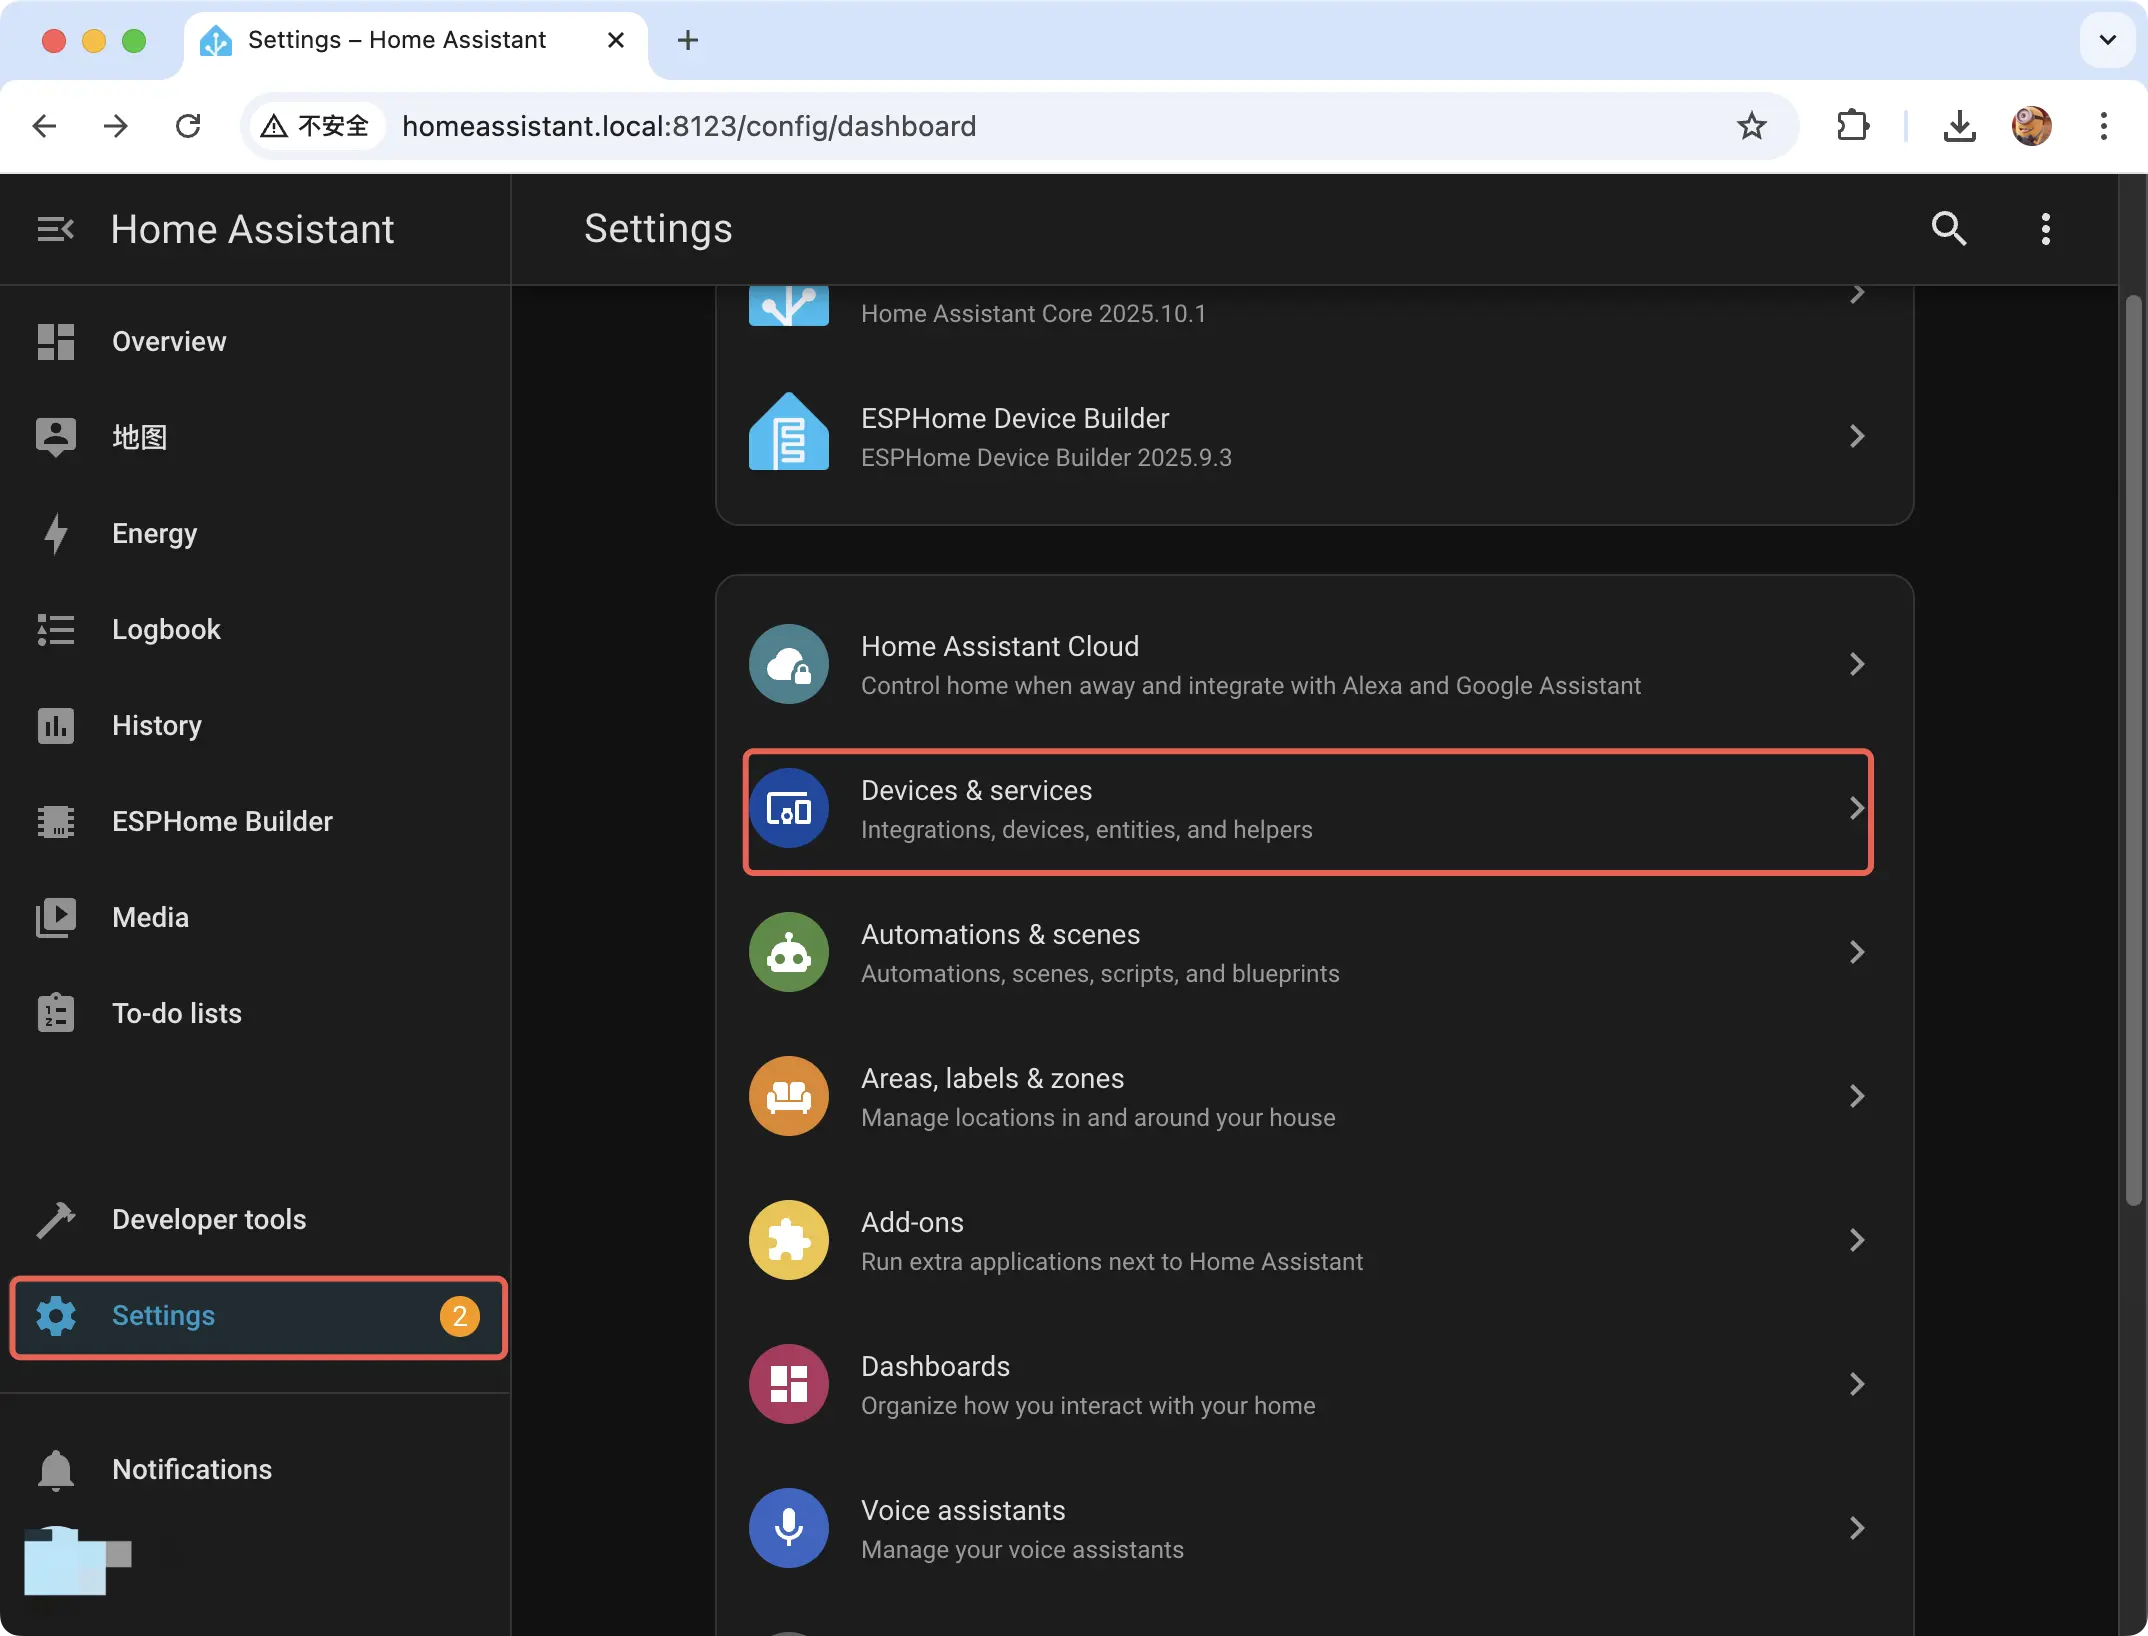
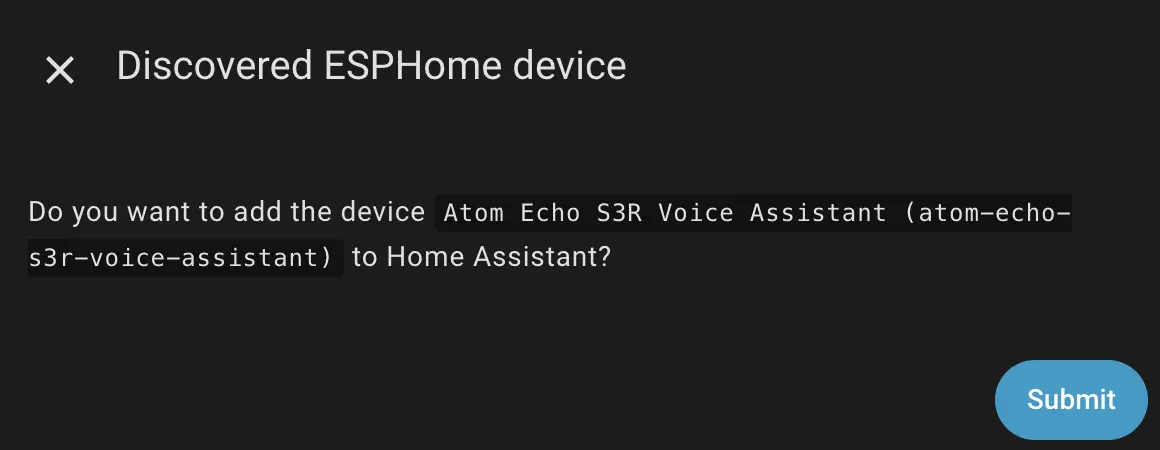
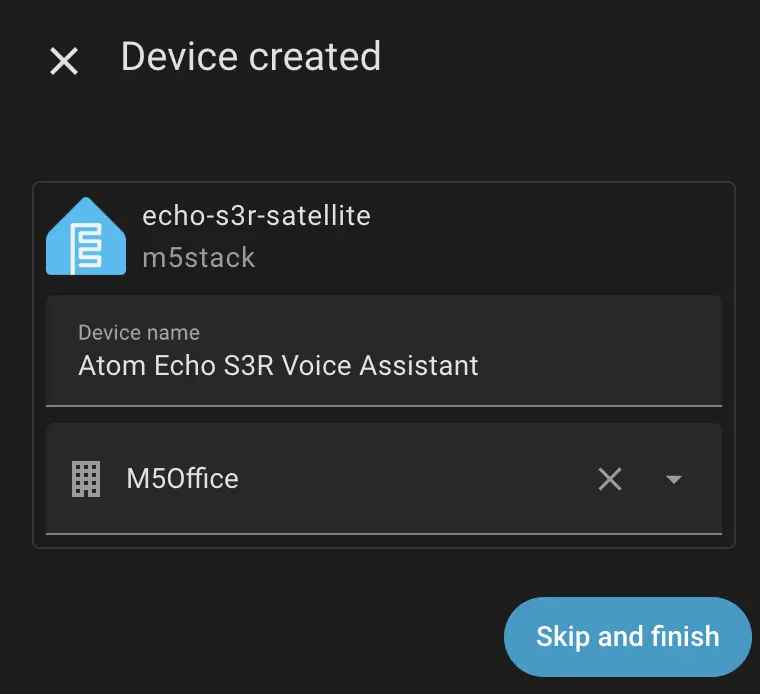
- Click
Addto add the integration.
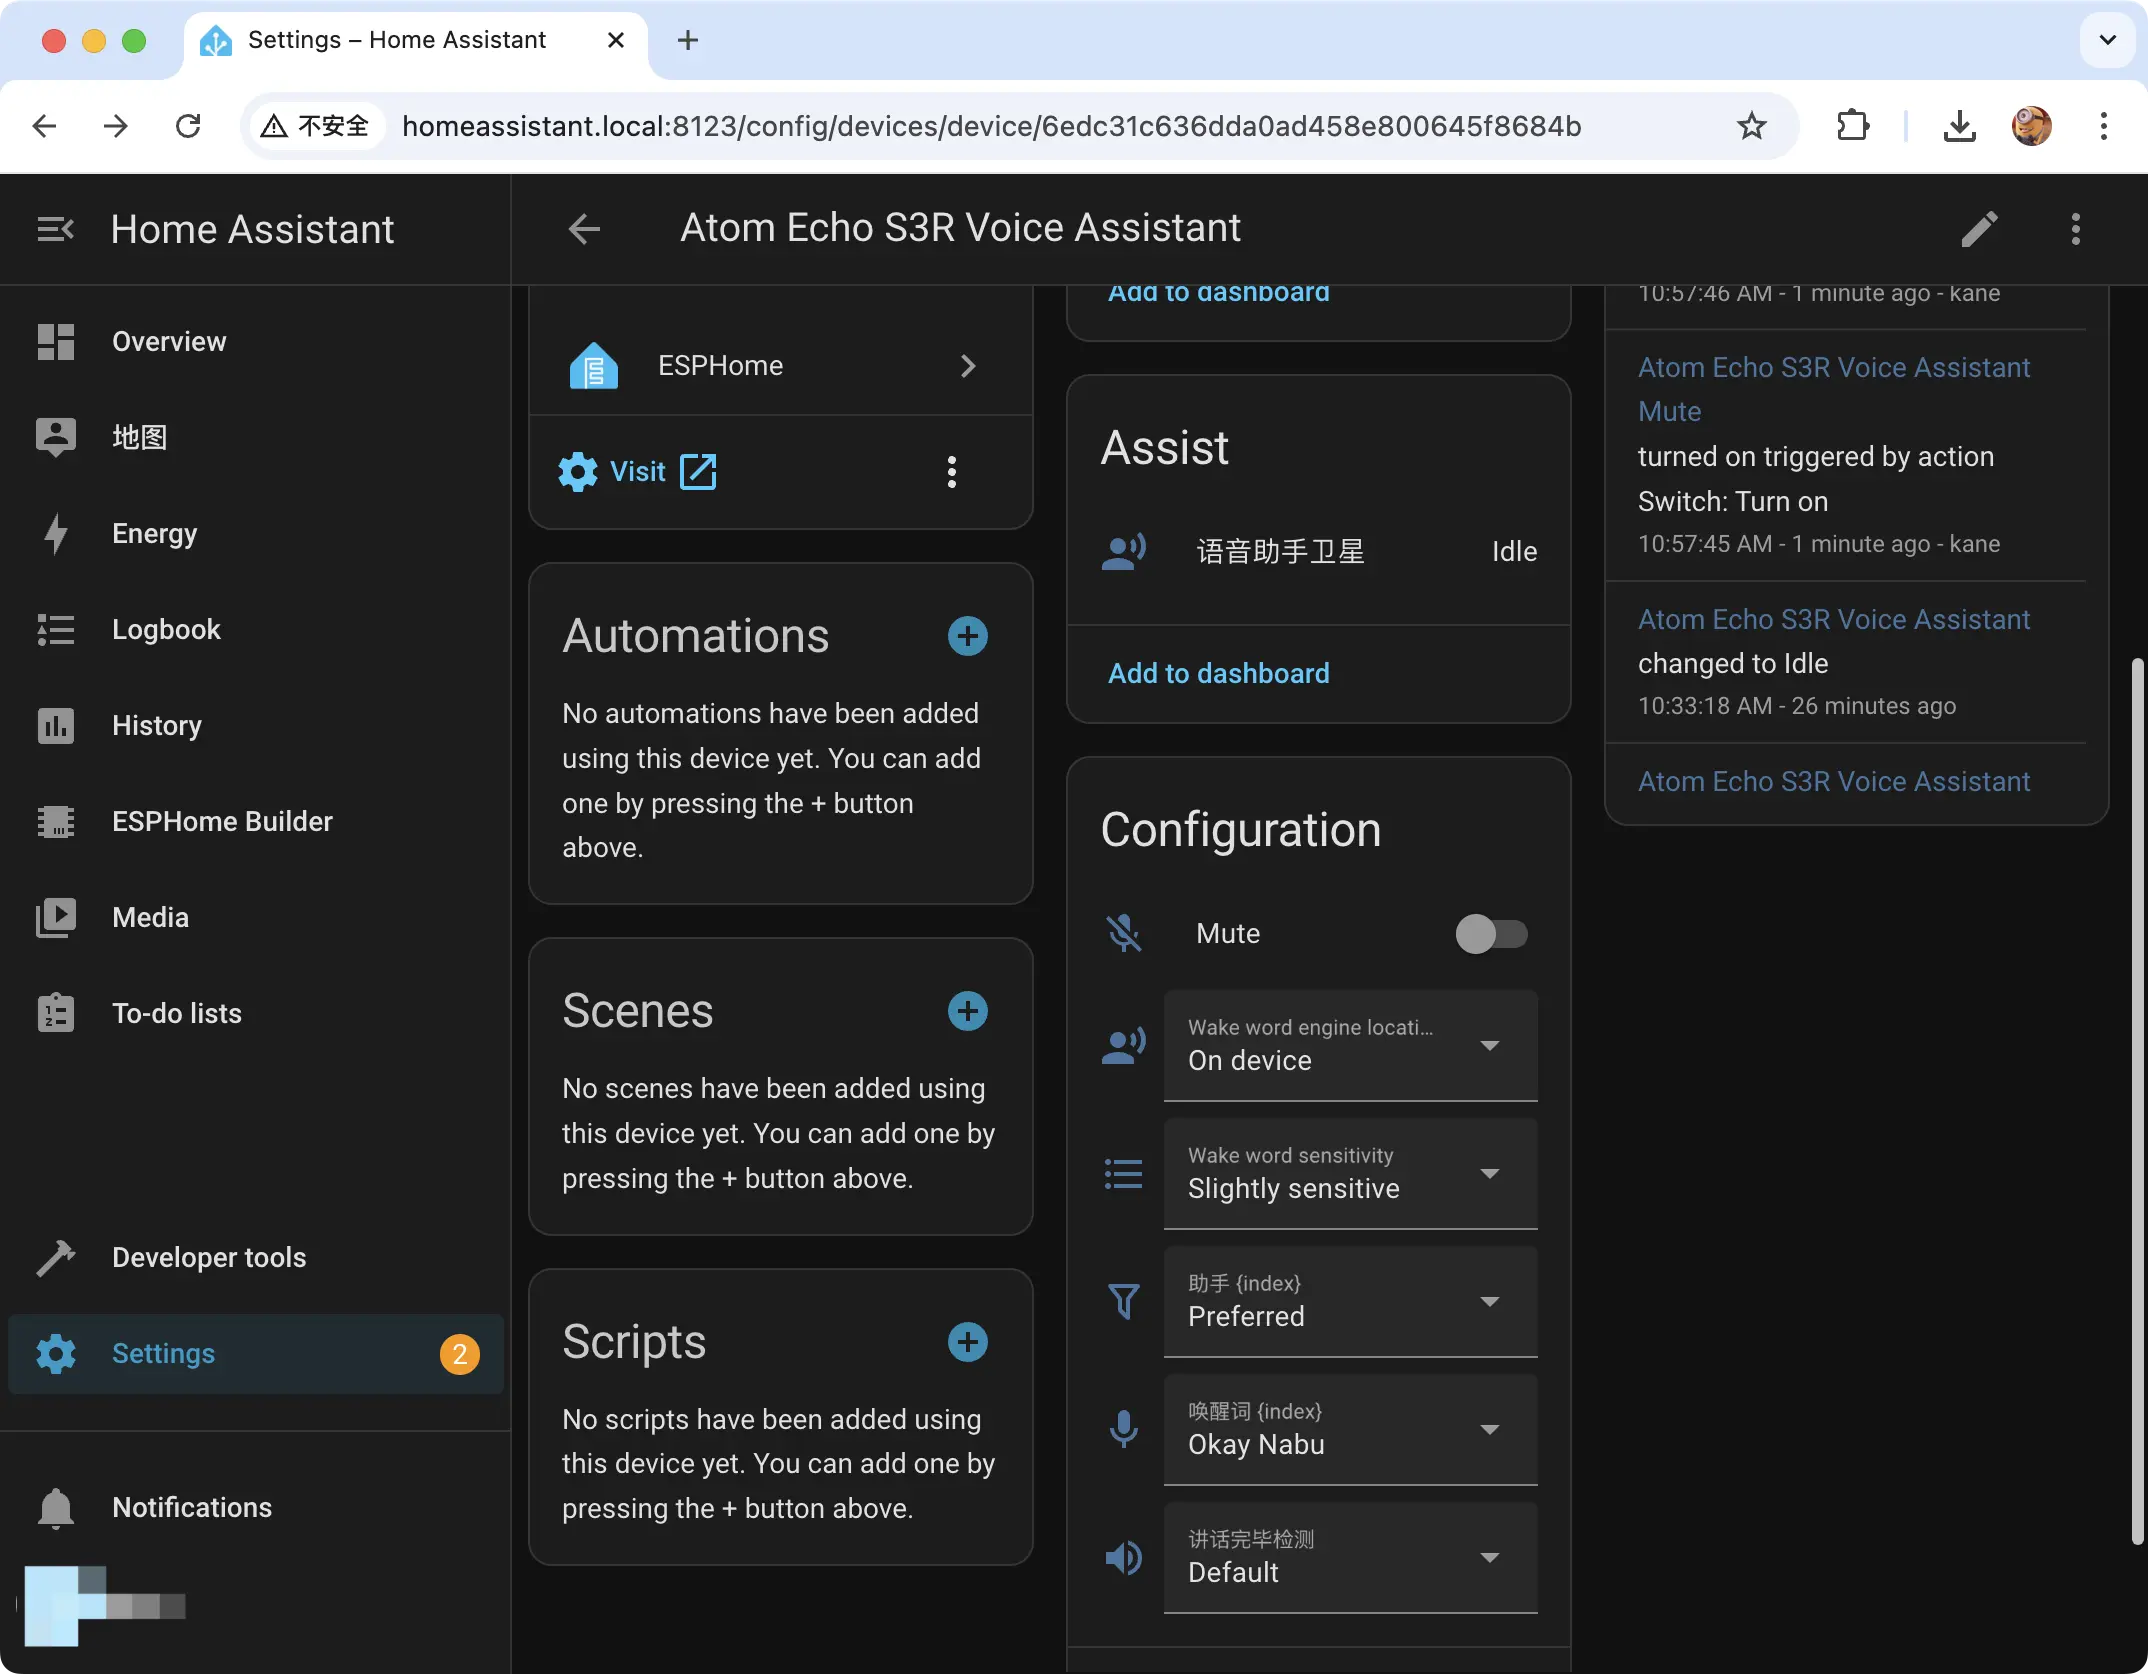
- After setting the correct Pipeline, try using the wake word
Okay Nabuto wake up the device.
Video
Page Tools