Home Assistant
Media Player
Expansion
Sensor
Atom-Lite HA Light Home Assistant Integration
This tutorial will guide you through completing the integration of Atom-Lite with Home Assistant for light control.
Preparation
- Refer to the Home Assistant Official Documentation to install Home Assistant.
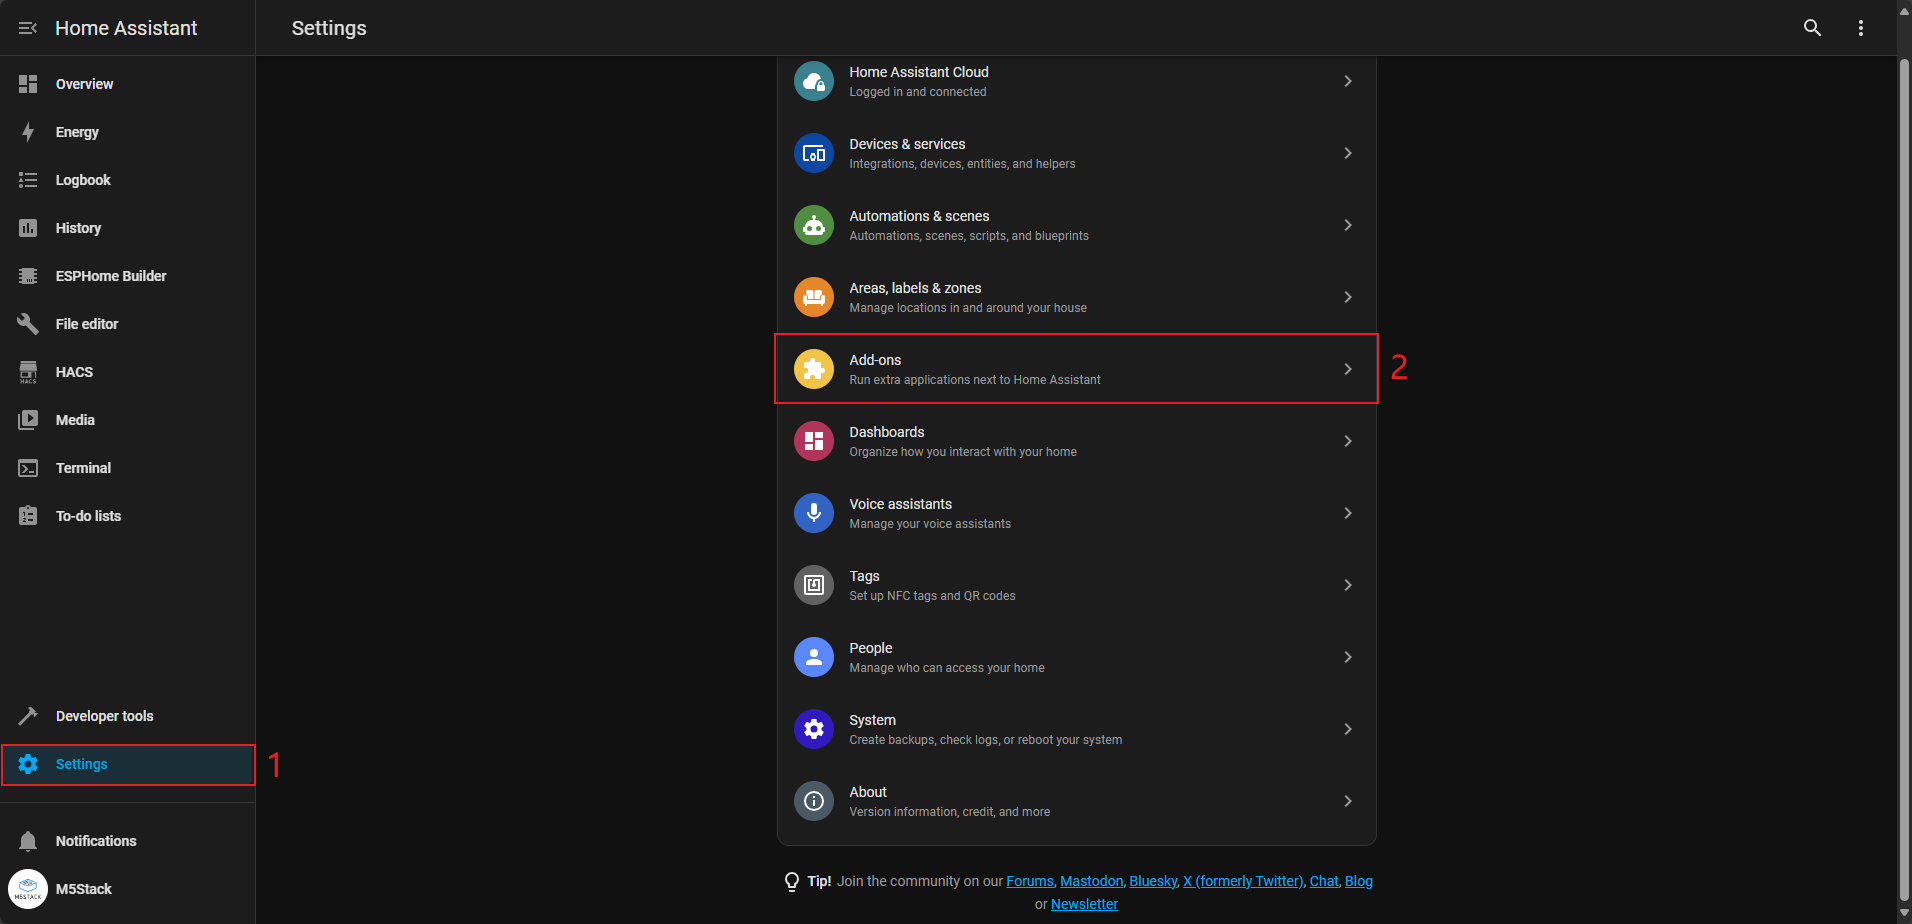
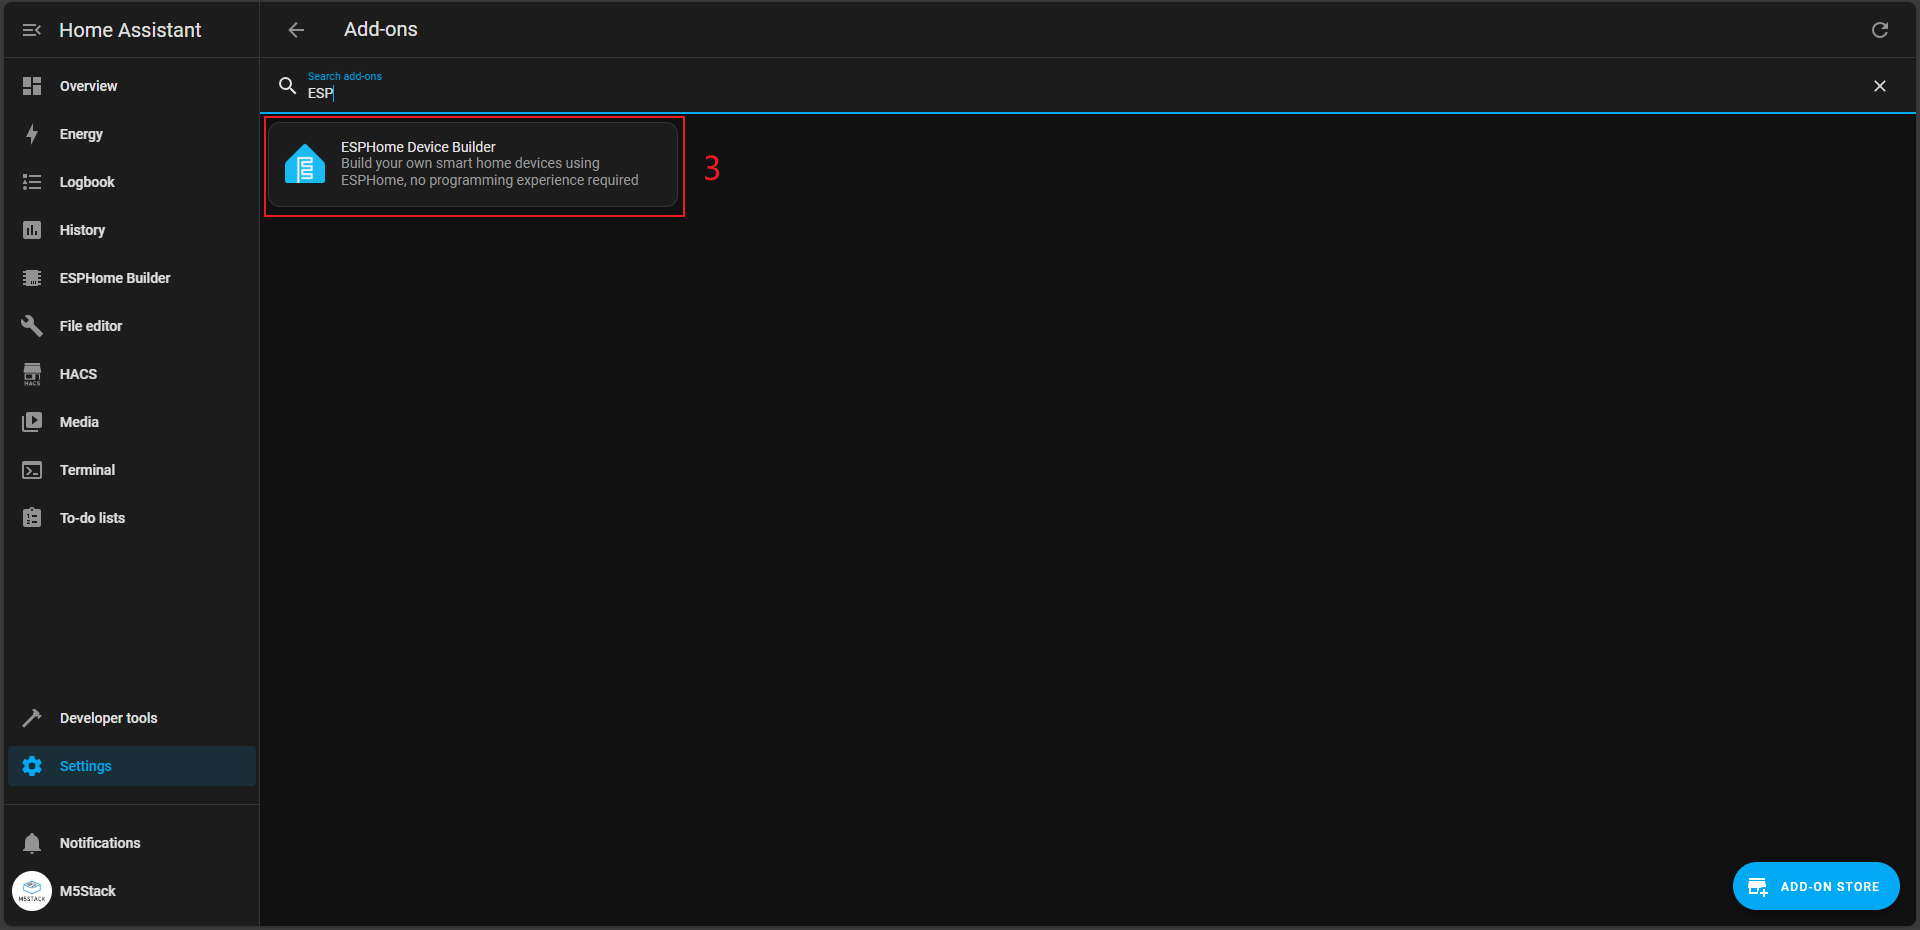
- Install the ESPHome Builder add-on in
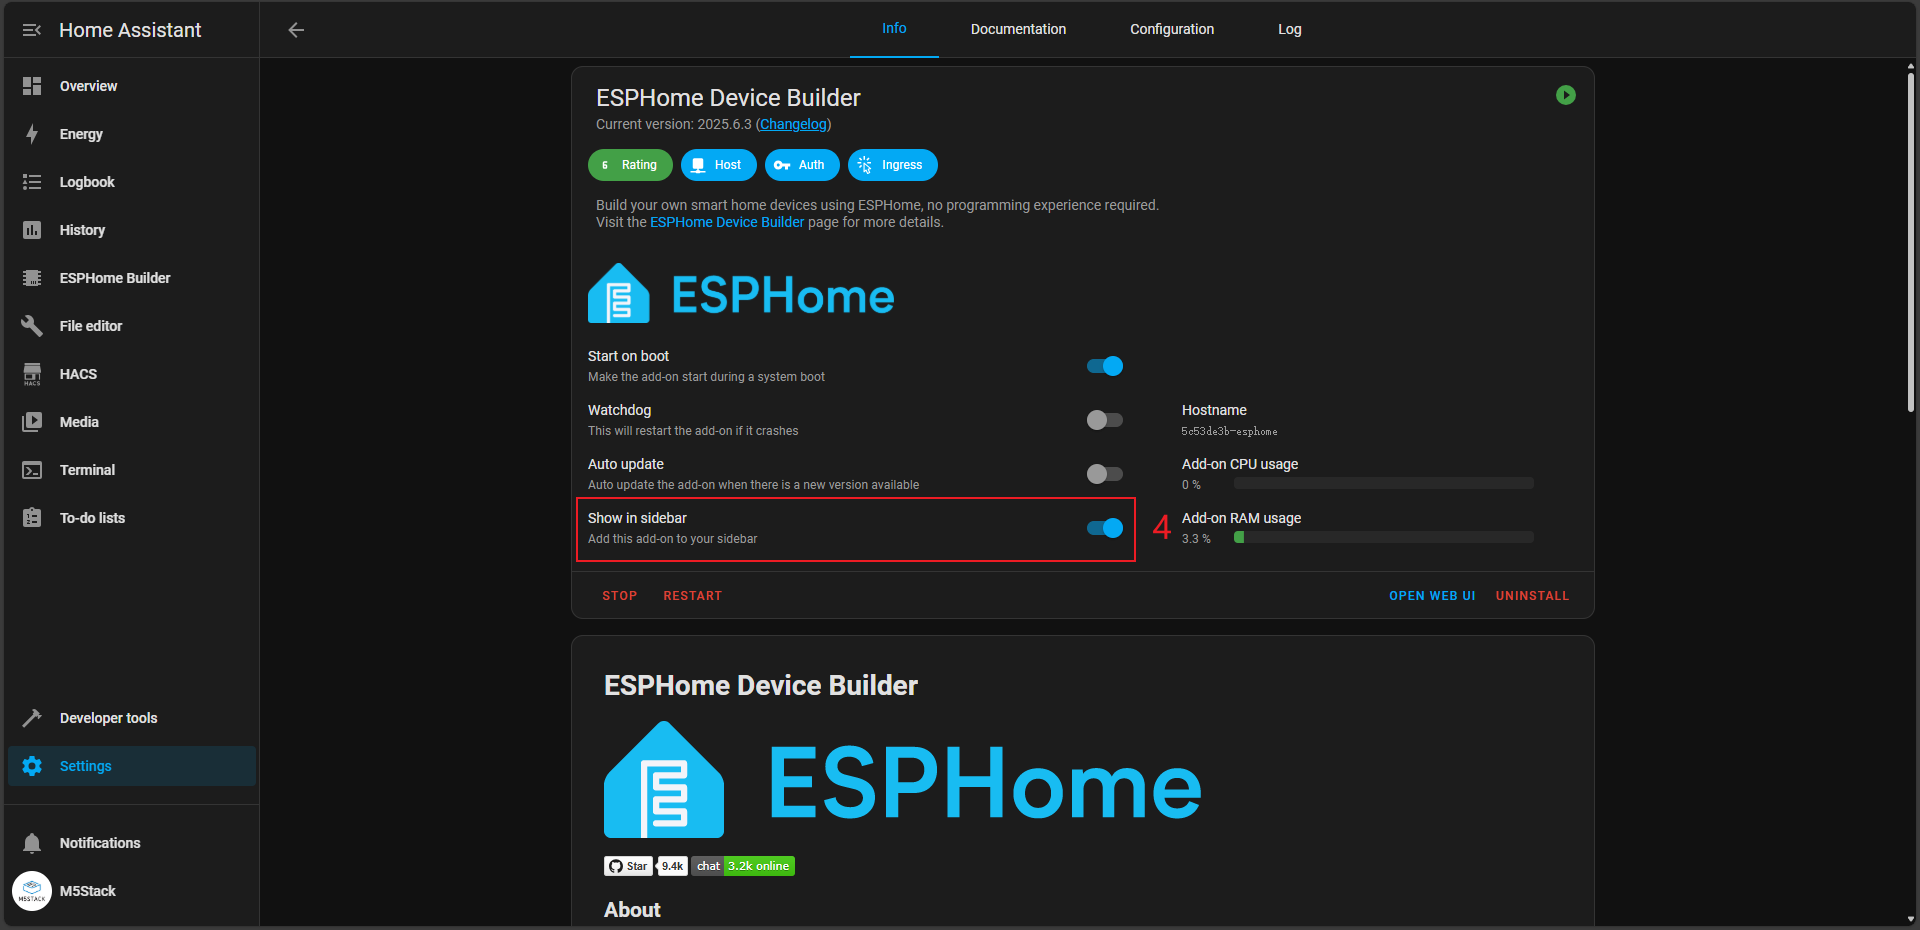
Settings->Add-ons->Add-on STORE. - After the ESPHome Builder add-on is successfully installed, select
Show in sidebaron its management page to add it to the left navigation bar. - This tutorial refers to the ESPHome Official Documentation; you can visit it if needed.
Quick Start
Click the button below to flash the firmware with one click. Follow the on-screen instructions to complete the configuration and quickly experience Atom-Lite integration with Home Assistant. For one-click flashing and subsequent configuration, please refer to the tutorial.
Note
Create Device
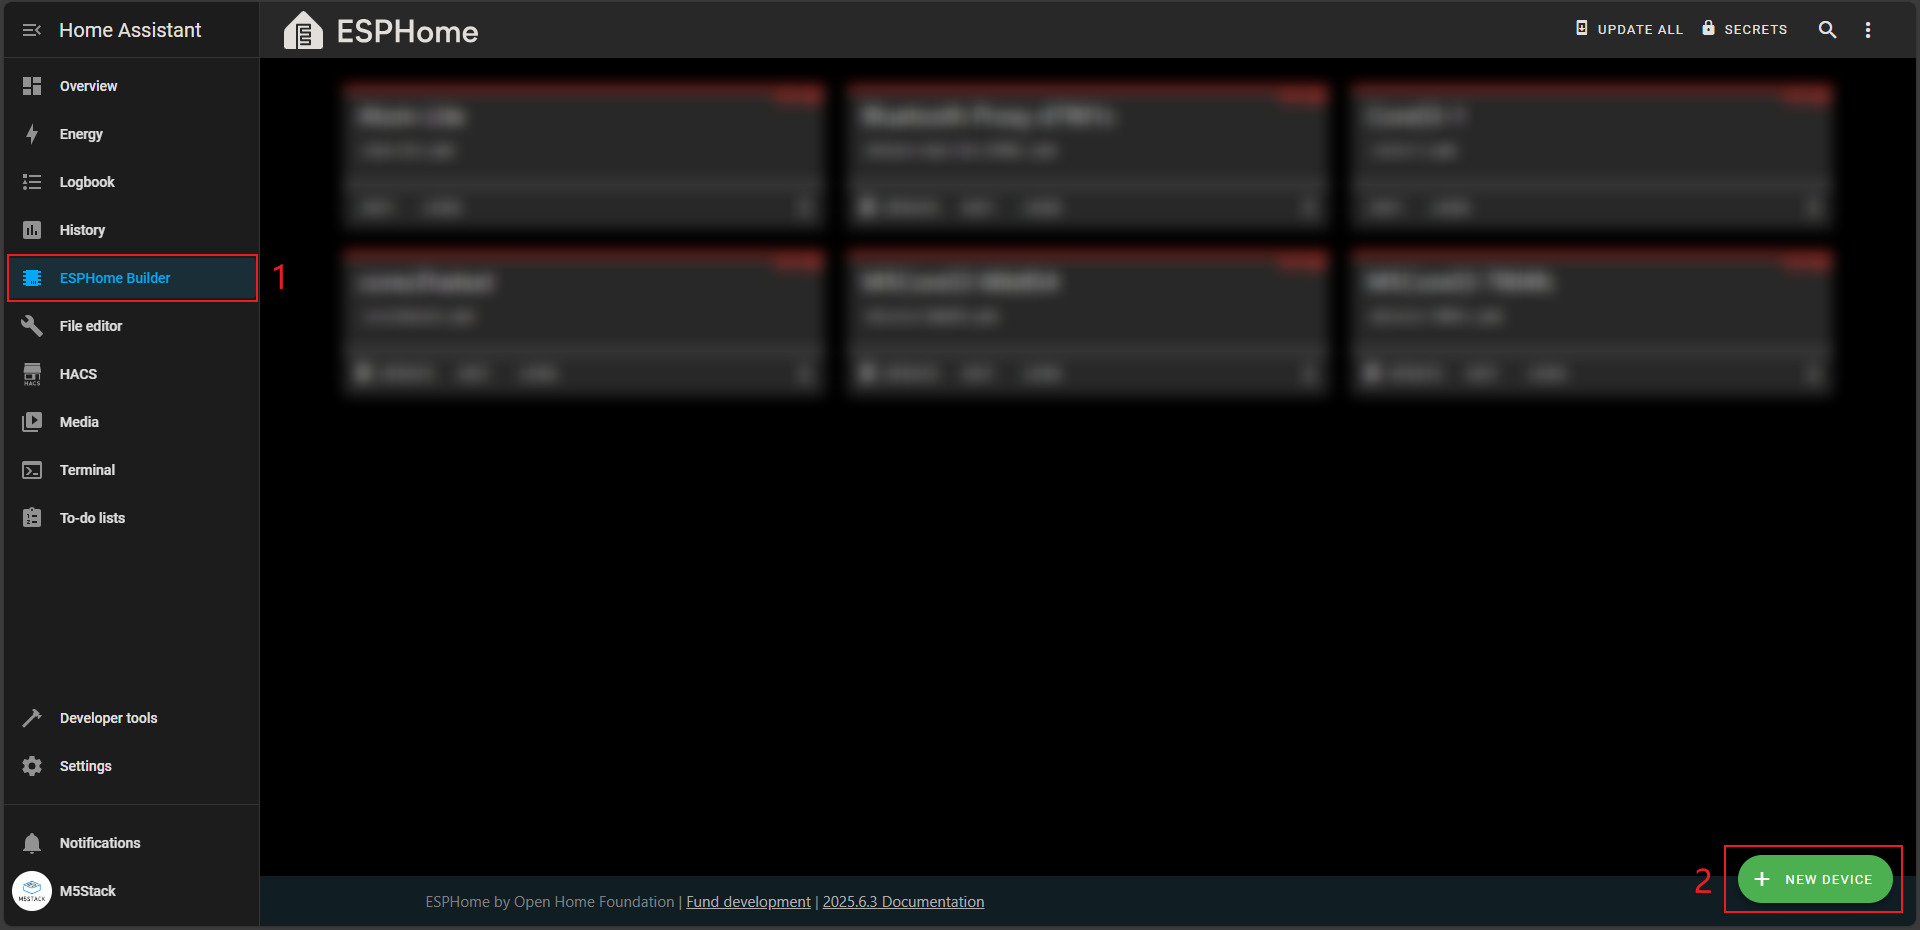
- Open the ESPHome add-on page, click
NEW DEVICEin the bottom right corner to create a new device.
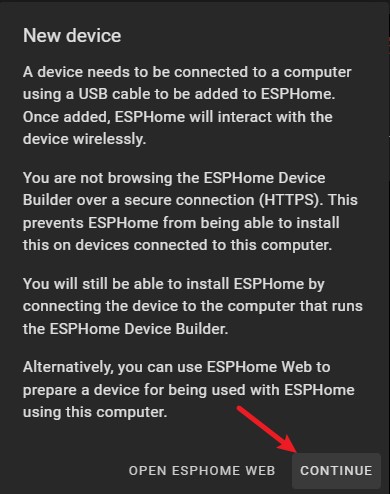
- When the New device prompt appears, click the
CONTINUEbutton.
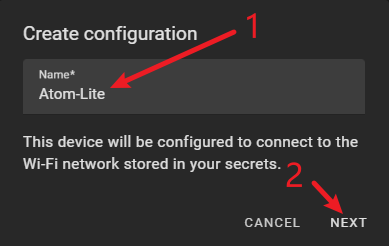
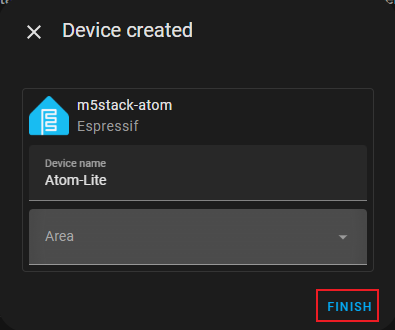
- Enter a name for the device. This name can be customized; here we enter
Atom-Lite.
- Subsequently, the device type selection screen appears. First, uncheck
Use recommended settings, then selectESP32to enter the details page.

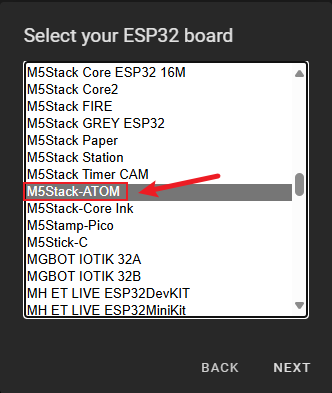
- Find
M5Stack-ATOMon the details page, select it, and click theNEXTbutton.
- When the device configuration success screen appears, copy the
keyand clickINSTALLto enter the installation step.
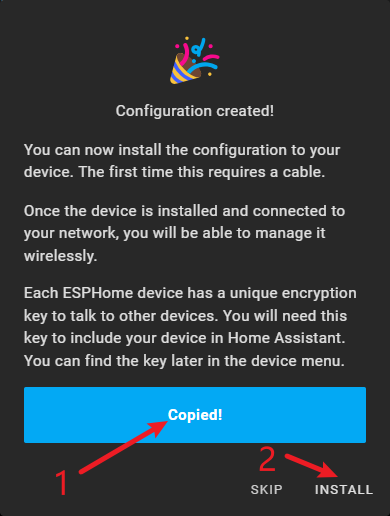
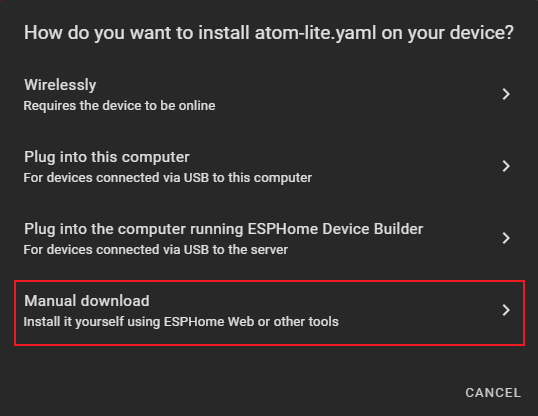
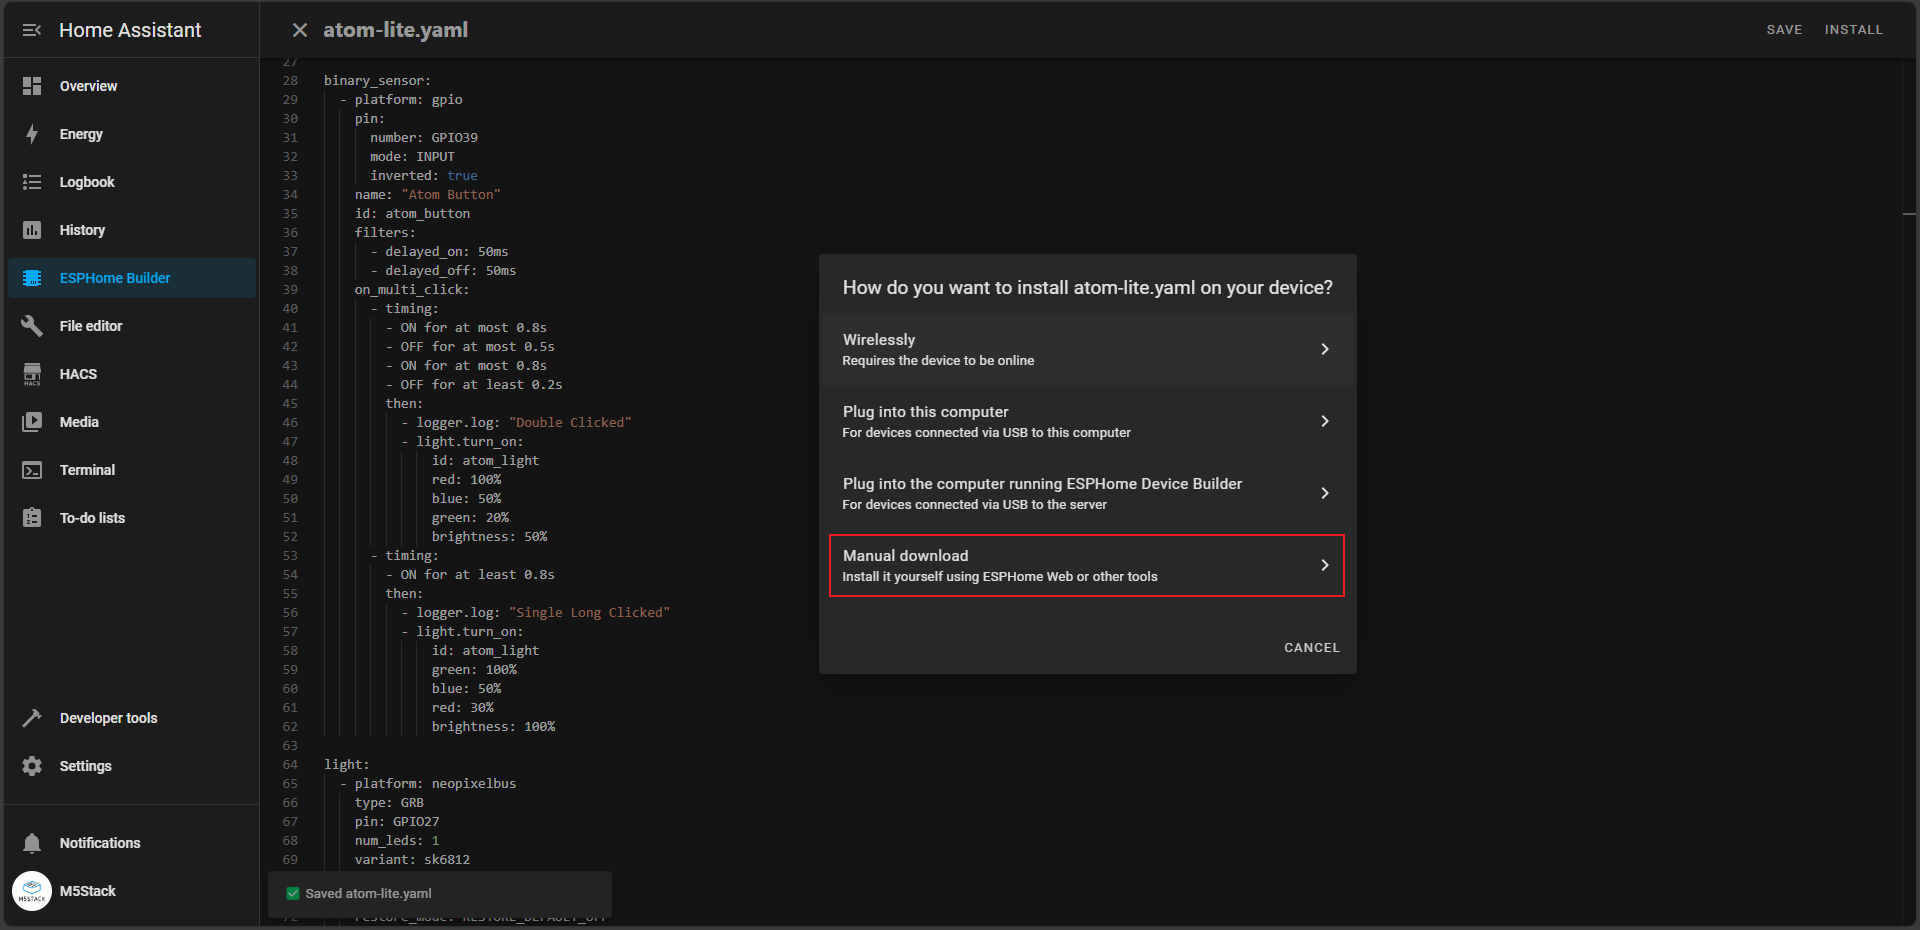
- Select
Manual downloadto start the program compilation and wait for the compilation and installation to complete.
Modify Configuration
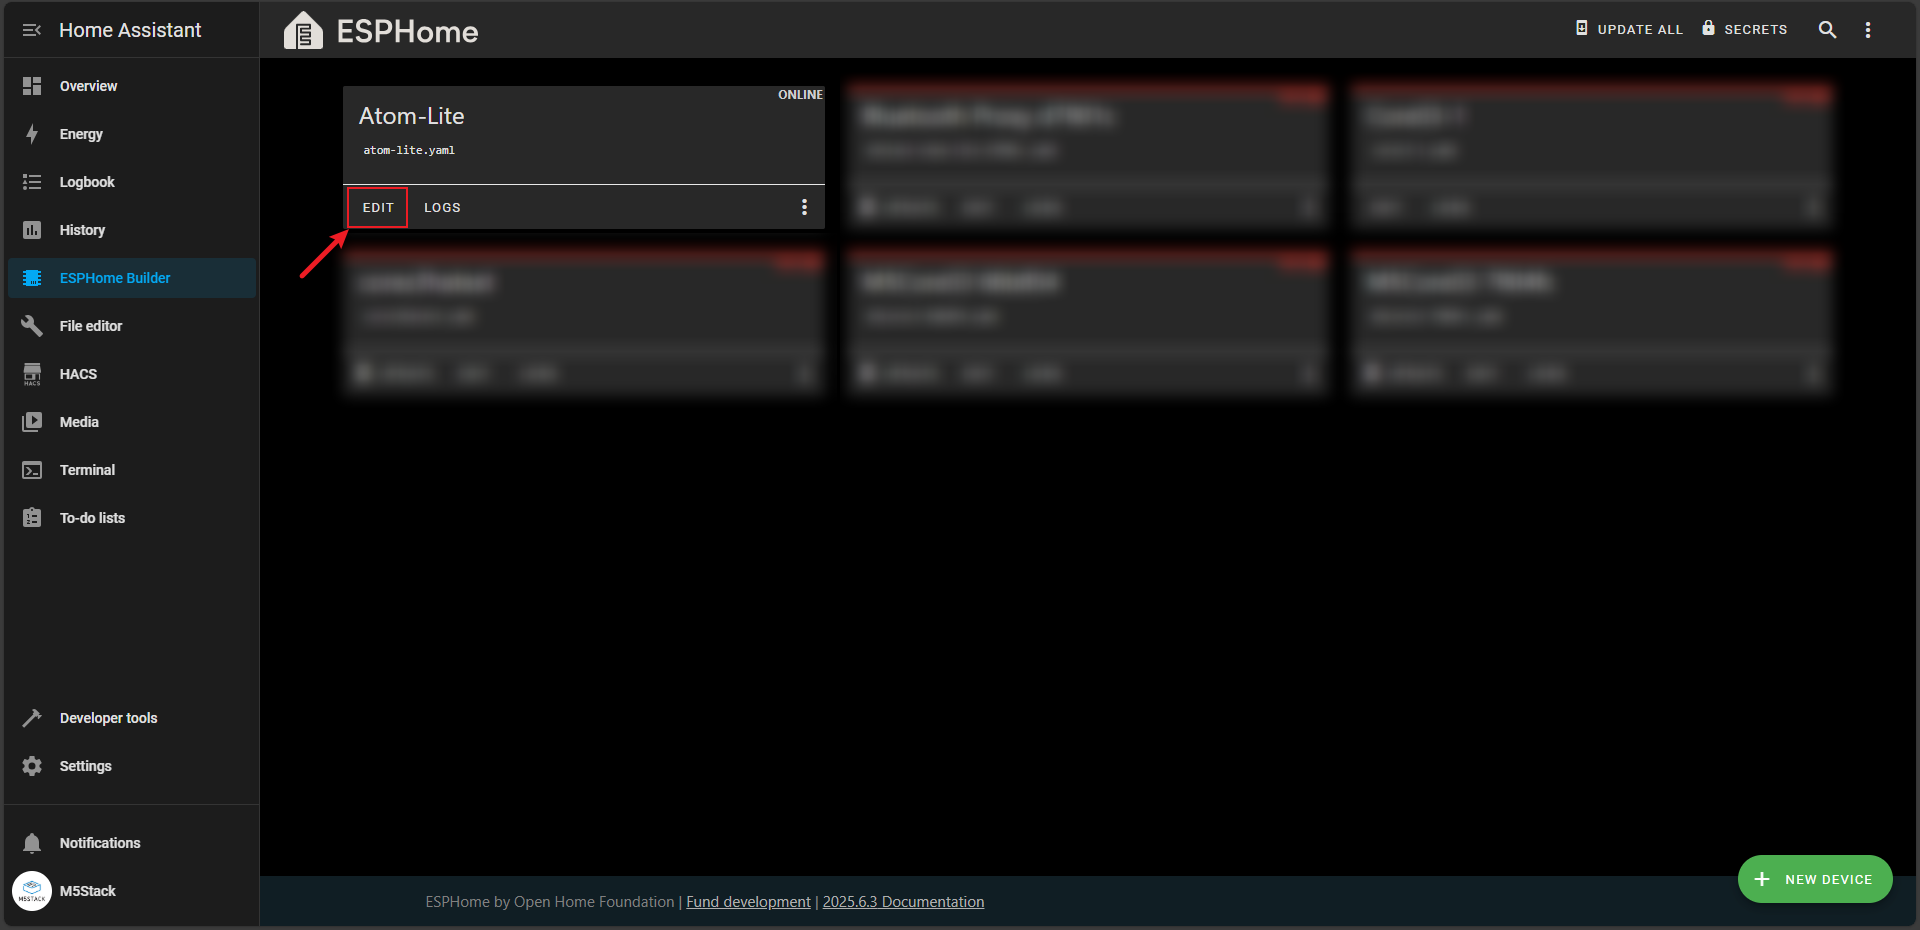
- When the above steps are completed, go back to the ESPHome Builder main interface and you will find an additional
Atom-Litedevice. Click theEDITbutton to enter the yaml file editing page.
- Copy the following code into the
yamlfile, and modify thessidandpasswordat the illustrated positions to your Wi-Fi account and password.
esphome:
  name: atom-lite
  friendly_name: Atom-Lite

esp32:
  board: m5stack-atom
  flash_size: 4MB
  framework:
    type: esp-idf

logger:
api:
  encryption:
    key: "*********"

ota:
  - platform: esphome
    password: "*****************"

wifi:
  ssid: "*********"
  password: "***********"
  ap:
    ssid: "Atom-Lite Fallback Hotspot"
    password: "jFsIc2XGuKRe"

captive_portal:

binary_sensor:
  - platform: gpio
    pin:
      number: GPIO39
      mode: INPUT
      inverted: true
    name: "Atom Button"
    id: atom_button
    filters:
      - delayed_on: 50ms
      - delayed_off: 50ms
    on_multi_click:
      - timing:
          - ON for at most 0.8s
          - OFF for at most 0.5s
          - ON for at most 0.8s
          - OFF for at least 0.2s
        then:
          - logger.log: "Double Clicked"
          - light.turn_on:
              id: atom_light
              red: 100%
              blue: 50%
              green: 20%
              brightness: 50%
      - timing:
          - ON for at least 0.8s
        then:
          - logger.log: "Single Long Clicked"
          - light.turn_on:
              id: atom_light
              green: 100%
              blue: 50%
              red: 30%
              brightness: 100%

light:
  - platform: esp32_rmt_led_strip
    rgb_order: GRB
    pin: GPIO27
    num_leds: 1
    chipset: SK6812
    name: "Atom RGB Light"
    id: atom_light
    restore_mode: RESTORE_DEFAULT_OFF
    effects:
      - random:
          name: "Random"
          transition_length: 1s
update_interval: 1sESP-IDF. The original NeoPixelBus Light under Arduino does not support the ESP-IDF framework. For the new version of ESPHome, please use the ESP32 RMT LED Strip component.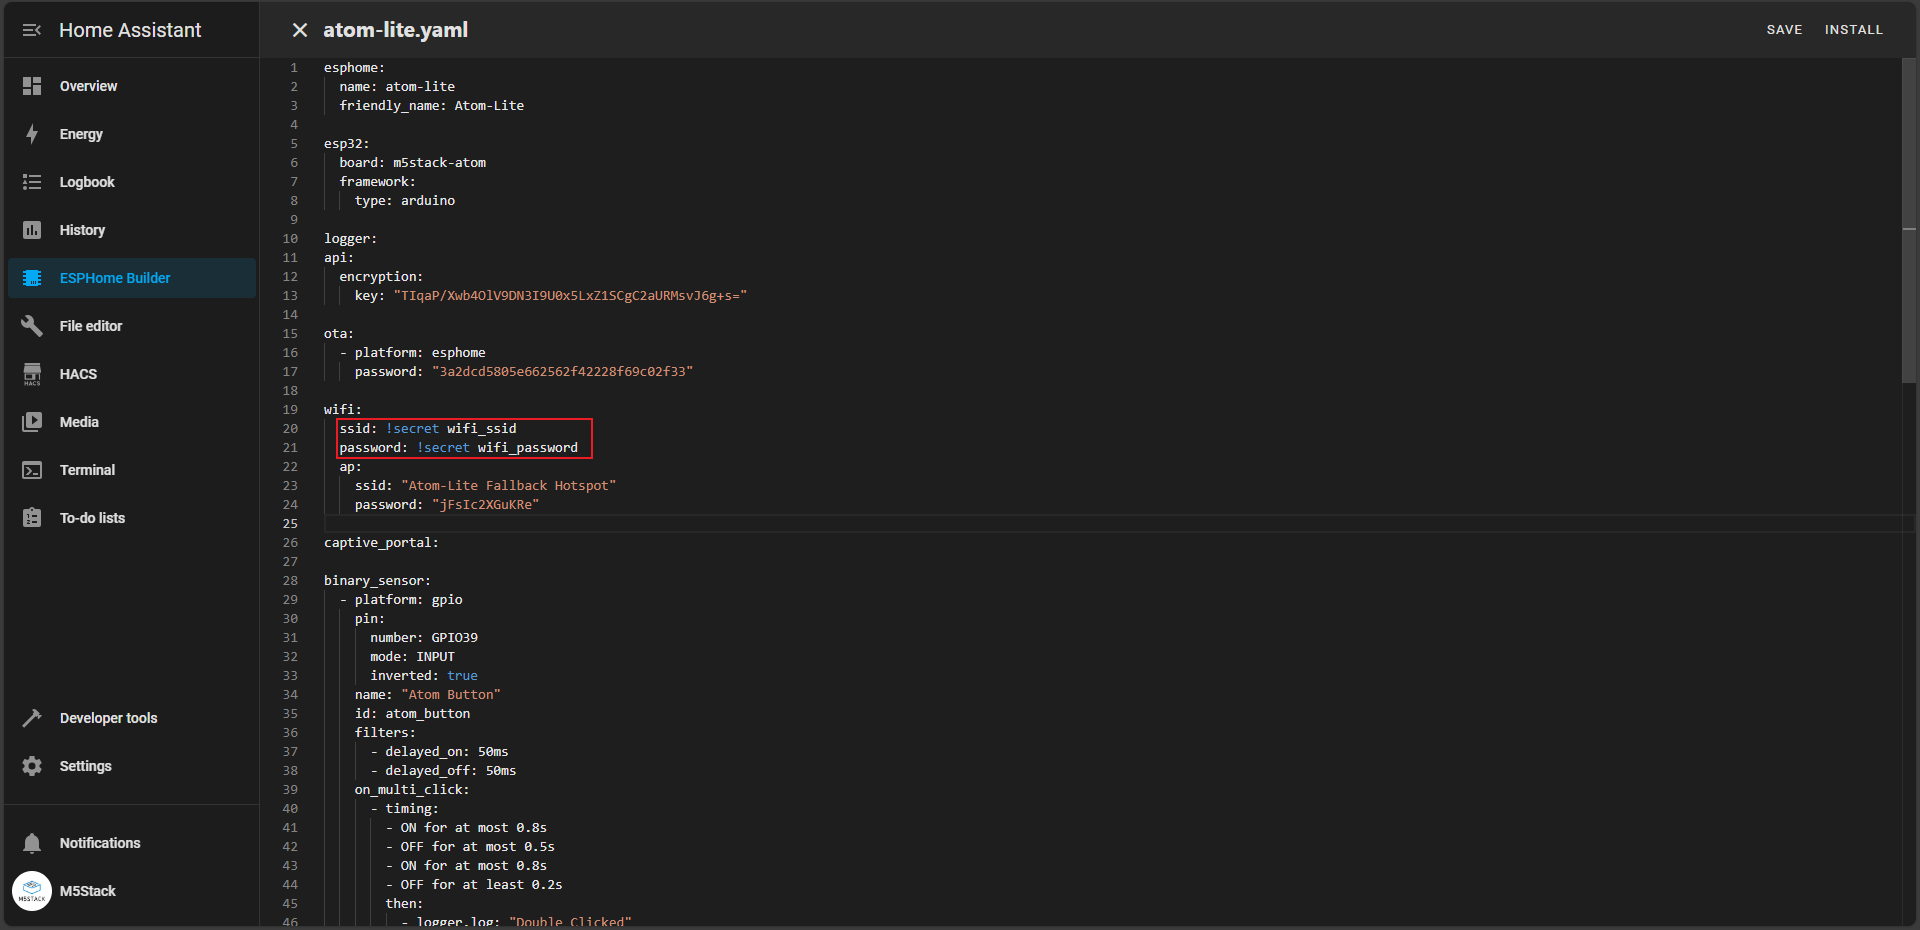
- Click the
SAVEbutton to save the yaml file first, then click theINSTALLbutton to start compiling the firmware and flashing.
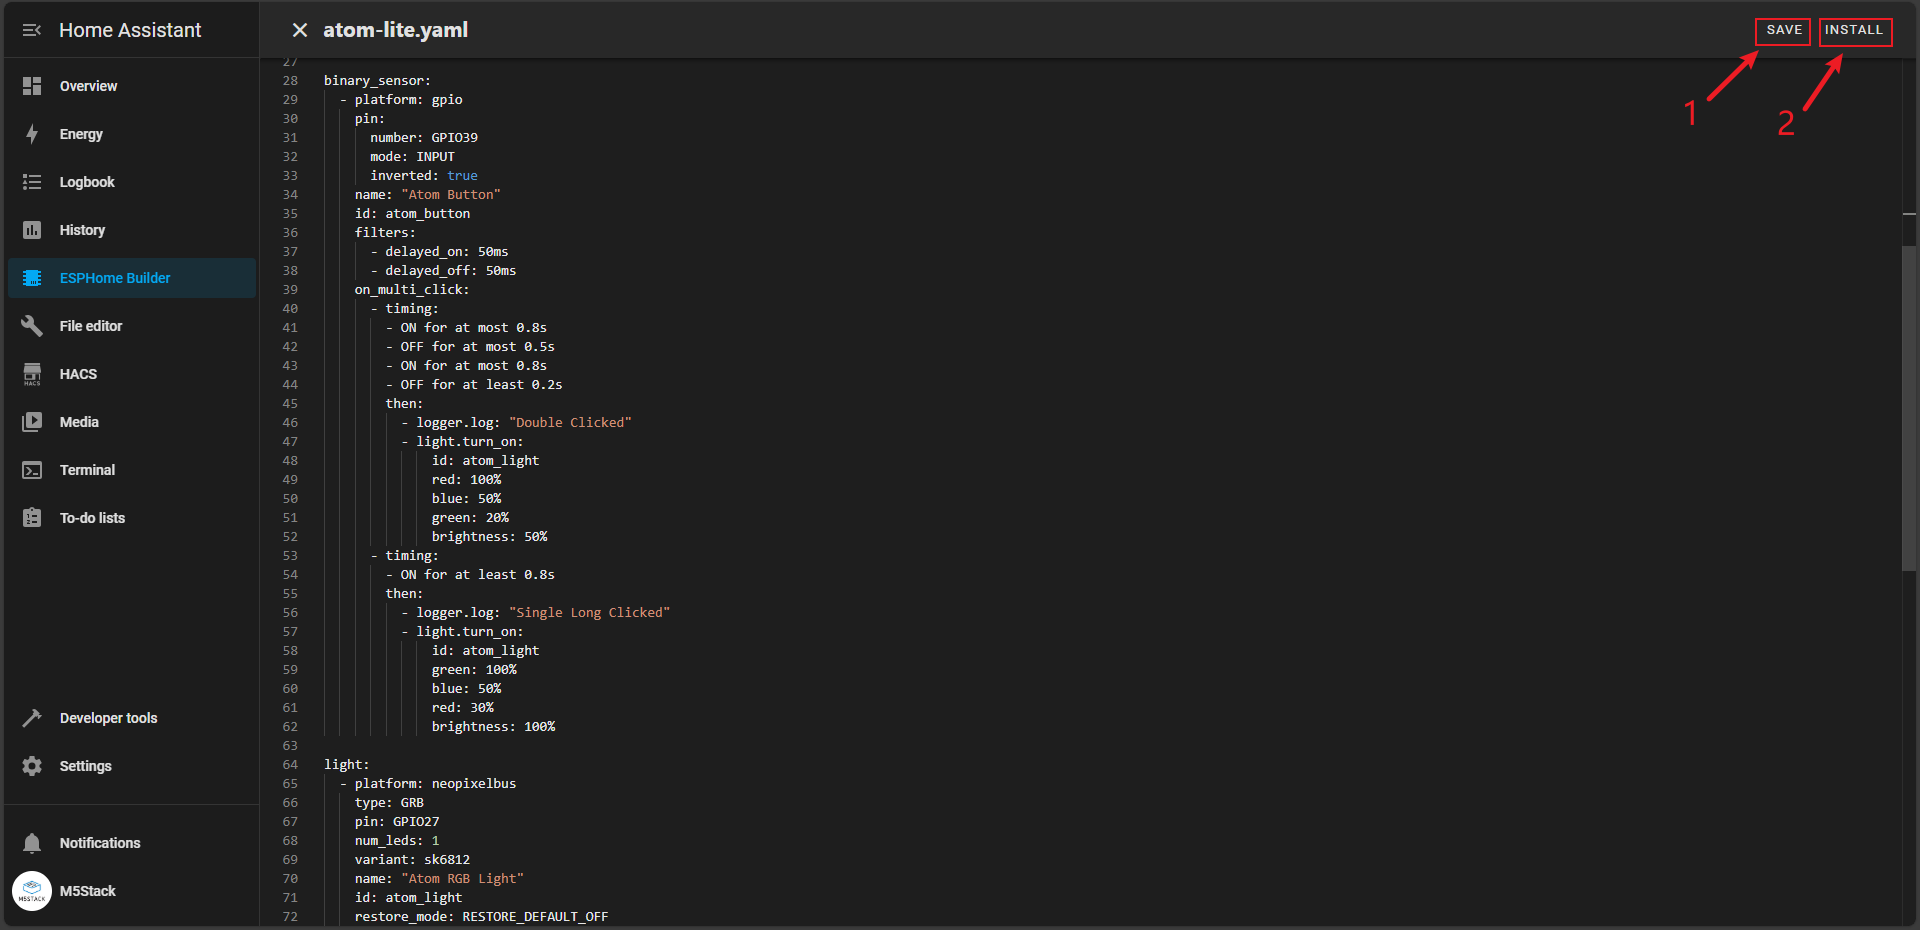
- Click
Manual downloadagain to start compiling the firmware and wait for completion.
Download and Flash Firmware
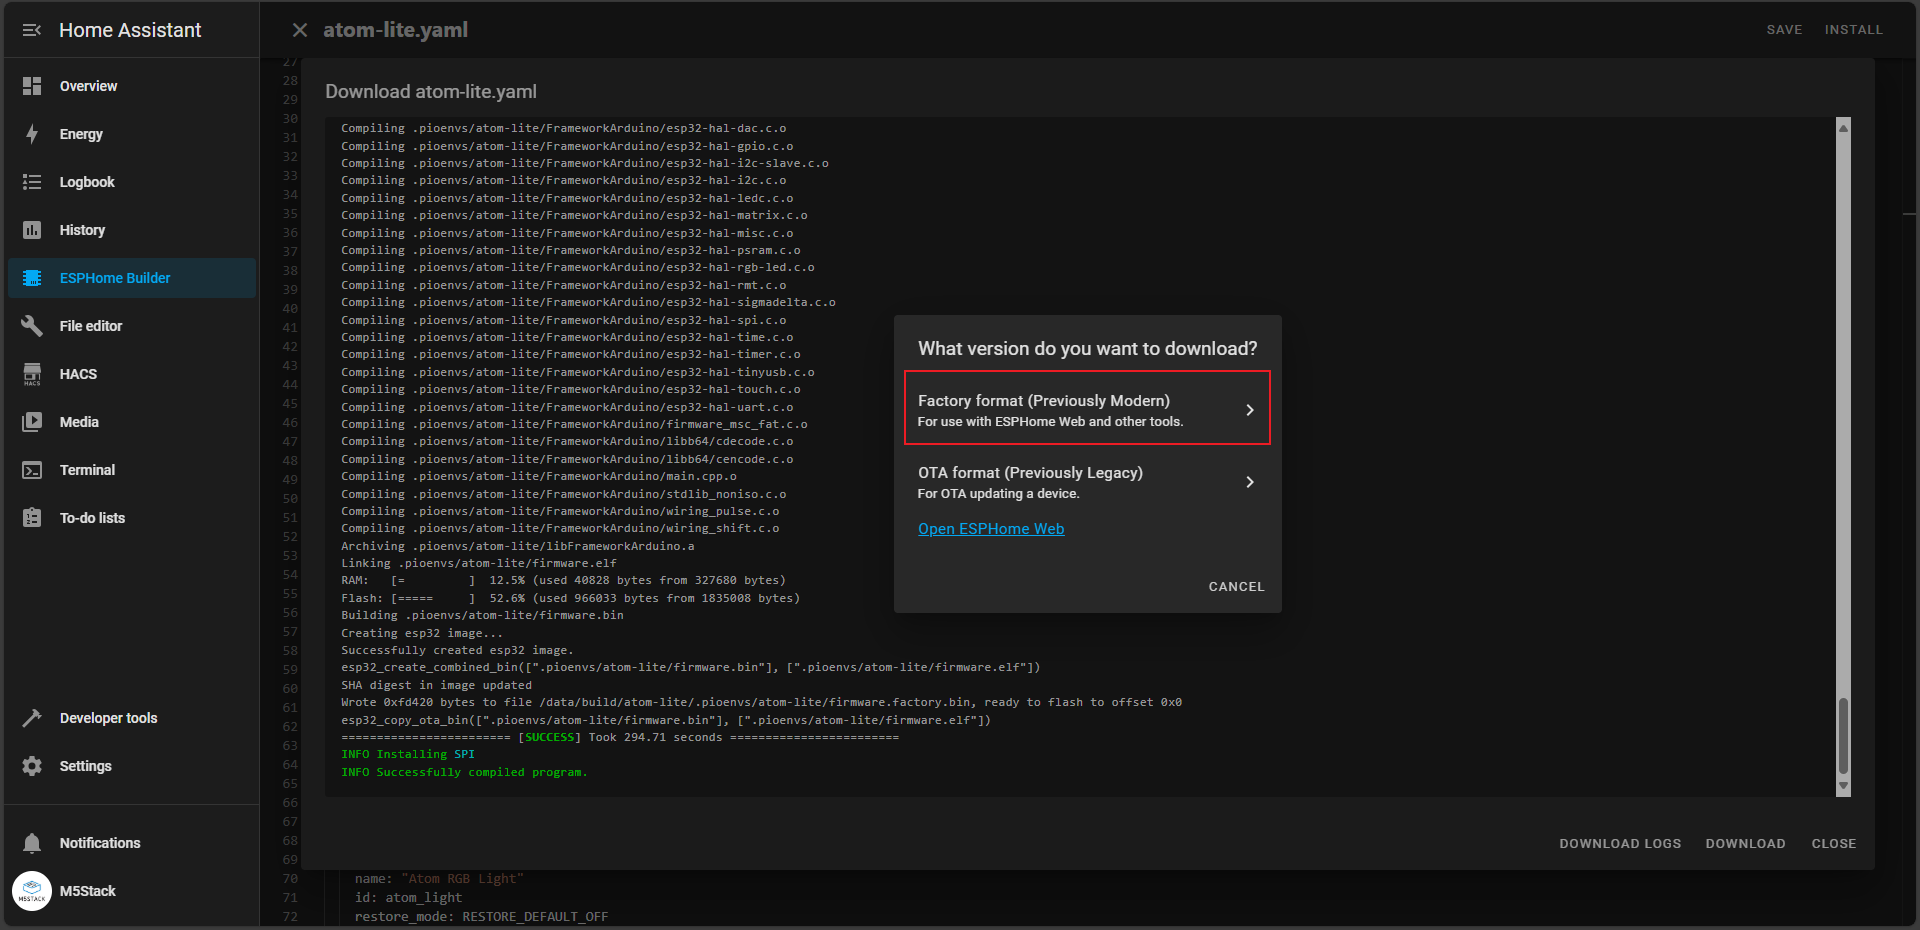
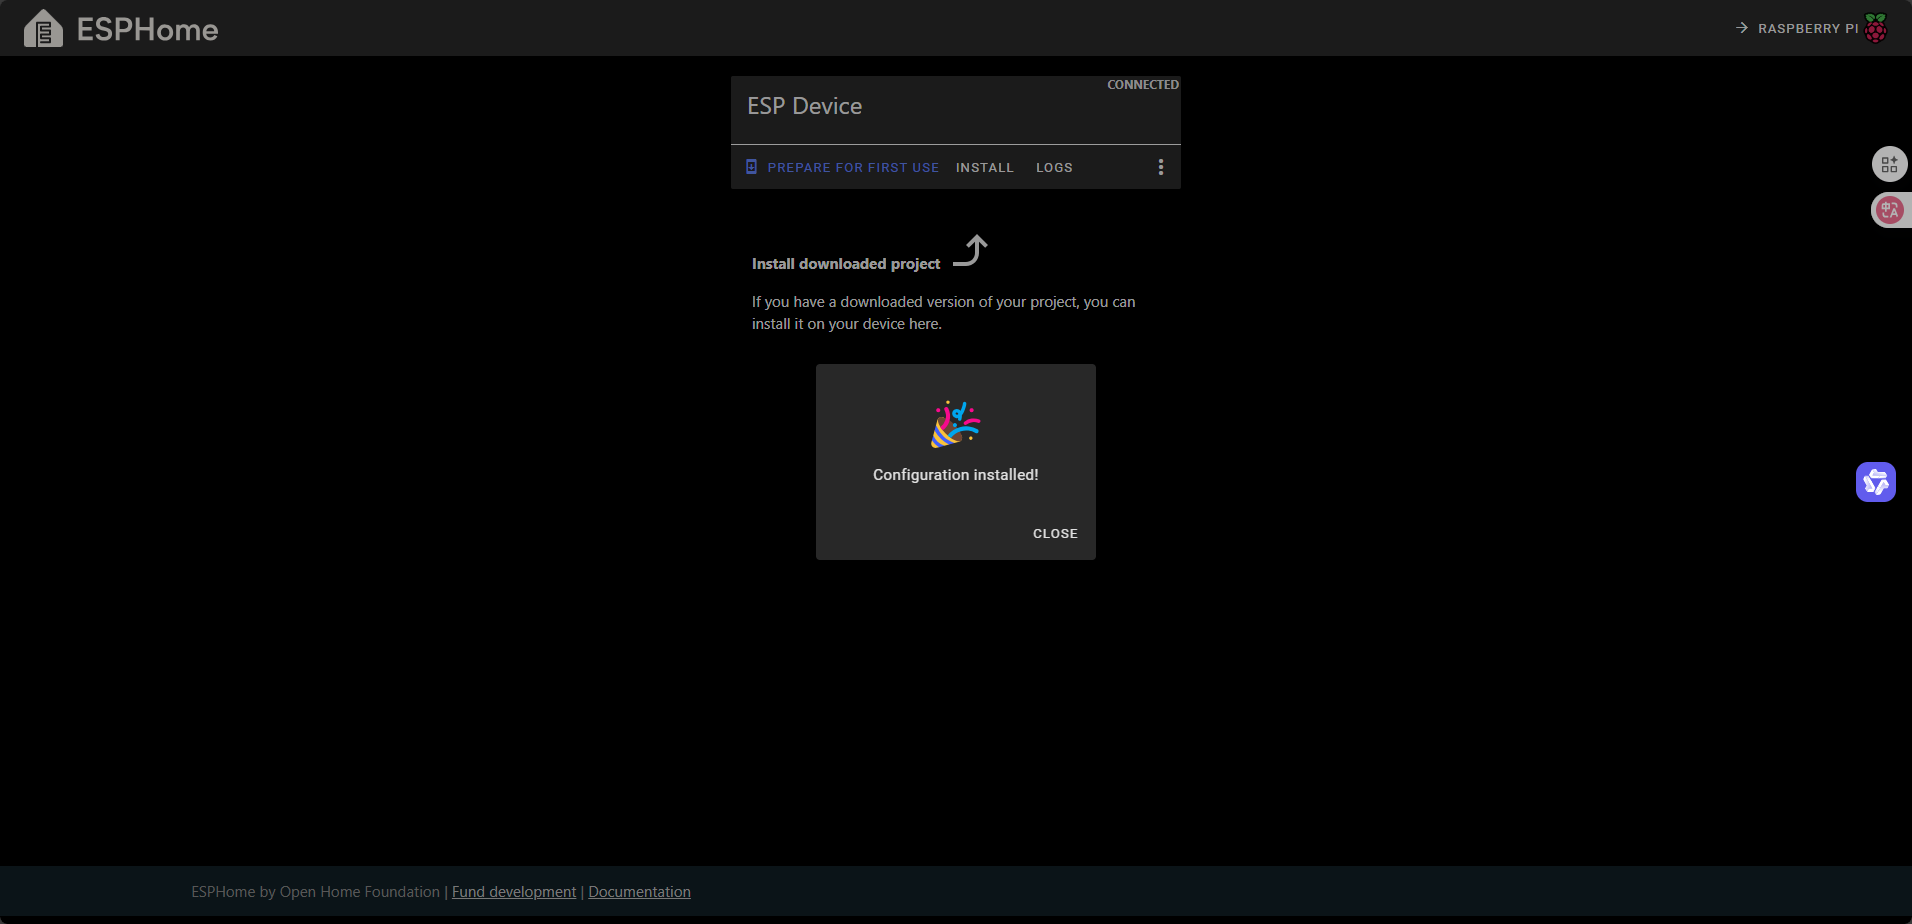
- Wait for the compilation to complete, click the
DOWNLOADbutton, and the flashing method selection interface will appear. Here we selectFactory formatto save to the local machine.
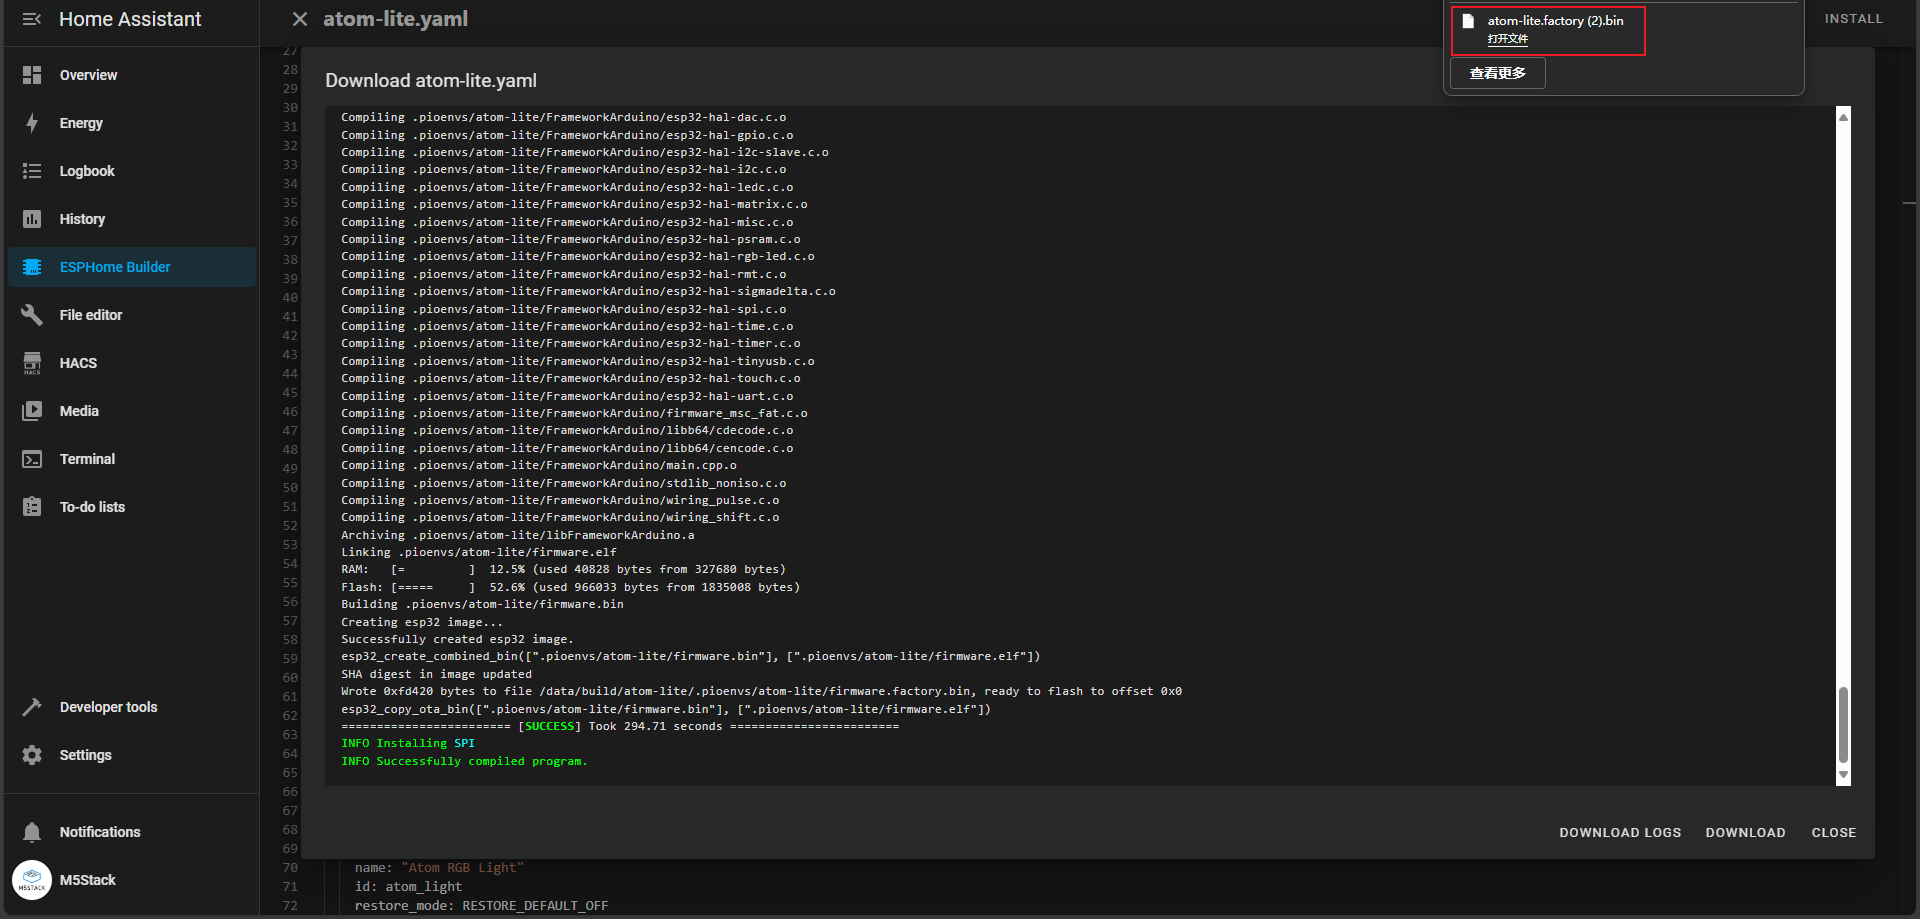
- Wait for the program local download to complete.
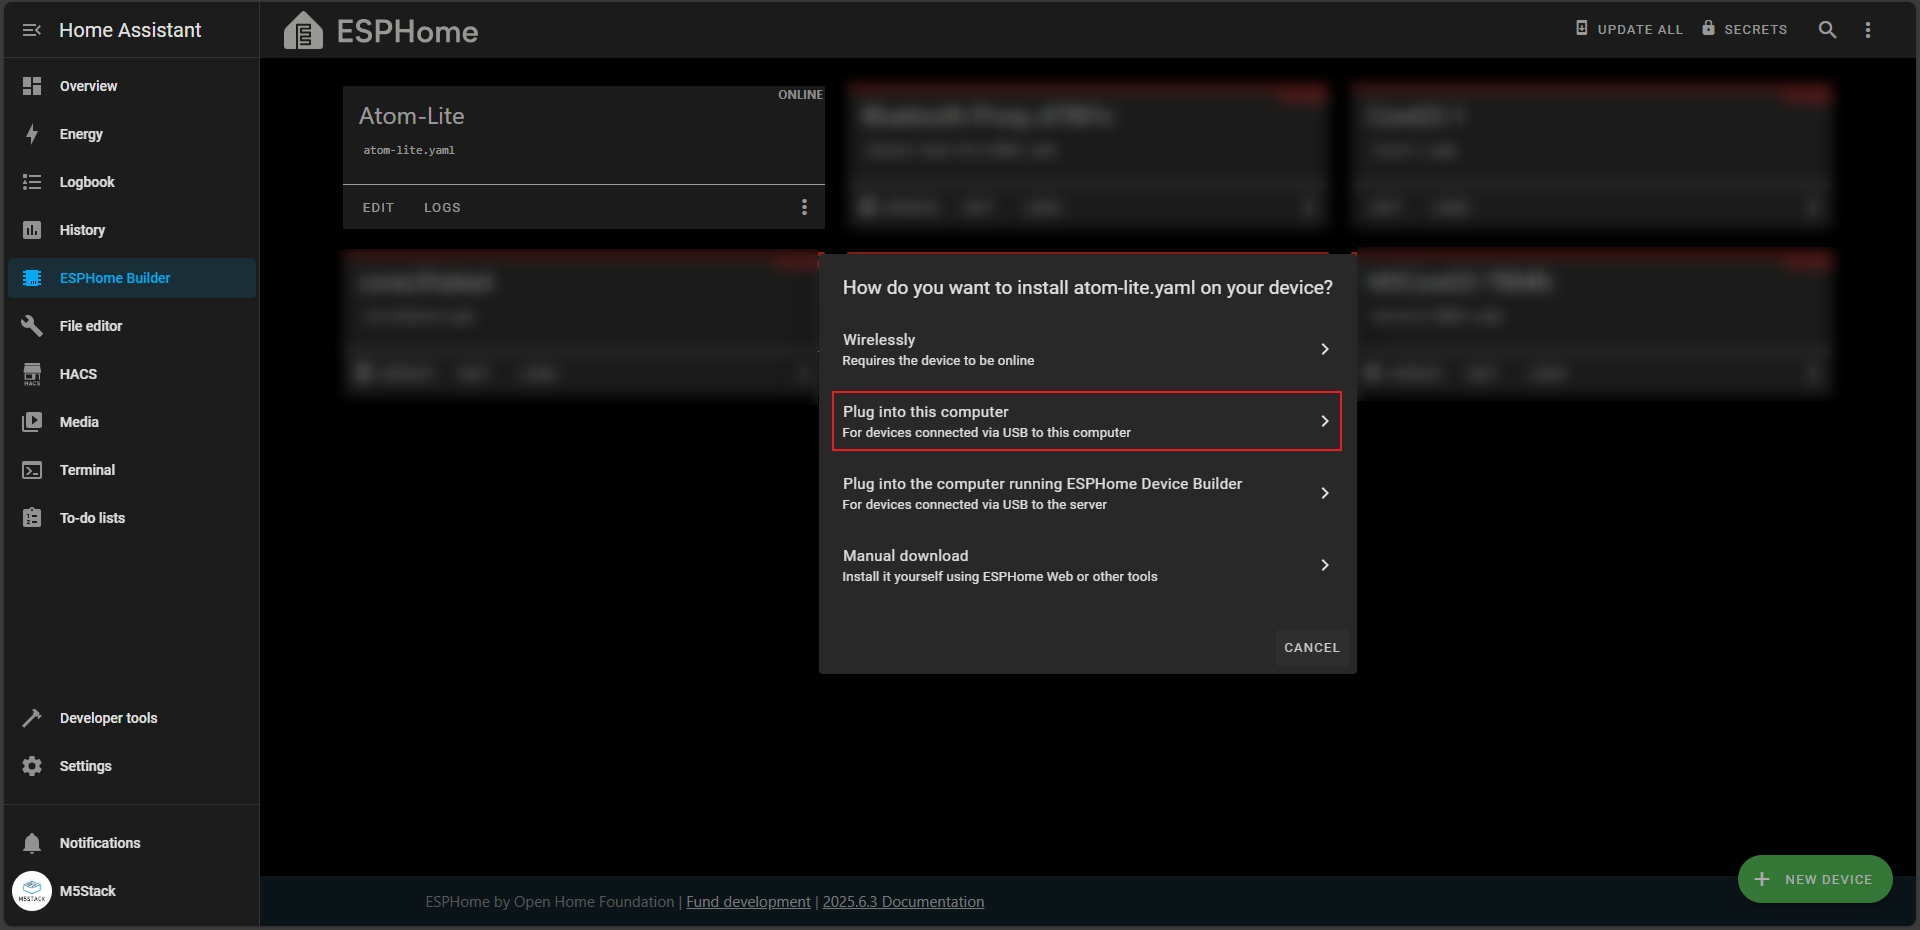
- Go back to the main interface, select
INSTALLto enter the flashing selection interface, this time selectPlug into this computer, and connect the device to the computer with USB to flash.
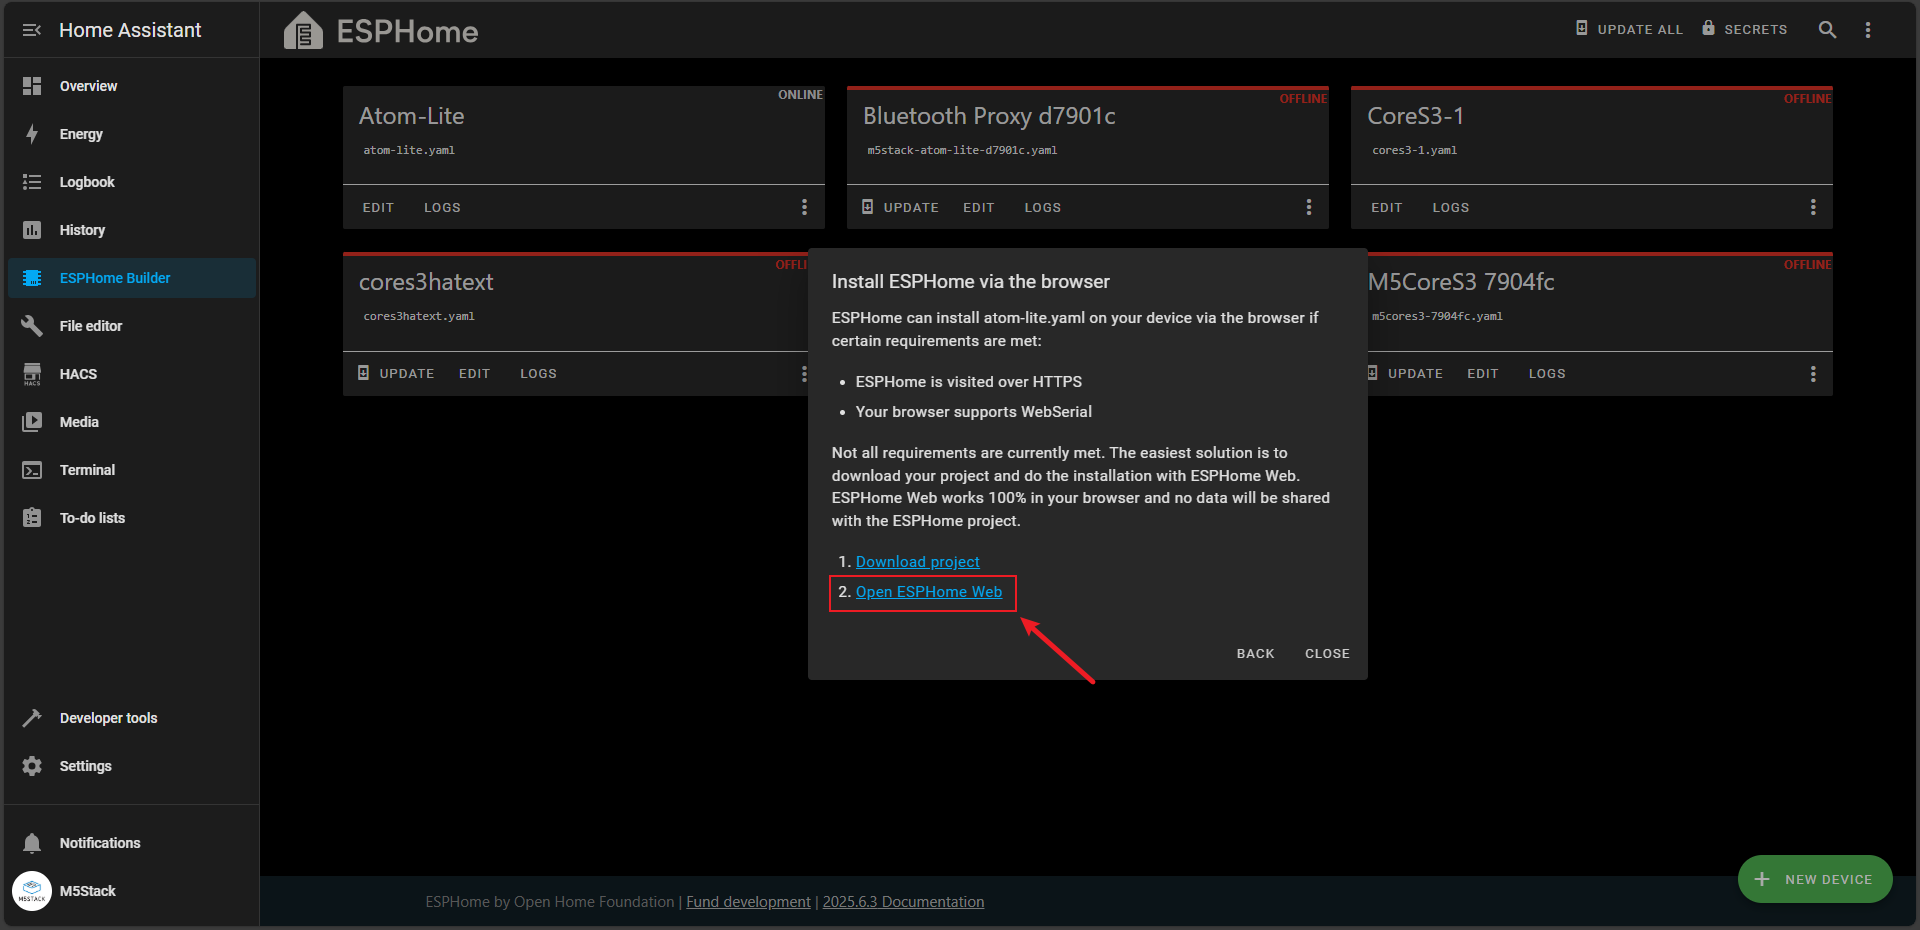
- Select
Open ESPHome Webto enter the flashing interface.
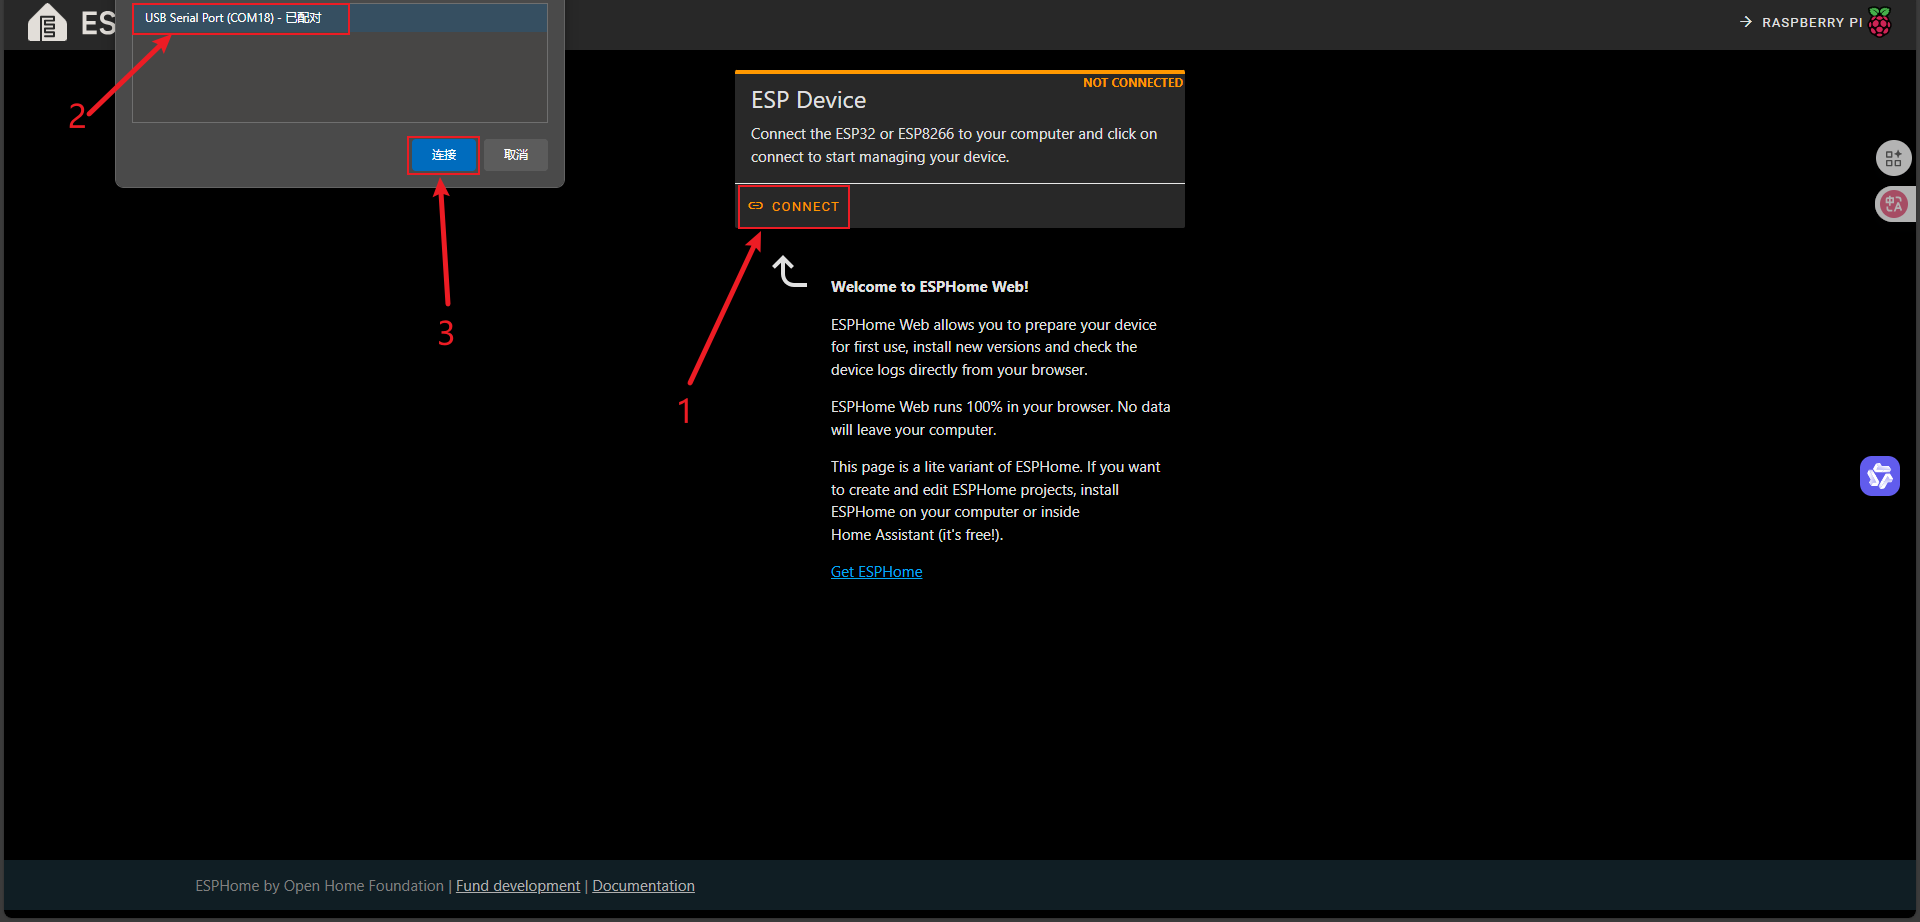
- Click the
CONNECTbutton first, then select the serial port device connected to the computer and connect (if no serial port appears here, please check if the hardware connection is incorrect).
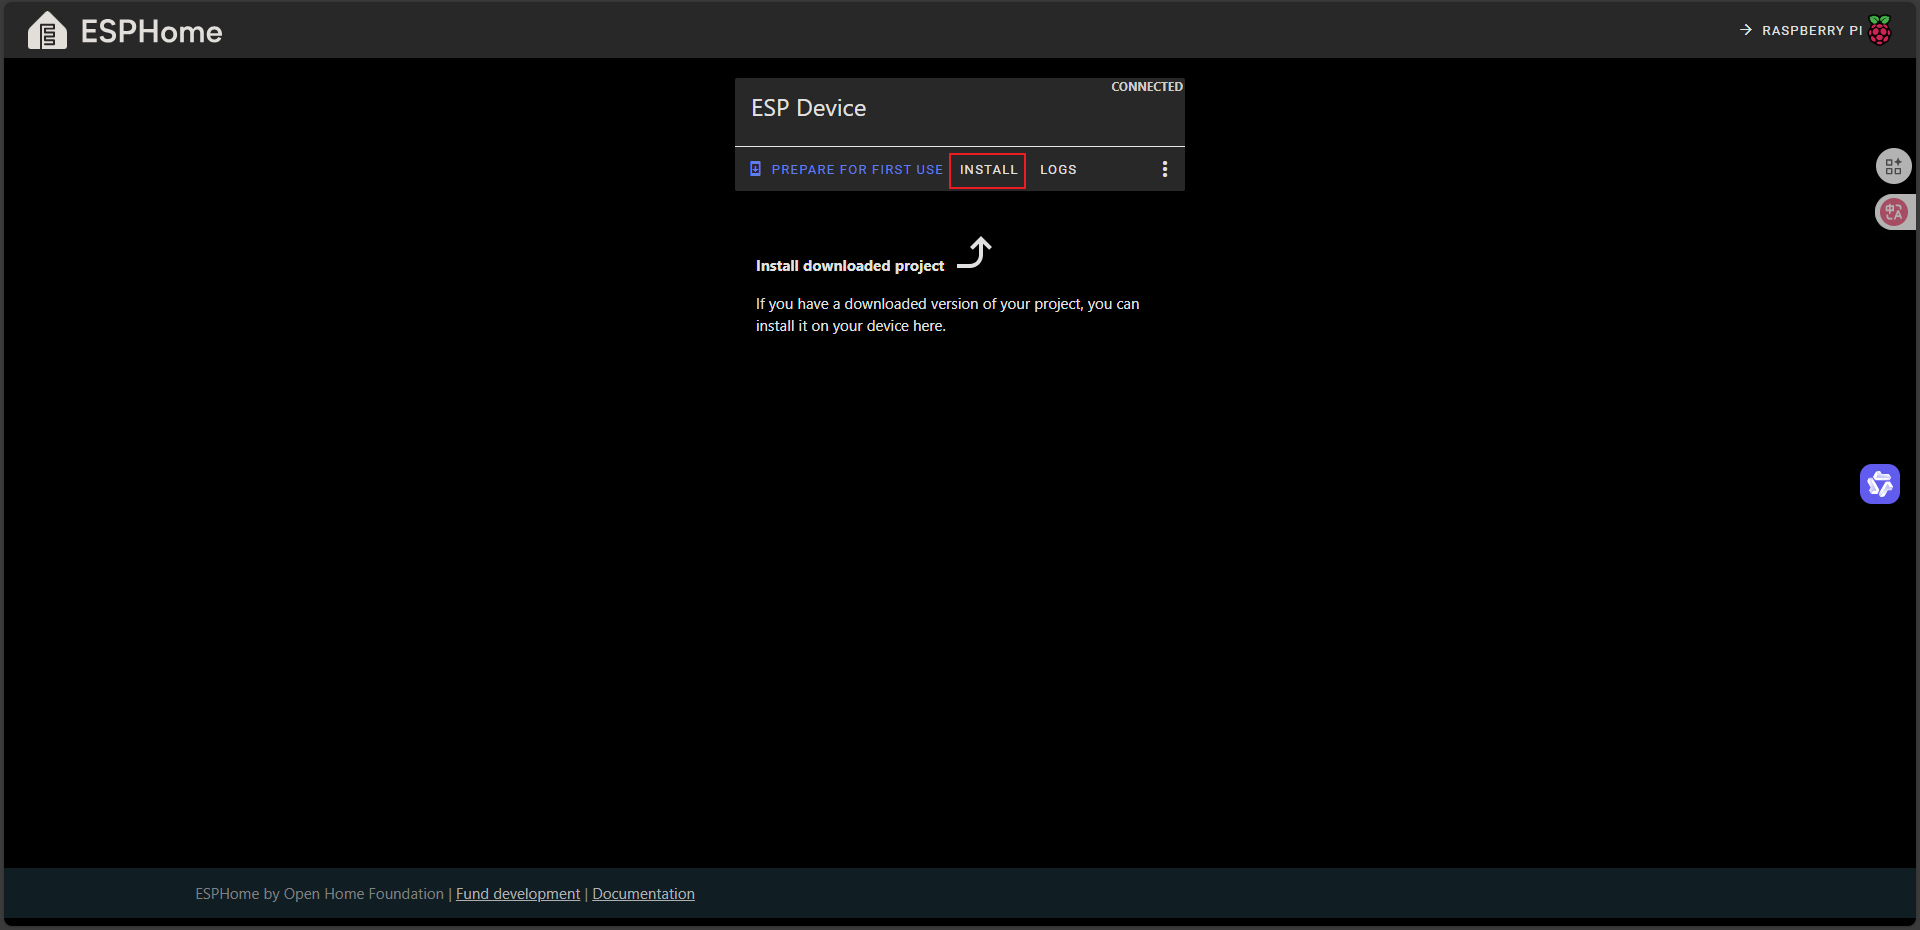
- Click
INSTALLto enter the local firmware file selection interface.
- Select the firmware file just saved locally, click
INSTALLand wait for the flashing to finish.

Flashing completed:
Quick Start
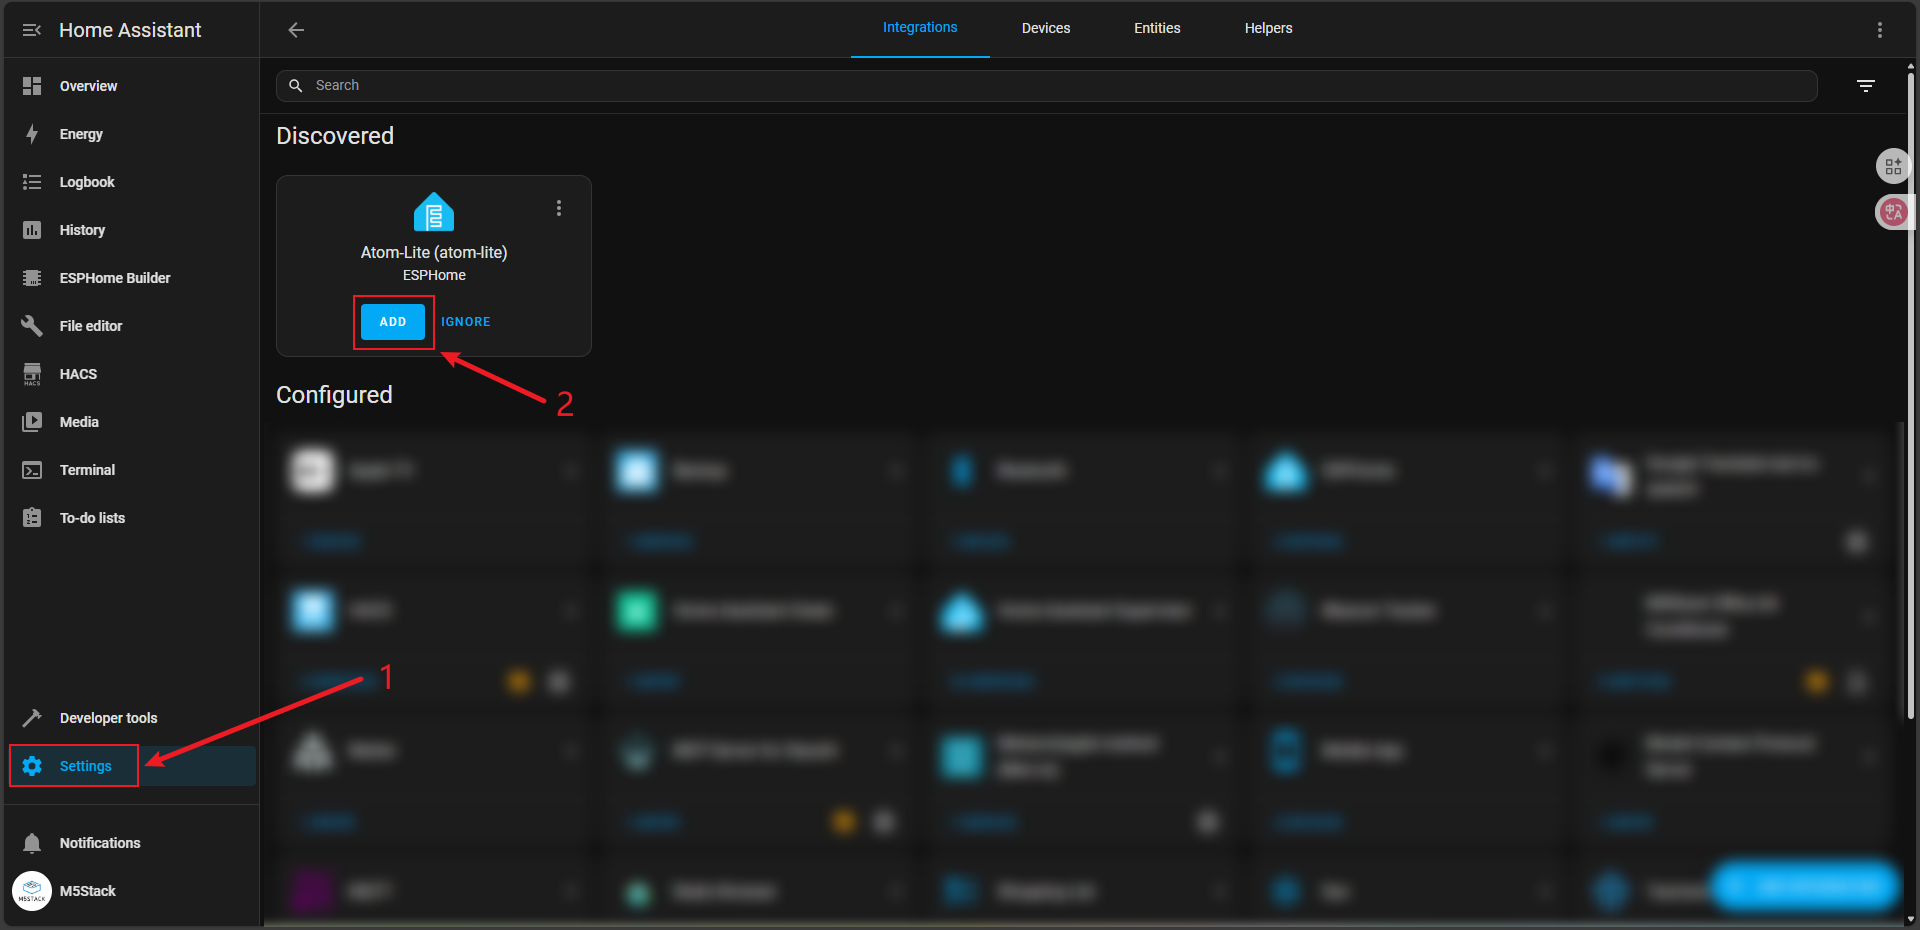
- After completing the firmware flashing, the device will automatically connect to Wi-Fi when powered on. Click
Settingsto enter the settings interface to view the device atDiscovered, clickADDto add the device.
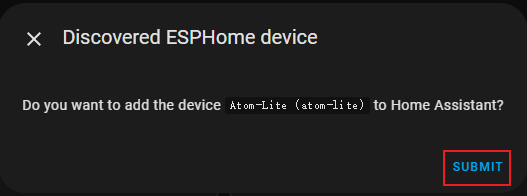
- Click
Settingsto enter the settings interface and selectDevices & services.
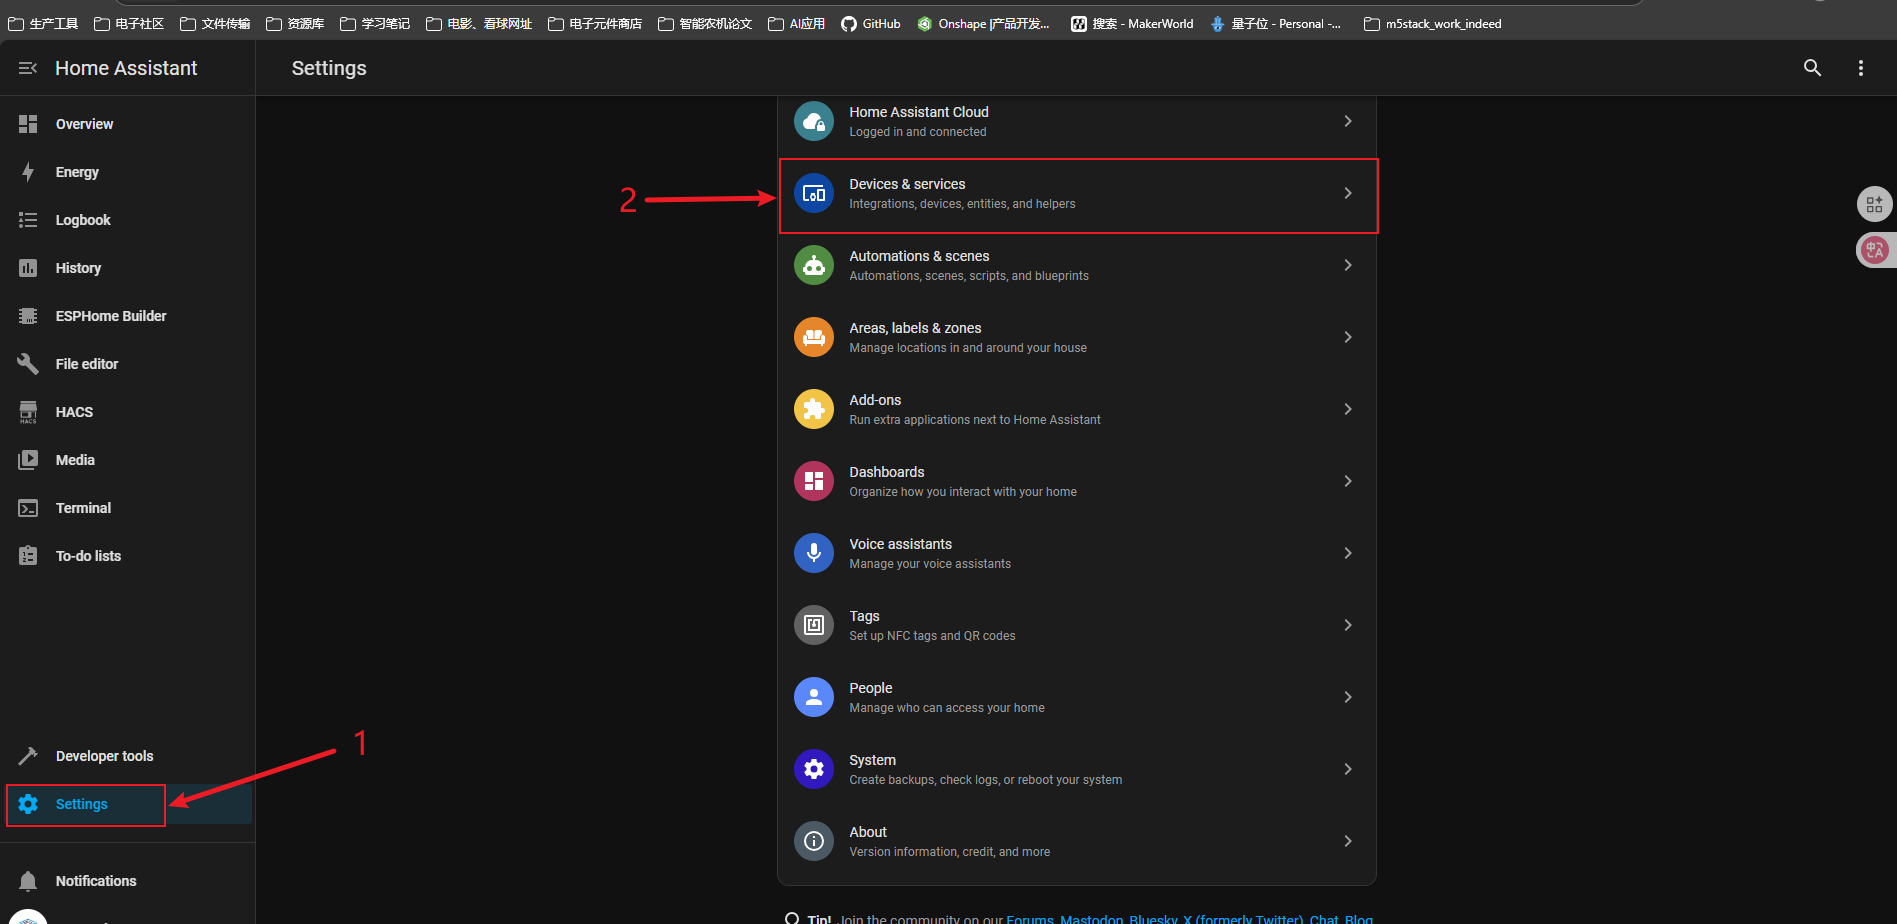
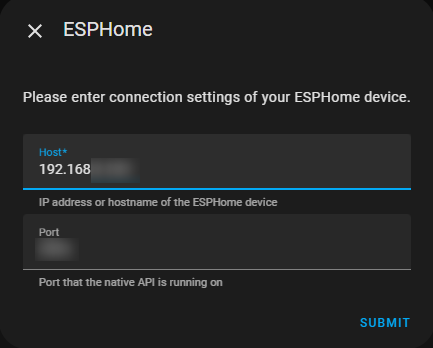
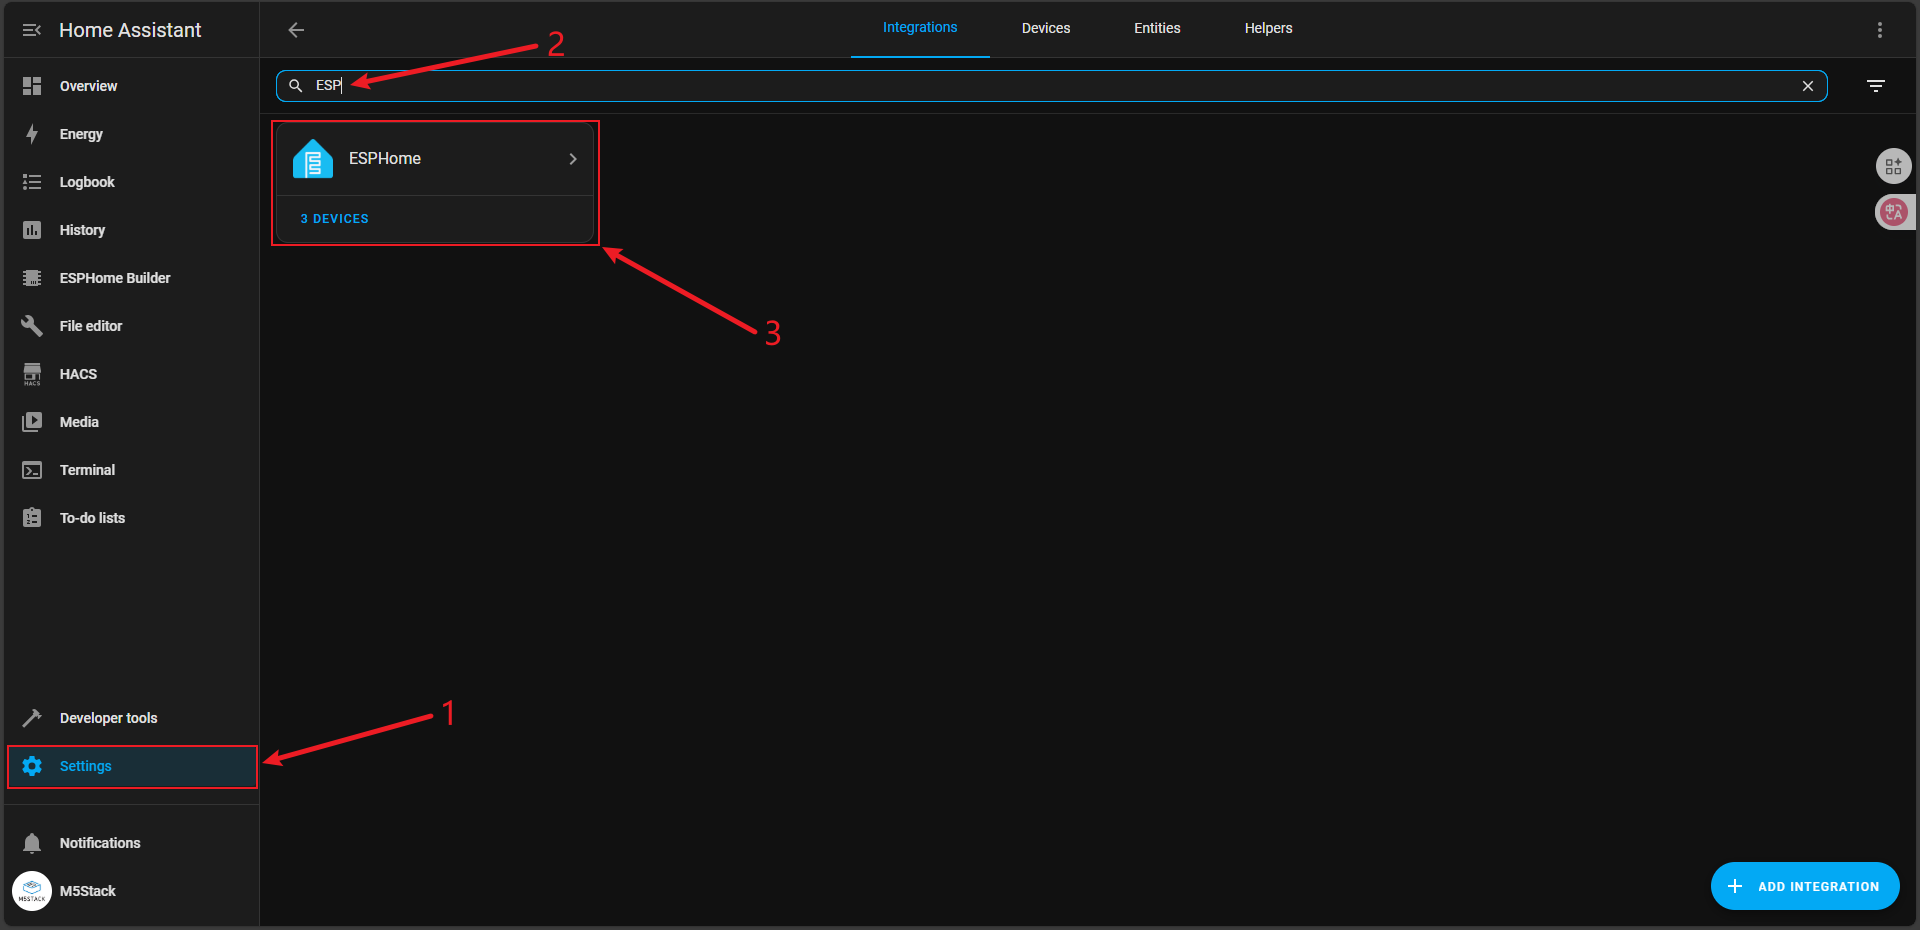
- Search for
ESPin the search bar to findESPHome, enter and selectAtom-Lite.
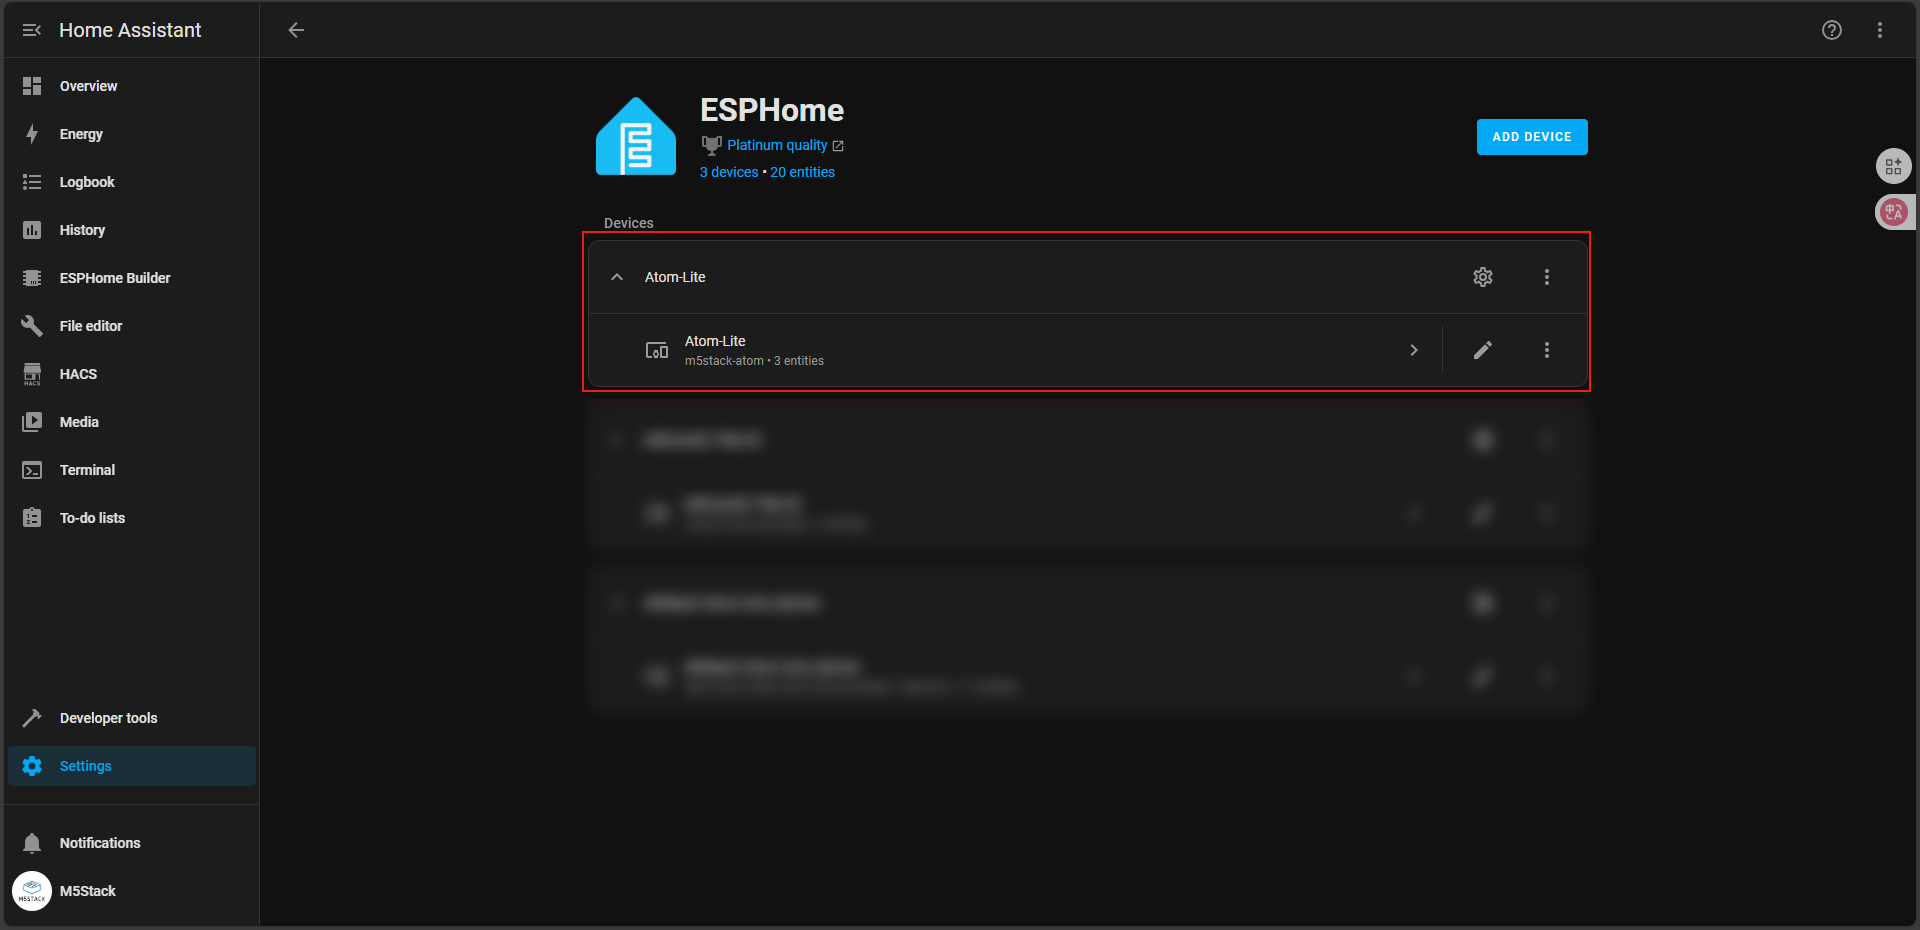
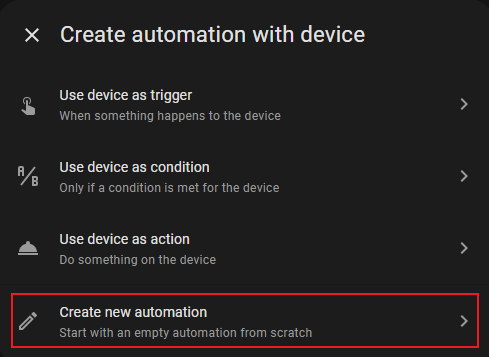
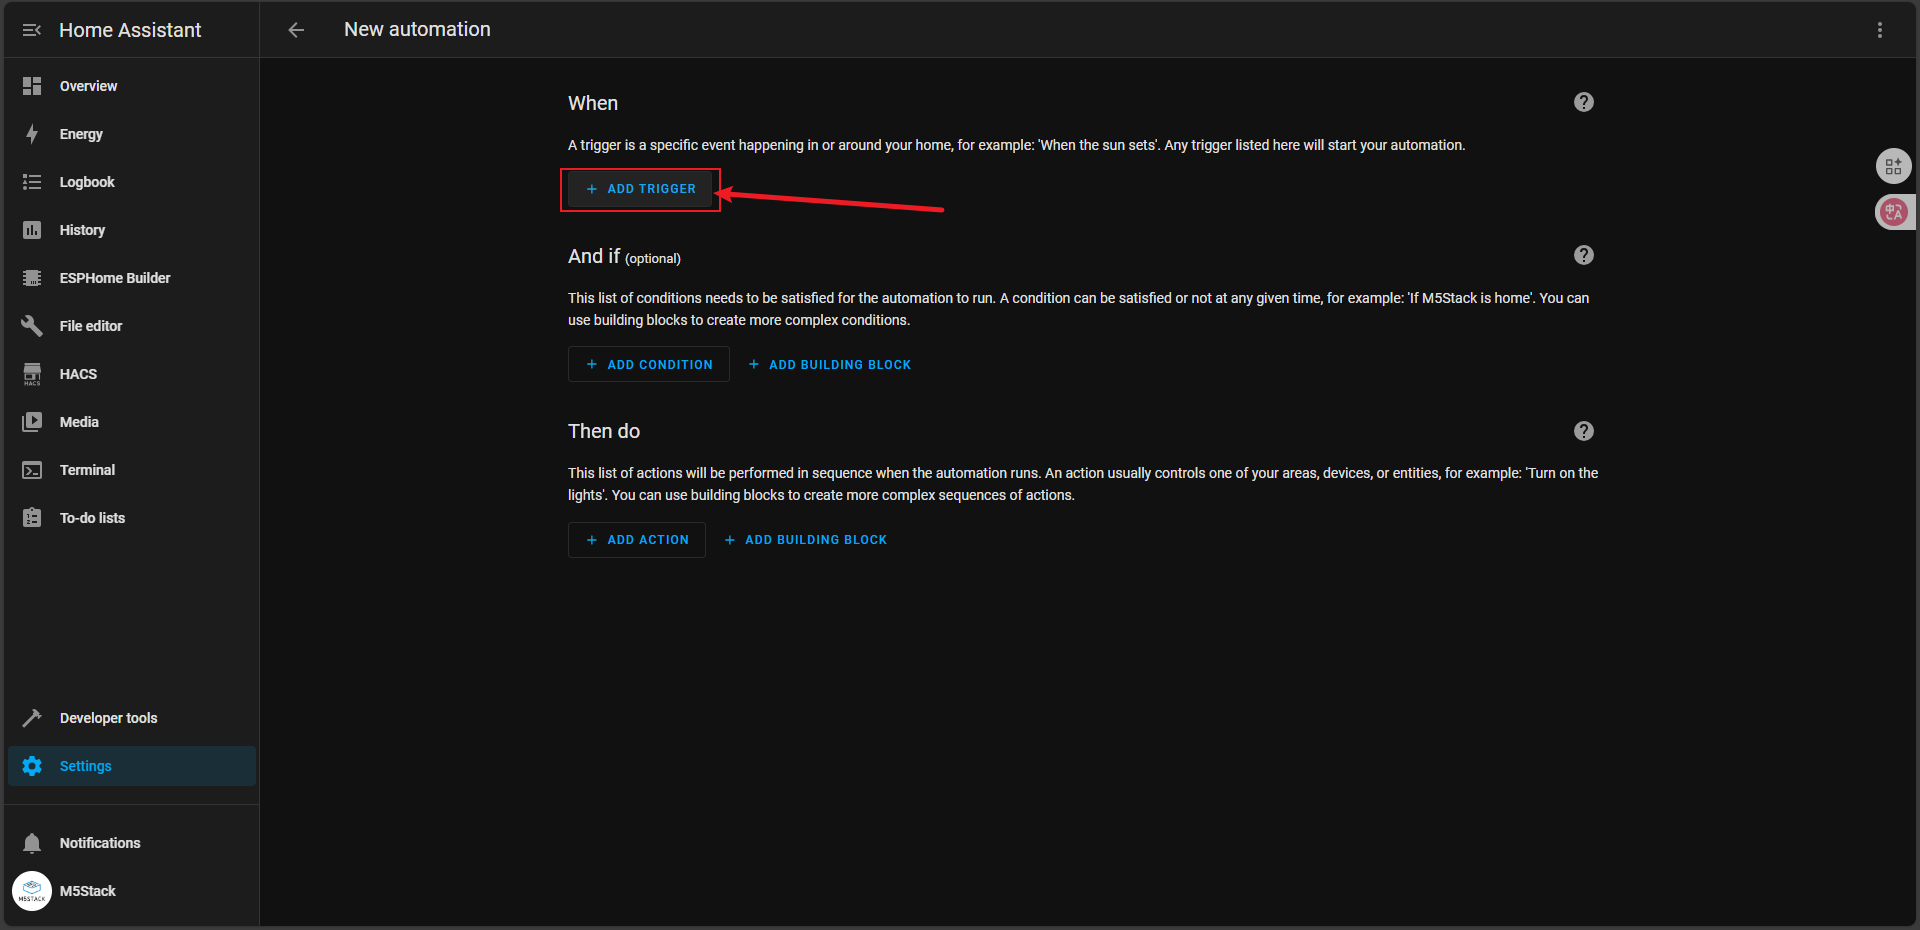
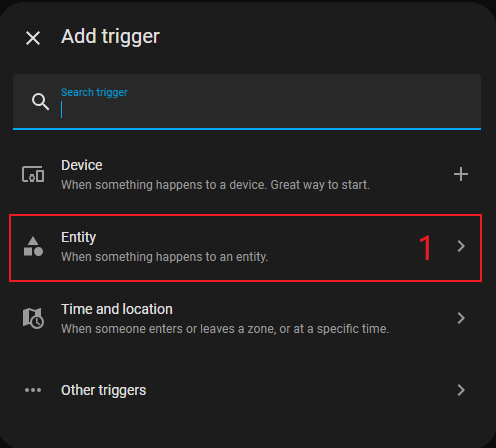
- In the
Atom-Liteconfiguration page, you can see twoEntities:Atom RGB LightandAtom Button. Automation is achieved by configuring variousEntitiesto implement logic. We click the+sign to addAutomations, and then follow the guide operations.
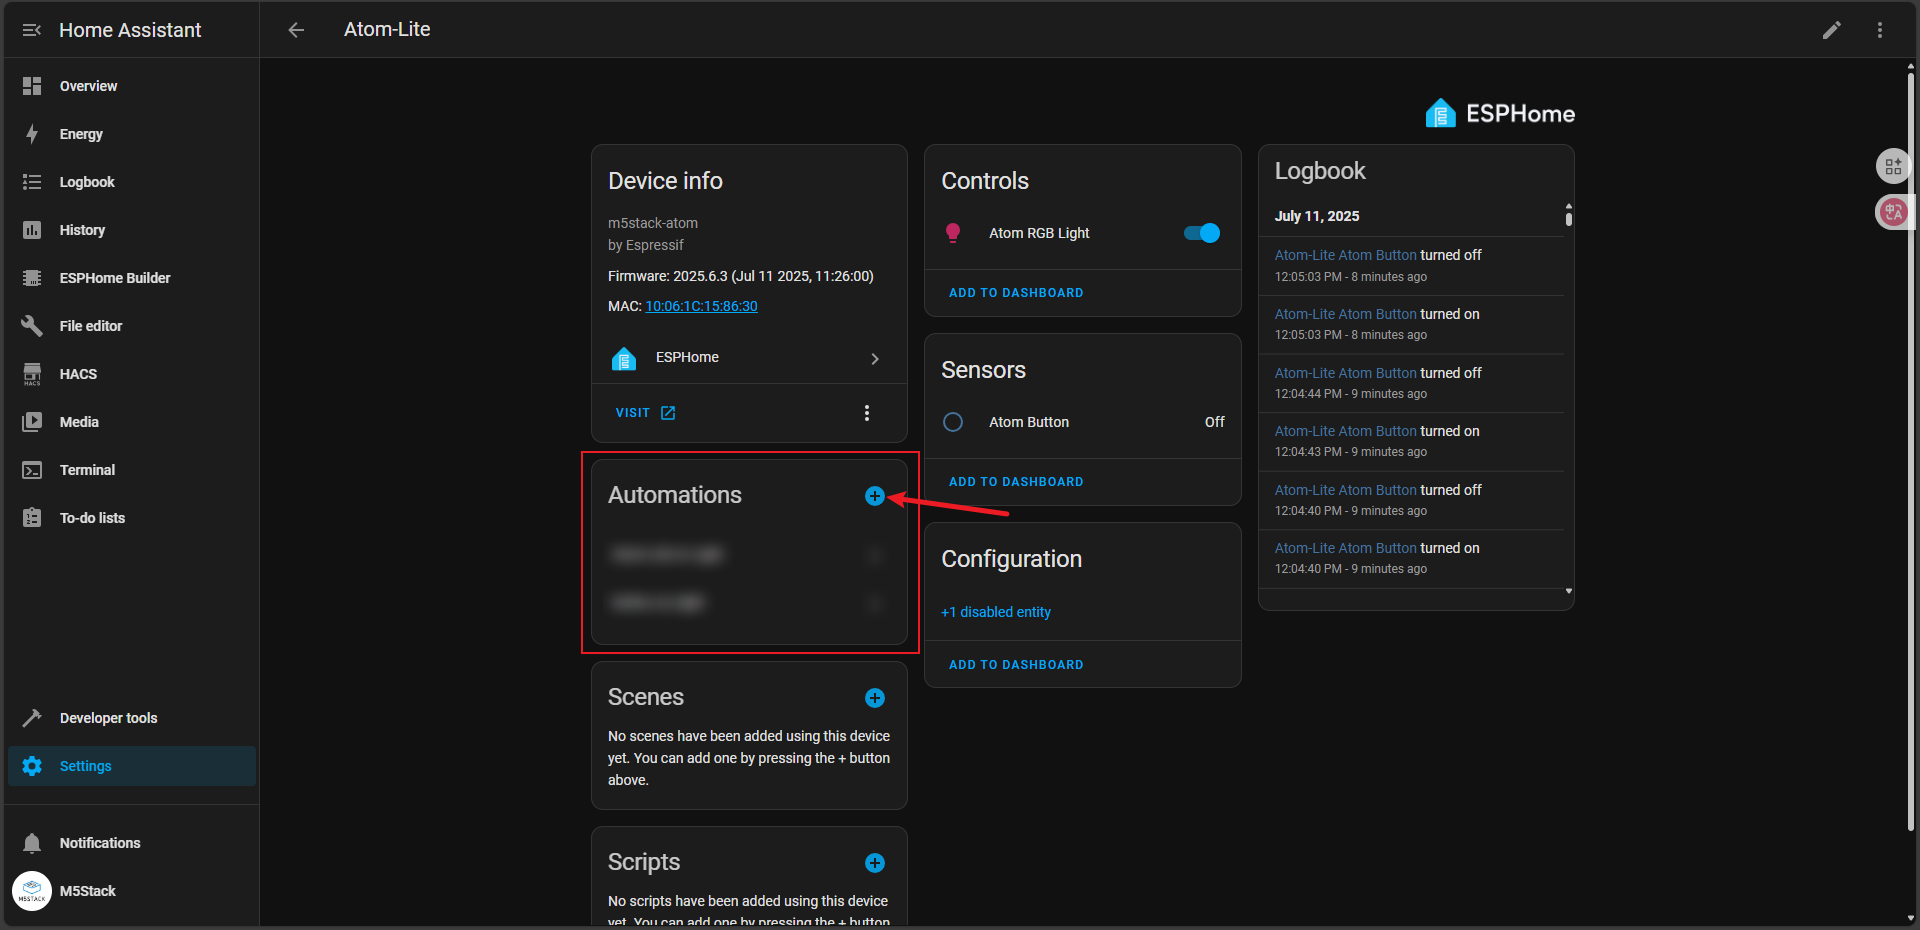
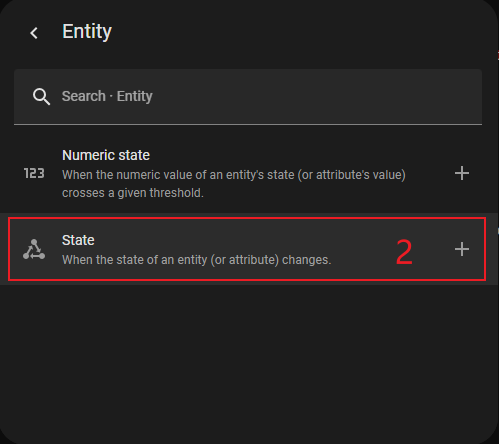
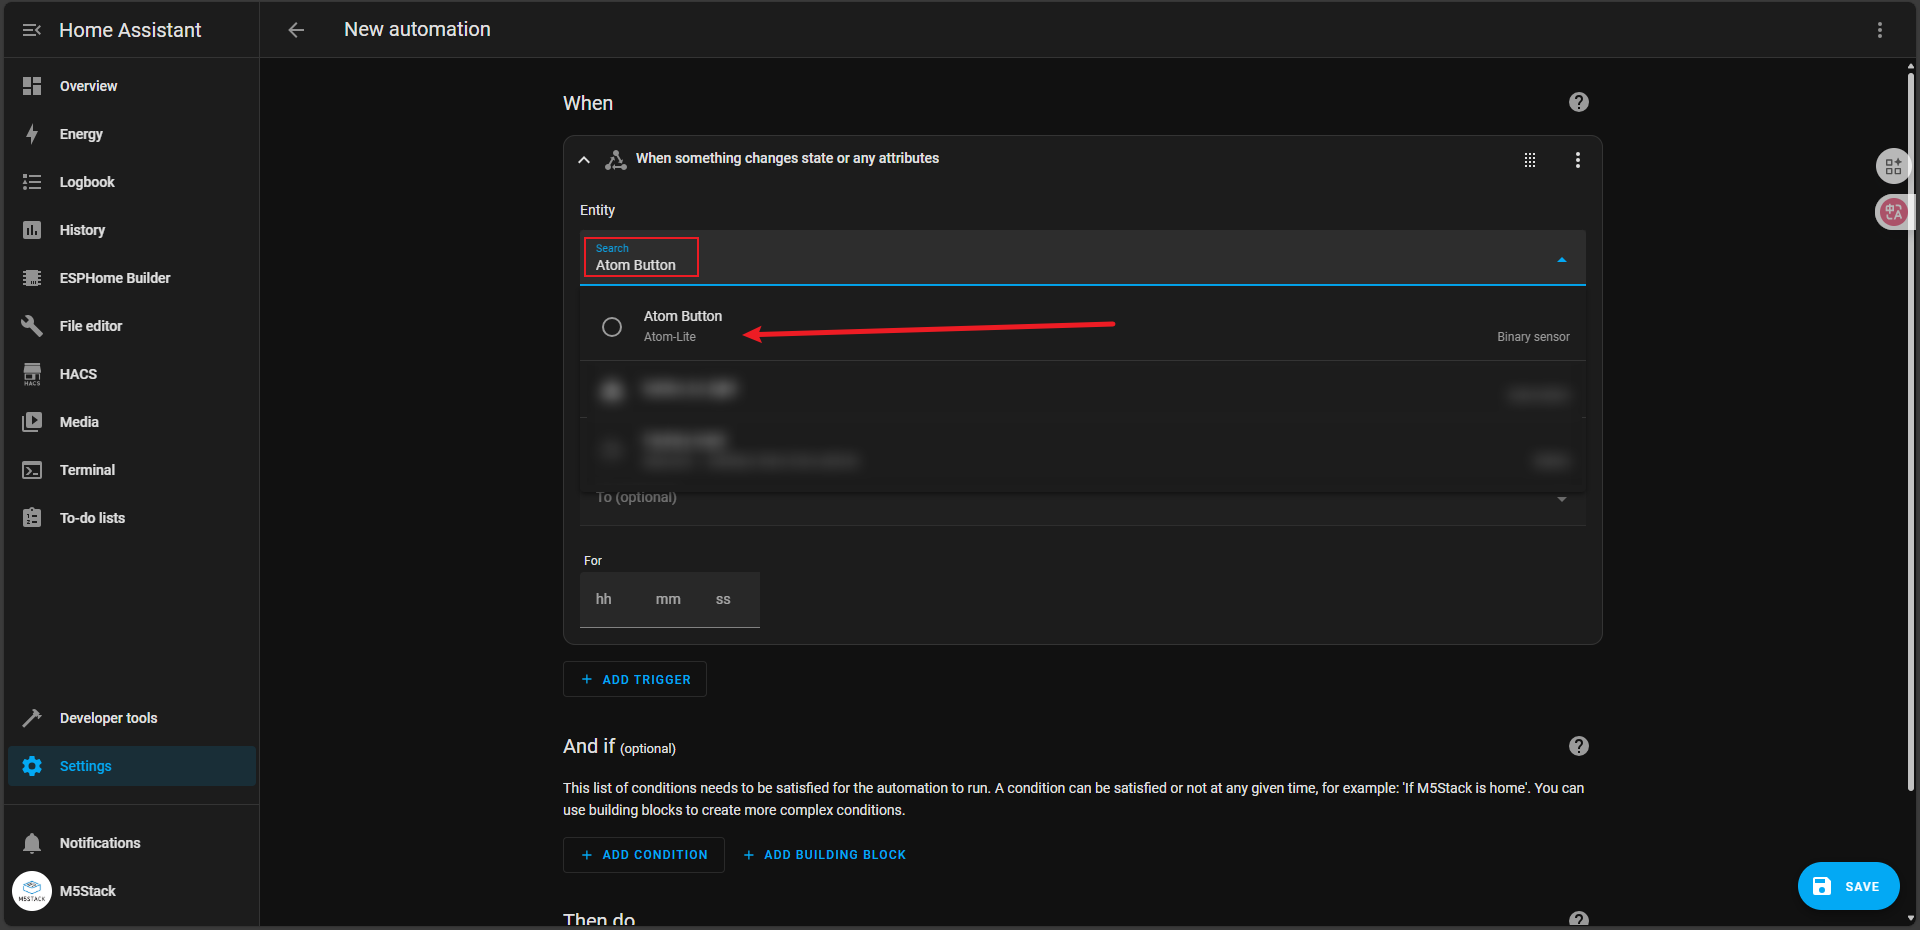

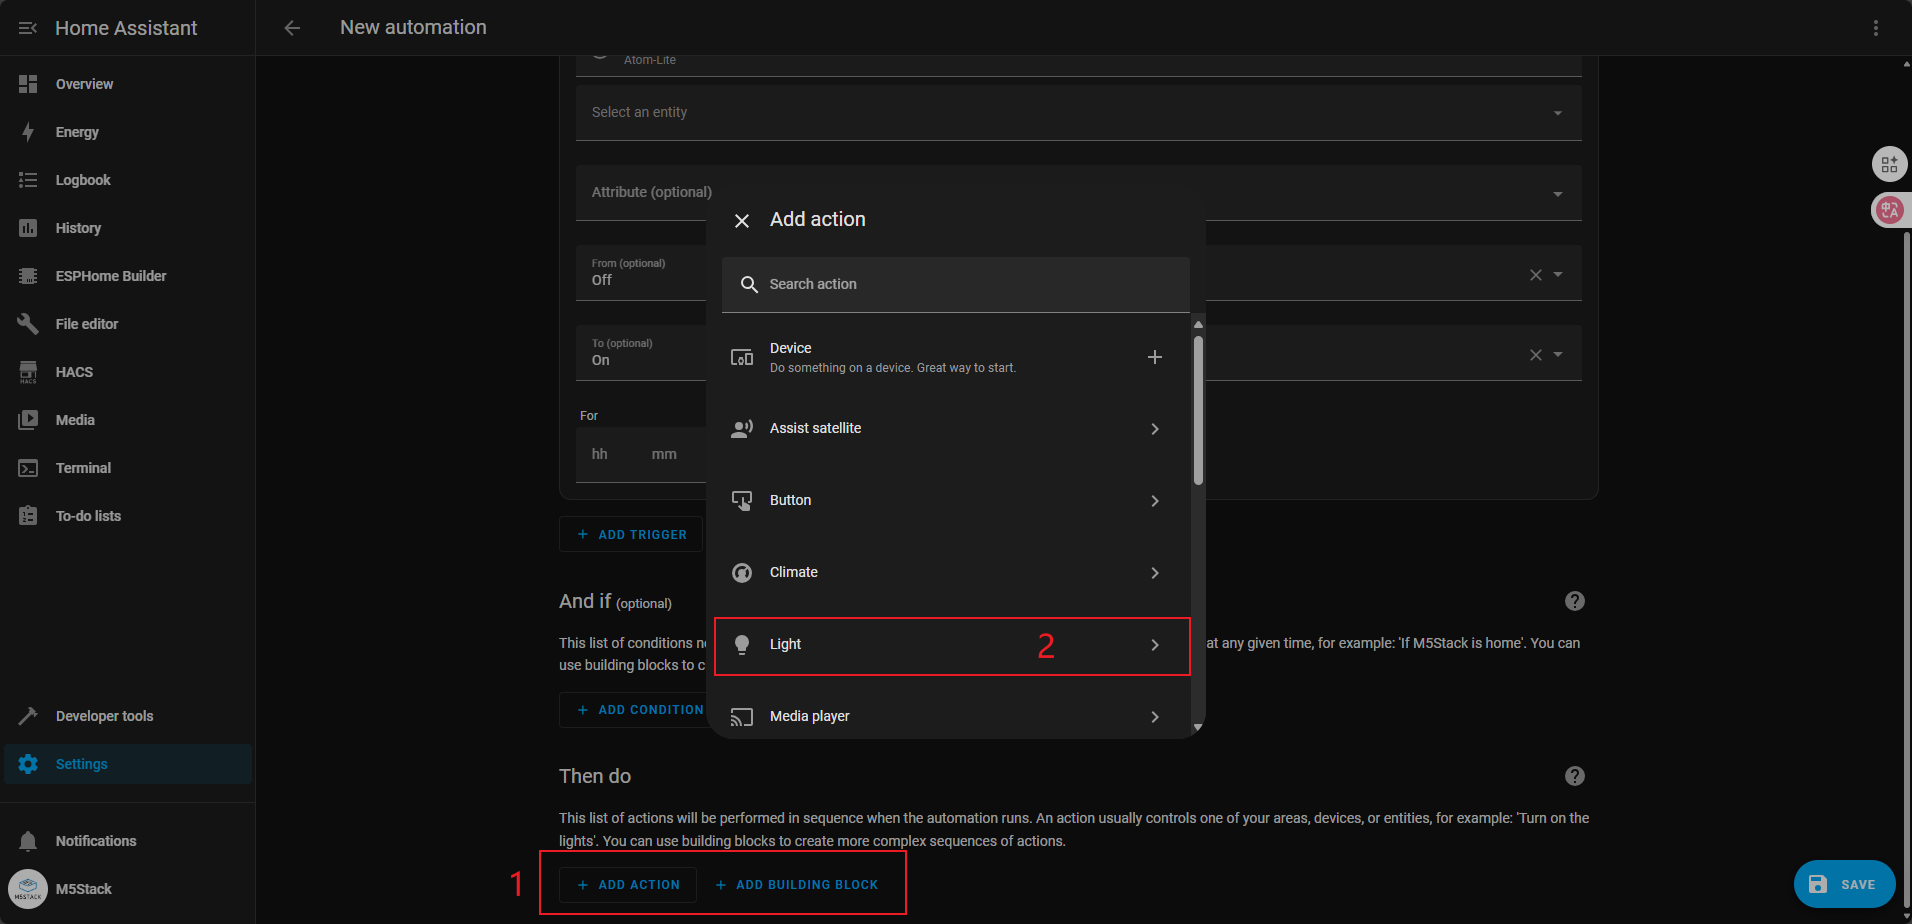


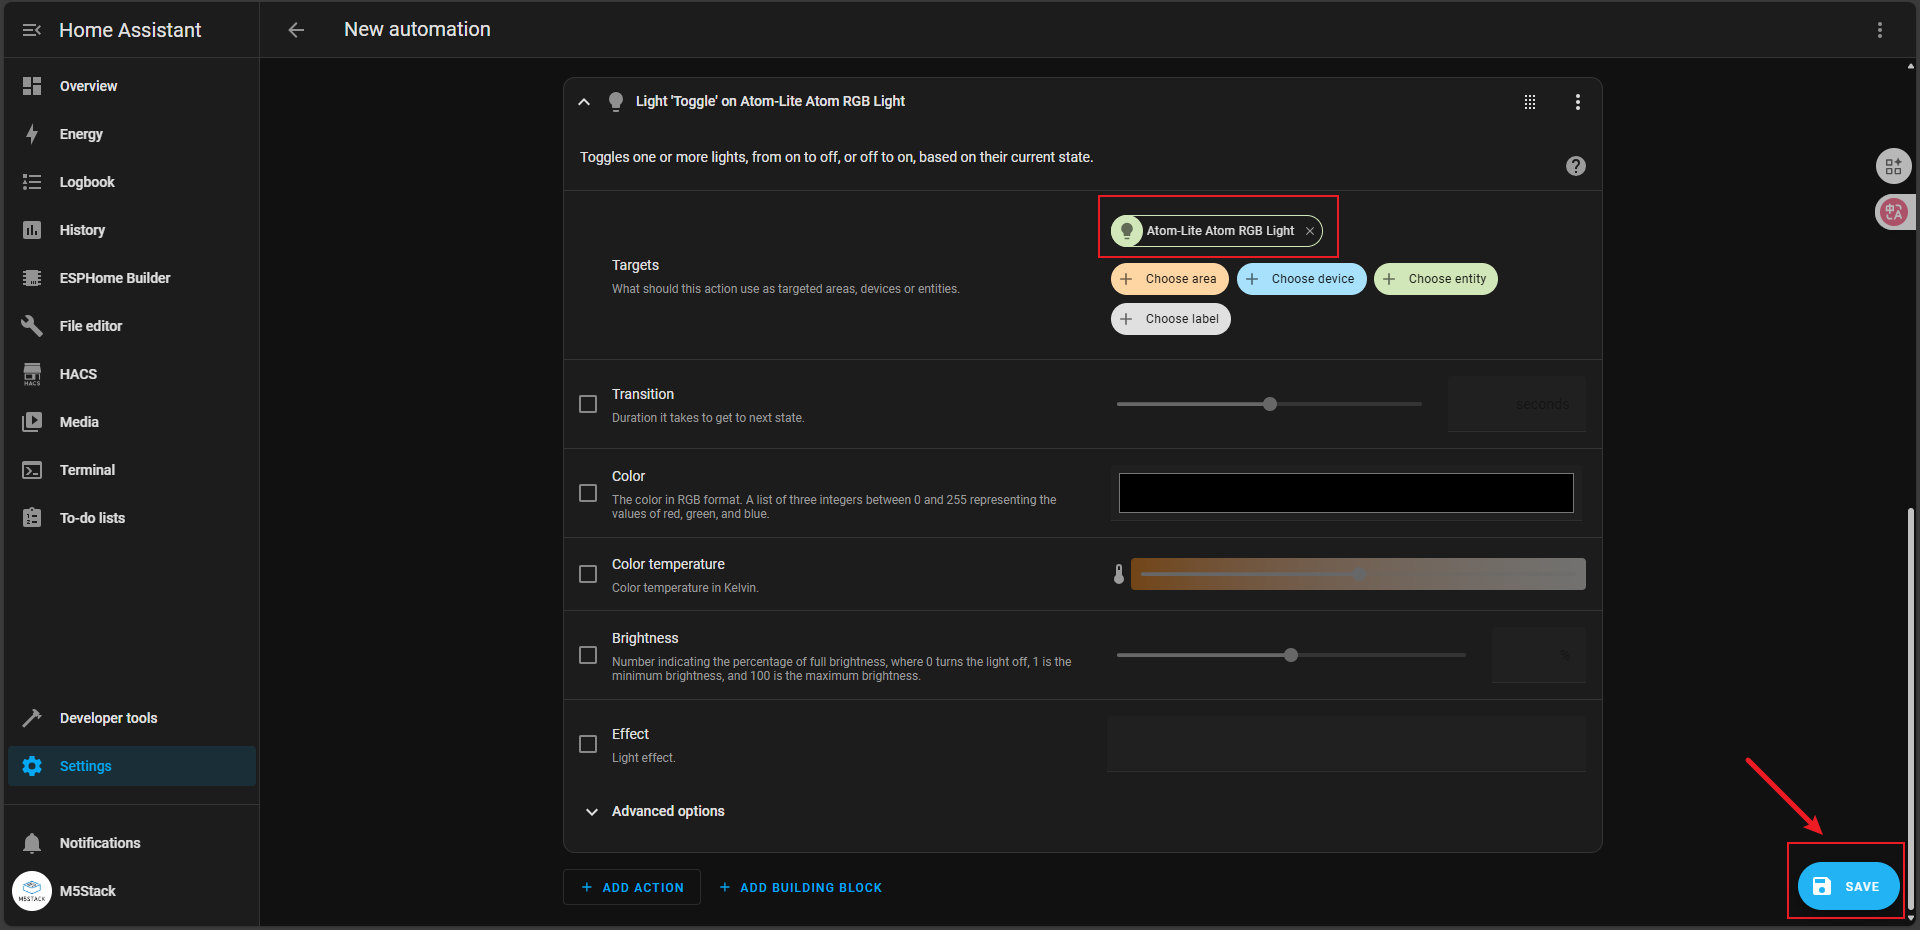
In this way, we used two entities, Atom Button and Atom RGB Light, to form an Automation. The effect of this automation is that clicking the button will toggle the light state.
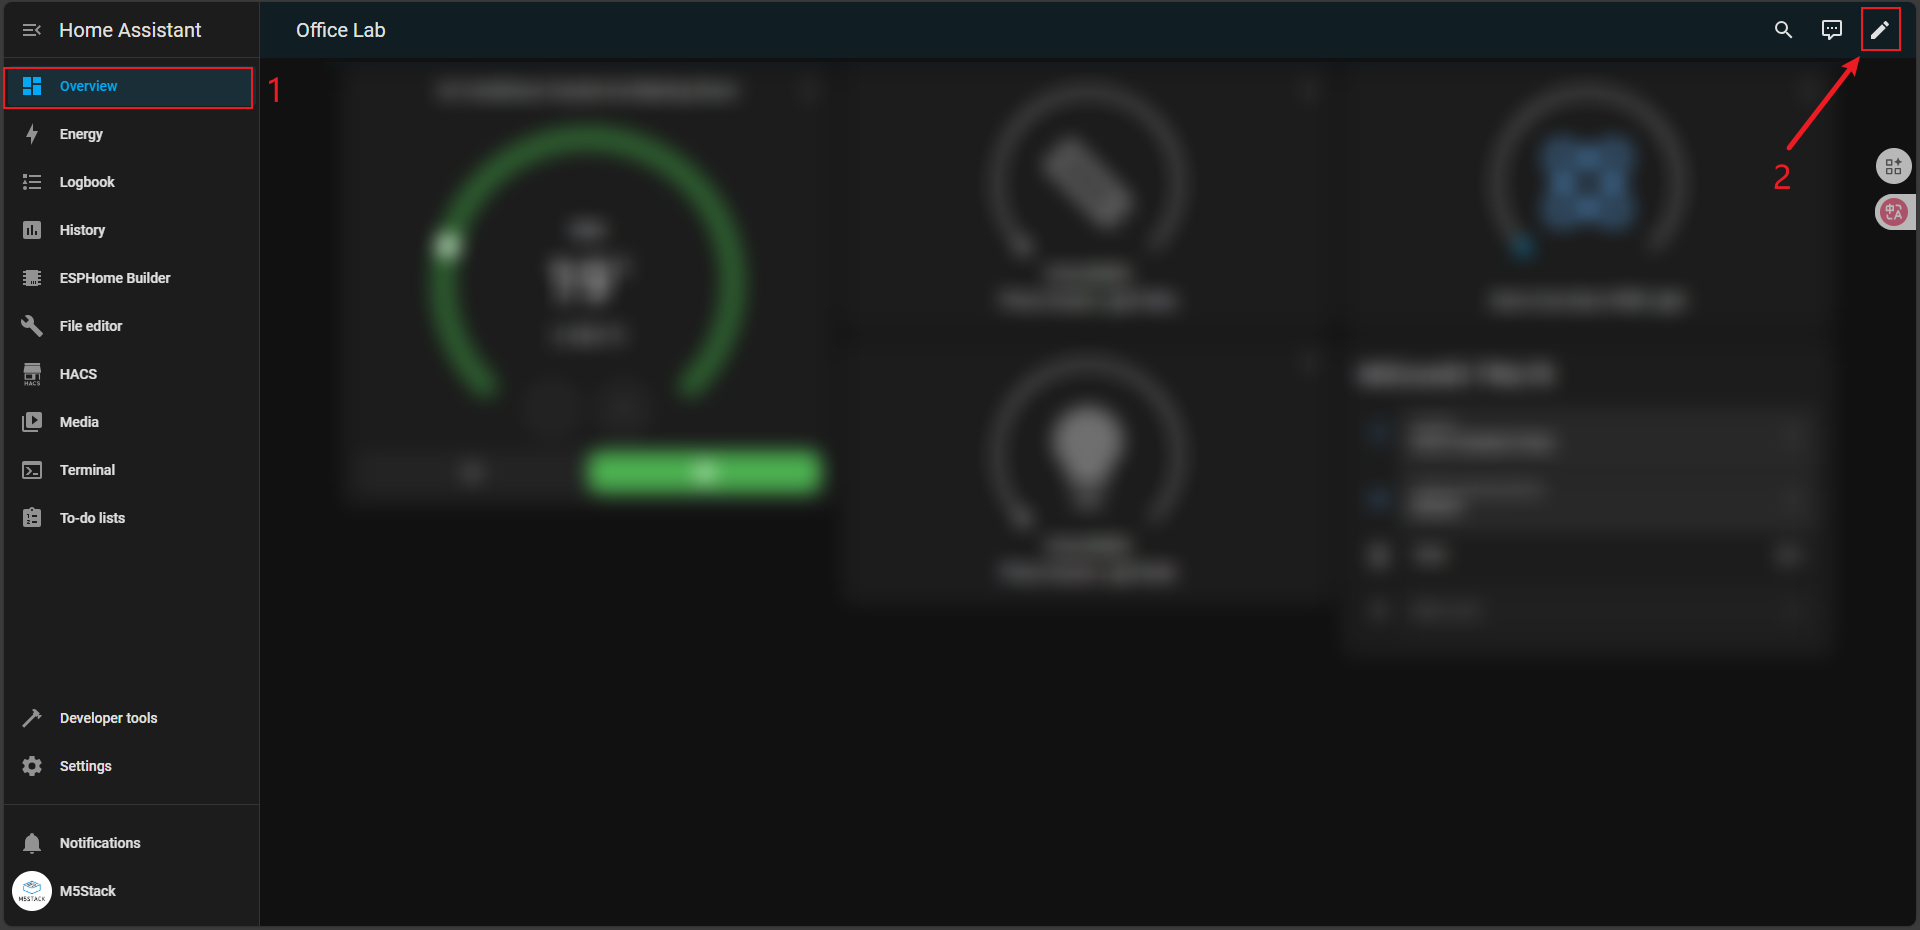
- Click the
Overviewmenu to enter the component control interface, click theeditbutton in the upper right corner to enter the editing interface.
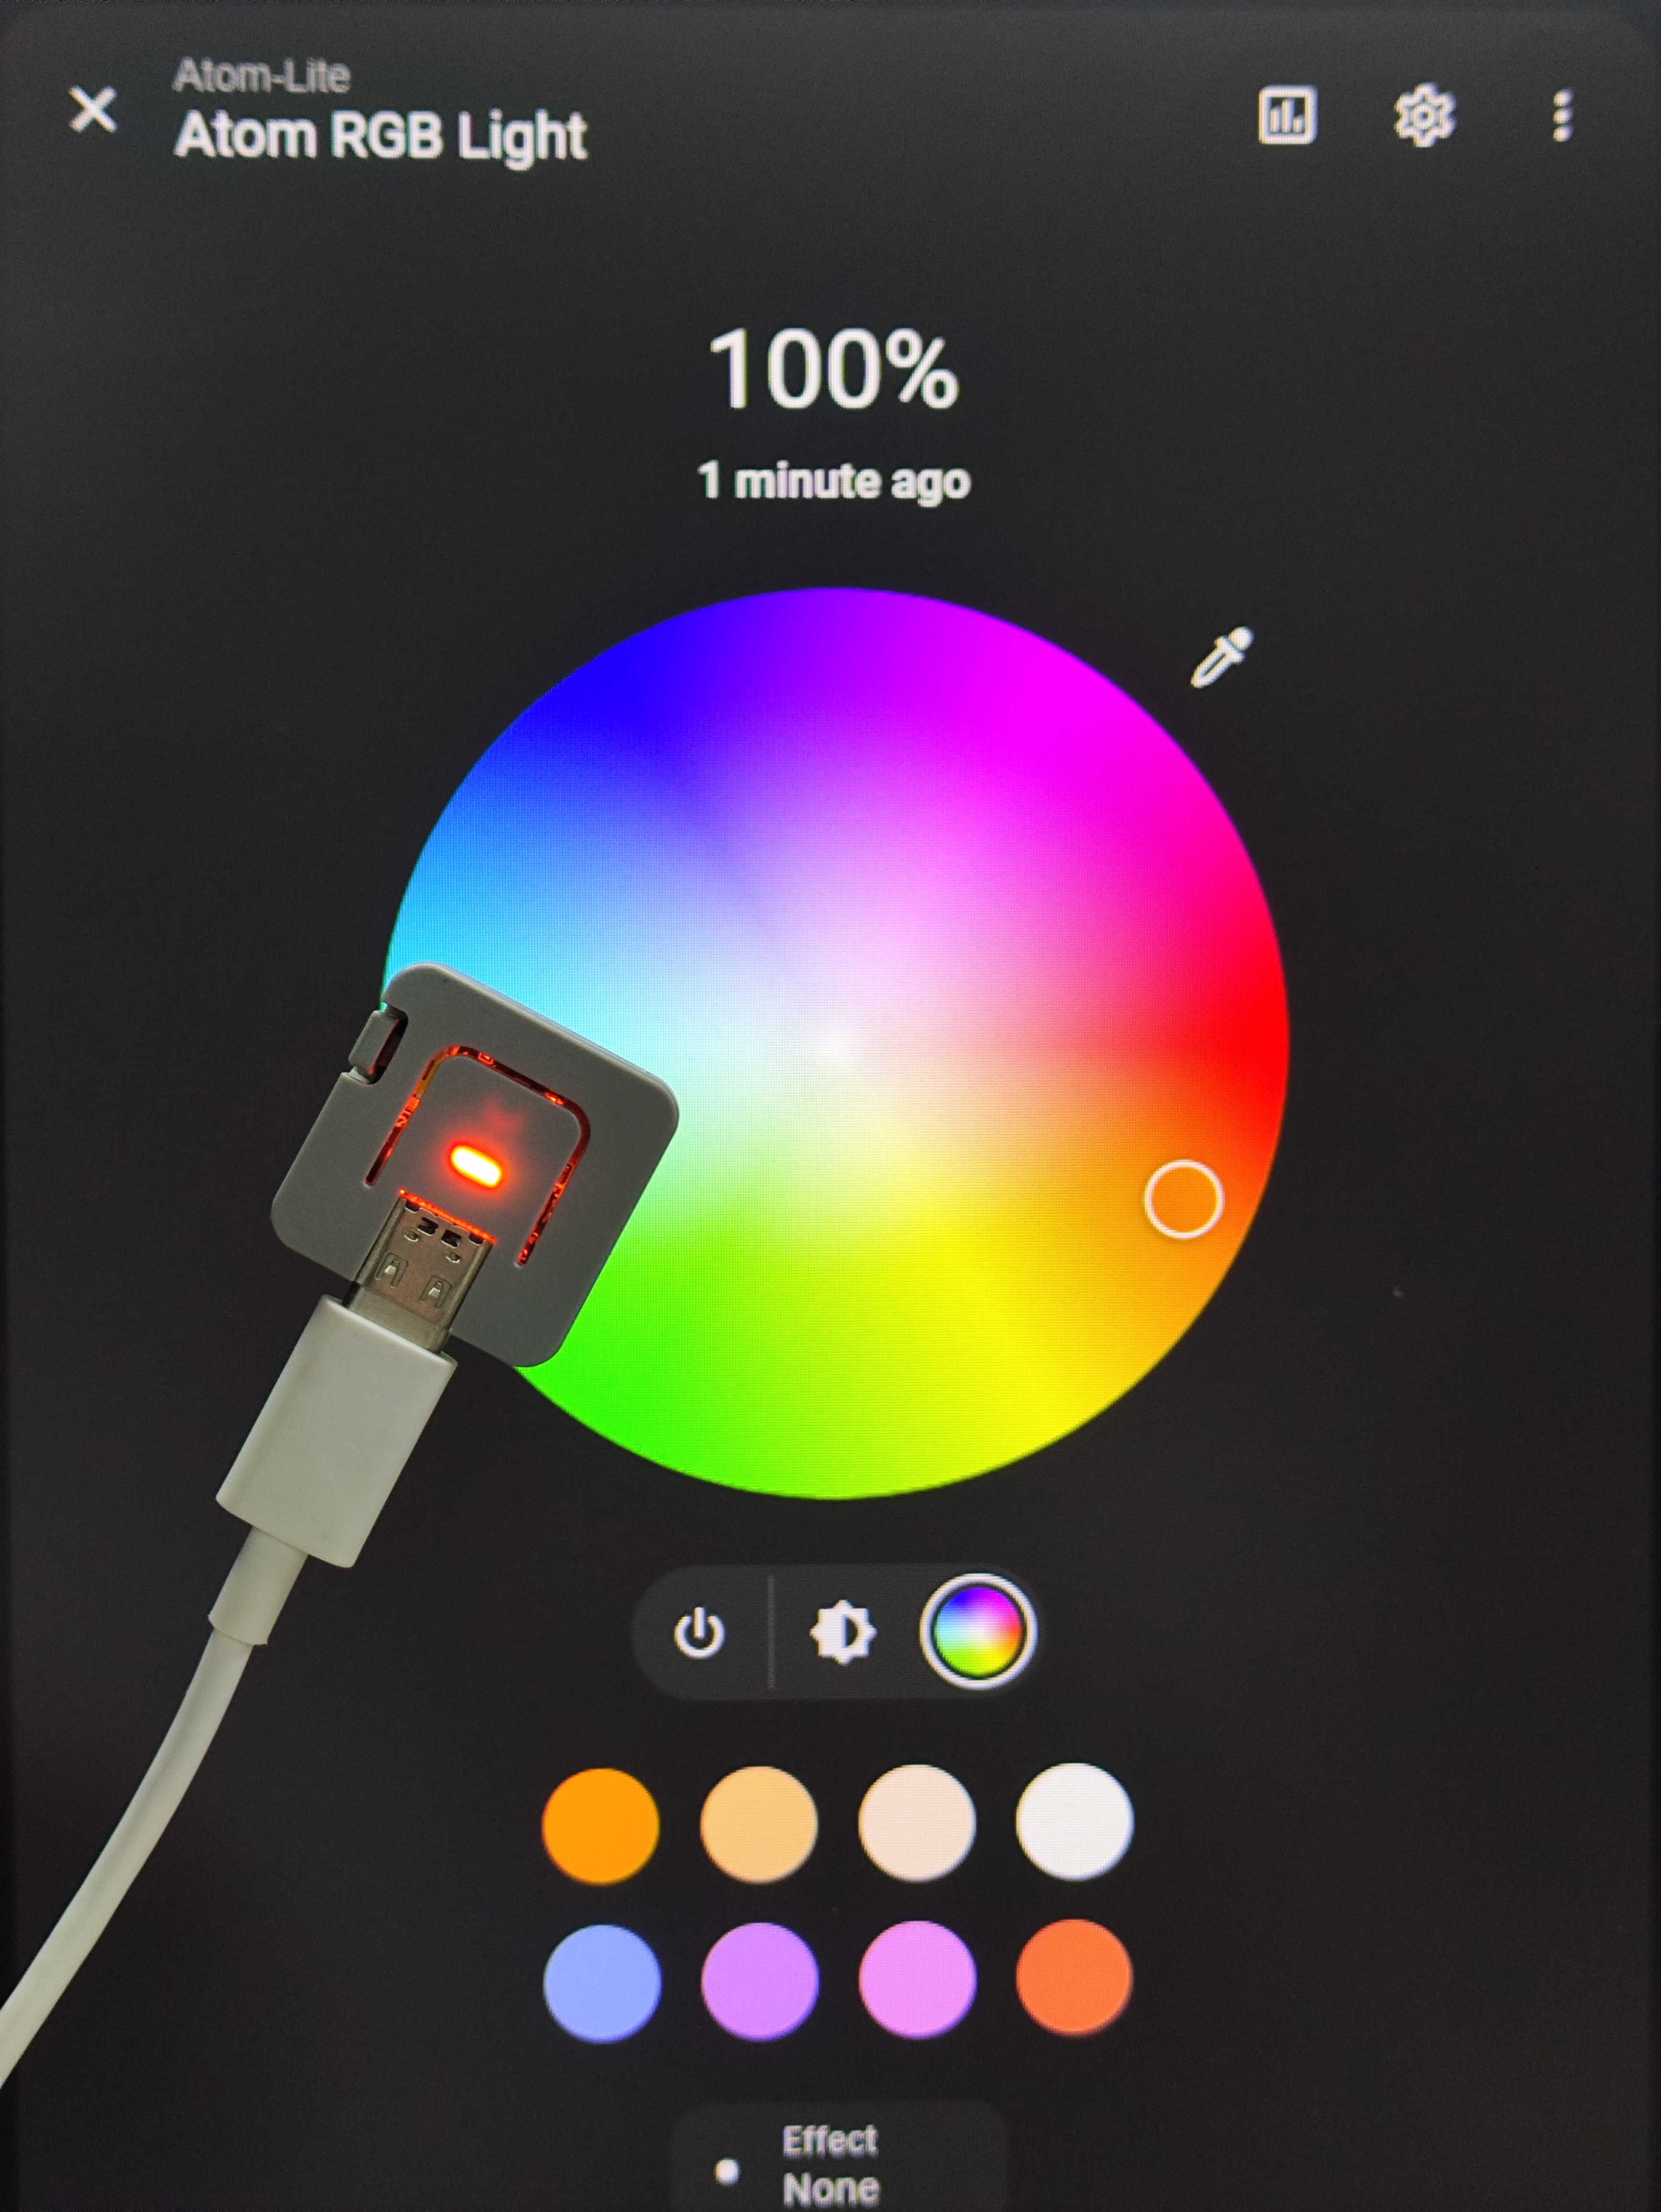
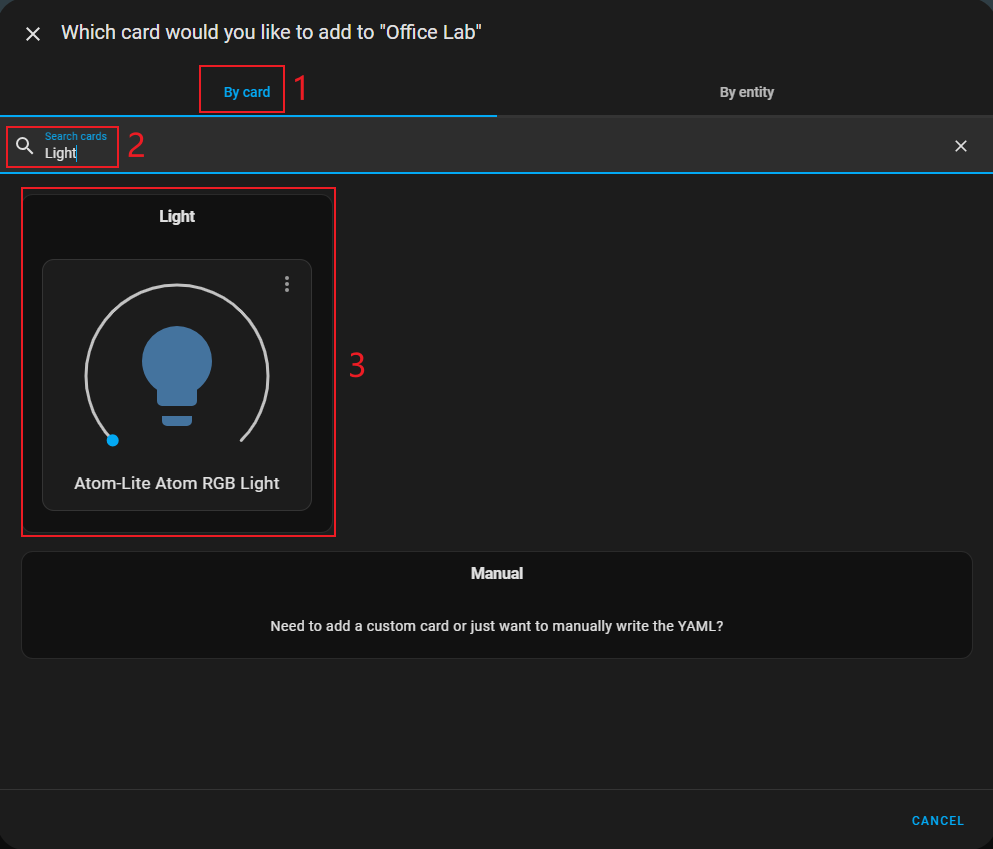
- In the
By cardinterface, search forLightand select theAtom RGB Lightentity component.
The component configuration is as follows:

- Double-click the button and the RGB light switches to pink.
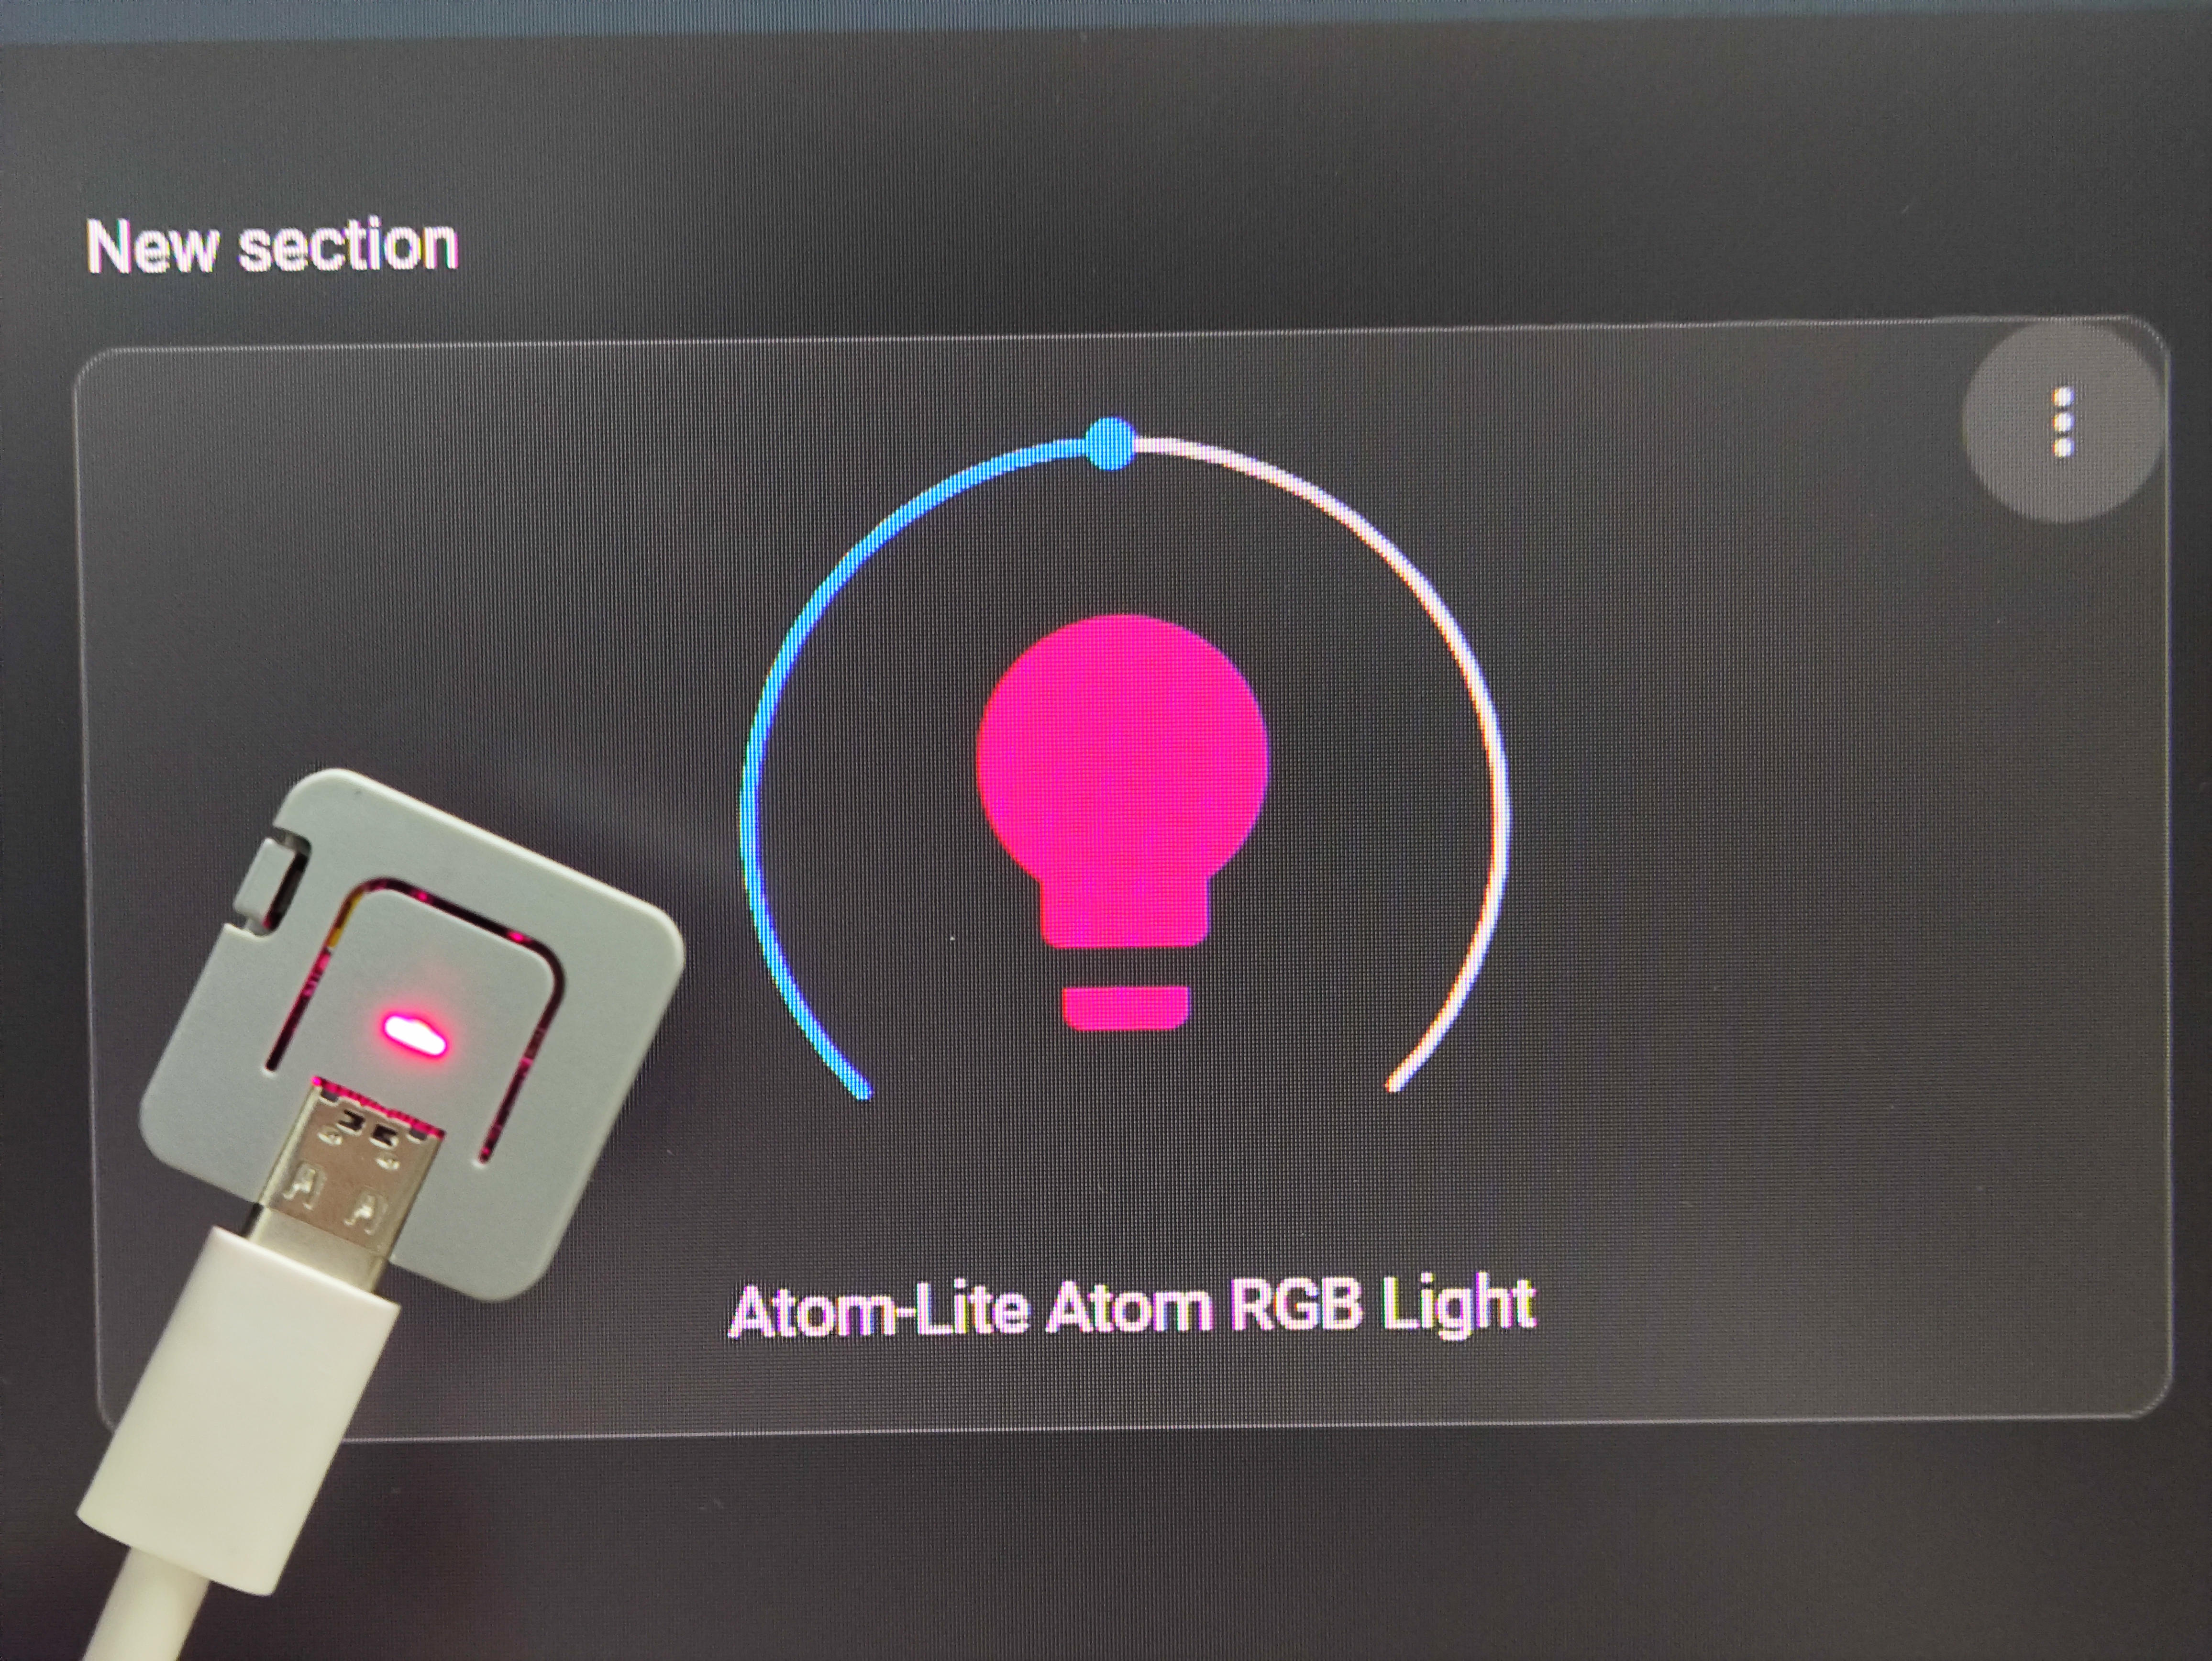
- Long press the button for more than 2 seconds, and the RGB light switches to green.

The status of the RGB light will not only be reflected on the component but can also be directly controlled through the component.