


Home Assistant
Media Player
Expansion
Sensor
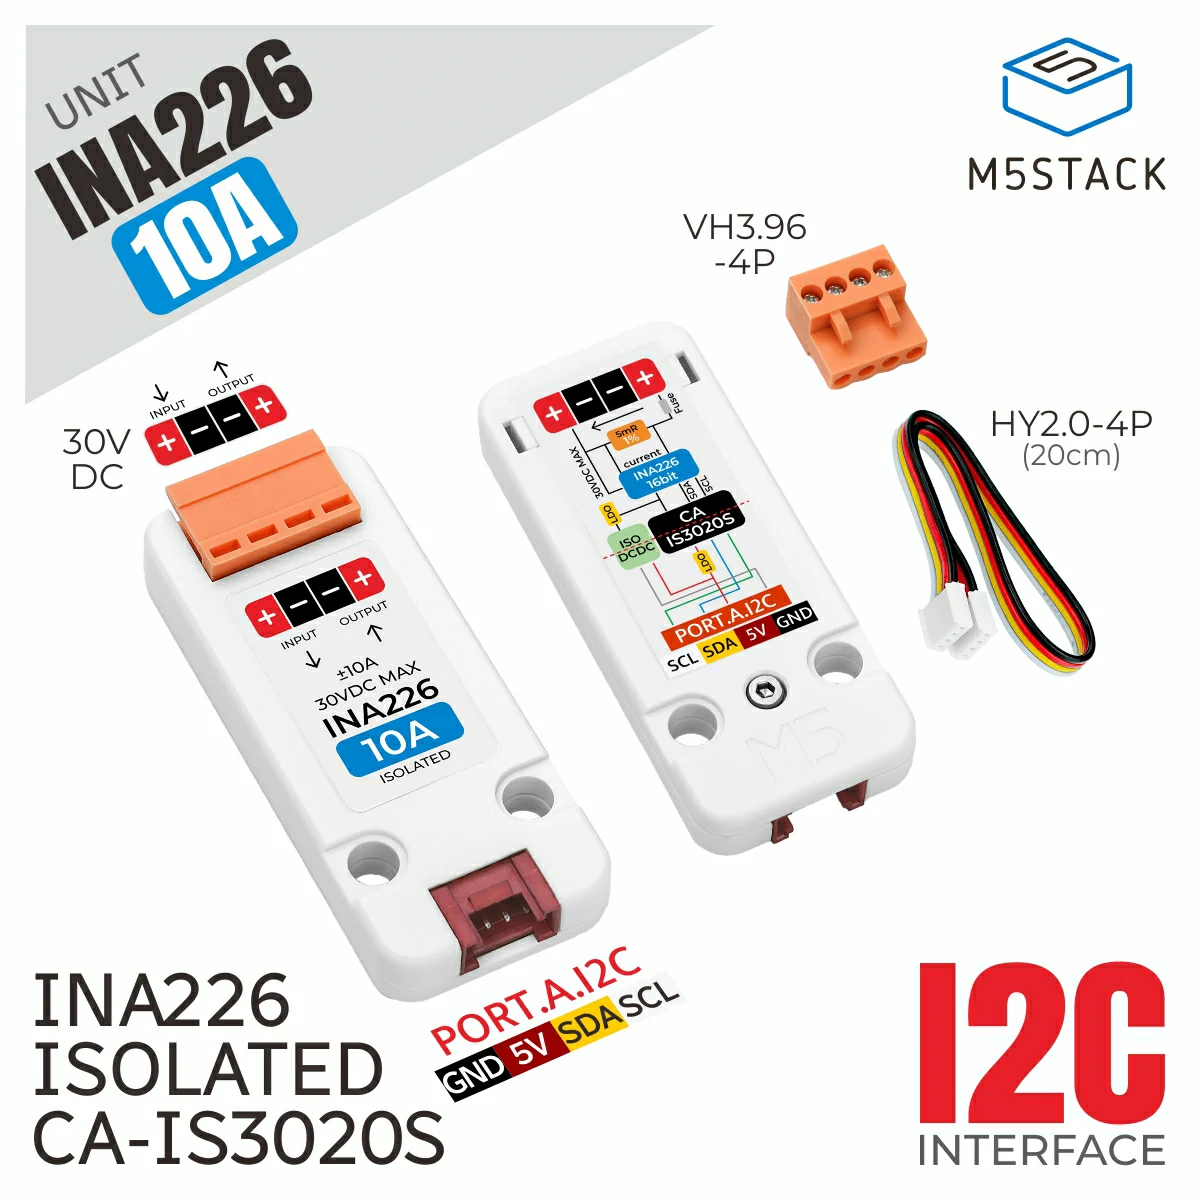
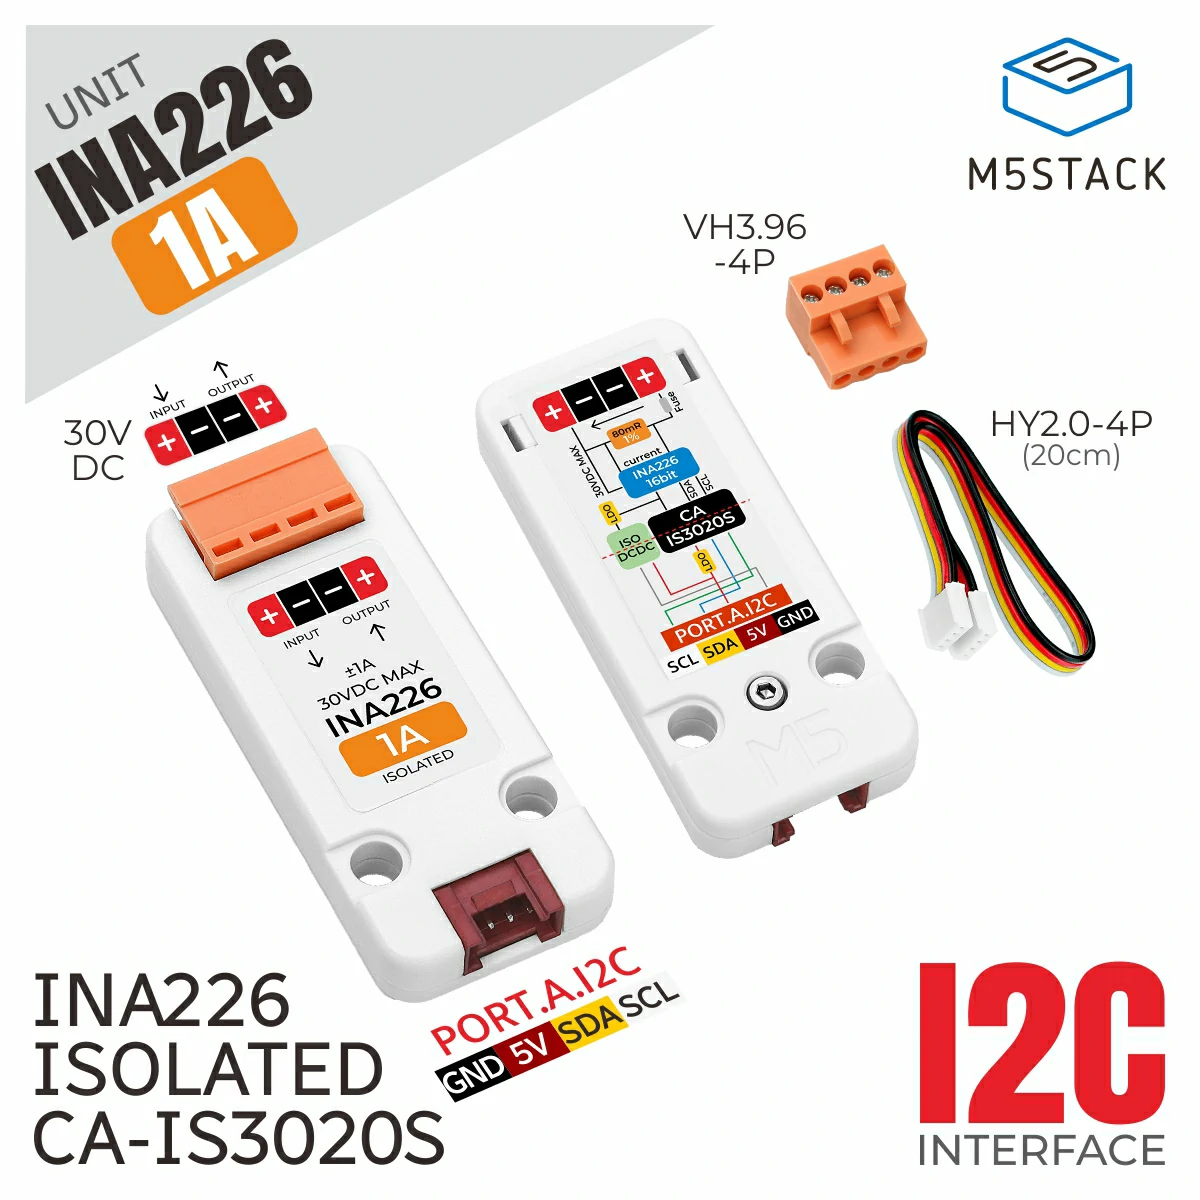
Unit INA226 10A/1A Home Assistant Integration
This tutorial will introduce how to use the Unit INA226 10A/1A DC electrical parameter measurement unit with the AtomS3R main controller and integrate it into Home Assistant to achieve real-time monitoring of DC voltage, current, and power.
Preparation
- Hardware List
- 1 x Unit INA226 10A / Unit INA226 1A
- 1 x AtomS3R
- 1 x HY2.0-4P Grove Cable (20cm)
- 1 x Home Assistant Host (Server, Mini PC, NAS, etc.)
- Software and Versions
- Home Assistant 2026.2.0 or above
- ESPHome Device Builder 2026.2.2 or above
Create Device
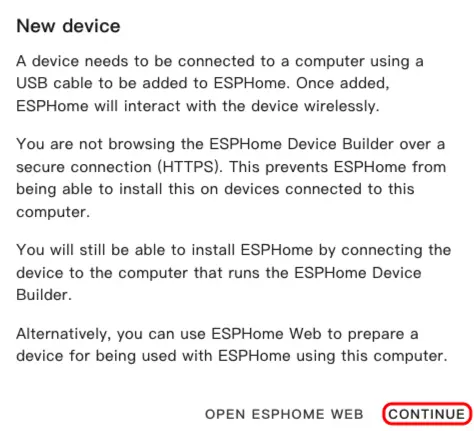
- Open the ESPHome Dashboard. If the initial guidance interface appears, click
CONTINUE.
- Click the green + button in the lower right corner to start creating a new device.
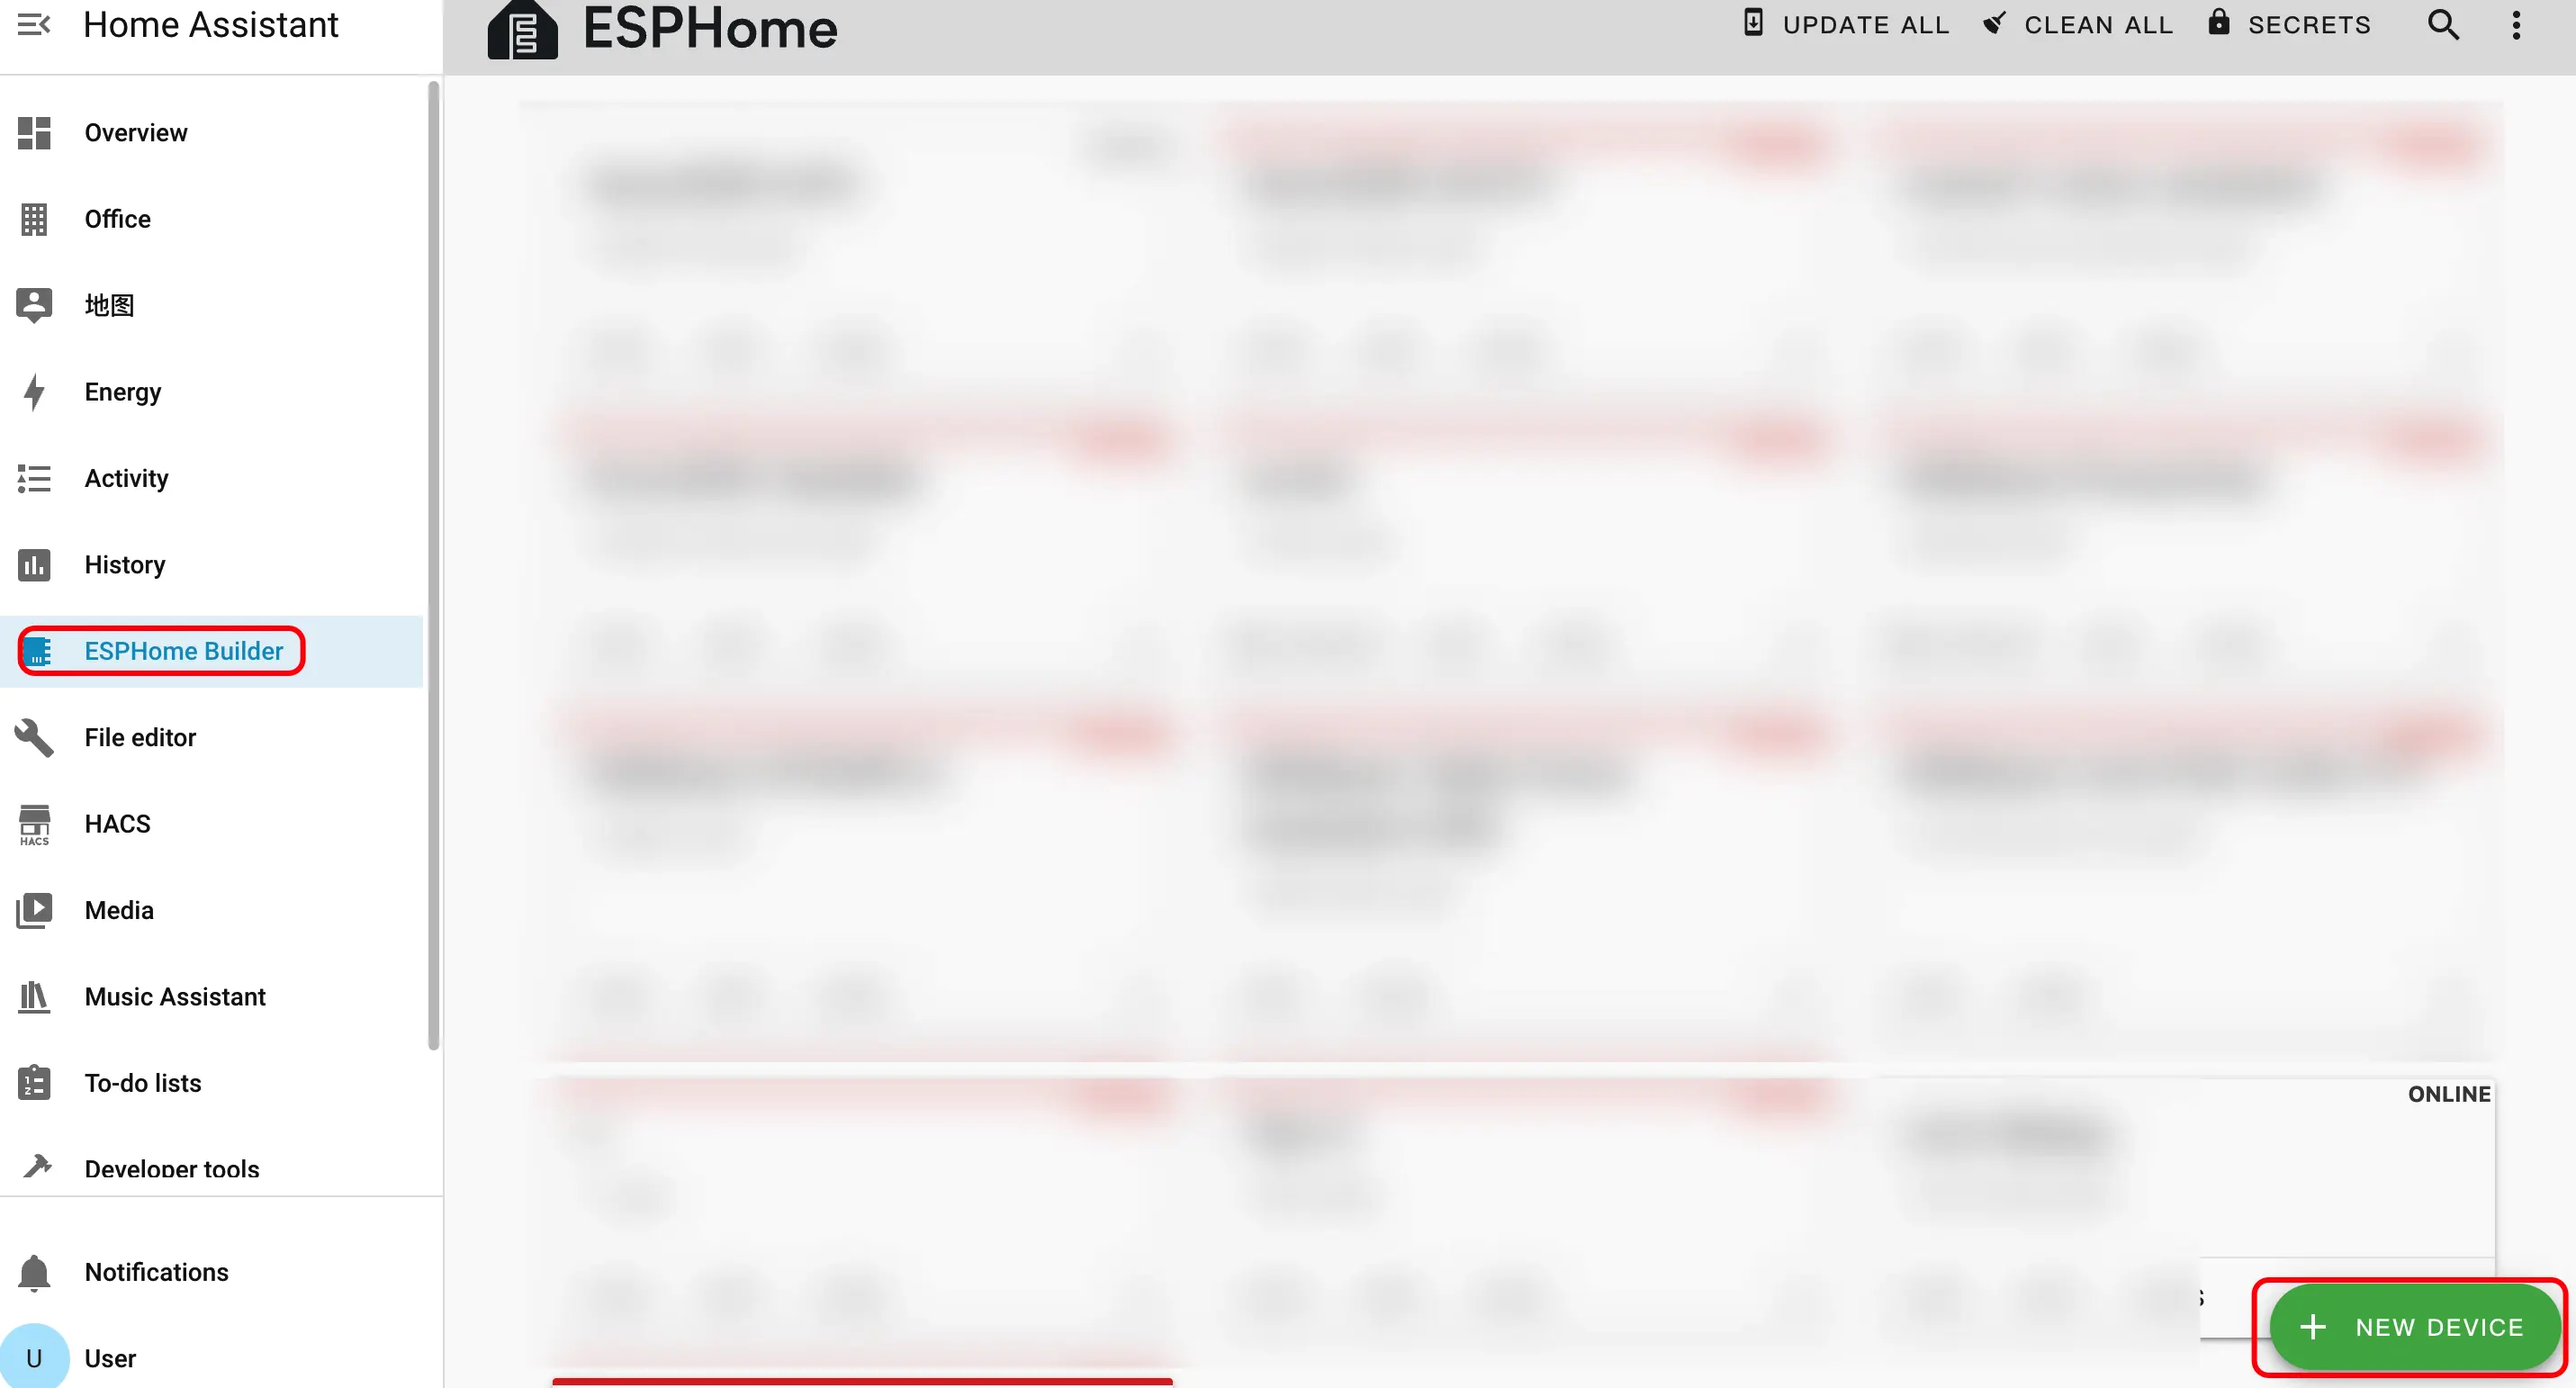
- Click
New Device Setupto enter the device creation wizard.

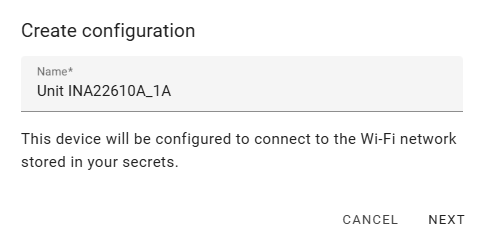
- Enter the device name and click
NEXT.
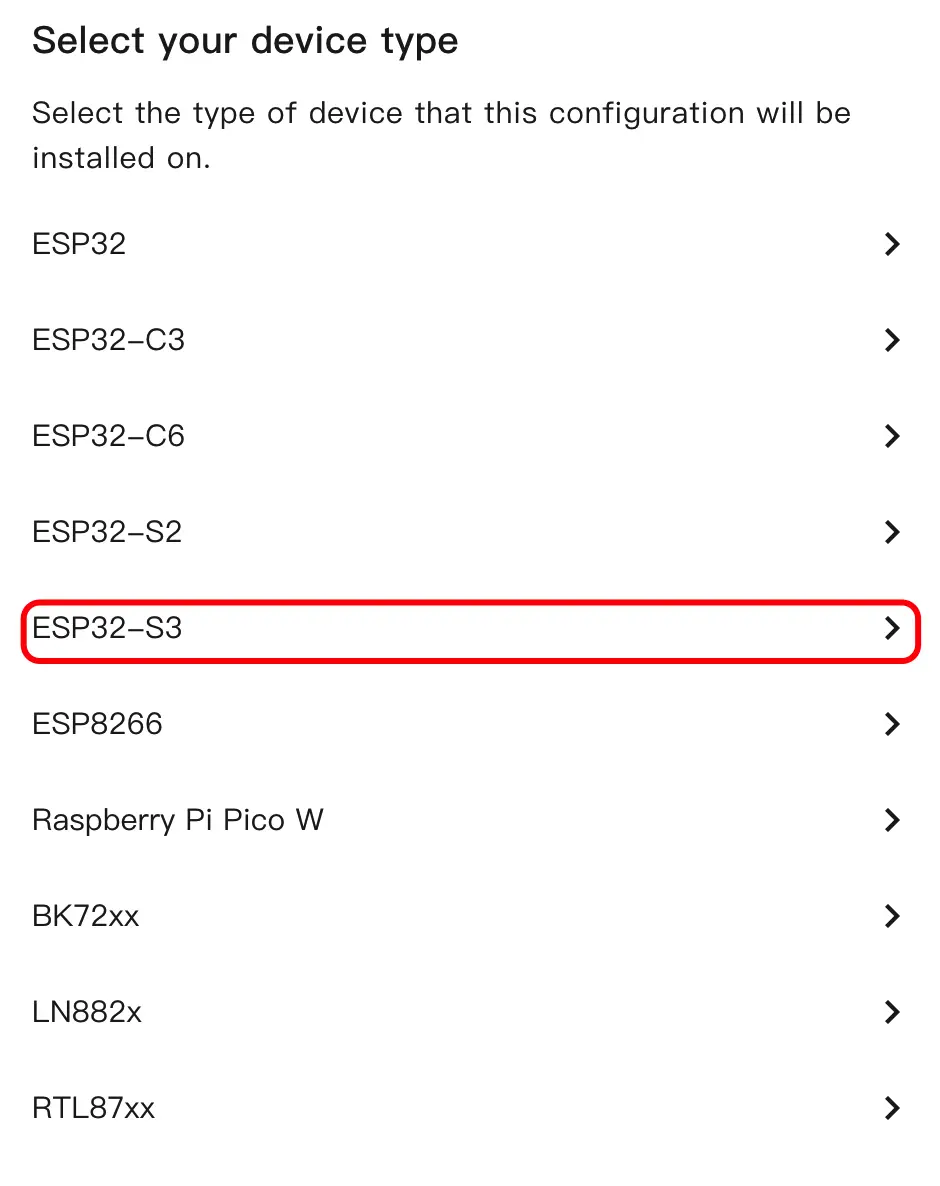
- Select the device type, click
ESP32S3.
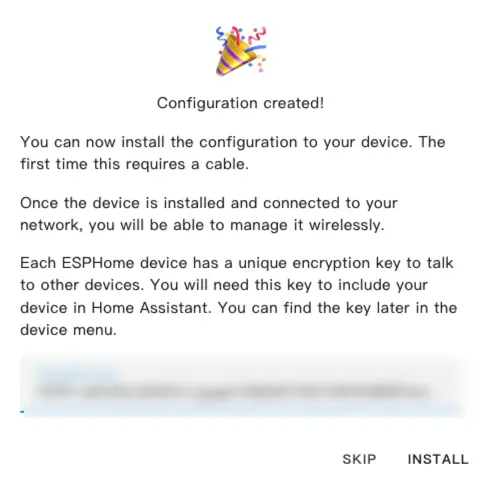
- Click
SKIPto skip the encryption key setting.
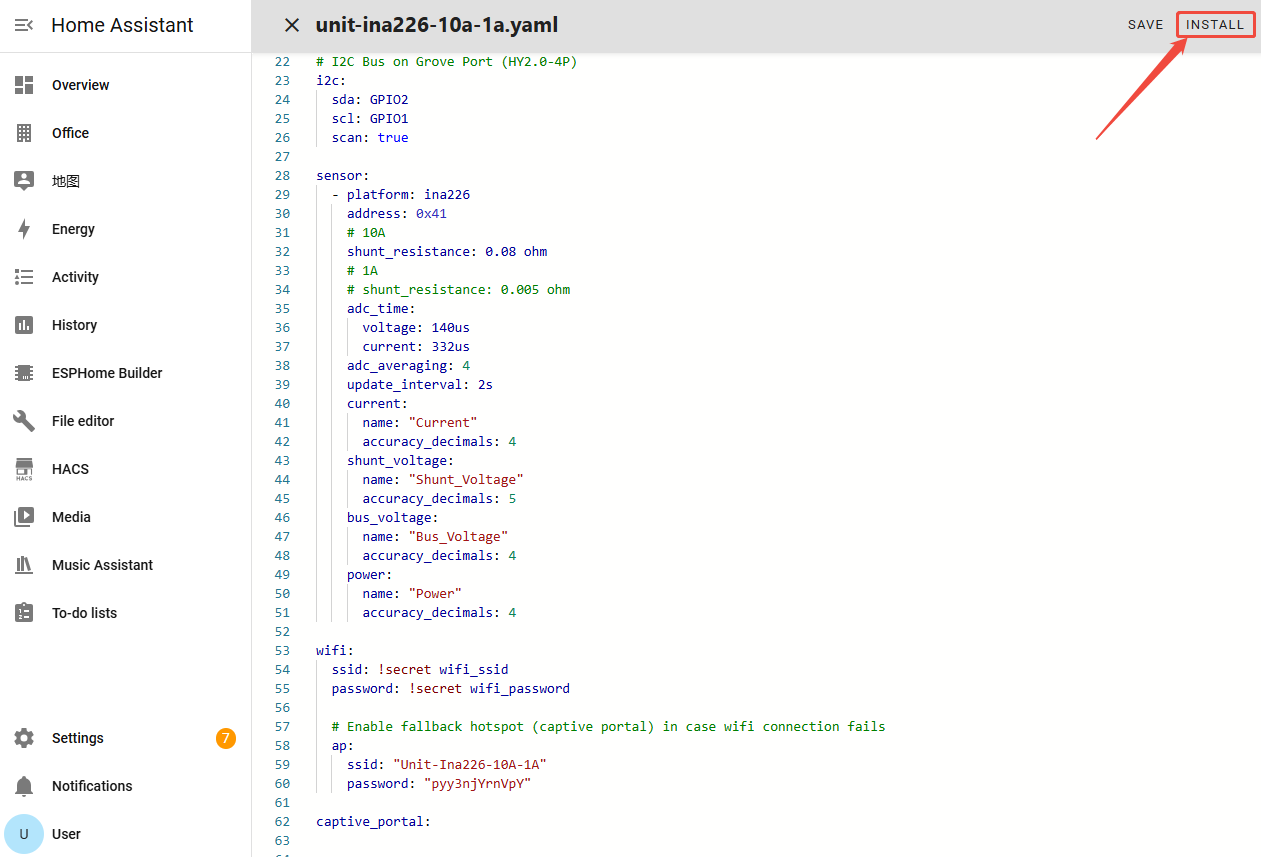
- Click
EDITto enter the YAML configuration page and customize device functions.

Modify Configuration
I2C Bus Configuration
Add the I2C component to configure the communication pins between Unit INA226 10A/1A and AtomS3R.
i2c:
  sda: GPIO2
  scl: GPIO1
scan: trueDescription
The PORT.A interface of AtomS3R corresponds to SDA: GPIO2, SCL: GPIO1. If using other ports, please adjust according to the actual pins.
Sensor Configuration
Add the Sensor component to enable the INA226 sensor entity.
sensor:
  - platform: ina226
    address: 0x41
    # 10A
    shunt_resistance: 0.08 ohm
    # 1A
    # shunt_resistance: 0.005 ohm
    adc_time:
      voltage: 140us
      current: 332us
    adc_averaging: 4
    update_interval: 2s
    current:
      name: "Current"
      accuracy_decimals: 4
    shunt_voltage:
      name: "Shunt_Voltage"
      accuracy_decimals: 5
    bus_voltage:
      name: "Bus_Voltage"
      accuracy_decimals: 4
    power:
      name: "Power"
accuracy_decimals: 4Main Parameter Descriptions:
| Parameter | Value | Description |
|---|---|---|
address | 0x41 | I2C address of Unit INA226 10A/1A. |
shunt_resistance | 0.08 ohm / 0.005 ohm | Use 0.08 for 10A and 0.005 for 1A shunt resistors. |
adc_time | 140us / 332us | ADC conversion time; voltage and current can be set separately. |
update_interval | 2s | Time interval for updating measurement values to Home Assistant. |
current | Current | Reports DC current in Amperes (A). |
shunt_voltage | Shunt Voltage | Reports shunt voltage in Volts (V). |
bus_voltage | Bus Voltage | Reports bus voltage in Volts (V). |
power | Power | Reports power in Watts (W). |
- For the above configuration instructions, please refer to the official ESPHome documentation: INA226 DC Current and Power Sensor
Download and Flash Firmware
Compile Firmware
- After completing the YAML modification, click
SAVEin the upper right corner to save the configuration, then clickINSTALL.
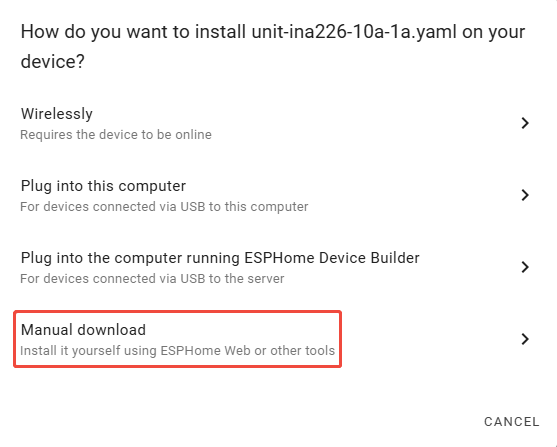
- Select
Manual Downloadin the pop-up window.
- Wait for the firmware compilation to complete, click
Downloadand selectFactory format (Previously Modern)to save the firmware locally.

Flash Firmware
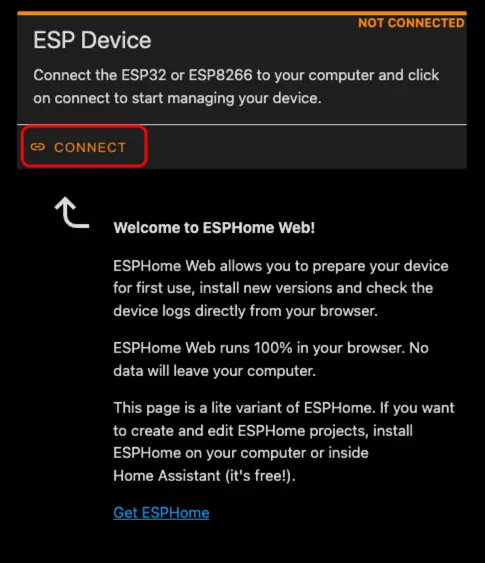
- Connect AtomS3R to the computer using a USB Type-C cable. Open ESPHome Web and click
CONNECT.
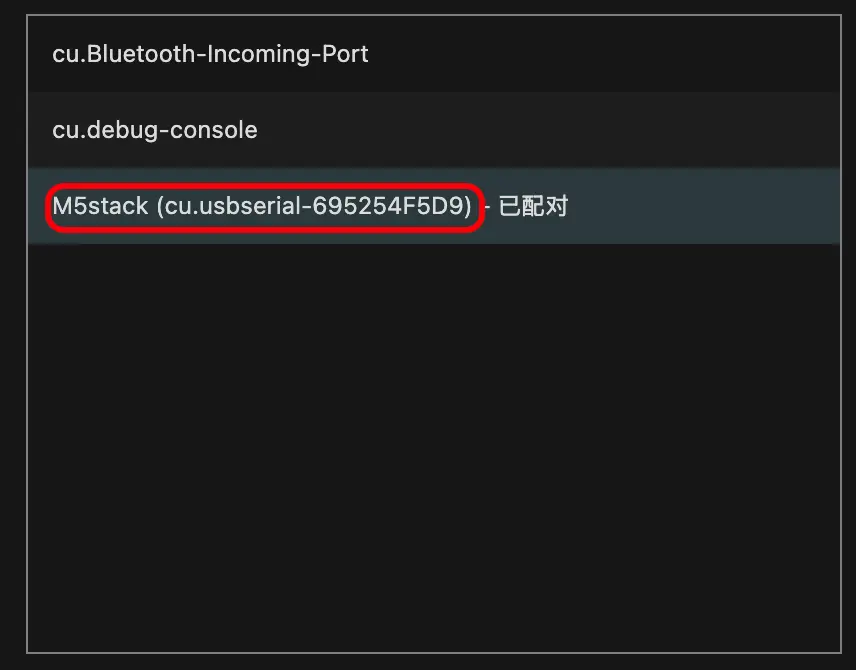
- In the pop-up serial port selection window, select the correct serial port number.
- Click
INSTALL.
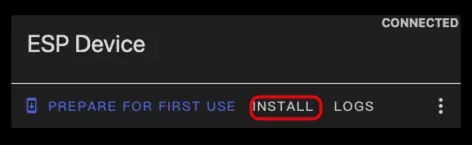
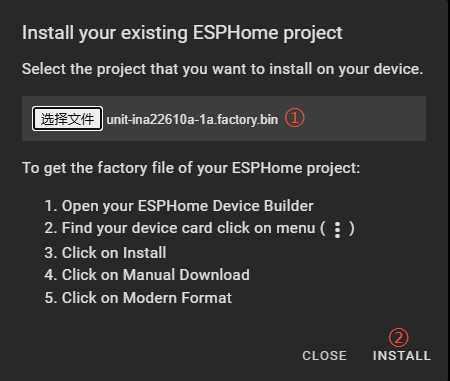
- Select the firmware file downloaded in step 3 and start flashing.
Important
The device must be reset after flashing is complete; otherwise, the firmware may not start normally.
Learn
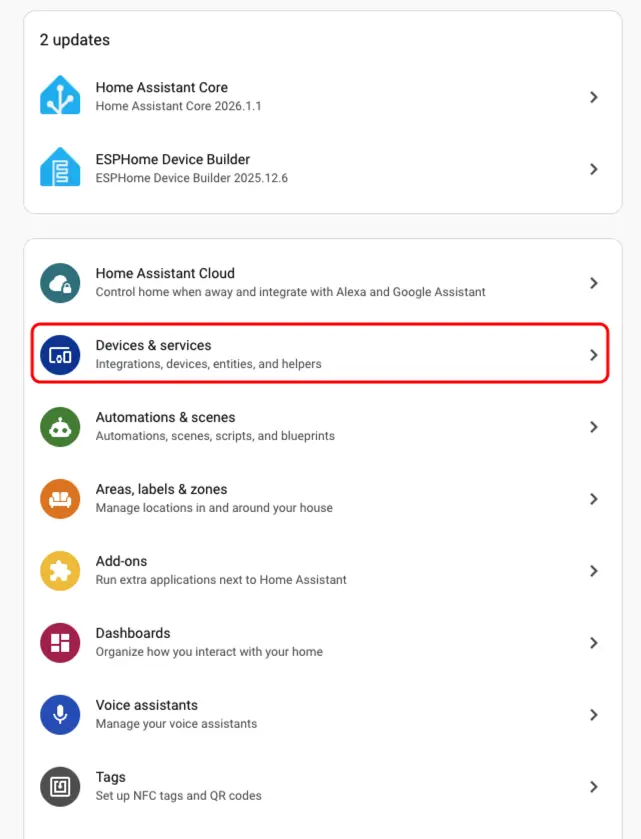
- In Home Assistant, click
Settings>Devices & Servicesin sequence to enter the integration management page.
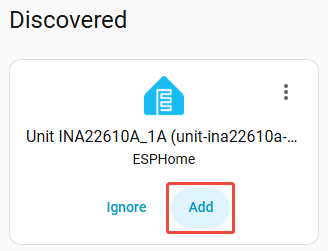
- Find the Unit INA226 10A/1A device in the
Discoveredarea, clickCONFIGURE, and follow the wizard to complete the configuration.
- After the device is added, multiple sensor entities can be seen on the device details page, such as Bus_Voltage, Shunt_Voltage, Current, and Power, along with their real-time values.
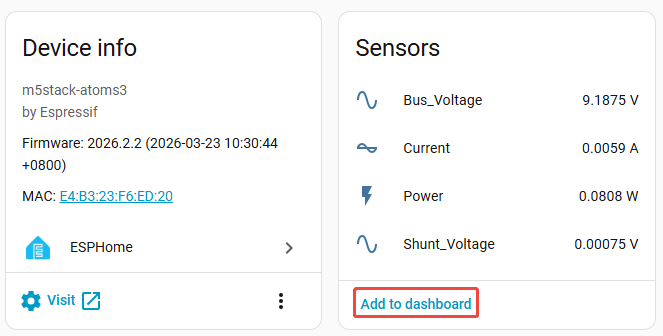
- Finally, add these sensor entities to the dashboard to monitor DC electrical parameters in real-time.
