Home Assistant
Media Player
Expansion
Sensor
Unit ENV-IV Sensor Home Assistant Integration
This chapter introduces the configuration methods and practical steps for integrating the Unit ENV-IV sensor platform into Home Assistant.

Preparation
- Confirm that the sensors used support ESPHome integration:
- BMP280 Temperature and Pressure Sensor: BMP280 datasheet
- SHT40 Temperature and Humidity Sensor: SHT40 datasheet
- Refer to the official ESPHome documentation for the latest configuration instructions:
Note
Unit ENV-IV is a standalone sensor platform and requires an additional main controller (such as Atom series, Stamp series, Stick series, Core/Basic series, etc.) to be integrated into Home Assistant.
Learn
- The I²C component needs to be enabled in the ESPHome configuration:
# Example configuration entry for ESP32
i2c:
  sda: GPIOXX
  scl: GPIOXX
scan: trueThe GPIO pins here will vary depending on the main controller used. For example, using Atom Lite as the main controller:
# I2C Bus on Grove Port (HY2.0-4P)
i2c:
  sda: GPIO26
scl: GPIO32Unit ENV-IV configuration example:
yaml
1 2 3 4 5 6 7 8 9 10 11 12 13 14 15 16 17 18 19
sensor:
  - platform: sht4x
    temperature:
      id: sht40_temp
      name: "Temperature"
    humidity:
      id: sht40_humi
      name: "Relative Humidity"
    address: 0x44

  - platform: bmp280_i2c
    temperature:
      name: "BMP280 Temperature"
      id: bmp280_temp
      oversampling: 16x
    pressure:
      name: "BMP280 Pressure"
      id: bmp_pressure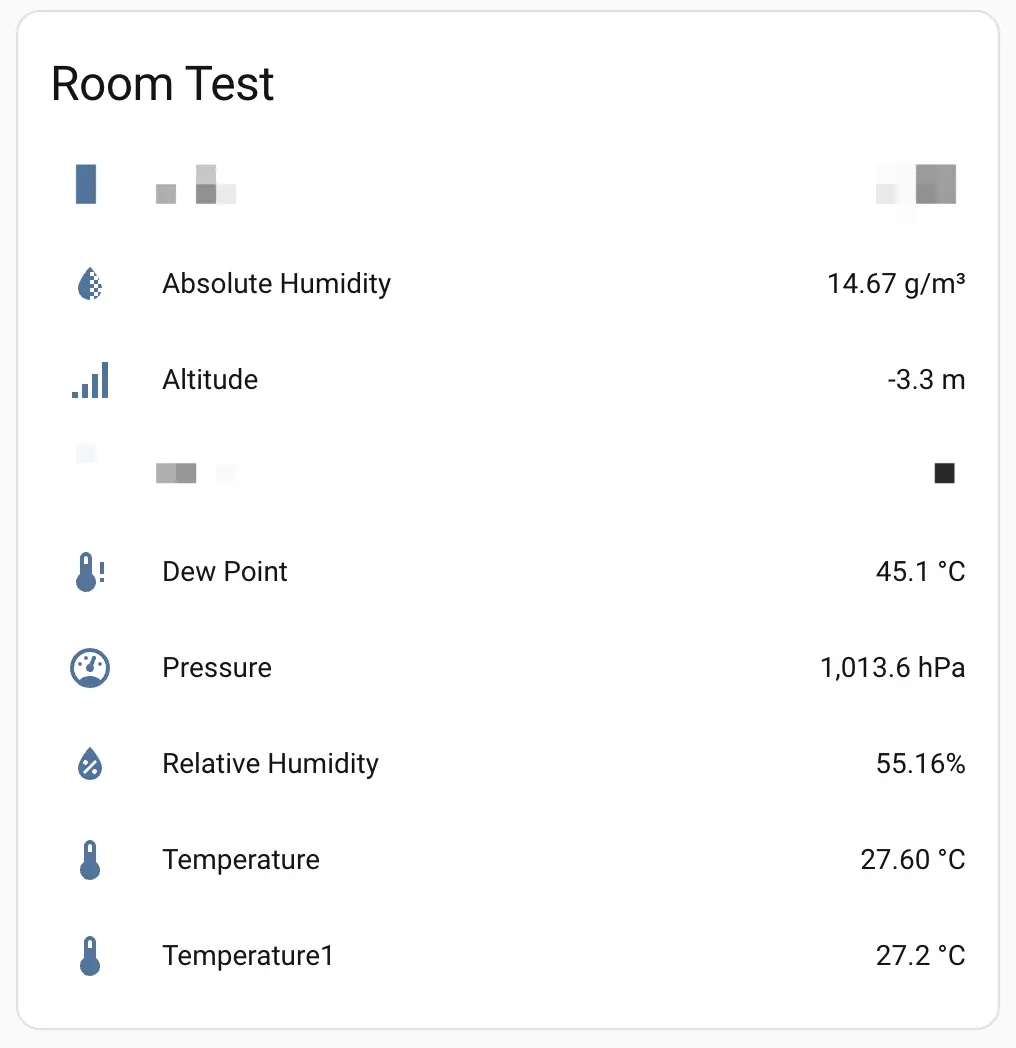
address: 0x76Similarly, you can calculate values such as altitude, absolute humidity, and dew point based on empirical formulas (calculation results are for reference only):
yaml
1 2 3 4 5 6 7 8 9 10 11 12 13 14 15 16 17 18 19 20 21 22 23 24 25 26
sensor:
  ...
  # add the following under the previous sensor declarations
  - platform: template
    name: "Altitude"
    lambda: |-
      const float STANDARD_SEA_LEVEL_PRESSURE = 1013.25; //in hPa, see note
      return ((id(bmp280_temp).state + 273.15) / 0.0065) *
        (powf((STANDARD_SEA_LEVEL_PRESSURE / id(bmp_pressure).state), 0.190234) - 1); // in meter
    update_interval: 15s
    icon: 'mdi:signal'
    unit_of_measurement: 'm'

  - platform: absolute_humidity
    name: "Absolute Humidity"
    temperature: sht40_temp
    humidity: sht40_humi

  - platform: template
    name: "Dew Point"
    lambda: |-
      return (243.5*(log(id(sht40_humi).state/100)+((17.67*id(sht40_humi).state)/
      (243.5+id(sht40_temp).state)))/(17.67-log(id(sht40_humi).state/100)-
      ((17.67*id(sht40_temp).state)/(243.5+id(sht40_temp).state))));
    unit_of_measurement: °C
icon: 'mdi:thermometer-alert'Note
To accurately calculate altitude using the BMP280 pressure sensor, you must first obtain the sea level standard pressure for your location and the current day. This can be achieved by replacing the global constant
STANDARD_SEA_LEVEL_PRESSURE, for example, by fetching the value in real-time from the internet or via the MQTT protocol from a fixed sensor.Getting Started
- After adding it to the Dashboard, you can view the sensor data in Home Assistant.
- Monitor temperature change curves.
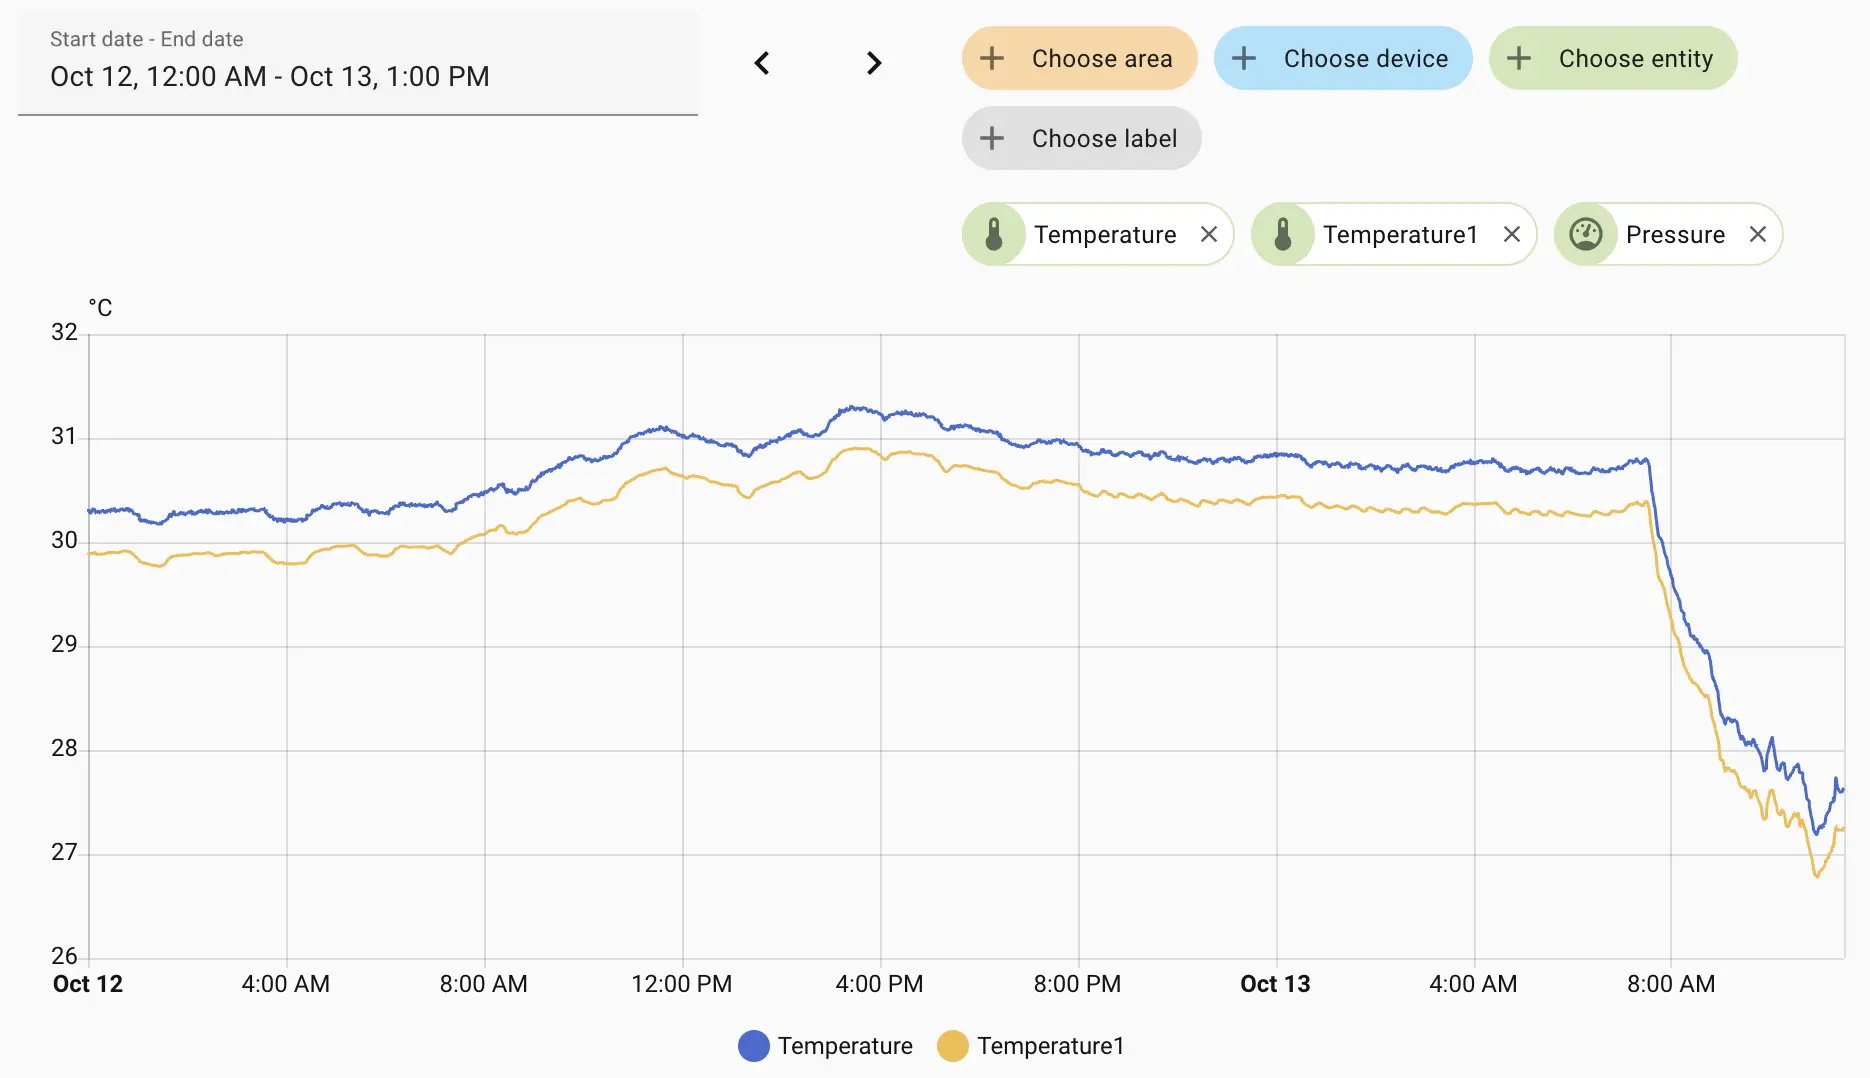
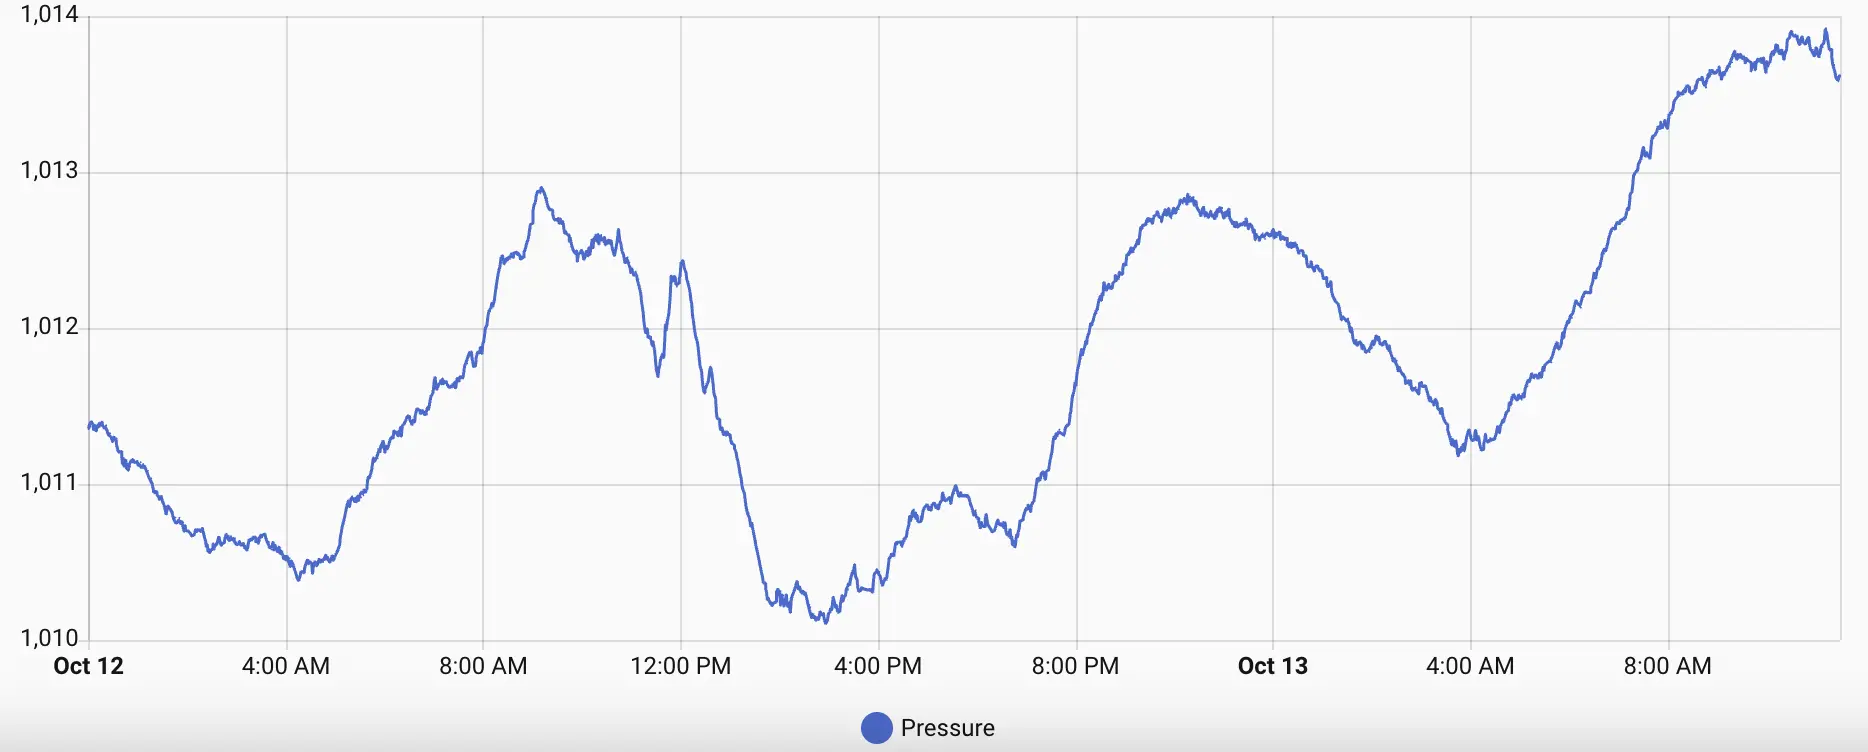
Note
Since the BMP280 also has a temperature sensor, there will be two temperature curves here.
- Monitor atmospheric pressure changes.