

Home Assistant
オーディオ再生
拡張ボード
センサー
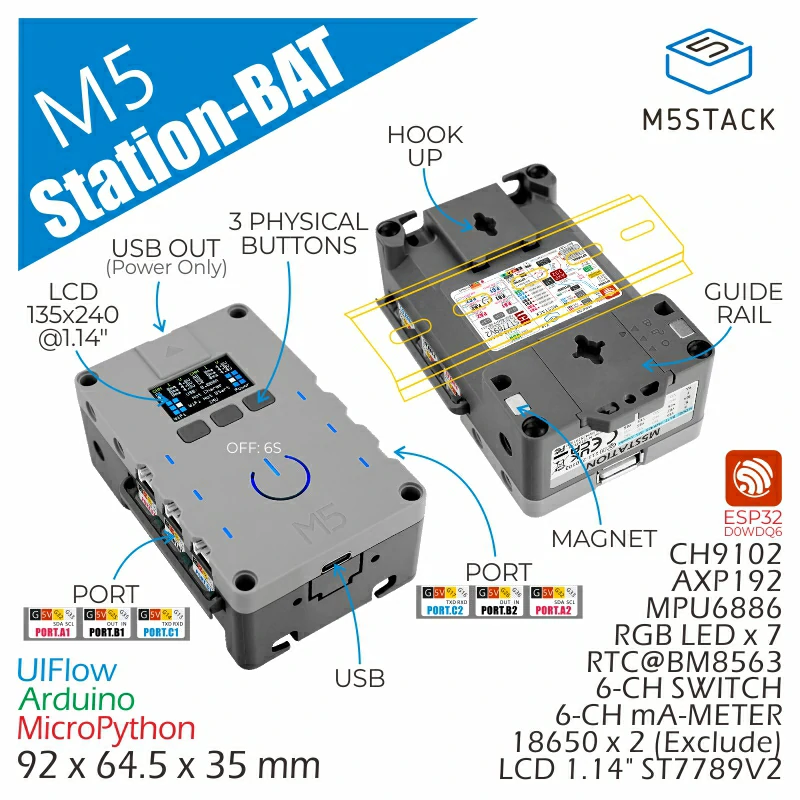
Station-Bat コントローラー Home Assistant 統合
本章では、Station-Bat を Home Assistant に統合するための完全な手順を説明します。
必要なもの
- Home Assistant がインストールされたホスト 1 台
- Home Assistant に ESPHome Builder プラグインをインストールして有効化する
ヒント
本チュートリアルでは ESPHome 2026.2.4 を使用してファームウェアのコンパイルと書き込みを行っています。コンパイル / アップロード中に問題が発生した場合は、ESPHome をこのバージョンに切り替えてから再試行してください。
クイックスタート
下のボタンをクリックするだけでファームウェアの書き込みが完了します。画面の指示に従って設定を行うことで、Station-Bat の Home Assistant 連携をすぐにお試しいただけます。ワンクリック書き込みとその後の設定方法については、チュートリアルを参照してください。
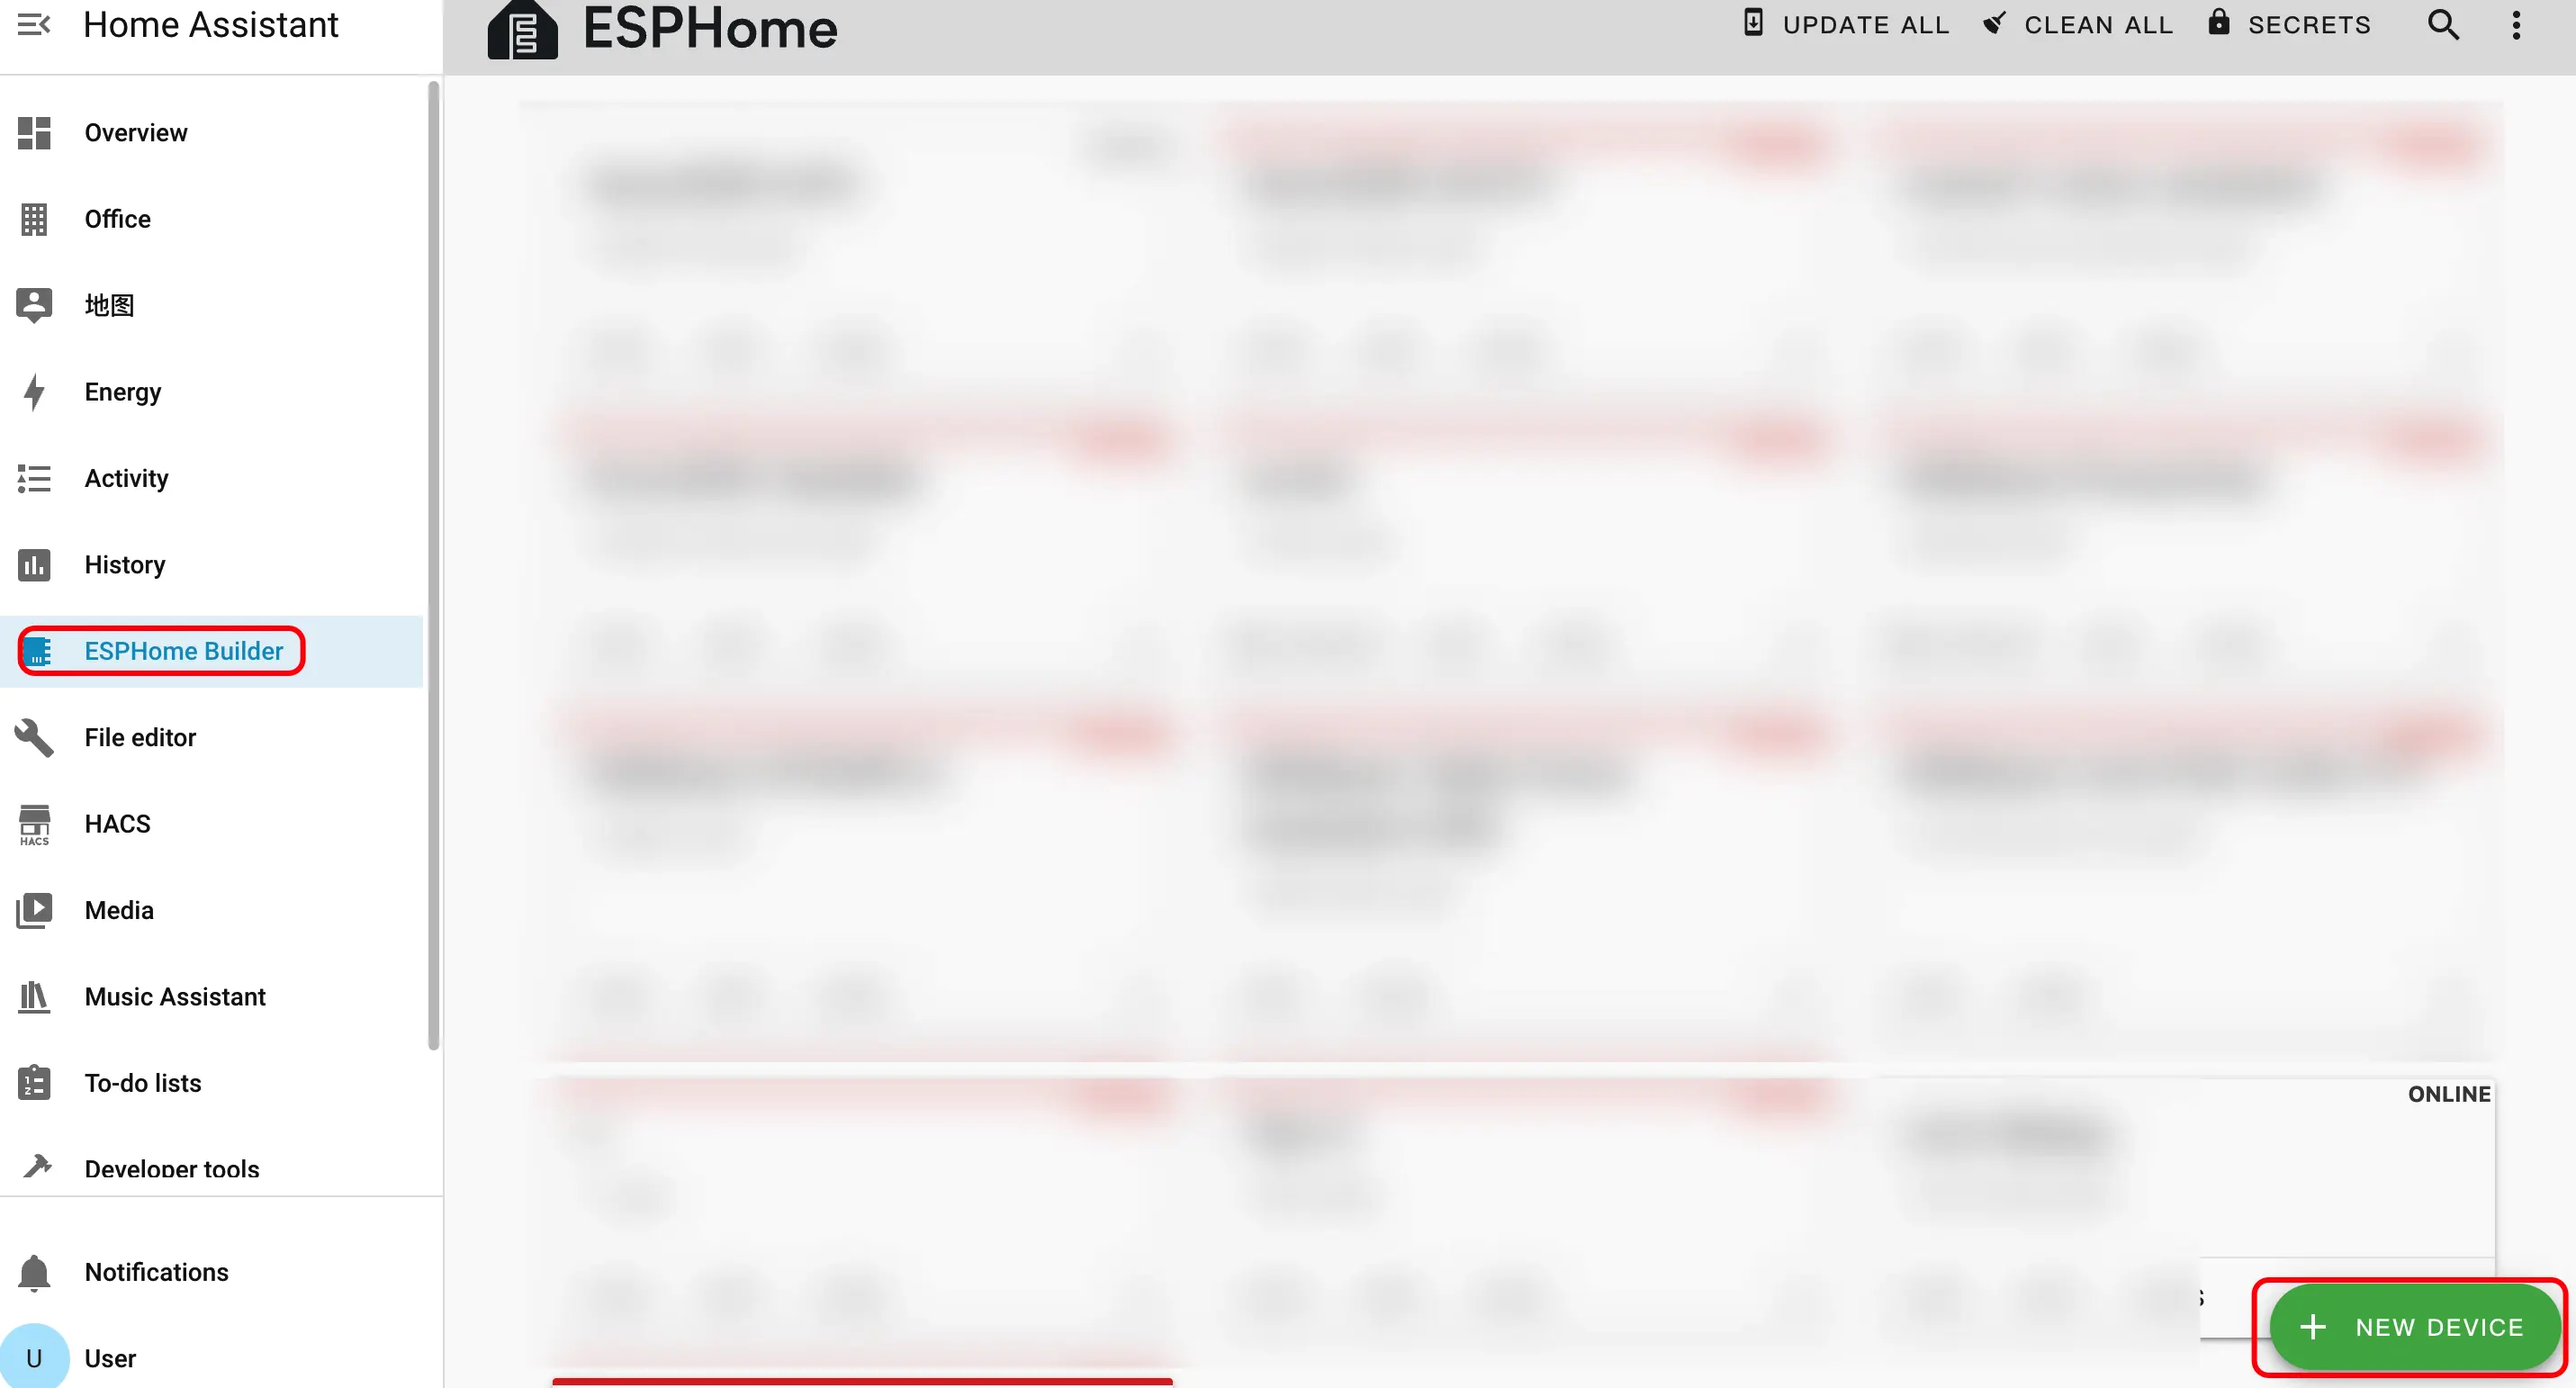
デバイスの追加
- 右下の緑色のボタンをクリックしてデバイスを作成します。
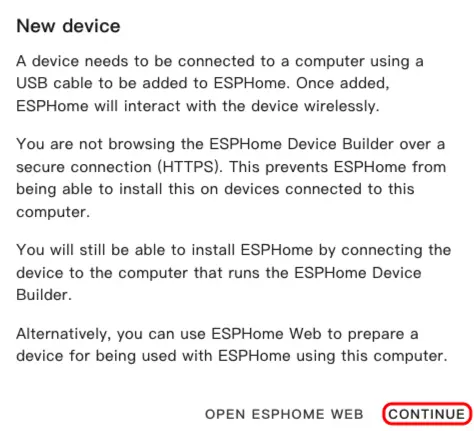
CONTINUEをクリックします。
New Device Setupをクリックします。

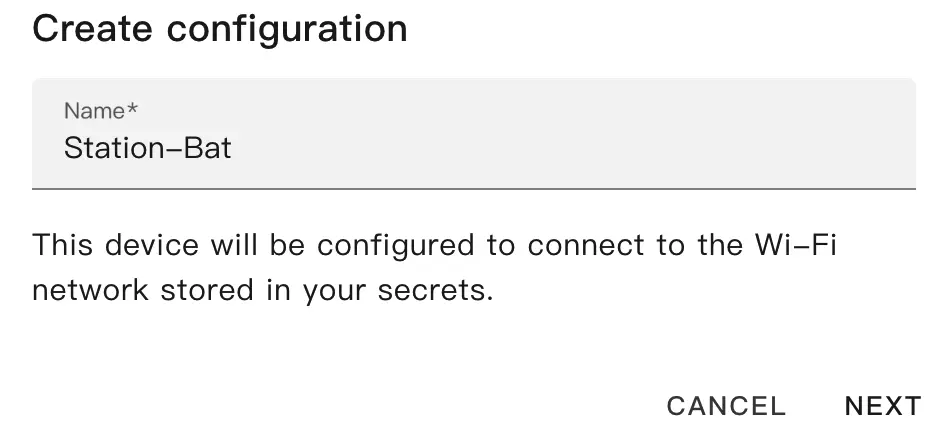
- デバイス名を入力し、
NEXTをクリックします。
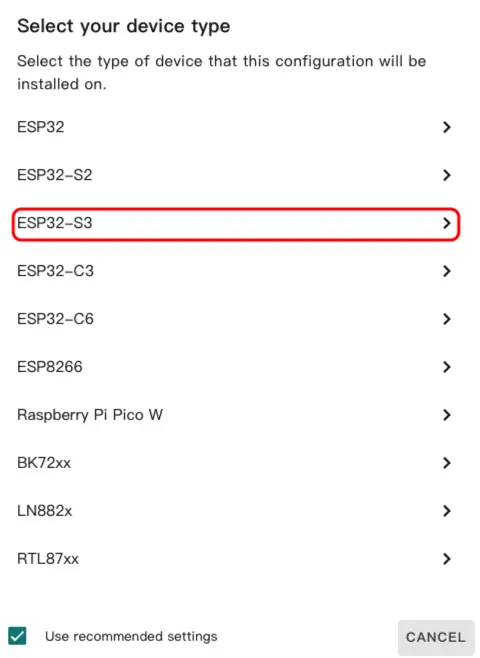
ESP32を選択します。
SKIPをクリックしてウィザードをスキップします。
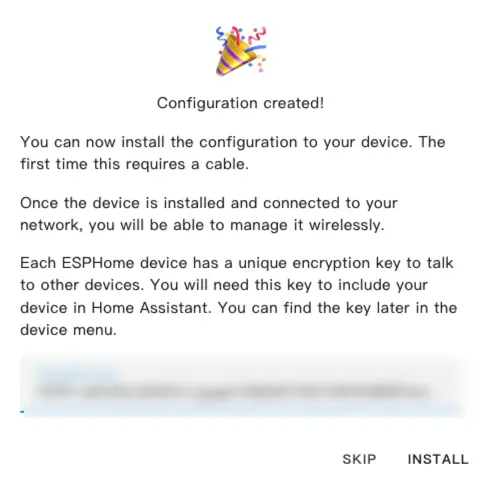
EDITをクリックし、YAML ファイルでデバイスの機能をカスタマイズします。
デバイスの設定
以下は設定の主要部分です。対応する説明と参考リンクを併記しています。
起動設定(Boot Configuration)
- 起動時の初期化ロジックを追加し、起動時に RTC から時刻を読み取れるようにします。
esphome:
  name: station-bat
  friendly_name: station-bat
  on_boot:
    - priority: 600
      then:
- bm8563.read_time:外部コンポーネント(External Components)
- External Components の設定を追加します。
m5station_axp192コンポーネントは Station-Bat に電源管理とバッテリー残量検出のサポートを提供します。
external_components:
  - source: github://m5stack/esphome-yaml/components
    components: [m5station_axp192]
refresh: 0sI2C バス設定
- I2C コンポーネントを追加します。この I2C バスは IMU、電源管理チップ、および電流 / 電圧モニタリングチップで共有されます。
i2c:
  - id: i2c_bus
    sda: GPIO21
scl: GPIO22SPI バス設定
- SPI コンポーネントを追加します。SPI バスは ST7789V ディスプレイの駆動に使用されます。
spi:
  clk_pin: GPIO18
mosi_pin: GPIO23センサー設定(Sensor)
- Sensor コンポーネントを追加します。
- MPU6886 IMU センサーを追加し、加速度、ジャイロスコープ、温度データを取得します。
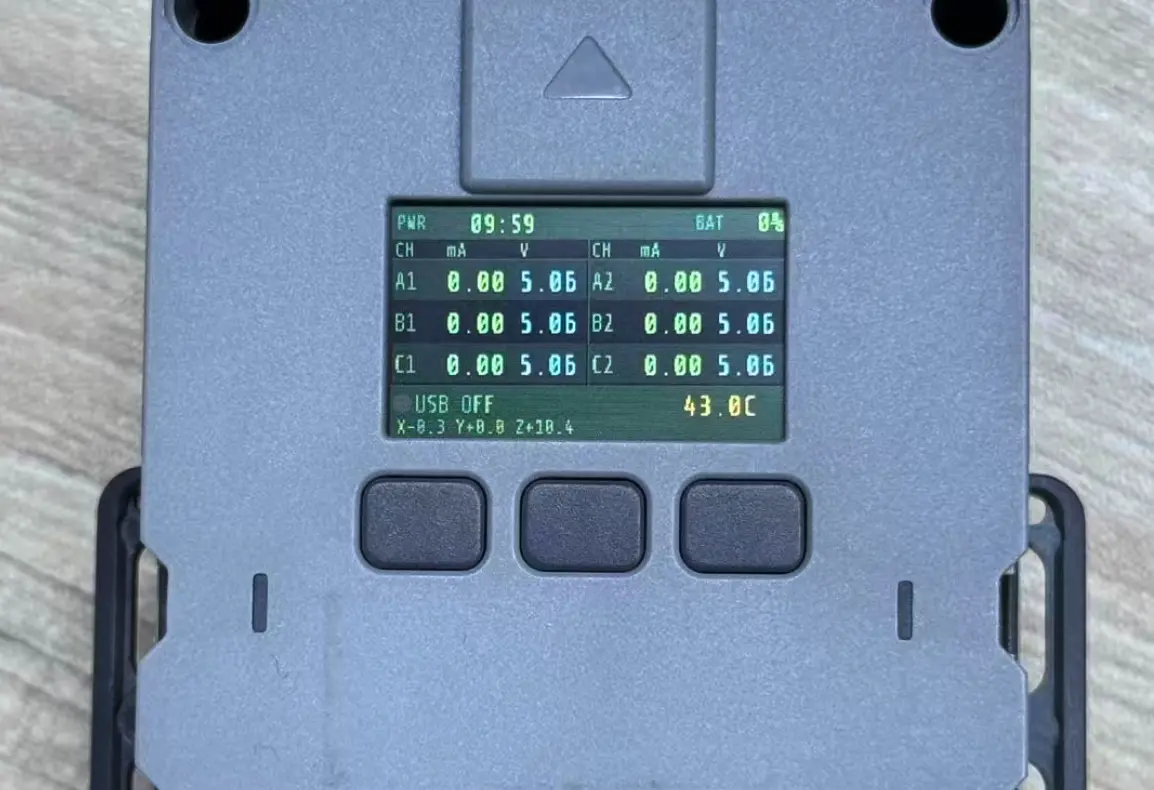
- 2 つの INA3221 電流 / 電圧モニタリングチップを追加し、合計 6 チャンネル(A1/A2、B1/B2、C1/C2)をカバーします。
m5station_axp192センサーは前述の外部コンポーネントが提供するもので、バッテリー残量などの電源関連情報に使用します。
sensor:
  - platform: mpu6886
    i2c_id: i2c_bus
    accel_x:
      name: "MPU6886 Accel X"
      id: imu_ax
    accel_y:
      name: "MPU6886 Accel Y"
      id: imu_ay
    accel_z:
      name: "MPU6886 Accel z"
      id: imu_az
    gyro_x:
      name: "MPU6886 Gyro X"
    gyro_y:
      name: "MPU6886 Gyro Y"
    gyro_z:
      name: "MPU6886 Gyro z"
    temperature:
      name: "MPU6886 Temperature"
      id: imu_temp
    update_interval: 5s

  - platform: m5station_axp192
    id: pmu
    i2c_id: i2c_bus
    battery_level:
      name: "M5Station Battery Level"
      id: bat_level
    update_interval: 60s
    brightness: 0.8

  - platform: ina3221
    id: ina1
    i2c_id: i2c_bus
    address: 0x40
    update_interval: 1s
    channel_1:
      shunt_resistance: 0.01
      bus_voltage:
        name: "P.A1 Bus Voltage"
        id: v_a1
      current:
        name: "P.A1 Current"
        id: i_a1
    channel_2:
      shunt_resistance: 0.01
      bus_voltage:
        name: "P.A2 Bus Voltage"
        id: v_a2
      current:
        name: "P.A2 Current"
        id: i_a2
    channel_3:
      shunt_resistance: 0.01
      bus_voltage:
        name: "P.B1 Bus Voltage"
        id: v_b1
      current:
        name: "P.B1 Current"
        id: i_b1

  - platform: ina3221
    id: ina2
    i2c_id: i2c_bus
    address: 0x41
    update_interval: 1s
    channel_1:
      shunt_resistance: 0.01
      bus_voltage:
        name: "P.B2 Bus Voltage"
        id: v_b2
      current:
        name: "P.B2 Current"
        id: i_b2
    channel_2:
      shunt_resistance: 0.01
      bus_voltage:
        name: "P.C1 Bus Voltage"
        id: v_c1
      current:
        name: "P.C1 Current"
        id: i_c1
    channel_3:
      shunt_resistance: 0.01
      bus_voltage:
        name: "P.C2 Bus Voltage"
        id: v_c2
      current:
        name: "P.C2 Current"
id: i_c2二値センサー設定(Binary Sensor)
- Binary Sensor コンポーネントを追加します。パネル上の 3 つの物理ボタンはそれぞれ GPIO37、GPIO38、GPIO39 にマッピングされています。
binary_sensor:
  - platform: gpio
    name: "Button1"
    pin:
      number: GPIO37
      inverted: true
  - platform: gpio
    name: "Button2"
    pin:
      number: GPIO38
      inverted: true
  - platform: gpio
    name: "Button3"
    pin:
      number: GPIO39
inverted: trueスイッチ設定(Switch)
- Switch コンポーネントを追加します。LCD バックライトは AXP192 電源管理チップで制御し、USB 電源出力は GPIO12 で制御します。
switch:
  - platform: template
    name: "LCD Backlight"
    id: lcd_backlight
    lambda: |-
      return true;
    restore_mode: ALWAYS_ON
    turn_on_action:
      - lambda: |-
          id(pmu).set_backlight(true);
    turn_off_action:
      - lambda: |-
          id(pmu).set_backlight(false);

  - platform: gpio
    name: "USB Power"
    id: usb_power
pin: GPIO12時刻設定(Time)
- Time コンポーネントを追加します。
- BM8563 RTC コンポーネントを追加します。BM8563 はオフライン時の計時を担い、Home Assistant に接続後は時刻を同期し、デバイス再起動時に RTC から時刻を復元します。
time:
  - platform: bm8563
    id: bm8563_time
    update_interval: never

  - platform: homeassistant
    id: ha_time
    on_time_sync:
      then:
- bm8563.write_time:ライト設定(Light)
- Light コンポーネントを追加します。Station-Bat には 7 つの WS2812 RGB LED が搭載されており、GPIO4 で駆動します。
light:
  - platform: esp32_rmt_led_strip
    rgb_order: GRB
    pin: GPIO4
    num_leds: 7
    chipset: ws2812
name: "My Light"ディスプレイ設定(Display)
- Display コンポーネントを追加します。
- ST7789V ドライバーを追加し、1.14 インチ IPS スクリーンの表示を制御します。
lambdaコードブロックには具体的な描画内容を定義します。完全なサンプルは下記リンクの設定ファイルをご参照ください。
display:
  - platform: st7789v
    model: CUSTOM
    width: 135
    height: 240
    offset_height: 52
    offset_width: 40
    cs_pin: GPIO5
    dc_pin: GPIO19
    reset_pin: GPIO15
    rotation: 90
    update_interval: 1s
    lambda: |-
      // Define your display content here
// See the complete example for a full implementationファームウェアのコンパイル(Firmware Build)
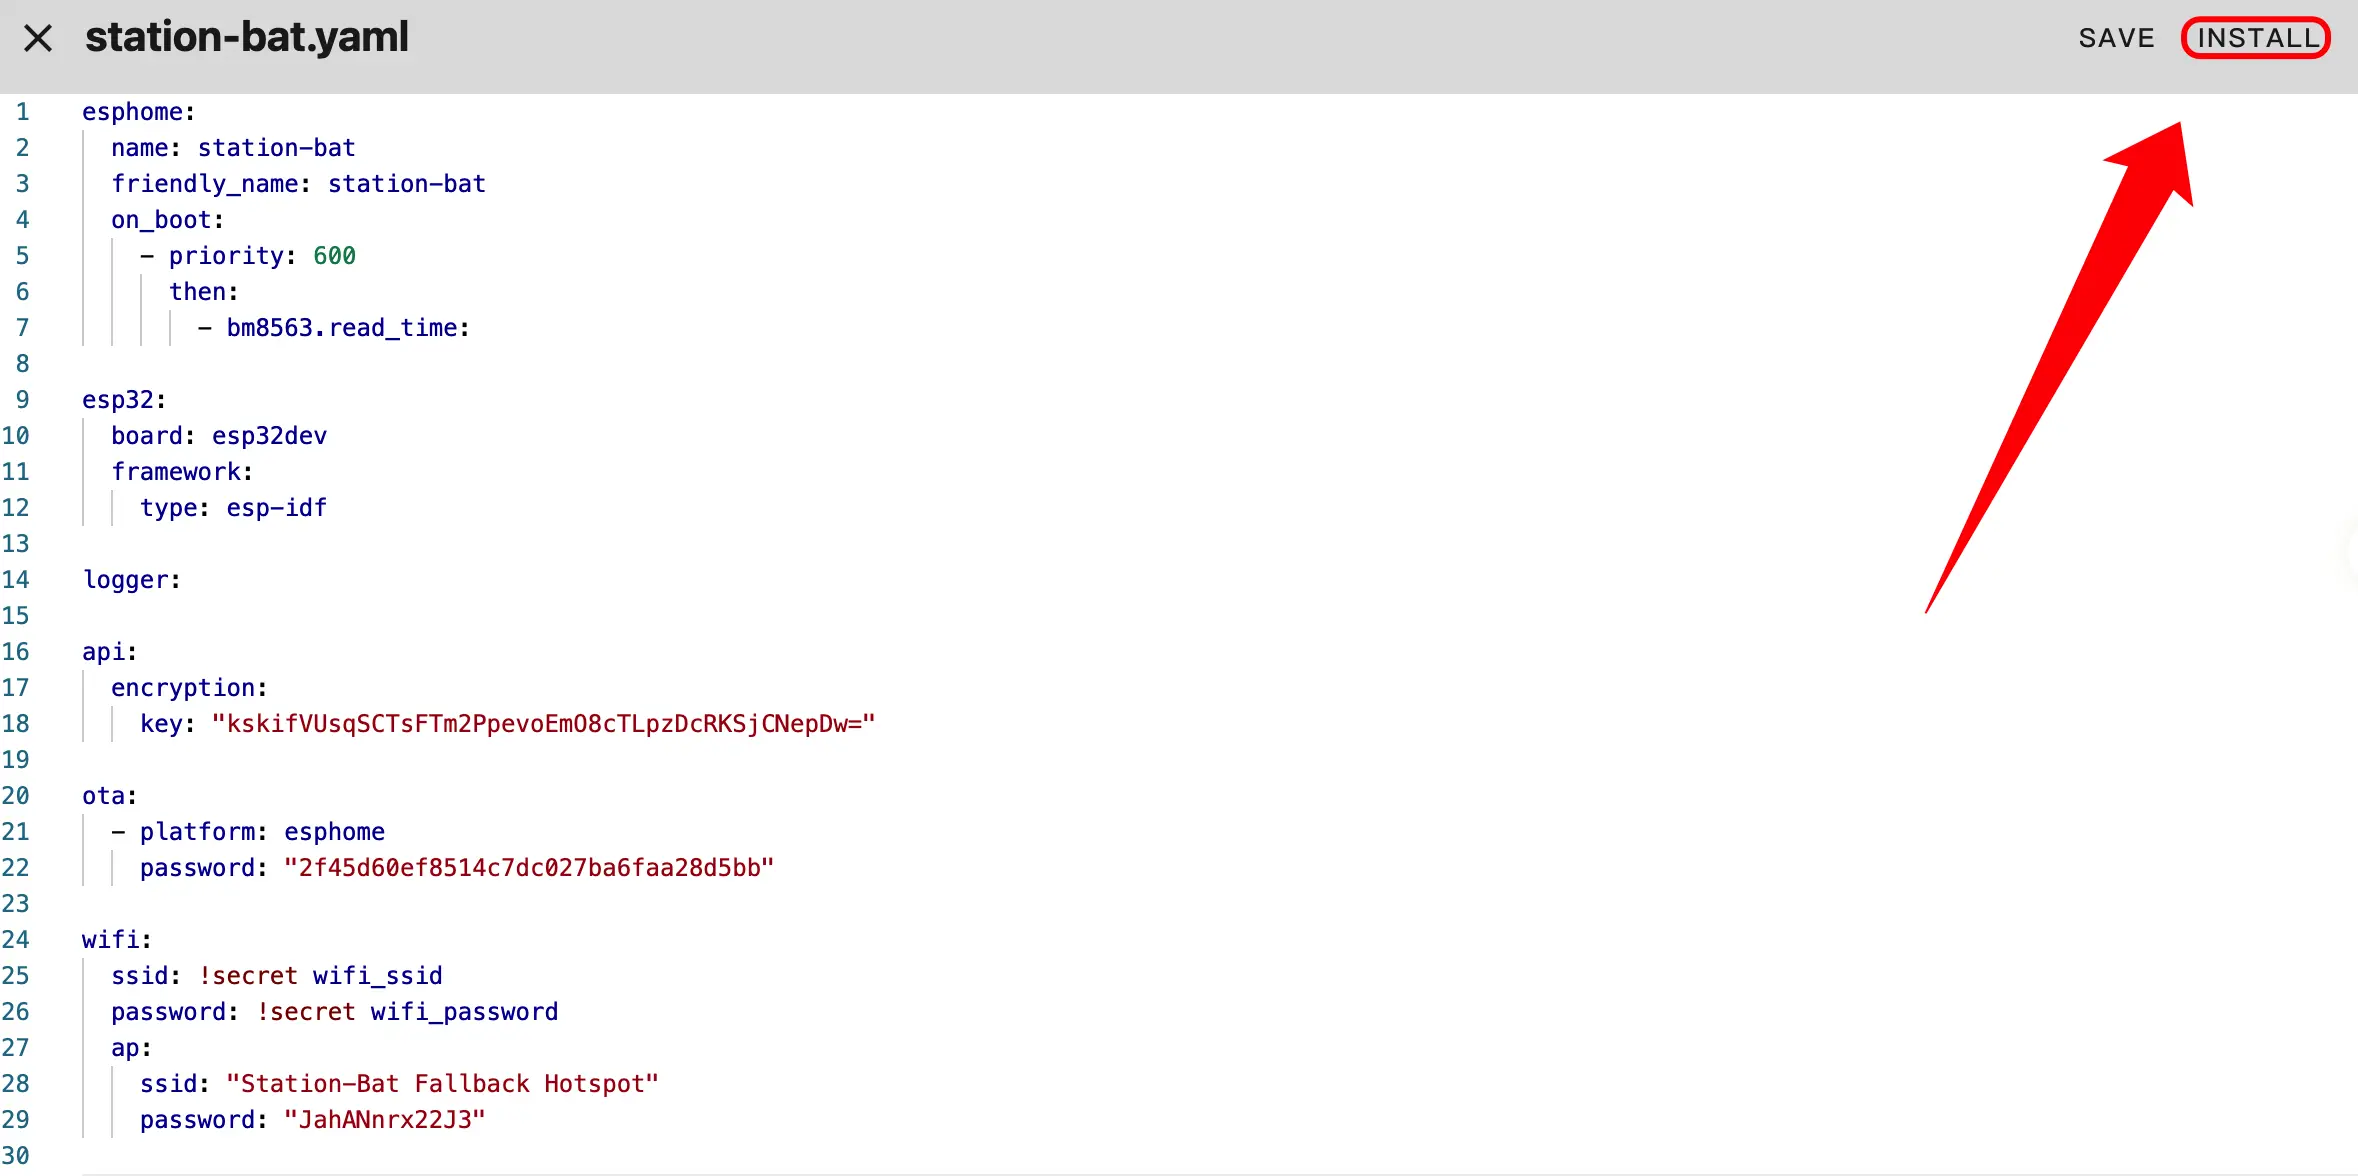
- 編集が完了したら、右上の
SAVEとINSTALLをクリックし、ダイアログでManual Downloadを選択して手動ダウンロードを行います。
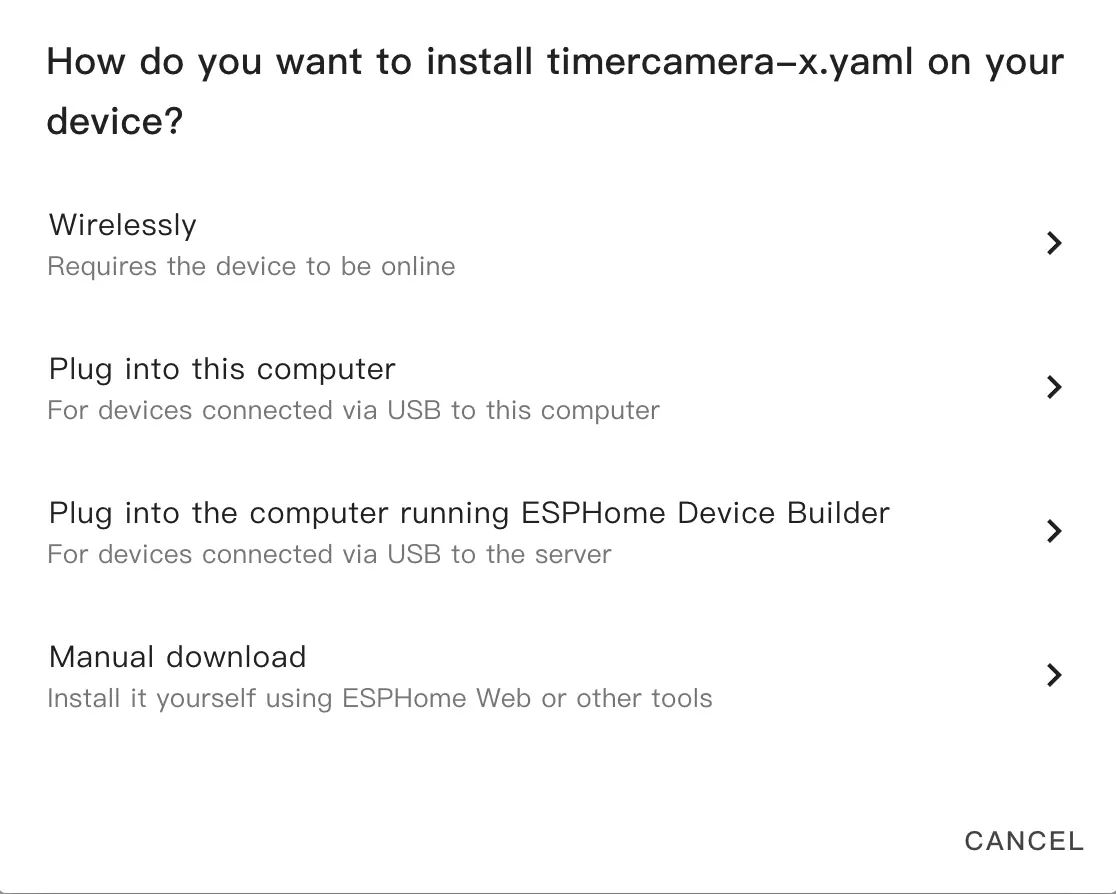
INSTALLをクリックし、ファームウェアのコンパイルが完了するまで待ちます。
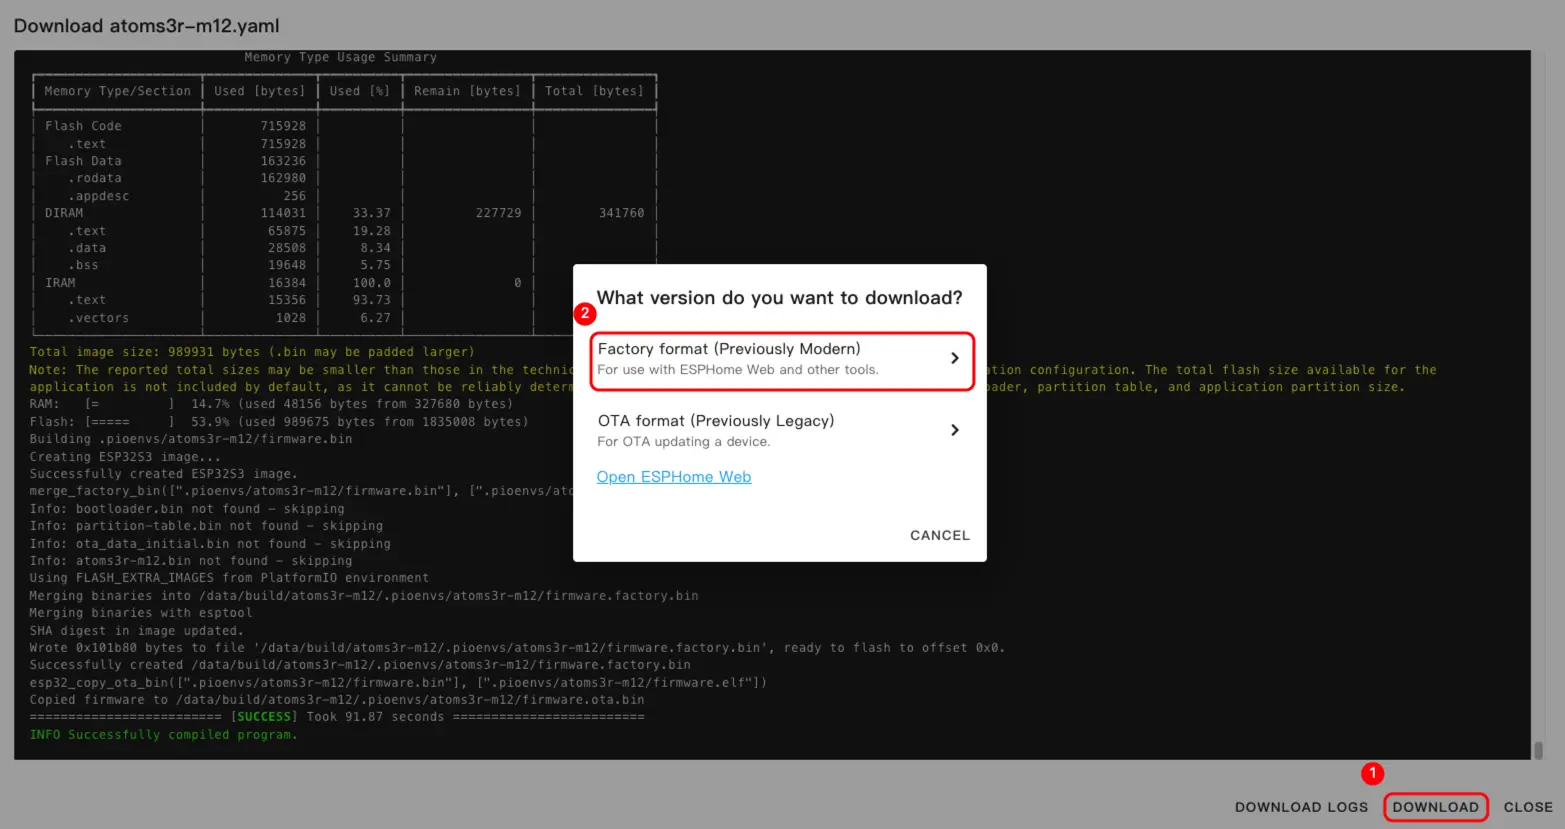
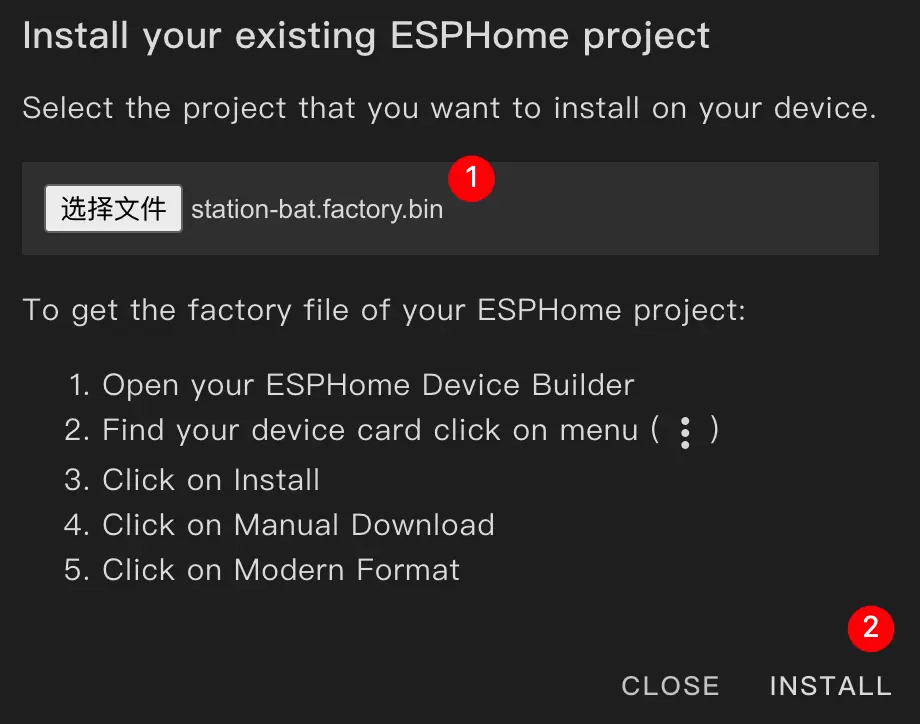
- コンパイルが完了したら、Download をクリックし、
Factory format (Previously Modern)形式を選択してダウンロードします。
ヒント
Station-Bat をクリックすると完全なサンプル設定を確認できます。初回ビルドは Home Assistant ホストの性能とネットワーク環境によっては時間がかかる場合があります。
ファームウェアの書き込み(Firmware Upload)
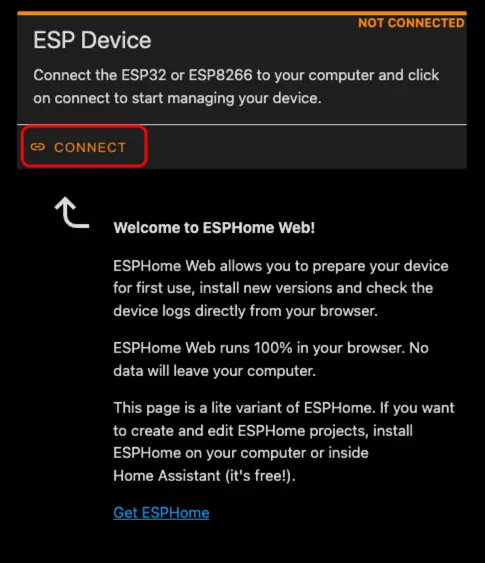
- USB Type-C ケーブルでデバイスをホストに接続し、ESPHome Web を開いて
CONNECTをクリックしてデバイスに接続します。
- ポップアップリストから対応するシリアルポートを選択します。
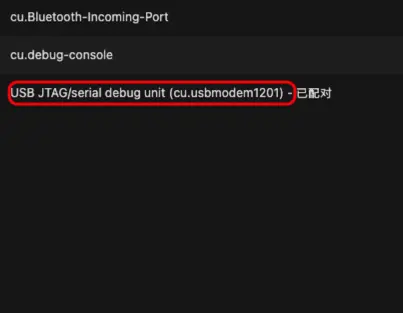
INSTALLをクリックします。
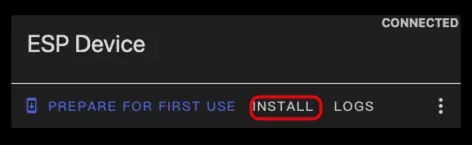
- 先ほどコンパイルしたファームウェアファイルを選択して書き込みます。
ヒント
書き込みが完了したら、デバイスのリセットボタンを押して新しいファームウェアを有効にしてください。
使い方
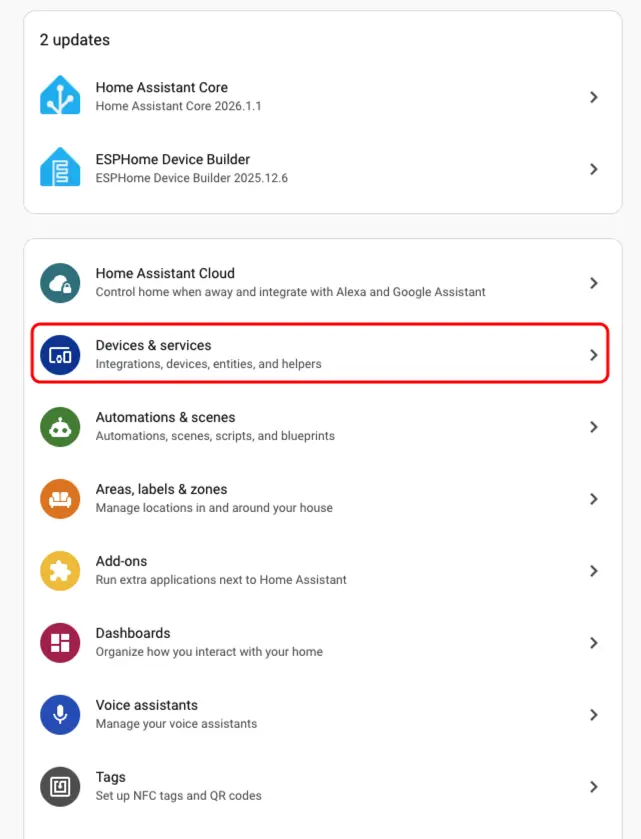
- Home Assistant で
Settings→Devices & Servicesをクリックし、デバイスリストを確認します。
Discovered(検出済み)エリアに対応するデバイスが表示されます。CONFIGUREをクリックして追加を完了します。
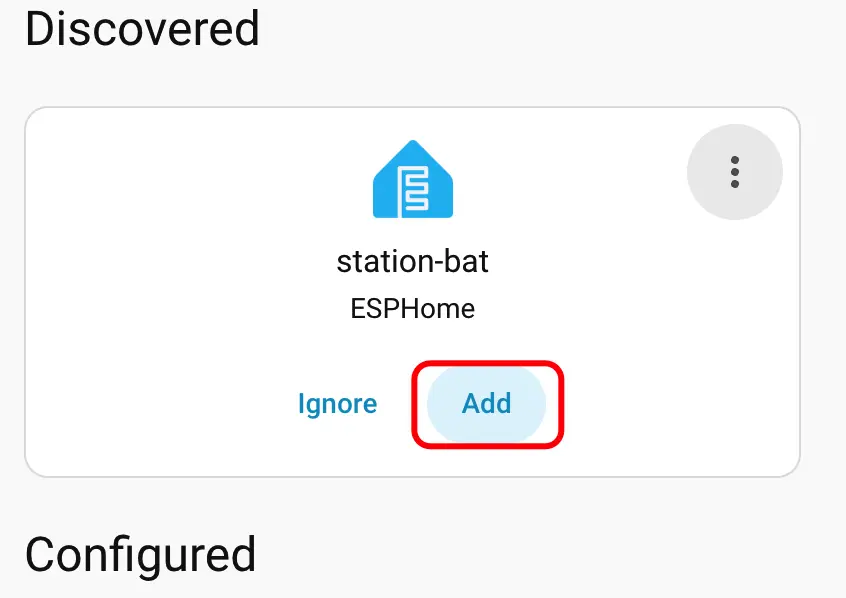
- 追加が完了すると、各種センサーデータが正しく表示されます。
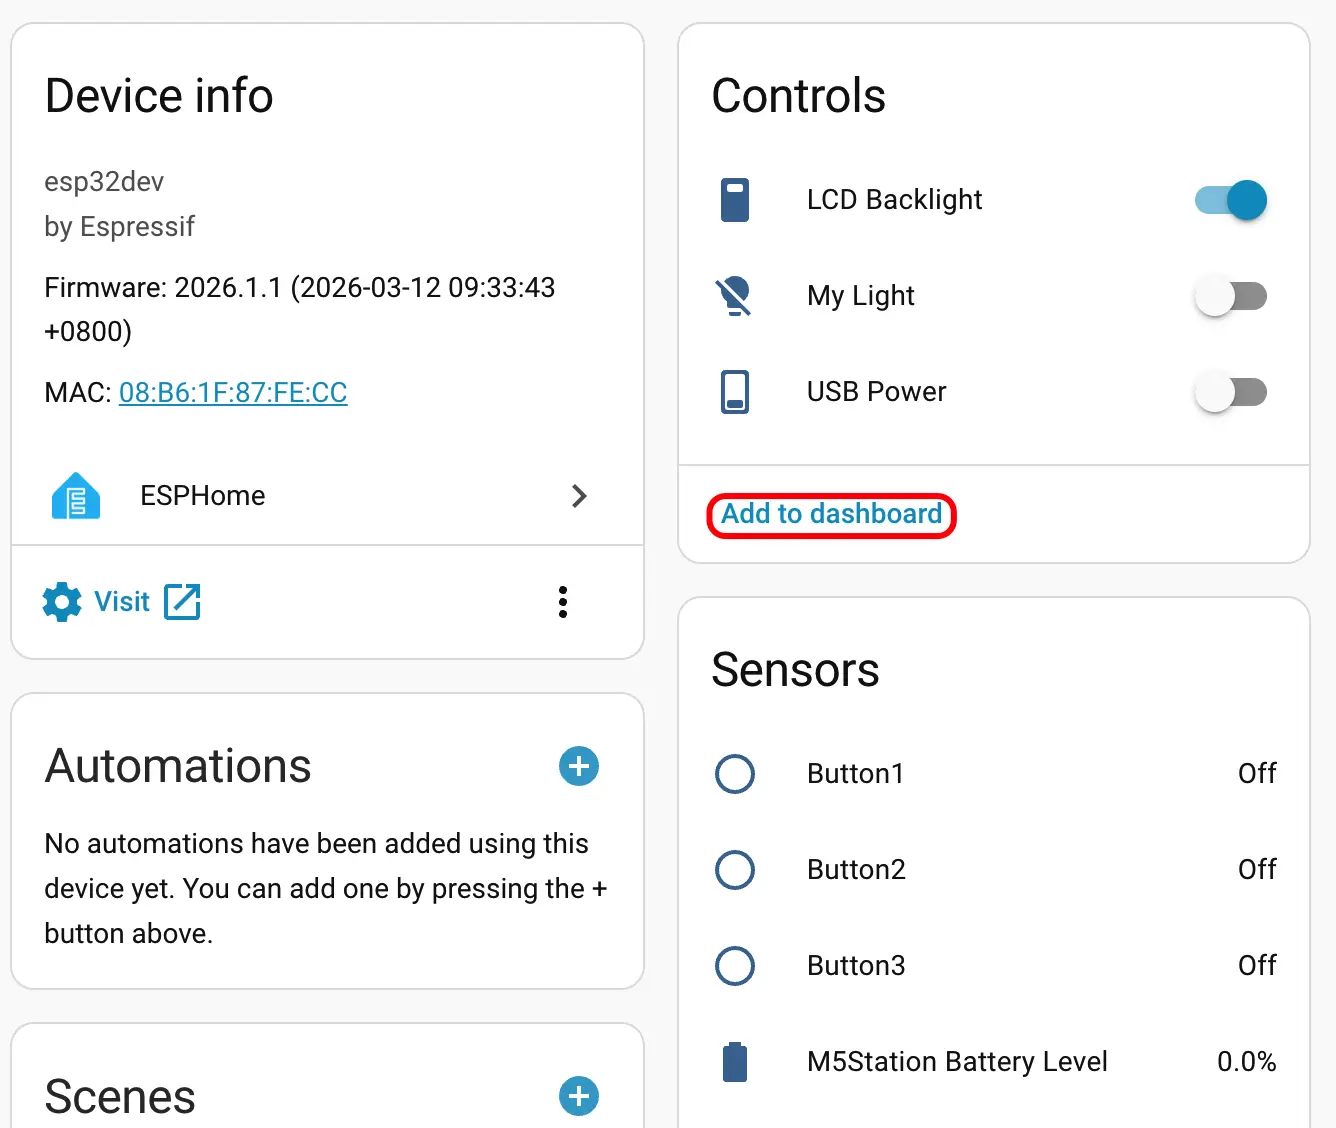
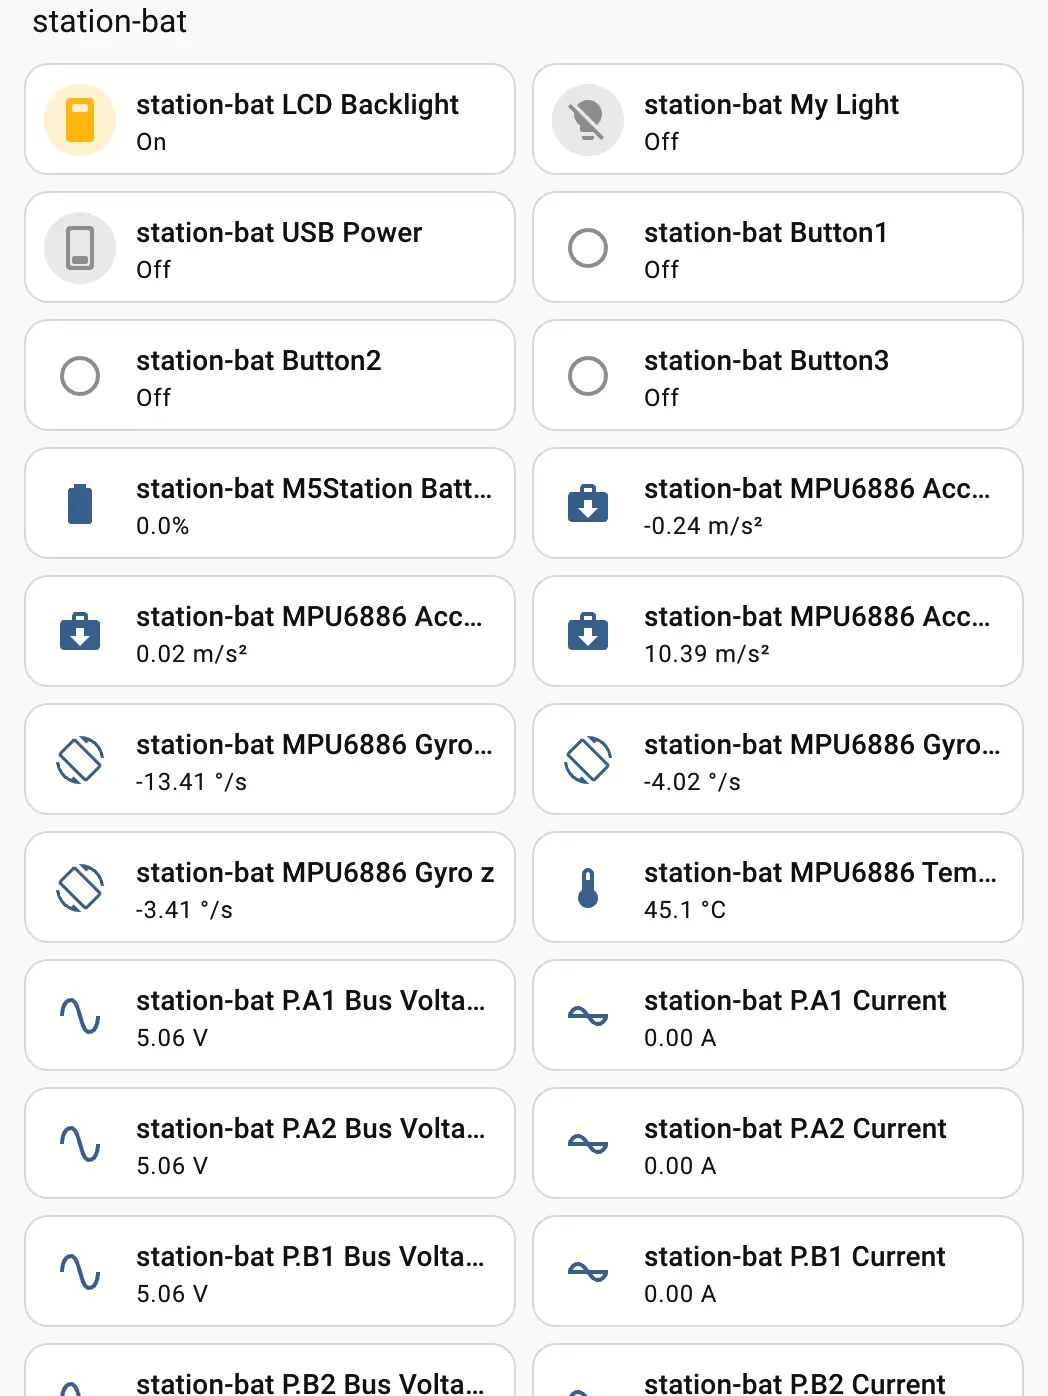
- 最後にこれらのエンティティを Dashboard(ダッシュボード)に追加すると、以下のように表示されます。
Page Tools