Home Assistant
Media Player
Expansion
Sensor
Unit Encoder Home Assistant Integration
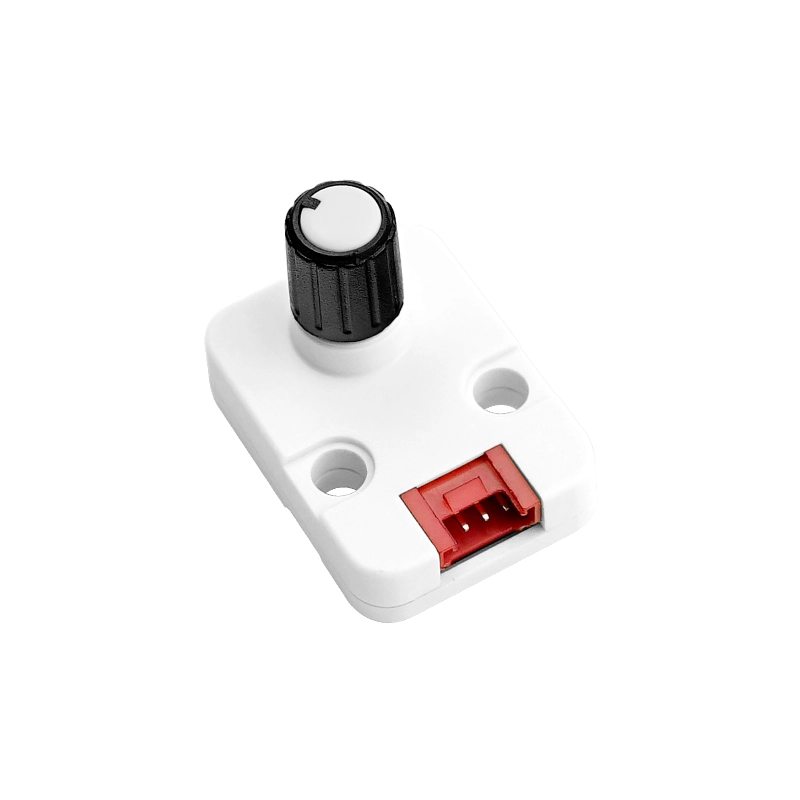
This tutorial uses the Unit Encoder rotary encoder with an Atom Lite controller and integrates it into Home Assistant to enable knob value reading, button detection, and RGB LED control.
Preparation
- Hardware list.
- 1 x Unit Encoder.
- 1 x Atom Lite.
- 1 x HY2.0-4P Grove Cable (20cm).
- 1 x Home Assistant host.
- Software and versions.
- Home Assistant 2026.5.0 or later.
- ESPHome Device Builder 2026.4.5 or later.
Create Device
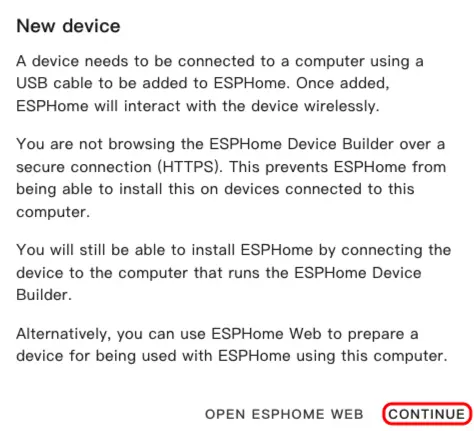
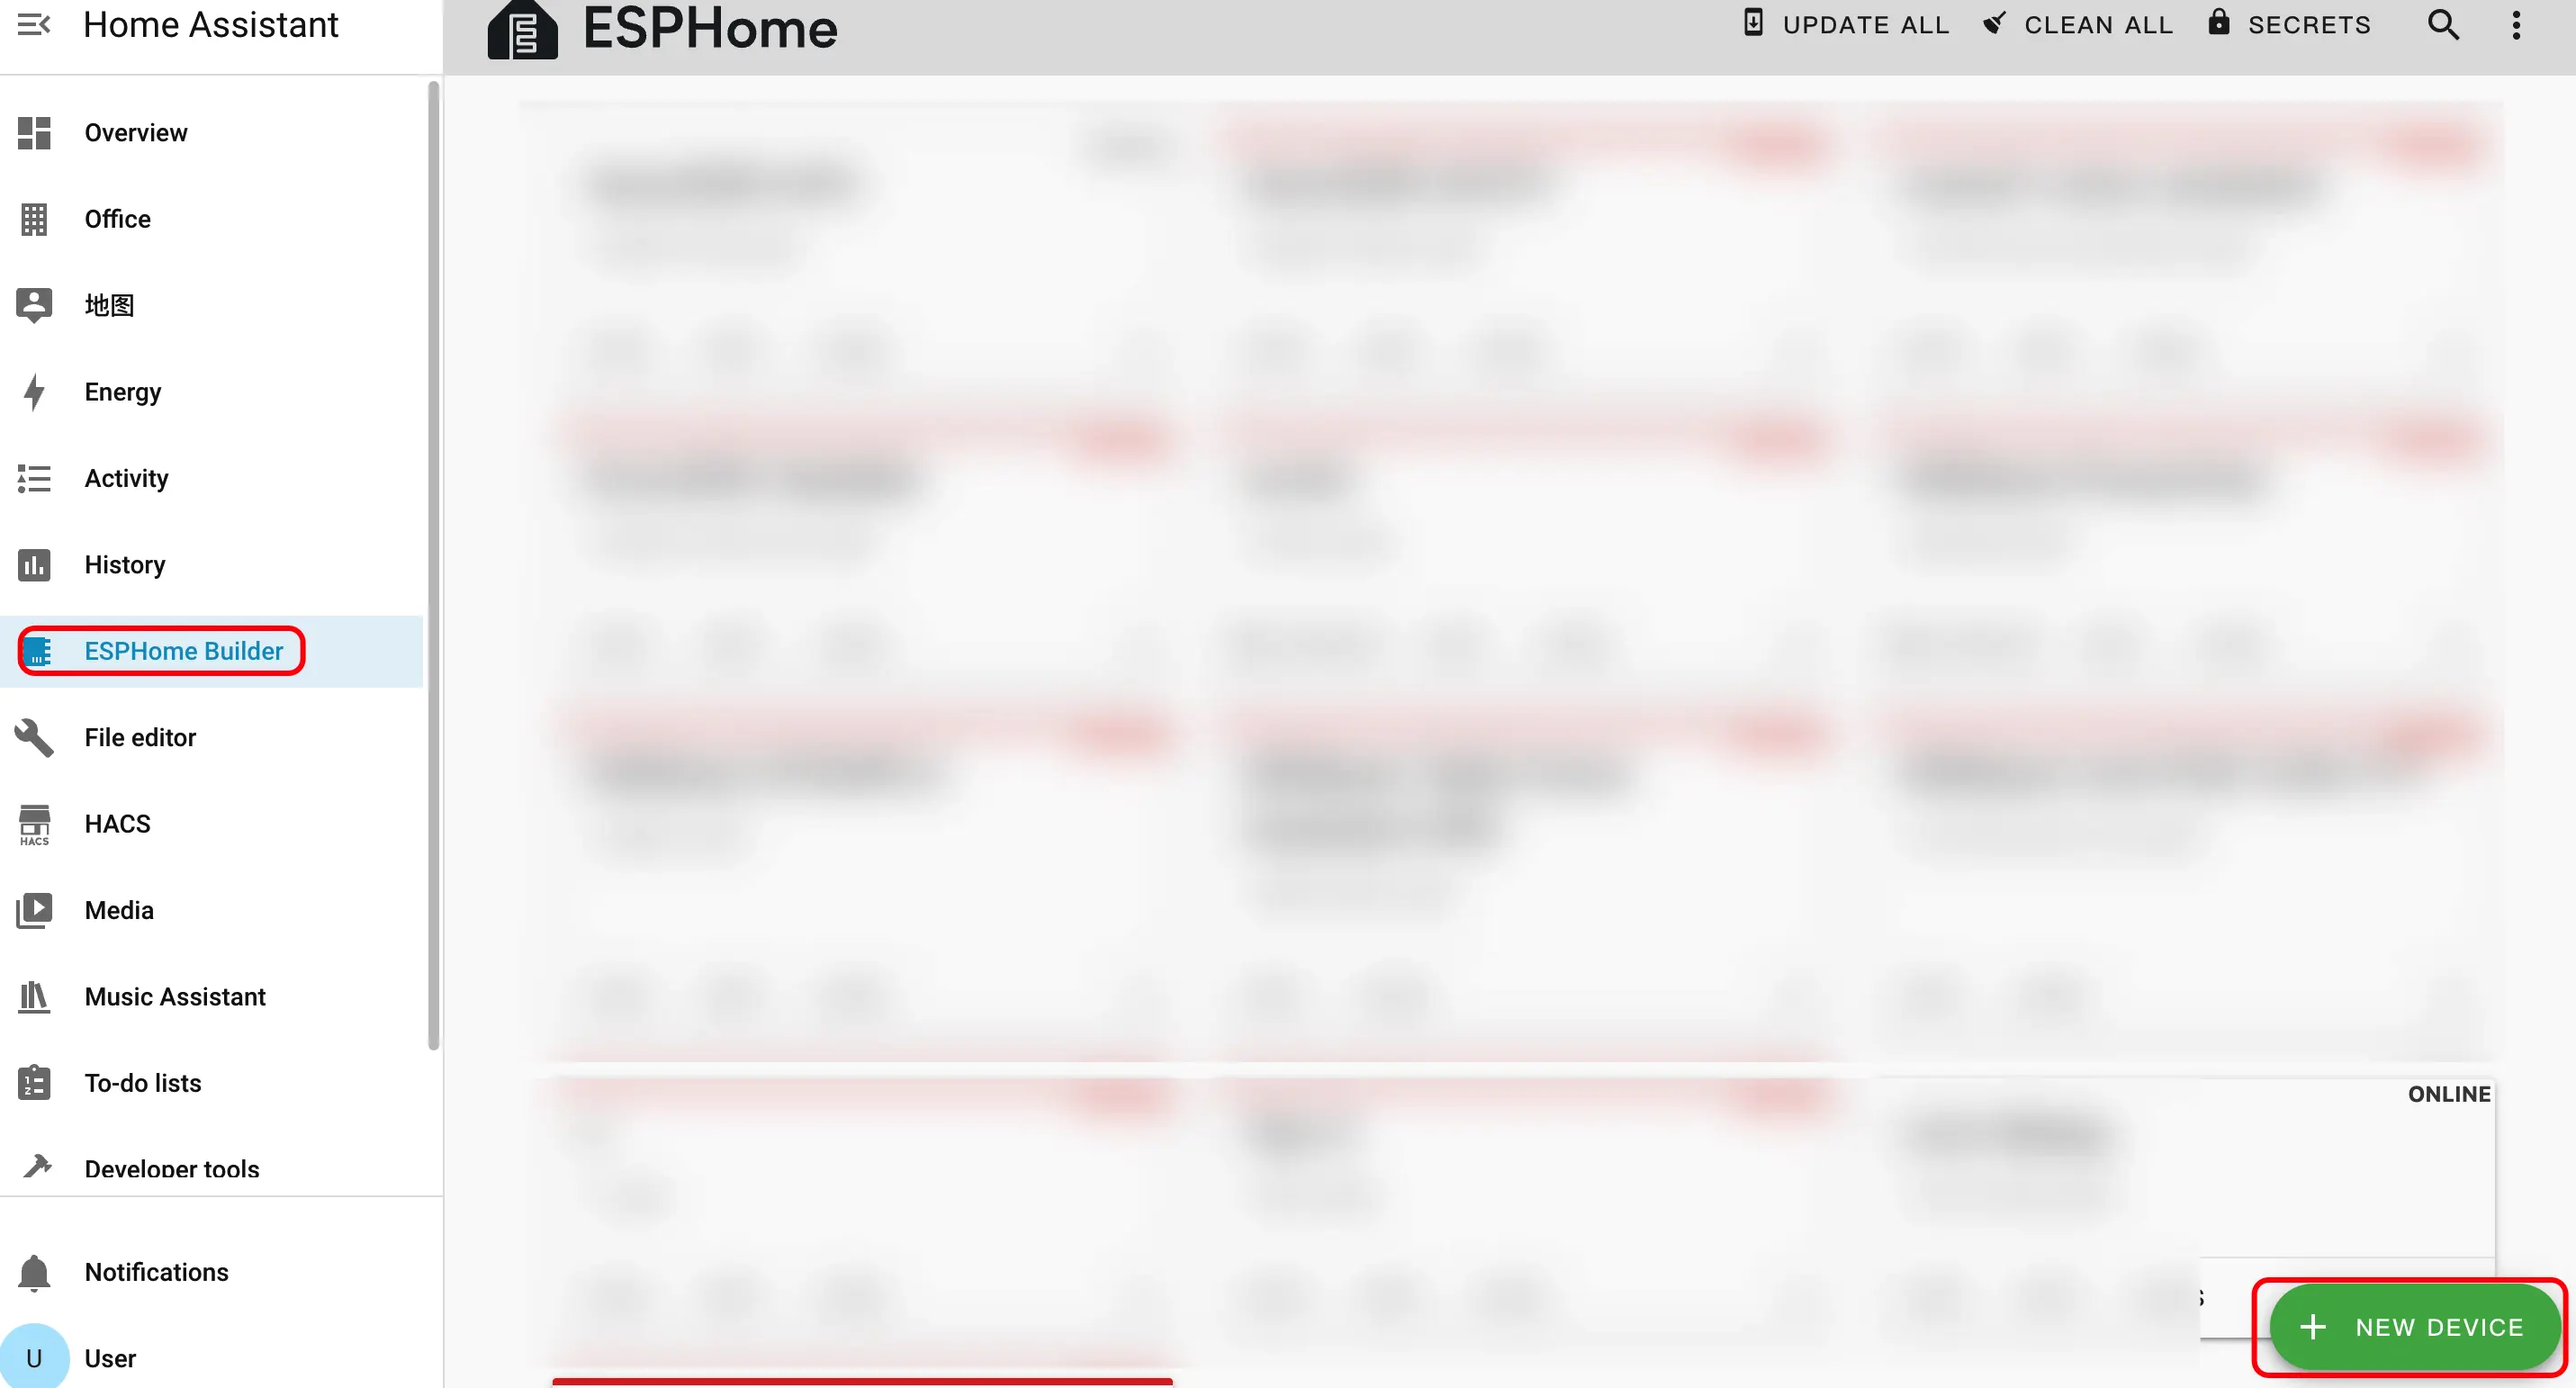
- Open the ESPHome Dashboard. If the initial setup wizard appears, click
CONTINUE.
- Click the green + button in the bottom-right corner to start creating a new device.
- Click
New Device Setupto enter the device creation wizard.

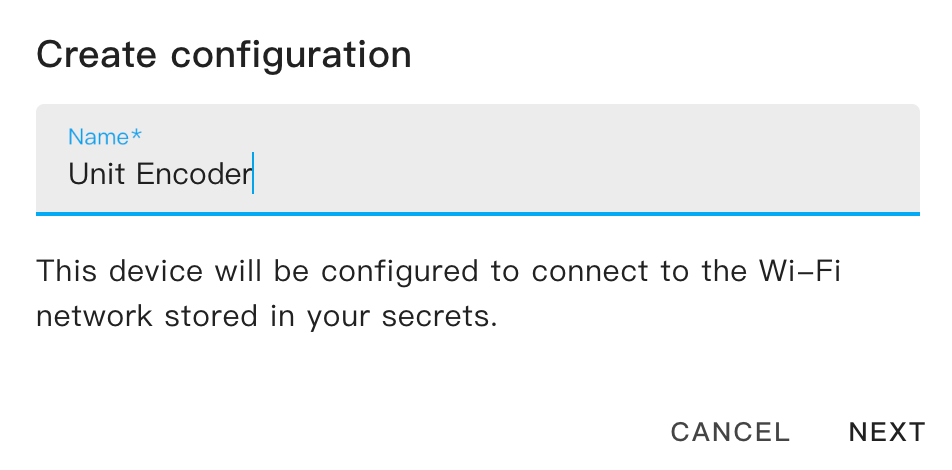
- Enter a device name and click
NEXT.
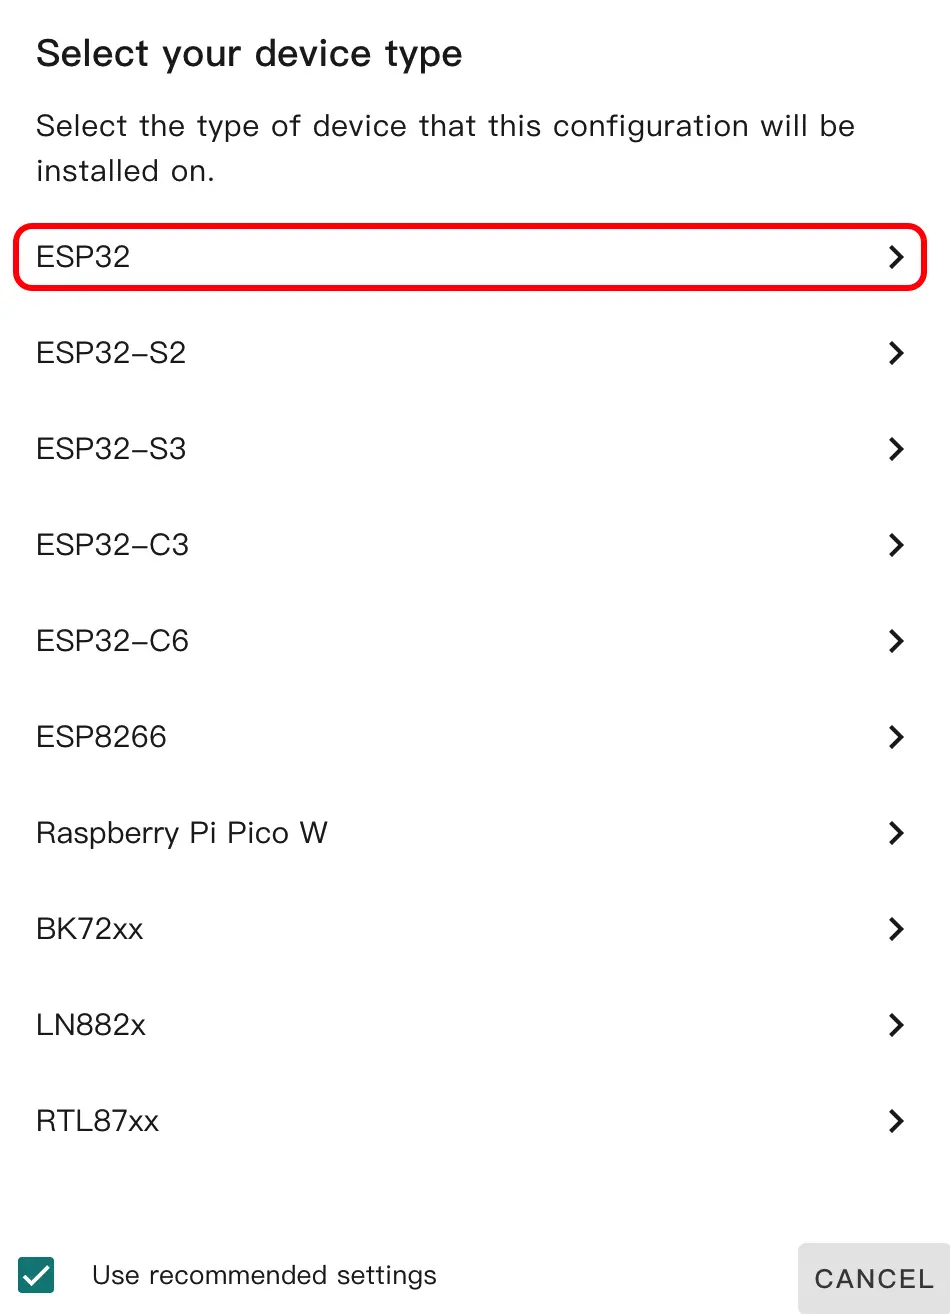
- Select the device type. First uncheck
Use recommended settings, then selectESP32. In the details panel, find and selectUnit Encoder, then clickNEXT.
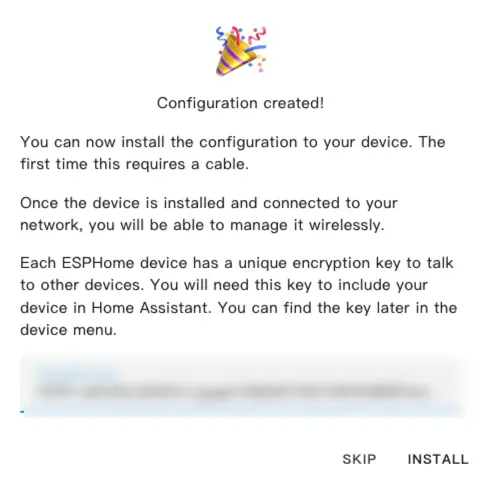
- Click
SKIPto skip the encryption key setup.
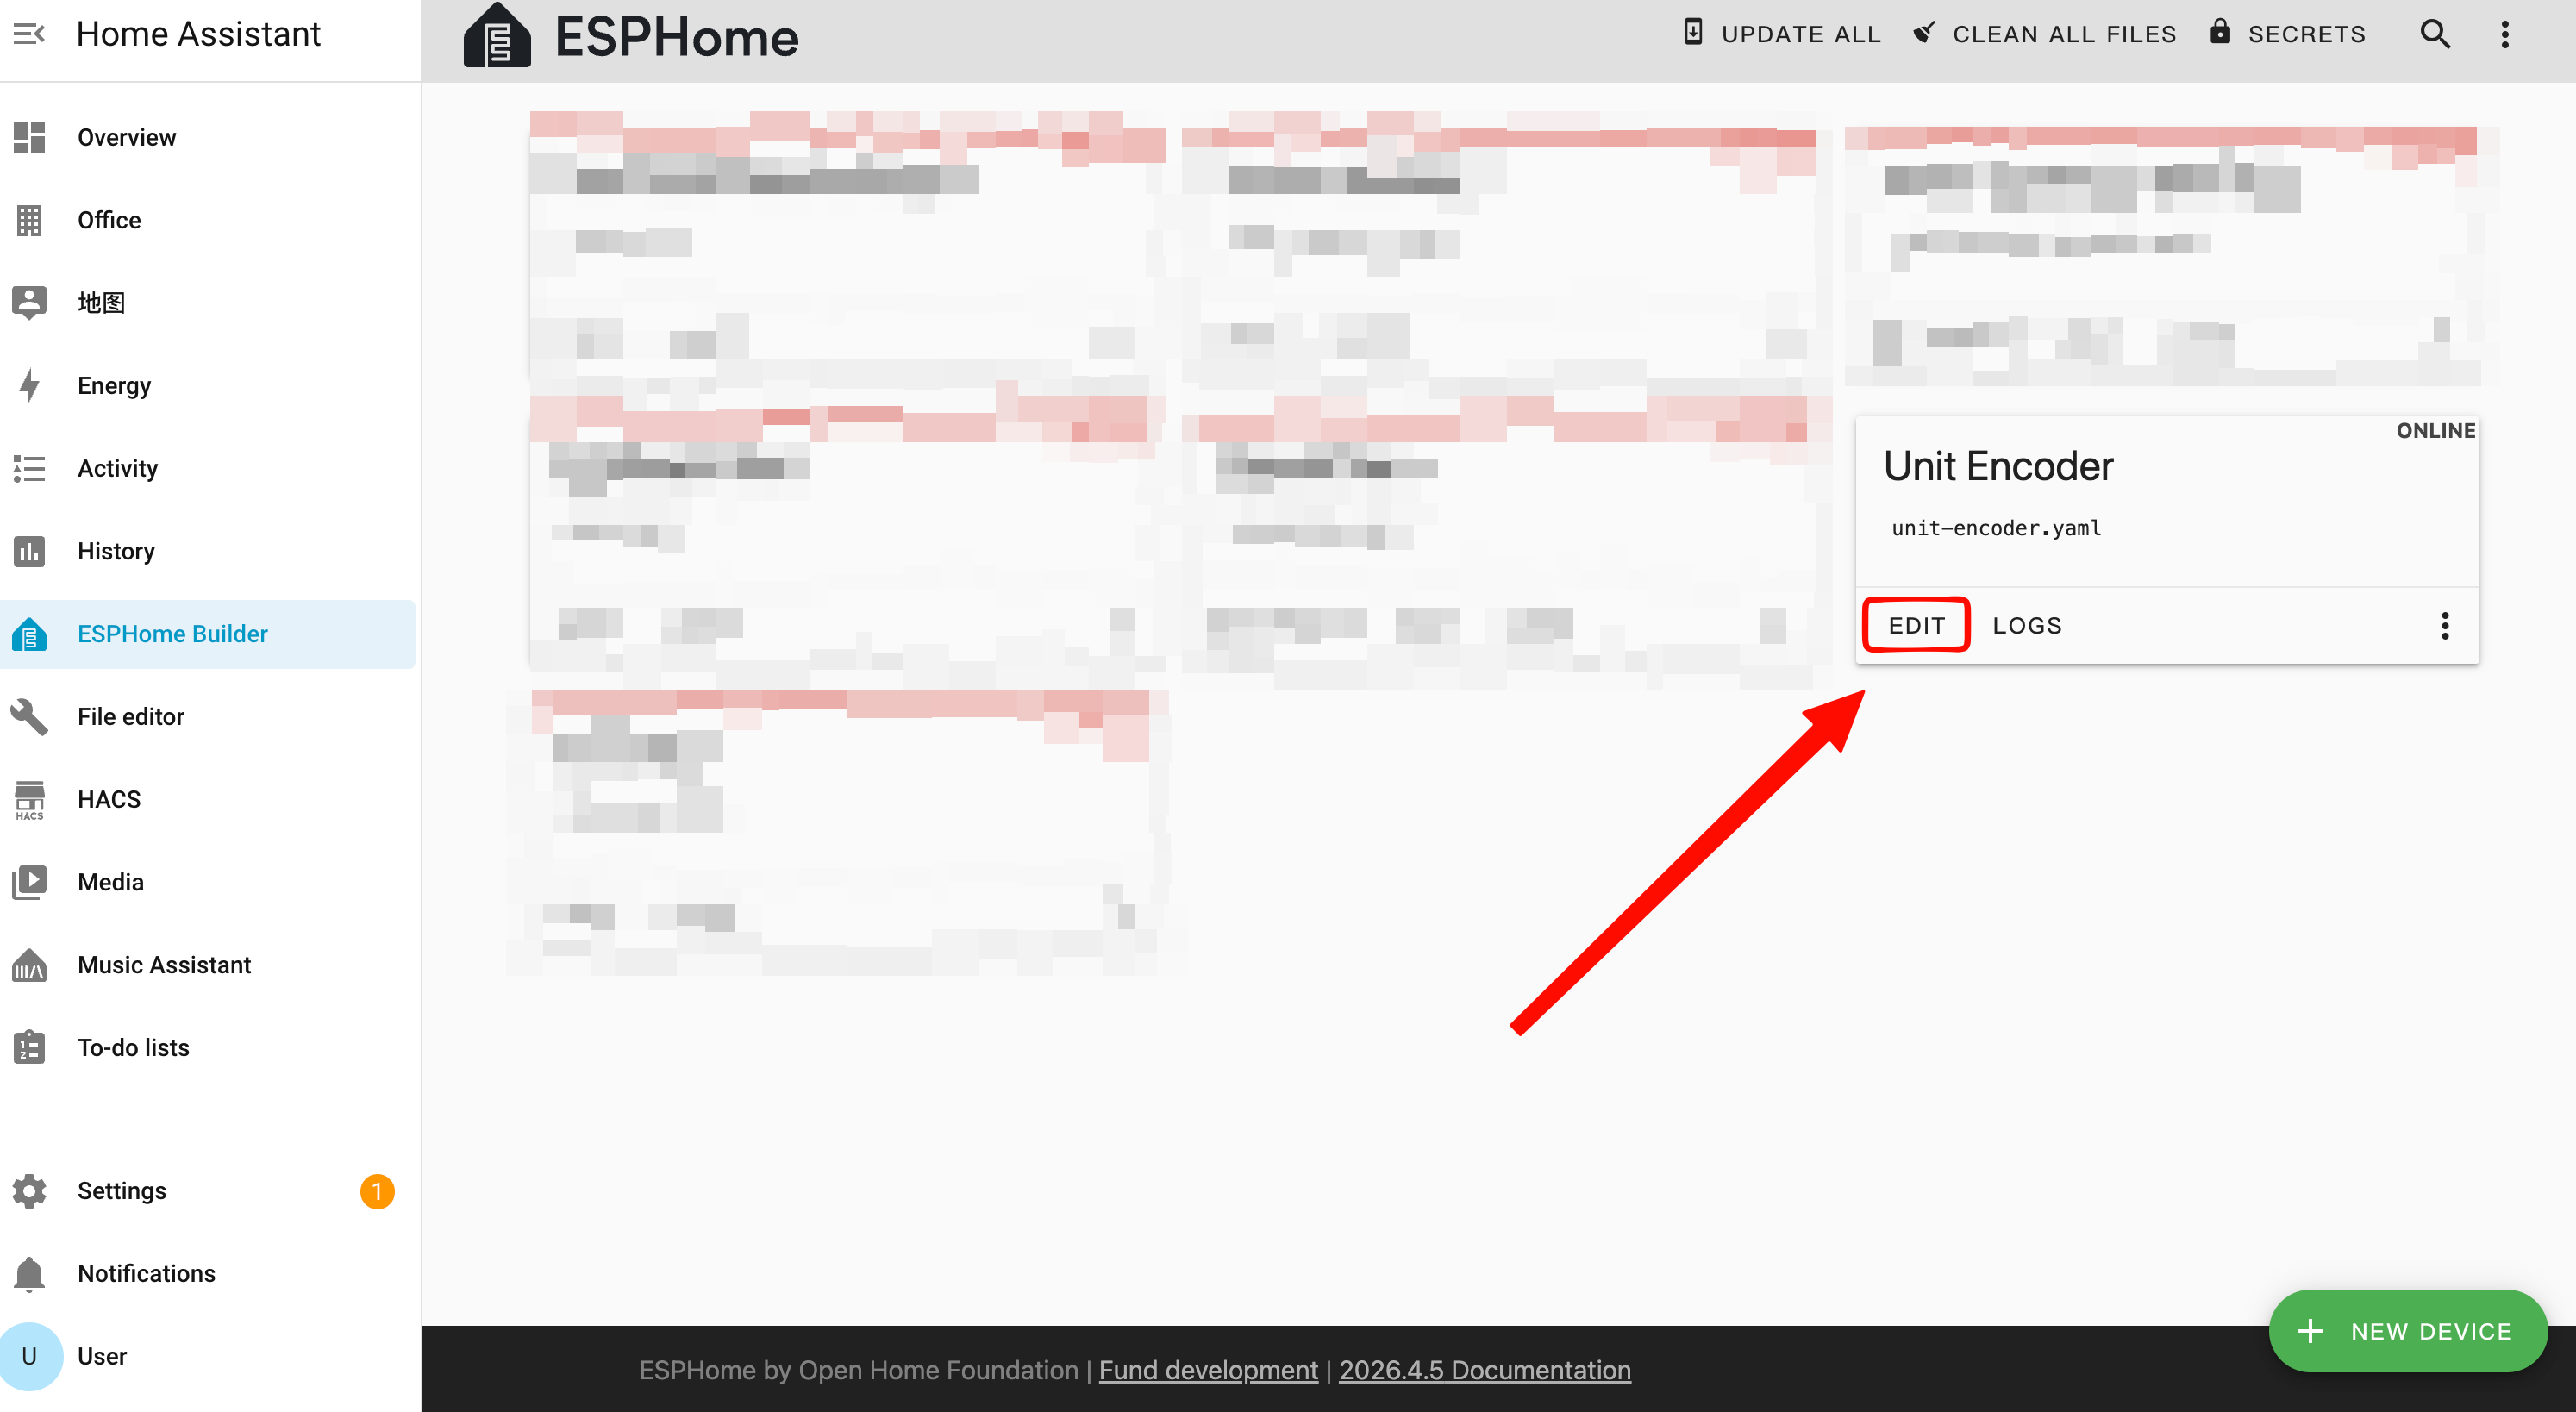
- Click
EDITto open the YAML configuration page and customize the device.
Device Configuration
External Components
Add the External Components configuration to the YAML file to load the Unit Encoder driver.
external_components:
  - source: github://m5stack/esphome-yaml/components
    components: [m5unit_encoder]
refresh: 0sI2C Bus Configuration
Add the I2C component and configure the communication pins between the Unit Encoder and Atom Lite.
i2c:
  sda: GPIO26
  scl: GPIO32
scan: trueSensor Configuration
Add the Sensor component to read the encoder rotation value.
sensor:
  - platform: m5unit_encoder
    id: unit_encoder_1
name: "Encoder Value"Binary Sensor (Button) Configuration
Add the Binary Sensor component to detect encoder button press events.
binary_sensor:
  - platform: m5unit_encoder
    m5unit_encoder_id: unit_encoder_1
name: "Encoder Button"Output Configuration
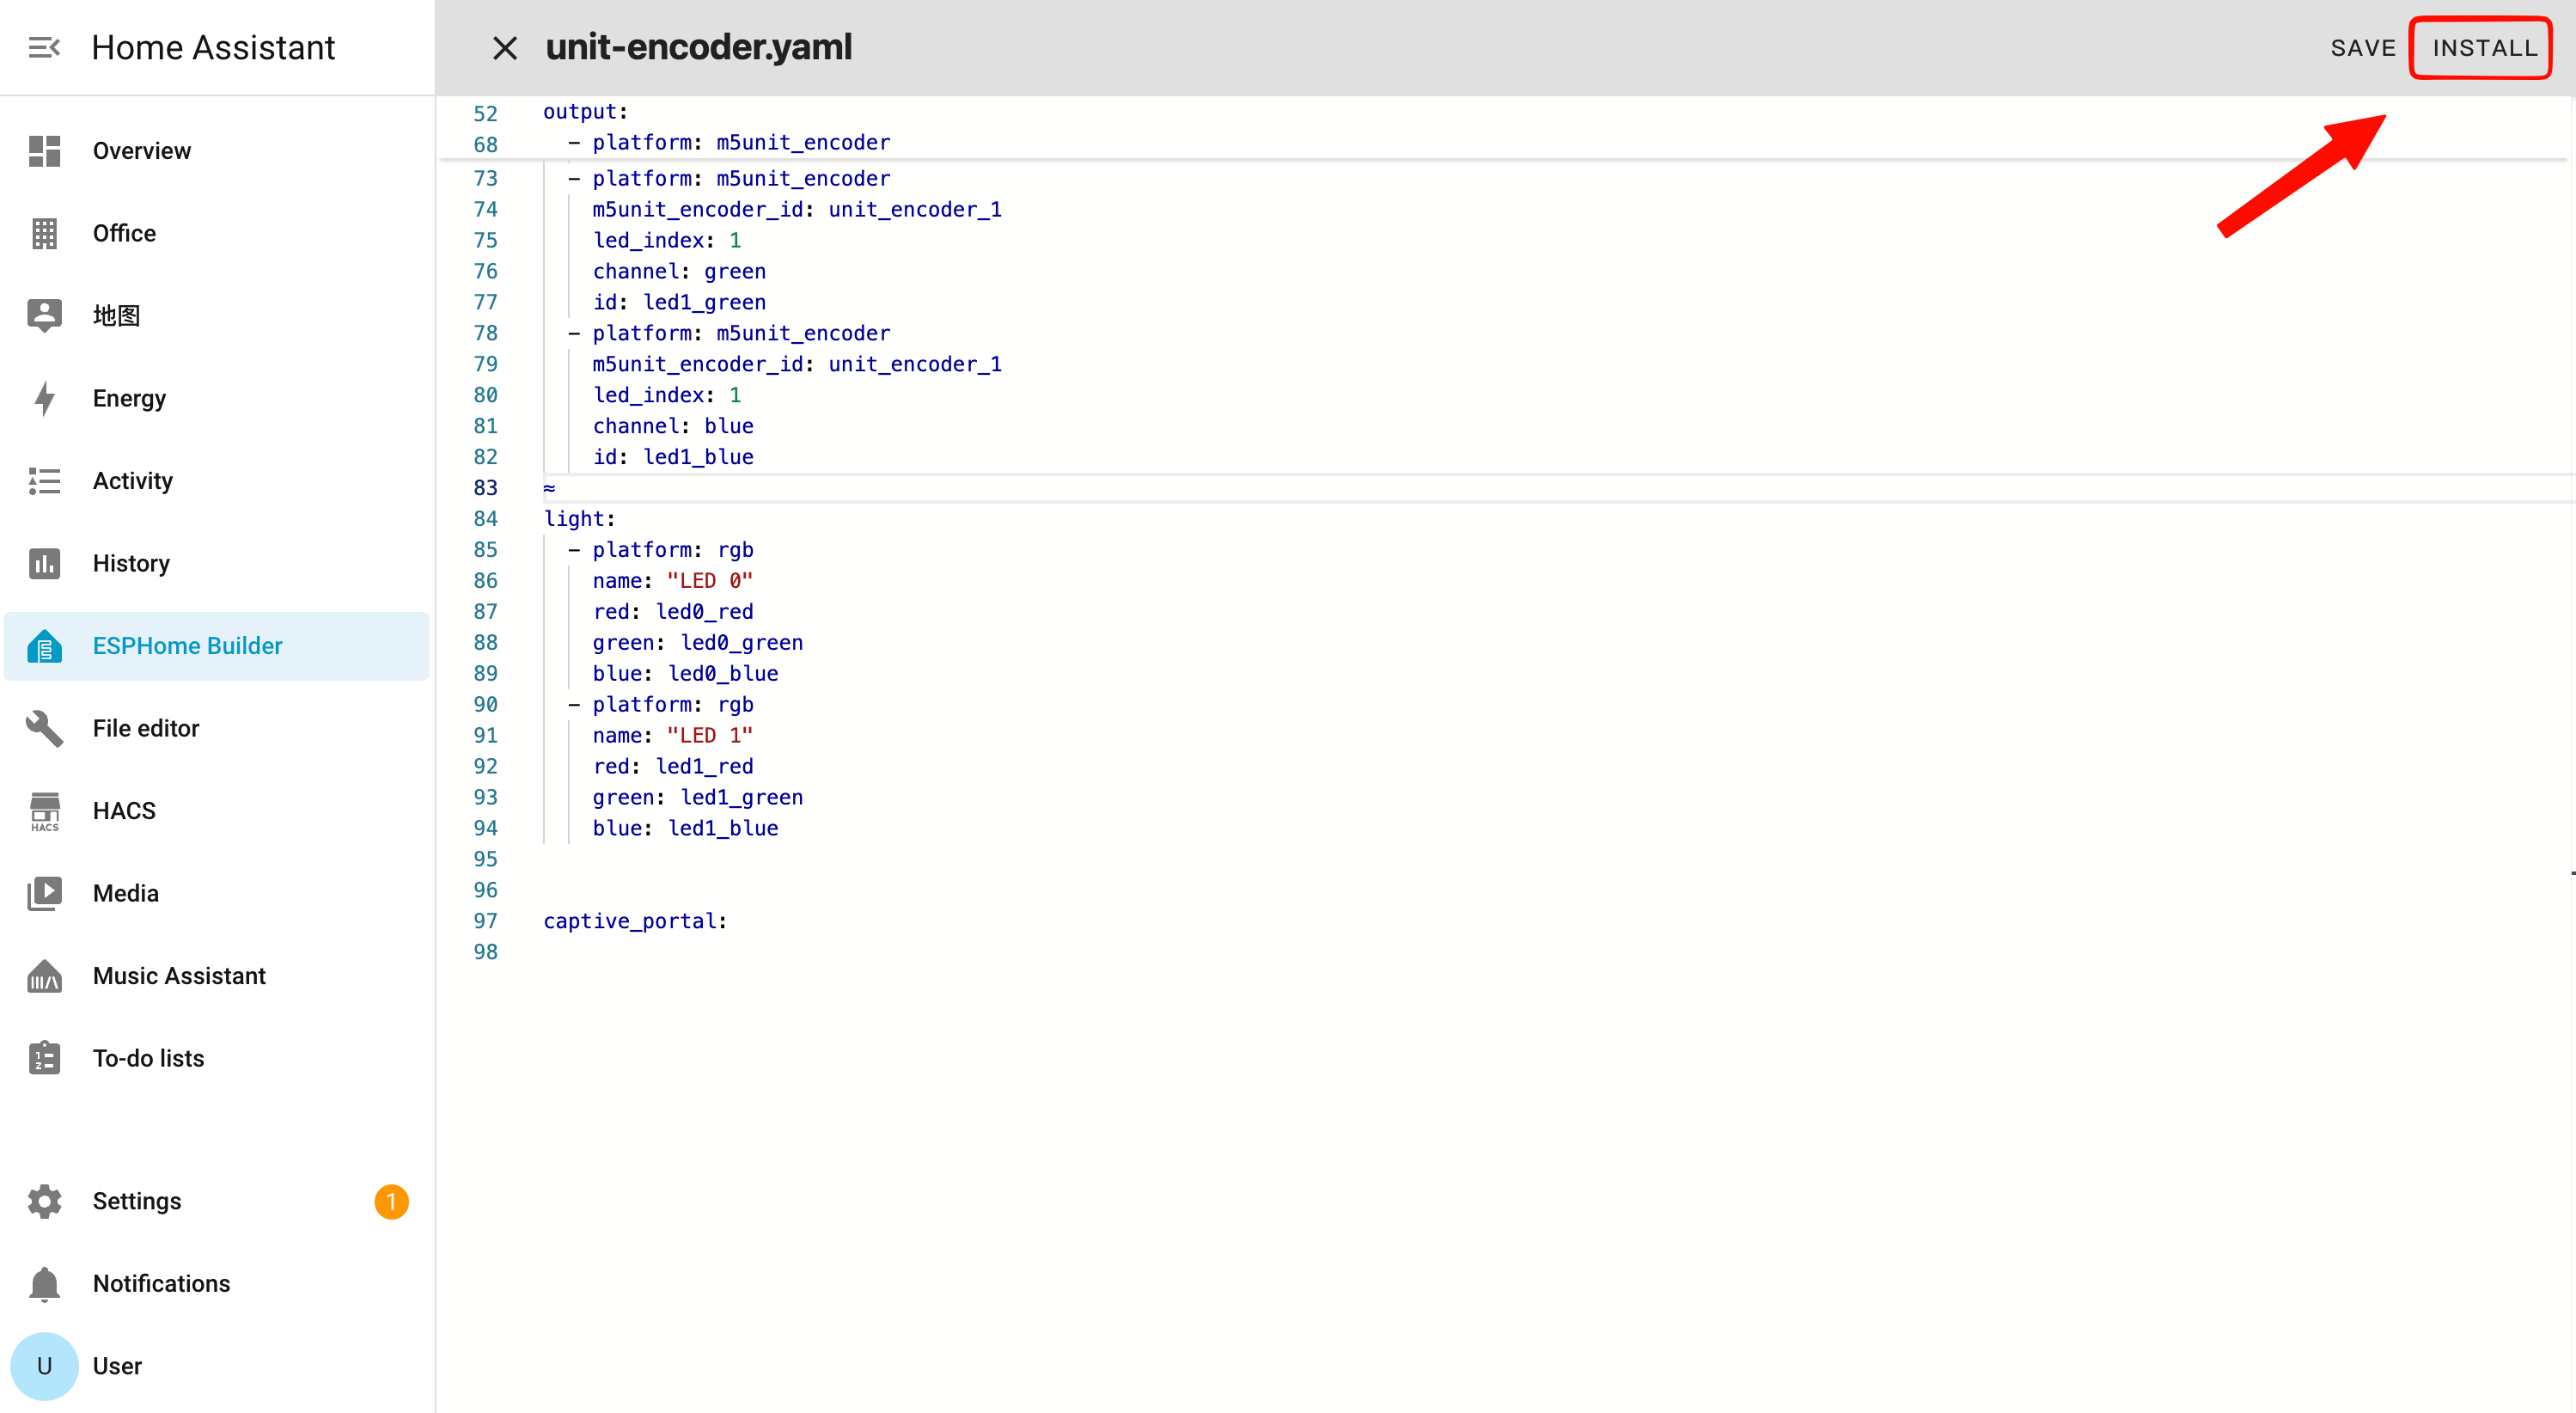
Add the Output component to map each color channel of the two SK6812 RGB LEDs as individual outputs for use by the Light component.
output:
  - platform: m5unit_encoder
    m5unit_encoder_id: unit_encoder_1
    led_index: 0
    channel: red
    id: led0_red
  - platform: m5unit_encoder
    m5unit_encoder_id: unit_encoder_1
    led_index: 0
    channel: green
    id: led0_green
  - platform: m5unit_encoder
    m5unit_encoder_id: unit_encoder_1
    led_index: 0
    channel: blue
    id: led0_blue
  - platform: m5unit_encoder
    m5unit_encoder_id: unit_encoder_1
    led_index: 1
    channel: red
    id: led1_red
  - platform: m5unit_encoder
    m5unit_encoder_id: unit_encoder_1
    led_index: 1
    channel: green
    id: led1_green
  - platform: m5unit_encoder
    m5unit_encoder_id: unit_encoder_1
    led_index: 1
    channel: blue
id: led1_blueLight Configuration
Add the Light component to control the two built-in SK6812 programmable RGB LEDs on the Unit Encoder.
light:
  - platform: rgb
    name: "LED 0"
    red: led0_red
    green: led0_green
    blue: led0_blue
  - platform: rgb
    name: "LED 1"
    red: led1_red
    green: led1_green
blue: led1_blueKey parameter descriptions:
| Parameter | Description |
|---|---|
m5unit_encoder_id | Links to the corresponding m5unit_encoder sensor instance ID |
led_index | LED index, 0 or 1, corresponding to the two SK6812 LEDs |
channel | Color channel: red, green, or blue |
Download and Flash Firmware
Compile Firmware
- After completing the YAML edits, click
SAVEin the top-right corner to save the configuration, then clickINSTALL.
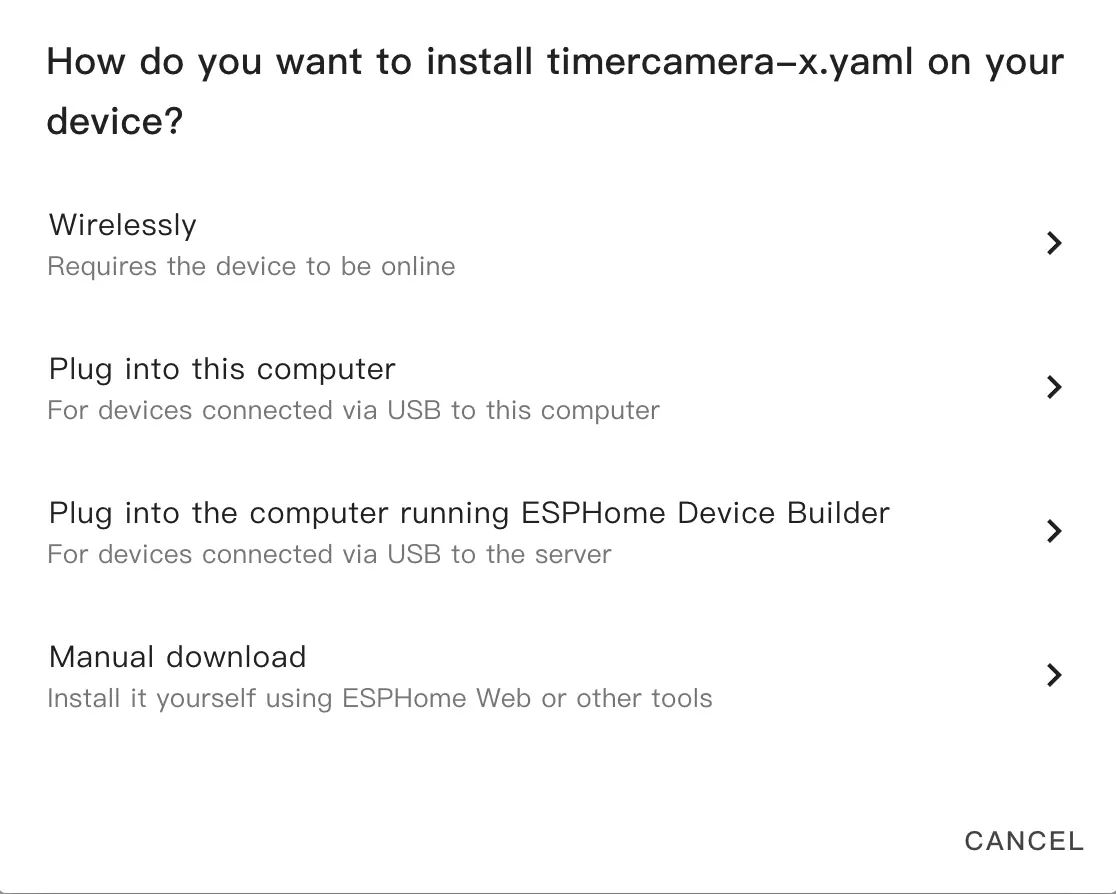
- In the pop-up window, select
Manual Download.
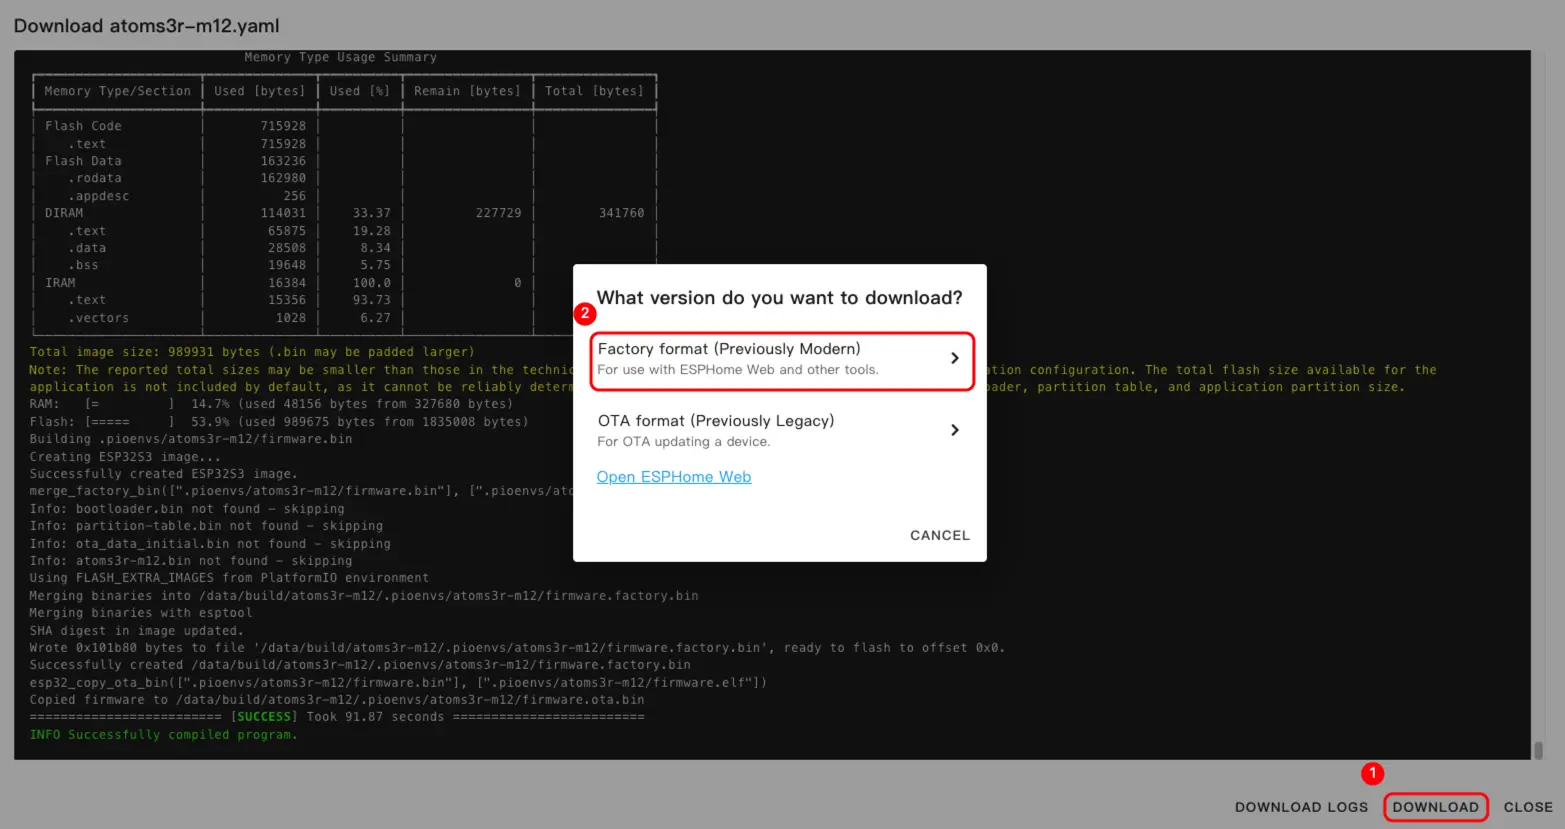
- Wait for the firmware to compile, then click
Downloadand selectFactory format (Previously Modern)to save the firmware locally.
Flash Firmware
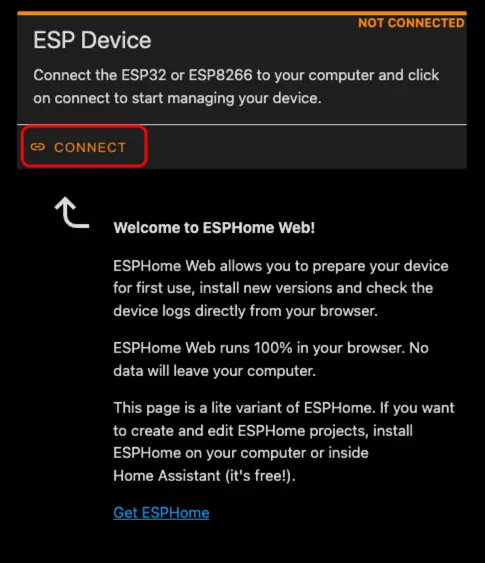
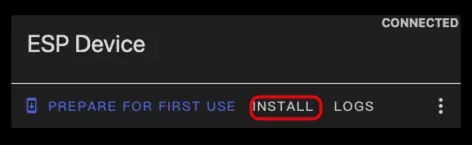
- Connect the Atom Lite to your computer via a USB Type-C cable. Open ESPHome Web and click
CONNECT.
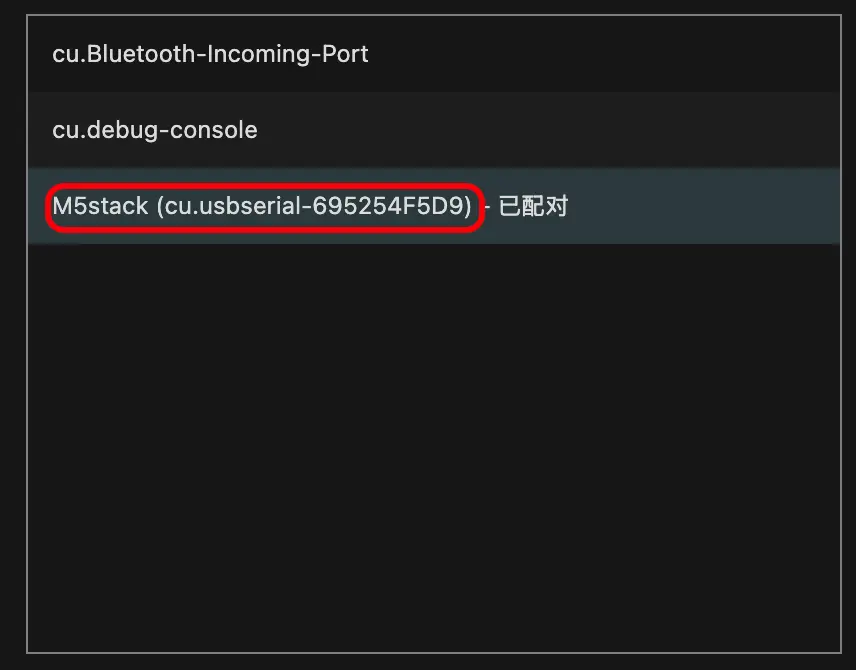
- In the serial port selection pop-up, find and select the corresponding port.
- Click
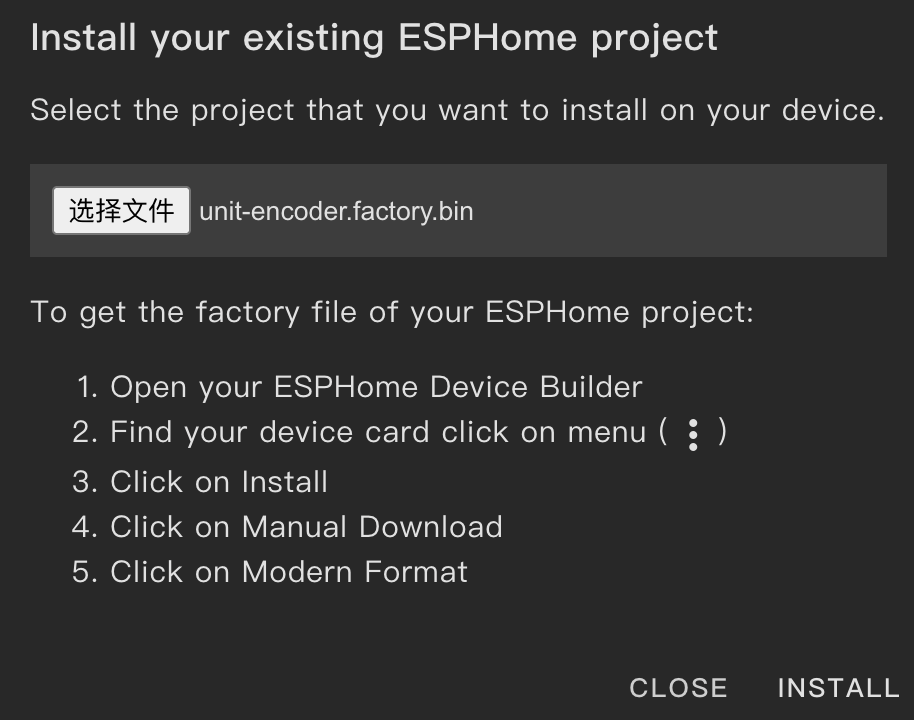
INSTALL.
- Select the firmware file downloaded in step 3 to upload.
Getting Started
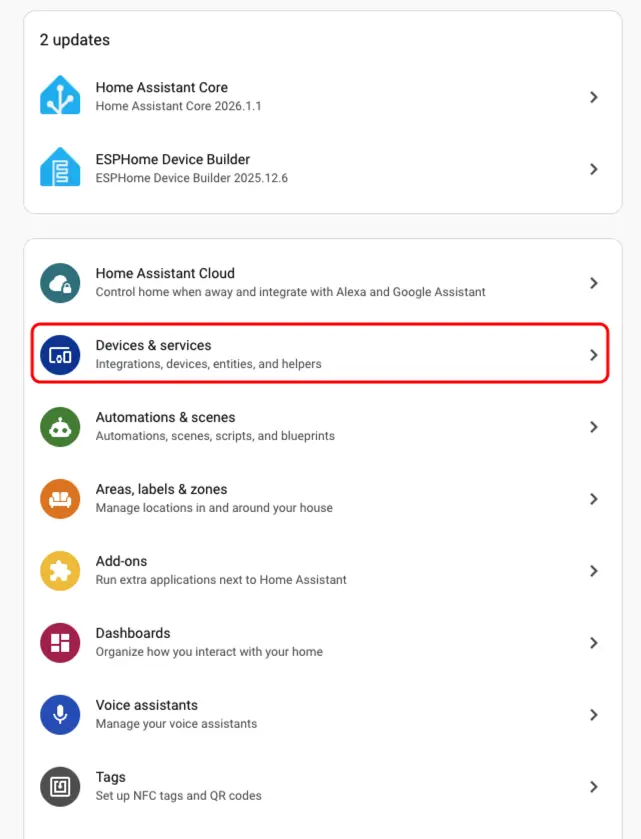
- In Home Assistant, go to
Settings>Devices & Servicesto open the integration management page.
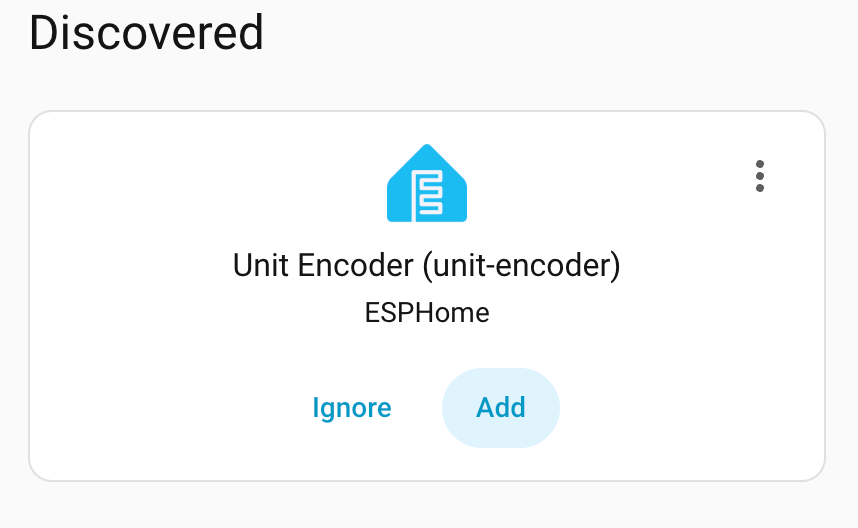
- In the
Discoveredsection, find the online Unit Encoder device, clickCONFIGURE, and follow the prompts to complete the setup.
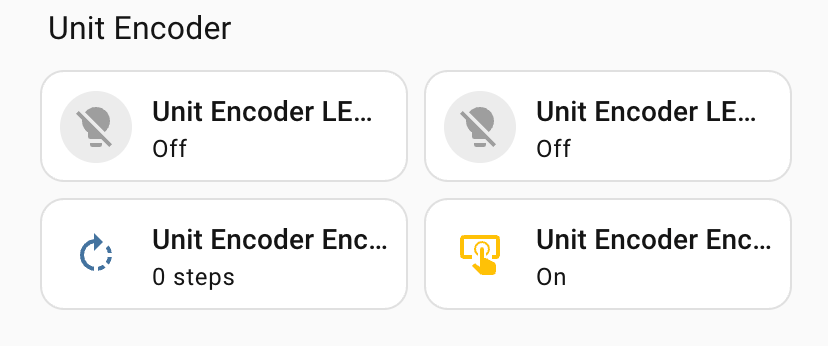
- Once added, the device page will show the encoder value, button state, and RGB LED control entities.
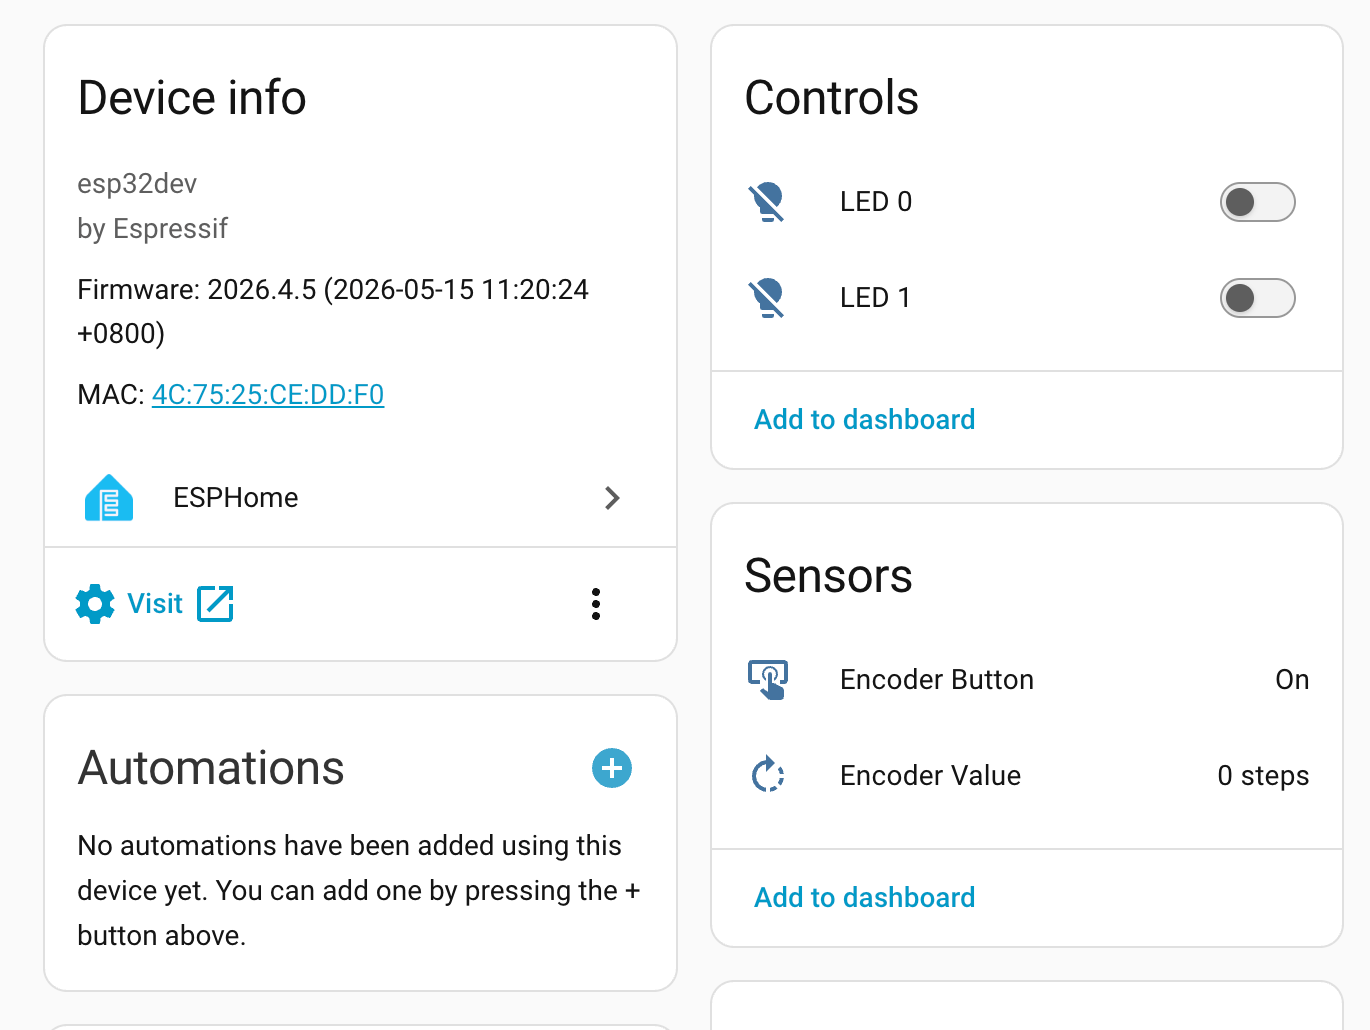
- Finally, add the sensor entities to a dashboard to monitor the encoder value and button state in real time, and to control the LED color.