Home Assistant
Media Player
Expansion
Sensor
Unit Scroll Home Assistant Integration
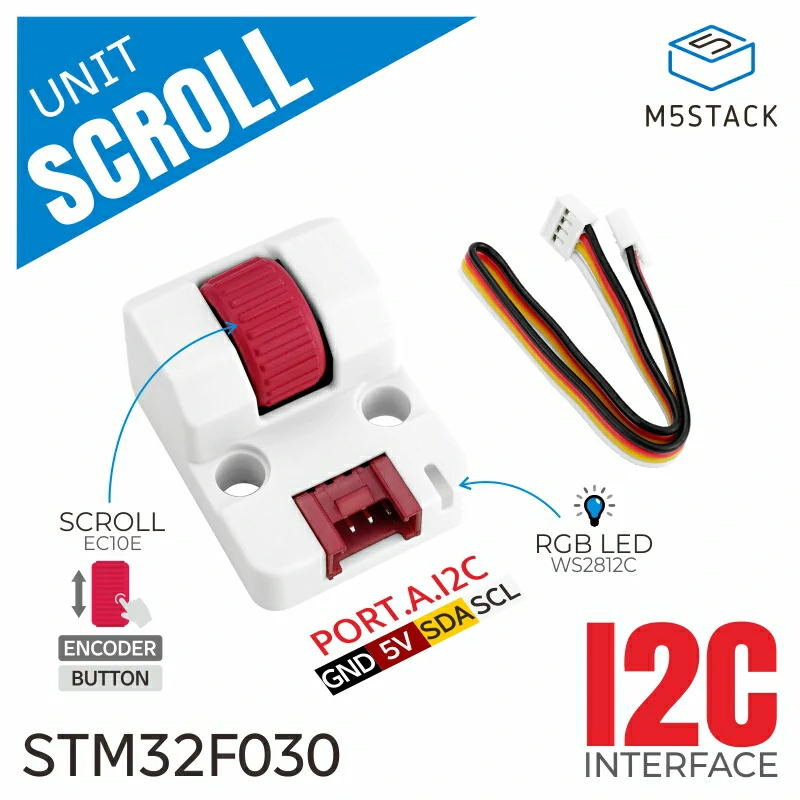
This tutorial introduces how to use the Unit Scroll wheel-style rotary encoder extension unit with a CoreS3 controller and integrate it into Home Assistant to monitor encoder values, switch button states, and control RGB lighting.
1. Preparation
Environment Setup
- Follow the official Home Assistant documentation to install Home Assistant. (This tutorial uses
Home Assistant 2026.2.0or later.) - Follow the official ESPHome documentation to install the ESPHome Device Builder add-on. (Note: This tutorial is based on
ESPHome 2026.2.2. If you encounter compilation errors, switch to this version first for verification.)
Hardware
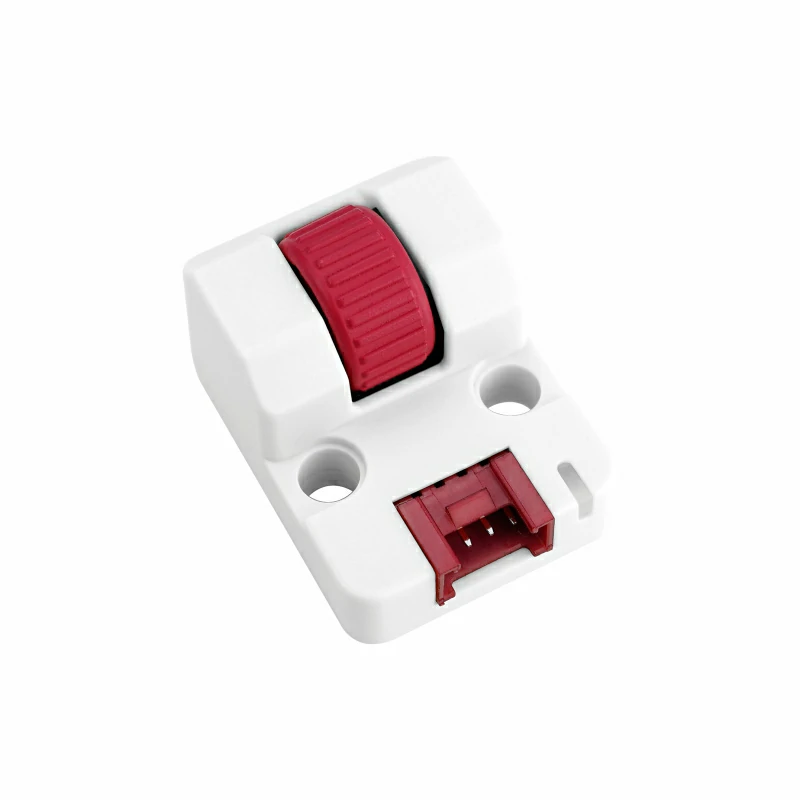
- Unit Scroll
- CoreS3
- HY2.0-4P Grove Cable (20cm)

2. Firmware Compilation & Flashing
This section explains how to recompile the project based on the yaml configuration file, making it easier to perform secondary development, modify features, or add new features.
Create Device
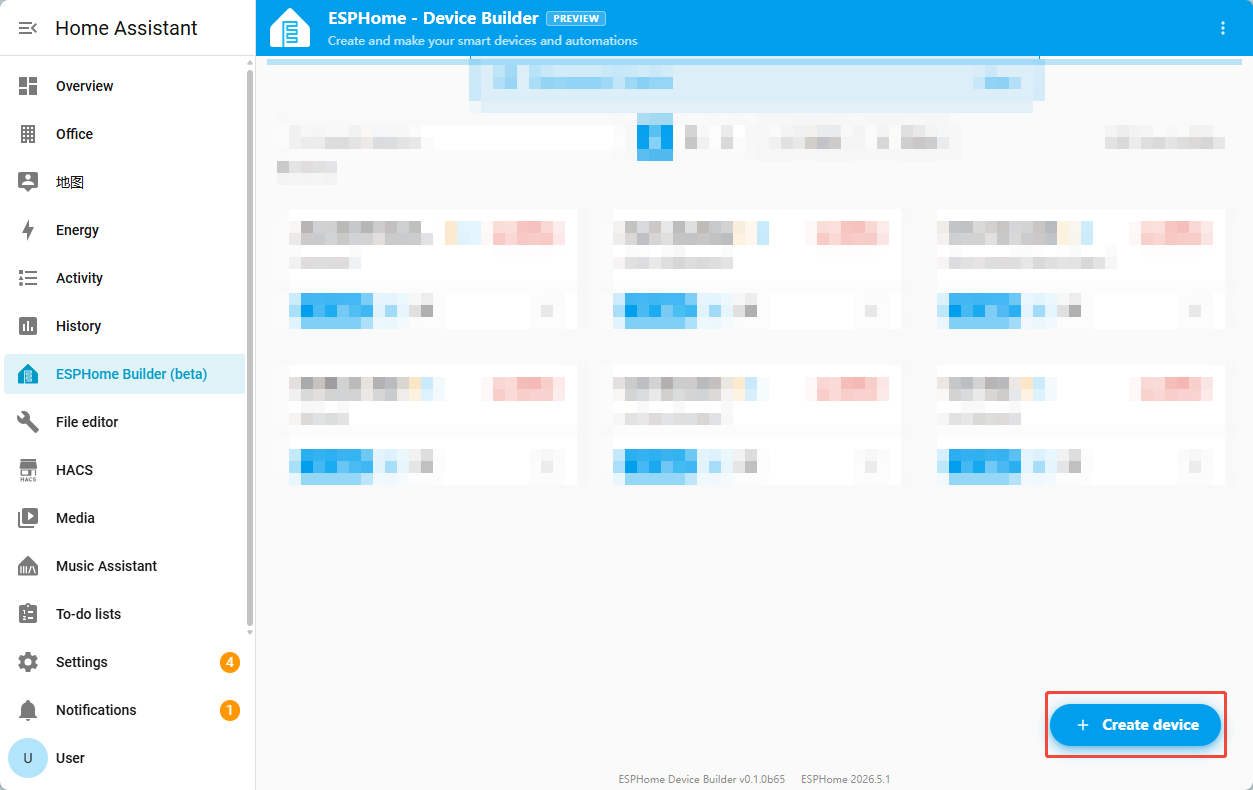
- Open ESPHome Builder and click the blue +Create device button in the lower-right corner to start creating a new device.
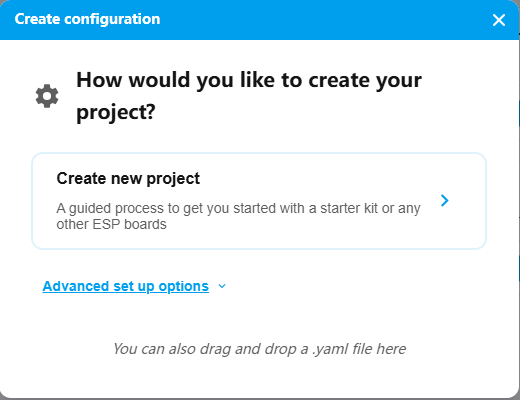
- Click
Create new projectto enter the device creation wizard.
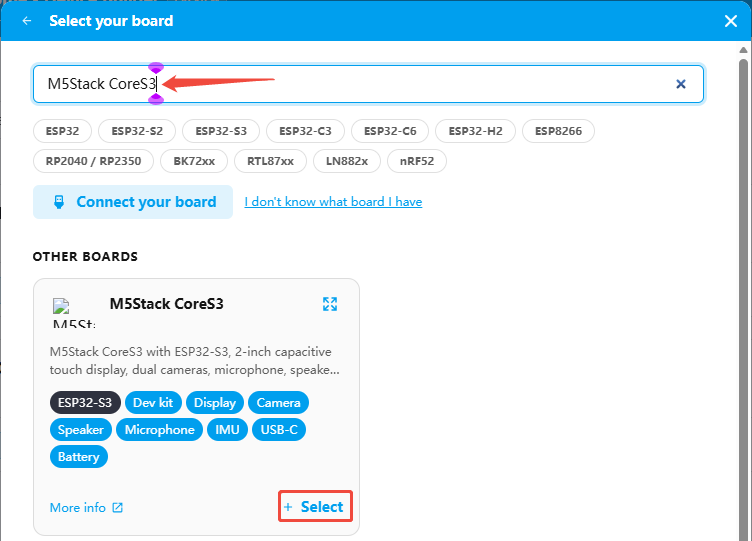
- Enter a device name in the search bar, such as M5Stack CoreS3, then click
+Select.
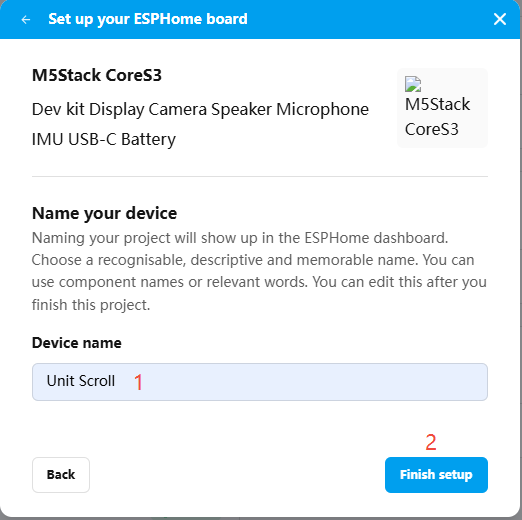
- Enter the device name
Unit Scroll, then clickFinish setup.
Modify Configuration
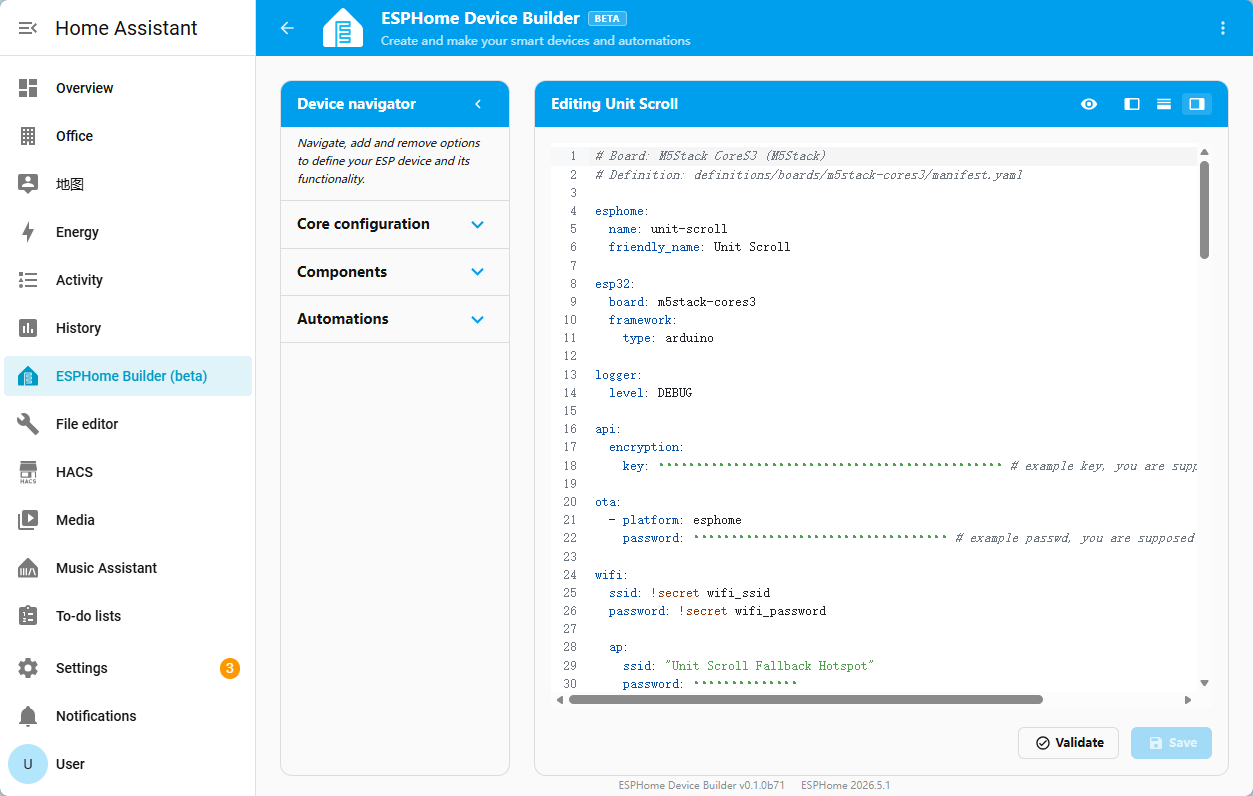
- After setup is complete, the YAML configuration page opens automatically, where you can customize the device functions.
External Component Configuration
Add the External component to load the Unit Scroll custom component:
external_components:
  - source: github://m5stack/esphome-yaml/components
    components: unit_scroll
    refresh: 0s

unit_scroll:
  id: my_scroll
  i2c_id: grove_i2c
  address: 0x40
  direction: true # false = clockwise increases value, true = counterclockwise increases value
  rgb_red: 0
  rgb_green: 255
rgb_blue: 0Main parameter descriptions:
| Parameter | Value | Description |
|---|---|---|
id | my_scroll | Unit Scroll component ID, used by subsequent sensors, outputs, and Lambda calls. |
i2c_id | grove_i2c | Bound I2C bus ID. |
address | 0x40 | Default I2C address of Unit Scroll. |
direction | true | Encoder counting direction, adjustable according to the actual rotation direction. |
rgb_red / rgb_green / rgb_blue | 0 / 255 / 0 | Initial RGB LED color after power-on. |
I2C Bus Configuration
Add the I2C component to configure the communication pins between Unit Scroll and CoreS3.
i2c:
  - id: grove_i2c
    sda: GPIO2
    scl: GPIO1
scan: trueGlobal Variable Configuration
Add the Globals component to save the enabled state of the RGB LED:
globals:
  - id: scroll_led_enabled
    type: bool
    restore_value: false
initial_value: 'true'Polling and Lighting Control
Add the Interval component to periodically read the encoder value and button state, and update the RGB color according to the encoder value. Pressing the Unit Scroll button toggles the RGB LED on/off.
interval:
  - interval: 100ms
    then:
      - lambda: |-
          static bool last_button = false;
          static uint16_t last_value = 0;
          static bool has_last_value = false;

          bool button = id(my_scroll).get_button_state();
          bool led_toggled = false;
          if (button && !last_button) {
            id(scroll_led_enabled) = !id(scroll_led_enabled);
            led_toggled = true;
            if (!id(scroll_led_enabled)) {
              auto call = id(scroll_rgb_led).turn_off();
              call.perform();
            }
            ESP_LOGI("unit_scroll_demo", "RGB LED is now %s", id(scroll_led_enabled) ? "ON" : "OFF");
          }
          last_button = button;

          uint16_t value = id(my_scroll).get_value();
          id(scroll_encoder_value).publish_state(value);
          bool value_changed = !has_last_value || value != last_value;

          uint8_t position = static_cast<uint8_t>(value & 0xFF);
          uint8_t region = position / 43;
          uint8_t remainder = (position - (region * 43)) * 6;
          uint8_t p = 0;
          uint8_t q = 255 - remainder;
          uint8_t t = remainder;
          uint8_t r = 0;
          uint8_t g = 0;
          uint8_t b = 0;

          switch (region) {
            case 0: r = 255; g = t; b = p; break;
            case 1: r = q; g = 255; b = p; break;
            case 2: r = p; g = 255; b = t; break;
            case 3: r = p; g = q; b = 255; break;
            case 4: r = t; g = p; b = 255; break;
            default: r = 255; g = p; b = q; break;
          }

          if (id(scroll_led_enabled) && (value_changed || led_toggled)) {
            auto call = id(scroll_rgb_led).turn_on();
            call.set_rgb(r / 255.0f, g / 255.0f, b / 255.0f);
            call.perform();
          }

          if (value_changed) {
            ESP_LOGD("unit_scroll_demo", "Encoder %u -> RGB(%u, %u, %u), RGB LED %s", value, r, g, b,
                     id(scroll_led_enabled) ? "on" : "off");
            last_value = value;
            has_last_value = true;
}Sensor Configuration
Add the Sensor component to publish the encoder value to Home Assistant.
sensor:
  - platform: template
    id: scroll_encoder_value
    name: "Encoder Value"
    icon: mdi:rotate-right
    accuracy_decimals: 0
update_interval: neverMain parameter descriptions:
| Parameter | Value | Description |
|---|---|---|
platform | template | Uses a template sensor to receive the encoder value published in the Lambda. |
id | scroll_encoder_value | Used by the Lambda to publish state. |
name | Encoder Value | Entity name displayed in Home Assistant. |
update_interval | never | Does not poll automatically; actively updated by the Lambda in interval. |
Output Configuration
Add the Output component to expose the three RGB channels of Unit Scroll as outputs.
output:
  - platform: unit_scroll
    id: scroll_rgb_red_output
    unit_scroll_id: my_scroll
    channel: rgb_red

  - platform: unit_scroll
    id: scroll_rgb_green_output
    unit_scroll_id: my_scroll
    channel: rgb_green

  - platform: unit_scroll
    id: scroll_rgb_blue_output
    unit_scroll_id: my_scroll
channel: rgb_blueLight Configuration
Add the Light component to combine the three RGB outputs into one RGB light entity.
light:
  - platform: rgb
    id: scroll_rgb_led
    name: "RGB LED"
    red: scroll_rgb_red_output
    green: scroll_rgb_green_output
    blue: scroll_rgb_blue_output
    restore_mode: ALWAYS_OFF
default_transition_length: 0sCompile Firmware
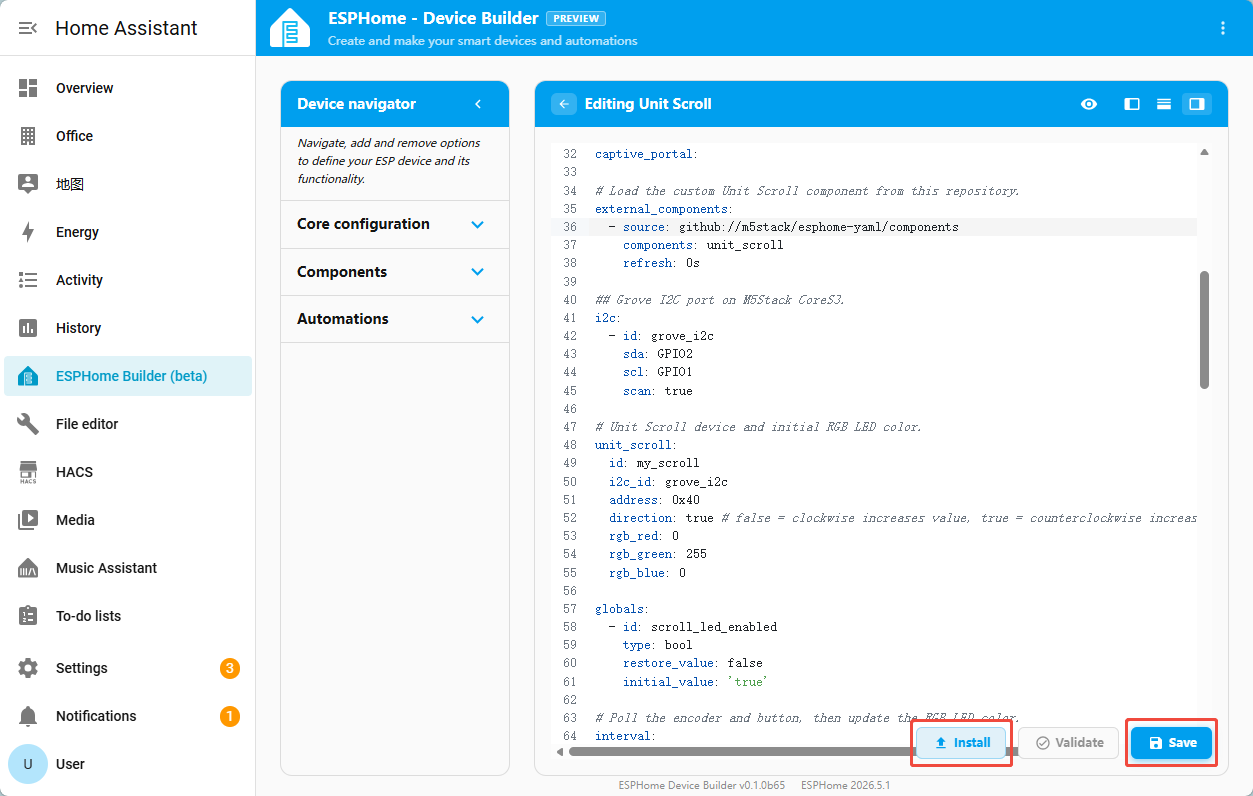
- After completing the YAML modifications, click
Savein the lower-right corner to save the configuration, then clickInstall.
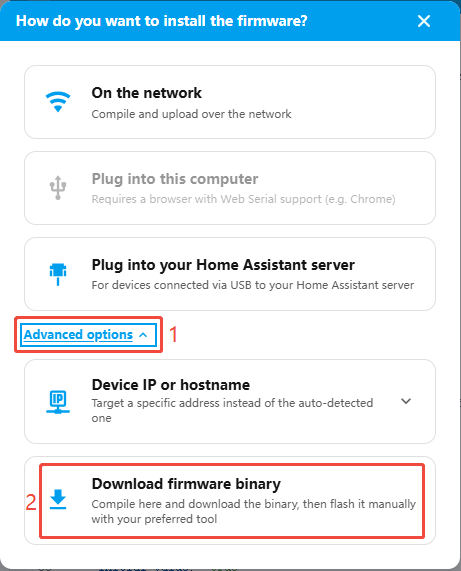
- In the pop-up window, expand
Advanced options, then clickDownload firmware binary.
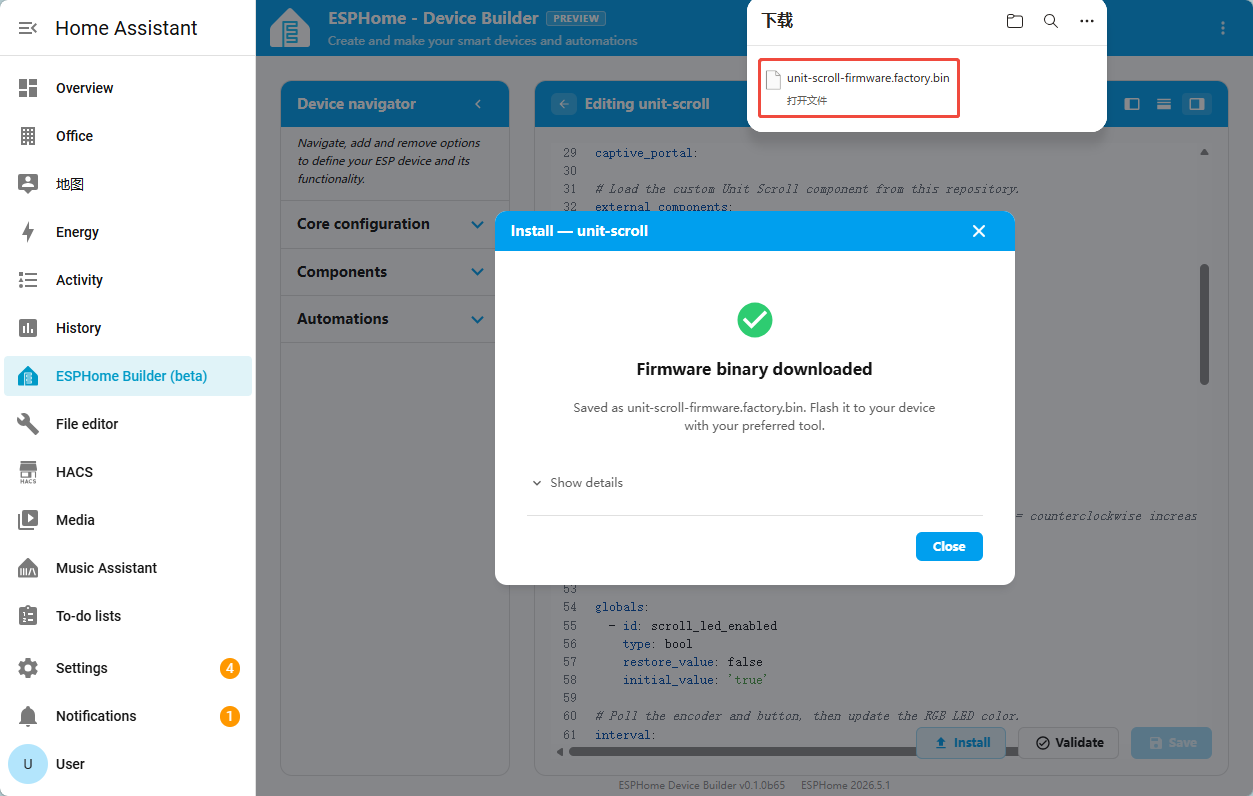
- Wait for the firmware compilation to complete. The firmware will be automatically saved locally.
Flash Firmware
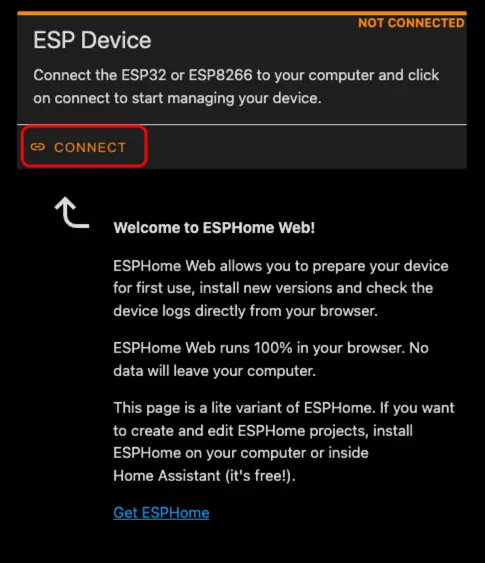
- Connect CoreS3 to the computer using a USB Type-C cable. Open ESPHome Web and click
CONNECT.
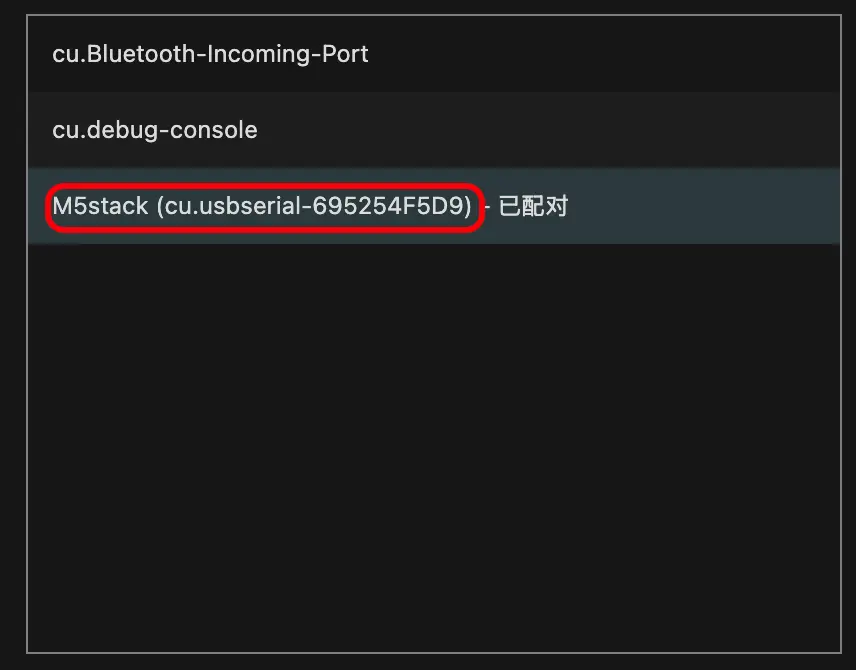
- In the pop-up serial port selection window, select the correct serial port.
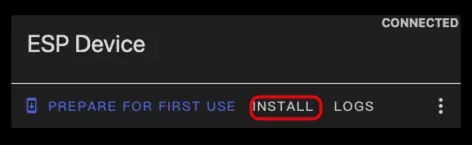
- Click
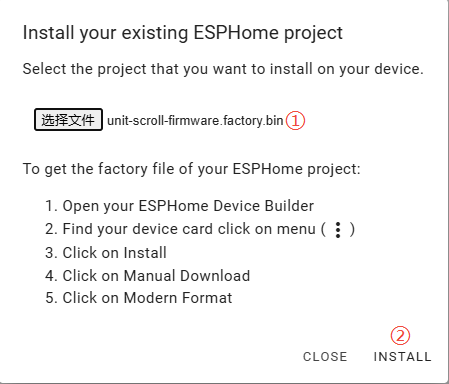
INSTALL.
- Select the firmware file downloaded in step 3 of the firmware compilation process and start flashing.
3. Getting Started
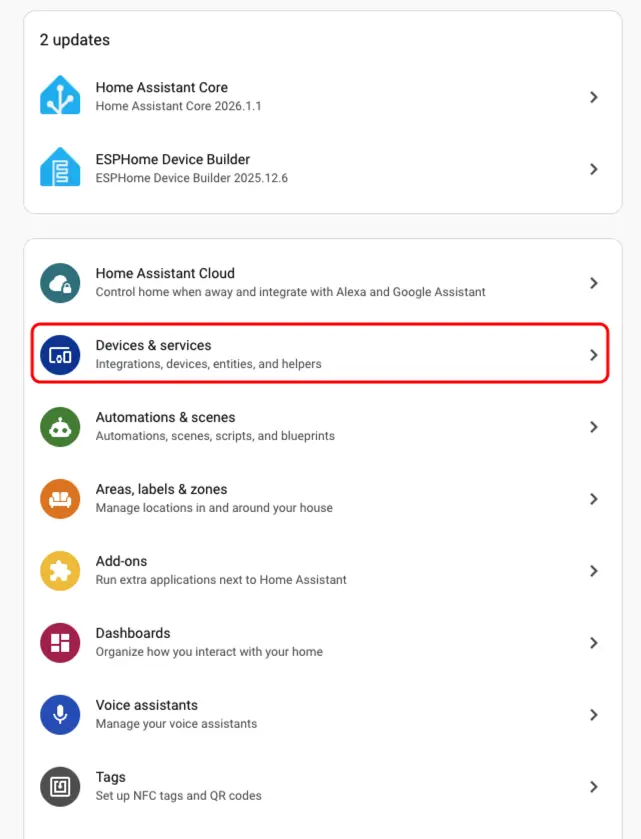
- In Home Assistant, click
Settings>Devices & Servicesin order to enter the integration management page.
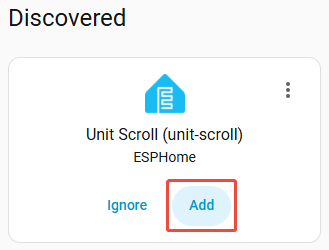
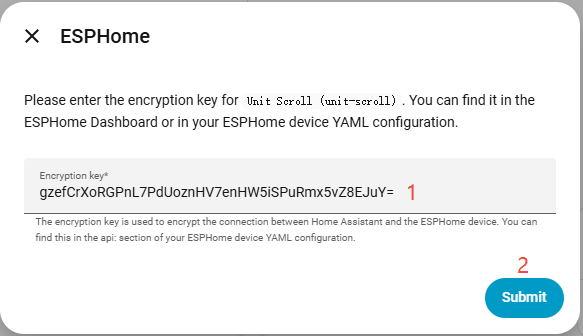
- Find the Unit Scroll device in the
Discoveredarea, clickAdd, then enter the Encryption Key from the YAML configuration and clickSubmit.
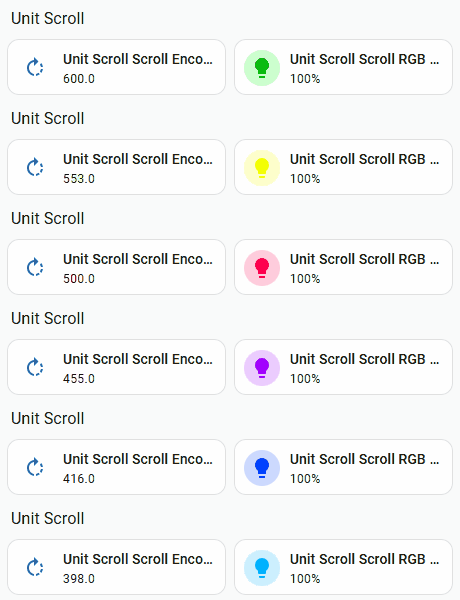
- After the device is added, you can see entities such as the encoder value and RGB LED on the device details page, along with their real-time states.
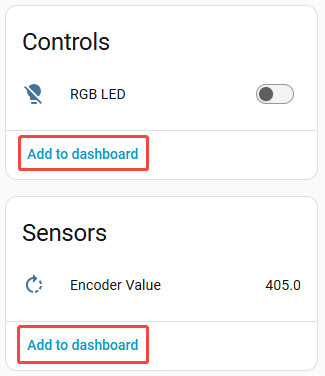
- Finally, add these entities to the dashboard to view the encoder value in real time and control the RGB LED of Unit Scroll.