


Home Assistant
Media Player
Expansion
Sensor
One-Click Flashing of ESPHome Factory Firmware
Starting with ESPHome version 2026.3.0, we have released pre-compiled ESPHome firmware for a wide range of devices, enabling one-click flashing via the ESPHome web tool. This guide uses the Atom EchoS3R voice assistant firmware as an example for demonstration. Firmware names and selection interfaces vary slightly across different devices, while the general workflow for network configuration and device addition remains consistent.
Preparation
Before proceeding with the firmware flashing process, please prepare the following items and environment in advance:
- The corresponding M5Stack device model
- A USB Type-C data cable (not a power-only cable)
- A browser that supports the
WebSerialAPI:Google ChromeorMicrosoft Edgeis recommended - Install the appropriate USB serial port driver on your computer (e.g., CH9102; install as needed based on the serial chip used in your device)
Firmware Flashing
- Connect your device to your computer using a USB Type‑C cable and put the device into download mode.
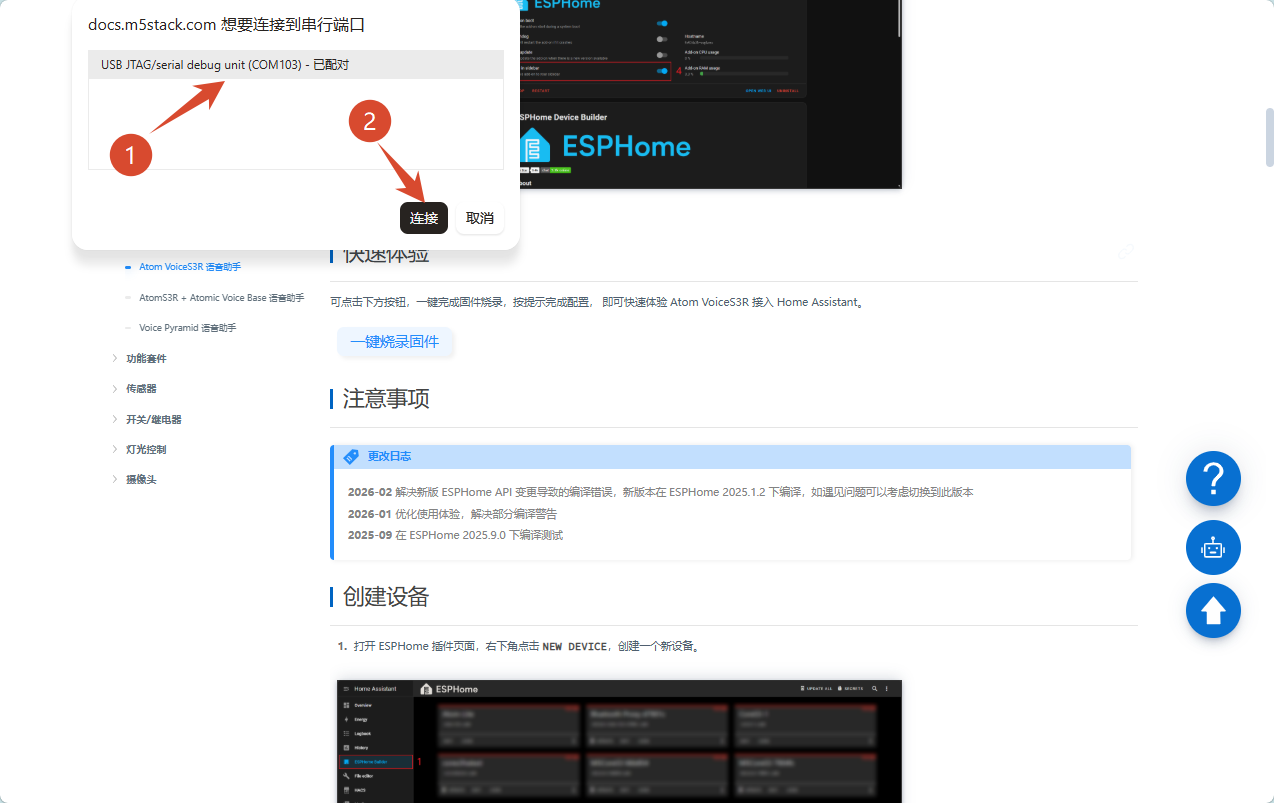
- Click the One-Click Firmware Flash button and select the corresponding serial port to establish a connection; if multiple devices are connected, ensure you select the target device.

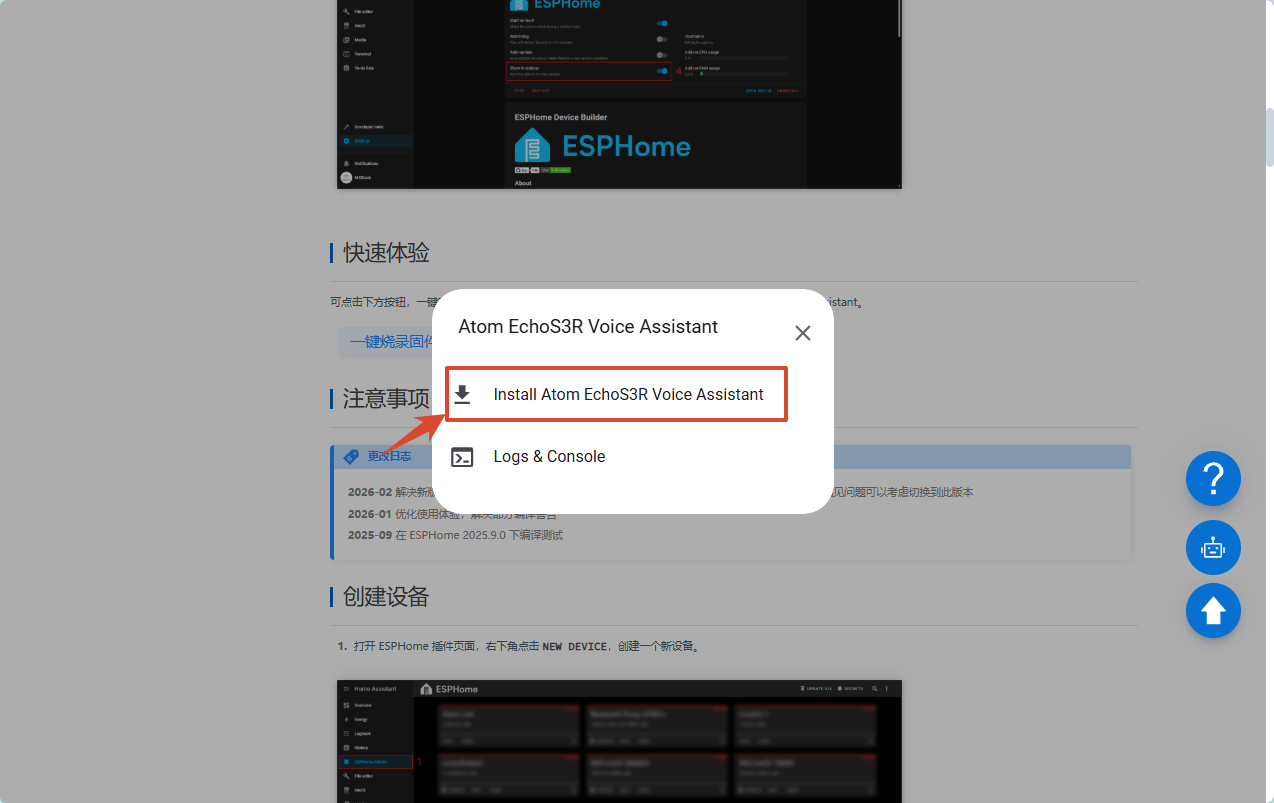
- After the device is successfully connected, click the install option.
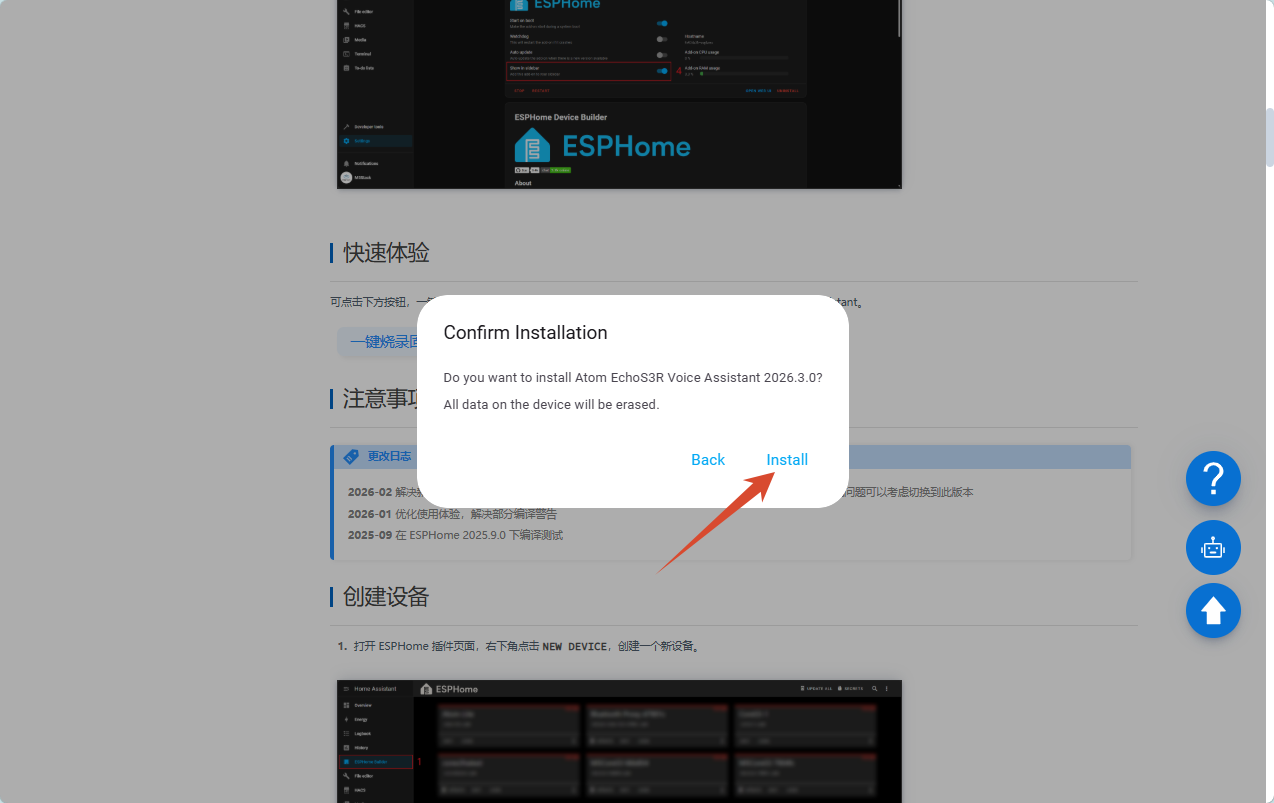
- Verify the firmware and device information, then click
Installto start flashing once confirmed correct.
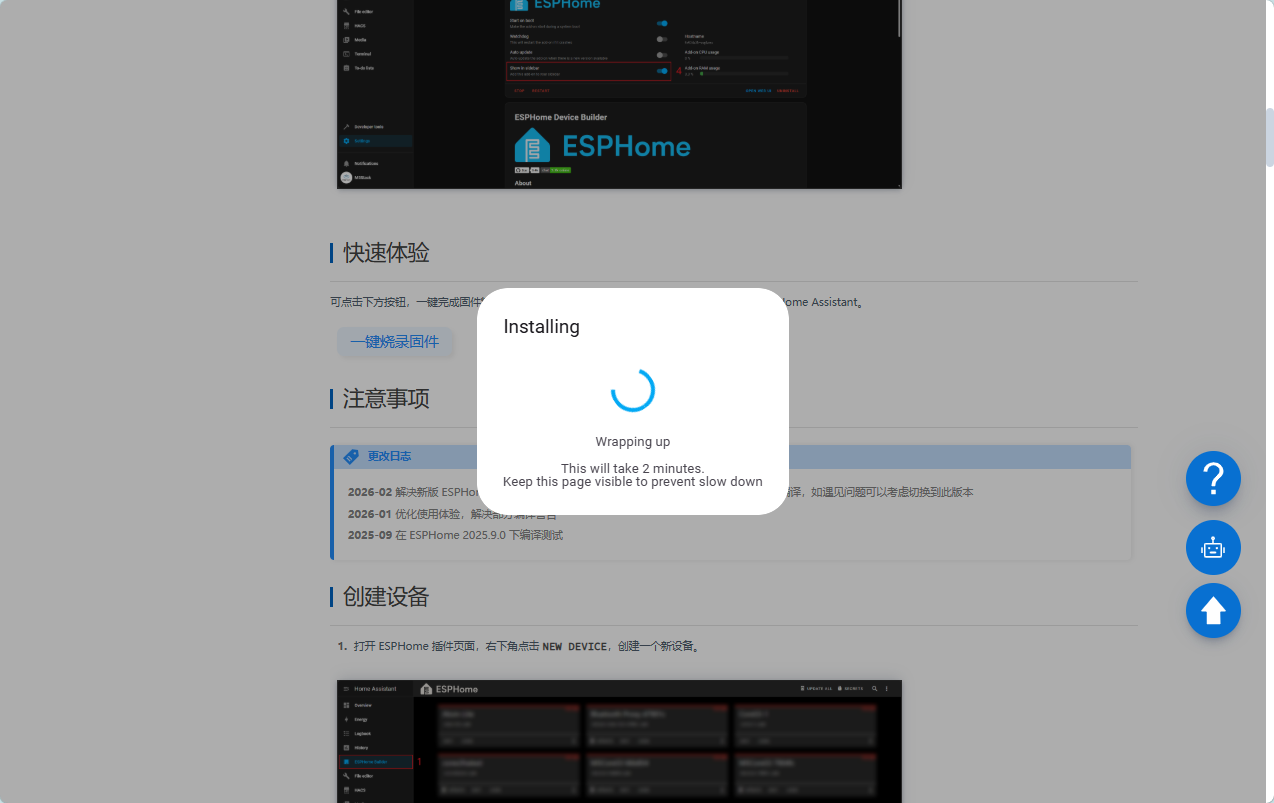
Wait for the firmware to download automatically and complete the flashing process.
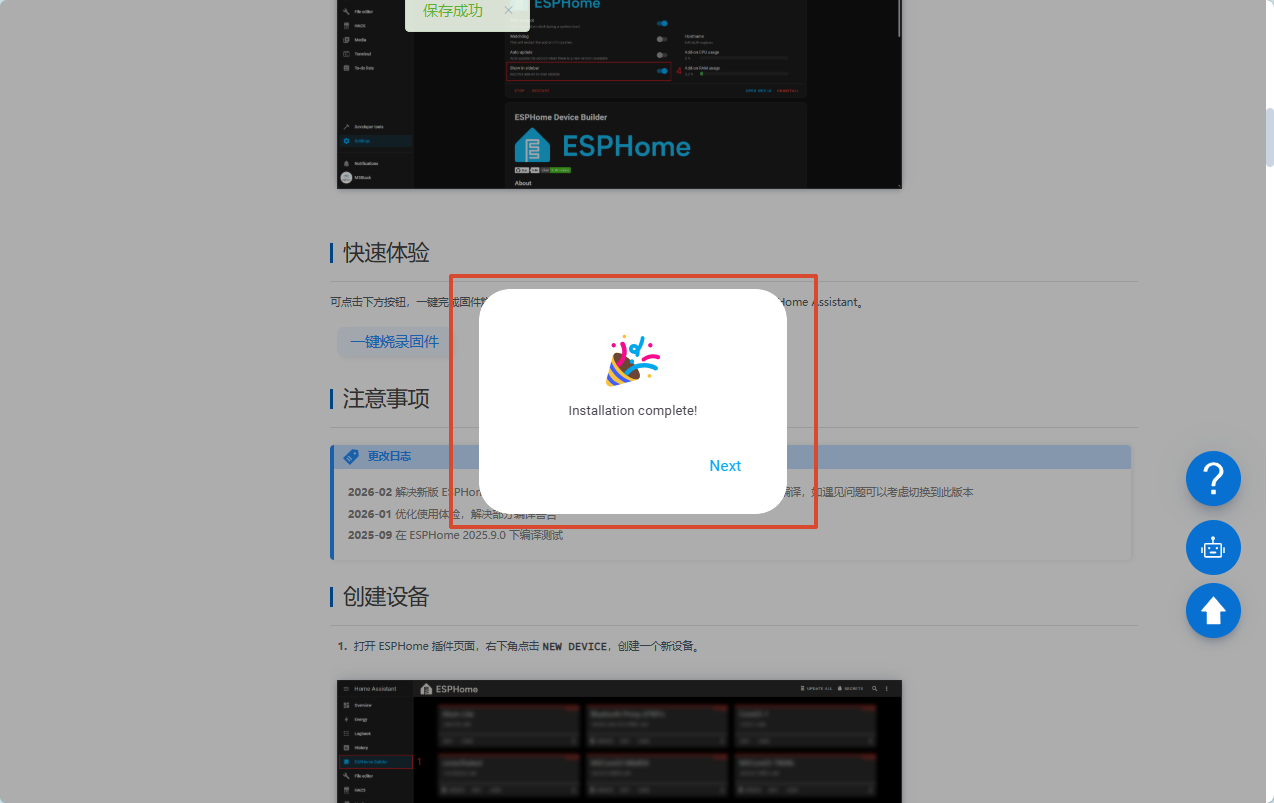
- Upon completion of flashing, some devices will reset automatically and directly enter the serial network configuration process. If the device does not restart automatically, perform a manual reset as needed.
Network Configuration
This step configures Wi‑Fi credentials for the device to connect to your wireless network normally.
Tip: This procedure does not apply to devices with default wired network access (e.g., PoE cameras). Such devices will obtain an IP address automatically via DHCP once connected to an Ethernet cable. You may skip directly to the "Device Configuration" section to continue adding the device.
Serial Port Network Configuration
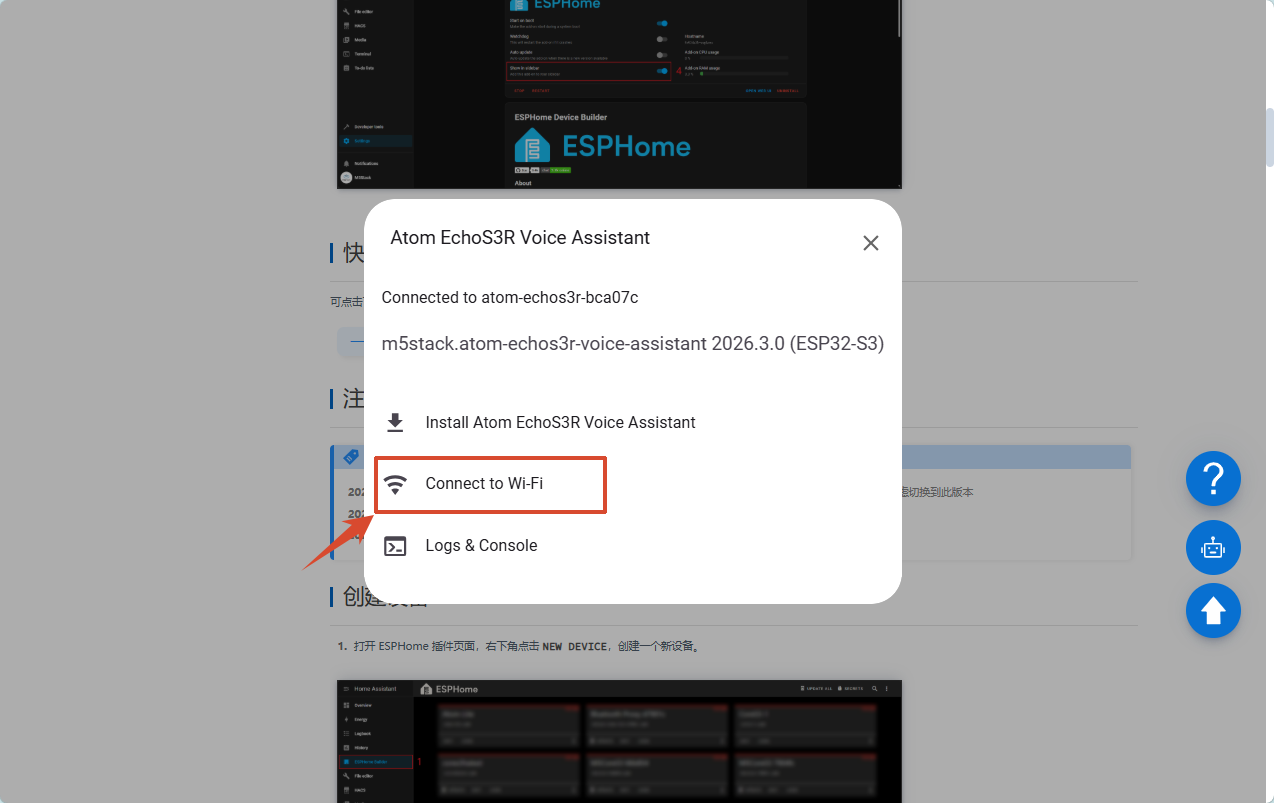
- After firmware flashing and device reset, the device will enable serial network configuration by default. Click the One-Click Firmware Flash button again to reconnect the device.
- In the network configuration options, select Connect to Wi-Fi to enter the network setup interface.
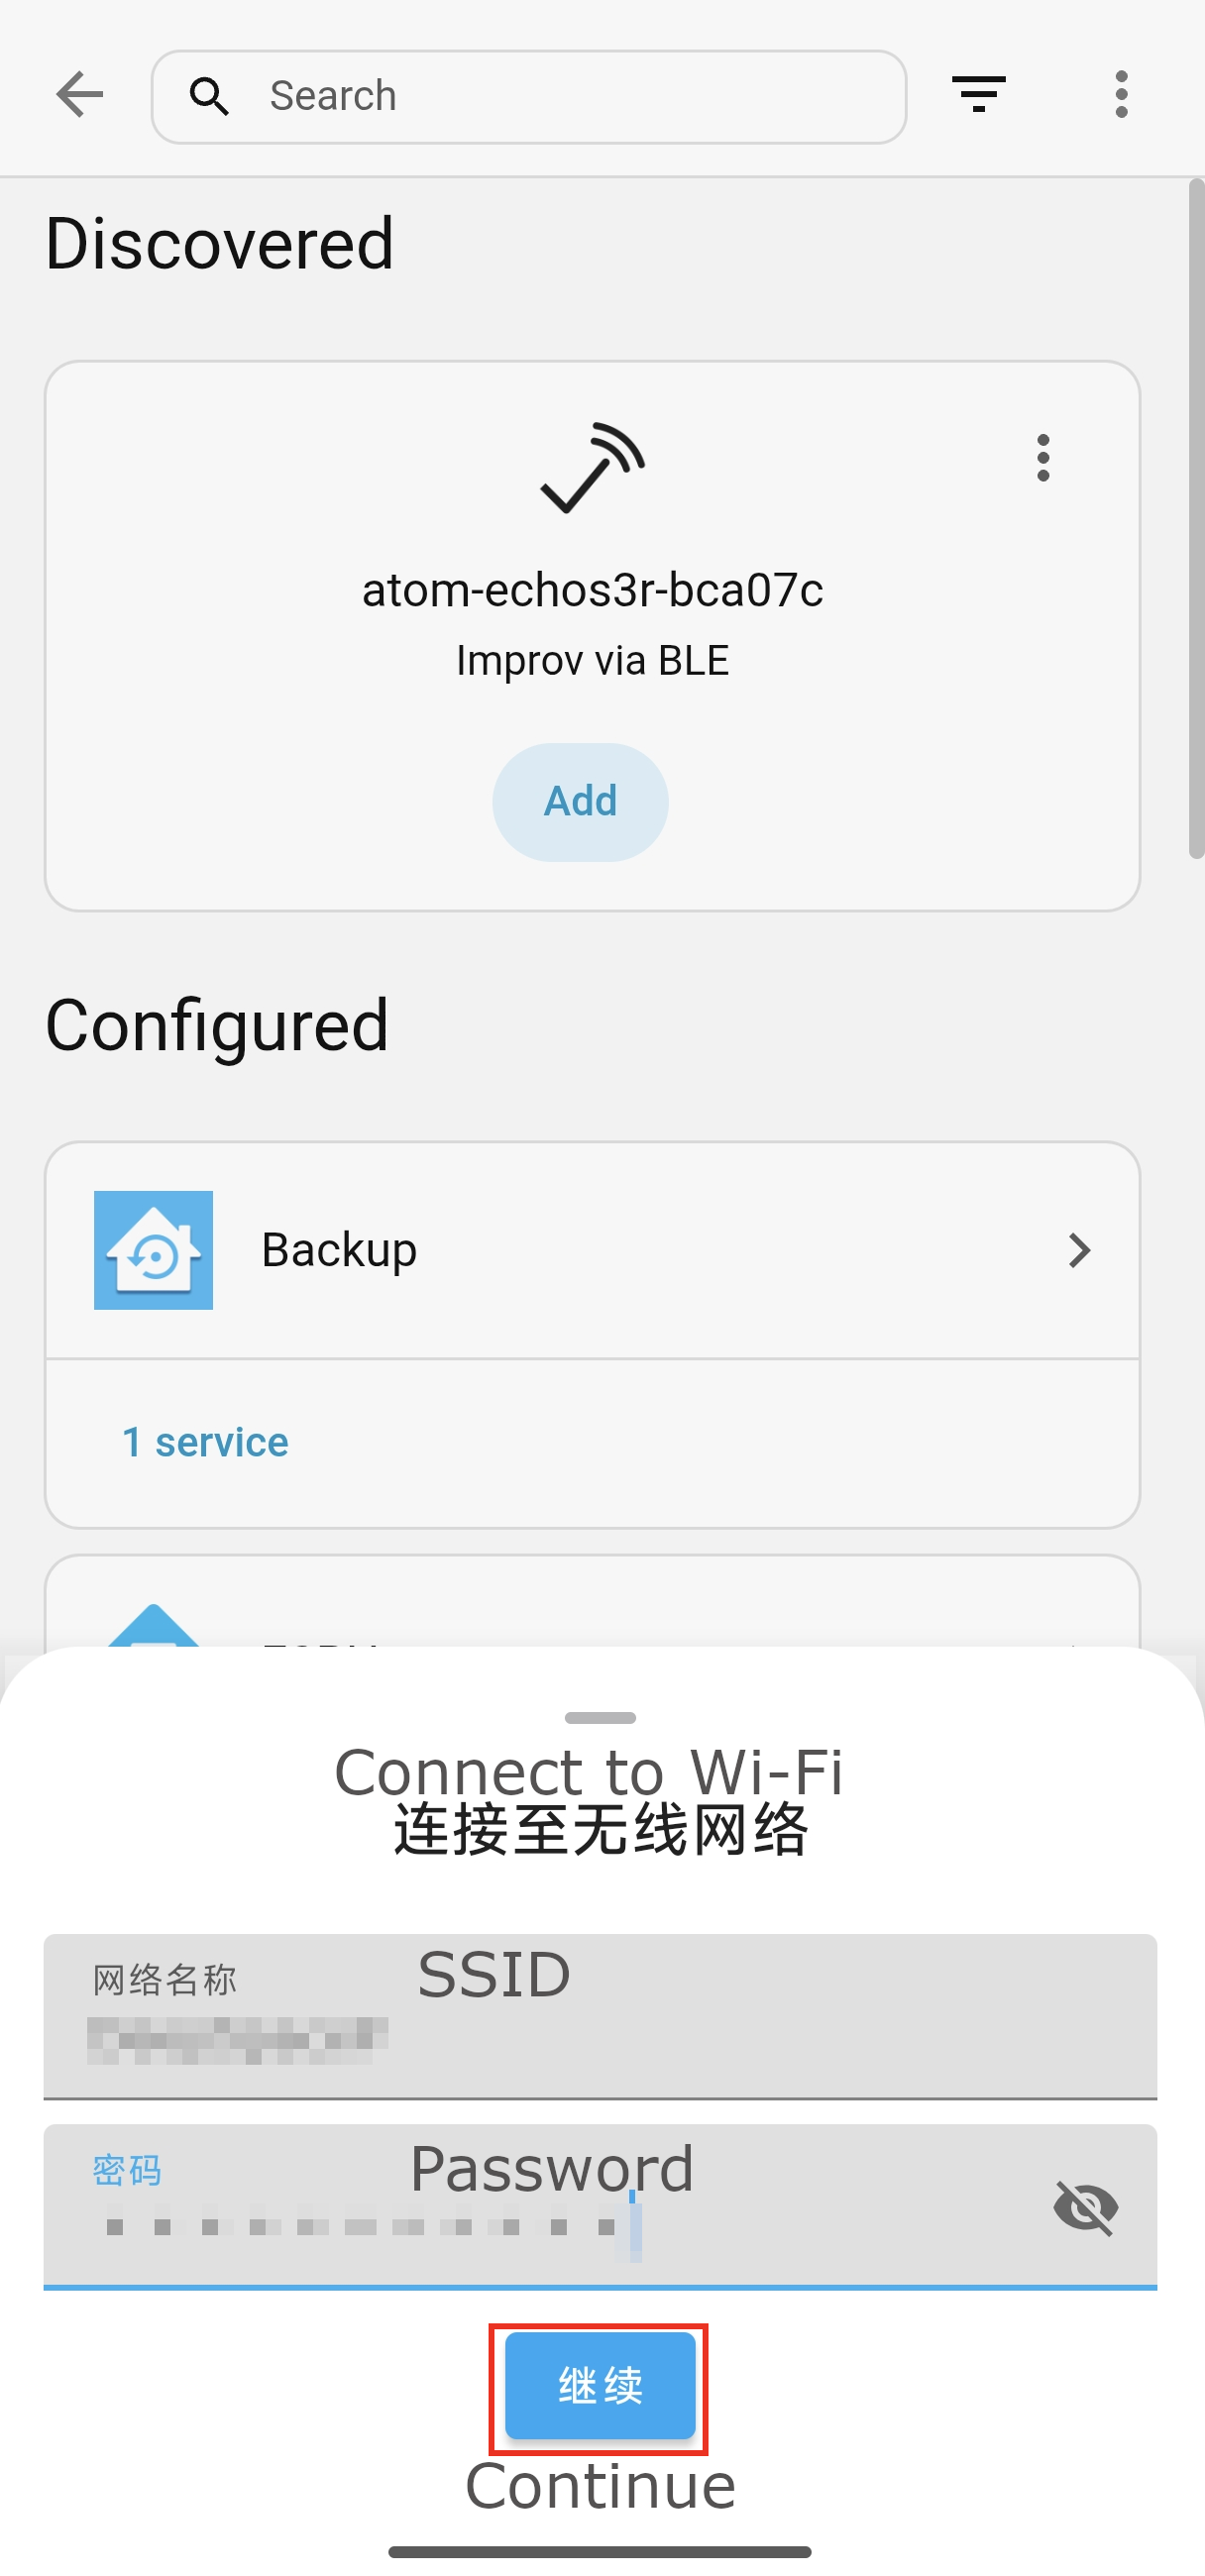
- Select your desired Network Name (SSID), enter the Wi‑Fi password, and click Connect.

- Wait for the network connection to complete until the interface displays a successful connection.

BLE Network Configuration
If you flashed the firmware without using this site’s WebSerial tool (e.g., via Web ESPHome), the network configuration interface will not pop up automatically. You can complete network setup by sending Wi‑Fi credentials to the device via mobile Bluetooth.
Notice: Please install the Home Assistant Companion App on your mobile device in advance:
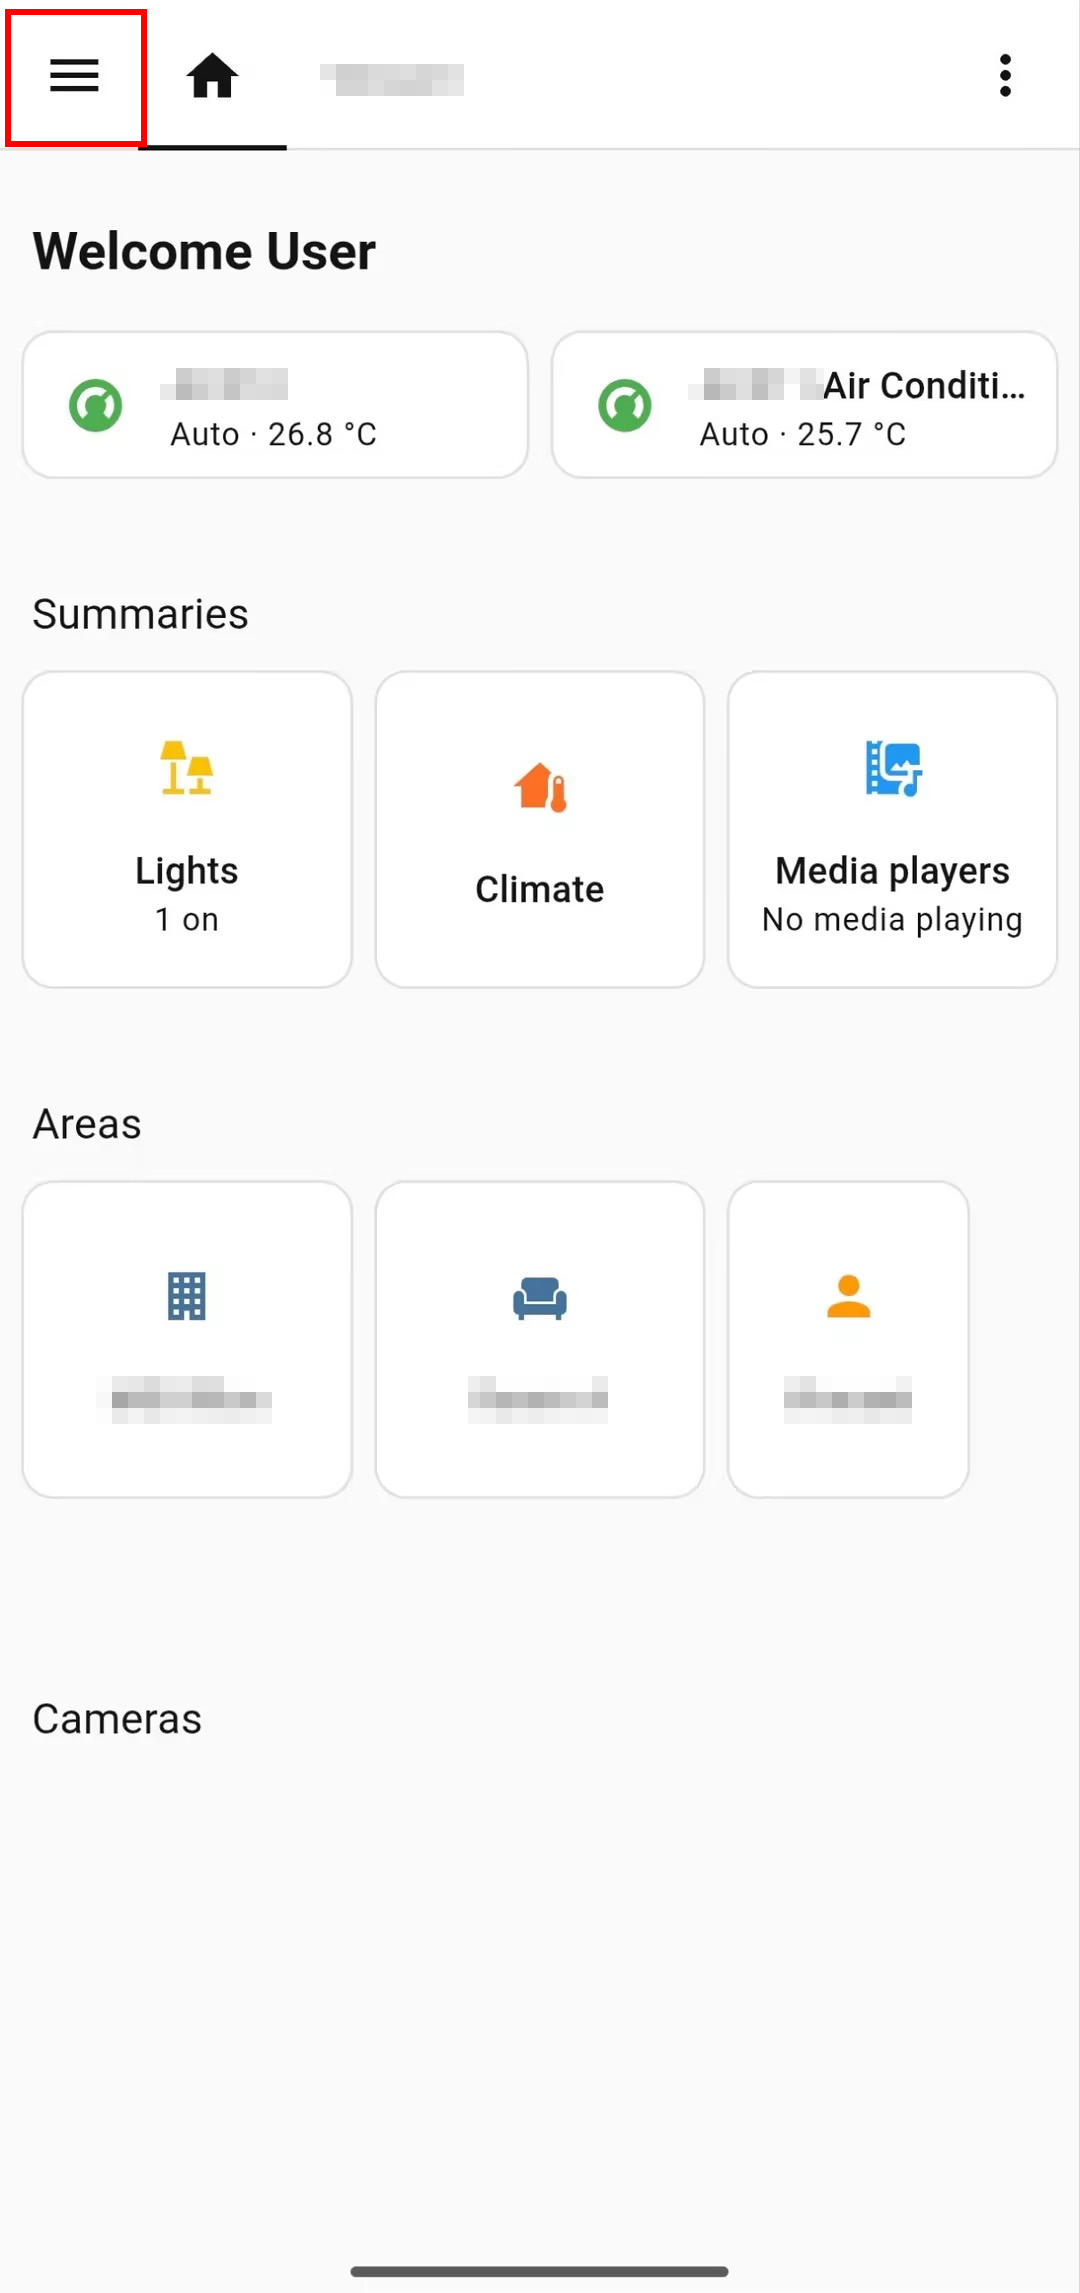
- After firmware flashing, enable Bluetooth on your phone and launch the Home Assistant Companion App.
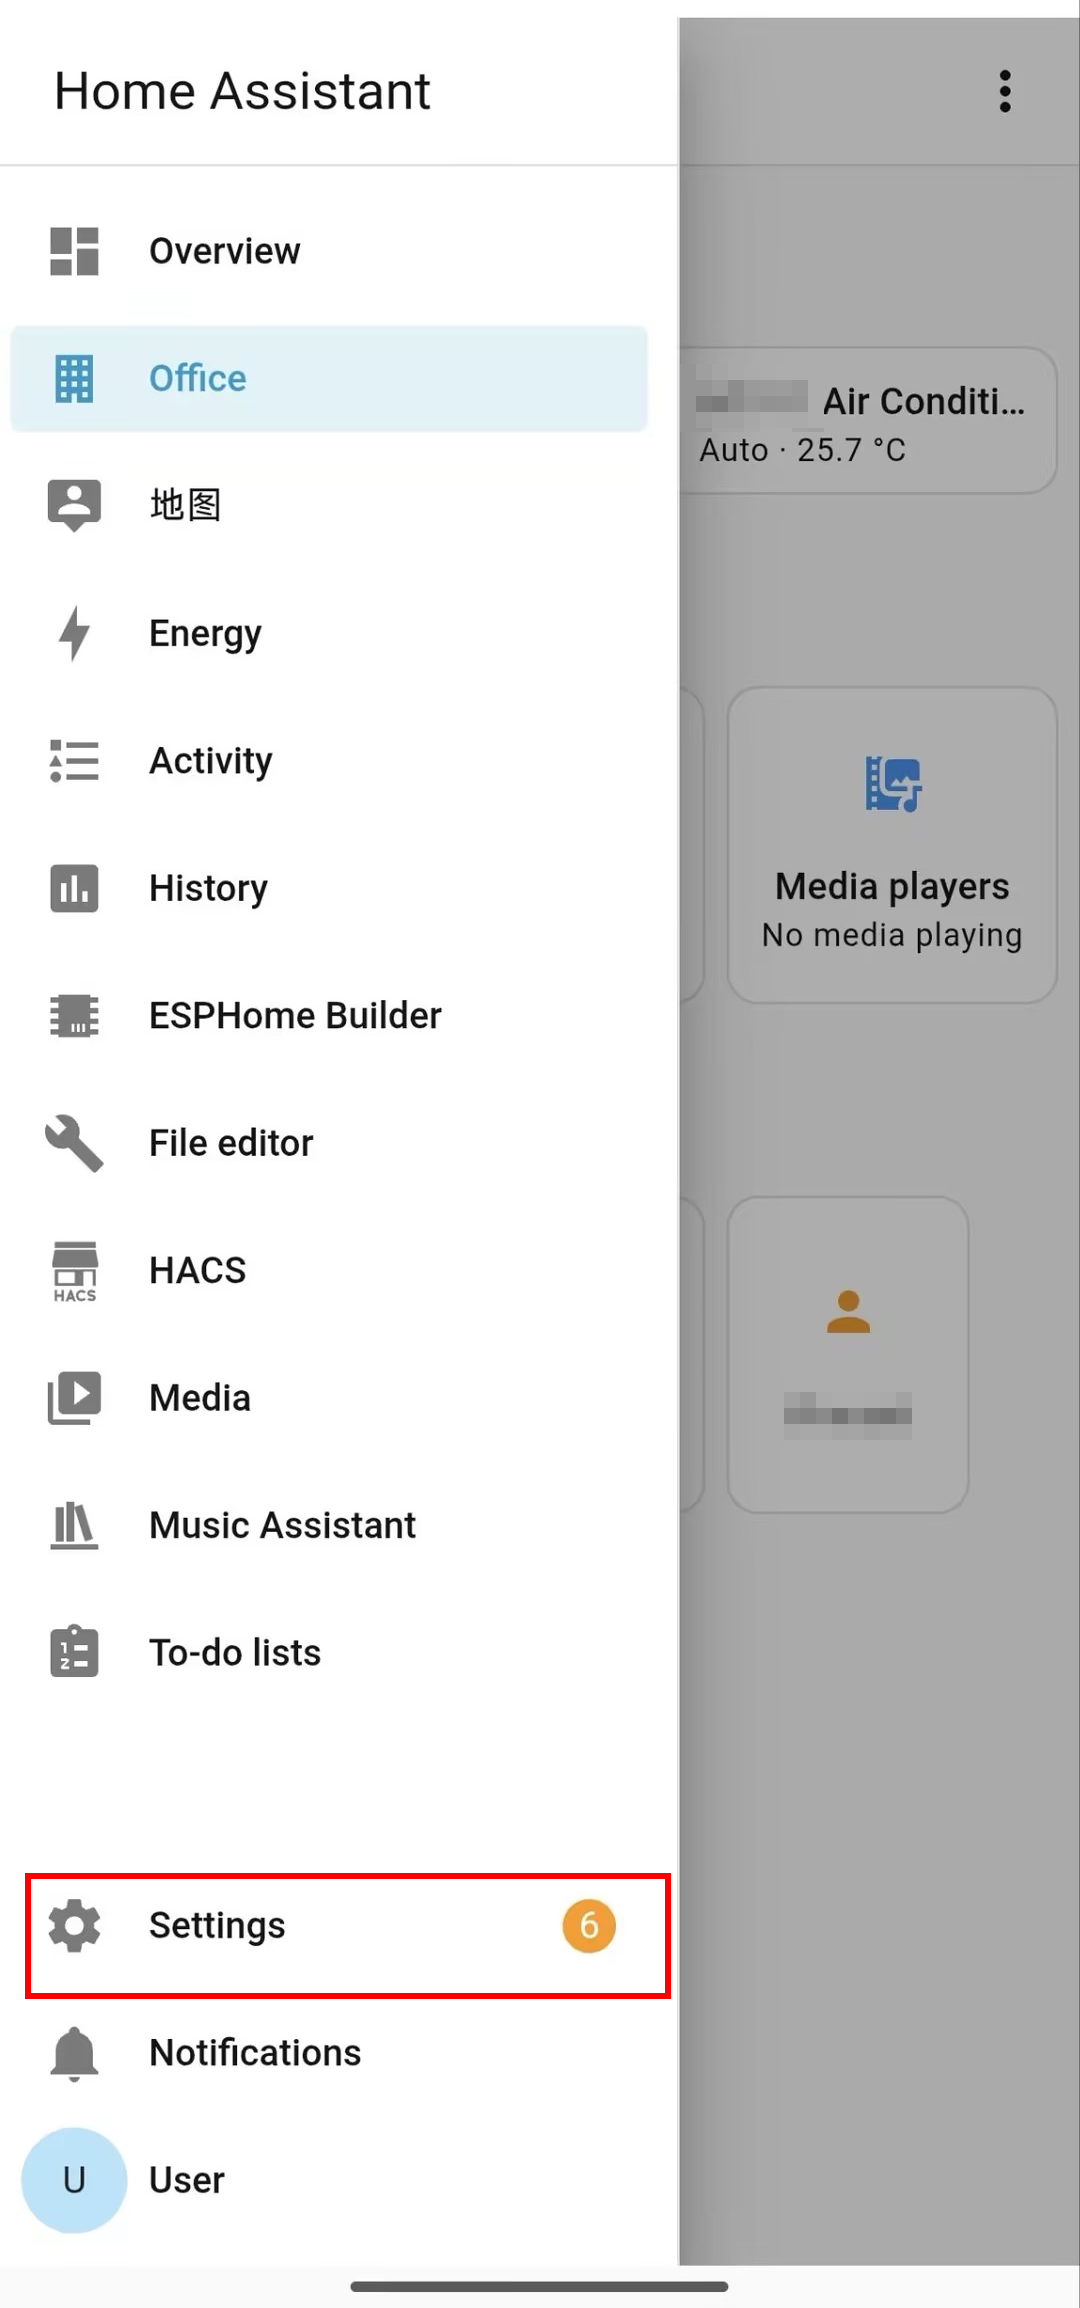
- Navigate within the app:
Settings > Devices & services.
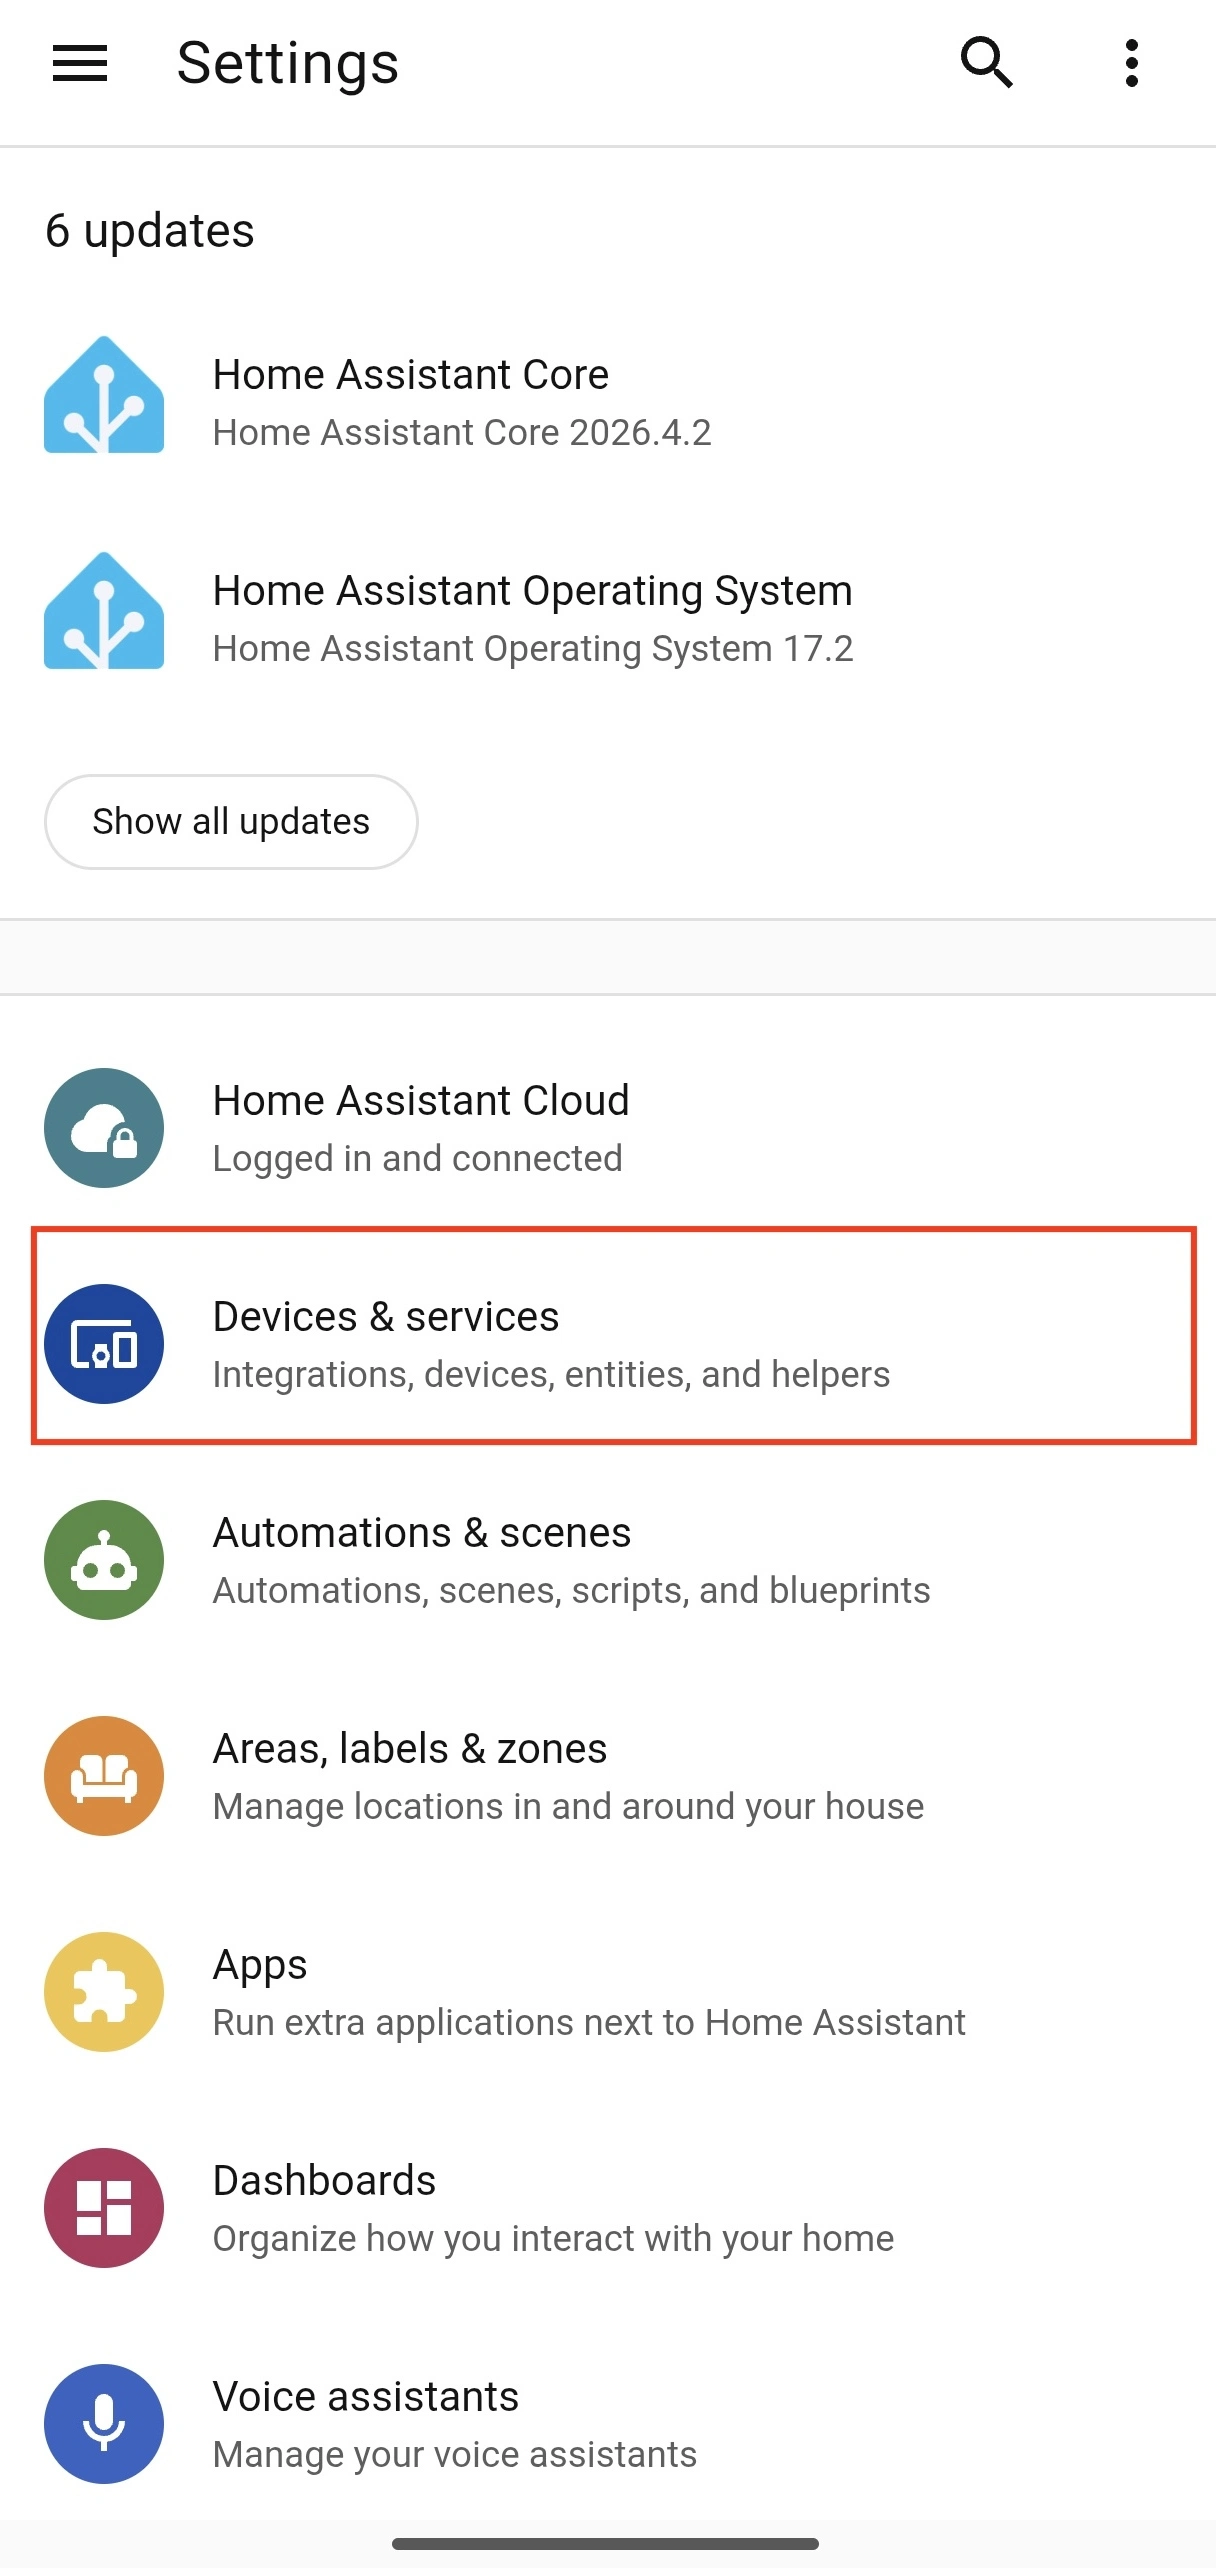
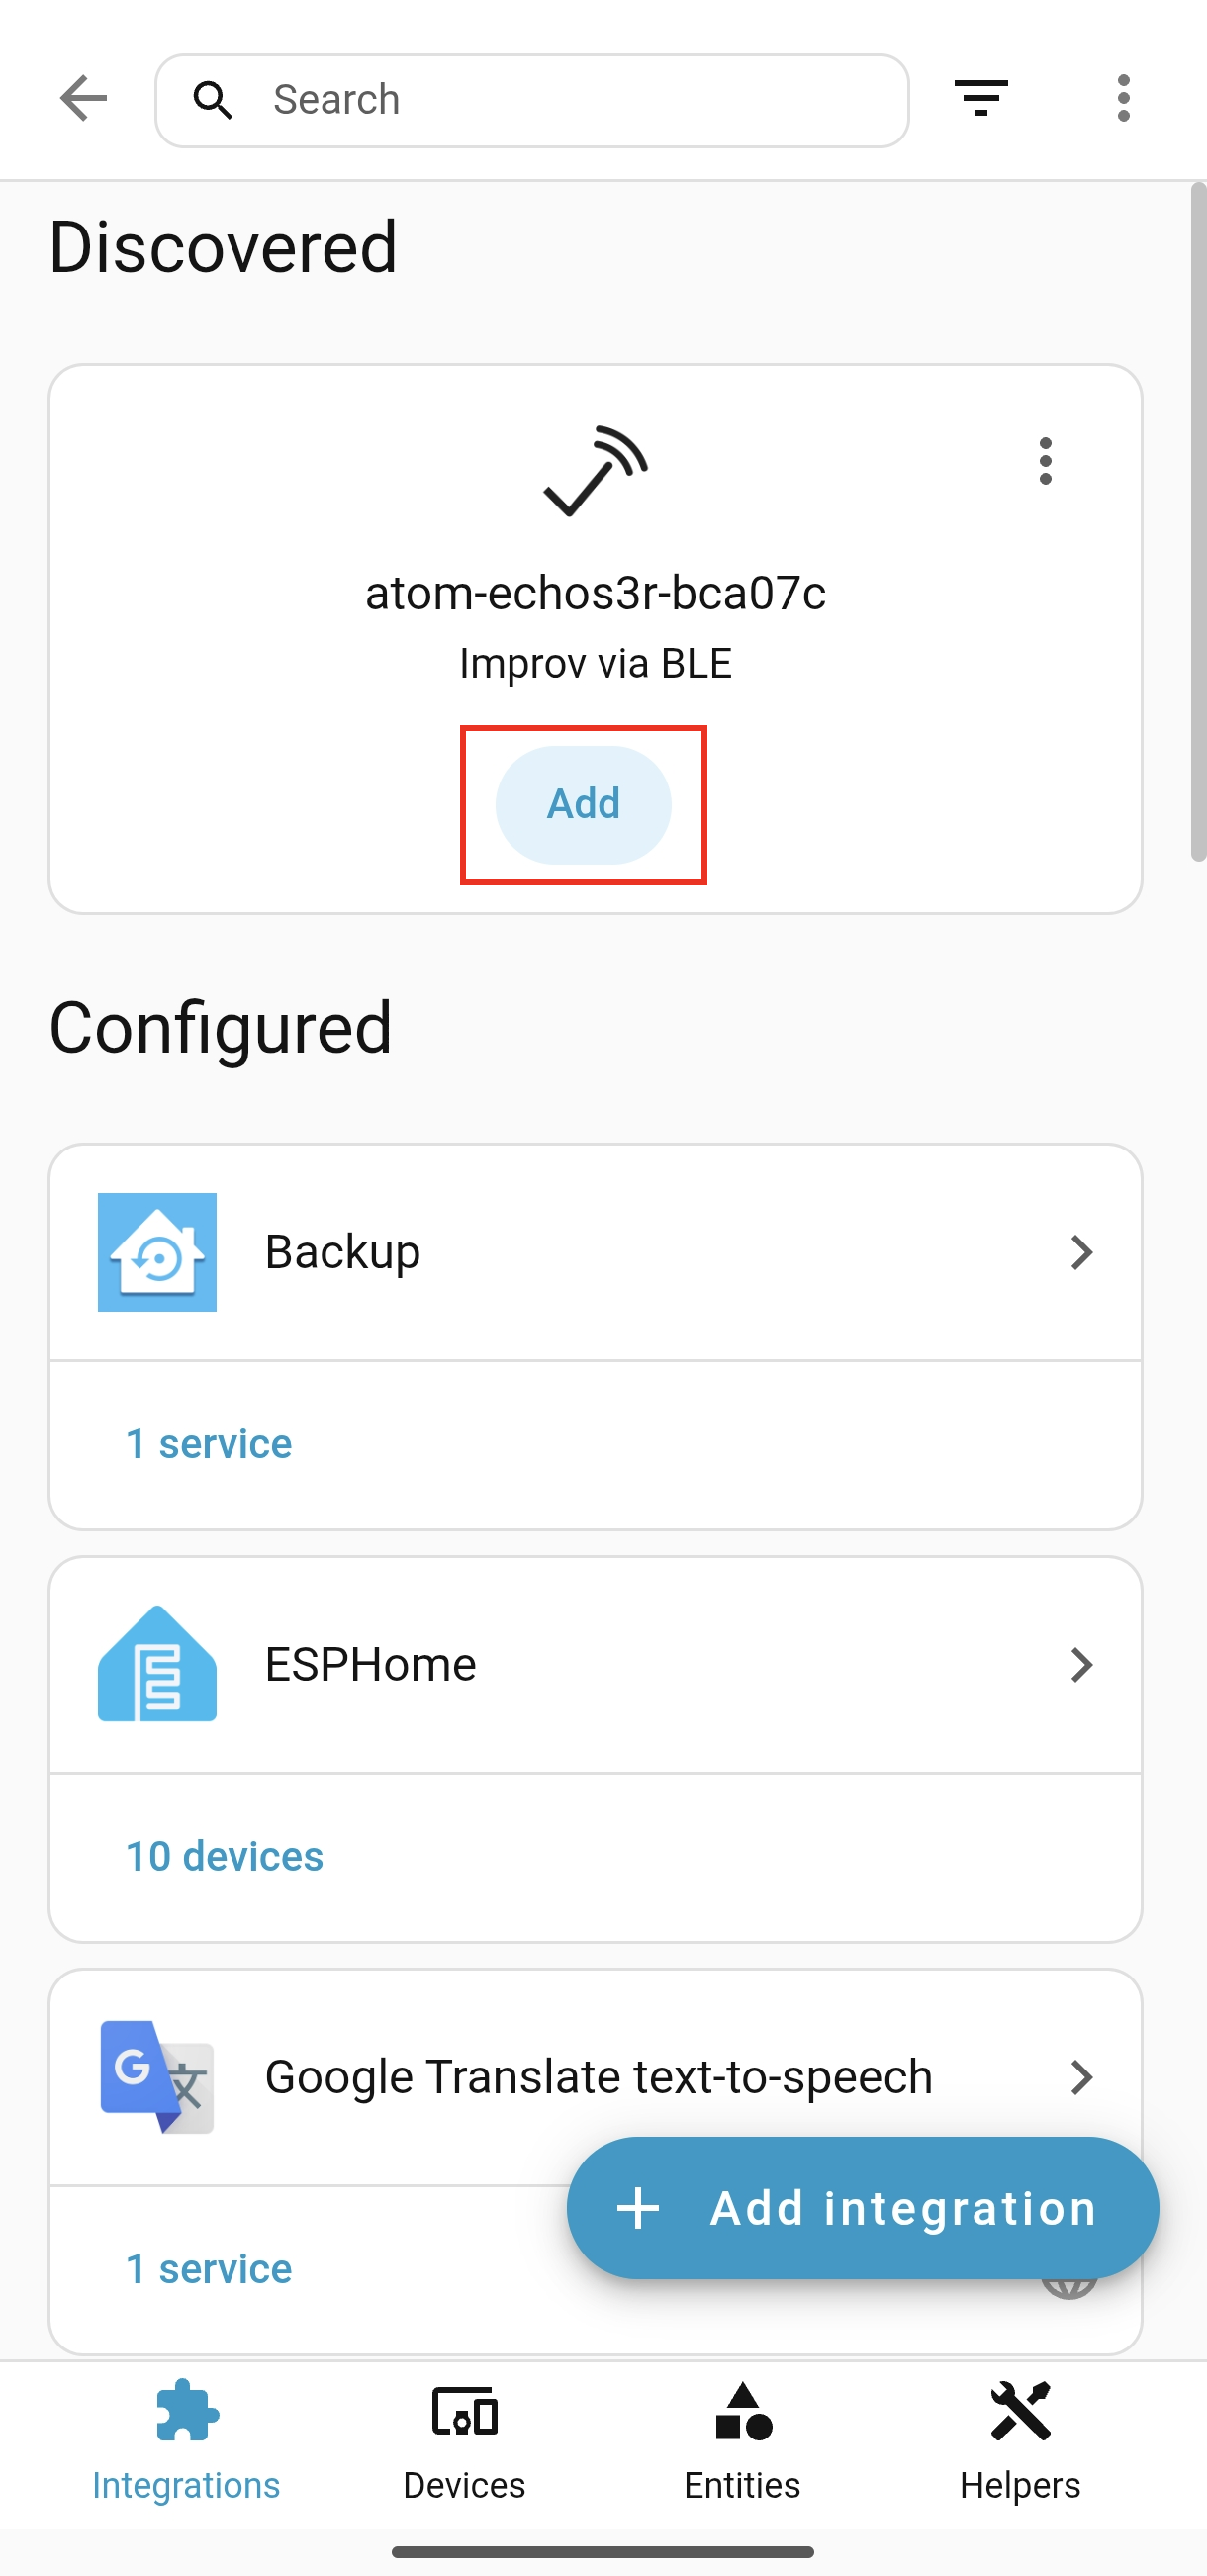
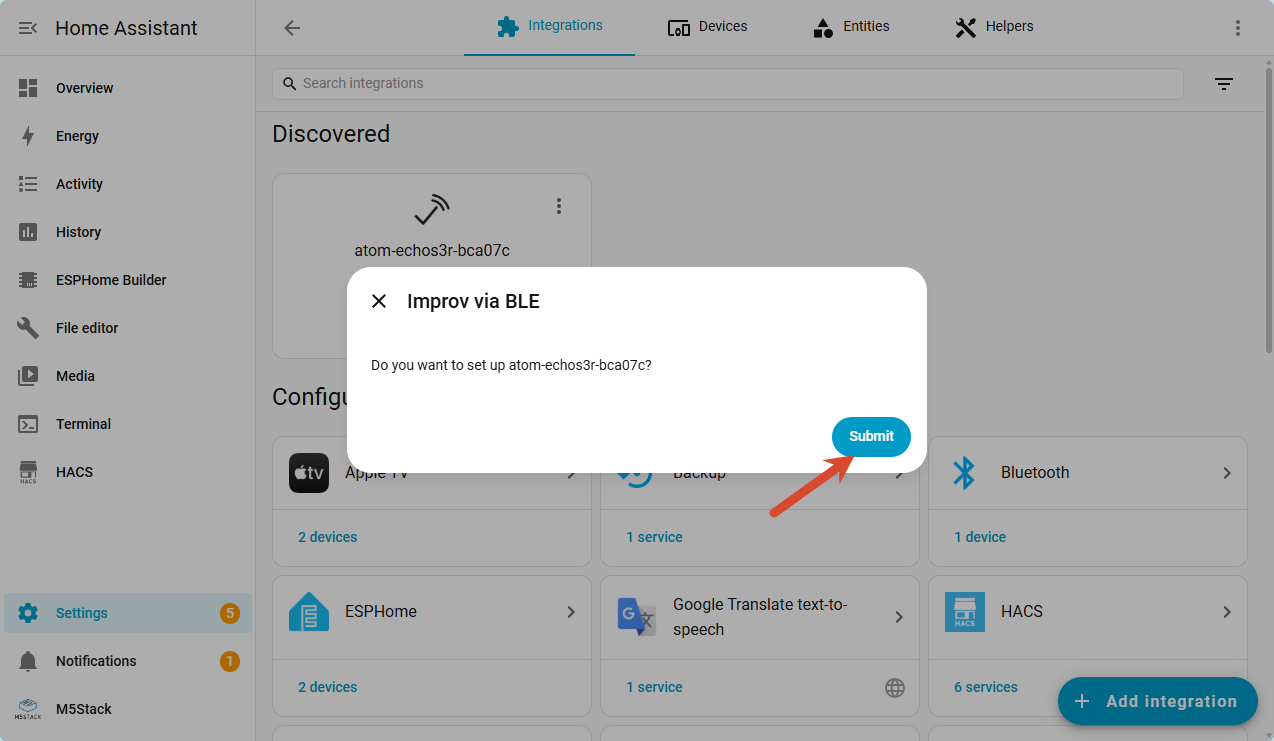
- Locate the pending device on the
Discoverypage, clickAdd, and enter your Wi‑Fi information following the on-screen prompts.

- Wait for the device to connect to the network to activate the configuration.
AP Network Configuration
- After flashing is finished, the device will automatically create an open hotspot named in the format:
<Device Name>_<First 6 Digits of MAC Address>.
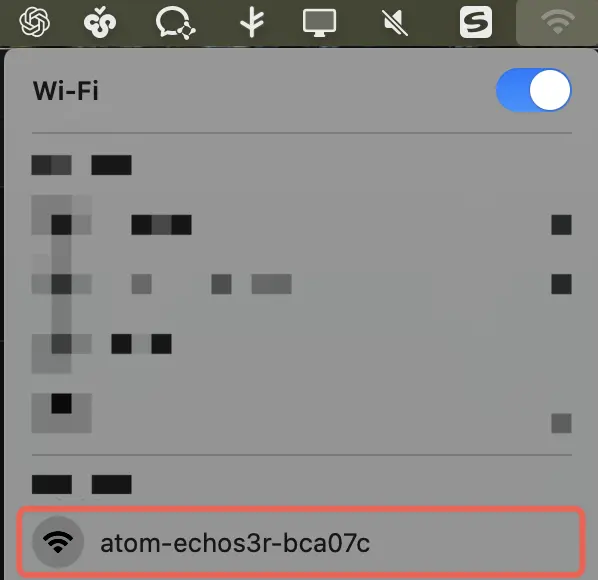
- Connect to this hotspot using your phone or computer; the configuration page will load automatically. If auto-redirection fails, manually visit:
http://192.168.4.1in your browser.
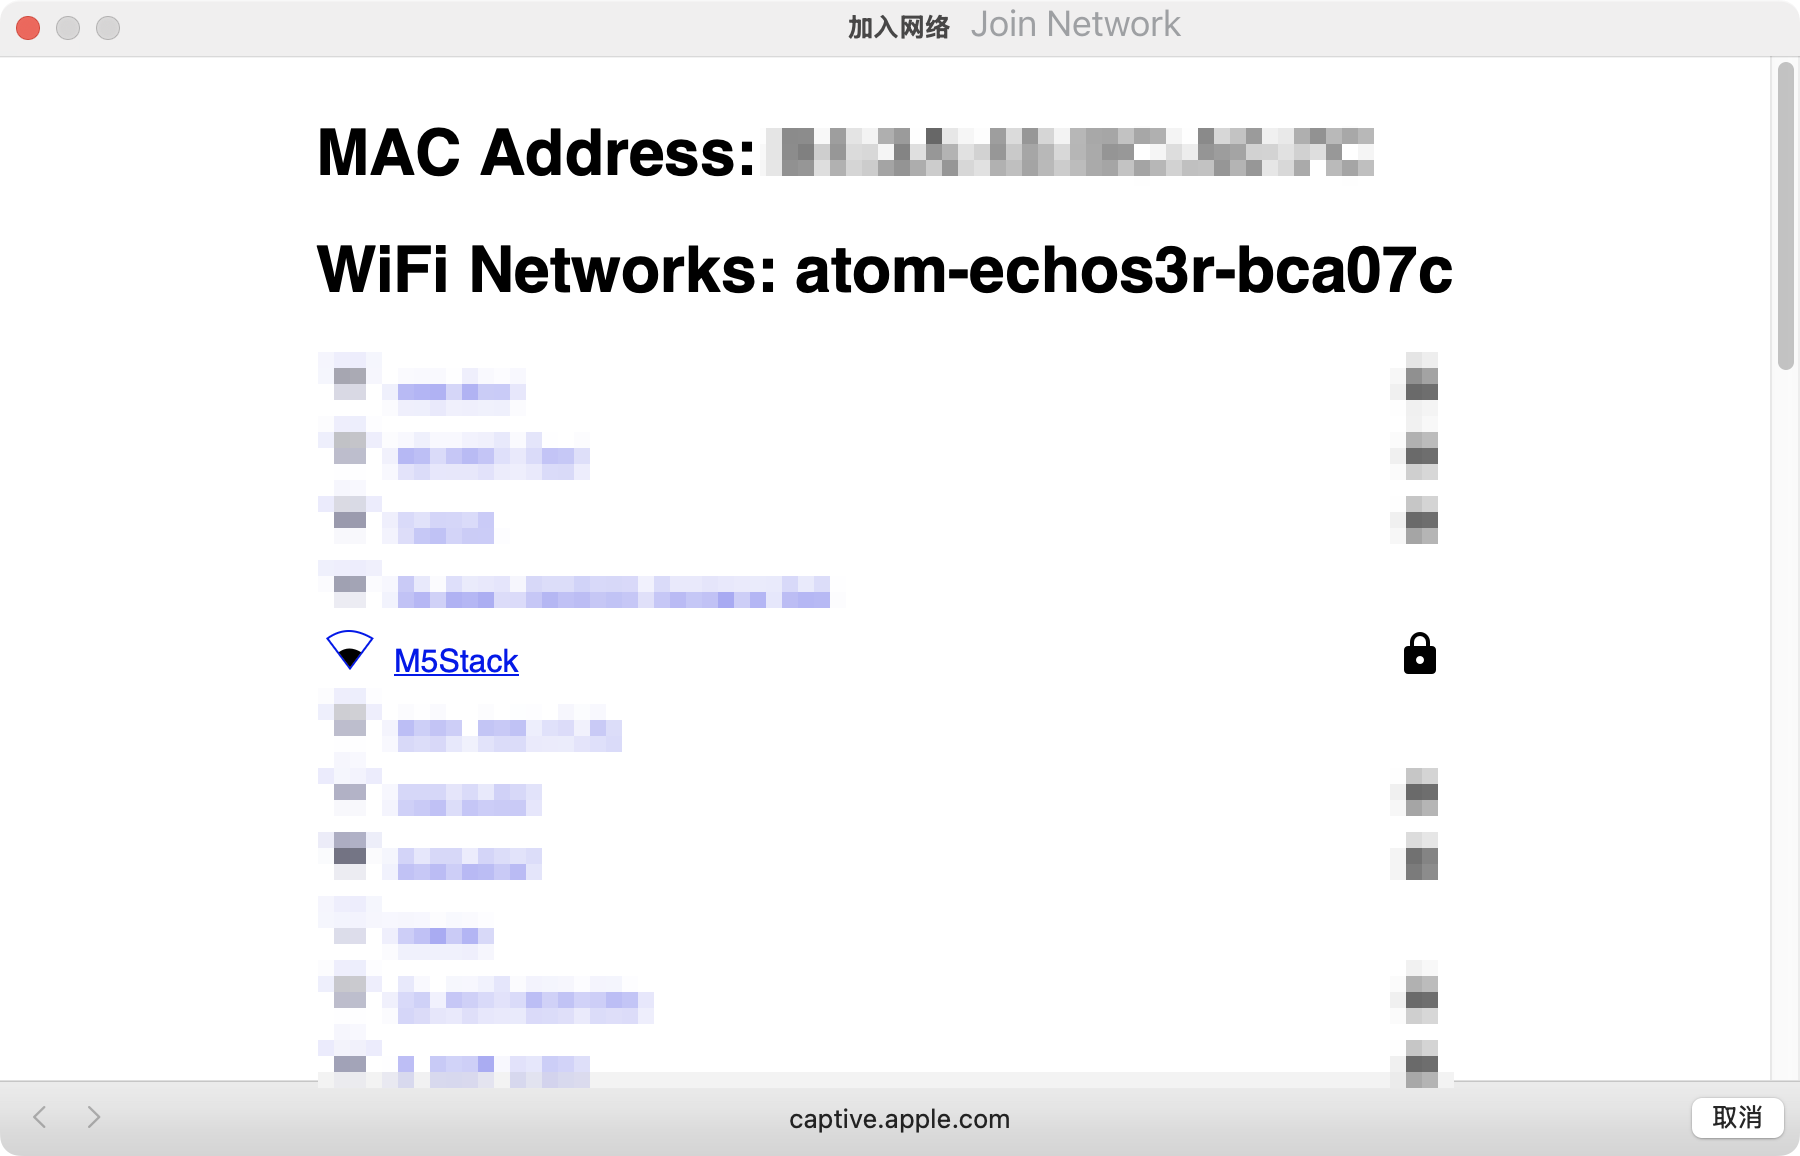
- On the configuration page, select your target Wi‑Fi SSID, enter the password, and click Save.
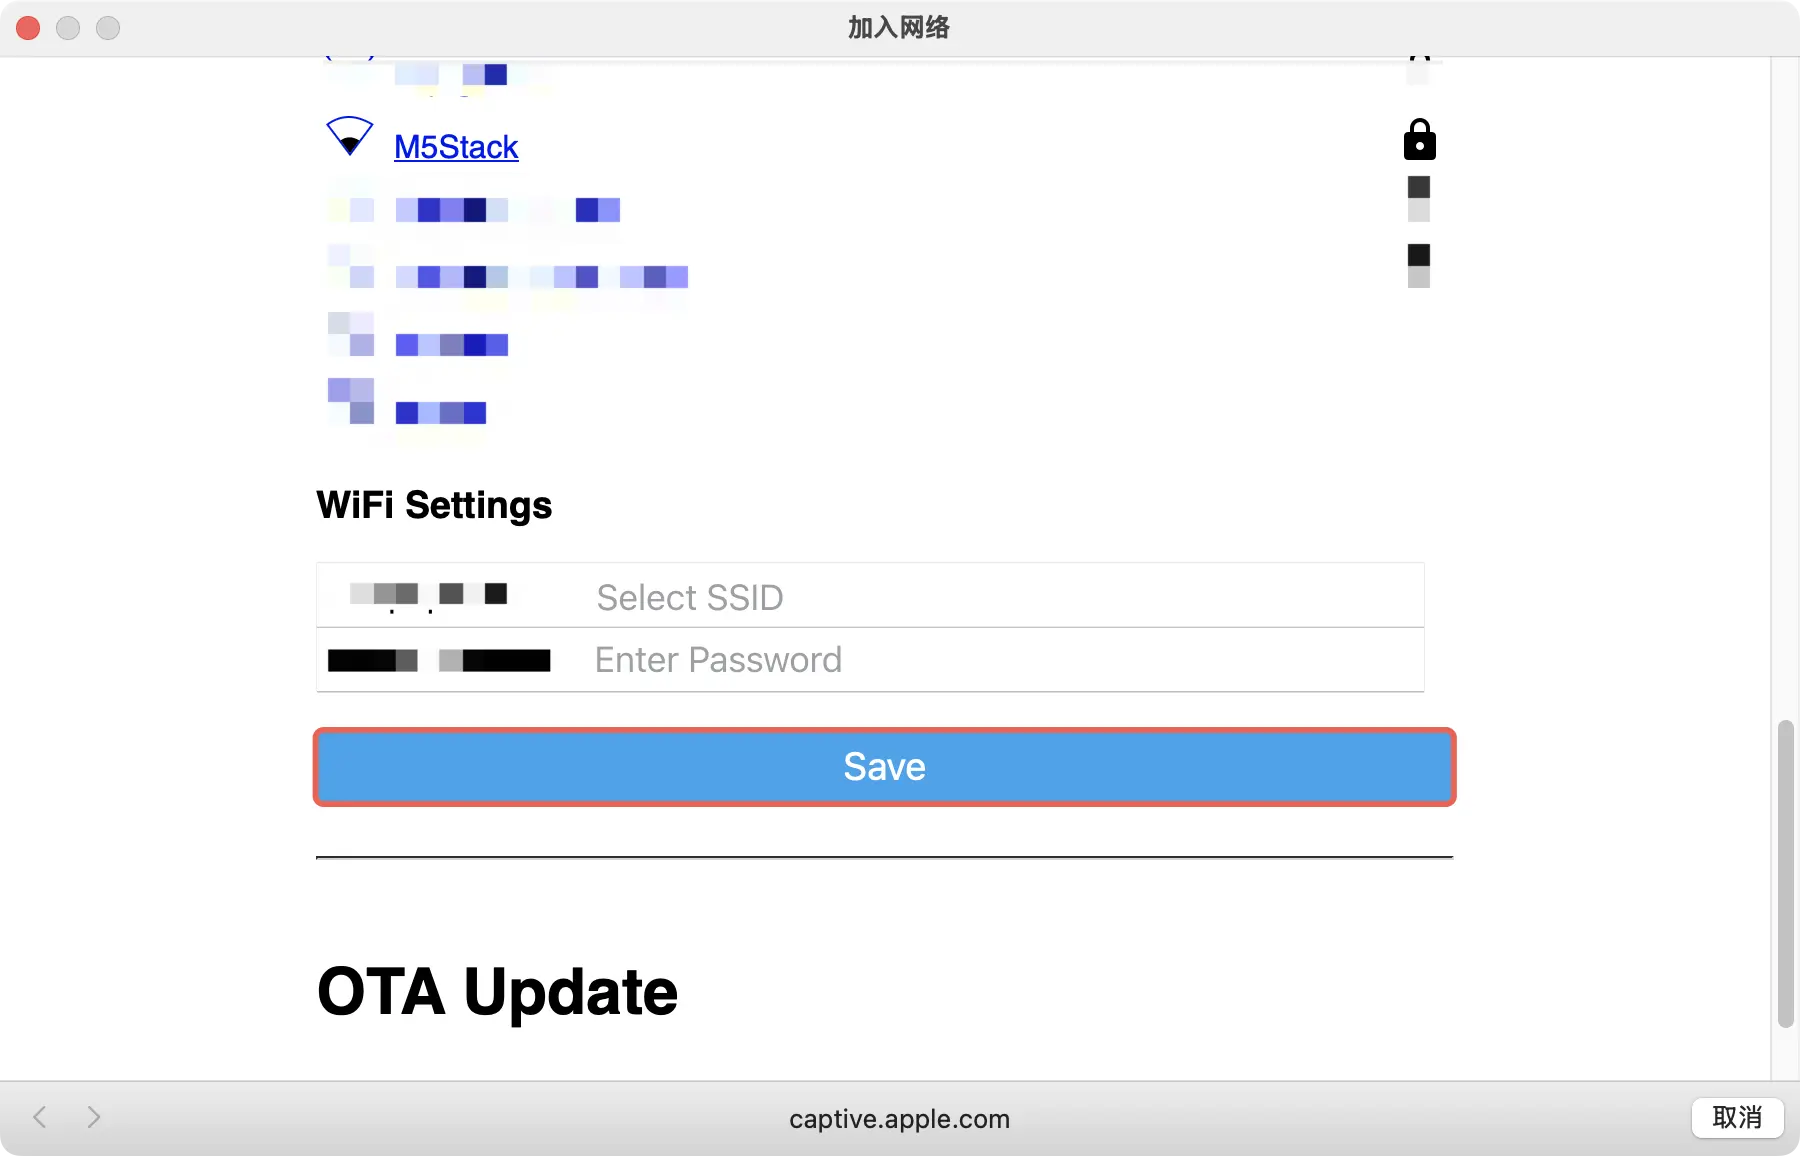
- The configuration takes effect once the device connects to the network and the setup popup closes automatically.
Device Configuration
After completing network setup via any method above, the device will connect to the specified network automatically.
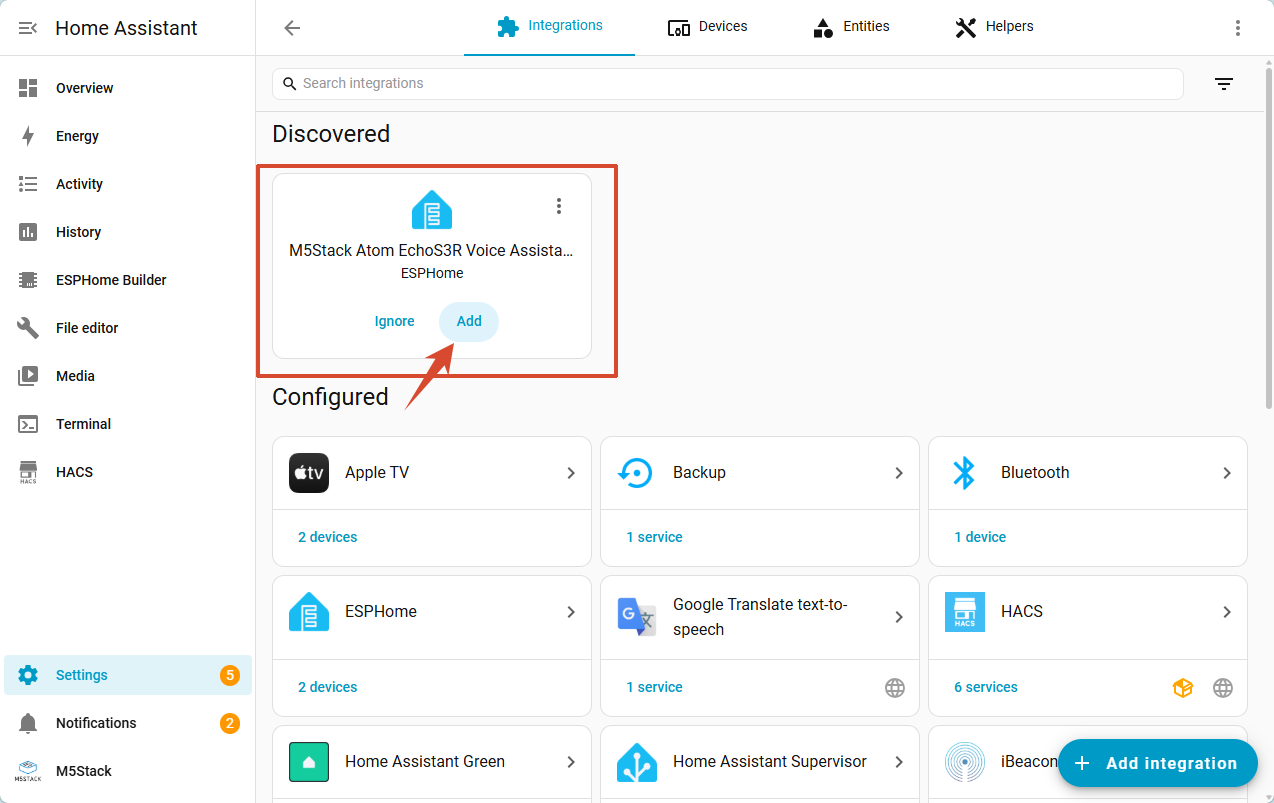
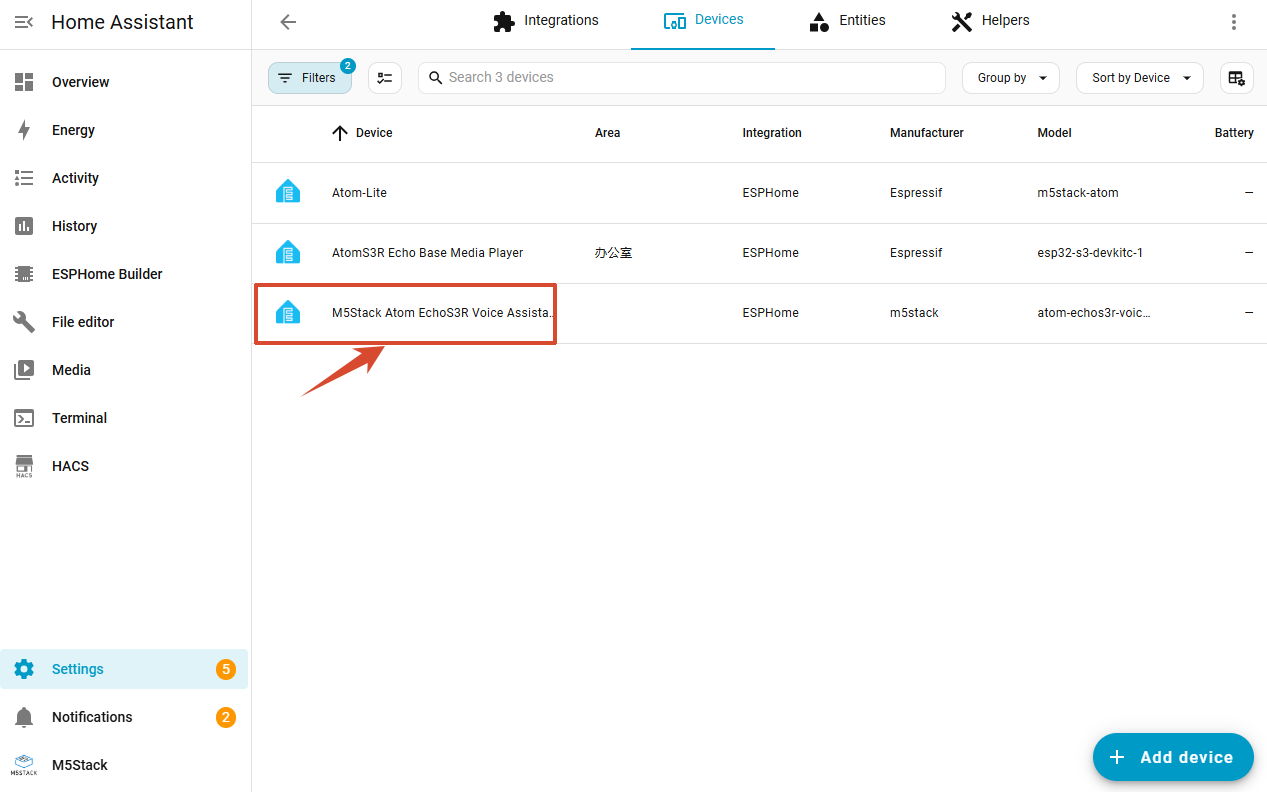
- Open Home Assistant and go to
Settings > Devices & services. Locate the device under theDiscoveredsection (available on both desktop and mobile app), then select it to finish addition.
Tip: Certain device types (such as voice assistants) may require additional initialization steps. Follow the device on-screen instructions or refer to the product-specific guide for initial setup.
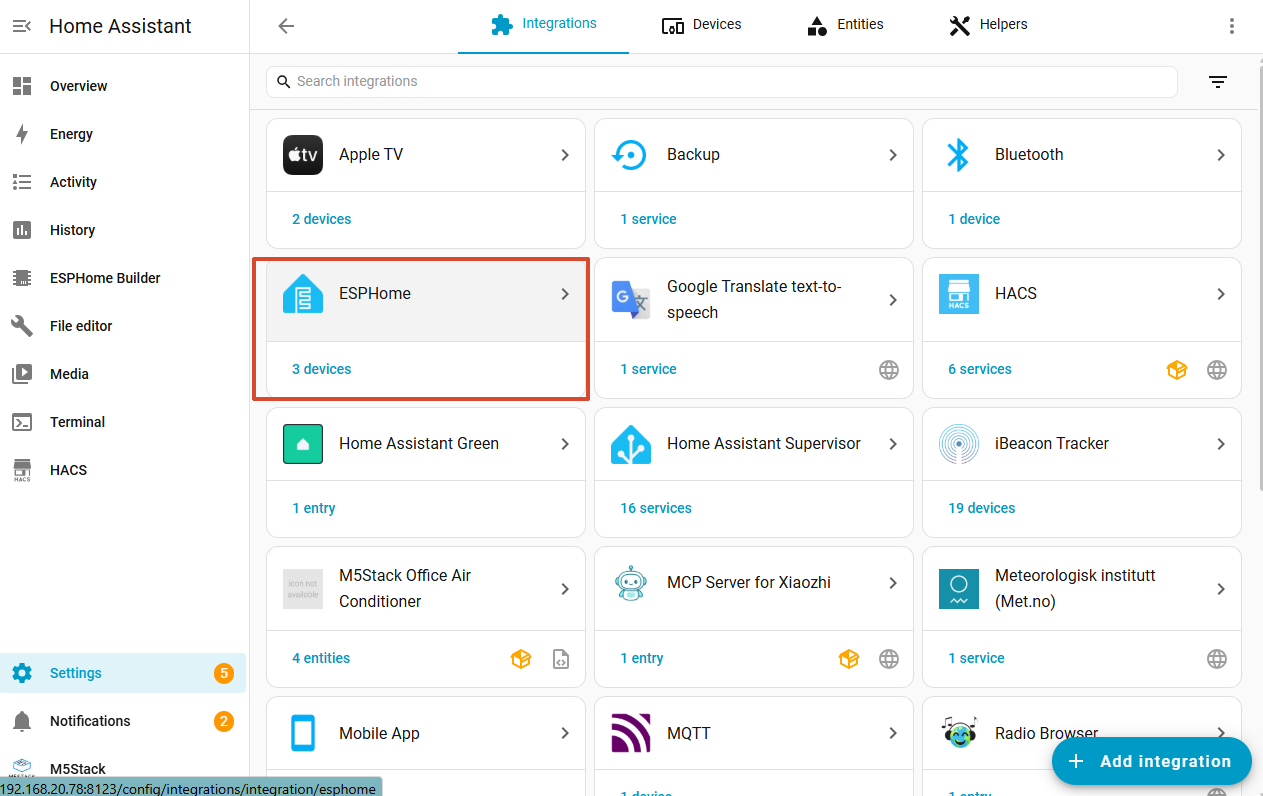
- Once added successfully, the device can be viewed on the ESPHome integration page.
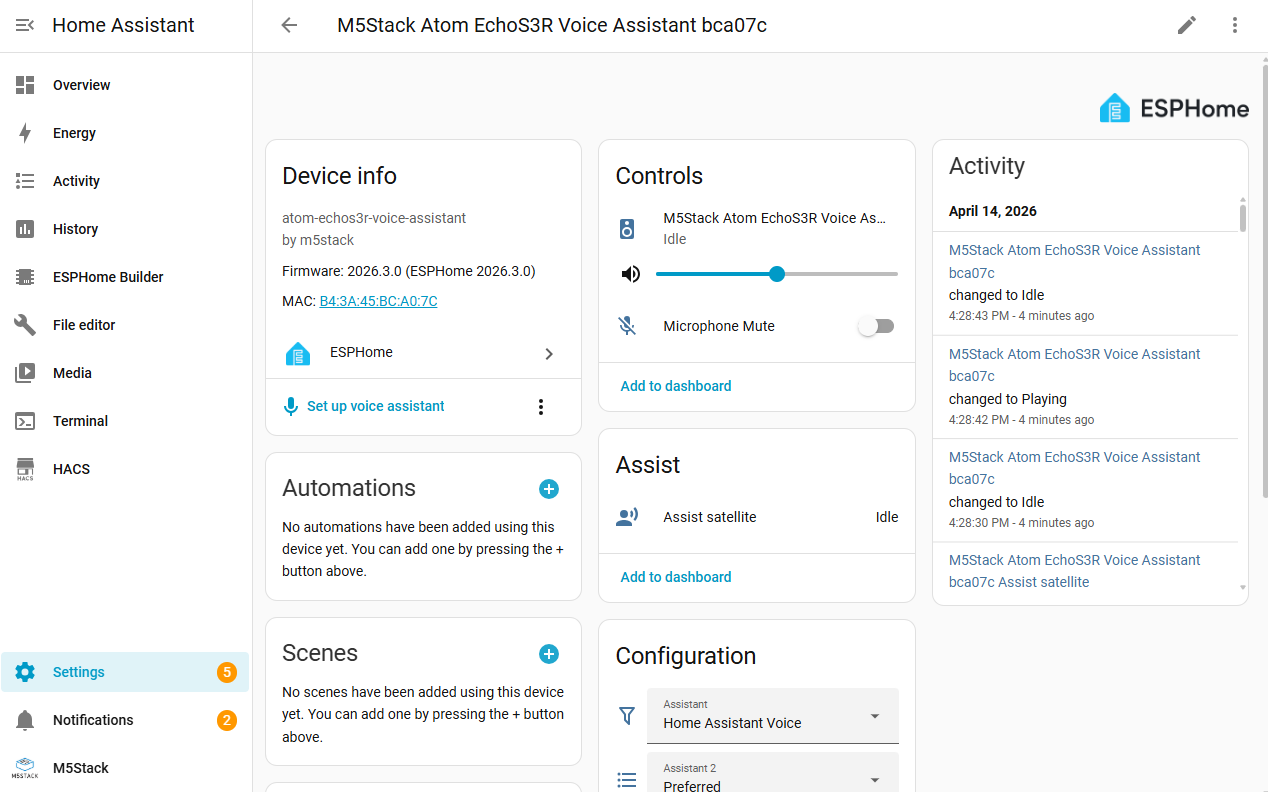
- Click to view device entities and related attributes:
Subsequent Operations
Factory default firmware does not include API encryption configurations. If you require encrypted device authentication, refer to the official device adaptation documentation to manually add encryption settings, compile custom firmware, and re-flash it to your device.