

Arduino 上手教程
2. 设备开发 & 案例程序
3. M5Unified
4. M5GFX
5. 拓展模块
Unit
Atomic
Tab5
IoT
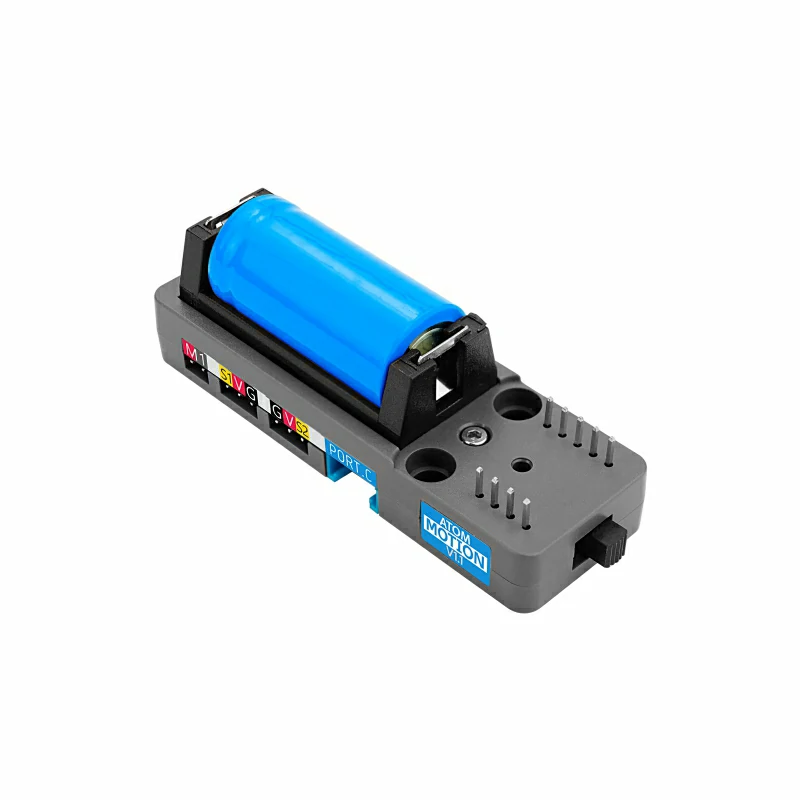
Atomic Motion Base Arduino 使用教程
1.准备工作
1.环境配置: 参考Arduino IDE上手教程完成IDE安装, 并根据实际使用的开发板安装对应的板管理, 与需要的驱动库。
2.使用到的驱动库:
3.使用到的硬件产品:

2.案例程序
案例说明
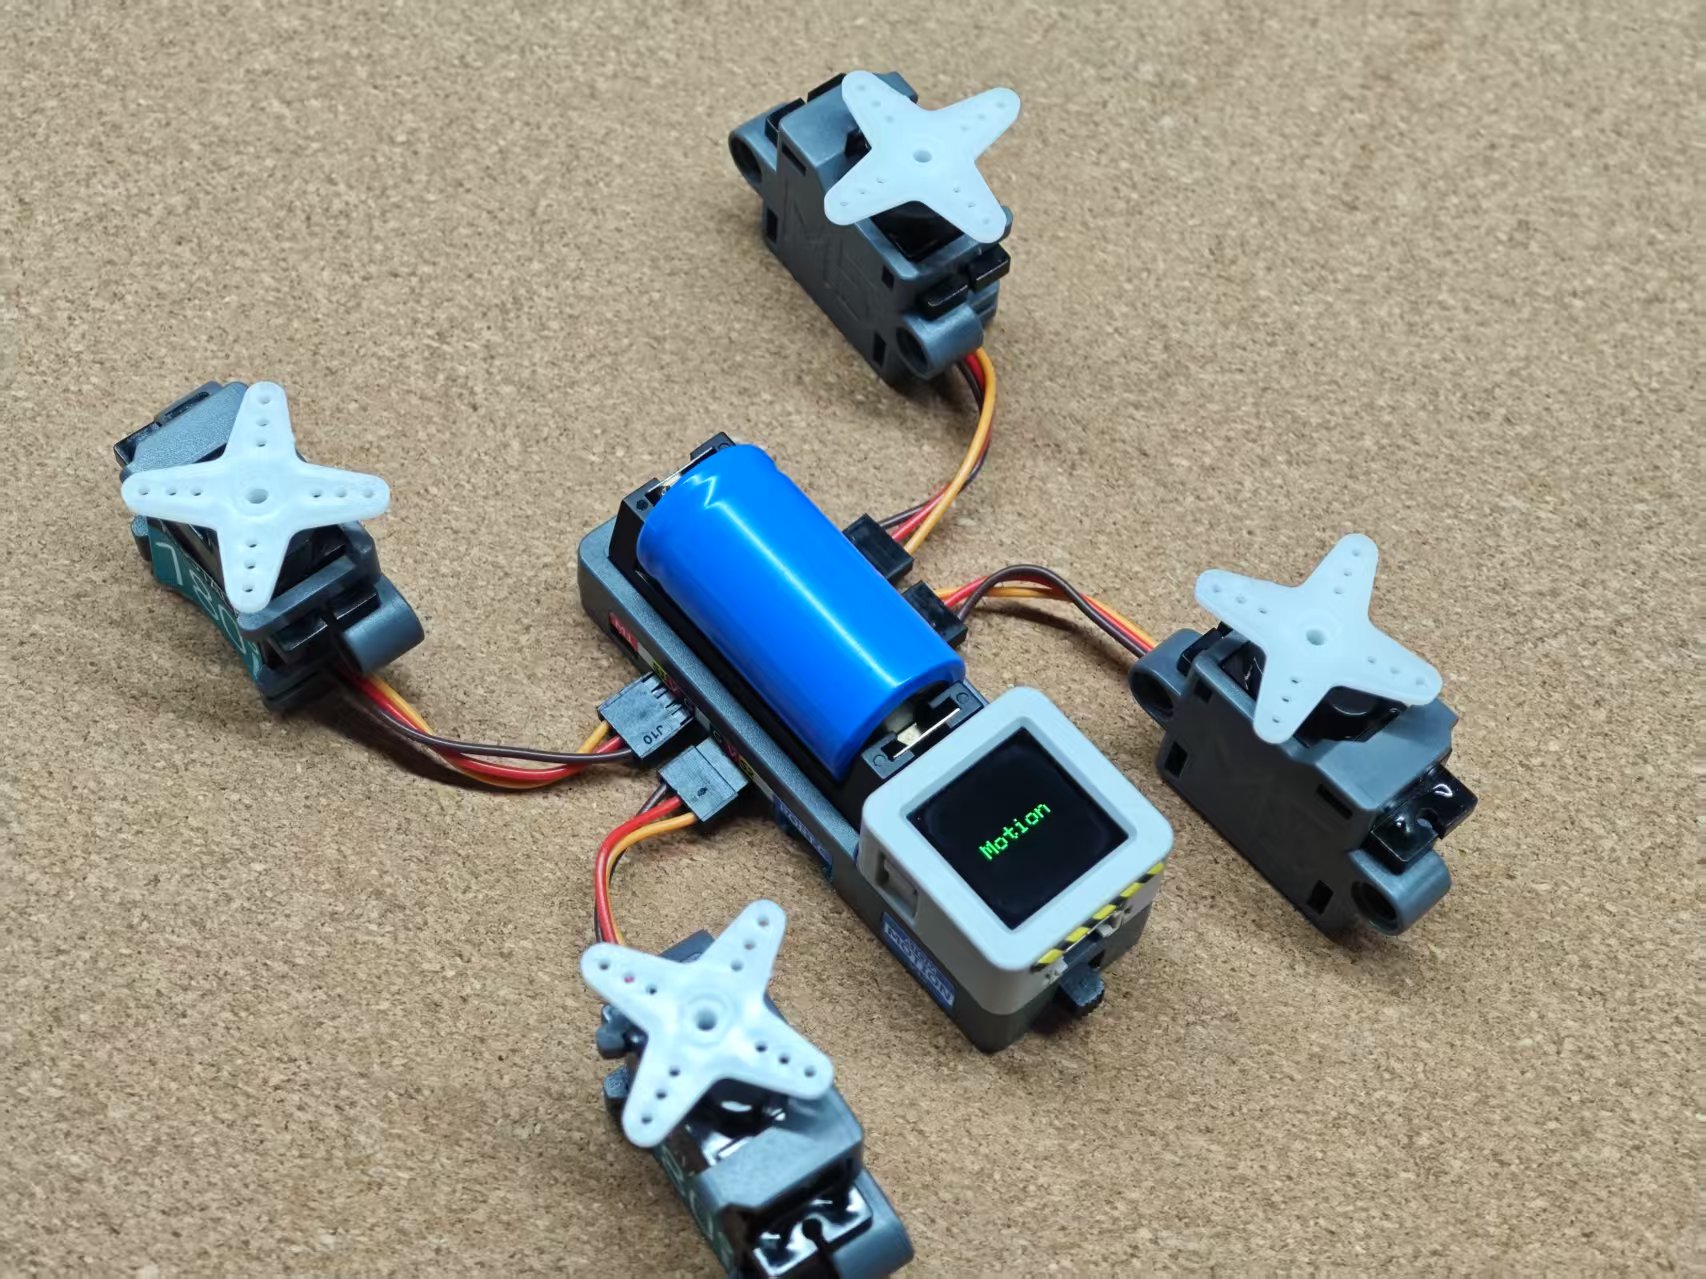
Atomic Motion Base 是一款搭配Atom系列主控使用的舵机+直流电机驱动底座。本案例将基于Atomic Motion Base 实现 4 通道舵机控制与 2 通道直流电机控制。
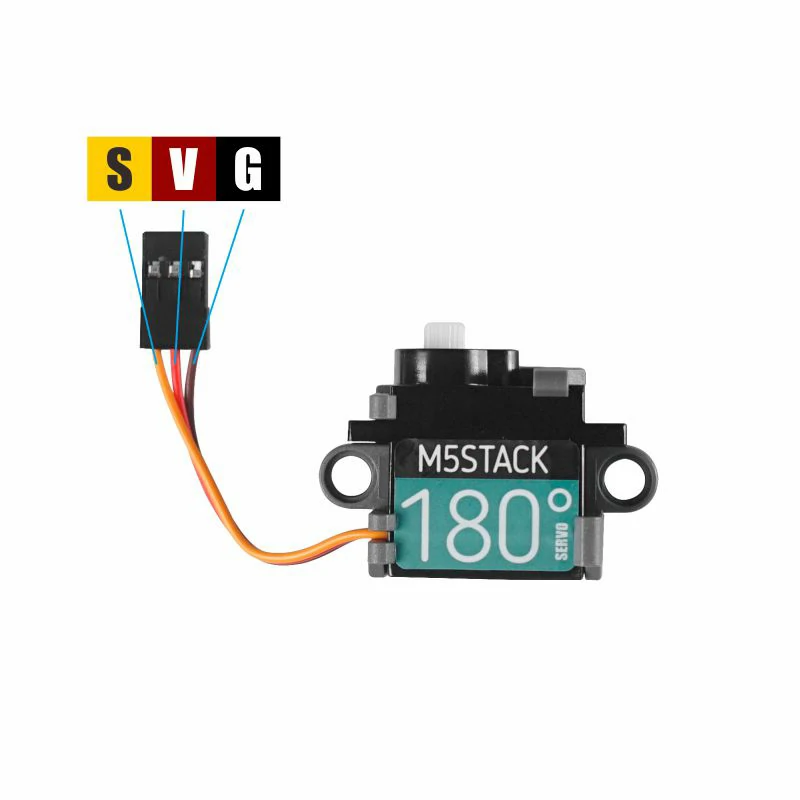
直流电机与舵机驱动
cpp
1 2 3 4 5 6 7 8 9 10 11 12 13 14 15 16 17 18 19 20 21 22 23 24 25 26 27 28 29 30 31 32 33 34 35 36 37 38 39 40 41 42 43 44 45 46 47 48 49 50 51 52 53 54 55 56 57 58 59 60 61 62 63 64 65 66 67 68 69 70 71 72
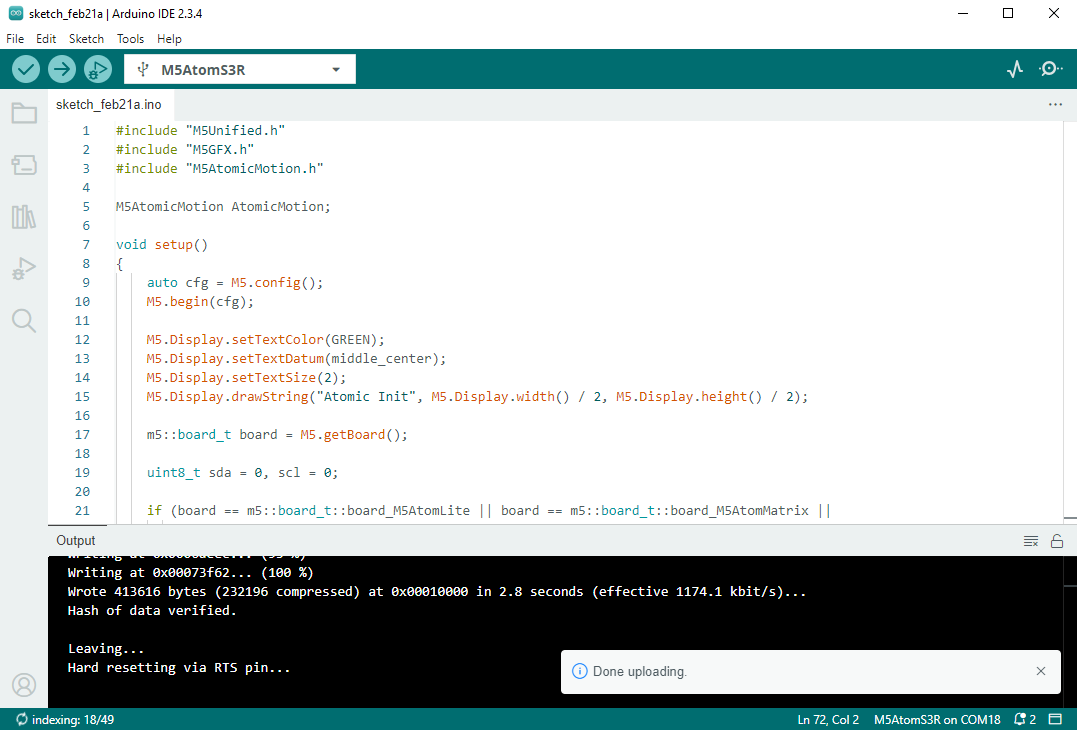
#include "M5Unified.h"
#include "M5GFX.h"
#include "M5AtomicMotion.h"

M5AtomicMotion AtomicMotion;

void setup()
{
    auto cfg = M5.config();
    M5.begin(cfg);

    M5.Display.setTextColor(GREEN);
    M5.Display.setTextDatum(middle_center);
    M5.Display.setTextSize(2);
    M5.Display.drawString("Atomic Init", M5.Display.width() / 2, M5.Display.height() / 2);

    m5::board_t board = M5.getBoard();

    uint8_t sda = 0, scl = 0;

    if (board == m5::board_t::board_M5AtomLite || board == m5::board_t::board_M5AtomMatrix ||
        board == m5::board_t::board_M5AtomEcho) {
        sda = 25;
        scl = 21;
    } else if (board == m5::board_t::board_M5AtomS3 || board == m5::board_t::board_M5AtomS3R ||
               board == m5::board_t::board_M5AtomS3Lite || board == m5::board_t::board_M5AtomS3RExt ||
               board == m5::board_t::board_M5AtomS3RCam) {
        sda = 38;
        scl = 39;
    }

    while (!AtomicMotion.begin(&Wire, M5_ATOMIC_MOTION_I2C_ADDR, sda, scl, 100000)) {
        M5.Display.clear();
        M5.Display.drawString("Init Fail", M5.Display.width() / 2, M5.Display.height() / 2);
        Serial.println("Atomic Motion begin failed");
        delay(1000);
    }

    M5.Display.clear();
    M5.Display.drawString("Motion", M5.Display.width() / 2, M5.Display.height() / 2);

    Serial.println("Atomic Motion Test");
}

void loop()
{
    for (int ch = 0; ch < 2; ch++) {
        AtomicMotion.setMotorSpeed(ch, 127);
        Serial.printf("Motor Channel %d: %d \n", ch, AtomicMotion.getMotorSpeed(ch));
    }
    delay(1000);
    for (int ch = 0; ch < 2; ch++) {
        AtomicMotion.setMotorSpeed(ch, -127);
        Serial.printf("Motor Channel %d: %d \n", ch, AtomicMotion.getMotorSpeed(ch));
    }
    delay(1000);
    for (int ch = 0; ch < 2; ch++) {
        AtomicMotion.setMotorSpeed(ch, 0);
        Serial.printf("Motor Channel %d: %d \n", ch, AtomicMotion.getMotorSpeed(ch));
    }
    delay(1000);
    for (int ch = 0; ch < 4; ch++) {
        AtomicMotion.setServoAngle(ch, 180);
        Serial.printf("Servo Channel %d: %d \n", ch, AtomicMotion.getServoAngle(ch));
    }
    delay(1000);
    for (int ch = 0; ch < 4; ch++) {
        AtomicMotion.setServoAngle(ch, 0);
        Serial.printf("Servo Channel %d: %d \n", ch, AtomicMotion.getServoAngle(ch));
    }
    delay(1000);
}功耗状态读取
案例说明
如果使用的是
Atomic Motion Base v1.1版本还支持读取当前电池电压, 工作电流值参数。cpp
1 2 3 4 5 6 7 8 9 10 11 12 13 14 15 16 17 18 19 20 21 22 23 24 25 26 27 28 29 30 31 32 33 34 35 36 37 38 39 40 41 42 43
#include <M5Unified.h>
#include <M5GFX.h>
#include <M5AtomicMotion.h>

M5AtomicMotion AtomicMotion;

void setup()
{
    auto cfg = M5.config();
    M5.begin(cfg);

    m5::board_t board = M5.getBoard();
    uint8_t sda = 0, scl = 0;

    if (board == m5::board_t::board_M5AtomLite || board == m5::board_t::board_M5AtomMatrix ||
        board == m5::board_t::board_M5AtomEcho) {
        sda = 25;
        scl = 21;
    } else if (board == m5::board_t::board_M5AtomS3 || board == m5::board_t::board_M5AtomS3R ||
               board == m5::board_t::board_M5AtomS3Lite || board == m5::board_t::board_M5AtomS3RExt ||
               board == m5::board_t::board_M5AtomS3RCam) {
        sda = 38;
        scl = 39;
    }

    while (!AtomicMotion.begin(&Wire, M5_ATOMIC_MOTION_I2C_ADDR, sda, scl, 100000)) {
        printf("Atomic Motion begin failed\n");
        delay(1000);
    }

    printf("Atomic Motion INA226 Test\n");
}

void loop()
{
    float voltage = AtomicMotion.ina226.readBusVoltage();
    float current = AtomicMotion.ina226.readShuntCurrent();

    printf("voltage: %.2f V\n", voltage);
    printf("current: %.2f A\n", current);

    delay(1000);
}3.编译上传
1.下载模式: 不同设备进行程序烧录前需要下载模式, 不同的主控设备该步骤可能有所不同。详情可参考Arduino IDE上手教程页面底部的设备程序下载教程列表, 查看具体的操作方式。
AtomS3R长按复位按键(大约2秒)直到内部绿色LED灯亮起,便可松开,此时设备已进入下载模式,等待烧录。

- 2.选中设备端口, 点击Arduino IDE左上角编译上传按钮, 等待程序完成编译并上传至设备。
4.开始运行
将Atomic Motion Base v1.1 电源开关至为 ON,即可开始驱动舵机/直流电机转动。
Page Tools