


Product Guide
Linux PC
AI Accelerator Card
LLM-8850 Card
Large Language Models
LLM
Real-Time AI Voice Assistant
XiaoZhi Voice Assistant
AtomS3R-M12 Volcengine Kit
Offline Voice Recognition
Home Assistant
Home Assistant OS
Industrial Control
IoT Measuring Instruments
Air Quality
Module13.2 PPS
VAMeter
T-Lite
Ezdata
Ethernet Camera
PoECAM
Wi-Fi Camera
Unit CamS3/-5MP
AI Camera
LoRa & LoRaWAN
Motor Control
Restore Factory Firmware
DIP Switch Usage Guide
Module GPS v2.0
Module GNSS
Module ExtPort For Core2
Module LoRa868 V1.2
Atom EchoS3R Voice Assistant
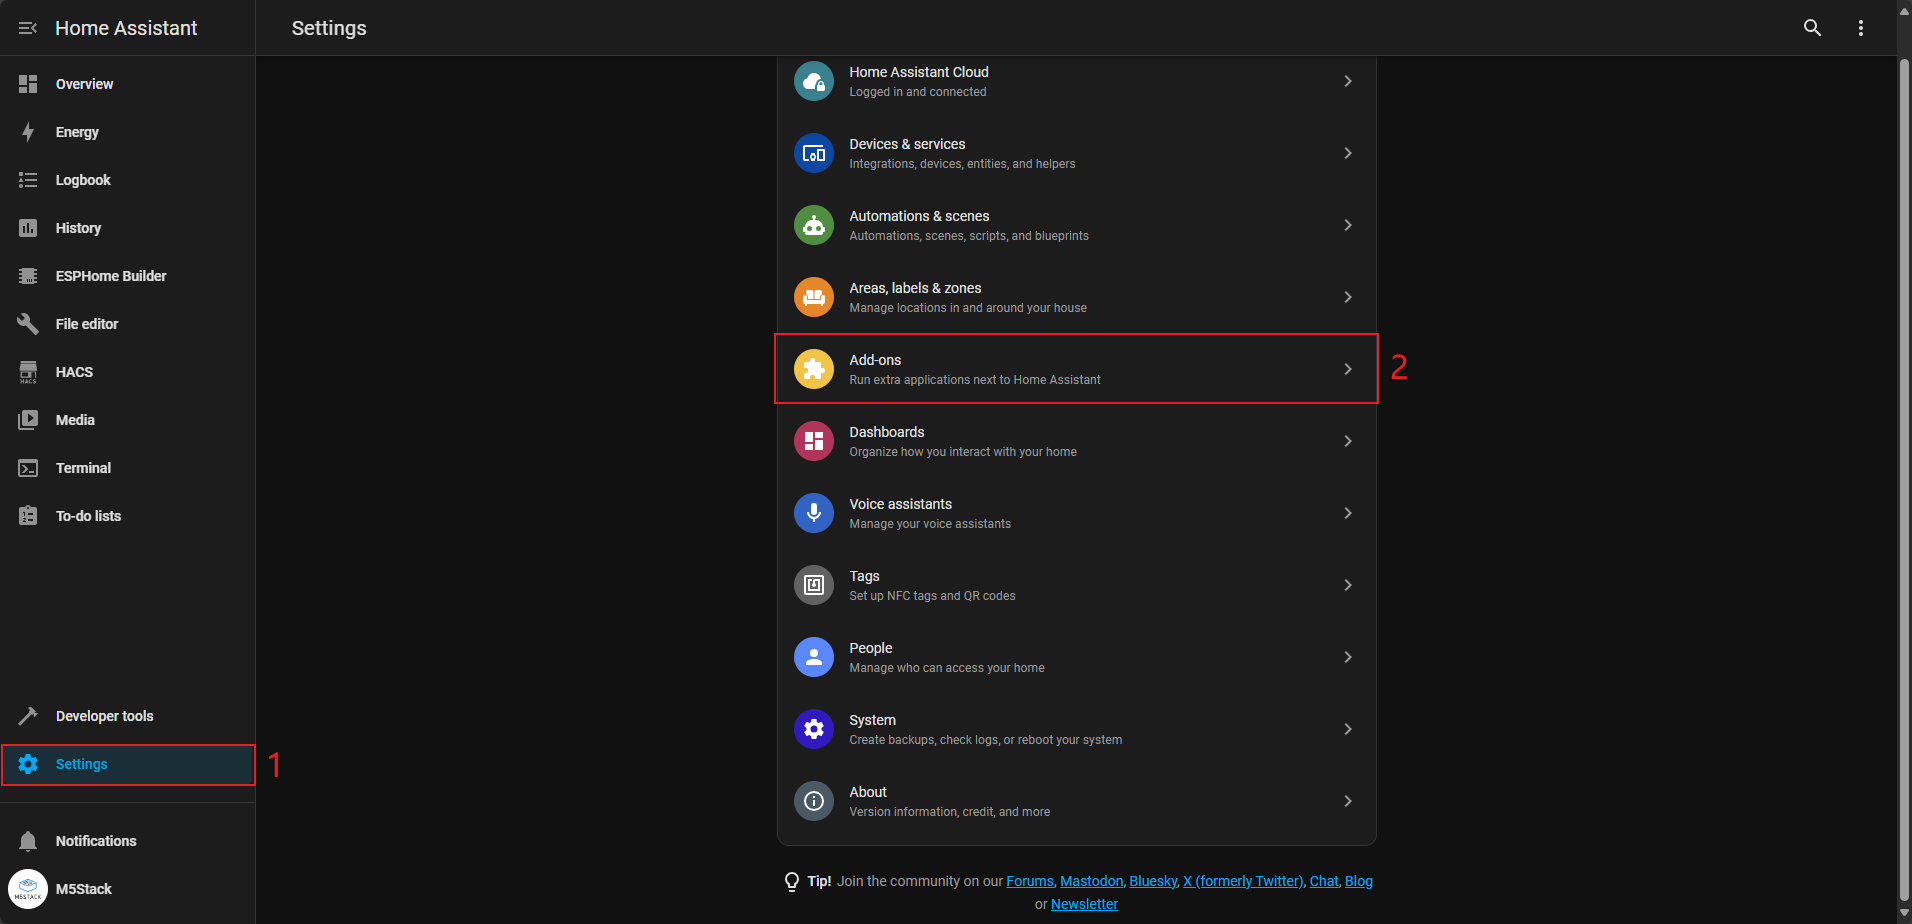
1. Environment Setup
- Refer to the Home Assistant getting started guide at Home Assistant Documentation to install Home Assistant.
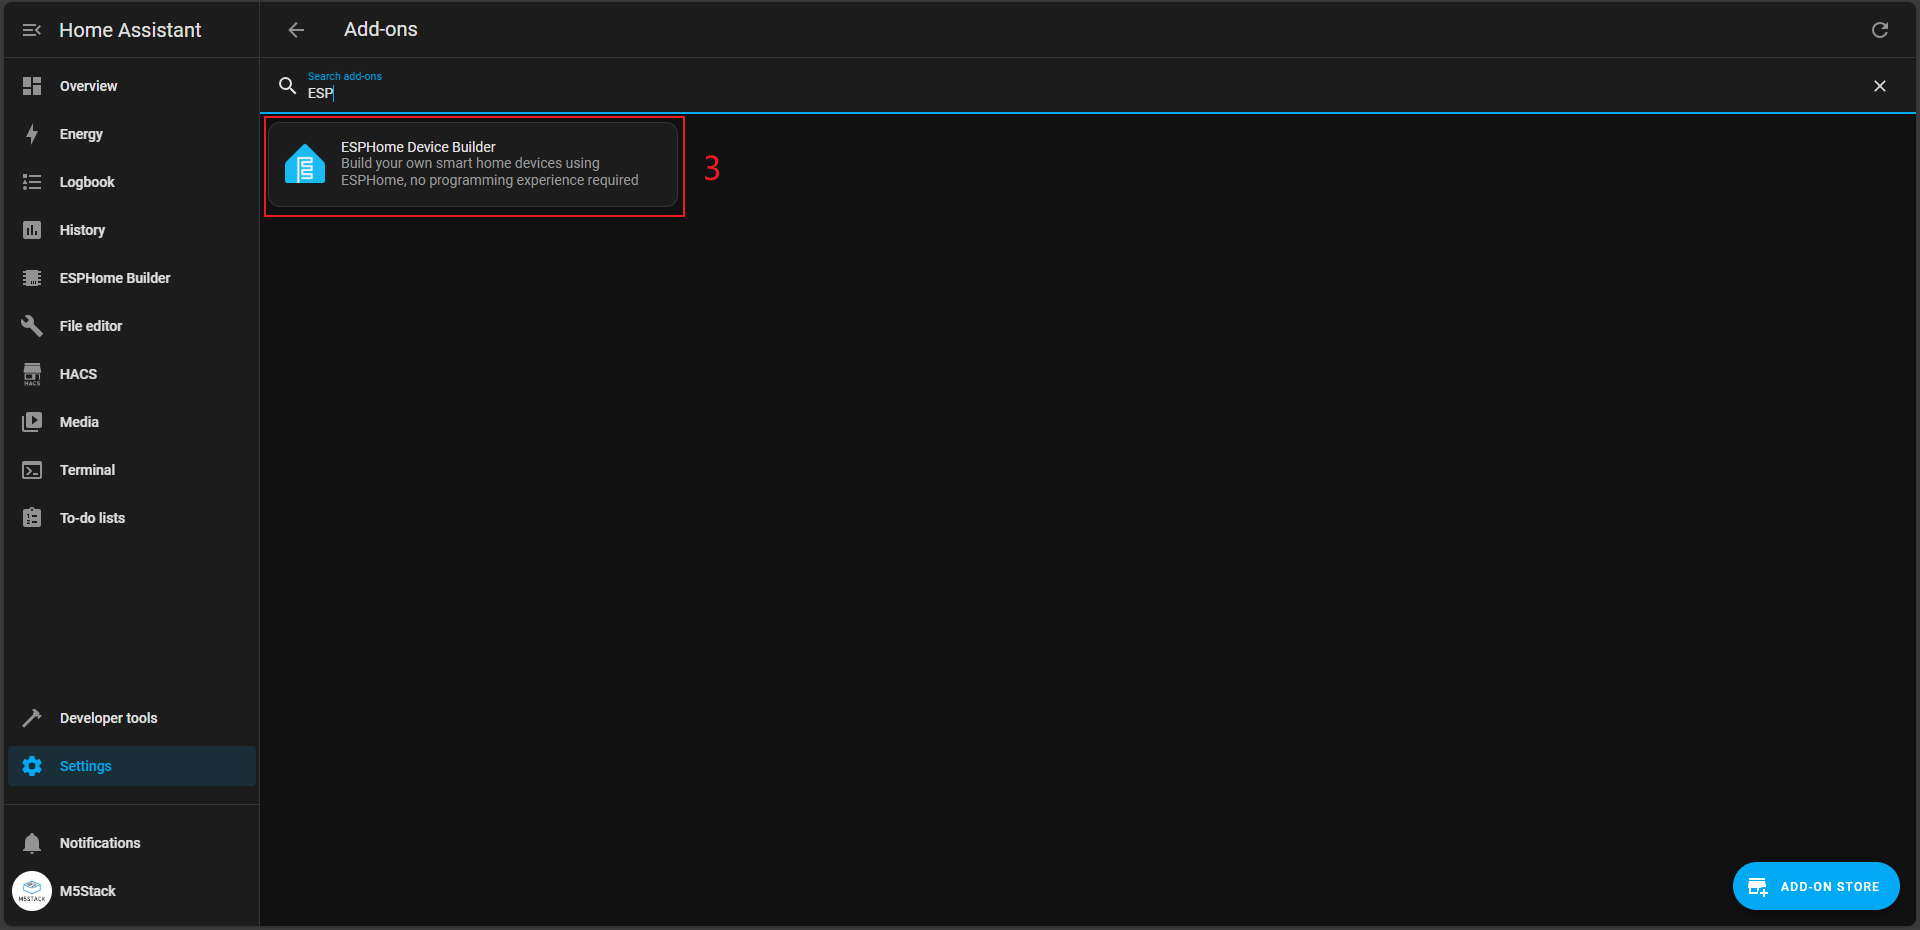
- Install the ESPHome Builder add-on from
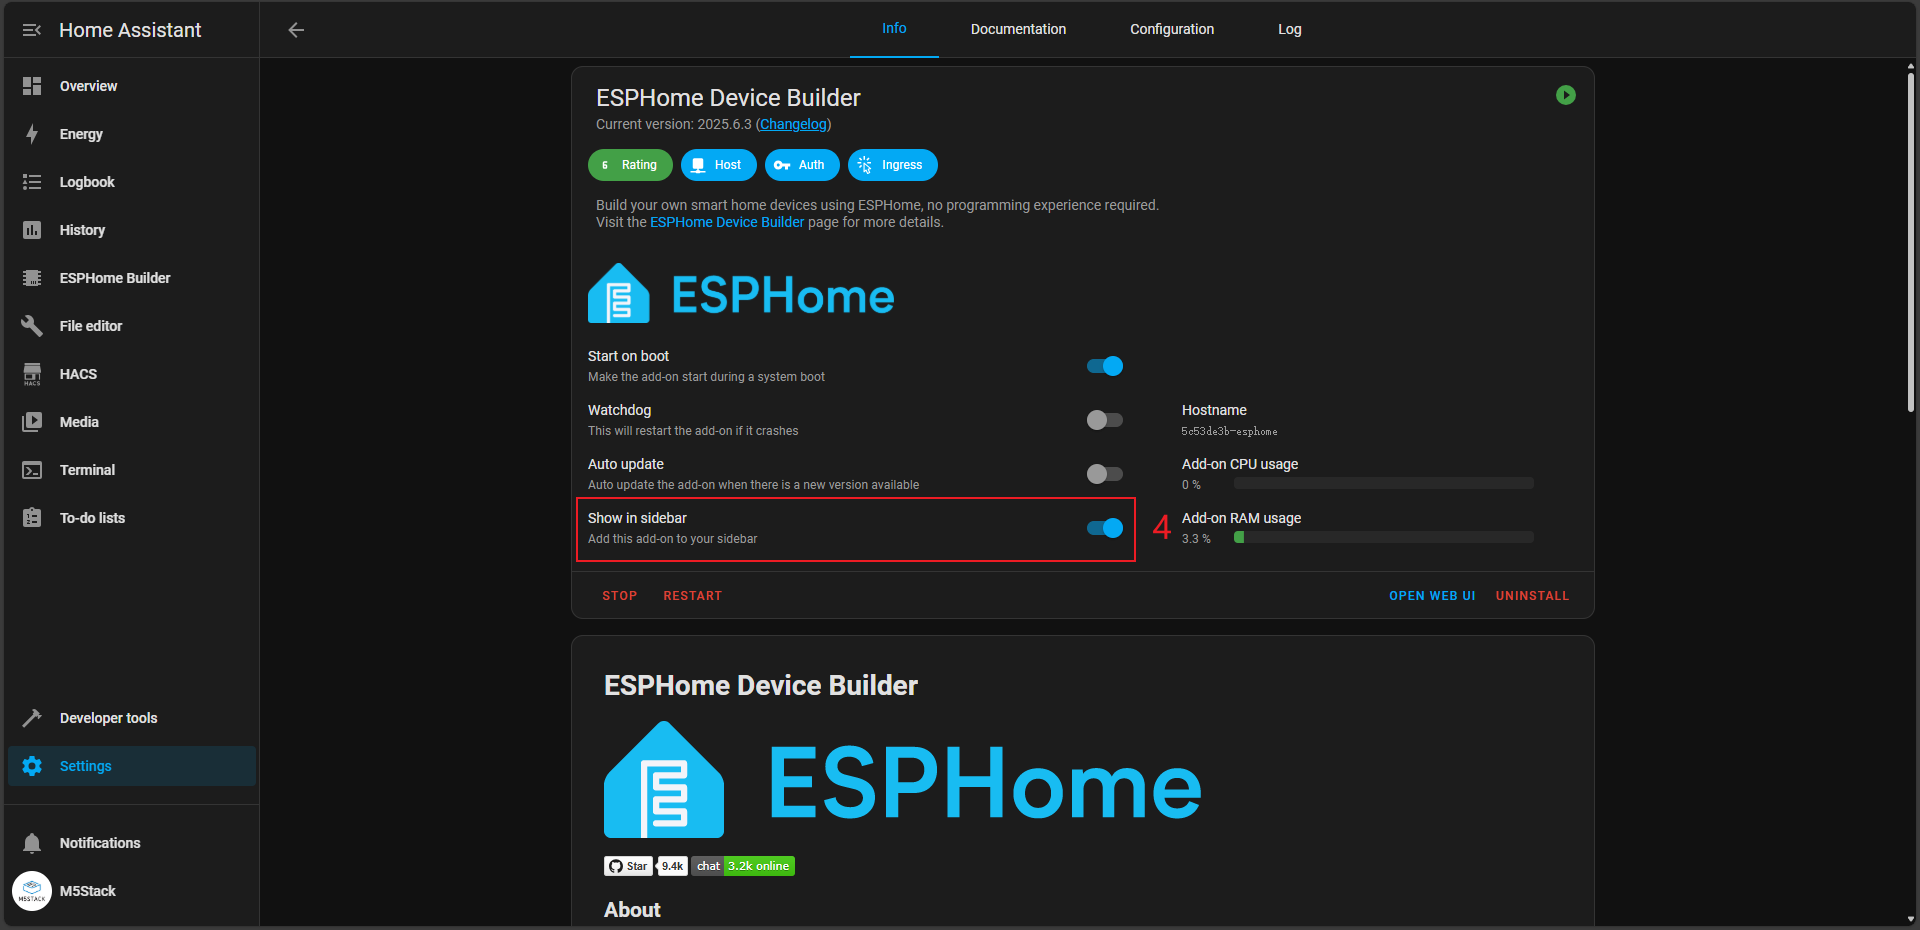
Settings -> Add-ons -> Add-on Store. - After installing the ESPHome Builder add-on, enable
Show in sidebaron its management page to add it to the left navigation bar. - This guide is based on the official HA getting started documentation for ESPHome: https://esphome.io/guides/getting_started_hassio. Visit it if you need more details.
- Follow the guides below to install and configure voice recognition related integrations:
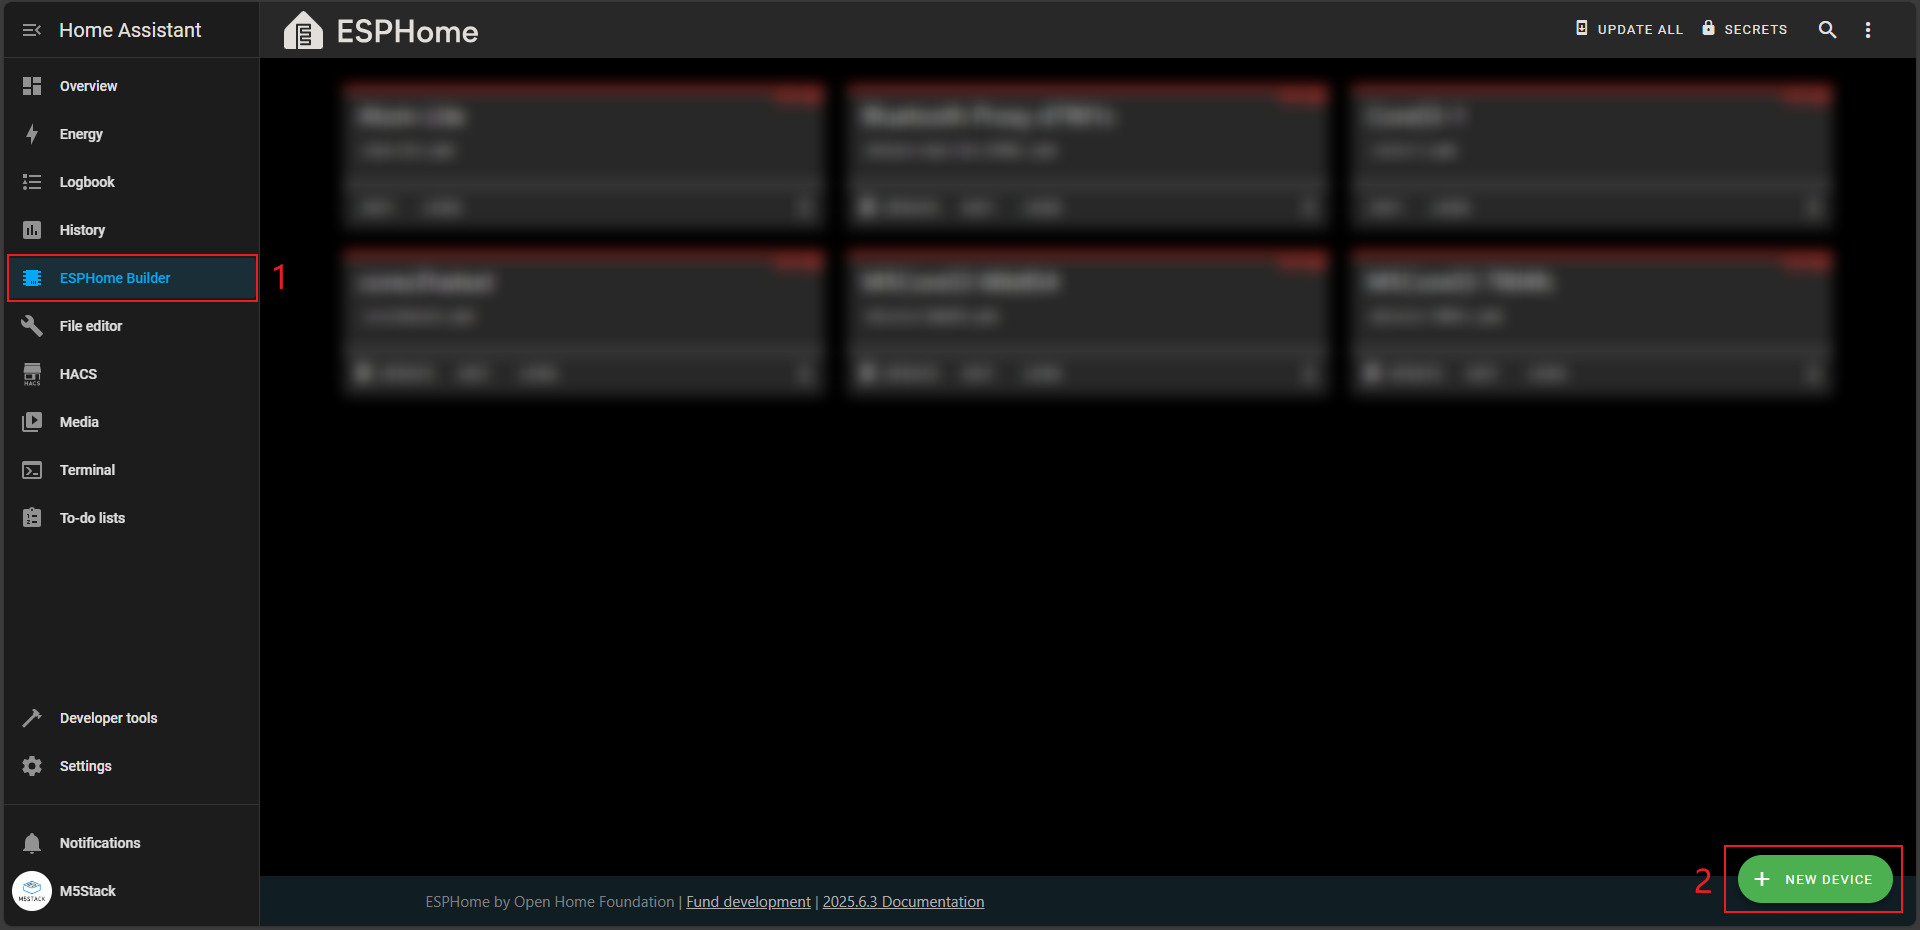
2. Add a Device
Open the ESPHome add-on page and click NEW DEVICE in the bottom-right corner to create a new device.
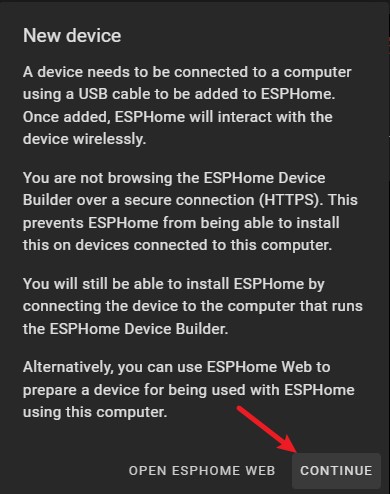
When the New Device prompt appears, click CONTINUE.
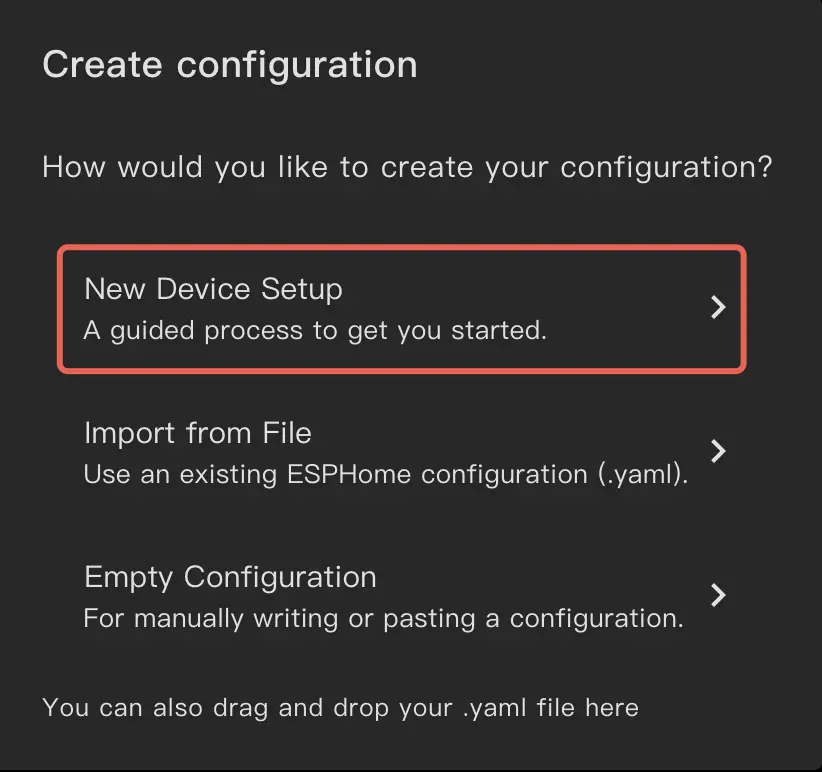
Click New Device Setup.
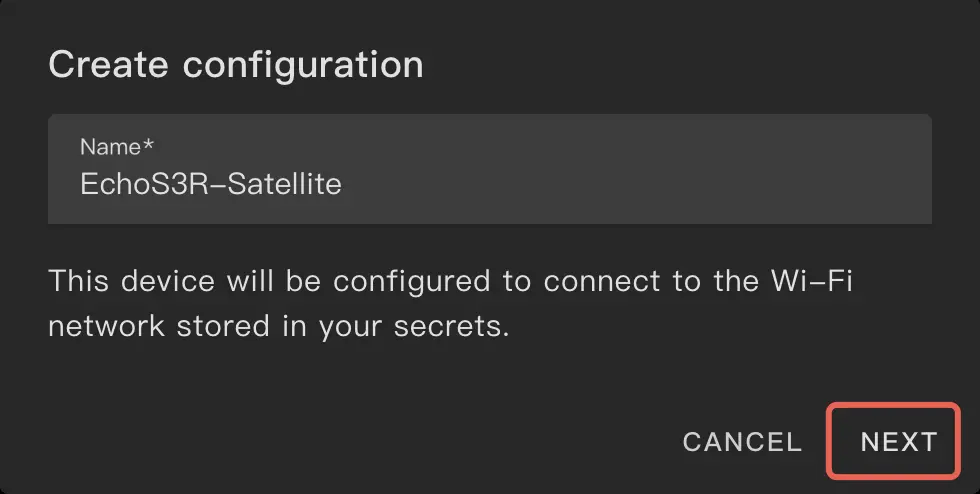
Give the configuration a suitable name:
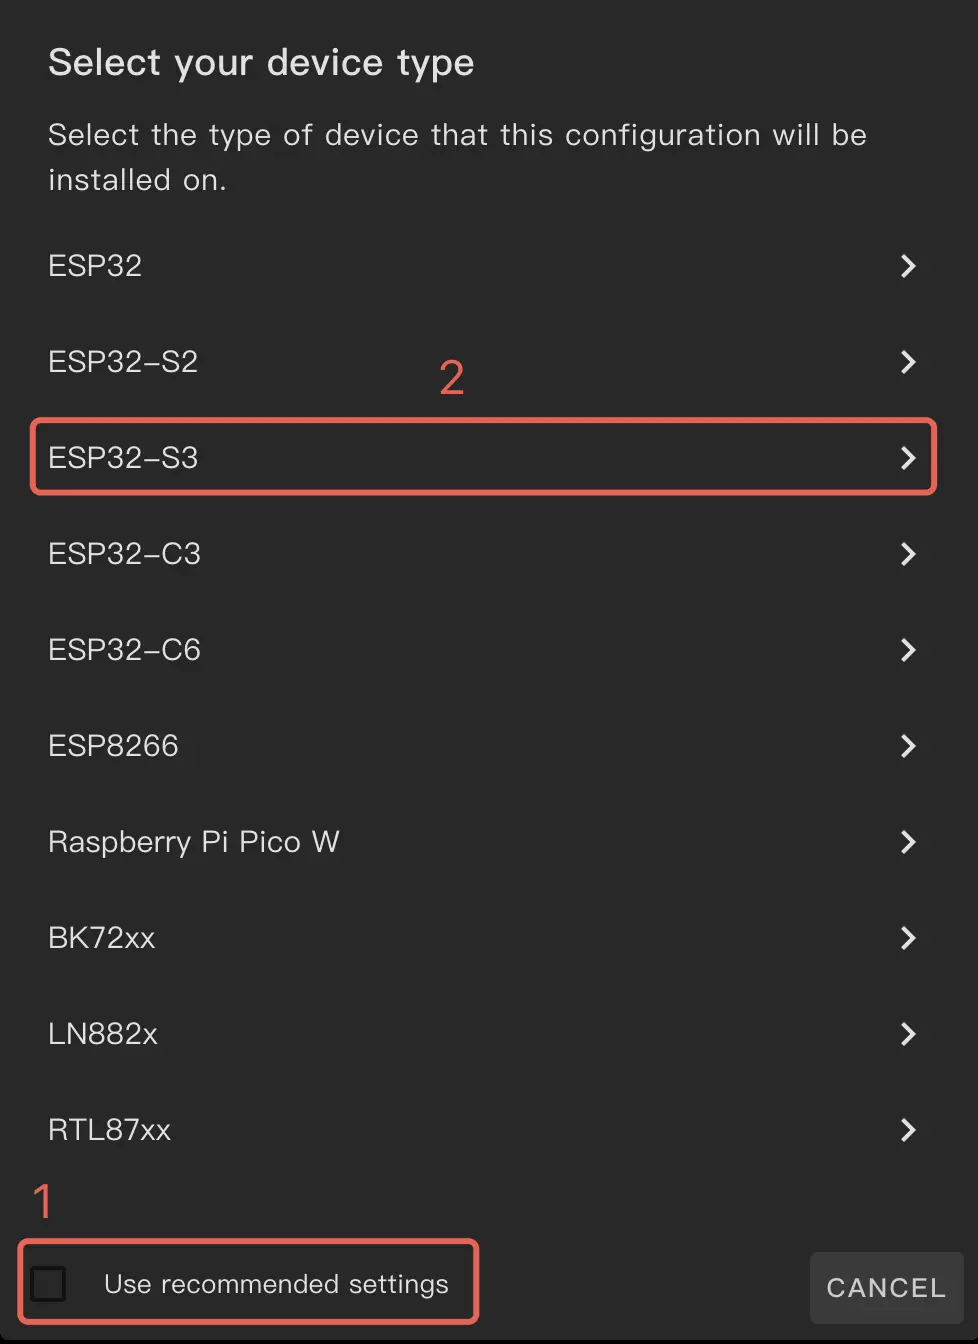
First uncheck Use recommended settings, then select the device platform ESP32S3:
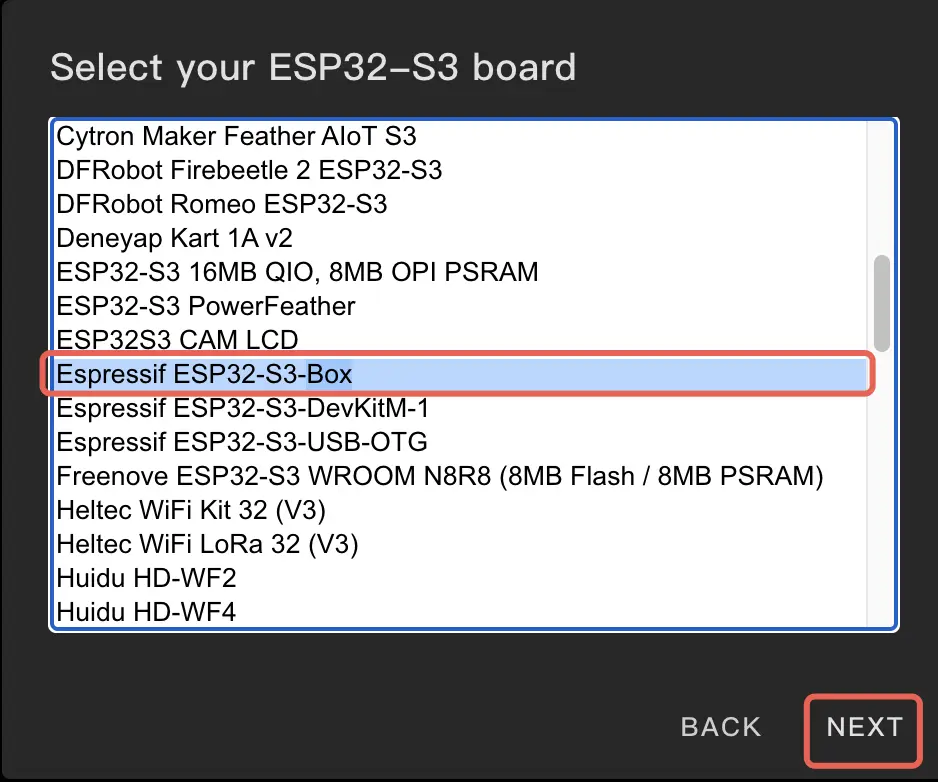
A dialog will ask you to choose the specific device. Select Espressif ESP32-S3-Box. Continue to set up the Home Assistant API key and the YAML configuration.
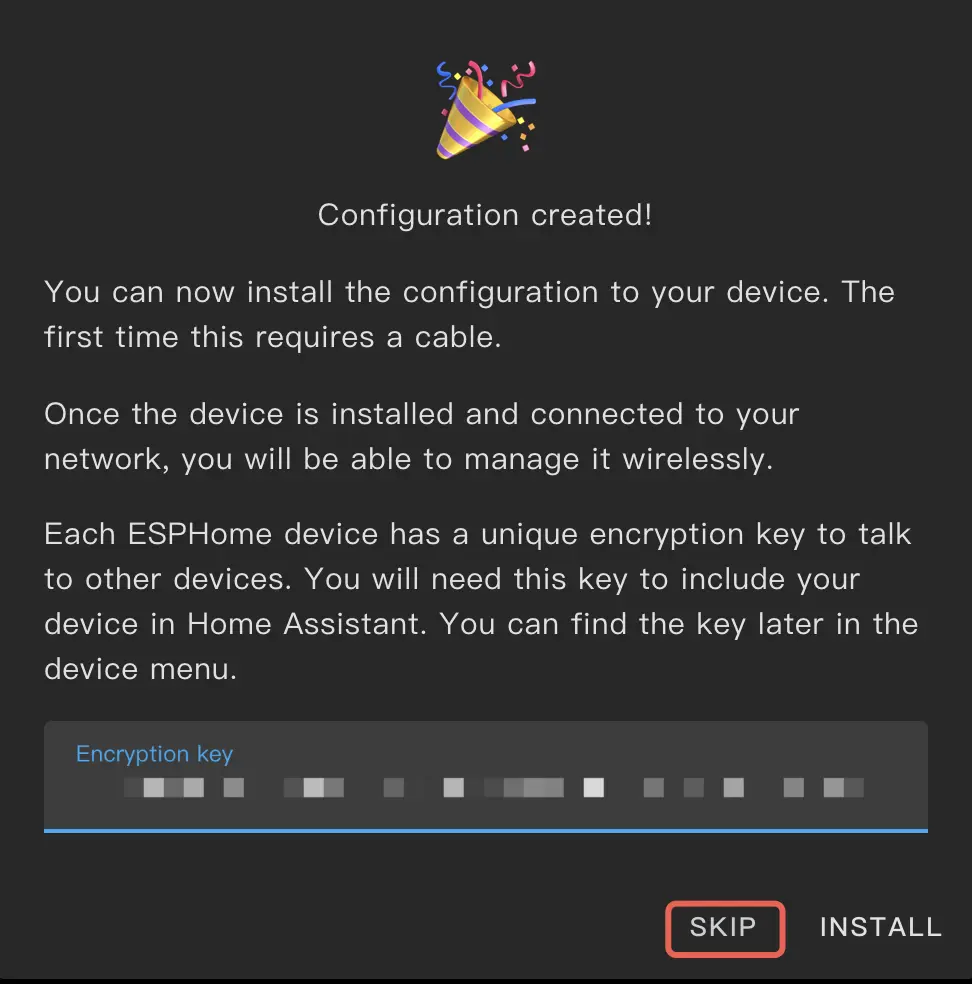
Copy the API key for later and then click Skip.
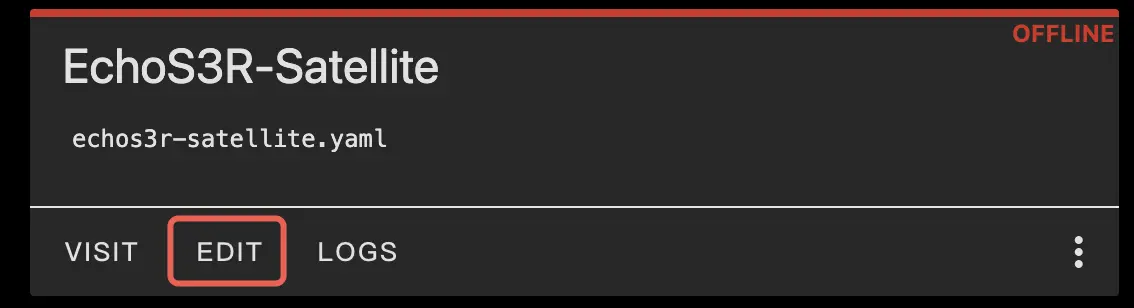
Under the generated configuration file click Edit to continue modifying the YAML file.
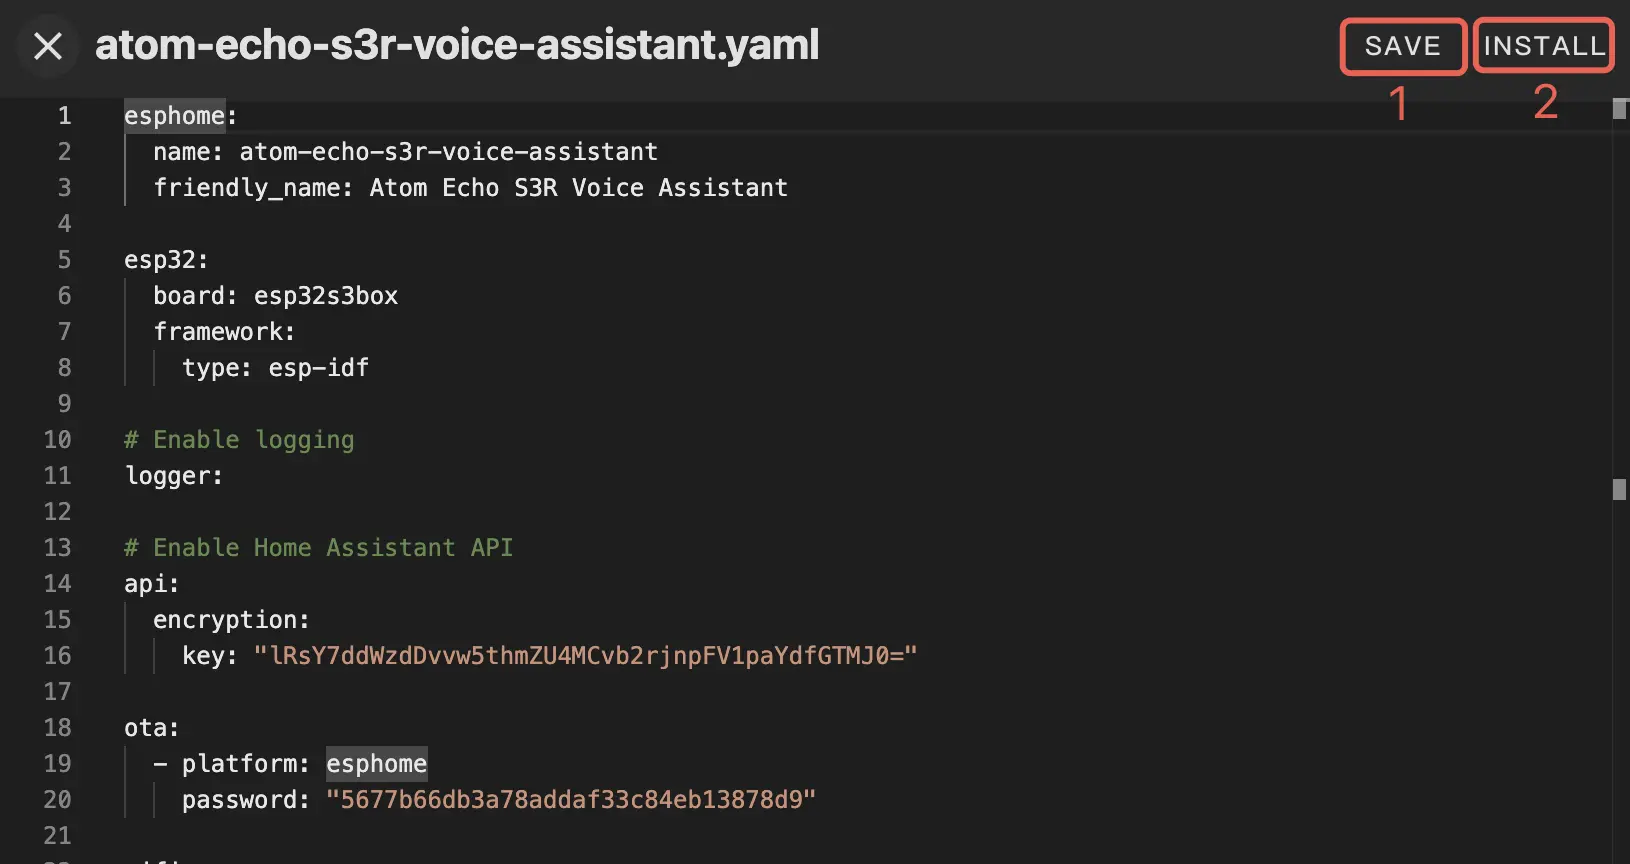
Below is an example YAML configuration. Add the packages section at the end:
esphome:
  name: atom-echos3r-voice-assistant
  friendly_name: Atom Echo S3R Voice Assistant

esp32:
  board: esp32s3box
  framework:
    type: esp-idf

# Enable logging
logger:

# Enable Home Assistant API
api:
  encryption:
    key: "***********************"

ota:
  - platform: esphome
    password: "************************"

wifi:
  ssid: !secret wifi_ssid
  password: !secret wifi_password

  # Enable fallback hotspot (captive portal) in case wifi connection fails
  ap:
    ssid: "Atom-EchoS3R-Voice-Assistant"
    password: ""

captive_portal:

# Add the external package here
packages:
  m5stack.atom-echos3r-voice-assistant: github://m5stack/esphome-yaml/common/atom-echos3r-satellite-base.yaml@main
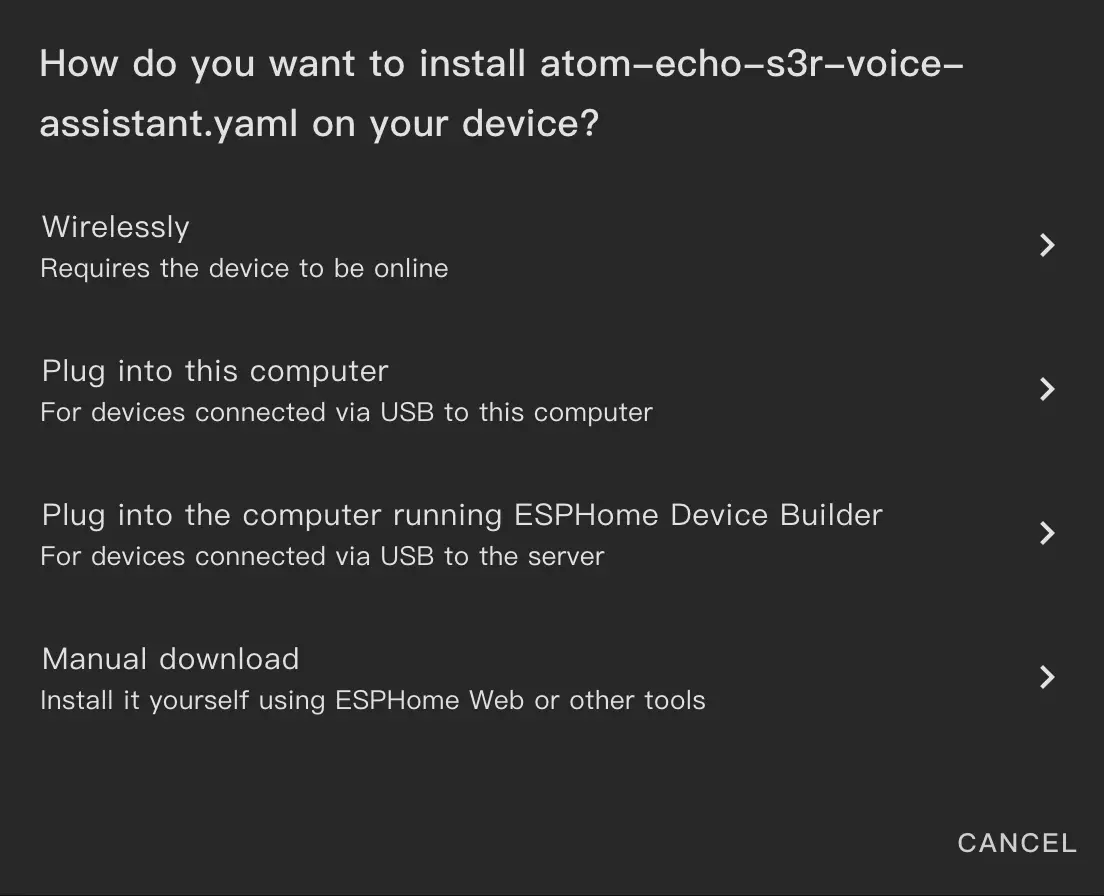
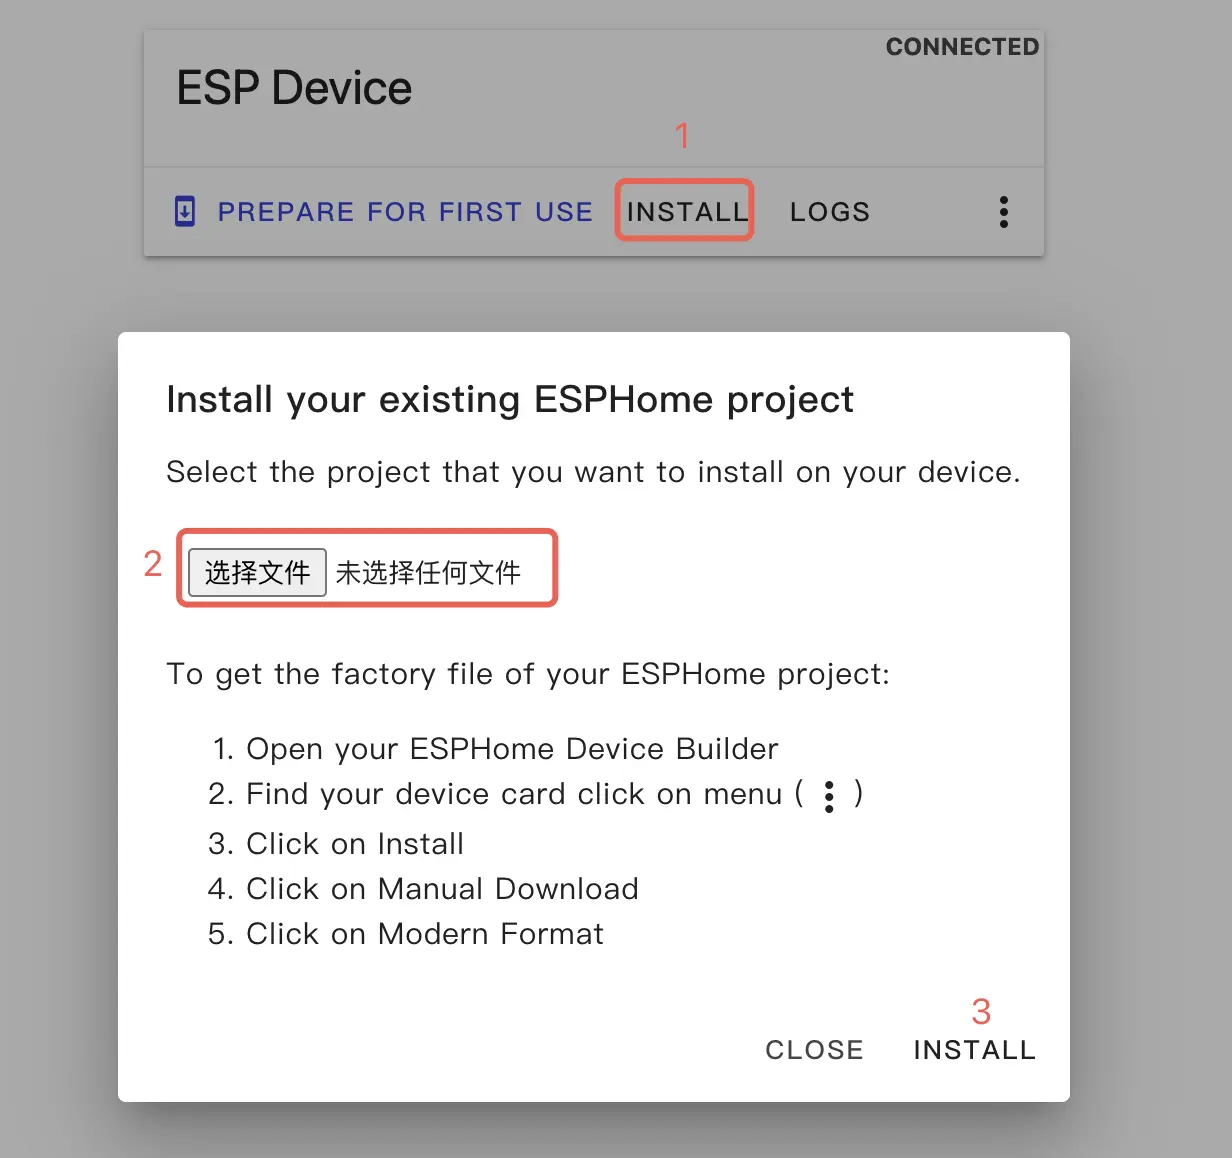
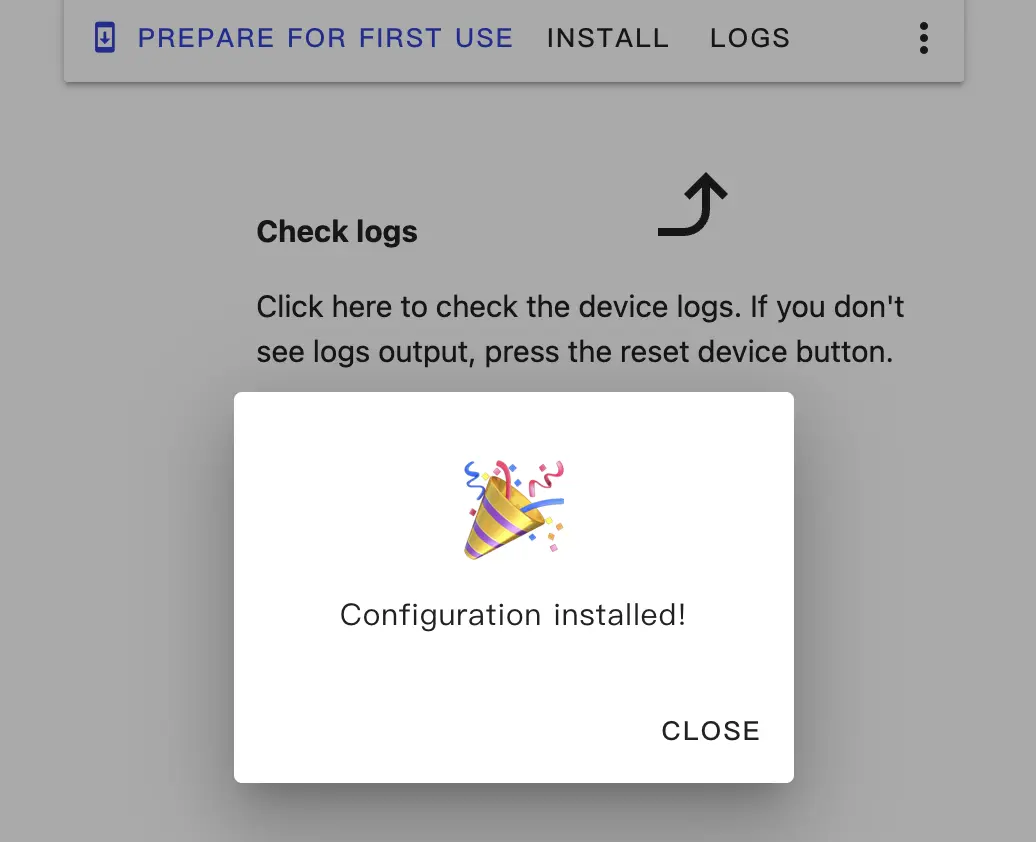
Click Save, then Install to begin installation:
Choose the installation method that applies to your situation. Typically, if the device is connected to the Home Assistant host and is in download mode, you can choose Plug into the computer running ESPHome Device Builder, then select the serial device to compile and upload.
Here we demonstrate using Manual download.
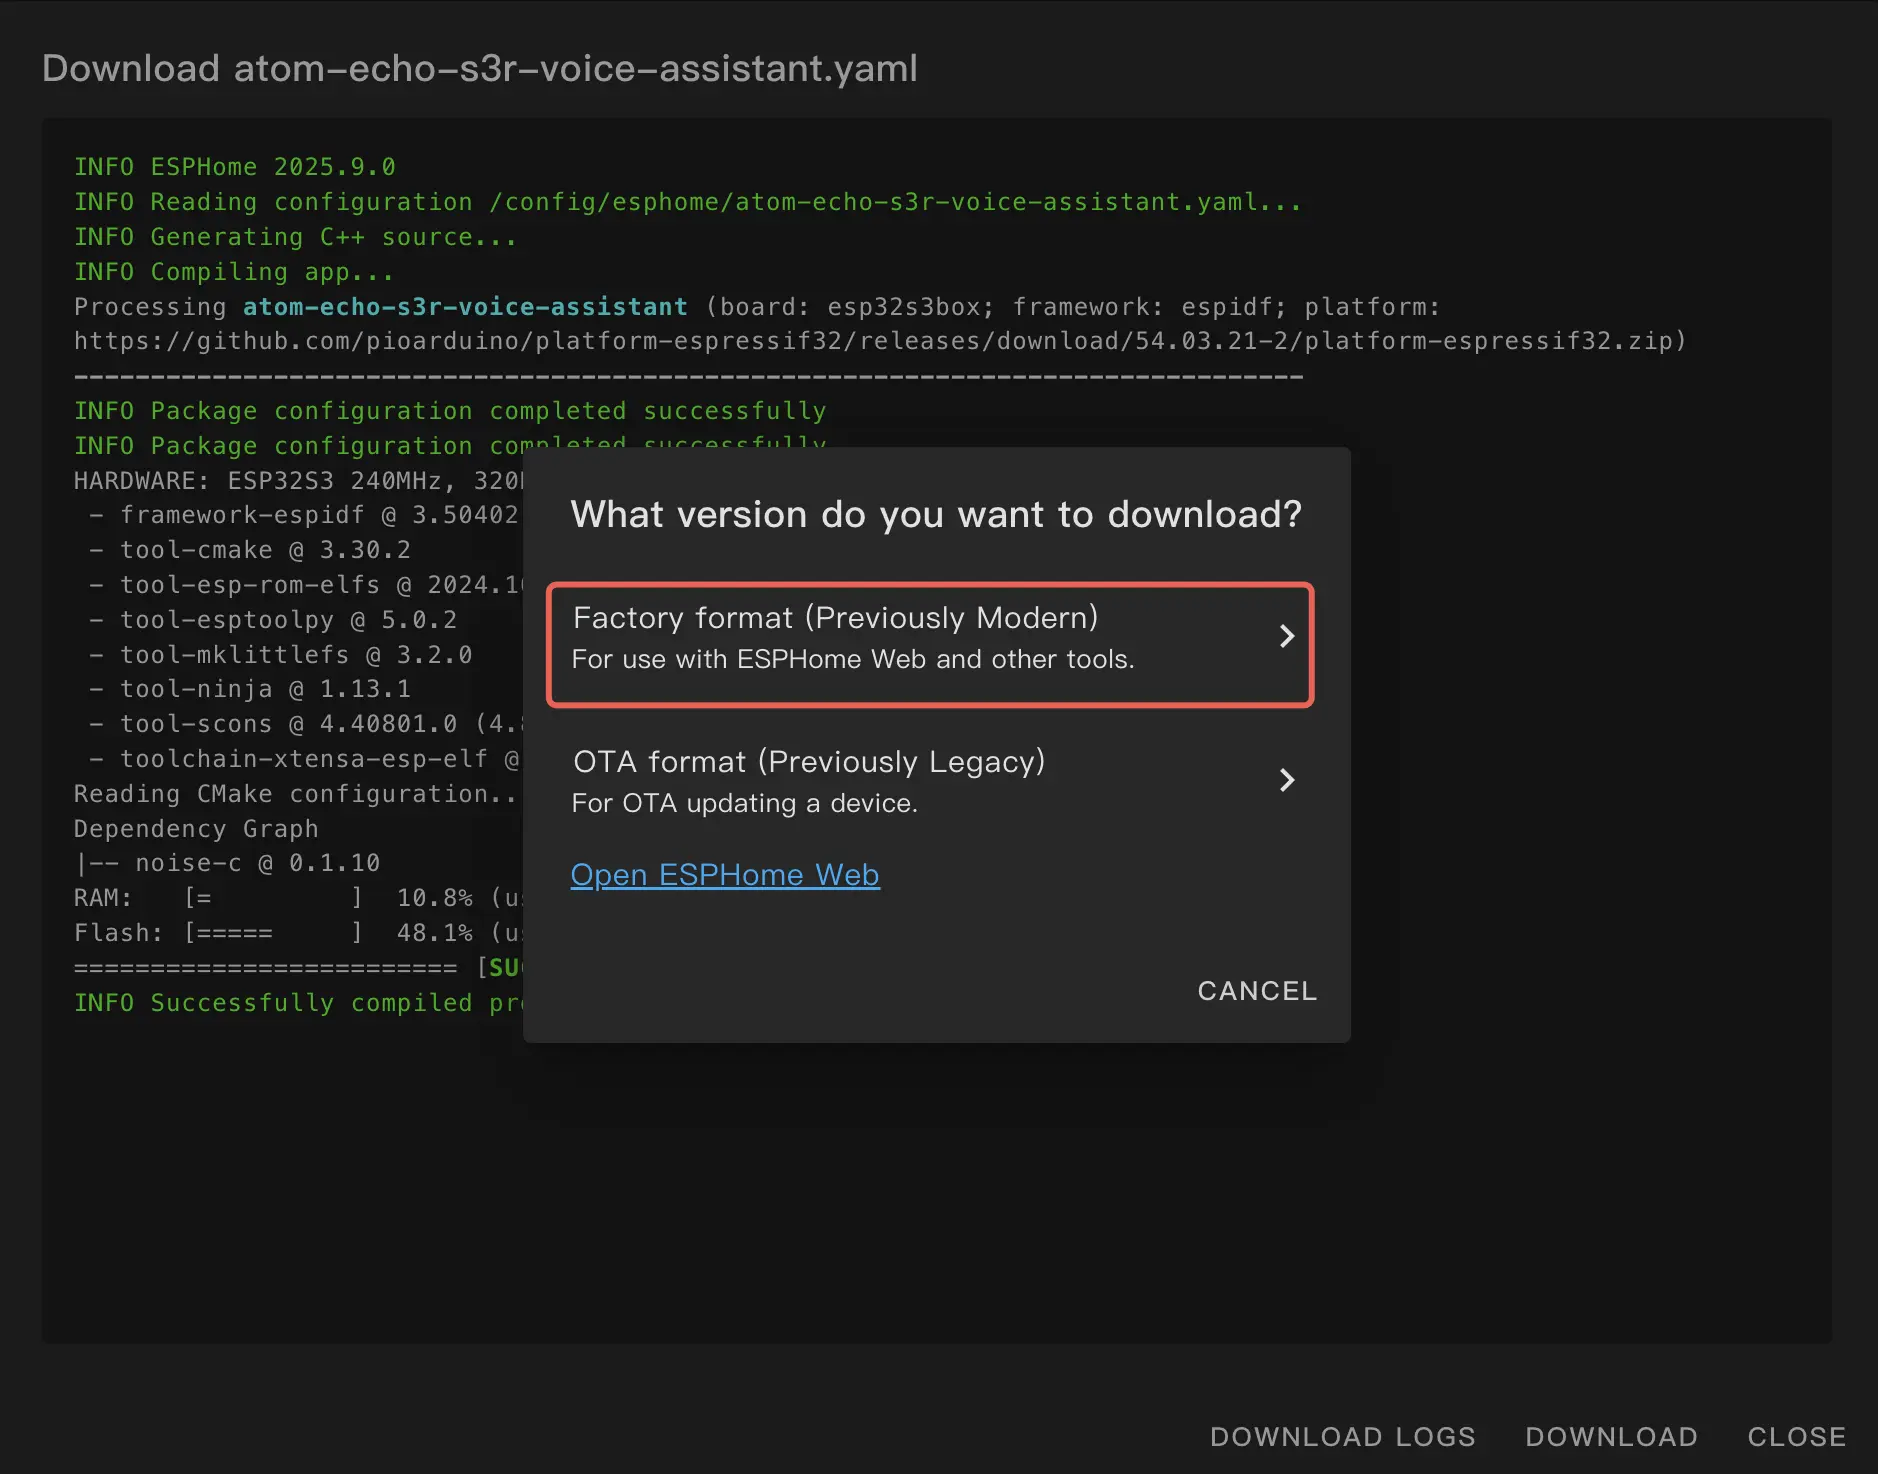
After compilation finishes, click Open ESPHome Web, then choose the Factory format to download the firmware:
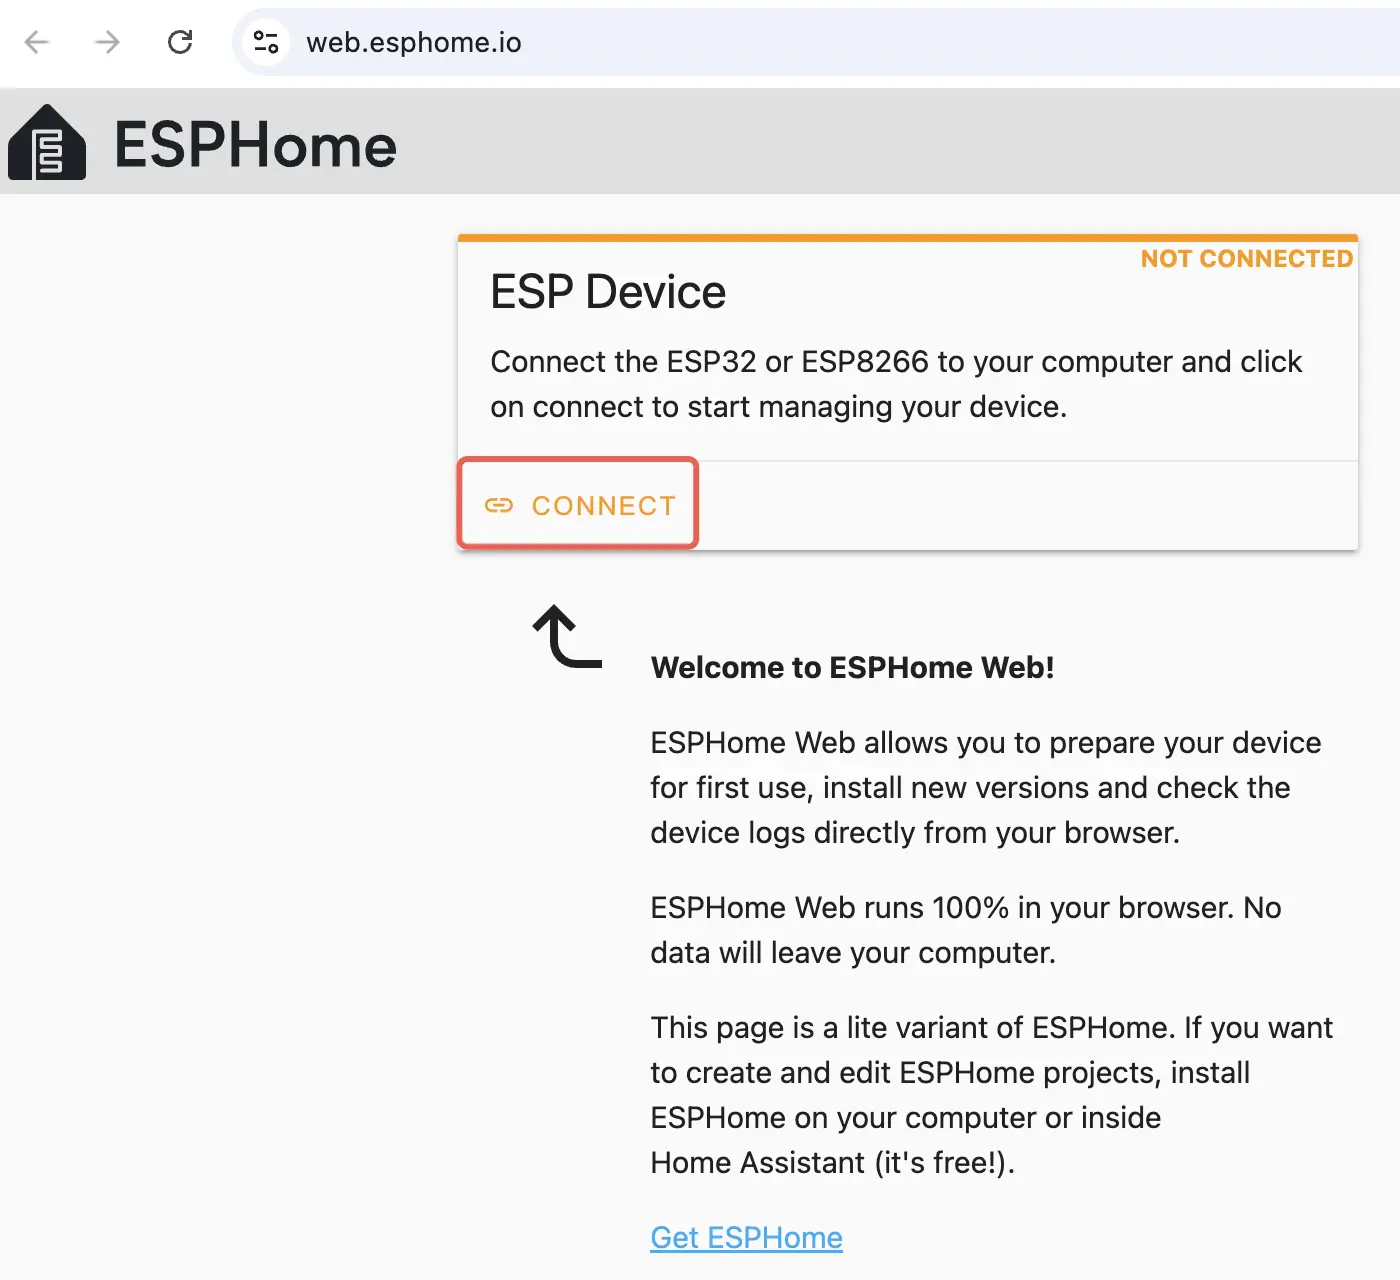
On the ESPHome Web page click CONNECT to connect your device
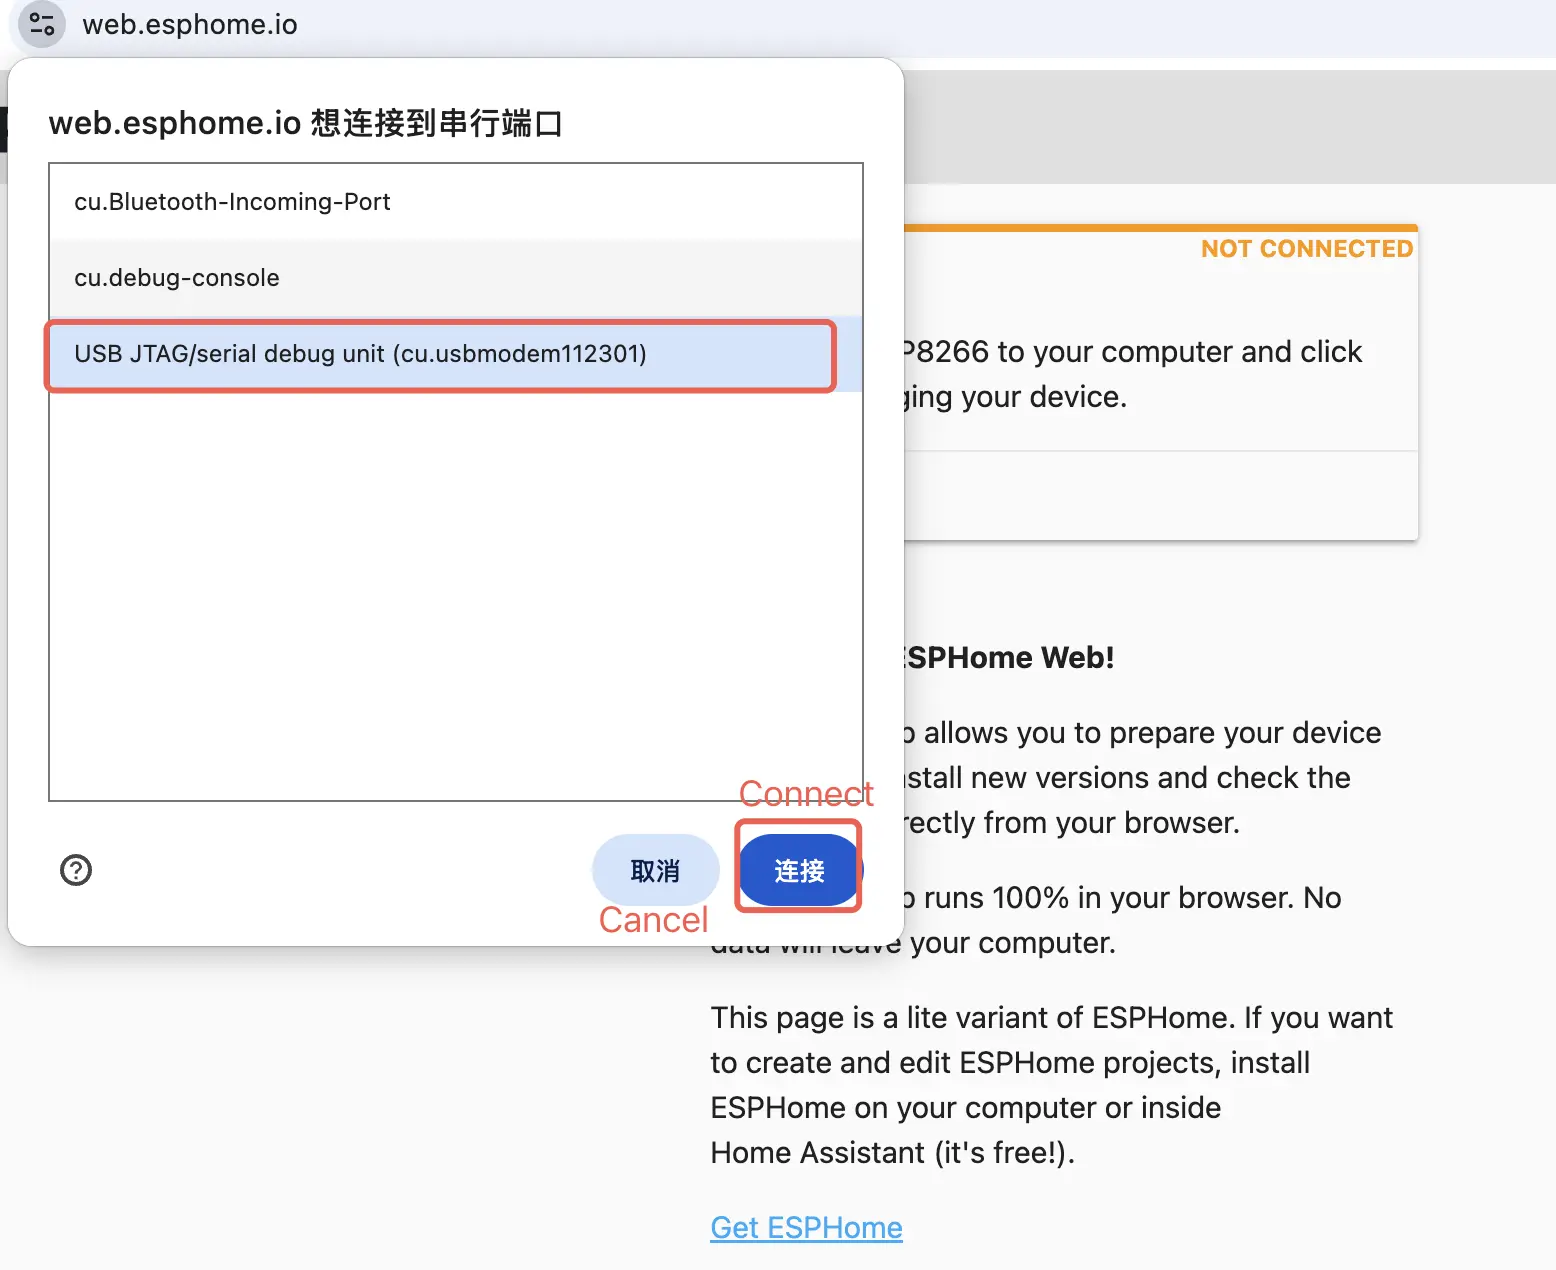
Select the correct serial port
Click INSTALL to upload the firmware
Wait for the flashing process to finish and then RESET the device
3. Configure the Device
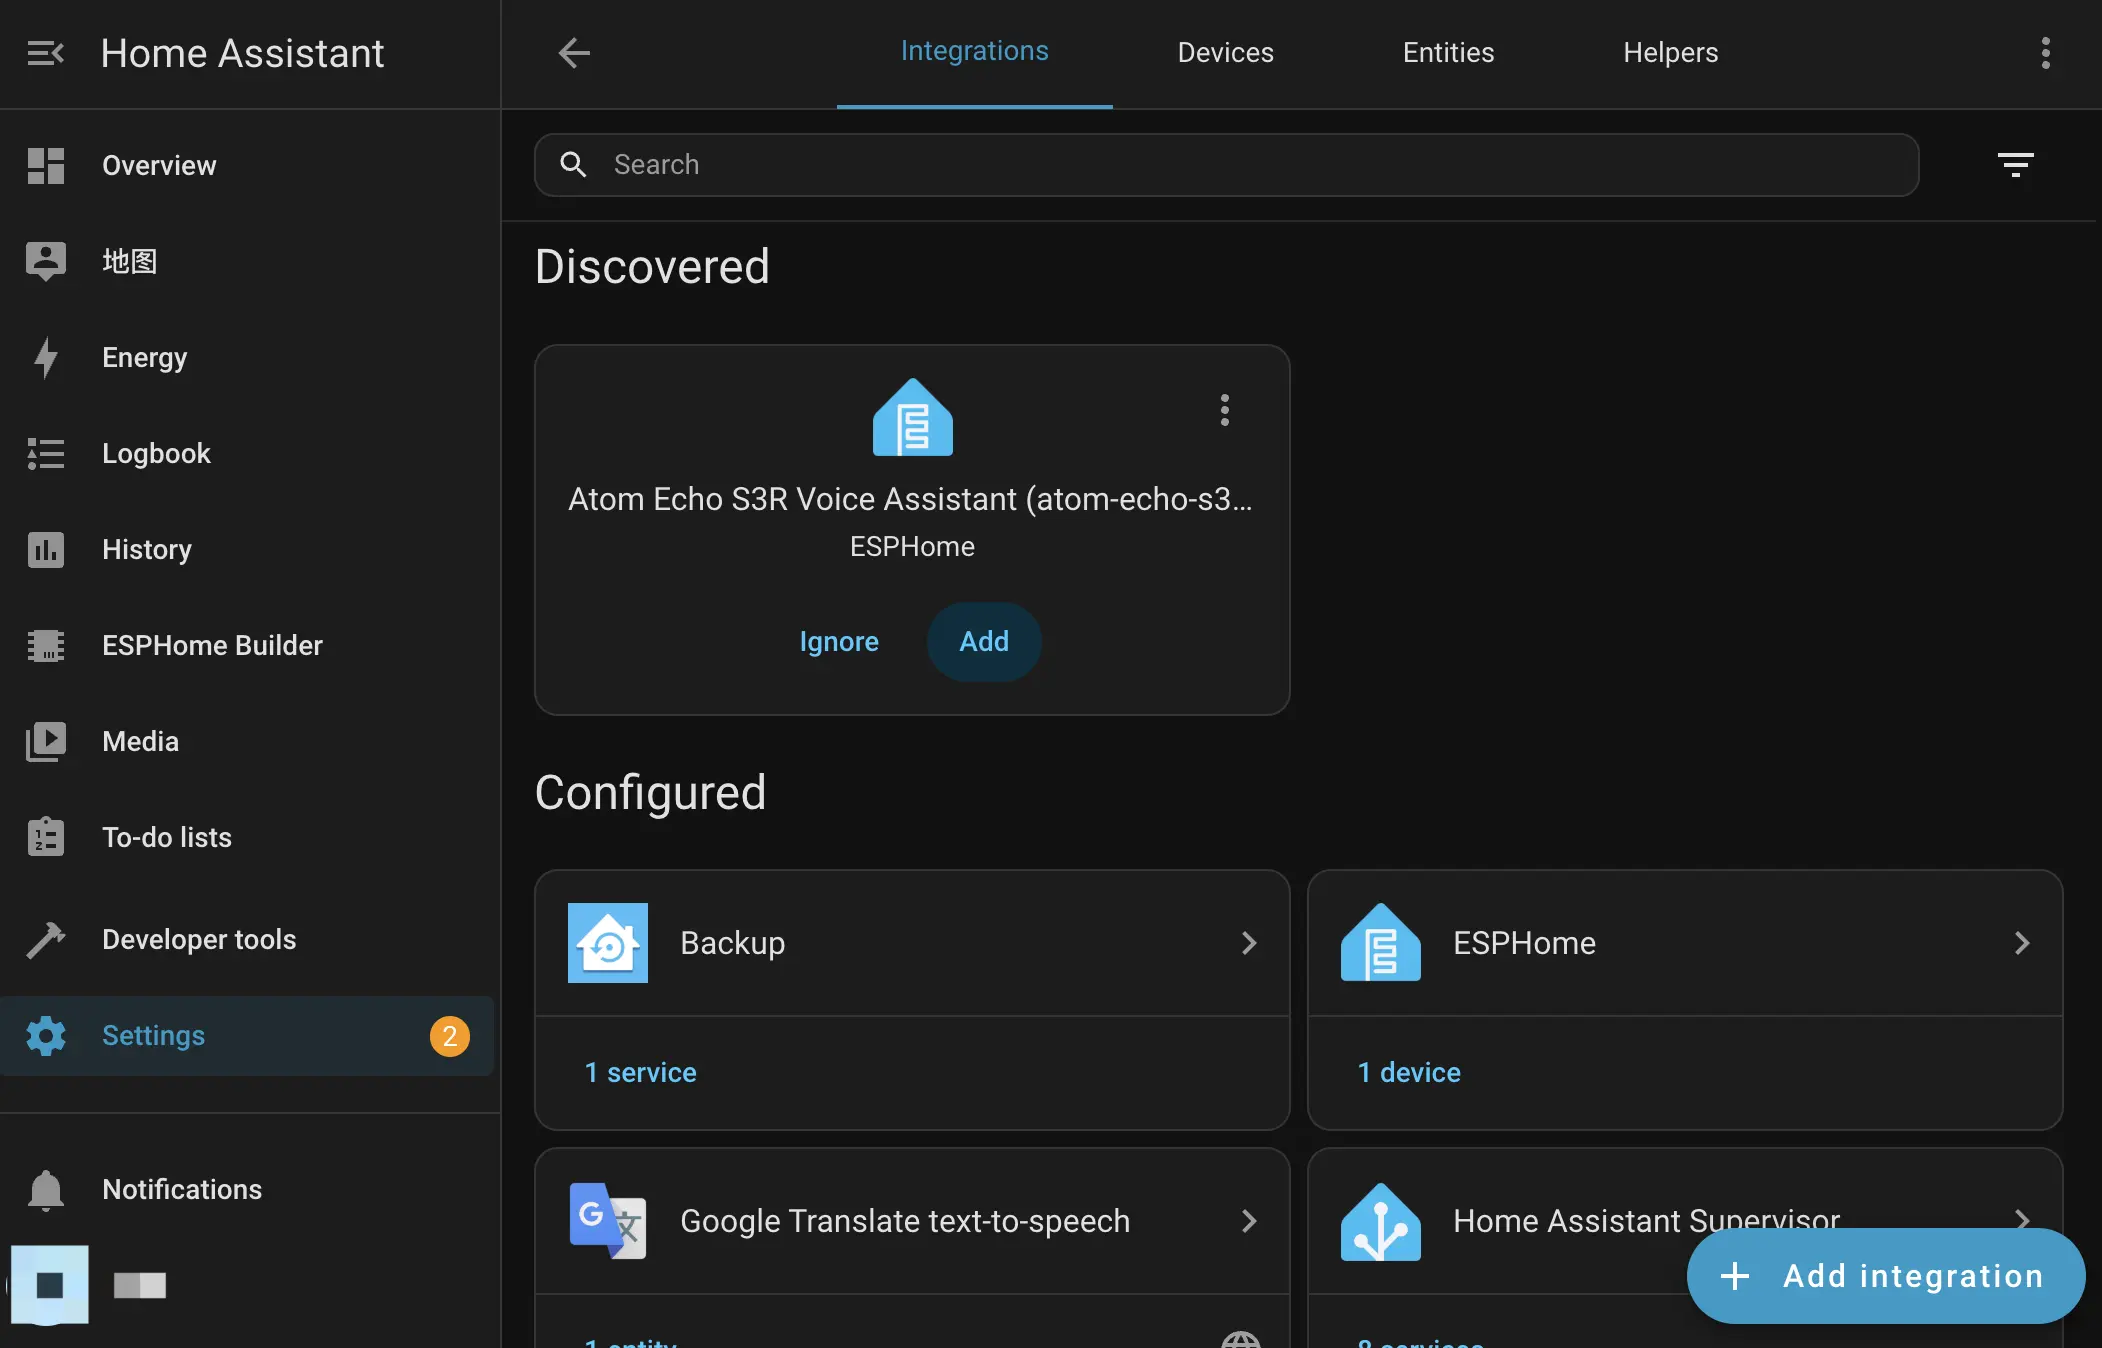
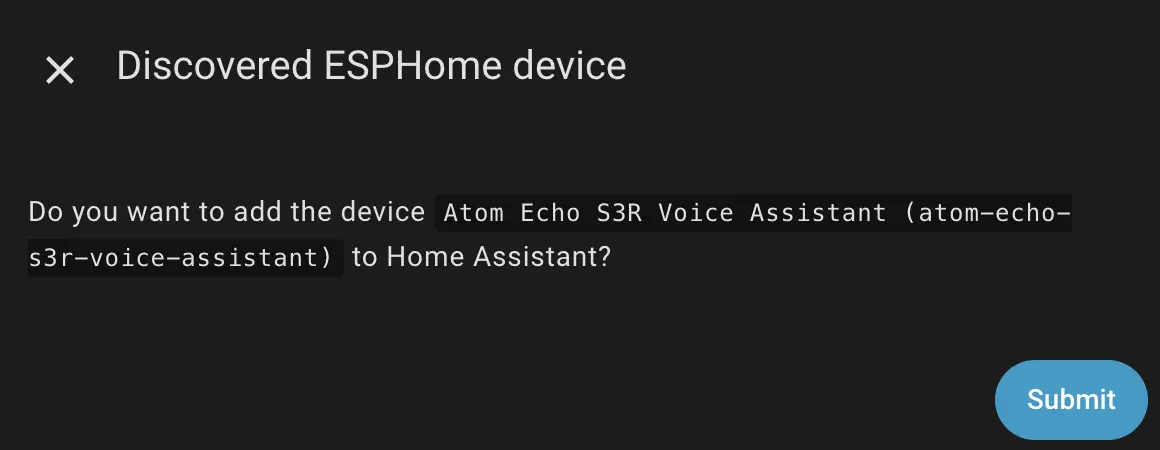
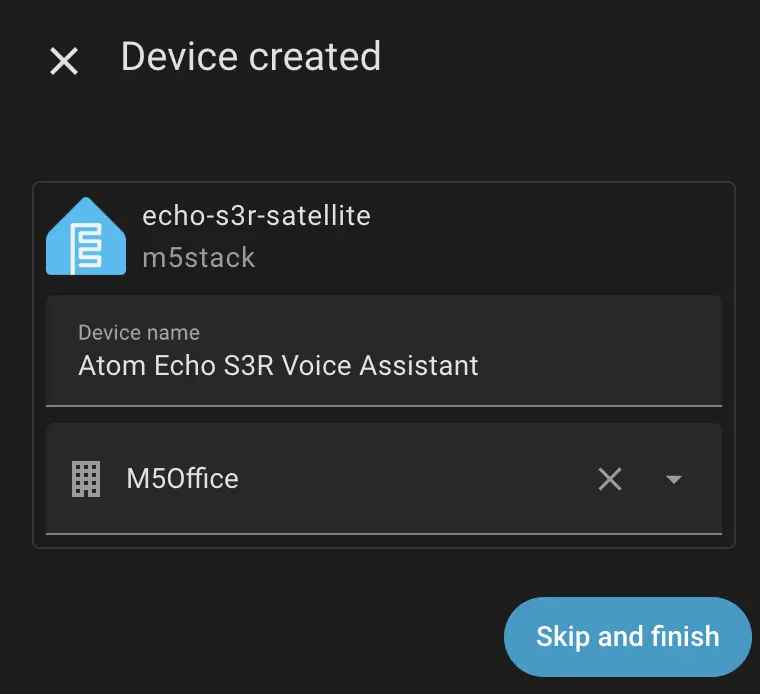
When the device powers up it will automatically connect to WiFi. Home Assistant on the same local network should detect the new device. You can find the discovery notification and click Check it out to configure it.
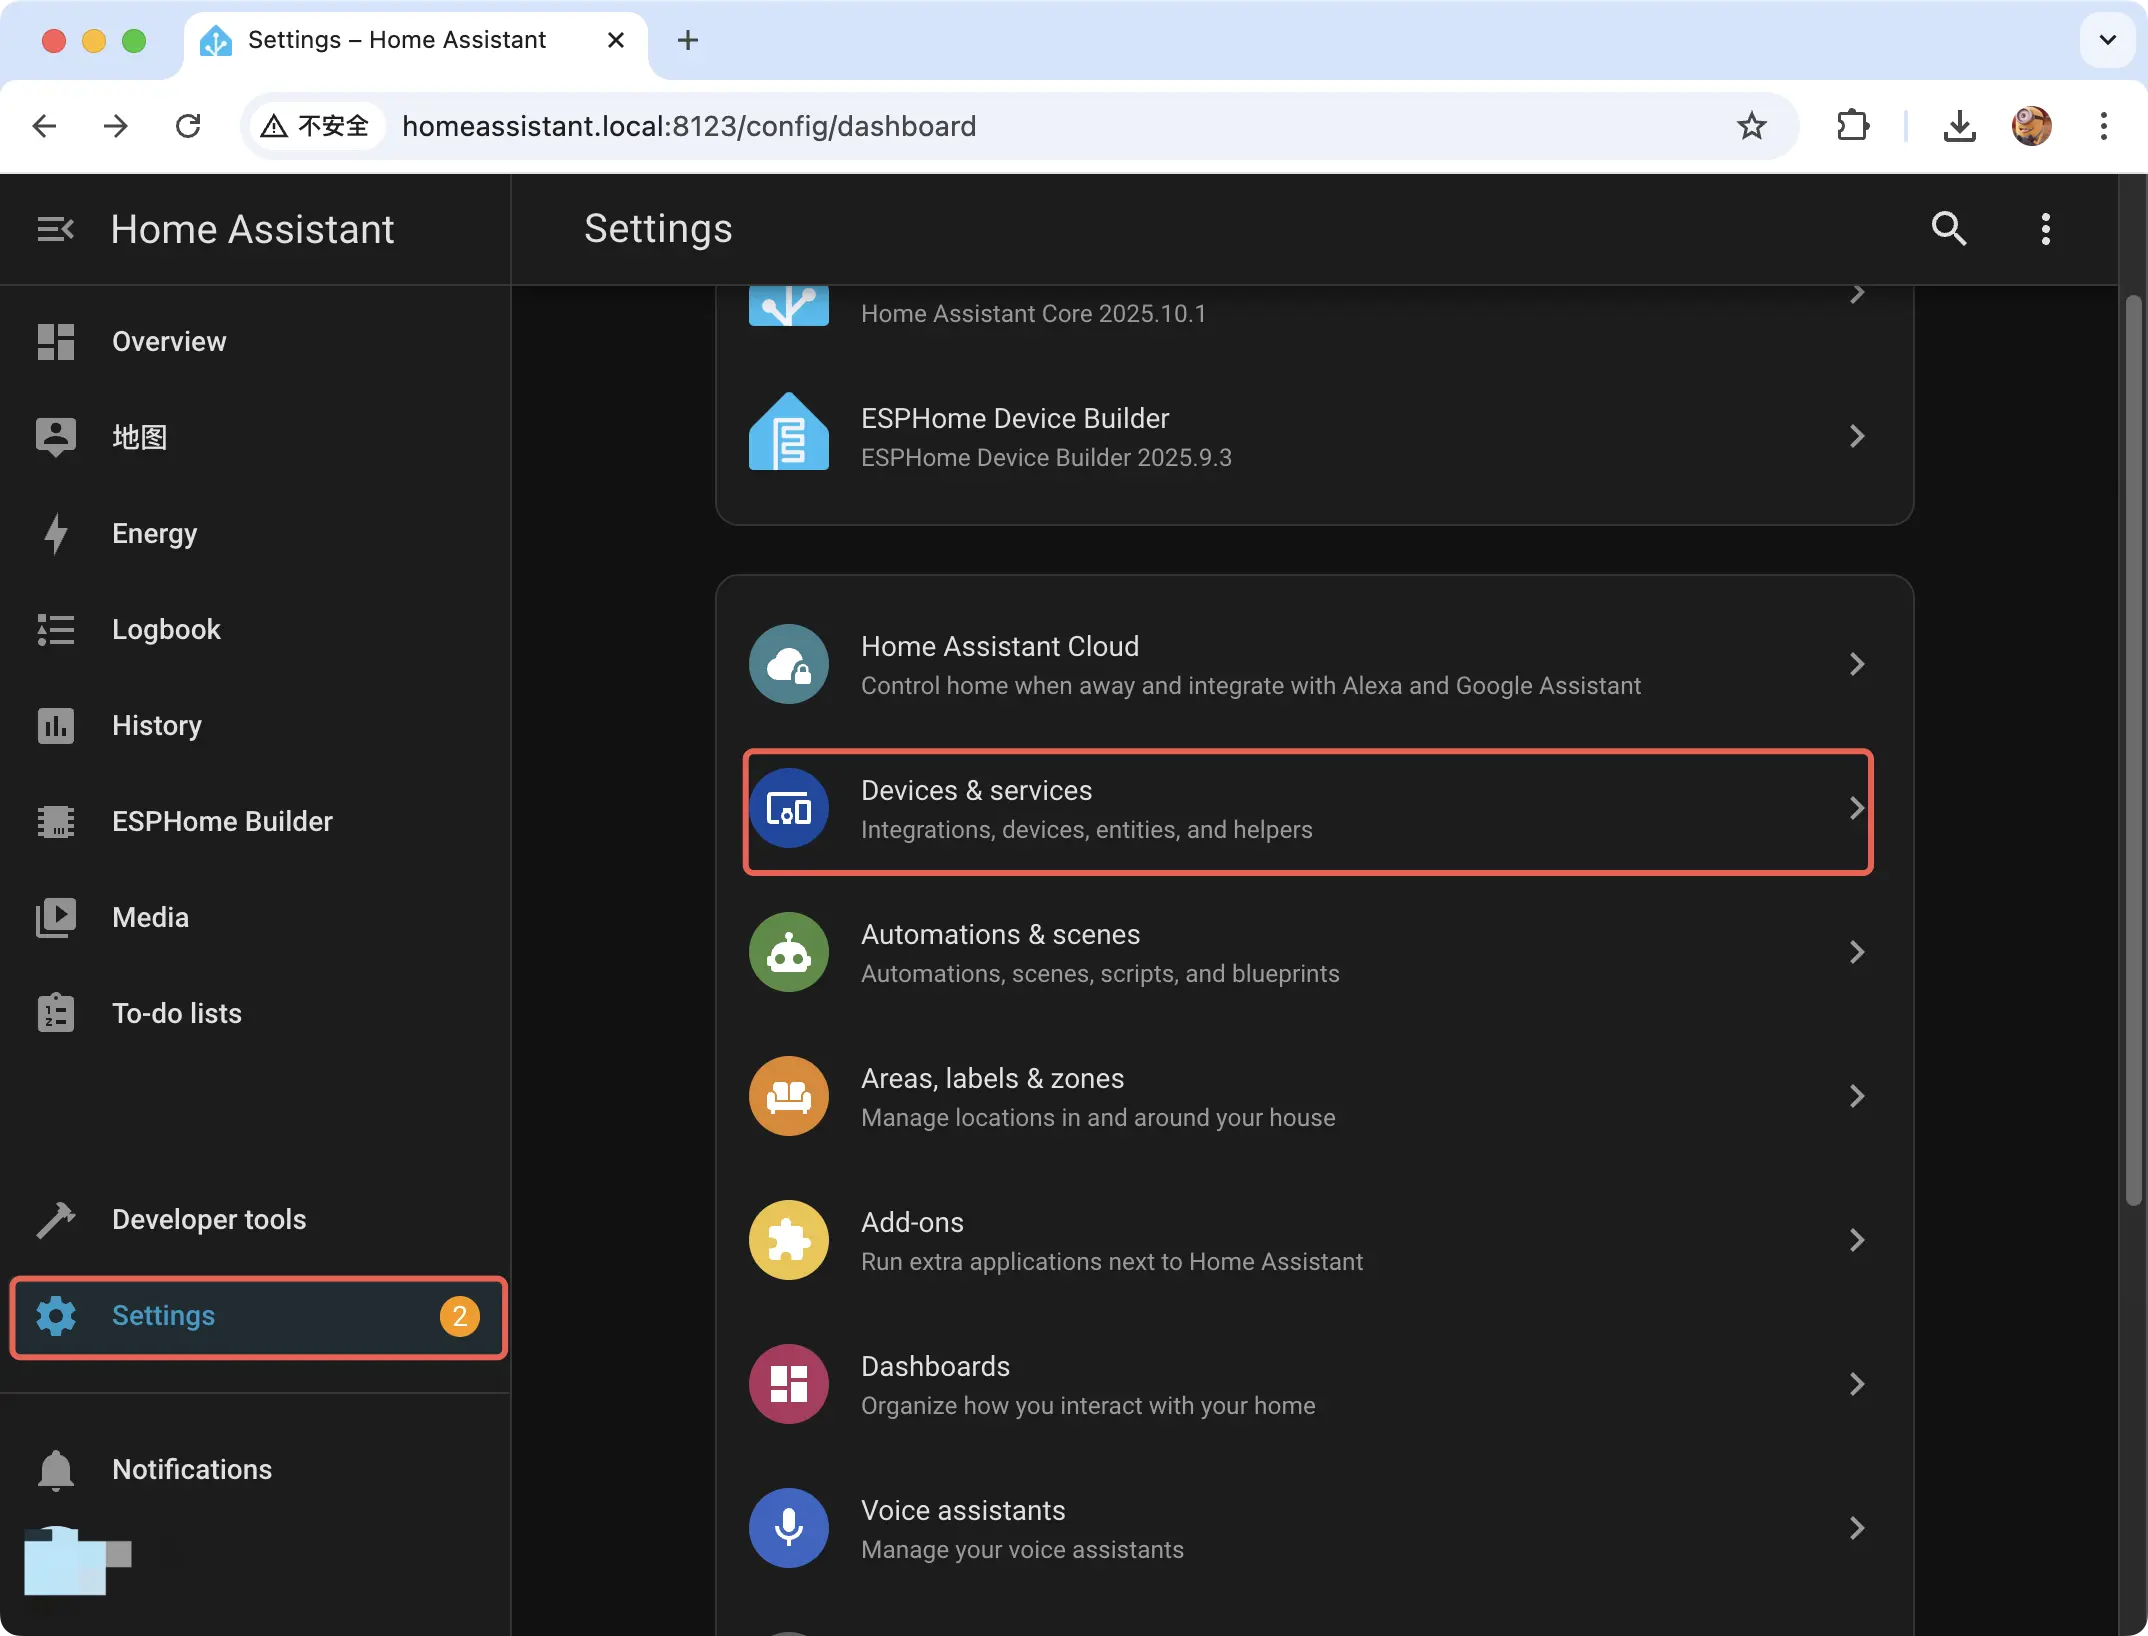
If you don't see a notification, go to Settings -> Devices & Services to find and configure the device.
Click Add to add the integration
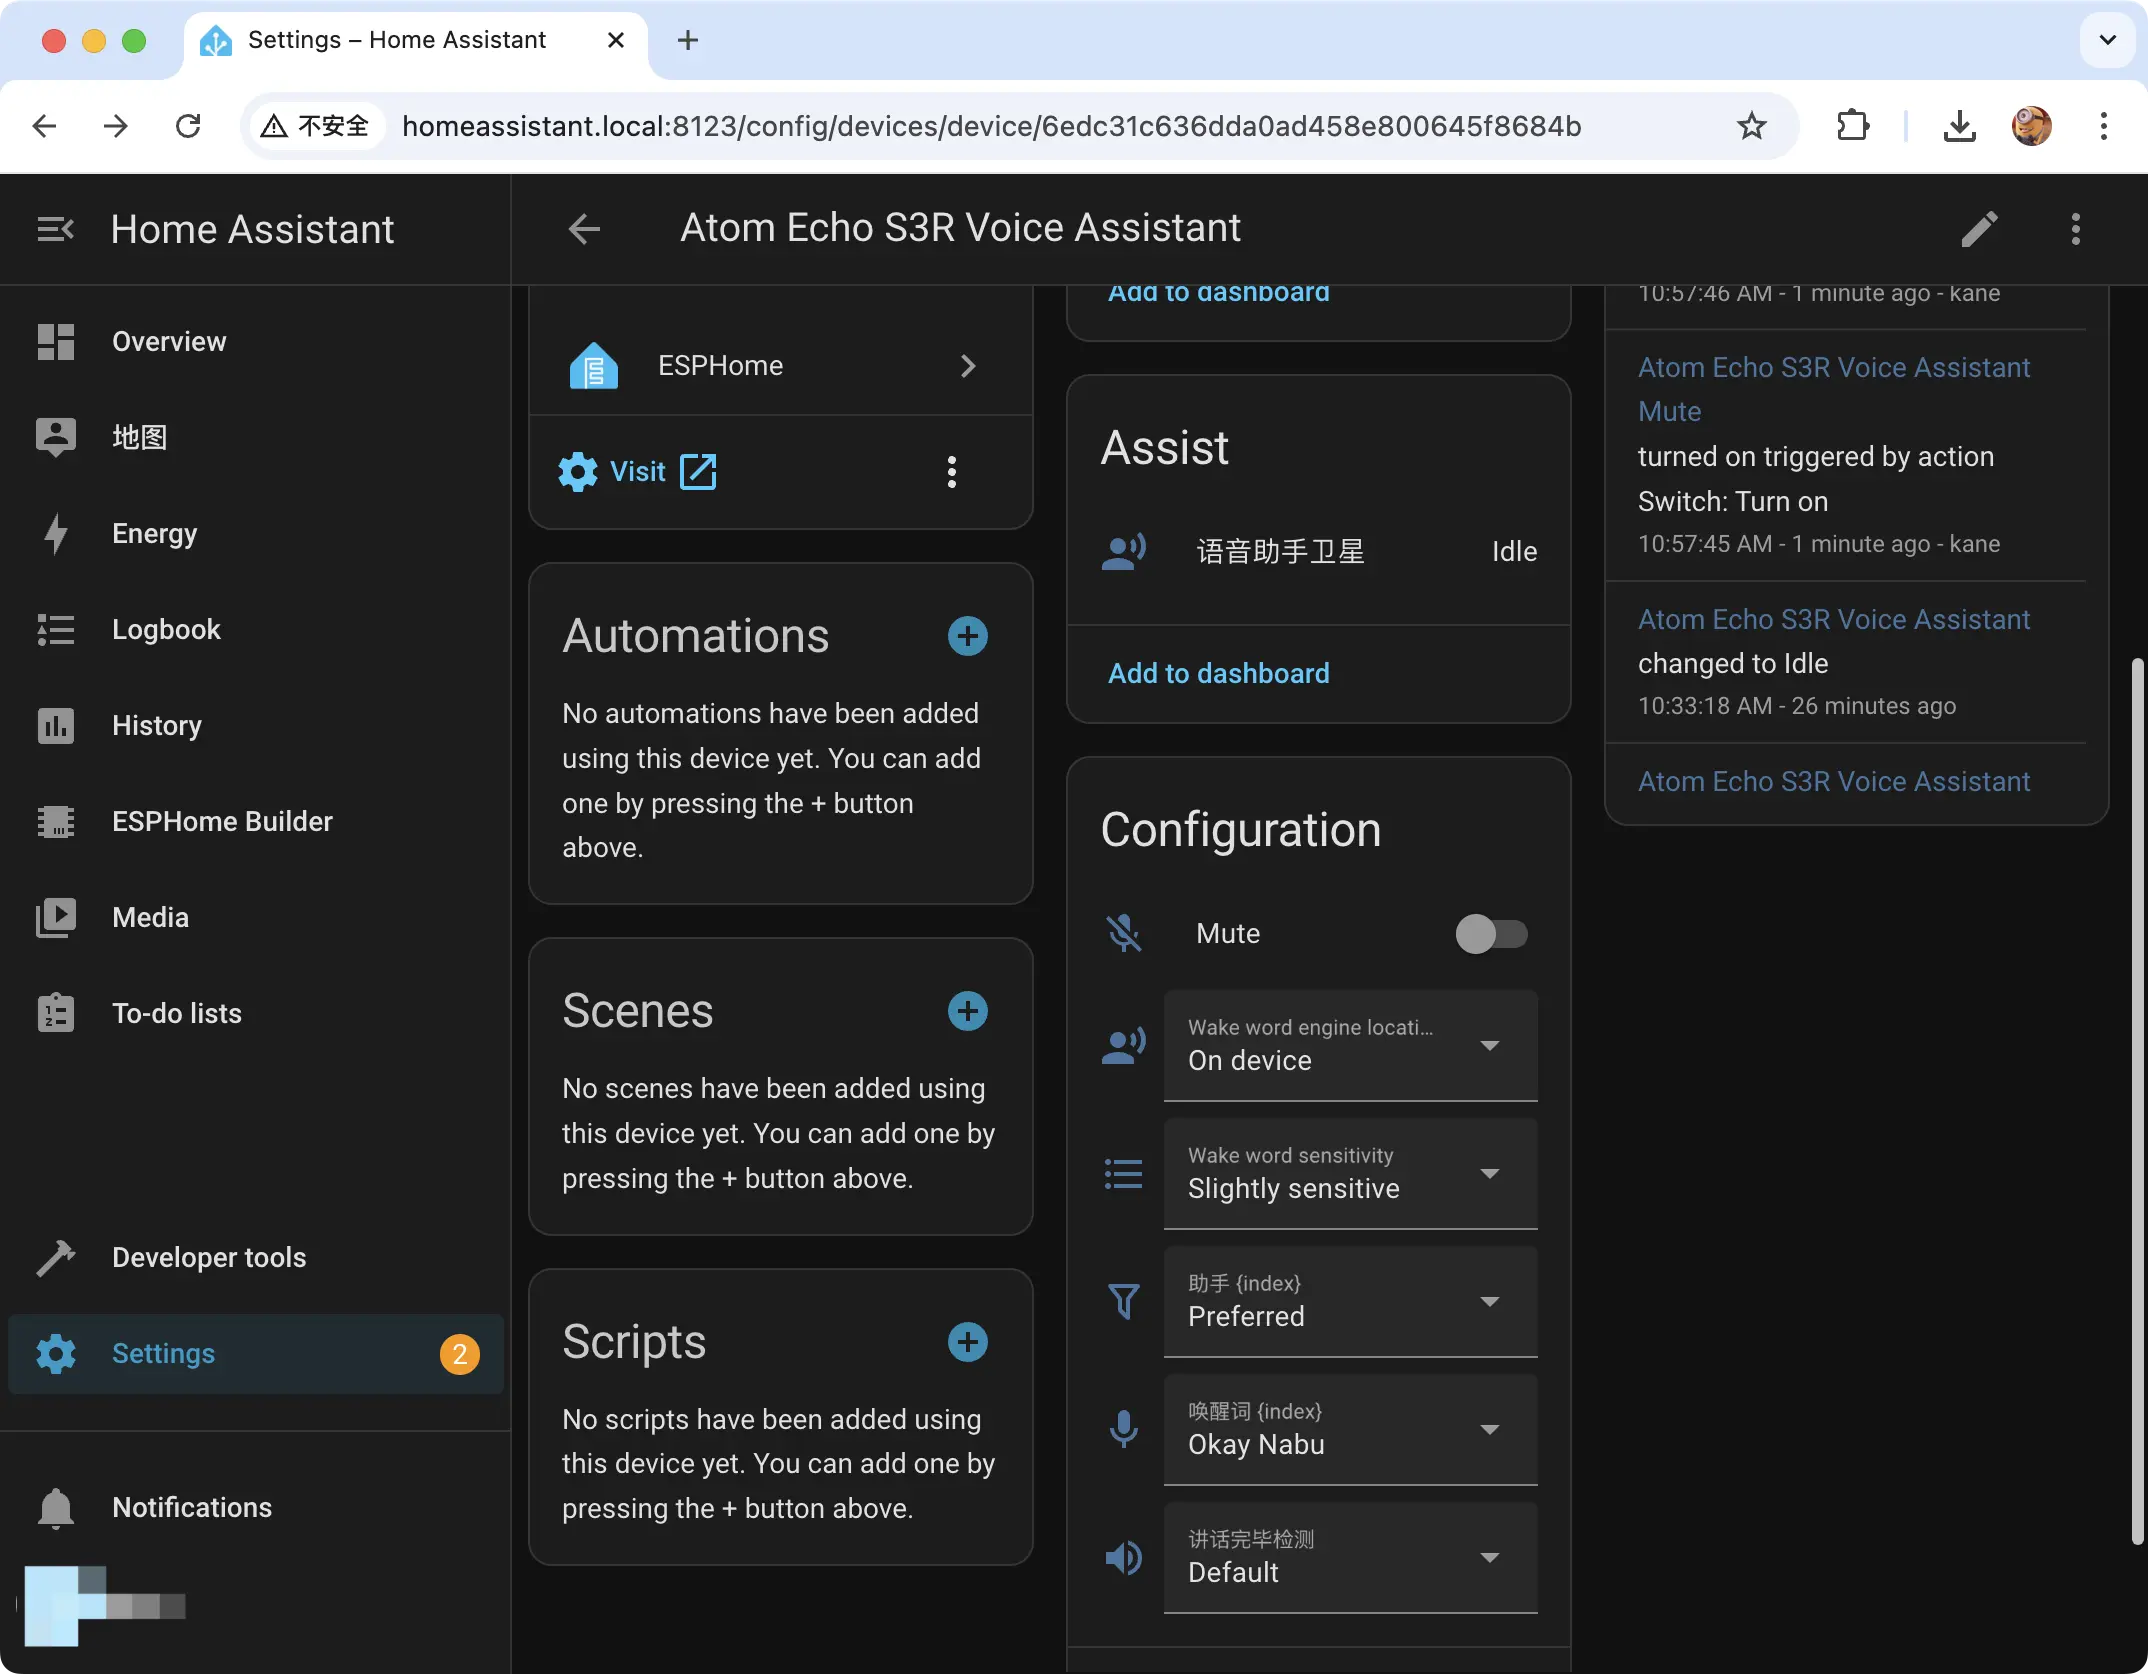
4. Test the Device
After you have configured the correct pipeline, try waking the device using the wake word Okay Nabu.
Demo video