

Product Guide
Linux PC
CardputerZero
AI Accelerator Card
LLM-8850 Card
Large Language Models
AI & Agent
Real-Time AI Voice Assistant
XiaoZhi Voice Assistant
AtomS3R-M12 Volcengine Kit
Offline Voice Recognition
Industrial Control
IoT Measuring Instruments
Air Quality
PowerHub
Module13.2 PPS
VAMeter
T-Lite
Input & Output Devices
Ethernet Camera
PoECAM
Wi-Fi Camera
Unit CamS3/-5MP
AI Camera
LoRa & LoRaWAN
Motor Control
Restore Factory Firmware
DIP Switch Usage Guide
Air Quality / Air Quality v1.1 User Guide
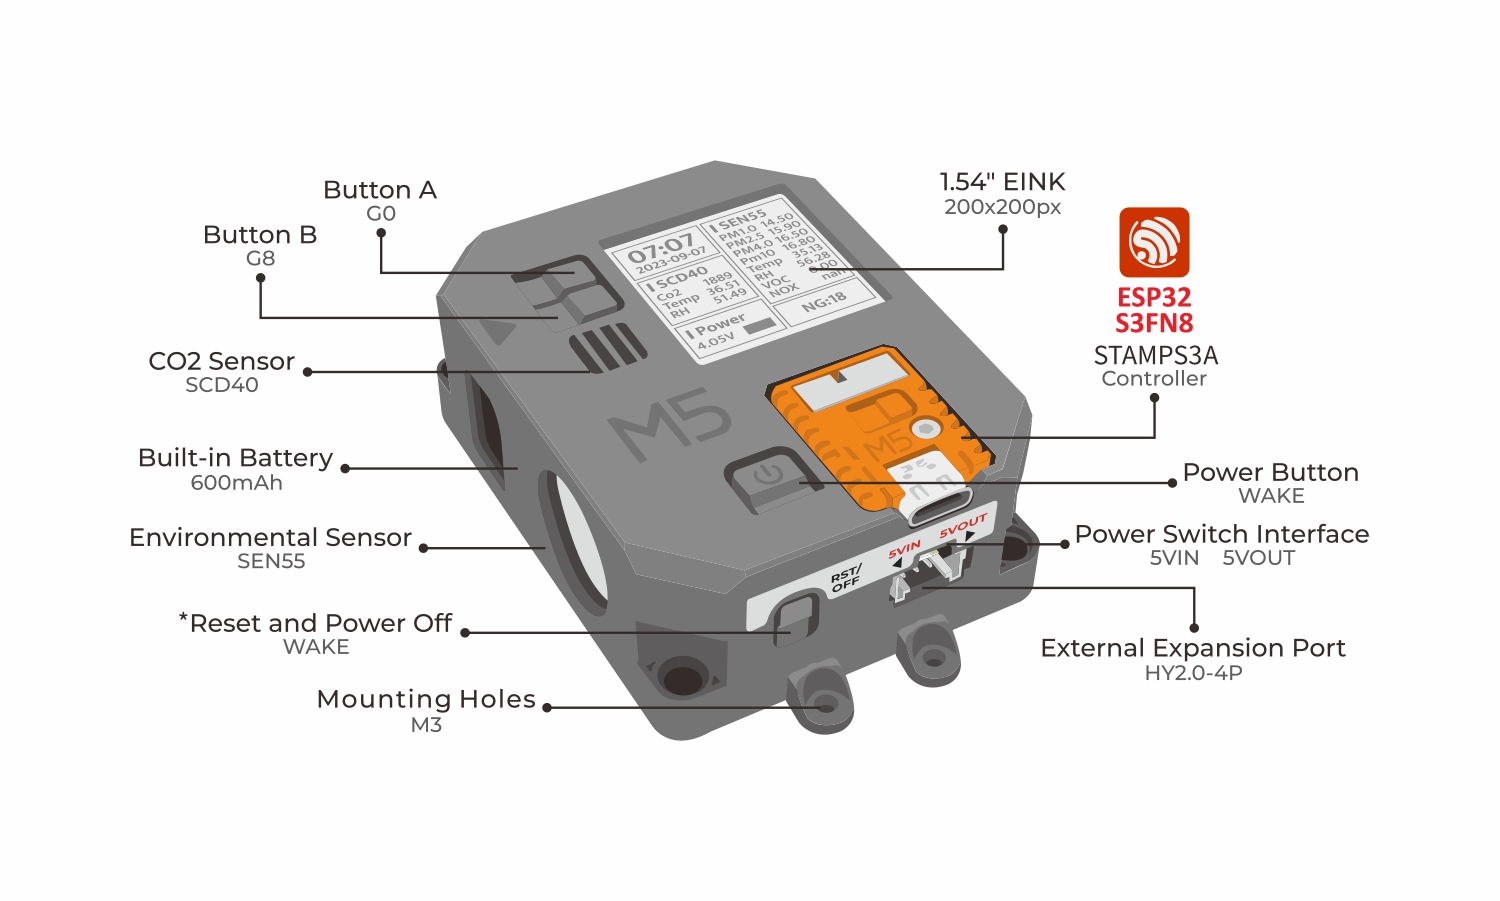
Product Introduction
Air Quality / Air Quality v1.1 is an integrated low-power air quality monitoring device with a built-in multifunctional air quality sensor SEN55 and CO2 sensor SCD40. It can monitor PM1.0, PM2.5, PM4, PM10 particulate matter, temperature, humidity, VOC, and CO2 concentrations in the air, making it suitable for long-term online monitoring of air environments in homes, schools, industries, and hospitals.
About Device Power Supply
This product is powered by a built-in battery and supports low-power timed wake-up. It also supports external USB power, allowing it to keep operating without entering sleep mode so the sensors can work continuously and ensure data collection accuracy.
Learn
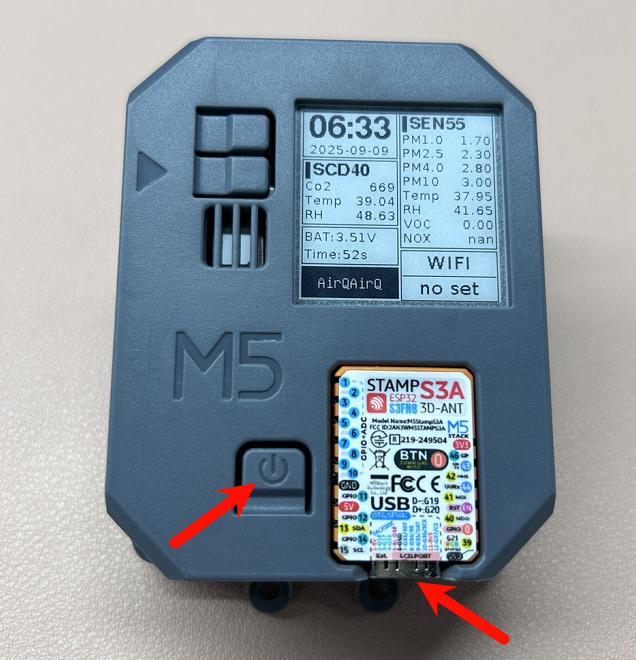
Power On/Off and Reset
- Power On: Long press the
Power Button. - Reset and Power Off:
- When powered via USB, pressing
Reset and Power Offwill reset the device. - When powered by battery, pressing
Reset and Power Offwill turn off the device. - When powered via USB, the device cannot be turned off.
- When powered via USB, pressing
Button Operation
Single click
Button Ato enter the remote QR code page:- Single click Button A to return to the previous page
Single click
Button Bto enter the deployment page:- Single click
Button Ato return to the previous menu - Long press
Button Afor 5s to turn the buzzer on/off - Single click
Button Bto enable AP configuration - Long press
Button Bfor 5s to restore factory settings
- Single click
Set Up Remote Access
- Single click the power button to turn on the device, or use USB power.
- Press
Button Bto enter AP configuration mode. The screen will display the AP hotspot name and QR code for connection.
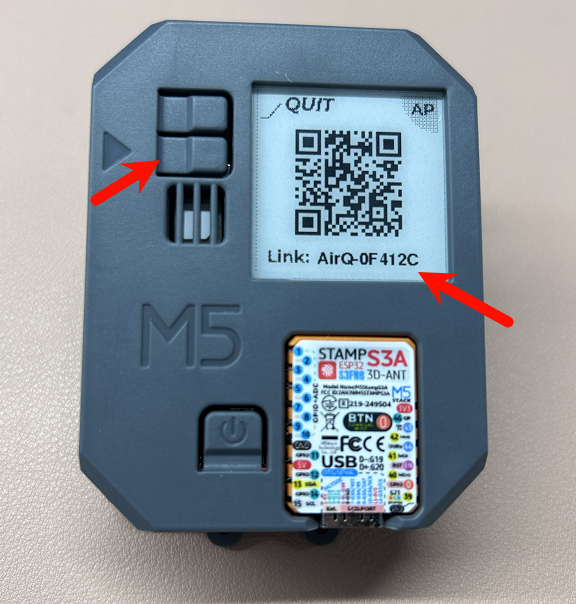
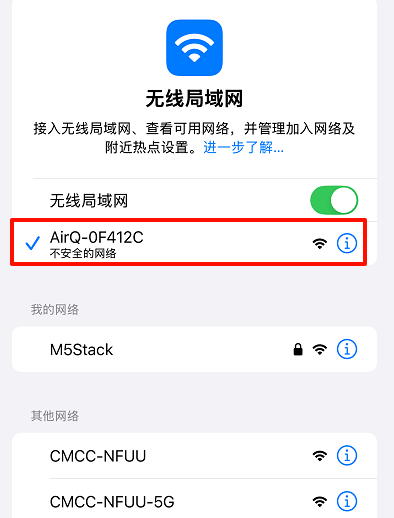
- Connect your phone to the AP hotspot
AirQ-xxxxxx. After connecting, the screen will display the configuration QR code and IP address.
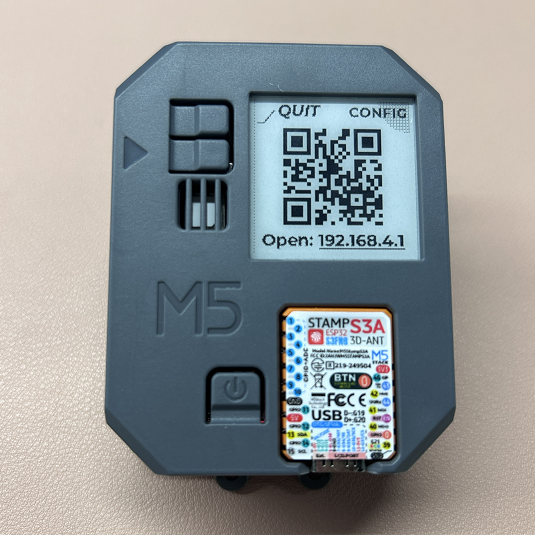
- Scan the configuration QR code on the device screen, or manually visit 192.168.4.1 to access the Wi-Fi configuration page. Configure the Wi-Fi, timezone, wake-up interval, and other information for the device, then click
CONNECT.
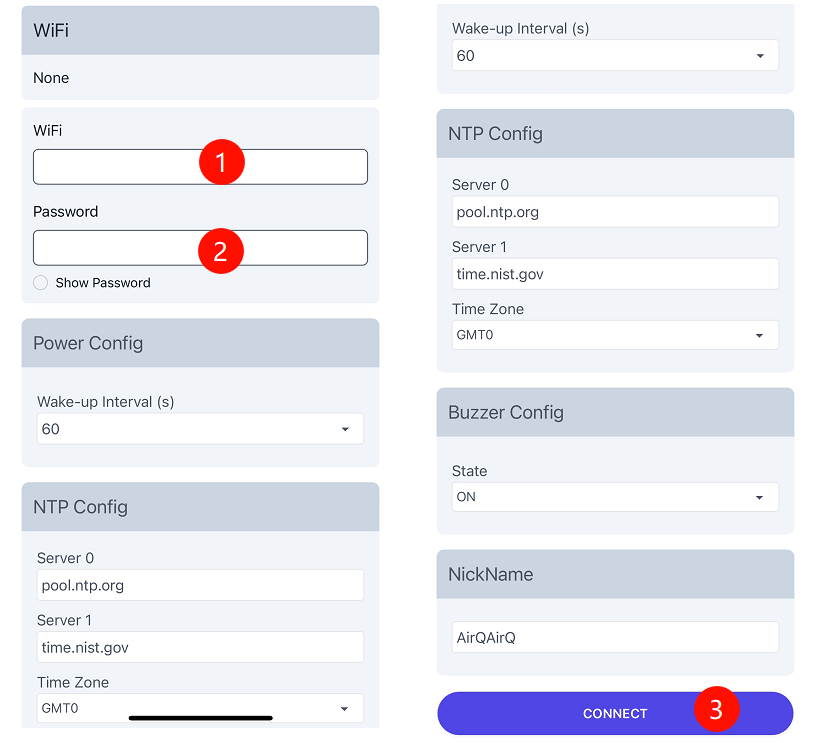
The screen will now display the public access address for retrieving device data.

- Copy this address into your computer or mobile browser to remotely access the device's data reading page and get real-time data collection information.
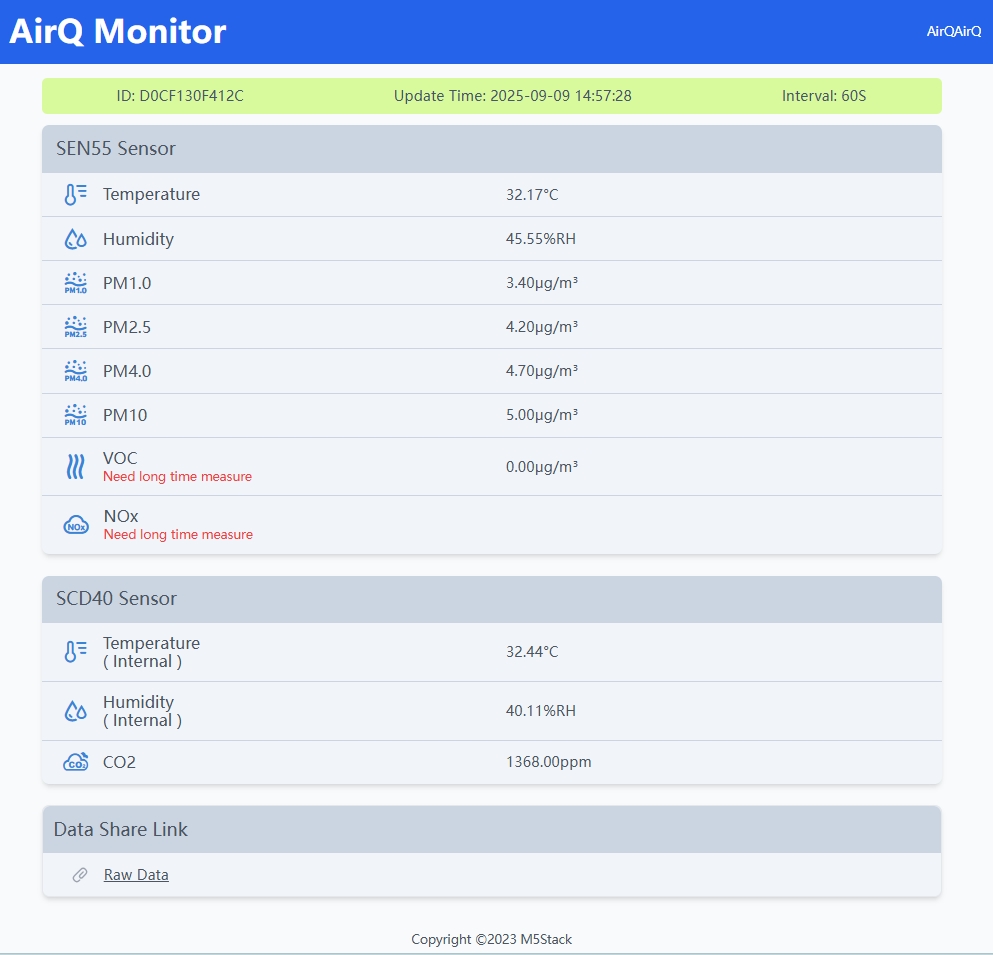
(Note: The Data Share Link shown above is the raw data interface. For detailed data format information, refer to Raw Data Format.)
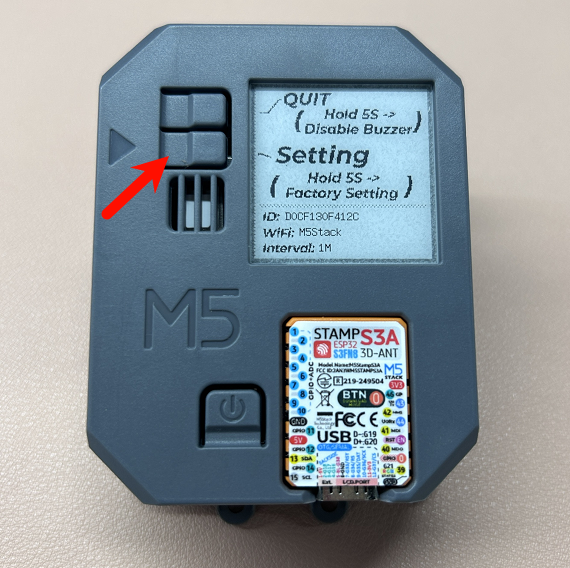
If the device is restarted, press Button B to enter the settings menu, then press Button B again to re-enter AP configuration mode.
Restore Factory Settings
- With the device powered on, press
Button Bto enter the settings menu.
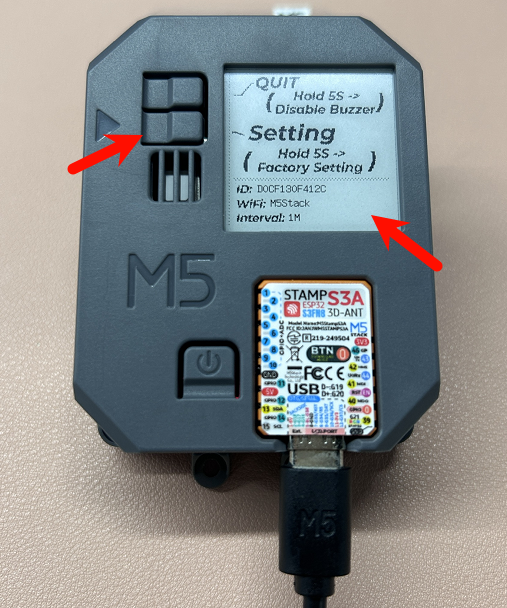
- Long press
Button Bfor 5s. The device will restore factory settings and restart.