UiFlow Tutorial
UiFlow1 Quick Start
2. Firmware & Program 1.0
UiFlow1 Development Guide
Project Management
Use LTE network
UiFlow1 Blockly
Event
UI
Unit
Module
Hat
UiFlow2 Quick Start
2. Firmware & Program 2.0
UiFlow2 Development Guide
UI Editor
Device Security & Sharing
UiFlow2 Video Column
Tough Firmware Burning and Program Pushing
1.Preparation
- Refer to the UIFlow Web IDE tutorial to understand the basic process of using UIFlow and complete the installation of the M5Burner firmware burning tool.
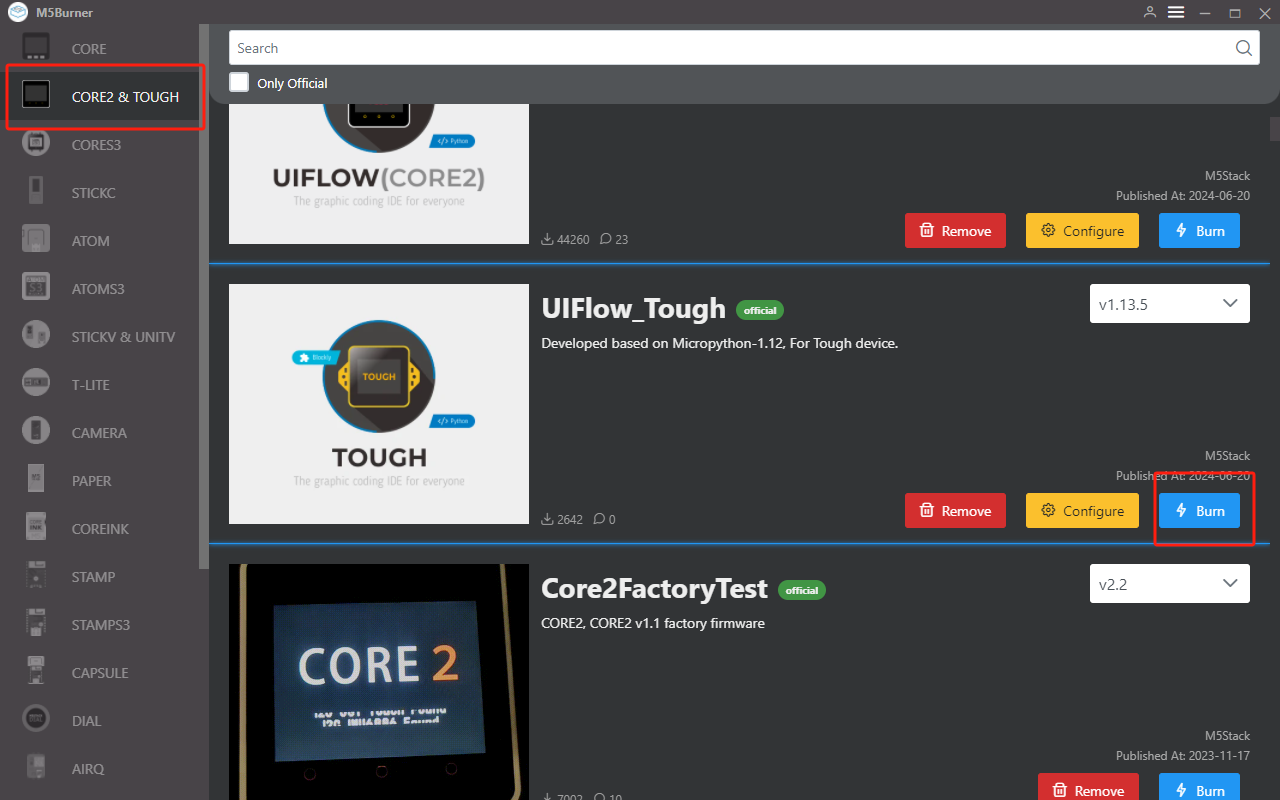
- Download the firmware for
Toughin M5Burner, as shown in the picture below.
2.USB Driver Installation
Click the links below to download the driver program that matches your operating system. There are currently two versions of the driver chip, CP210X (for the
CP2104 version) / CP34X (for the CH9102 version) driver package. After extracting the package, select the installation package that matches the bit version of your operating system for installation. (If you are unsure of which USB chip your device uses, you can install both drivers. CH9102_VCP_SER_MacOS v1.7 may show an error during installation, but it has actually been installed successfully, so you can ignore it.)| Driver Name | Applicable Driver Chip | Download Link |
|---|---|---|
| CP210x_VCP_Windows | CP2104 | Download |
| CP210x_VCP_MacOS | CP2104 | Download |
| CP210x_VCP_Linux | CP2104 | Download |
| CH9102_VCP_SER_Windows | CH9102 | Download |
| CH9102_VCP_SER_MacOS v1.7 | CH9102 | Download |
3.Port Selection
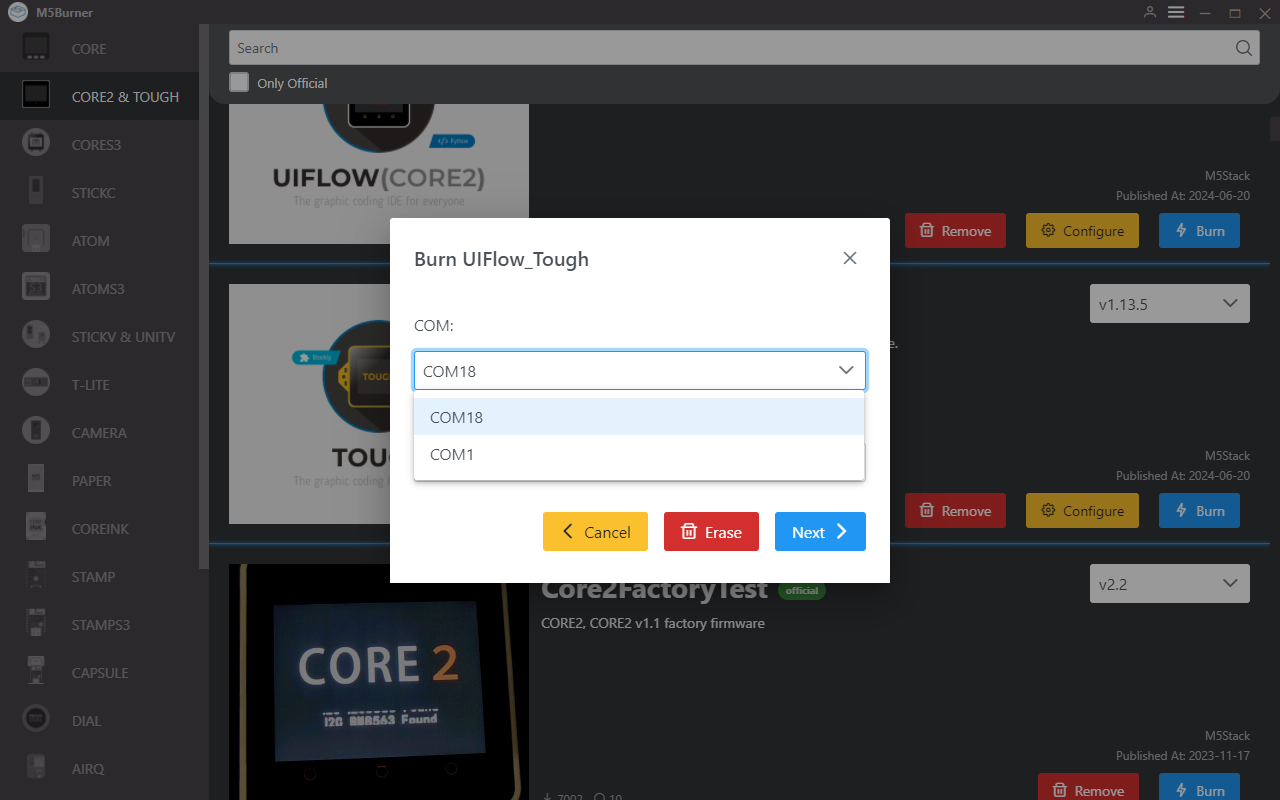
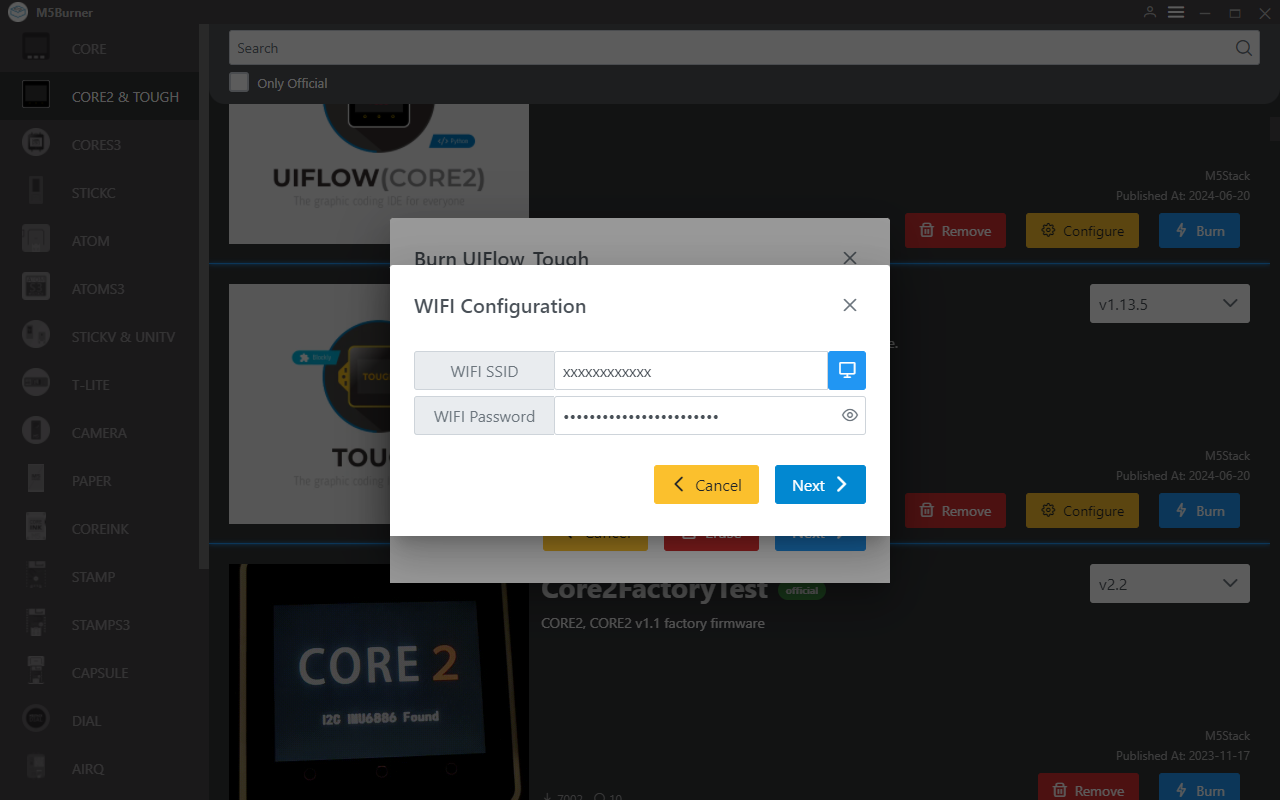
- Connect the device to the computer via a USB cable, click the Burn button for the corresponding firmware in M5Burner, fill in the WiFi information, and select the corresponding device port.
4.Firmware Burning
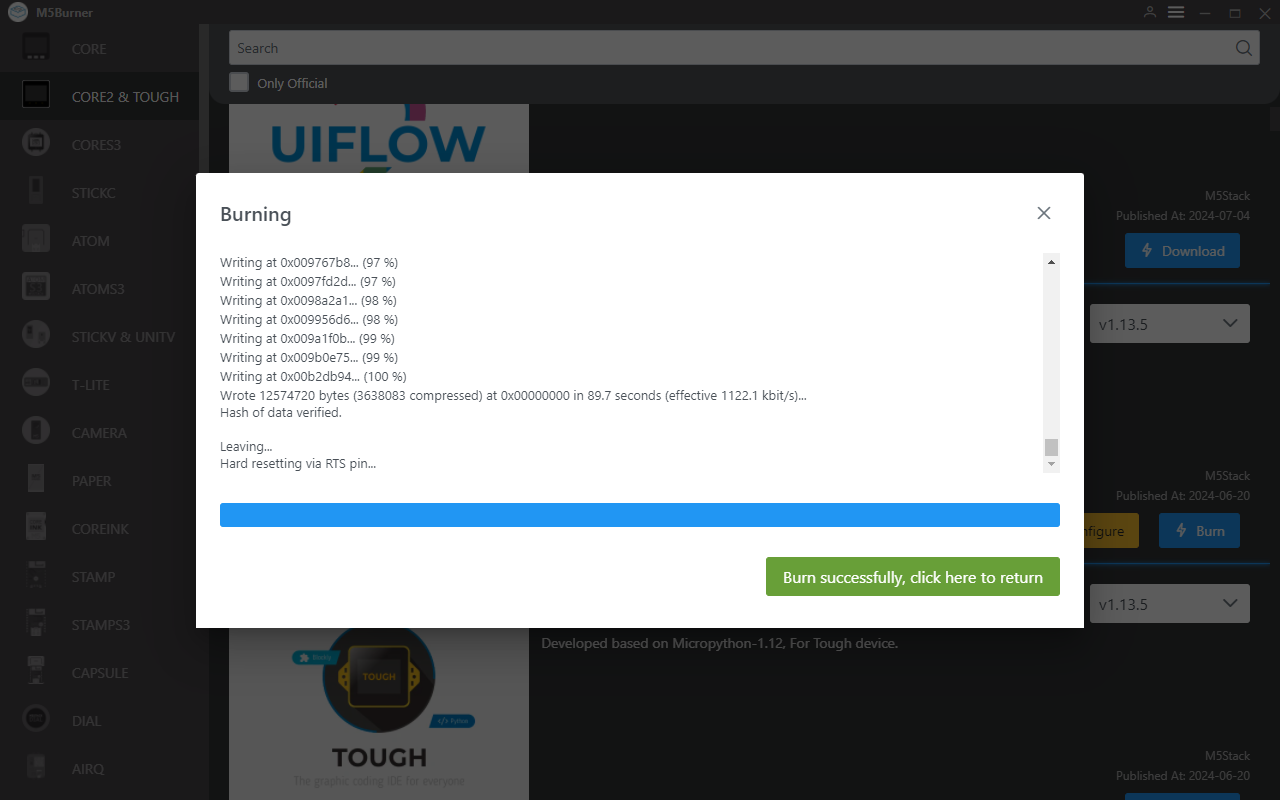
- Click the Start button to begin burning. Note: If burning fails or connection times out during the process, please check for port occupation, or try updating the USB cable, or lower the baud rate.
When the prompt Burn successfully, click here to return appears, it indicates that the burning is successful.
5.API KEY
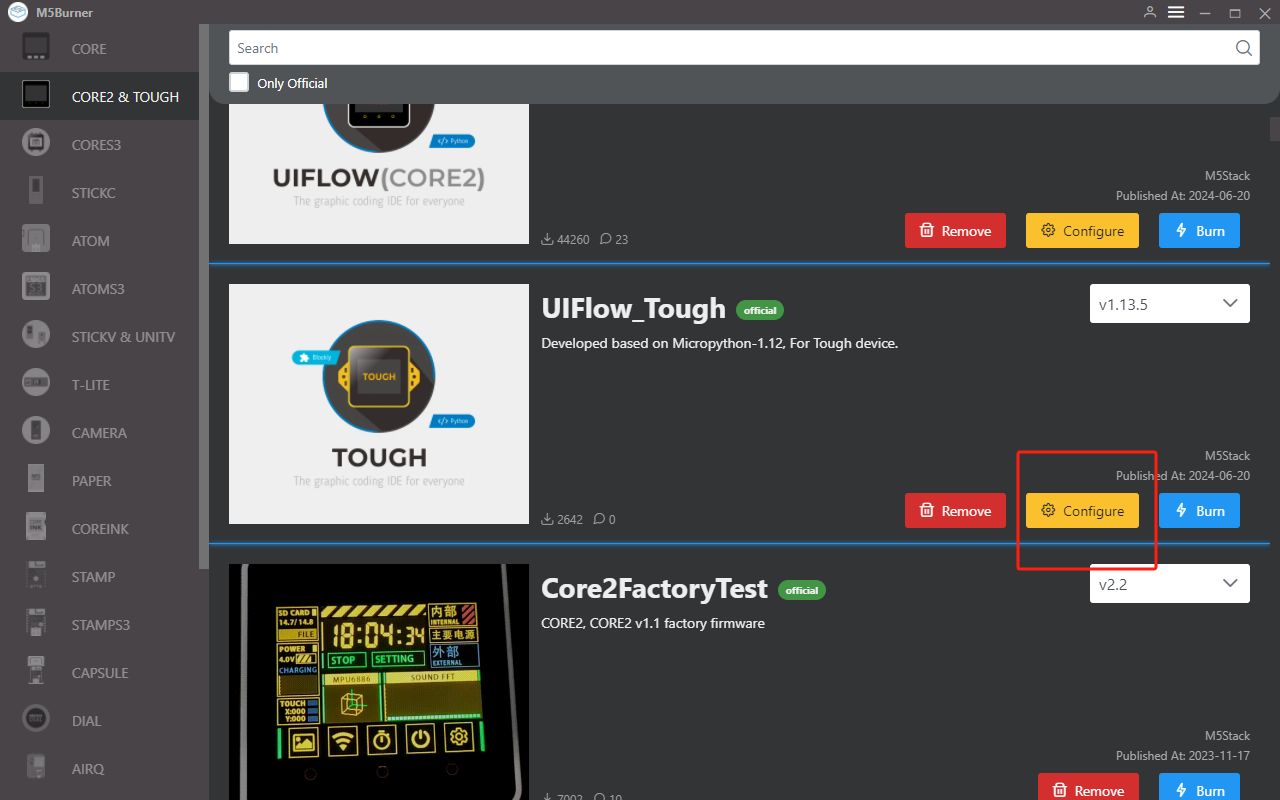
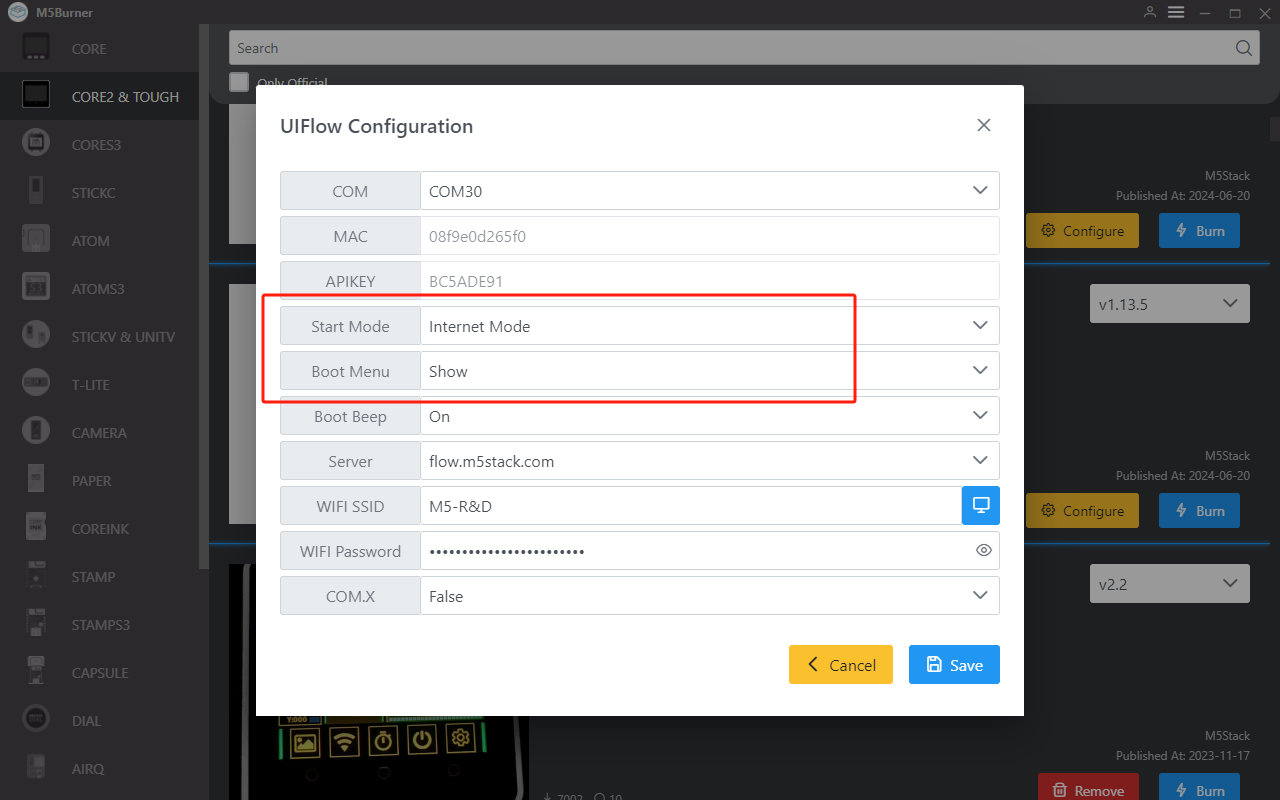
- After completing the firmware burning, the device will reboot and maintain the USB connection. Use M5Burner to click the
Configureoption, select the corresponding port, and clickLoadto load the current device configuration. Once obtained, a pop-up will display the current device'sAPI KEY,Start Mode, and other information, at which point we can copy and save the device's API KEY information for later use. Note: In this example, we will use UIFlow Web IDE (online version) for programming, therefore,Start Modeneeds to be set toInternet Mode.
6.RUN
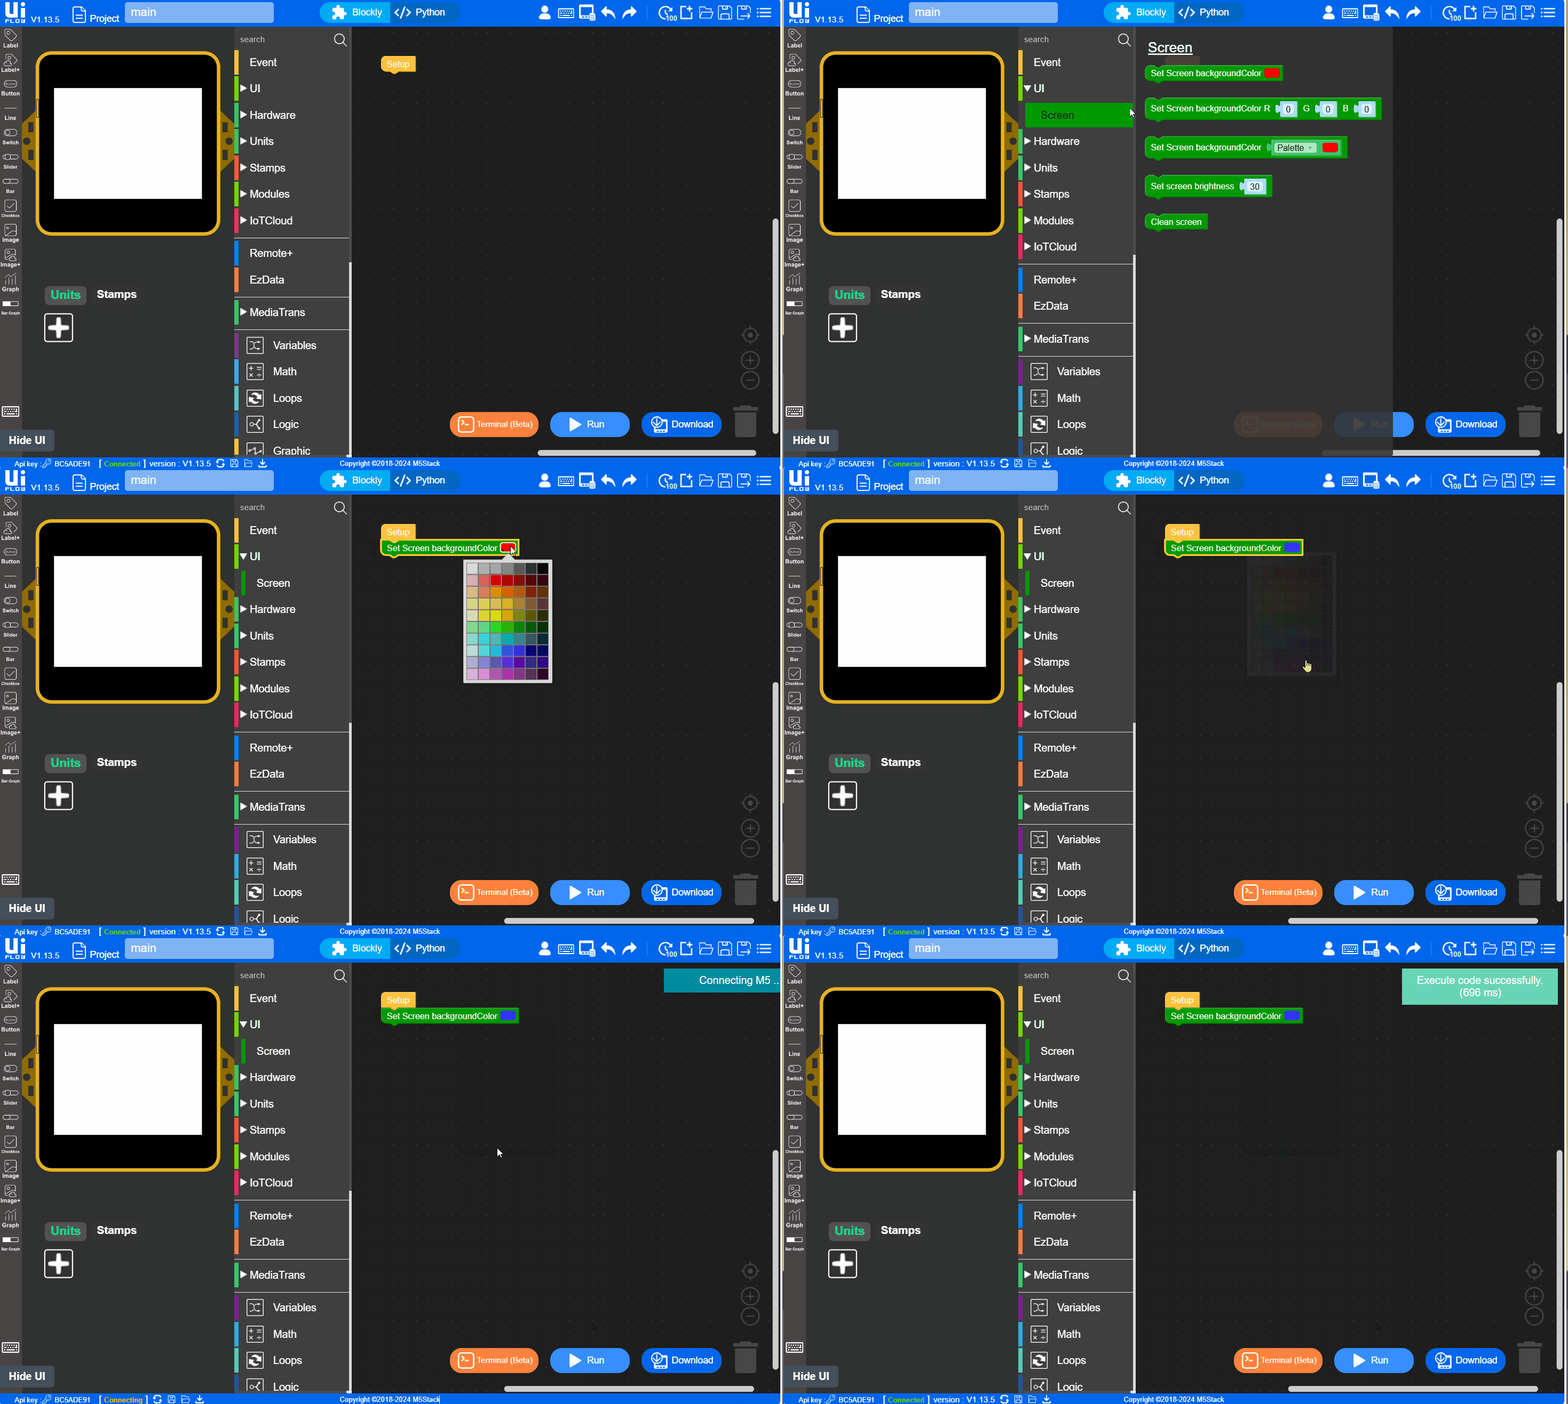
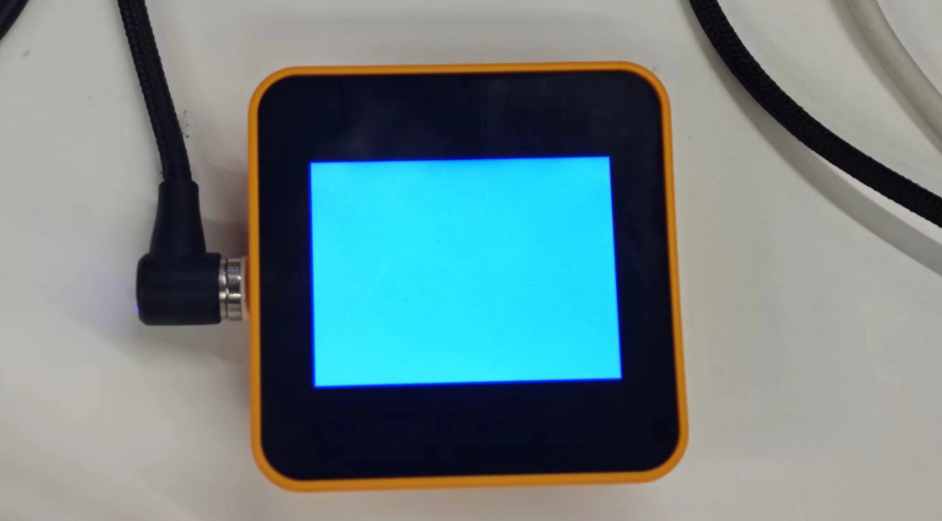
After the above configuration is complete, drag any block to the workspace. Click the triangle Run button in the lower right corner to execute the program.
7. USB Programming Mode
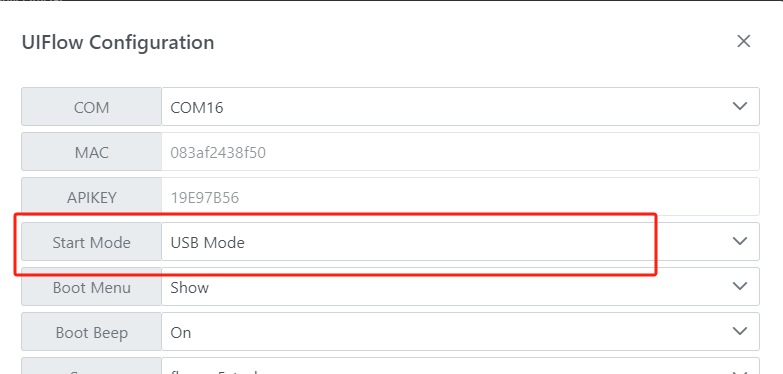
- Refer to the UIFlow Desktop IDE Tutorial for the installation process of UIFlow Desktop and understand the basic workflow. Follow the operations below to set the device to USB programming mode, or use the
Configureoption in M5Burner to setStart ModetoUSB Mode, and then you can program with UIFlow Desktop IDE.
