StickC: Flash Firmware & Run Code
1.Preparation
Refer to the UIFlow2 Web IDE tutorial, to understand the basic process of using UiFlow2 and complete the installation of the M5Burner firmware burning tool.
- Log in and register for M5Burner. After the device is successfully burned, the device information will be bound to the account at the same time.

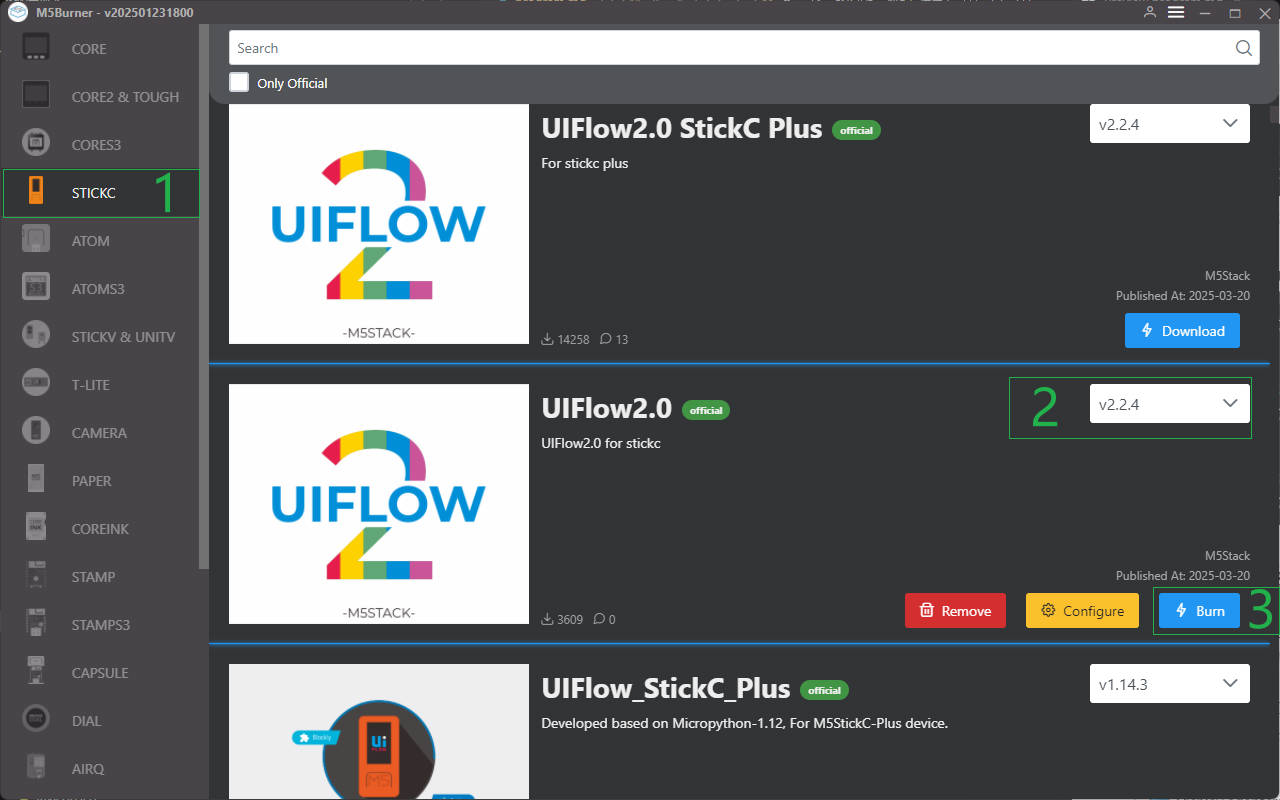
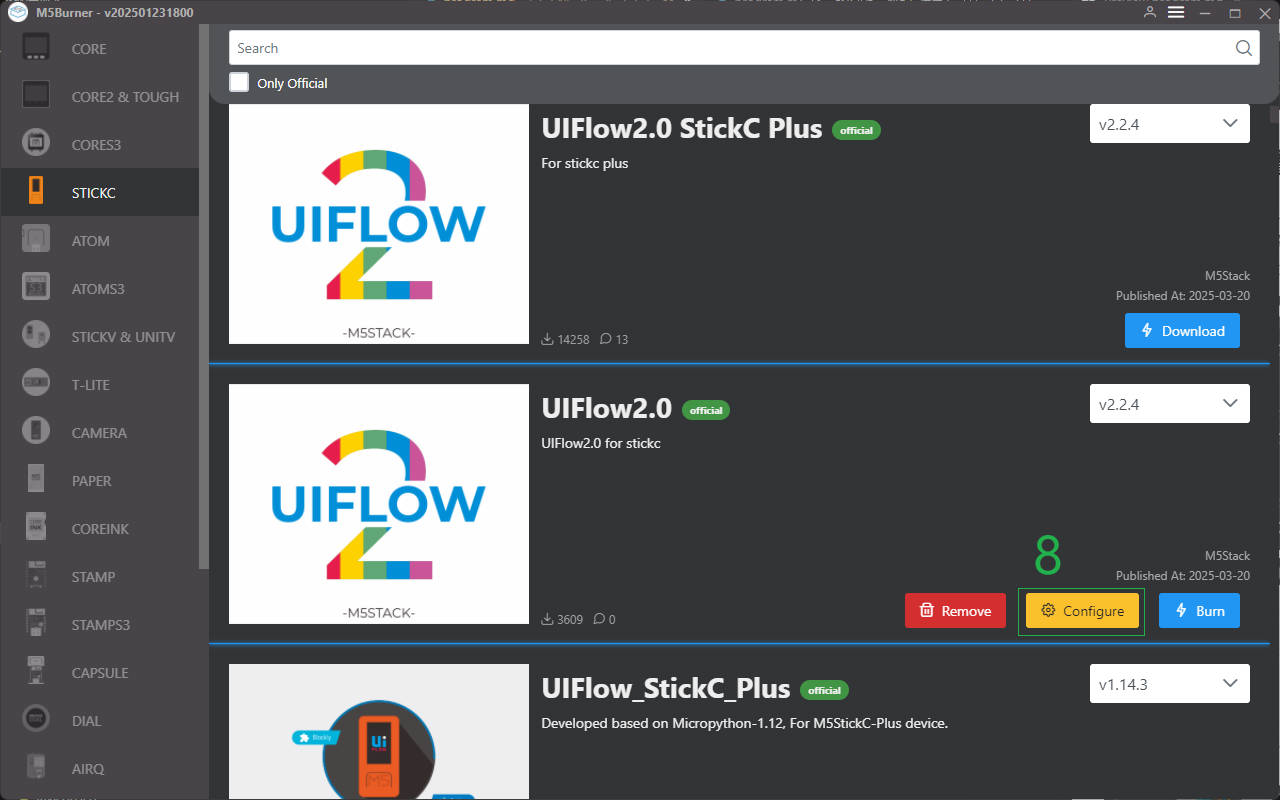
- Download the compatible firmware in
M5Burner, as shown in the figure below.
2. USB Driver Installation
M5Stack or USB Serial. It is recommended to use the driver files for installation directly in Device Manager for Windows, as the executable file installation method may not work properly.) Click here to download the FTDI driver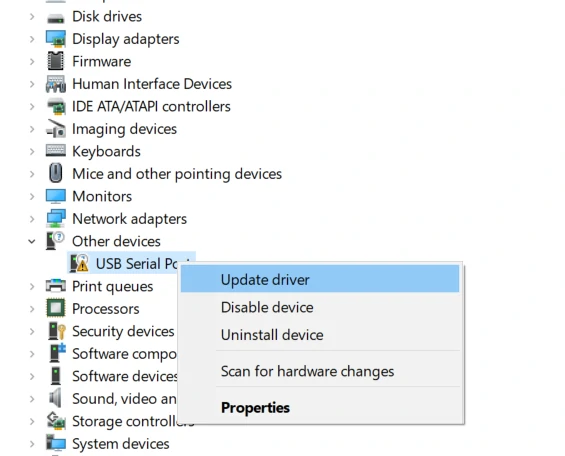
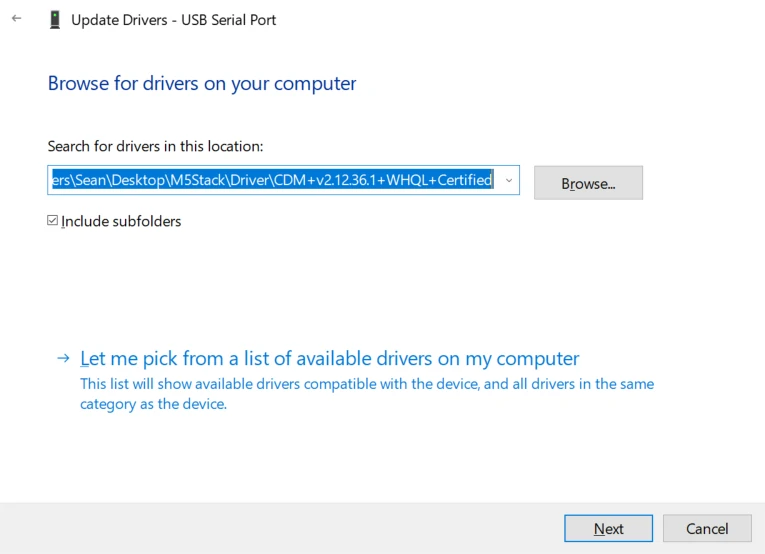
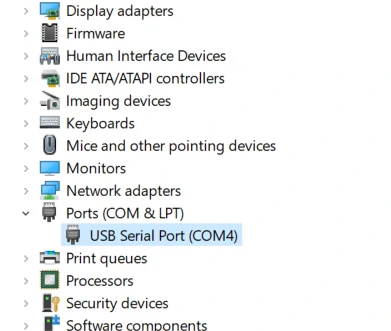
System Preferences -> Security & Privacy -> General -> Allow apps downloaded from: -> App Store and identified developers.3.Port connection
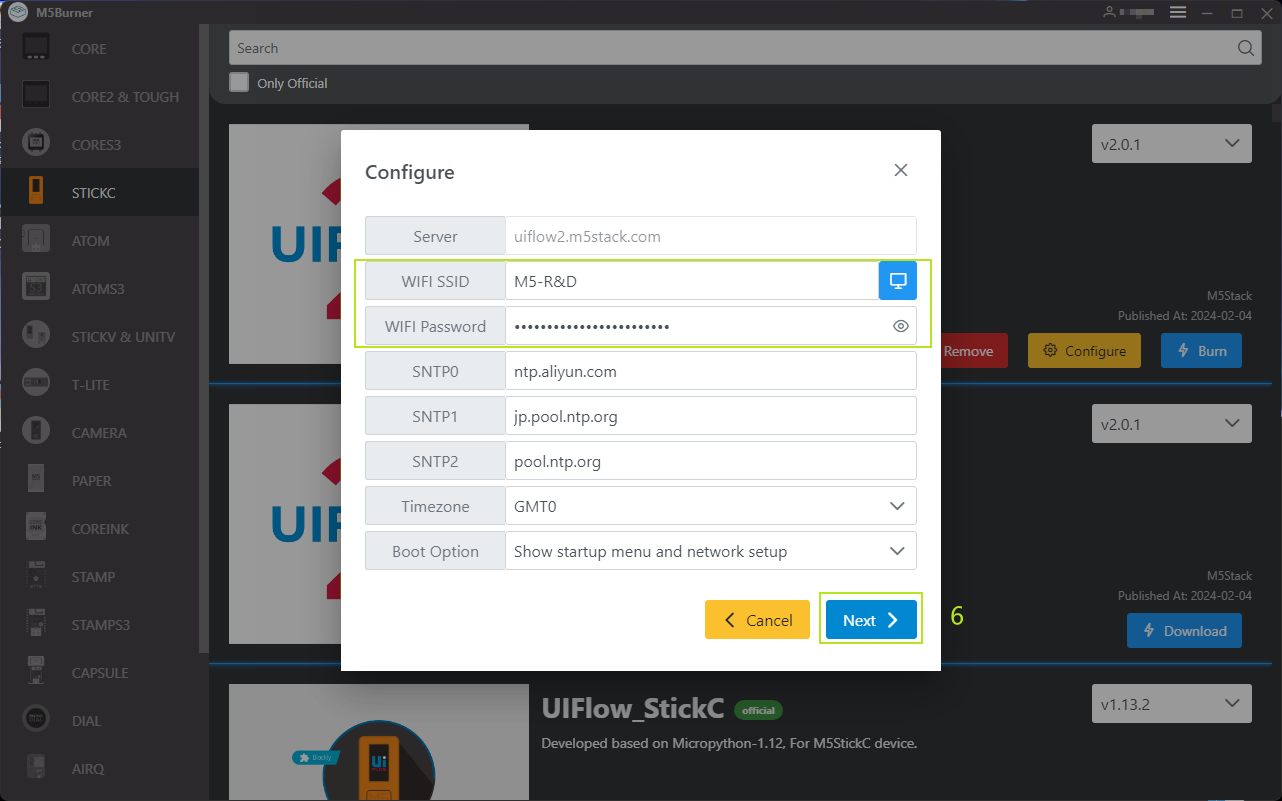
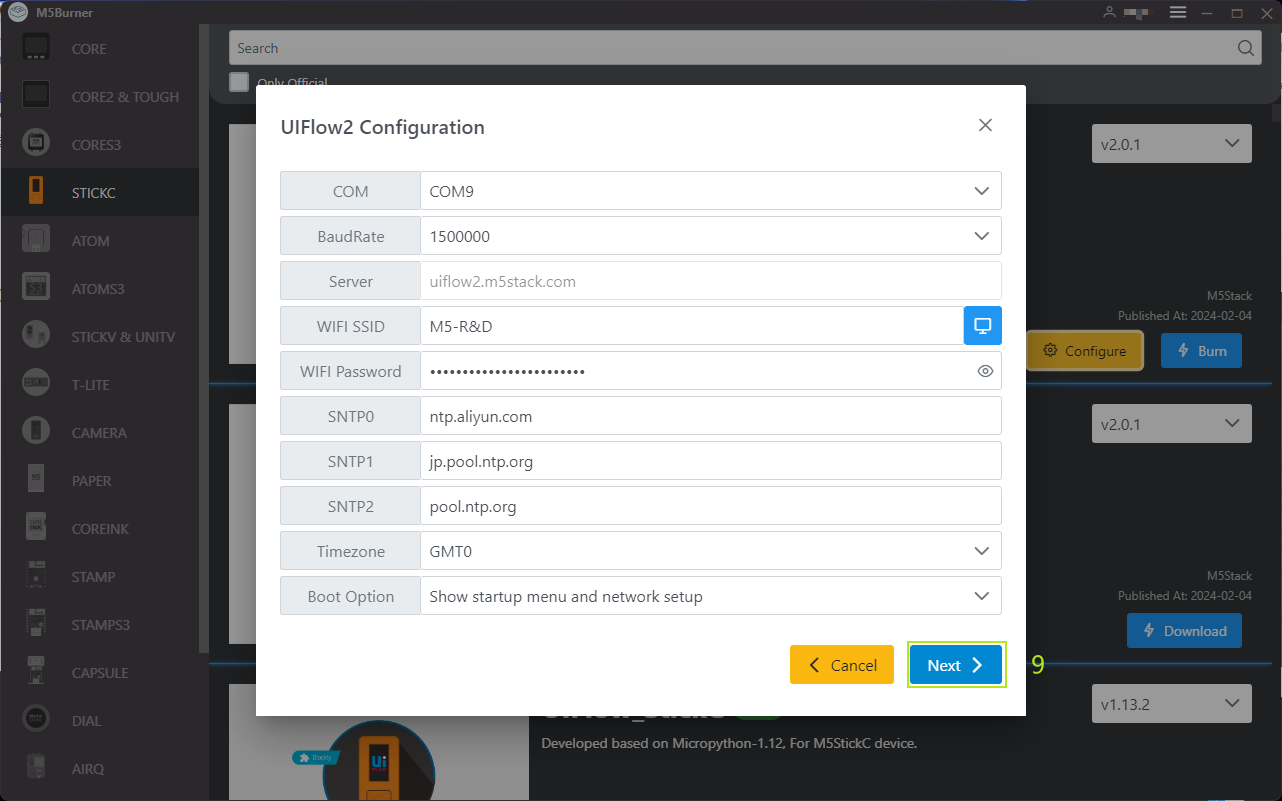
Connect the device to the computer through a USB cable, click the Burn button for the corresponding firmware in M5Burner, fill in the Wi-Fi information, and select the corresponding device port.
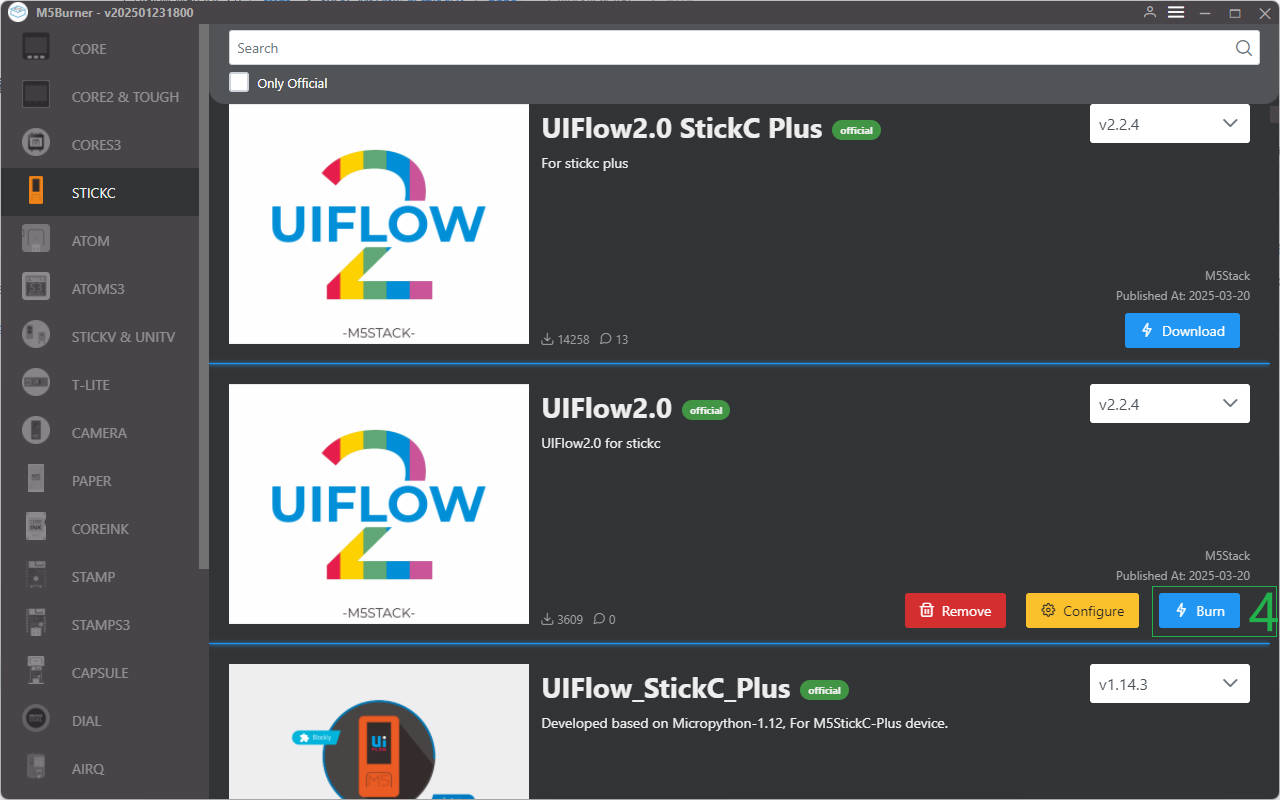
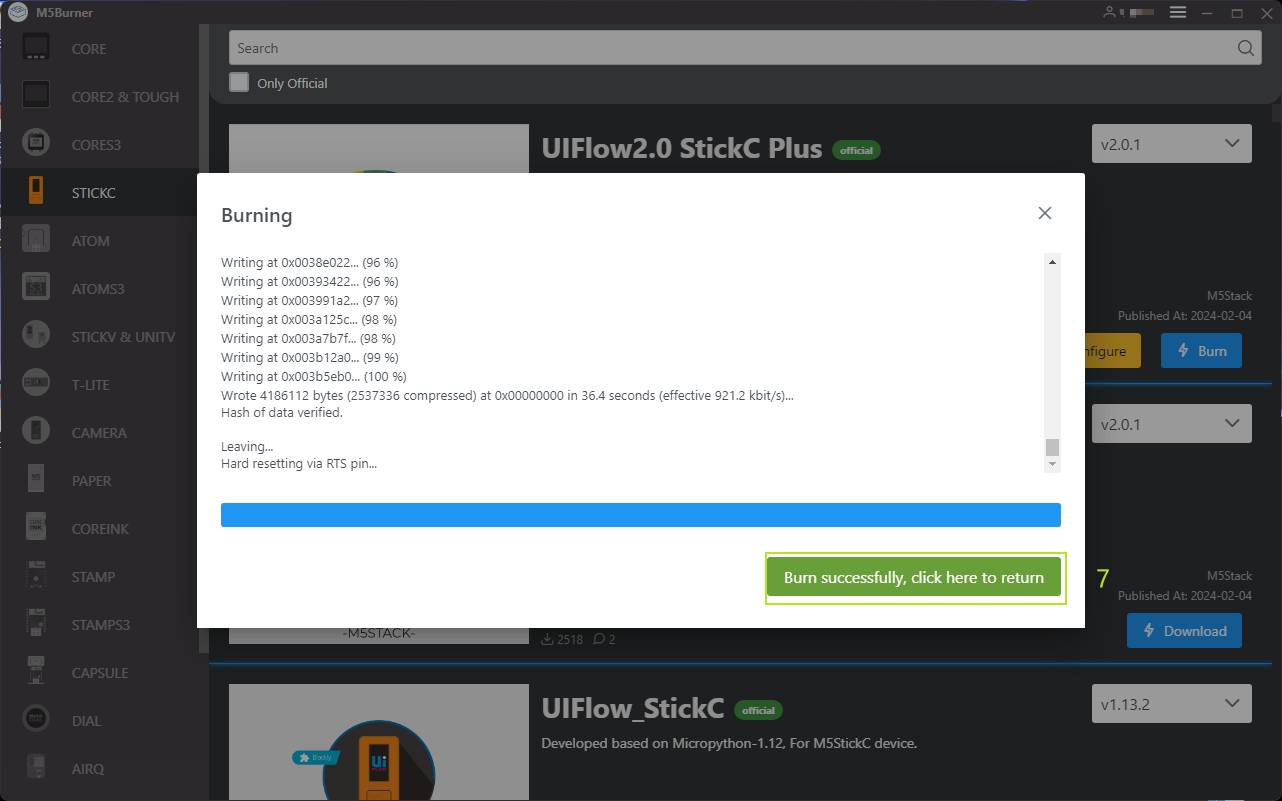
4.Firmware burning
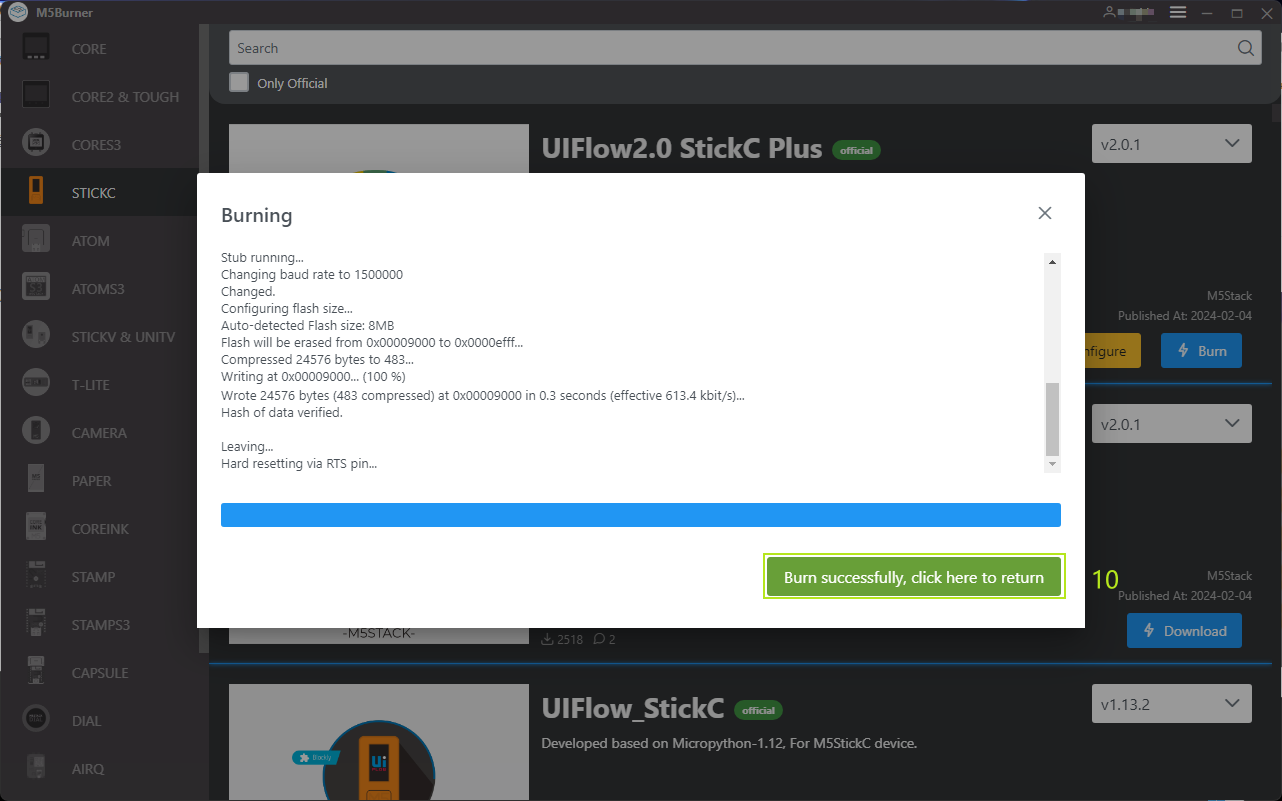
After completing the firmware burning, the device will restart while maintaining the USB connection.
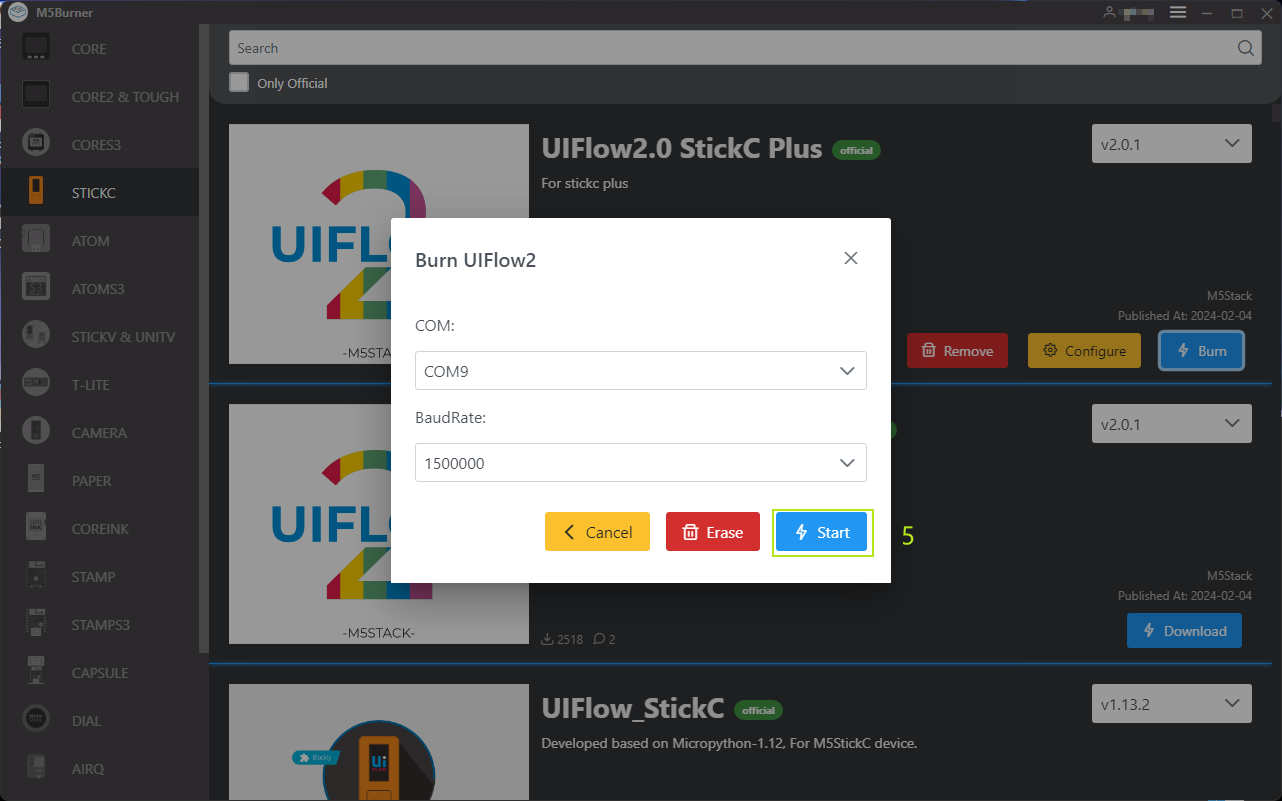

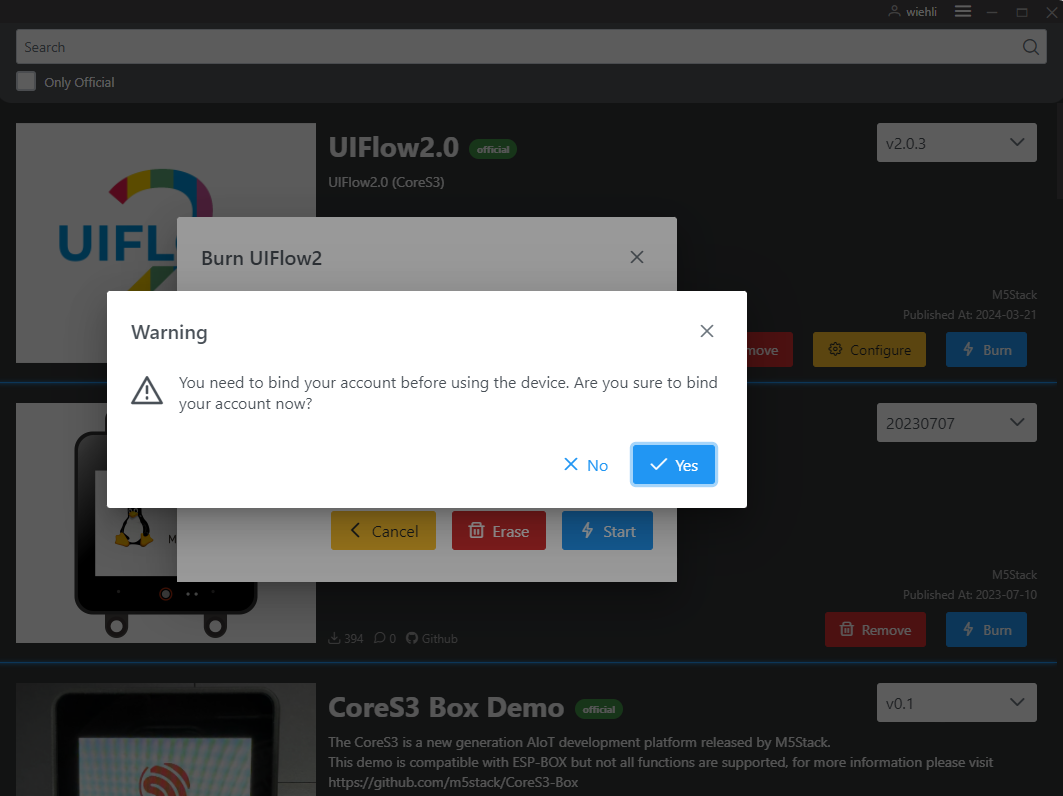
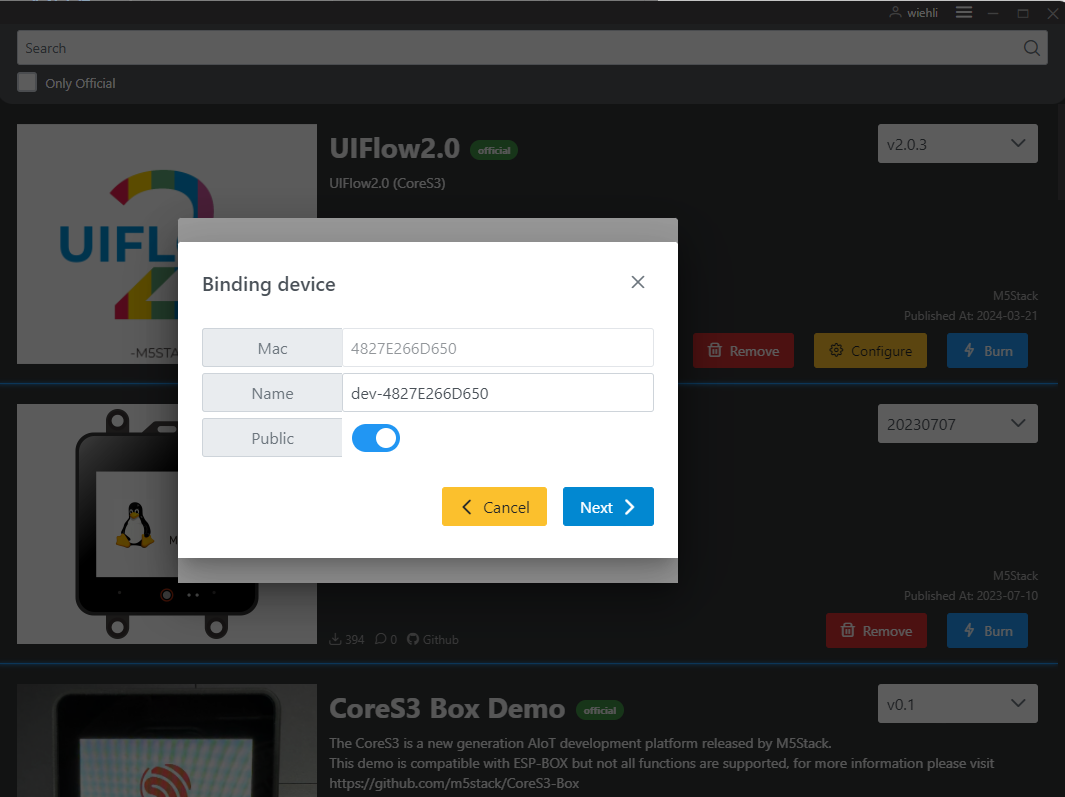
Note: If your device is connected for the first time, you need to bind the device under this account.
Configuration information:
- COM: Serial port
- audRate: Baud rate of serial port communication
- Server: Indicates the IP address of the server connected to the device
- WIFI SSID / WIFI Password
- SNTP Server
- SNTP0: Alibaba Cloud NTP Server (China)
- SNTP1: Indicates the NTP server pool in Japan
- SNTP2: Indicates the global public NTP server pool
- Timezone: Specifies the time zone
- Boot Option
- run main.py directly
- show startup nemu and network setup
- only net work setup
5.Modifying Device configuration
Use M5Burner to click on the Options button, fill in the device configuration that needs to be modified, and confirm. Note: After successful burning, the device needs to be restarted. If you need to change the device configuration again, you need to modify the burning configuration information again.
6.Log in to UiFlow2
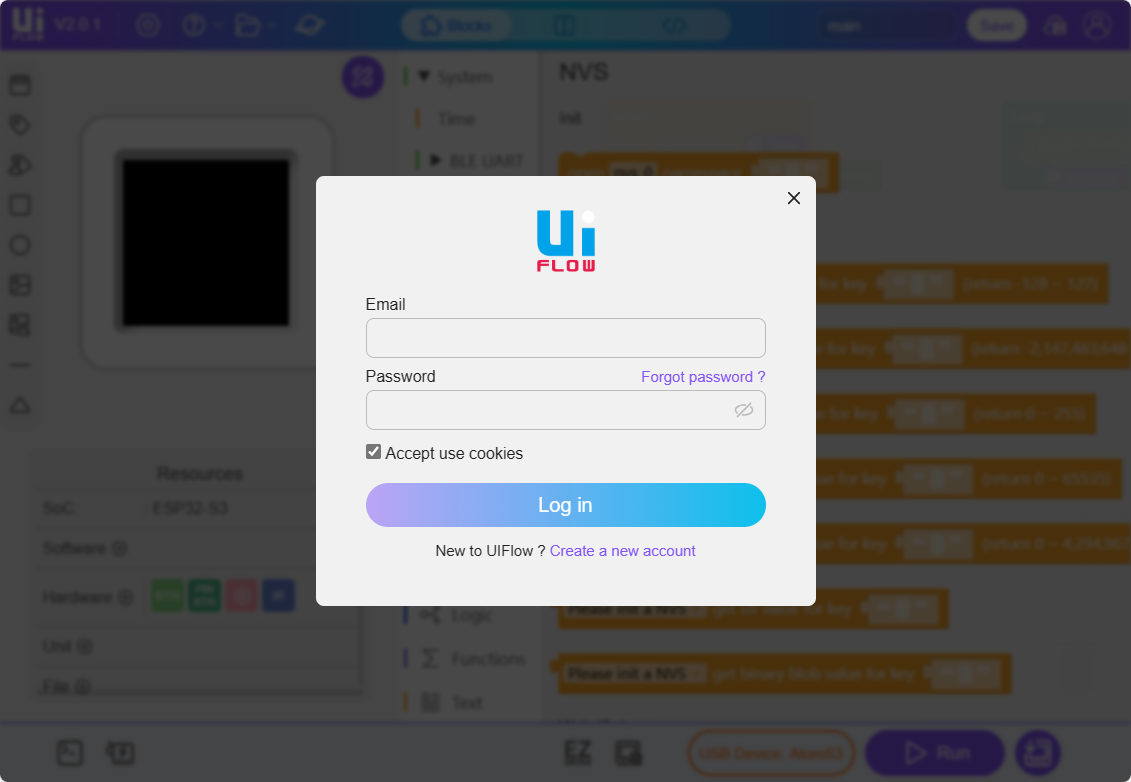
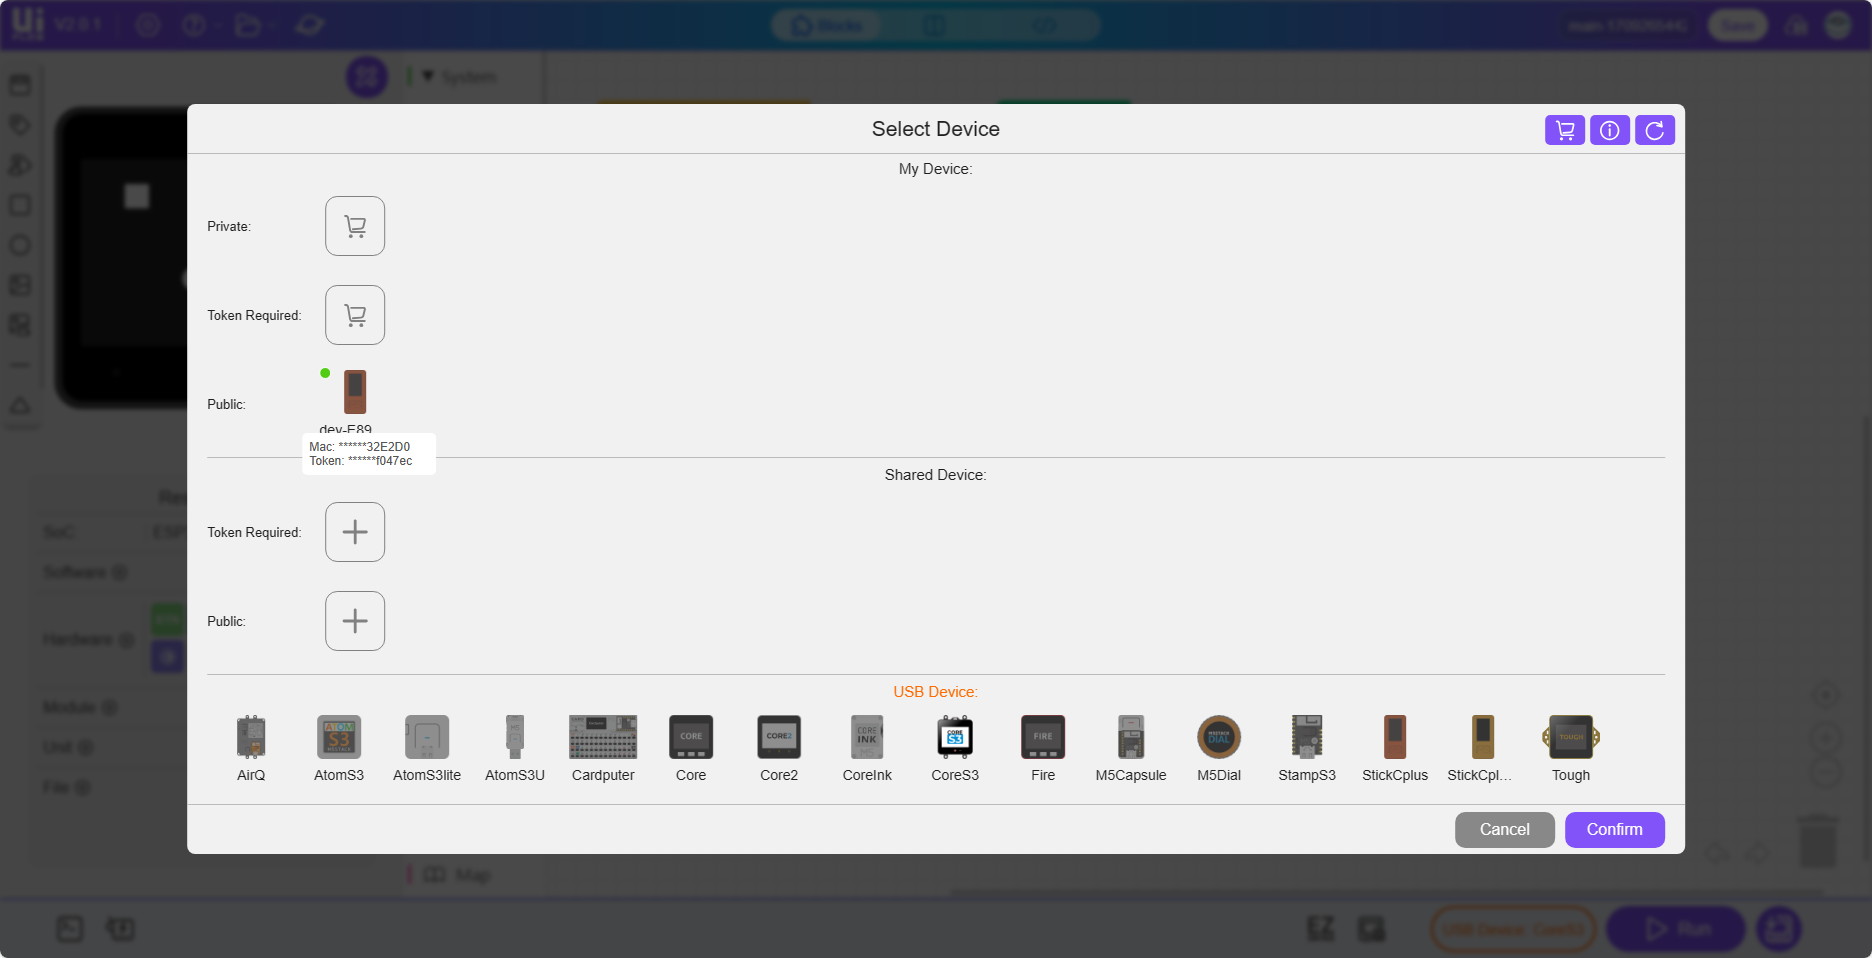
Click the user icon in the upper right corner of the page to log in to the UiFlow2 system account. Note: This account needs to be the same as that of logging in M5Burner. After logging in successfully, under this account, the Device successfully connected to valid Wi-Fi can be viewed by clicking Select Device. If the device owner needs to be changed, the relationship between the device and the account needs to be unbound.
WI-FI MODE
Ensure that Wi-Fi has been configured: When burning the program, you need to configure Wi-Fi and other information in the Configure section of the M5Burner burning program.
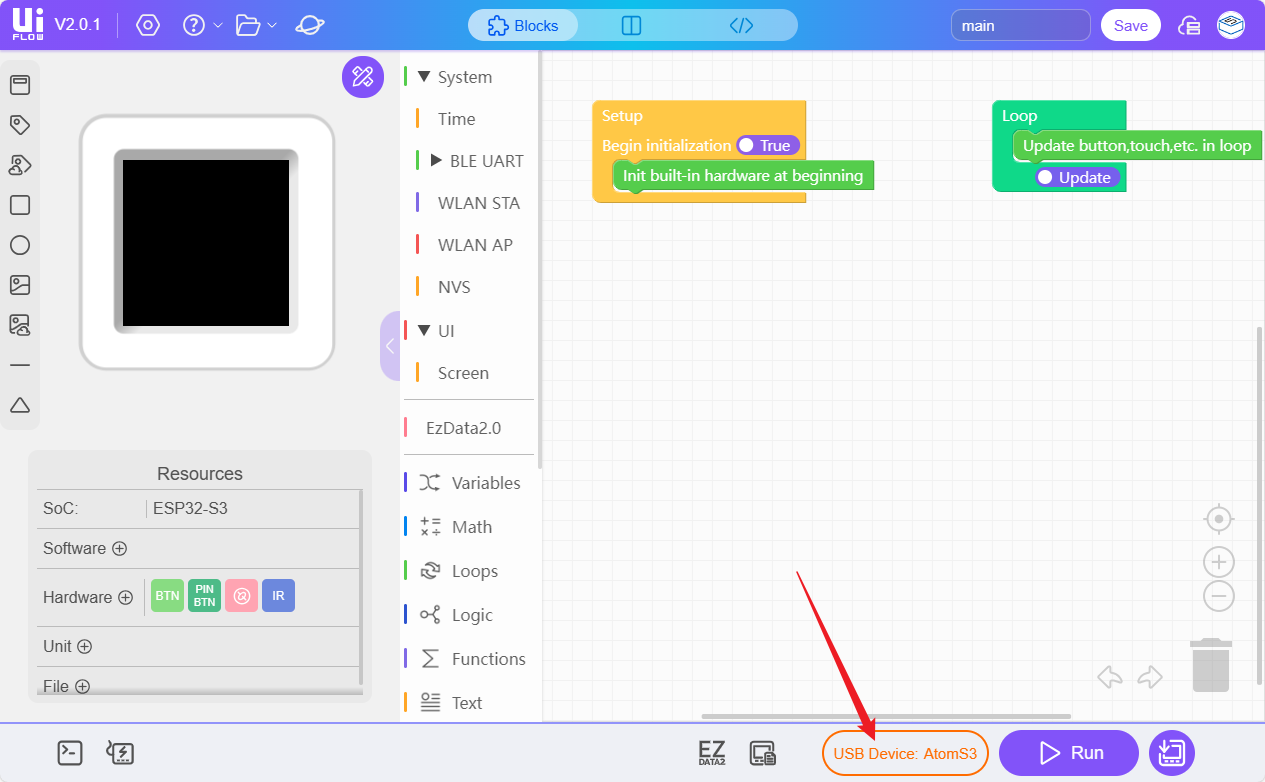
Select an online device.
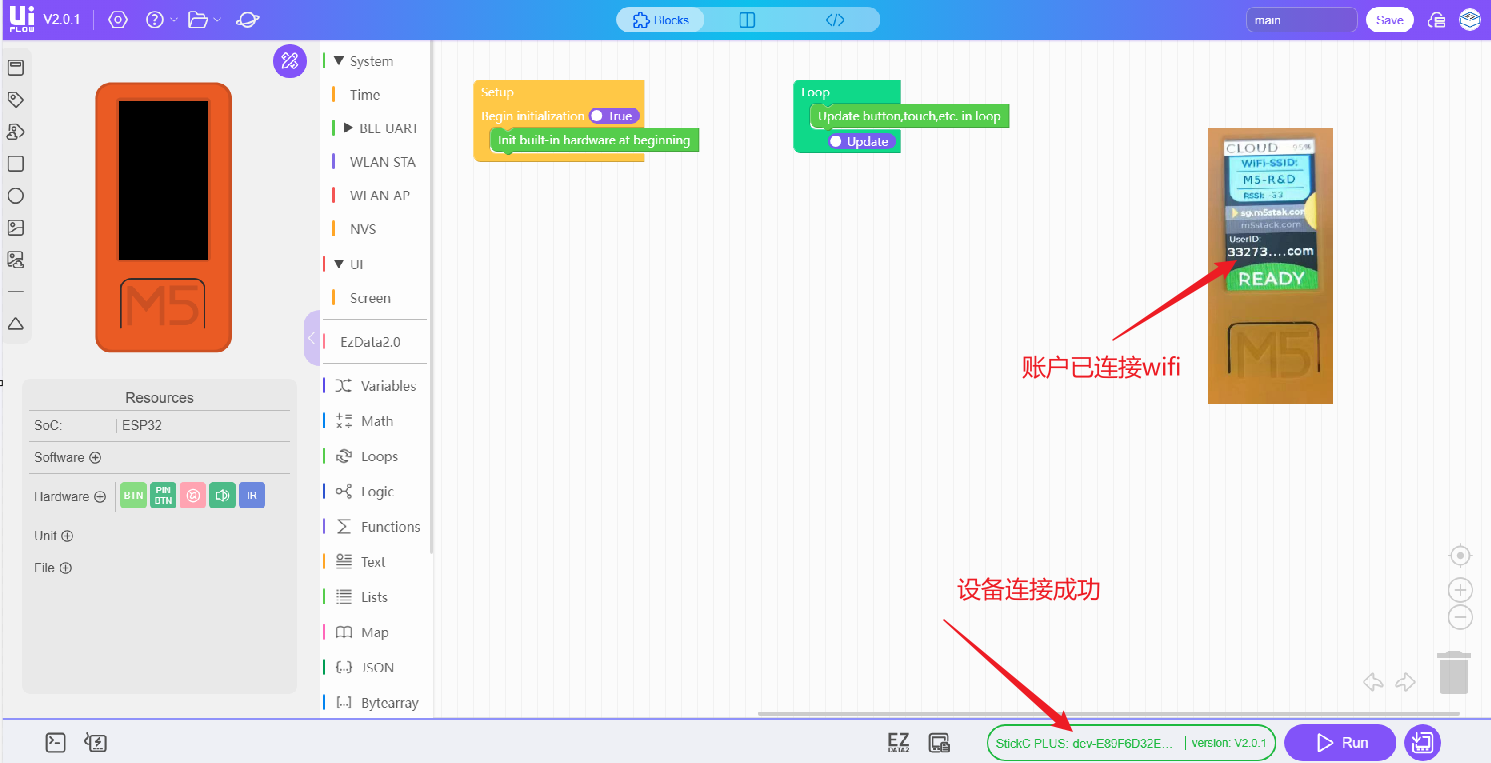
USB Mode
Select the device module to which the USB is to be connected

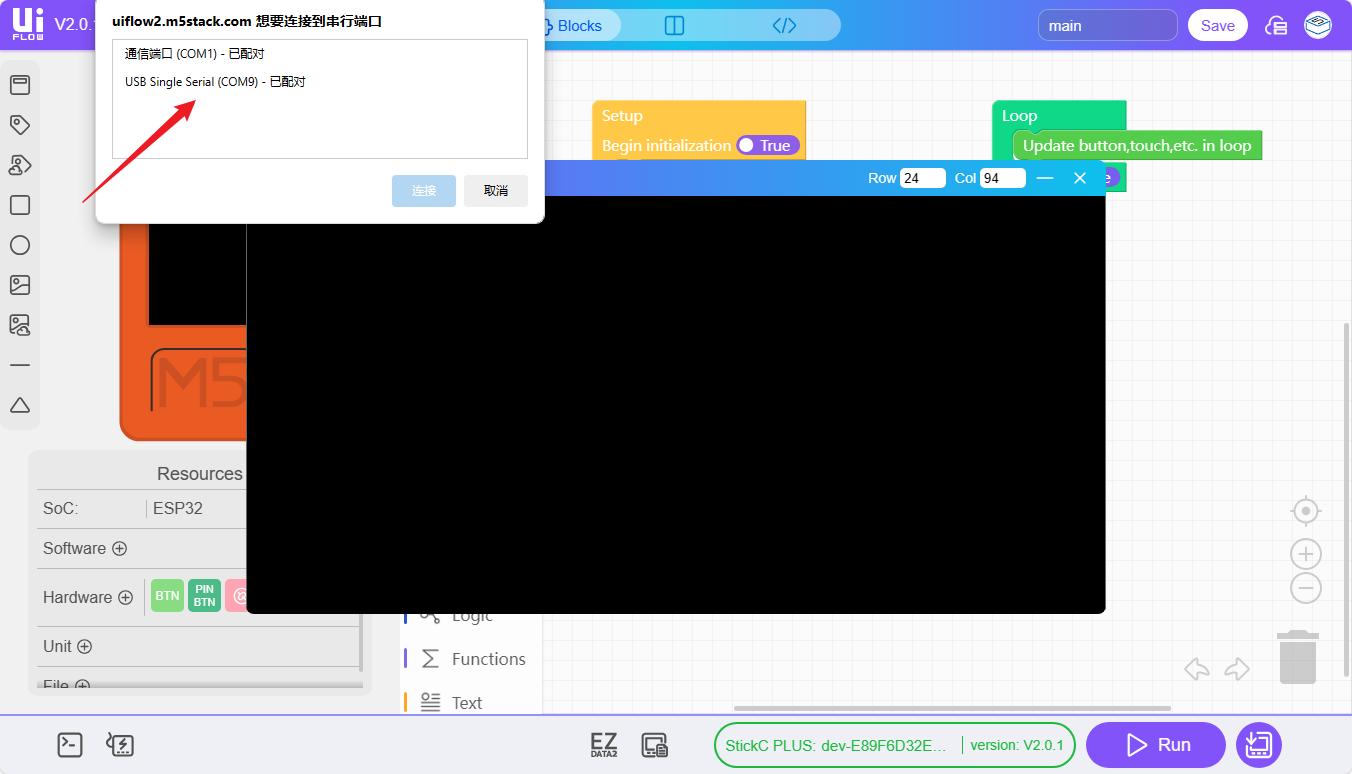
Connect M5StarkC to the computer's USB port and click the WebTerminal button.
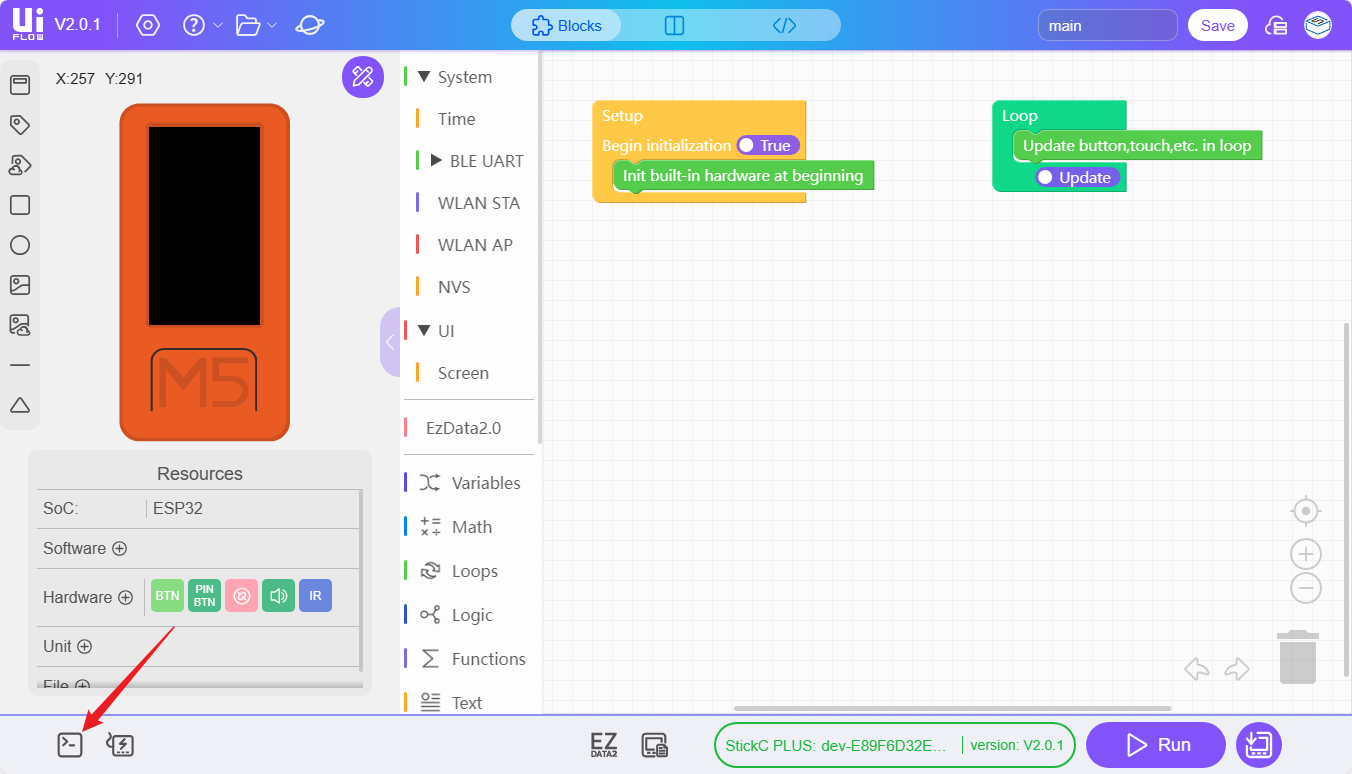
Select the USB-connected device in the pop-up box, click Select, and when the WebTerminal screen displays "Connected to Serial Port!", it means that the USB connection is successful.
7.RUN
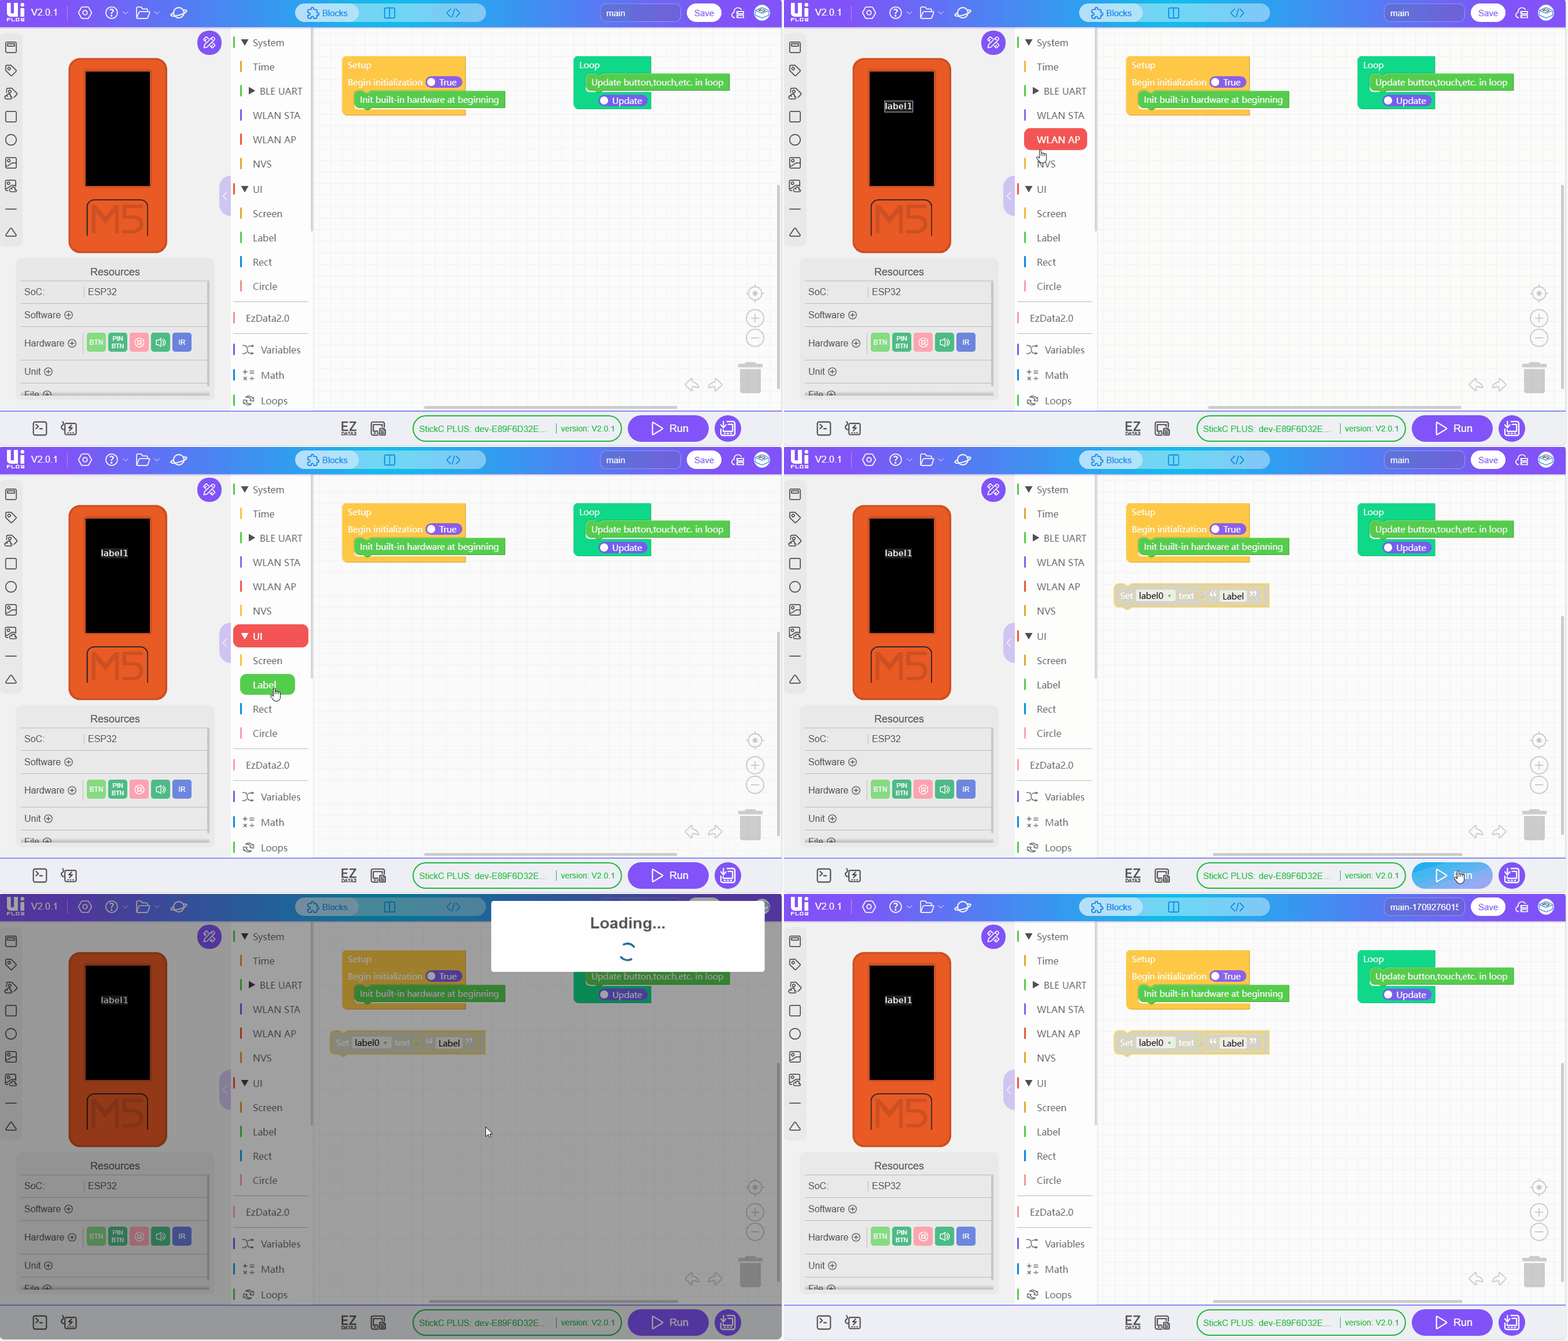
After completing the above steps, you can start programming using UiFlow2.
