

UiFlow Tutorial
UiFlow1 Quick Start
2. Firmware & Program 1.0
UiFlow1 Development Guide
Project Management
Use LTE network
UiFlow1 Blockly
Event
UI
Unit
Module
Hat
UiFlow2 Quick Start
2. Firmware & Program 2.0
UiFlow2 Development Guide
UI Editor
UiFlow2 Video Column
StickC Firmware Burning and Program Pushing
1. Preparation
- Refer to the UIFlow Web IDE Tutorial to understand the basic workflow of using UIFlow and complete the installation of the M5Burner firmware burning tool.
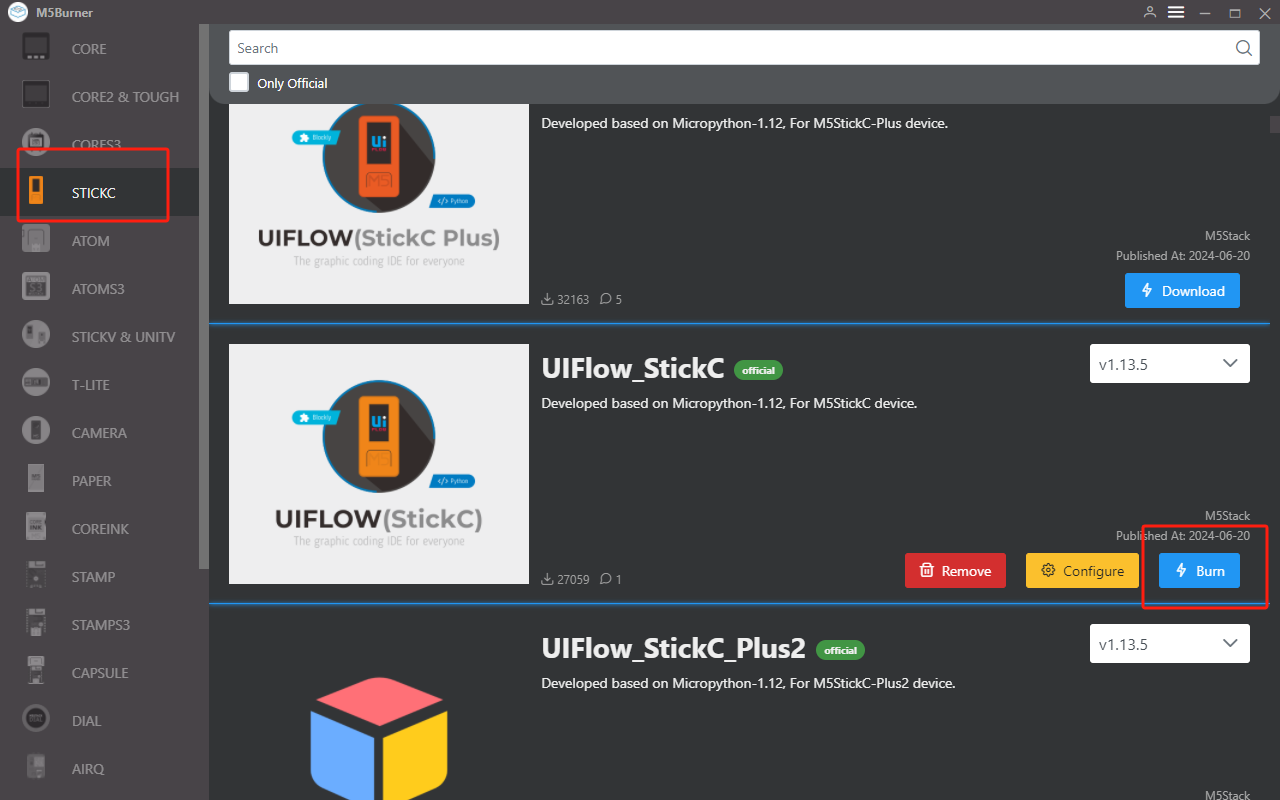
- Download the firmware compatible with
StickCin M5Burner, as shown in the image below.
2. USB Driver Installation
Baud Rate Limit
When performing the device program download operation, it is recommended to select the following serial port baud rate options. If other speeds are used, it may result in the program being unable to be downloaded properly.
1500000 bps / 750000 bps / 500000 bps / 250000 bps / 115200 bps
1500000 bps / 750000 bps / 500000 bps / 250000 bps / 115200 bps
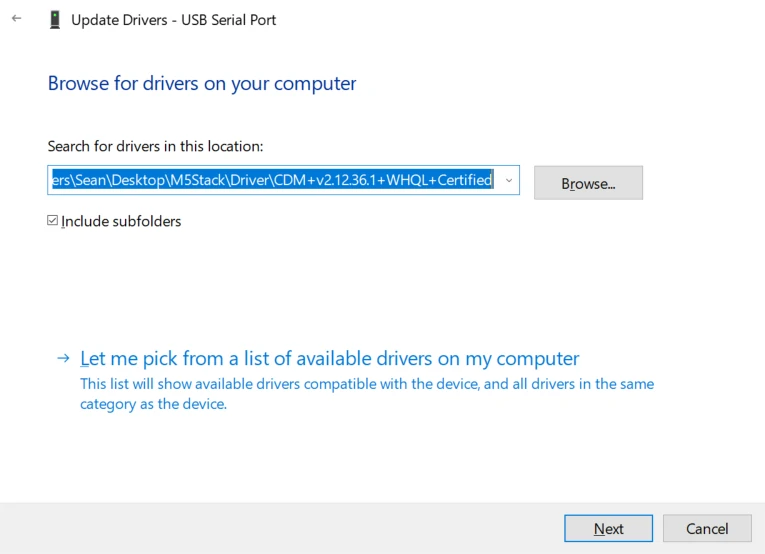
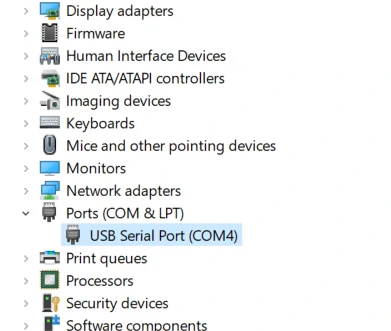
Connect the device to the PC and open Device Manager to install the FTDI driver for the device. For example, in Windows 10, download the driver matching your operating system, unzip it, and install it through Device Manager. (Note: In some system environments, you may need to install the driver twice for it to take effect. The unrecognized device name is usually
M5Stack or USB Serial. It is recommended to use the driver files for installation directly in Device Manager for Windows, as the executable file installation method may not work properly.) Click here to download the FTDI driver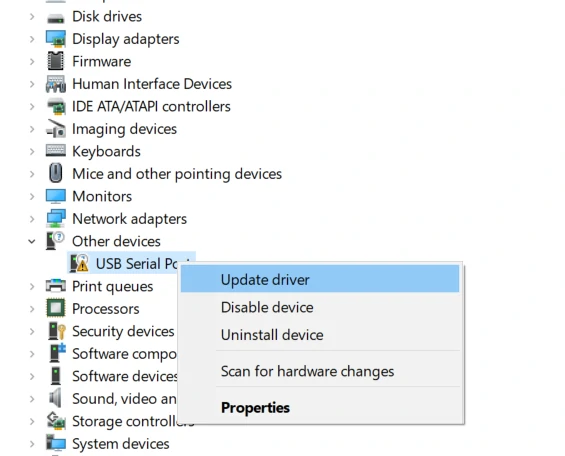
For MacOS users, before installation, please check
System Preferences -> Security & Privacy -> General -> Allow apps downloaded from: -> App Store and identified developers.3. Port Selection
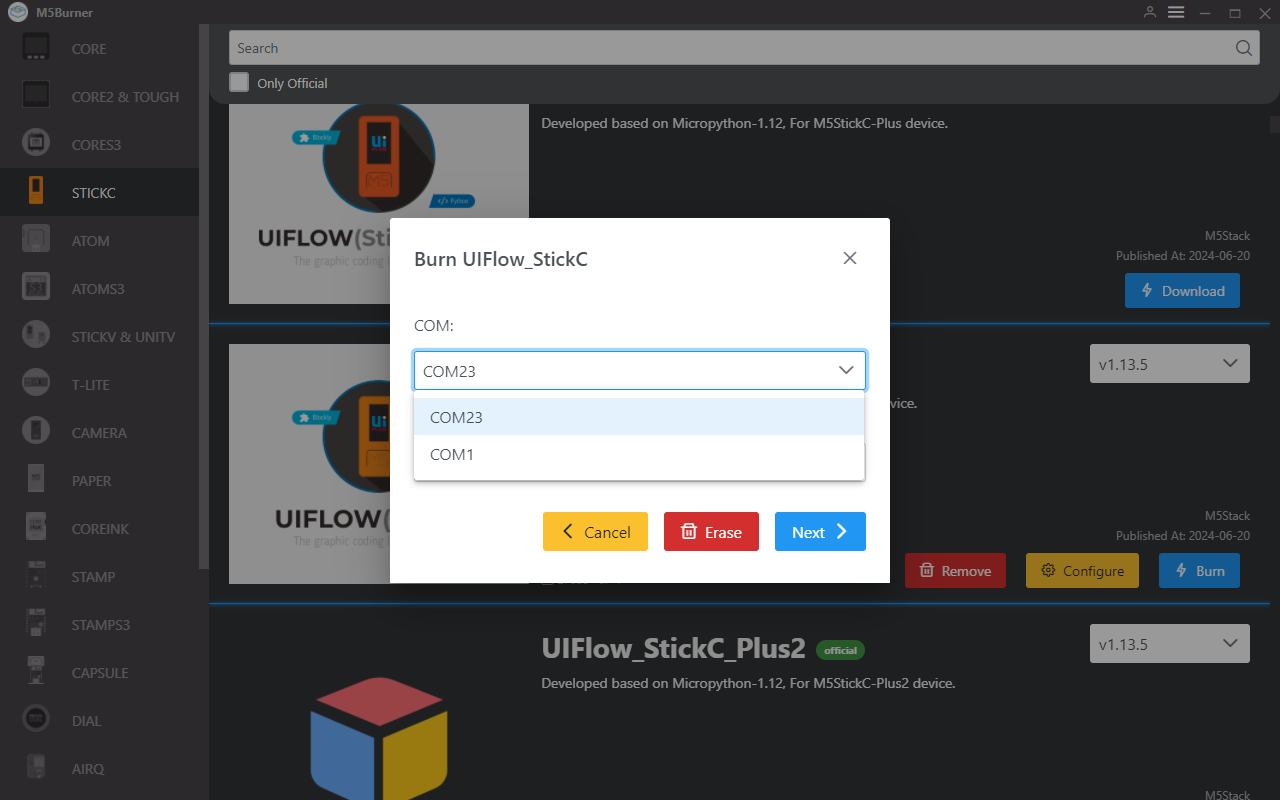
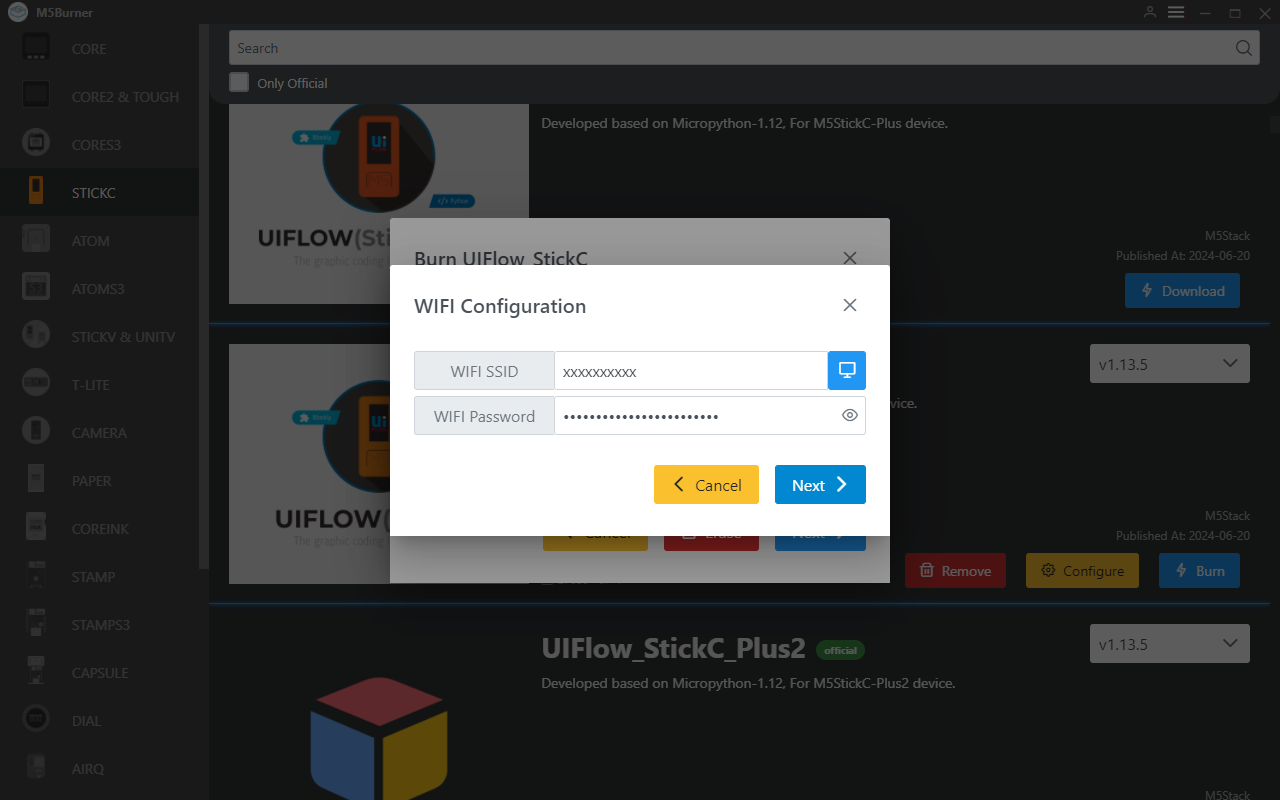
- Connect the device to the computer via USB. In M5Burner, click the Burn button for the corresponding firmware, fill in WiFi information, and select the corresponding device port.
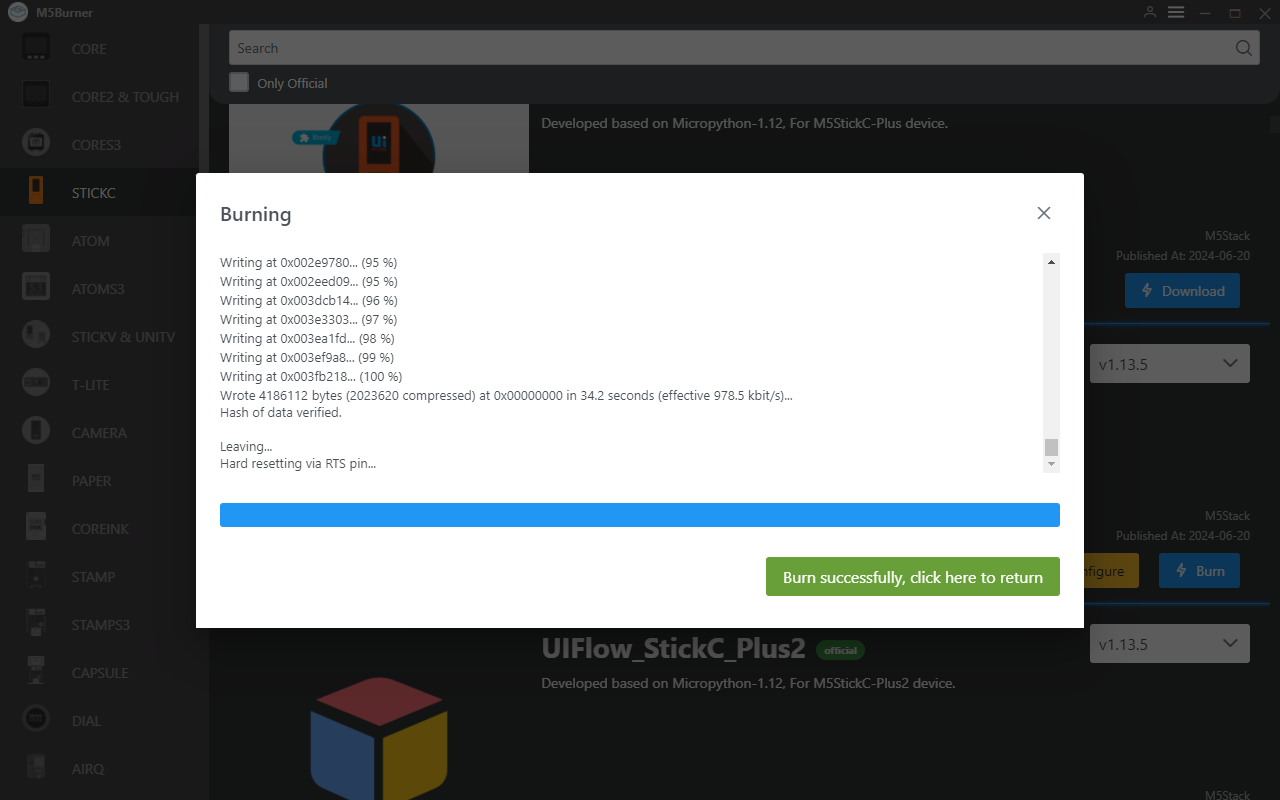
4. Firmware Burning
- Click the Start button to begin burning. Note: If burning fails or connection times out, check for port occupancy, try updating the USB cable, or lower the baud rate.
5. API KEY
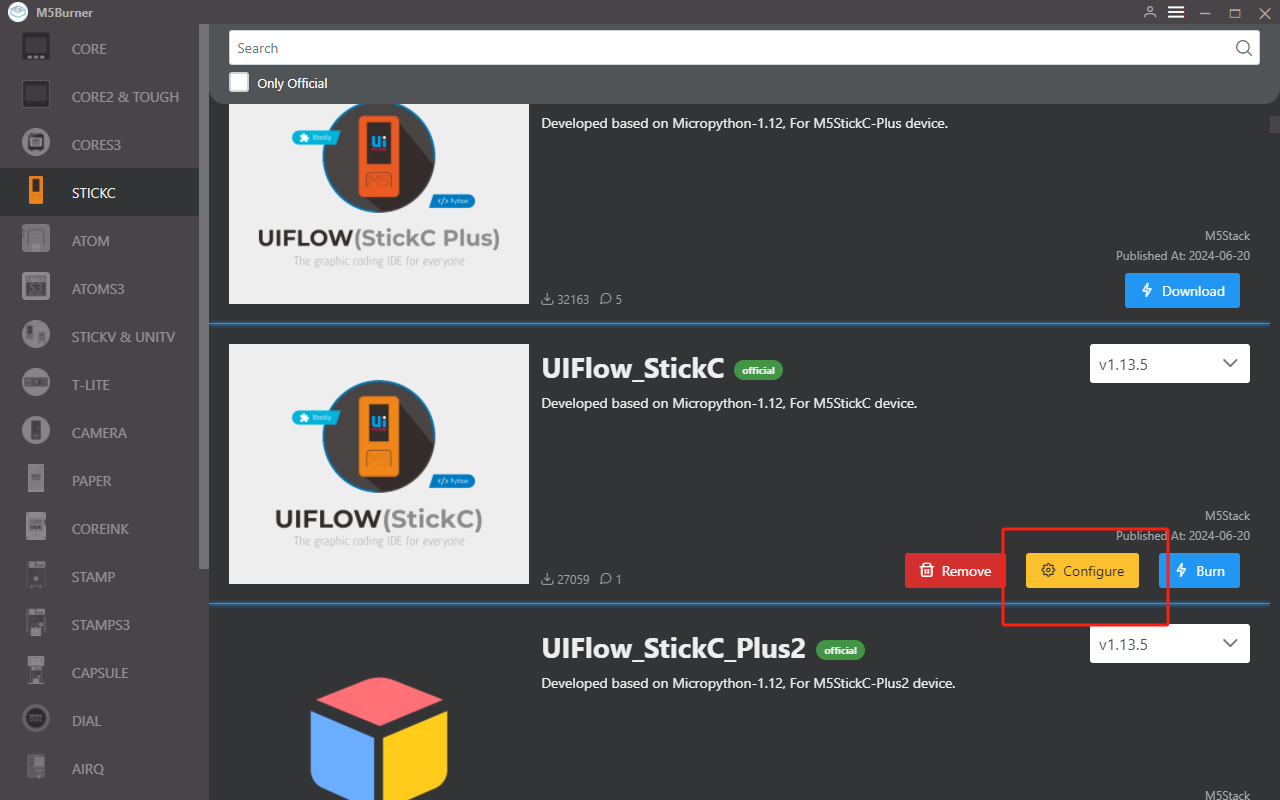
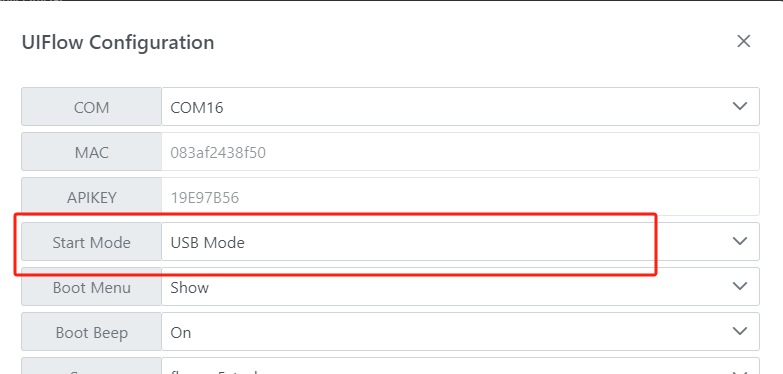
- After completing the firmware burning, the device will restart while remaining connected via USB. Use M5Burner to click the
Configureoption, select the corresponding port, and clickLoadto load the current device configuration. Once loaded successfully, a popup will display the device'sAPI KEY,Start Mode, and other information. At this point, we can copy and save the device's API KEY for later steps. Note: In this example, we will use UIFlow Web IDE (web version) for programming, so theStart Modeneeds to be set toInternet Mode.

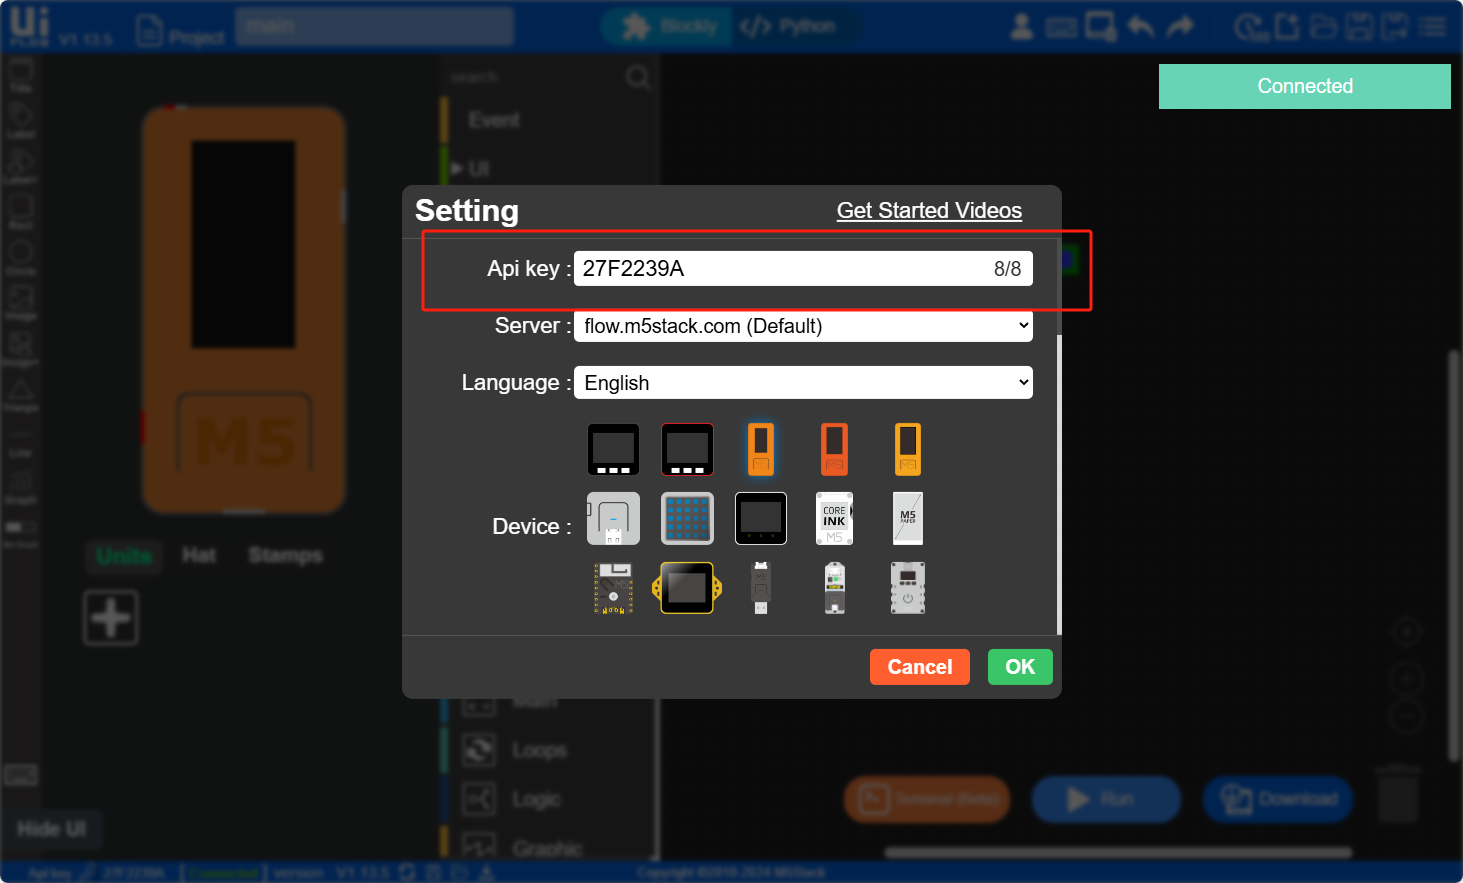
After configuring the device for online programming mode, we need to use the API KEY to connect the device with UIFlow, allowing programs to be pushed to the specified device. Users need to visit flow.m5stack.com on their computer's browser to enter the UIFlow programming page.
Click the settings button in the upper right corner of the page, enter the API KEY obtained in the previous step, click OK to save, and wait for the connection success prompt.
6. RUN
1.After completing the above steps, you can start programming with UIFlow. Add UI controls and click the Run button in the upper right corner.

7. USB Programming Mode
- Refer to the UIFlow Desktop IDE Tutorial for the installation process of UIFlow Desktop and understand the basic workflow. Follow the operations below to set the device to USB programming mode, or use the
Configureoption in M5Burner to setStart ModetoUSB Mode, and then you can program with UIFlow Desktop IDE.
Page Tools