UiFlow Tutorial
UiFlow1 Quick Start
2. Firmware & Program
UiFlow1 Development Guide
Project Management
Use LTE network
UiFlow1 Blockly
Event
UI
Unit
Module
Hat
UiFlow2 Quick Start
2. Firmware & Program
UiFlow2 Development Guide
UI Editor
UiFlow2 Video Column
Atom-Lite: Flash Firmware & Run Code
1. USB Driver Installation
Before burning the firmware to the Atom-Lite, please install the FTDI driver first, so that your computer can properly recognize the device and generate a virtual serial port, ensuring normal communication between the burning tool and the device. The specific steps are as follows:
- Select the driver file that matches your operating system from the list below, download it, and unzip it. You can also visit the FTDI Chip official website to obtain more versions of FTDI drivers.
| Driver Name | Download Link |
|---|---|
| Windows_Desktop_x64 | Download |
| Windows_Desktop_x86_32 | Download |
| Windows_Desktop_ARM | Download |
| MacOS_Intel | Download |
| MacOS_ARM64 | Download |
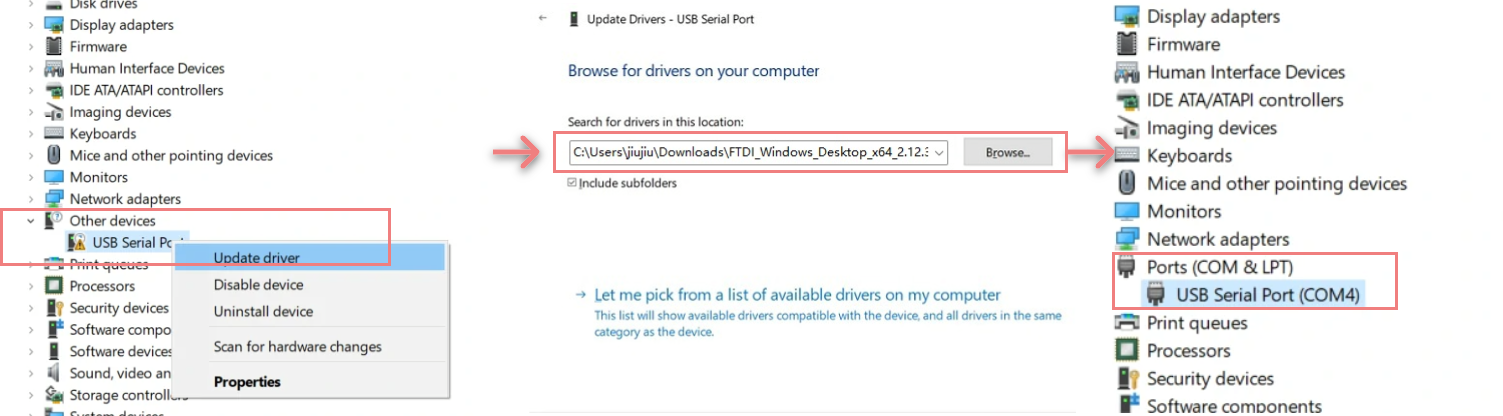
- Connect the device to your PC, open Device Manager, and install the FTDI driver for the device (the screenshot below uses Windows 10 as an example). (Note: On some systems, you may need to install the driver twice for it to take effect. The unrecognized device is usually named
M5StackorUSB Serial.)
System Preferences -> Security & Privacy -> General -> Allow apps downloaded from -> App Store and identified developers.1500000 bps / 750000 bps / 500000 bps / 250000 bps / 115200 bps
2. UiFlow2 Firmware Flashing
Refer to the UiFlow2 Web IDE Tutorial to learn the basic workflow of UiFlow2 and complete the installation of the M5Burner firmware flashing tool.
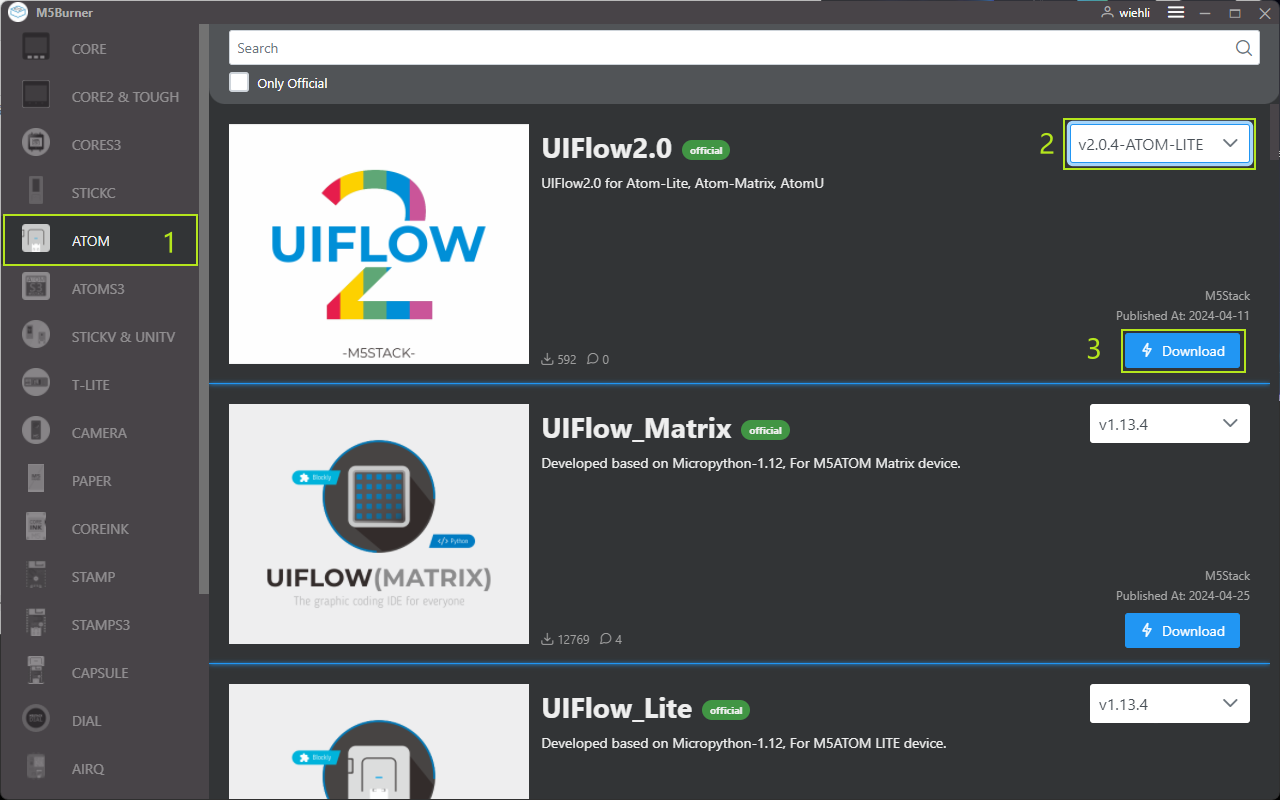
Download the firmware for
Atom-Litein M5Burner, as shown below.
- Connect the device to the computer with a USB cable. After the device powers on, plugging in the USB port will automatically enter download mode. When the connection is successful, M5Burner will display
Found New Device. The device is now in programming mode and waiting for flashing.
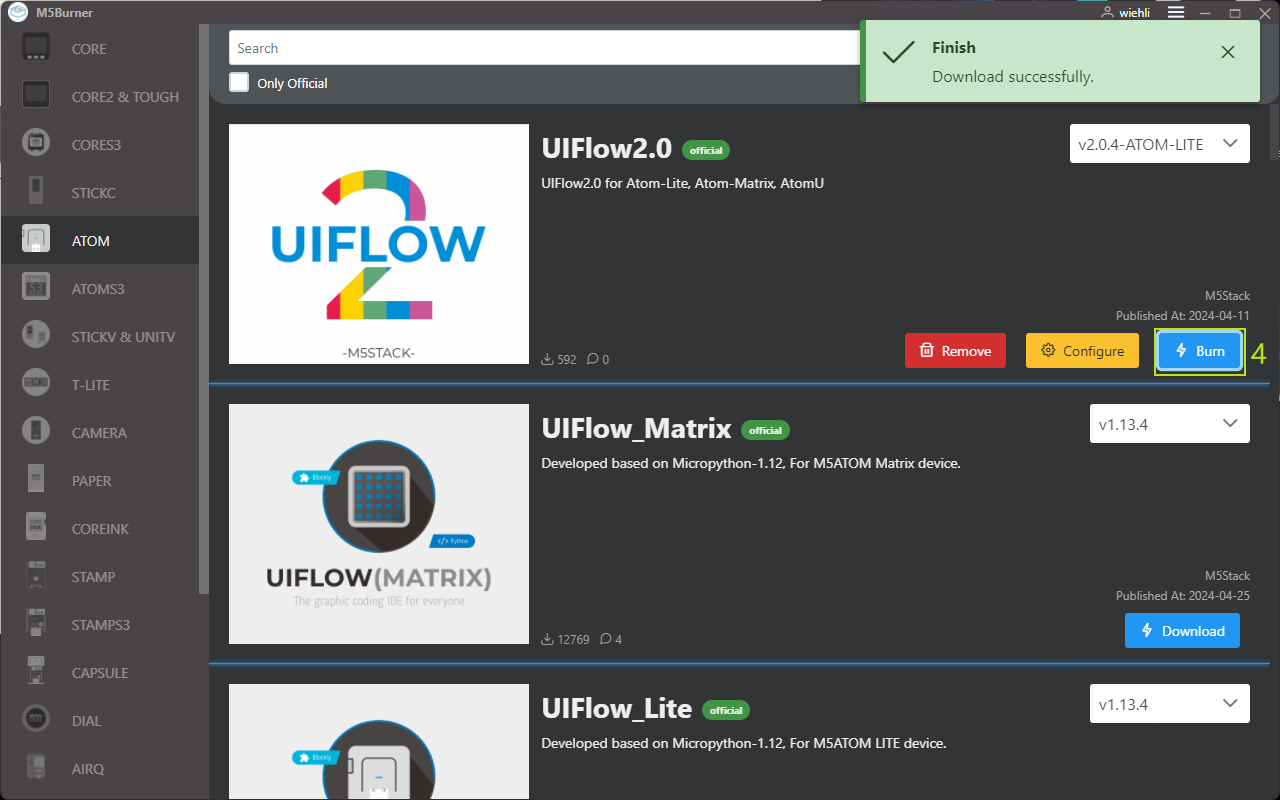
- In M5Burner, click the
Burnbutton for the corresponding firmware, select the device port, and clickStart.
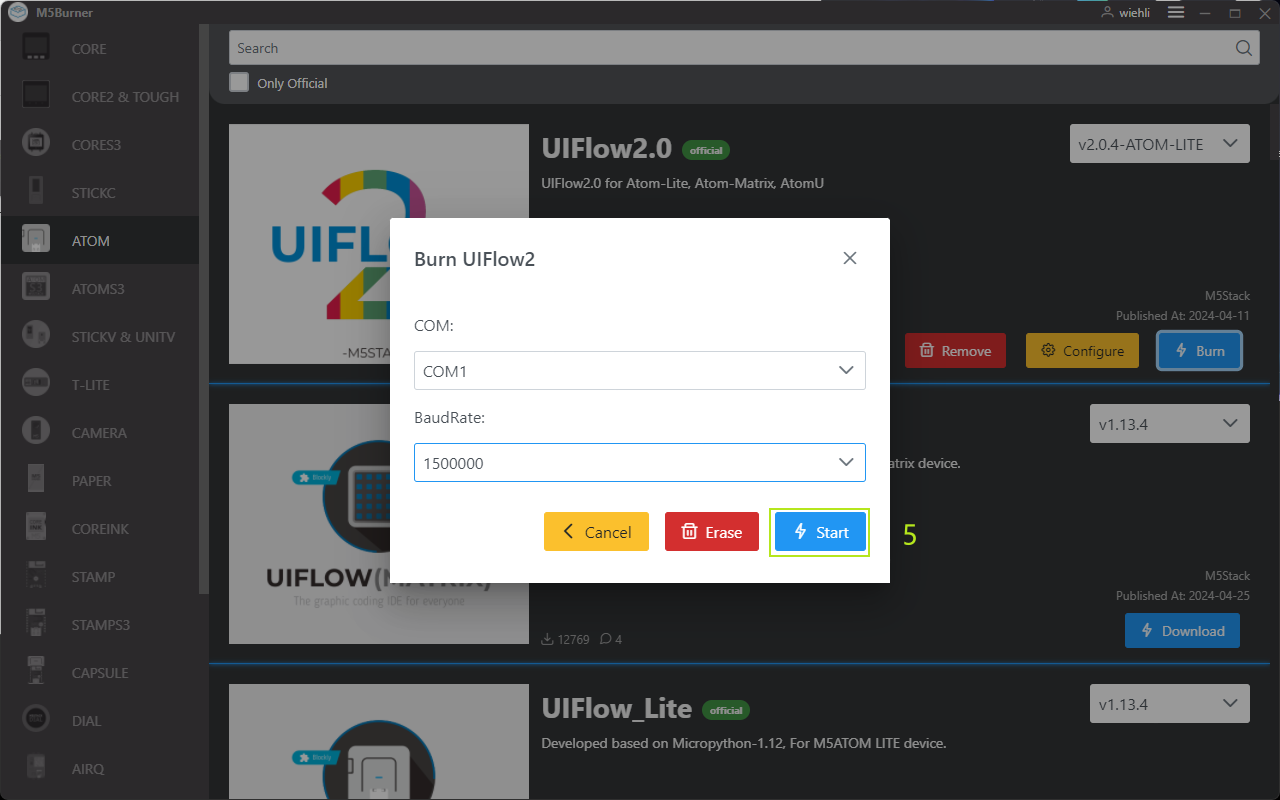
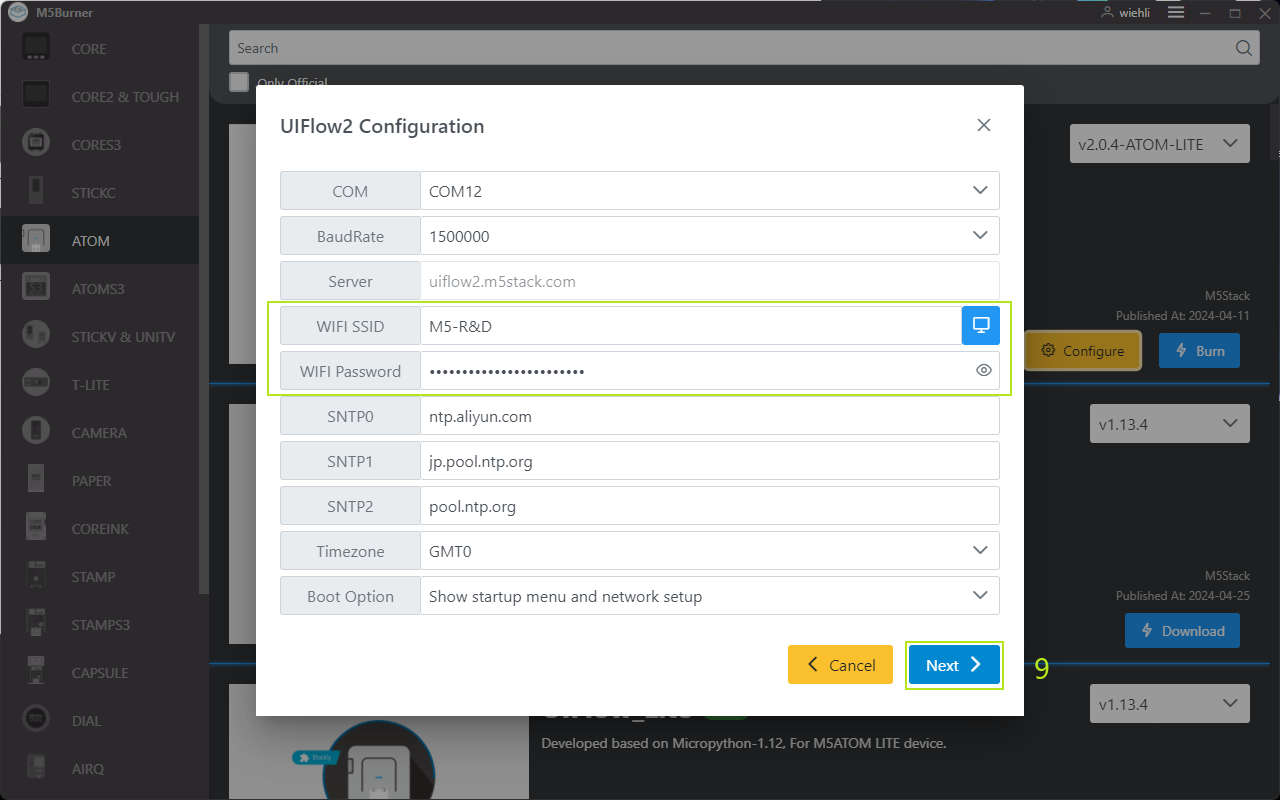
- Enter the Wi-Fi configuration required by the device, including Wi-Fi SSID and Wi-Fi Password, as well as any other device configuration that needs to be added or modified, then click
Nextto start flashing.

Configuration information:
- COM: Select the serial port corresponding to the device
- BaudRate: Baud rate for serial communication
- Server: Server address the device connects to
- WIFI SSID/WIFI Password: Wi-Fi name and password used by the device
- SNTP Server:
- SNTP0: Alibaba Cloud NTP server (China)
- SNTP1: Japan NTP server pool
- SNTP2: Global public NTP server pool
- Timezone: Time zone setting
- Boot Option: Set the device boot mode after firmware flashing is complete
- Run main.py directly: After flashing is complete, run the program in main.py directly without connecting to the network or displaying the UiFlow2 startup screen
- Show startup menu and network setup: The device connects to the network, and devices with a screen will display the UiFlow2 startup screen
- Only network setup: The device only performs network setup and does not display the UiFlow2 startup screen
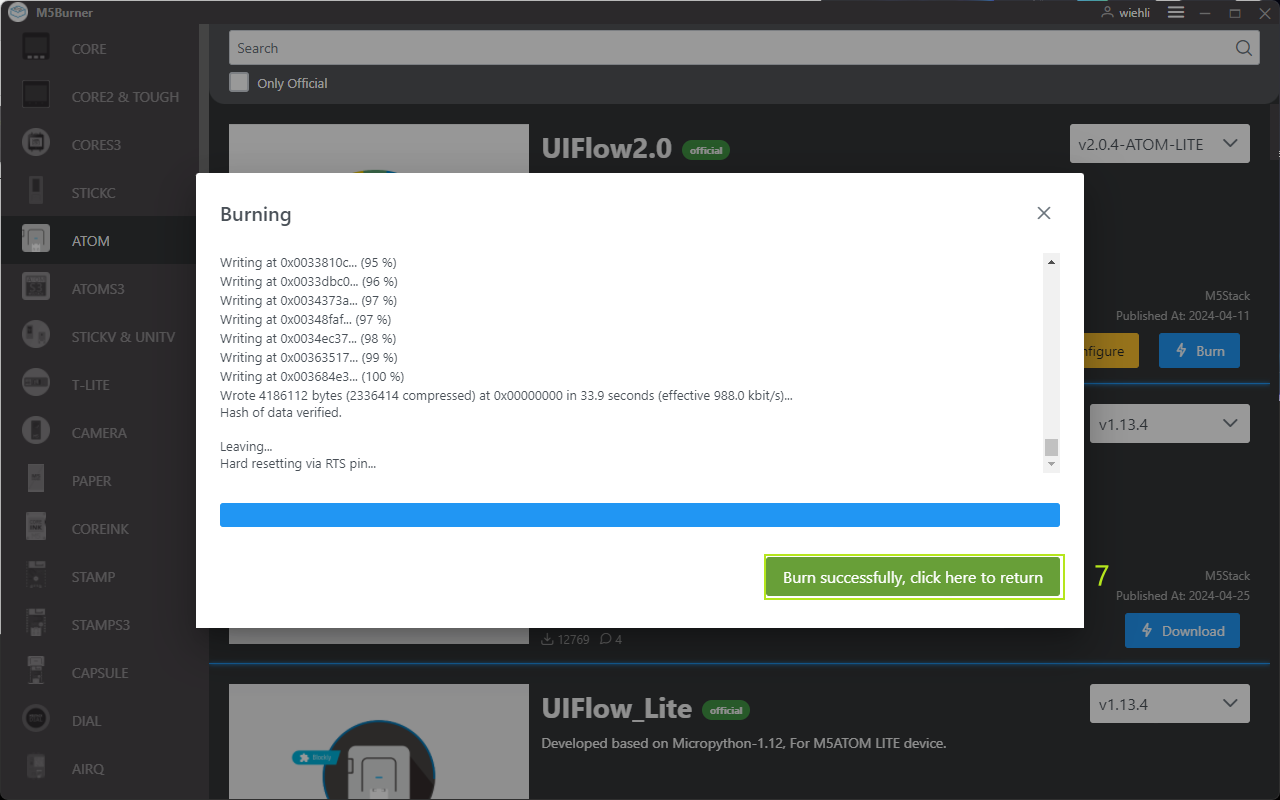
When Burn successfully, click here to return is displayed, flashing is successful.
- After firmware flashing is complete, if you need to modify the device configuration, keep the USB connection, restart the device, click
Configure, and modify the settings according to the prompts.


3. Device Connection
The device supports connecting to UiFlow2 via Access Code (wireless network) or USB (wired connection to a computer) for program pushing and debugging. Refer to the following steps:
Access Code Wireless Connection
Visit uiflow2.m5stack.com to open the UiFlow2 Web IDE.
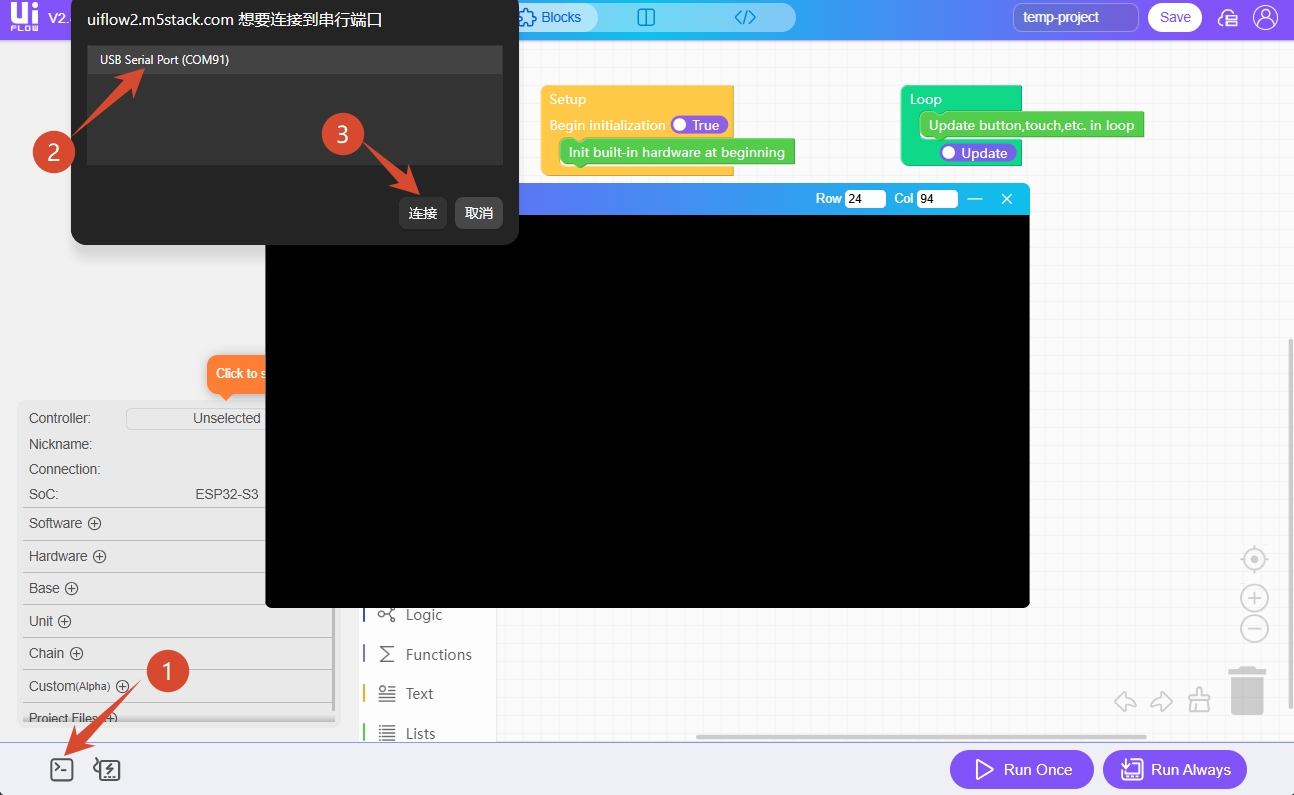
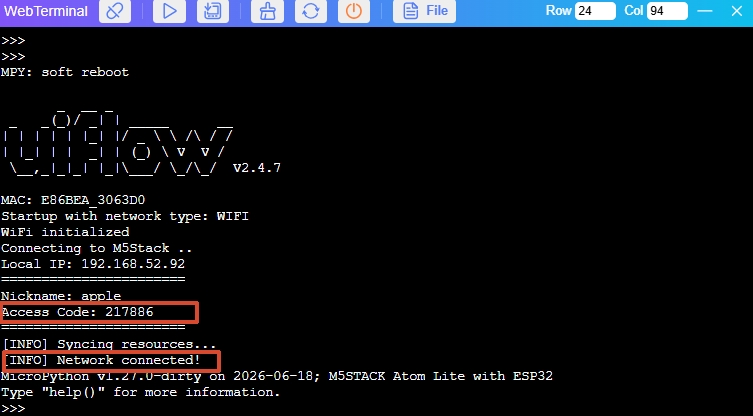
Make sure the device is connected to the network and obtain the Access Code: you can use WebTerminal to view the current valid
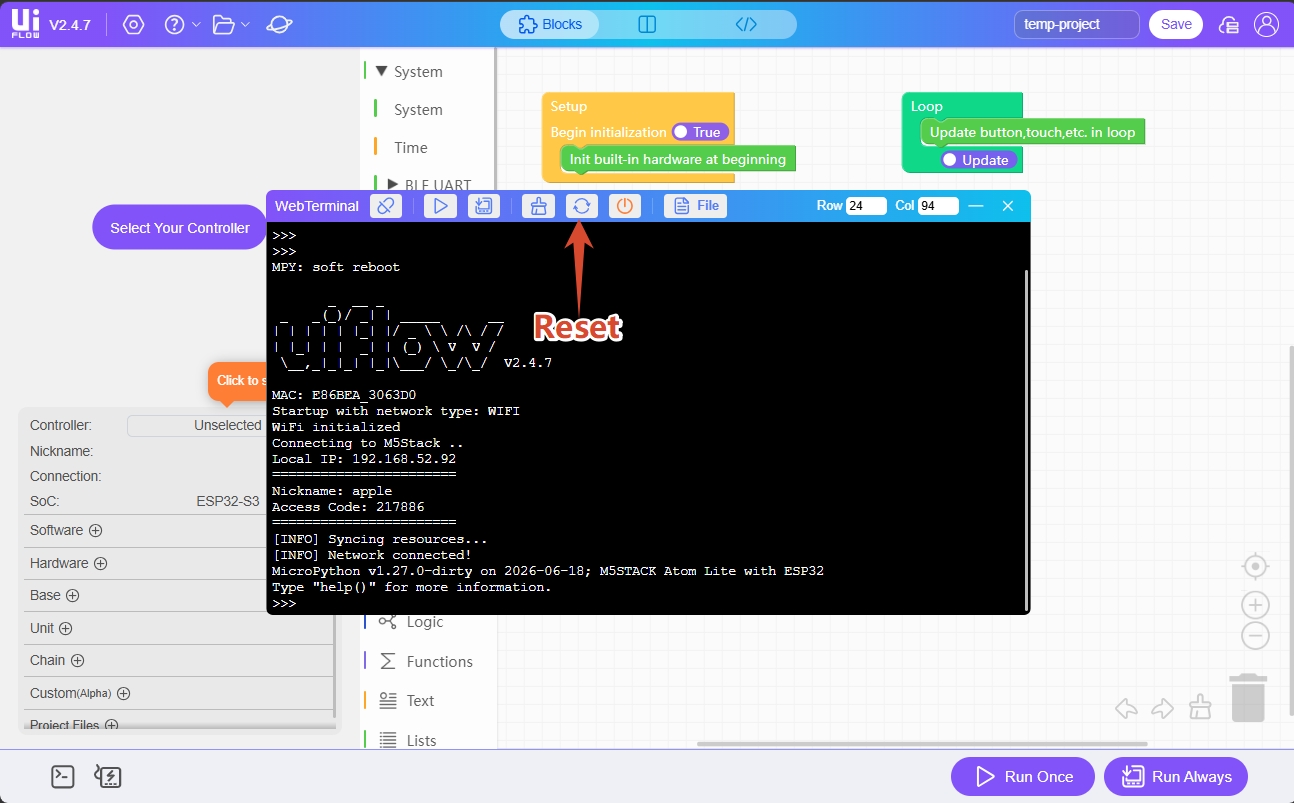
Access Codegenerated by the device. Click theWebTerminalbutton, select the serial port forAtom-Litein the dialog, then clickConnectto open the serial monitor. You can view the current validAccess Codeand Wi-Fi connection status. (Note: If the corresponding information is not displayed, clickSoft Resetto perform a soft reboot.)
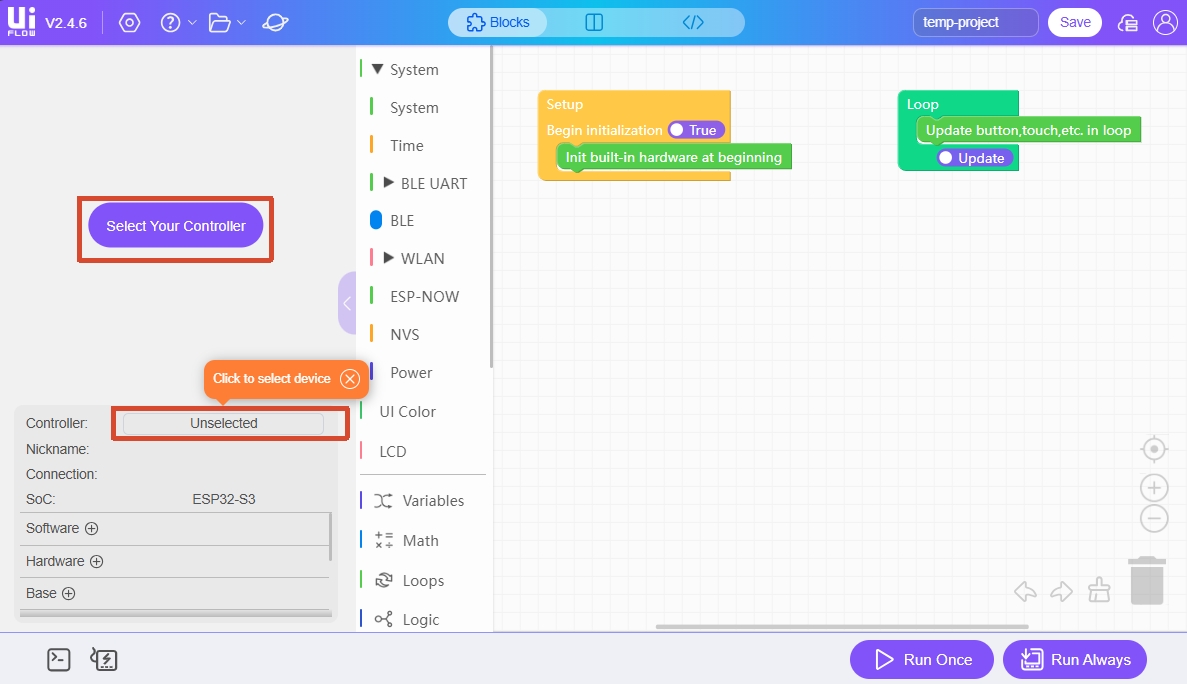
- Click
Select Your Controlleron the page (shown on first entry) or theControllerbutton to enter theSelect Devicepage.
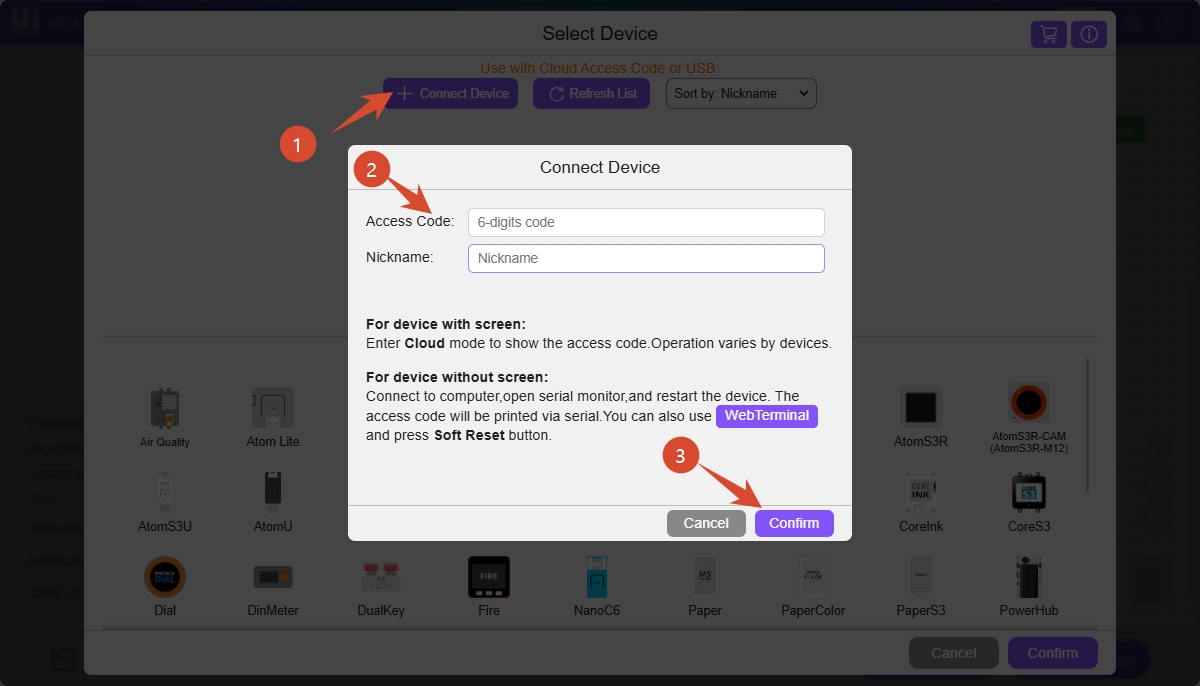
- Click
Connect Device, enter the access code and a custom device name, then clickConfirmto connect Atom-Lite to UiFlow2.
- Select the connected
Atom-Litedevice on theSelect Devicepage, then clickConfirmto enter the UiFlow2 programming interface.
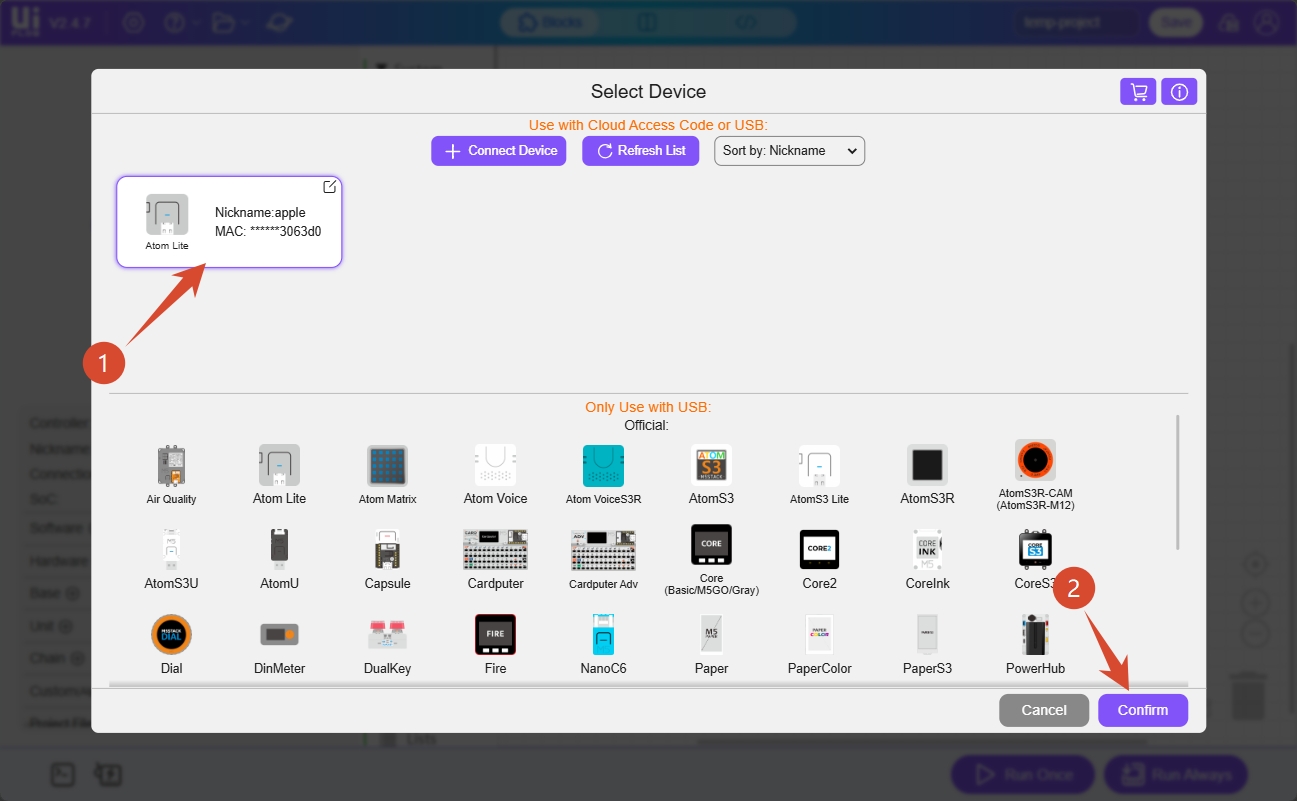
USB Wired Connection
Visit uiflow2.m5stack.com to open the UiFlow2 Web IDE, and connect Atom-Lite to the computer with a USB cable.
Click
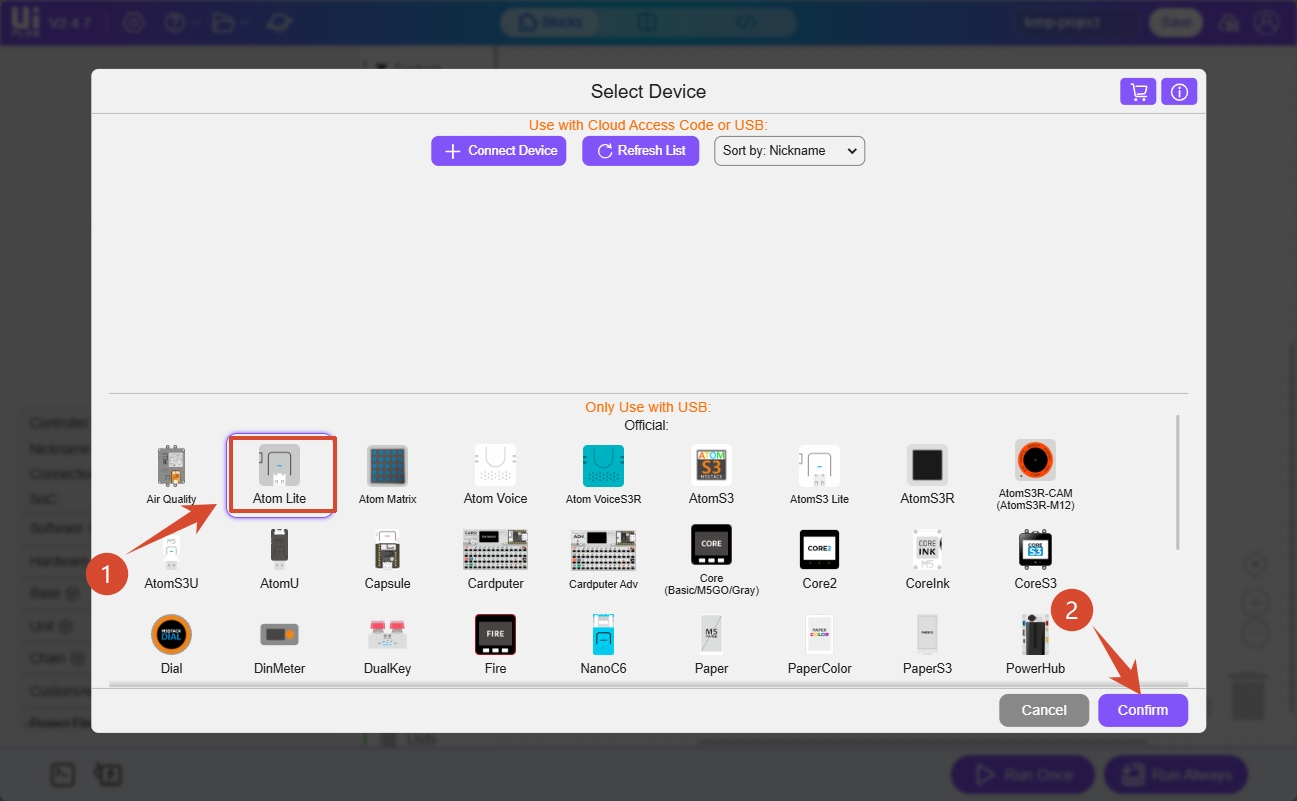
Select Your Controlleron the page (shown on first entry) or theControllerbutton to enter theSelect Devicepage.
- Select Atom-Lite from the device list, then click
Confirm.
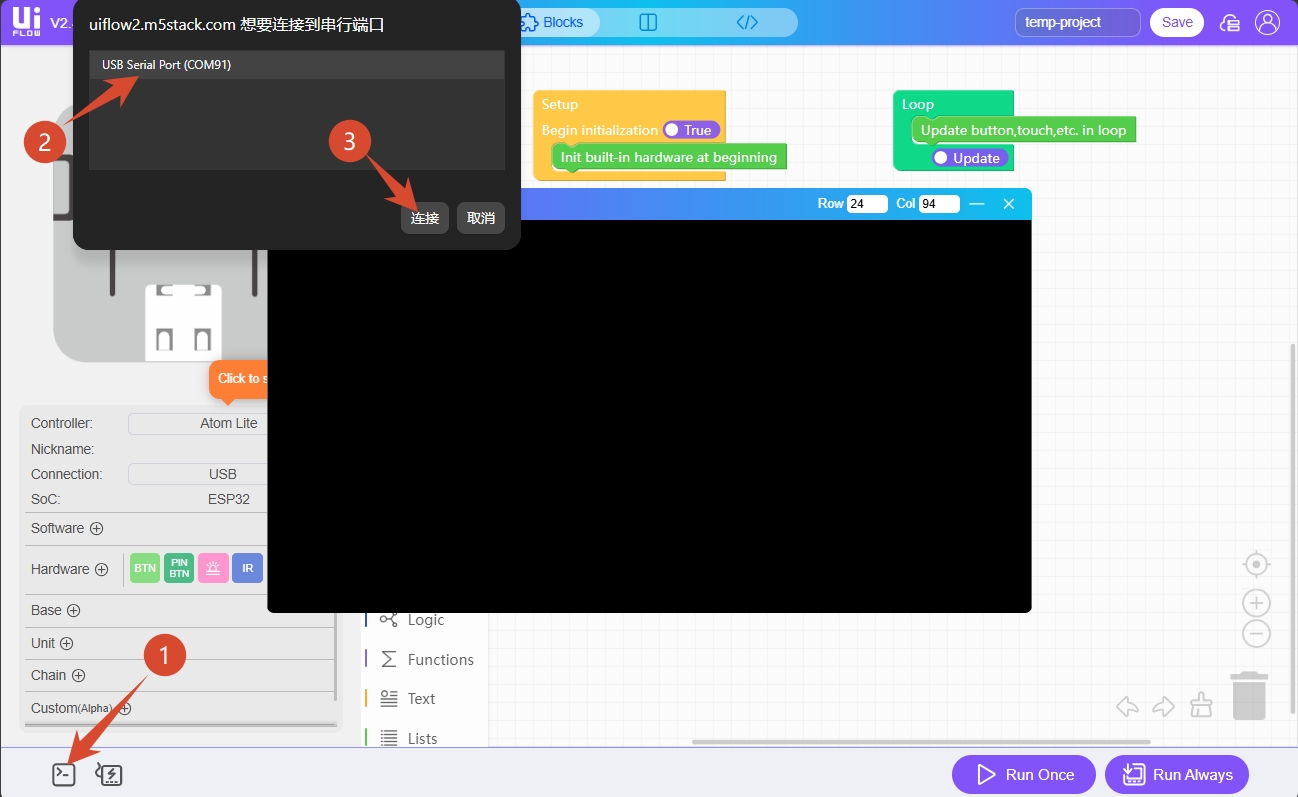
- Click the
WebTerminalbutton, select the serial port forAtom-Litein the dialog, and clickConnect.
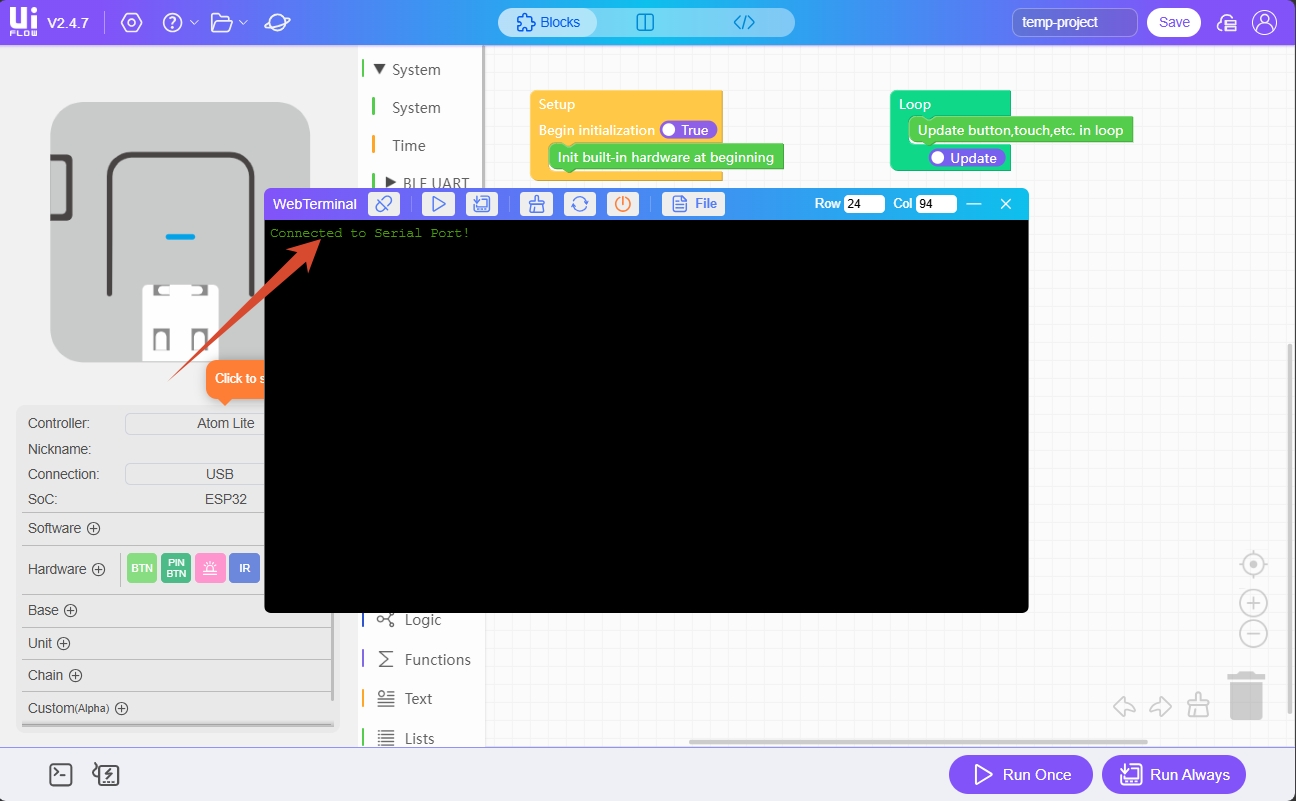
When the WebTerminal screen displays Connected to Serial Port!, the USB connection is successful.
4. Program Run and Download
After the device is connected to UiFlow2, you can drag Blockly blocks to edit programs.
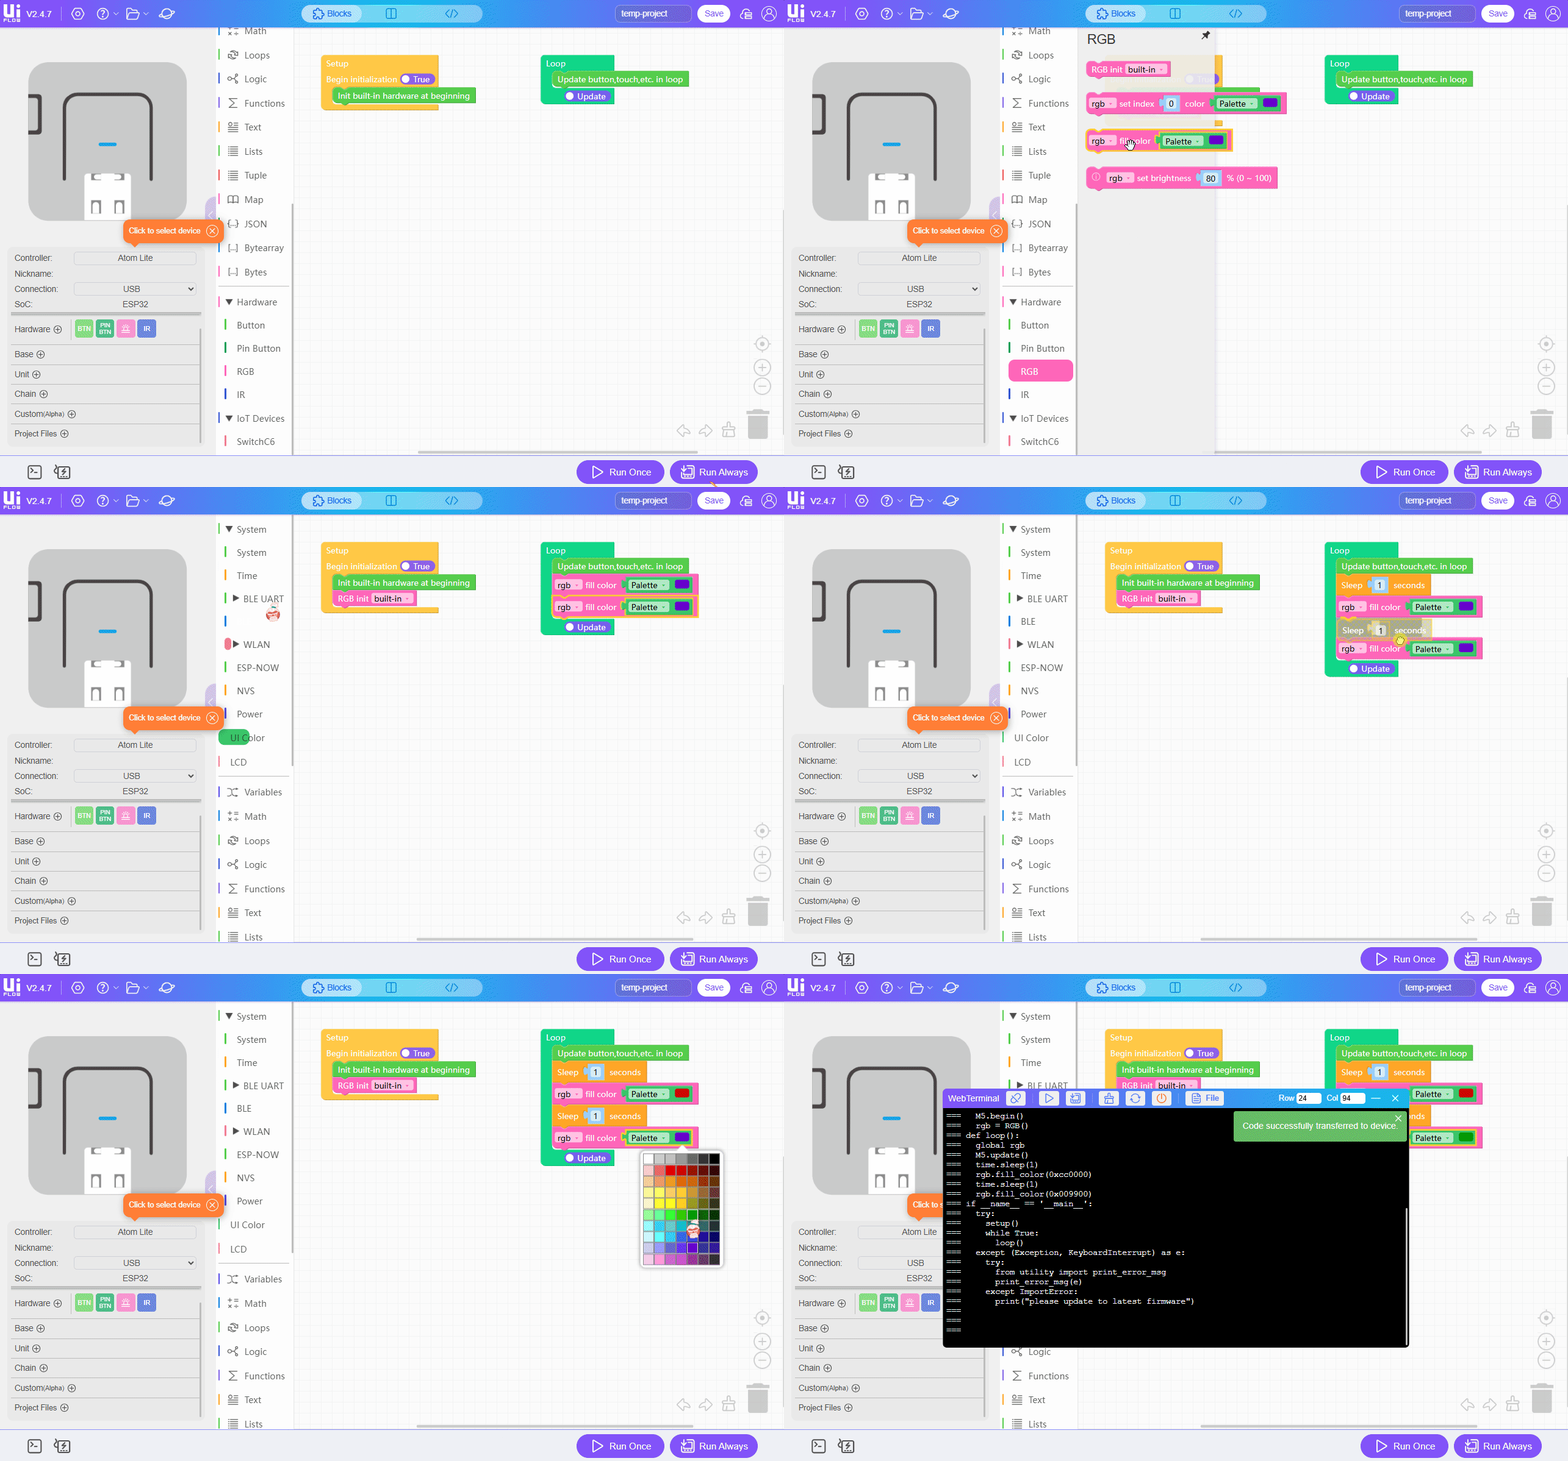
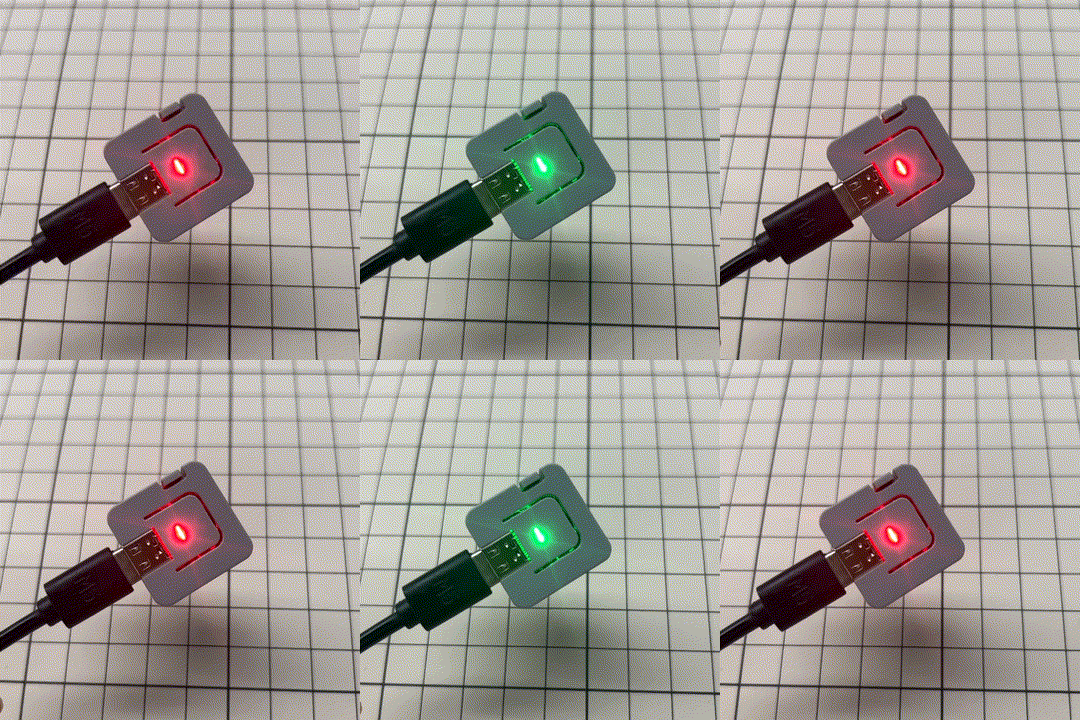
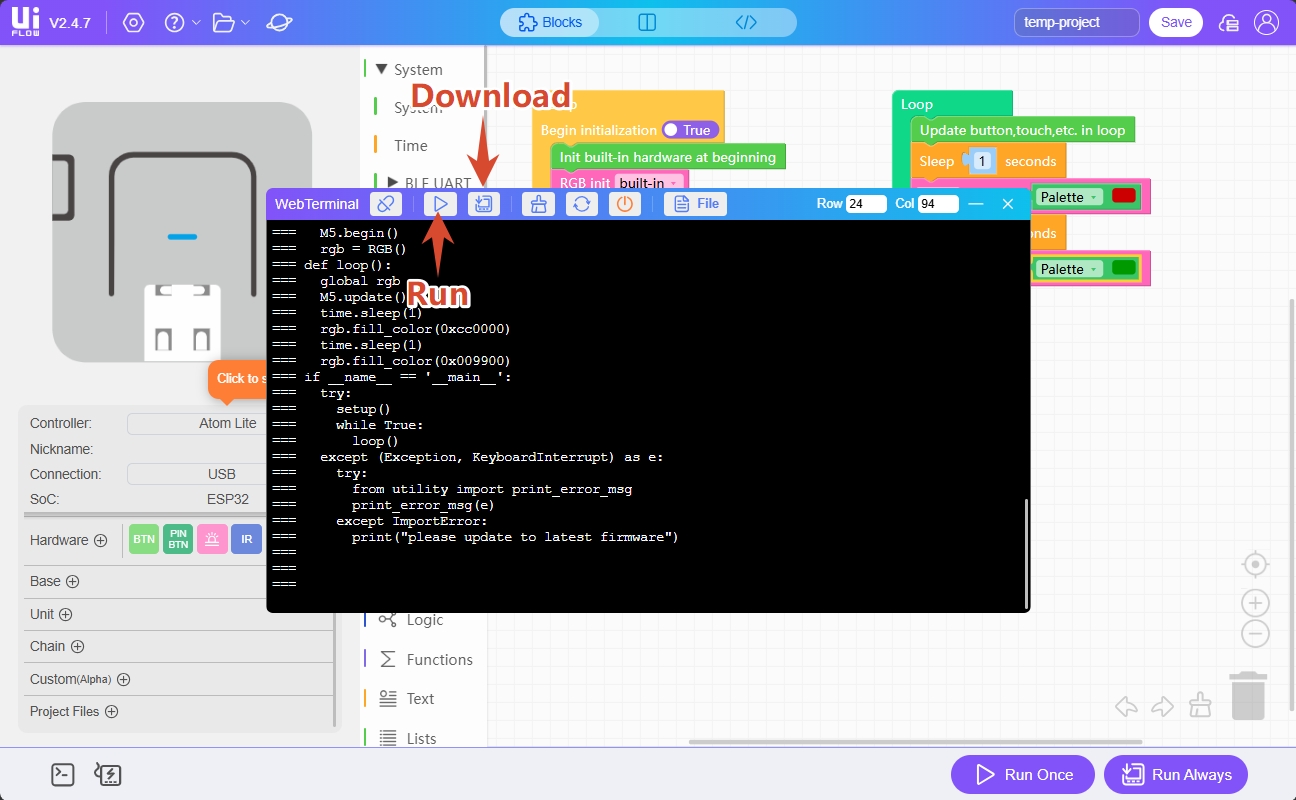
After editing the program, click the Run Once button in the lower-right corner to run the program once for testing. Click Run Always to download the program to the device.
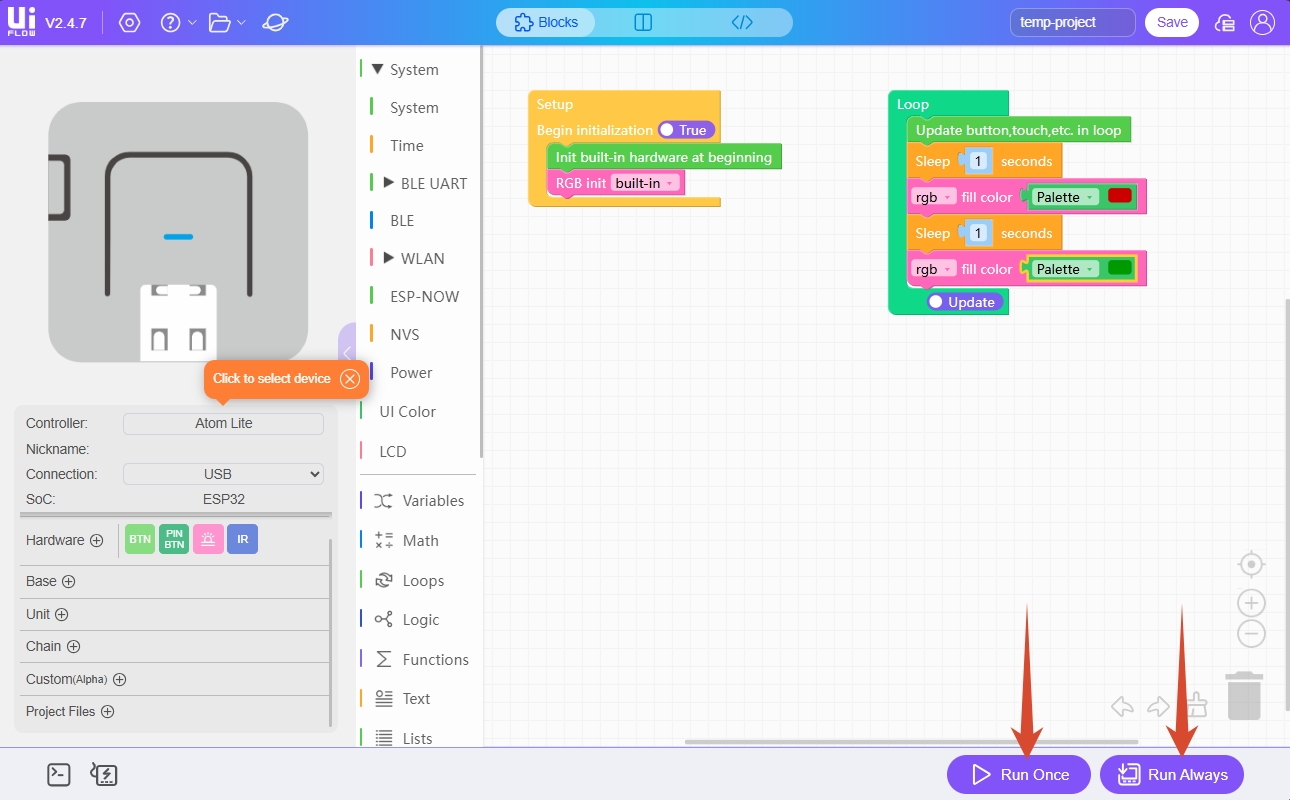
You can also run once or download the program in the WebTerminal window.